
Related Manuals for Wirepath WPS-750-DOM-IP


Summary of Contents for Wirepath WPS-750-DOM-IP
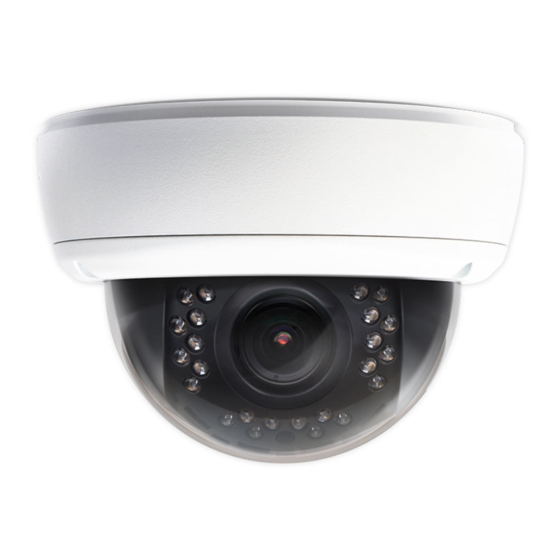
- Page 1 WPS-750-DOM-IP IP Dome Camera Installation and User’s Manual Review manual thoroughly before installation. Retain for future reference.
-
Page 3: 1- Safety Instructions
WPS-750-DOM-IP Installation Manual 1- Safety Instructions Read and follow all instructions and warnings in this manual. Keep for future reference. Install according to manufacturer’s instructions. Do not install near any heat sources such as radiators, heat registers, stoves or other apparatus (including amplifiers) that produce heat. -
Page 4: Table Of Contents
WPS-750-DOM-IP Installation Manual Table of Contents 1- Safety Instructions ........................3 2- Manual Overview .......................... 7 3- Required Items for Installation ....................8 4- Package Contents ......................... 8 5- Optional Accessories ........................8 5.1-Mounts ..........................8 5.2-Power Supplies ........................9 6- Camera Overview .......................... - Page 5 WPS-750-DOM-IP Installation Manual 5-Configure Camera for Remote Access .................. 23 12- Advanced Menu Configuration ....................24 12.1-System Information ......................24 12.1.1-Server Information ..........................24 12.1.2-OSD Setting ............................24 12.1.3-Time Settings ............................25 12.2-User Management ......................25 12.3-System Update ......................... 26 12.4-IP Settings ........................
- Page 6 WPS-750-DOM-IP Installation Manual 12.13.1-Input Settings ............................41 12.13.2-Output Settings ............................. 41 12.14-Log List ........................... 41 12.15-SD Card .......................... 42 13- Mobile Apps Access ........................43 14- Specifications ..........................44 15- Dimensions ..........................48 16- Warranty ............................49 17- Contacting Technical Support ....................49 18- Technical Information Glossary ....................
-
Page 7: 2- Manual Overview
WPS-750-DOM-IP Installation Manual 2- Manual Overview We recommend that this document is read in its entirety before proceeding with system design, installation, or operation of the WPS- 750-DOM-IP camera. When viewing this document electronically, the content identified within references can be quickly located by clicking on the reference. -
Page 8: 3- Required Items For Installation
WPS-750-DOM-IP Installation Manual 3- Required Items for Installation The following items are required during the installation of a Wirepath™ IP Camera. It is recommended that these items are prepared in advance to ensure that the installation can be performed smoothly. -
Page 9: Power Supplies
WPS-750-DOM-IP Installation Manual 5.2- Power Supplies Local Power Supplies PS-12DC-1A 12 Volt 1 Amp Power Supply for Cameras & IR Systems Remote Power Supplies Use these remote power supplies to power all the cameras in the system from a remote location. -
Page 10: 6- Camera Overview
WPS-750-DOM-IP Installation Manual 6- Camera Overview 6.1- Features 2 MegaPixel 16x9 CMOS sensor This camera sports a 2MP 16x9 CMOS sensor that provides improved picture quality over a typical CCD sensor. Supports full 1080HD up to 1920x1080 at 30FPS. -
Page 11: Camera Connections
Connect to a 12V DC 1A power supply. The camera is not supplied with a power supply, see section 5.2-Power Supplies for details on the power supply options available from Wirepath™. Note: No power supply is needed if PoE is being used to power the camera via the Ethernet connection. -
Page 12: Main Camera Interface
WPS-750-DOM-IP Installation Manual 6.3- Main Camera Interface Note: The camera requires configuration before accessing for the first time. See sections 9-IP Installer Software Initial Configuration before opening the browser. 6.3.1- Accessing the Camera Note: IE 8.0 or higher is required to access the camera; other browsers are not supported at this time. -
Page 13: 3-Live View Controls
WPS-750-DOM-IP Installation Manual 6.3.3- Live View Controls 6.3.3.1- Top of Screen Video Expands the camera’s image to full screen. Press ESC or double click on full screen image to return to Live View screen. Digital Zoom Select the checkbox to enable Digital Zoom. -
Page 14: 7- System Diagram Considerations
7.1.1- Power Supplies Wirepath™ Surveillance IP Cameras can be powered using PoE (Power over Ethernet) which supplies power via the Cat5e/Cat6 Ethernet connection. We recommend this method be used as it limits the amount of wiring required thus drastically reducing installation time. -
Page 15: 8- Camera Installation
WPS-750-DOM-IP Installation Manual 8- Camera Installation 1. Prepare Camera for Mounting Prior to mounting to the Camera, we recommend that the position and angles be preset in order to speed installation. These settings can be fine-tuned once the Camera is mounted. - Page 16 A-5. Position the Camera base over the marked holes from step 3-A-1. A-6. Secure the Camera with the provided screws Note: If a Wirepath™ mount is being used, follow the instructions provided with the mount as the steps required differs from the steps above.
- Page 17 WPS-750-DOM-IP Installation Manual 4. Fine-Tuning Camera Adjustments The camera is supplied with a BNC Test Adapter that allows for viewing the output of the camera on a monitor or the WPS- CCTV-TESTER (not included). Use this connection to adjust the camera directly from the installed location.
-
Page 18: 9- Ip Installer Software
WPS-750-DOM-IP Installation Manual 9- IP Installer Software The IP Installer software provides a quick view of Wirepath™ IP Surveillance devices connected to local network. This software is required for initial setup of any Wirepath™ IP Surveillance device. Recommendation: Before starting any configuration or service of Wirepath™ IP devices, we recommend that the latest version of the IP Installer is downloaded from www.SnapAV.com to ensure that all functionality is available. -
Page 19: 10- Initial Configuration
Note: Any data displayed in these fields should be replaced with information obtained from the network admin to ensure they are set properly. H. Assign a name to the Camera that will identify it easily when using the IP Installer or configuring a Wirepath™ NVR, and for recordings, or captured images. -
Page 20: 6-Change The Administrator Password
WPS-750-DOM-IP Installation Manual 6- Change the Administrator Password Now that the camera is visible on the network, we recommend that the administrator password is changed from the default to prevent unwanted access. See section 12.2-User Management for details on the features used in this step. -
Page 21: 11- Additional Configuration
WPS-750-DOM-IP Installation Manual 11- Additional Configuration Recommendation: While the camera can be configured remotely from outside the local network, operation can be slow. We strongly recommend that the bulk of configuration be performed via the local network to avoid slow response times. -
Page 22: 3-Configure Motion Detection Areas
WPS-750-DOM-IP Installation Manual 3- Configure Motion Detection Areas Motion Detection allows for specific areas of the image to be used for triggering the recording of video, an alarm, or sending a notification. When an area is defined, motion in that area will trigger the predefined action; this is useful to avoid unwanted events from being triggered due to motion in areas of no concern. -
Page 23: 5-Configure Camera For Remote Access
B.5- Click Apply at the bottom to save the settings. Note: If installing multiple cameras, this step only needs to be completed once. After that, each Wirepath™ Surveillance camera can be accessed using the same Hostname and each camera’s uniquely assigned port number. -
Page 24: 12- Advanced Menu Configuration
WPS-750-DOM-IP Installation Manual 12- Advanced Menu Configuration 12.1- System Information This menu displays important information about the camera’s network settings, and allows for setting items such as language, Date, and Time. 12.1.1- Server Information Displays information about the Camera’s MAC Address, allows for entering a name to easily identify the Camera, and selecting a language for the GUI. -
Page 25: 3-Time Settings
WPS-750-DOM-IP Installation Manual 12.1.3- Time Settings Proper time settings are important for producing accurate time stamps for events, recorded video, and captured snapshots. Server Time Displays the Current Time and Date for the Cameras Date Format Select the desired format to display the Date. -
Page 26: System Update
WPS-750-DOM-IP Installation Manual 12.3- System Update Important Note: Updating Firmware MUST be performed over a wired IP connection to the device. While it is possible to recover from an upgrade that fails due to a lost or intermittent connection, the camera will be inoperable until it is recovered via a reliable connection. -
Page 27: Ip Settings
WPS-750-DOM-IP Installation Manual 12.4- IP Settings 12.4.1- IP Assignment Allows for configuration of the Camera’s network settings for IP communication. We recommend that this information is provided by the network administrator to avoid address conflicts with other devices on the network. -
Page 28: 3-Upnp Settings
The ONVIF (Open Network Video Interface Forum) standard is used by IP surveillance for communication across devices from various manufacturers. This setting does not require configuration when being used with Wirepath™ IP surveillance devices. See section 18.3-ONVIF (Open Network Video Interface) for more details. -
Page 29: 8-Lltd (Link Layer Topology Discovery)
WPS-750-DOM-IP Installation Manual 12.4.8- LLTD (Link Layer Topology Discovery) When enabled, the Cameras connection status and properties can be viewed in a PCs network map. The PC must support LLTD in order to use this feature. See section 18.4-LLTD (Link Layer Topology Discovery) for more details. -
Page 30: Advanced Ip Settings
WPS-750-DOM-IP Installation Manual 12.5- Advanced IP Settings 12.5.1- HTTPS Settings Accessing the Camera through HTTPS provides an additional security level for the video stream by requiring certificate authentication. Subject Display the Subject Content of the certificate Date Date the certificate was created. -
Page 31: Pppoe & Ddns Settings
WPS-750-DOM-IP Installation Manual 12.6- PPPoE & DDNS Settings 12.6.1- PPPoE Settings Point-to-Point Protocol Over Ethernet (PPPoE) is a network protocol primarily used DSL (Digital Subscriber Line) providers and modems. This protocol requires a login to connect to the modem even when a router is used. -
Page 32: Server Settings
WPS-750-DOM-IP Installation Manual 12.7- Server Settings A “server” in this case is an Email account, FTP site or Samba network share, each of which must be configured in order to send or save notifications, snapshots or short video recordings. While all methods can be used, only Email is needed for notifications. -
Page 33: 2-Ftp Settings
WPS-750-DOM-IP Installation Manual 12.7.2- FTP Settings When an FTP server is configured, recorded video and snapshot files can be stored on the server for later access. Contact the network administrator for FTP server information. FTP Site address. This is usually the same as one would use to access the FTP Server FTP site from a browser or FTP client. -
Page 34: Image Settings
WPS-750-DOM-IP Installation Manual 12.8- Image Settings While the default settings will work in most cases, the conditions at the location of the Camera may require tweaking to ensure that the image is clear and accurate. Use this menu to adjust the image for daytime, or nighttime, and adjust the image parameters. - Page 35 WPS-750-DOM-IP Installation Manual Changes the orientation of the image based on the mounting method. Default is Video configured for standard mounting from a ceiling or eave. Select Flip or Mirror to Orientation change the orientation of the image. Select Day and Night settings for the camera: Day &...
-
Page 36: Video Settings
WPS-750-DOM-IP Installation Manual 12.9- Video Settings The Camera supports up to 4 streams that can be used for streaming to a mobile device, network recorder, control system GUI, or the browser GUI simultaneously. While the highest quality is desired, it may not be supported by the network or device, and will also have a larger storage size. -
Page 37: 2-Streaming 3
WPS-750-DOM-IP Installation Manual Video Bitrate Advanced Mode Only: Sets the fixed bitrate to use when CBR is selected for bitrate control. While many intermediate settings exist, recommend setting to 1, 2, 4, 6 or 8 Mbps for compatibility with Wirepath™ NVRs. -
Page 38: Audio Settings
WPS-750-DOM-IP Installation Manual 12.10- Audio Settings Use this menu to configure Audio if the Camera has a microphone installed. IP Camera to When enabled, allows audio from a microphone (ex: WPS-ACC-MIC) installed at the Camera to be heard at the PC. -
Page 39: Event Settings
WPS-750-DOM-IP Installation Manual 12.11- Event Settings 12.11.1- Motion Detection Provides up to 3 areas to select for detecting motion on the camera. When configured, an action such as recording video, taking a snapshot or series of snapshots, and/or sending email notification can be performed after the motion is detected. -
Page 40: 3-Record Time Setting
WPS-750-DOM-IP Installation Manual 12.11.3- Record Time Setting Pre Alarm Amount of time prior to the event to start the recording, from 0-5 seconds. Post Alarm Amount of time after to the event to stop the recording, from 0-10 seconds. Note: The camera cannot currently record for the entire time of a motion event. -
Page 41: I/O Settings
WPS-750-DOM-IP Installation Manual 12.13- I/O Settings Use this menu to configure the Cameras Contact & Relay connections. 12.13.1- Input Settings DI Sensor State Camera expects contact closure connected to the DI input to be normally Open. An Event is triggered when the contact is closed. -
Page 42: Sd Card
WPS-750-DOM-IP Installation Manual 12.15- SD Card Use this menu to set the amount of days of recording to store on an installed SD Card. Displays “No SD Card” when no microSD card is installed. Playback When a microSD card is installed and the card contains media, displays folder names consisting of dates when media was saved. -
Page 43: 13- Mobile Apps Access
WPS-750-DOM-IP Installation Manual 13- Mobile Apps Access FREE Use your computer, or iPhone®, native iPad®, or Android, Smartphone Apps to view cameras while at the office or on the go. Details on setup and operation can be found @ www.SnapAV.com. -
Page 44: 14- Specifications
WPS-750-DOM-IP Installation Manual 14- Specifications Imaging 1/2.7” 2MP CMOS sensor Image sensor Lens Type Vari-focal 3.3~12mm Mega Pixel Lens F1.4 Video Resolution 1920x1080@30fps, 1280x720@30fps, 640x480@30fps, 320x240@30fps, 176x144@30fps 0.5 lux @F1.4 (IR off) Minimum Illumination 0 lux @F1.4 (IR on) DC IRIS... - Page 45 WPS-750-DOM-IP Installation Manual Technology Image Adjustment Brightness, Contrast, Hue, Saturation, Sharpness Sense Up Digital WDR 2D DNR Sense Up Flip Mirror Shutter Speed Adjustable Day&Night Adjustable Quad Streaming Image Snapshot Full Screen Monitoring Privacy Mask Video Compression H.264/ M-JPEG/ MPEG4...
- Page 46 WPS-750-DOM-IP Installation Manual Network Ethernet 10/ 100 Base-T HTTP, HTTPS, SNMP, QoS/DSCP, Access list, RTSP, TCP/ IP, UDP, SMTP, FTP, PPPoE, DHCP, DDNS, NTP, Network Protocol UPnP, 3GPP, SAMBA, Bonjour Input/Output Ports Video Test Port Setup Power Port On Pigtail...
- Page 47 WPS-750-DOM-IP Installation Manual Housing & Power Operating Temperature 14°F ~ 113°F 4.04” (H) x 5.91” (W) Dimensions Weight 2.18 lbs Weather Rating IP66 Vandal Resistant Yes - PoE IEEE 802.3af POE / Consumption 4.8W(IR Off) / 6.72W(IR On) 12VDC Power 3.84W(IR Off) / 5.16W(IR On)
-
Page 48: 15- Dimensions
WPS-750-DOM-IP Installation Manual 15- Dimensions 5.91" Maximum Camera Angle 4.04" Side View Top View Pg. 48 © 2013 Wirepath™ Surveillance... -
Page 49: 16- Warranty
This warranty shall not apply to products which have been abused, modified, disassembled or improperly installed. Products to be repaired under this warranty must be returned to Wirepath™ Surveillance or a designated service center with prior notification and an assigned return authorization number (RA). -
Page 50: 18- Technical Information Glossary
RTSP in our IP cameras allows the direct control of the stream from within the camera. This technology enables Wirepath™ products to stream video to devices even if they can’t support any of our remote viewing apps. -
Page 51: Http Vs. Https
WPS-750-DOM-IP Installation Manual has been supported since. The advantage of LLTD is the ability to see an animated representation of the network topology as it applies to installed hardware. Most advanced IT installers will not have a need for this setting to be enabled. - Page 52 © 2013 Wirepath™ Surveillance 130304-1252...
Need help?
Do you have a question about the WPS-750-DOM-IP and is the answer not in the manual?
Questions and answers