Table of Contents
Advertisement
Quick Links
Advertisement
Table of Contents

Subscribe to Our Youtube Channel
Related Manuals for Promise Technology SmartStor DS4600


Summary of Contents for Promise Technology SmartStor DS4600
- Page 1 MART DS4600 Product Manual Version 2.0 For Mac Only...
- Page 2 You should back up all data before installing any drive controller or storage peripheral. Promise Technology is not responsible for any loss of data resulting from the use, disuse or misuse of this or any other Promise Technology product. Notice...
-
Page 3: Table Of Contents
Contents Contents Chapter 1: Introduction to SmartStor ..........1 About This Manual ................1 Architecture ..................2 Key Benefits ..................2 Specifications ..................3 Client OS Support ................4 Utility OS Support ................4 Chapter 2: Installation and Setup ............5 Unpacking the SmartStor .............. - Page 4 SmartStor DS4600 Product Manual Setting Up the SmartStor (Advanced) ..........30 One Click Setup ................ 30 Advanced Setup ............... 31 Managing RAID Volumes ............... 38 Viewing a List of RAID Volumes ..........38 Viewing RAID Volume Status ........... 39 Managing Backups ................. 40 One Touch Backup ..............
- Page 5 Contents Chapter 6: Support ................81 Frequently Asked Questions ............81 Contacting Technical Support ............82 Limited Warranty ................85 Disclaimer of other warranties ..........85 Your Responsibilities ..............86 Returning Product For Repair ............87 Appendix A: Maintenance ..............89 Upgrading the Firmware ..............
- Page 6 SmartStor DS4600 Product Manual...
-
Page 7: Chapter 1: Introduction To Smartstor
Specifications (page 3) • Client OS Support (page 4) Promise Technology’s SmartStor DS4600 is a direct attached storage (DAS) solution for external storage targeted for small and medium business (SMB) users and small office/home office (SOHO) users. With a DAS product, users can save their work and have access to files without having to carry around a disk drive or access a network connection. -
Page 8: Architecture
Architecture The SmartStor DS4600’s architecture is based on the Oxford Semiconductor OXUFS936QSE, a universal interface SATA RAID Controller. Five data ports provide maximum flexibility in high-speed client-to-DAS data connections. The SmartStor is a plug-and-play device with no drivers to load. -
Page 9: Specifications
Chapter 1: Introduction to SmartStor Specifications • Disk drive support: • Four 1.5 Gb/s or 3 Gb/s SATA 3.5-inch disk drives • Conforms to Serial ATA 1.0 specification and Serial ATA II: Extensions to Serial ATA 1.0 specification (SATA II, phase I specification) •... -
Page 10: Client Os Support
SmartStor DS4600 Product Manual Client OS Support Mac OS 10.4 and above. Utility OS Support Mac OS 10.4 and above. -
Page 11: Chapter 2: Installation And Setup
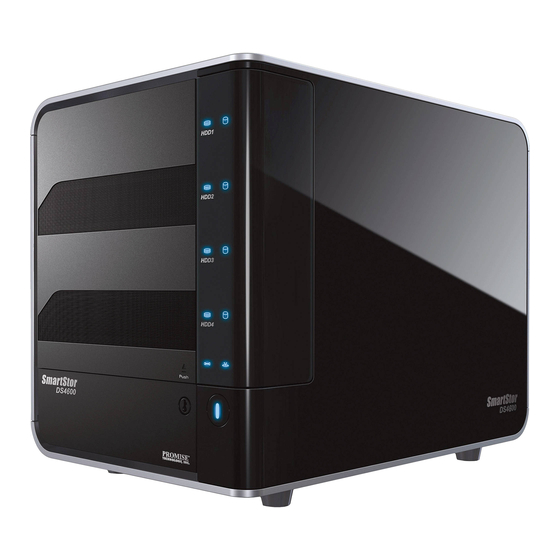
Connecting the Power (page 9) • Installing the Software (page 7) • Setting Up the SmartStor (page 11) Unpacking the SmartStor The SmartStor DS4600 box contains the following items: • SmartStor DS4600 Unit • CD with SmartNAVI software, Product Manual and Quick Start •... - Page 12 SmartStor DS4600 Product Manual Figure 1. SmartStor DS4600 Front View Disk Drive Drive Carrier Disk Status LED Disk Activity LED System Status Volume Activity LED One Touch Backup Button Keyhole Note: This SmartStor is shown without the front door. Warning Please note that the keyhole of the upper and lower side, to avoid the machine damage or can not be used.
-
Page 13: Remove Anti-Shaking Cushion
Chapter 2: Installation and Setup Remove Anti-Shaking Cushion Remove the plastic protective film from Front door. Remove "tape from door", then push firmly on the bottom right corner of the front-door to open. Open door completely and remove the "anti-shaking" cushion (foam)" Pull out one drive tray at a time and fully re-seat it. - Page 14 SmartStor DS4600 Product Manual Drag the SmartNAVI.app icon to the right side Applications folder. The SmartStor appears on your Mac as a hard disk drive. See Figure 4. Figure 4. SmartStor on a Mac SmartStor appears as a Hard Disk Drive...
-
Page 15: Connecting The Power
Chapter 2: Installation and Setup Connecting the Power To power the SmartStor: Attach the power cord on the back of the SmartStor Power Button enclosure and plug the other end into the power source. On the back of the SmartStor, press the power button. -
Page 16: Connecting To Your Mac
SmartStor DS4600 Product Manual Choose a file system format from the dropdown menu. (The HFS+ file system is recommended for Mac users.) Connecting to Your Mac SmartStor DS4600 has three data connection options: • eSATA – Up to 300 MB/s •... -
Page 17: Firewire
Chapter 2: Installation and Setup Attach the other end of the eSATA cable to the Mac. FireWire To use this option, your Mac must have an FireWire connector on the motherboard or an FireWire HBA card installed. FireWire 800 and 400 cables have different connectors. - Page 18 SmartStor DS4600 Product Manual Press and hold the One Touch Backup button for two seconds. One Touch Backup Button Warning One Touch Backup Button is not a Power on/off button. The DAS beeps and reboots. Then your RAID volume is ready.
-
Page 19: Chapter 3: Smartnavi
Chapter 3: SmartNAVI This chapter covers the following topics: • Working with SmartNAVI (below) • Making Management Settings (page 18) • Setting Up the SmartStor (Advanced) (page 30) • Managing RAID Volumes (page 38) • Managing Backups (page 40) Working with SmartNAVI The SmartNAVI software connects your Mac to the SmartStor, performs backups, changes the network settings, create RAID volumes, add and mounts folders, and manages file downloads from the Internet. - Page 20 SmartStor DS4600 Product Manual • If the SmartNAVI Window is open, click the DS4600 in the Device List. The System information frame displayed.
-
Page 21: Choosing A Smartnavi Language
Chapter 3: SmartNAVI Choosing a SmartNAVI Language On Mac, you choose the display language. To choose a language: Open the Main Window. From the dropdown menus, choose Function > Language, then choose the the language you prefer. Figure 1. SmartNAVI Function menu on the Mac OS desktop... -
Page 22: Viewing Smartnavi Information
SmartStor DS4600 Product Manual Viewing SmartNAVI Information SmartNAVI is the software application that connects your Mac with the SmartStor DAS system. To view information about SmartNAVI on Macintosh, from the dropdown menus at the top of the screen, choose Help > About. - Page 23 Chapter 3: SmartNAVI With SmartNAVI as the active application, press Command-Q.
-
Page 24: Making Management Settings
SmartStor DS4600 Product Manual Making Management Settings This category includes the following topics: • Configuring a DAS System (below) • Locating the SmartStor (page 21) • Editing the Node Name of SmartStor (page 22) • Viewing the System Event Log (page 23) •... - Page 25 Chapter 3: SmartNAVI Click the OK button to continue. Advanced Setup To configure your DAS system using Advanced Setup: Open the SmartNAVI Main Window. See “Opening the Main Window” on page 13.
- Page 26 SmartStor DS4600 Product Manual Click the Setup Wizard icon and click the Advanced Setup button. Choose the Partition Scheme you want for your RAID volume. • Apple Partition Map • Master Boot Record Scheme • GUID Partitioning Table Click the Next button to continue.
-
Page 27: Locating The Smartstor
Chapter 3: SmartNAVI • Type a volume name in the field provided. • Choose a file system format from the dropdown menu. Click the Next button to continue. Review your parameters. To make changes, click the Previous button. To accept the parameters and configure your DAS system, click the OK button. -
Page 28: Editing The Node Name Of Smartstor
SmartStor DS4600 Product Manual The Status LED blinks blue for several seconds (right). Editing the Node Name of SmartStor This feature helps you to edit a node name. To edit a SmartStor: Disk Status LED Go to the Main Window. -
Page 29: Viewing The System Event Log
Chapter 3: SmartNAVI Change the node name that you want, and press the Enter key on your keyboard. Viewing the System Event Log DAS events report functions and status of the DAS system. The Event Log displays the 20 most recent events. Events are reported by date, time, severity (information or warning) and description. -
Page 30: Making Mail Event Log Settings
SmartStor DS4600 Product Manual Up to 500 events are reported. There is no Save or Clear feature. Note For backup system events, see “Viewing the Backup Event Log” on page 61. Making Mail Event Log Settings The SmartStor can send email messages to notify you of critical events. You must input the required information for this function to work. -
Page 31: Sending A Test Email Message
Chapter 3: SmartNAVI • Email receiver address (To) • Optional click the Enable option to enable authentication. • User Name • Password • Password Confirmation Click the Confirm button to save your settings. Sending a Test Email Message To use this function, the Mail Event Log must be enabled and properly set up. To sent a test message: Go to the Main Window. -
Page 32: Upgrading The Firmware
Downloading the Firmware Upgrade File To download the upgrade file: Point your browser to http://www.promise.com. The firmware was placed in “Support” > “Download” > “SmartStor DS4600” Download the DS4600 firmware upgrade file to your Mac. The firmware upgrade filename will be similar to ds4600_xxxxxx_xx.upg... -
Page 33: Making Enclosure Settings
Chapter 3: SmartNAVI Making Enclosure Settings Note An enabled buzzer warns you of any problems with the DAS system. An enabled fan saves energy and reduces noise. To make enclosure settings: Go to the Main Window. See “Opening the Main Window” on page 13. Click the DAS Management icon and click the Settings button. -
Page 34: Shutting Down The Smartstor
SmartStor DS4600 Product Manual Shutting Down the SmartStor The only time you need to shut down the SmartStor is to replace the disk drive cooling fan or the power supply. See “Appendix A: Maintenance” on page 89. During and after the shutdown, none of your folders are accessible from your Mac. -
Page 35: Restarting The Smartstor
Chapter 3: SmartNAVI Directly To shut down the SmartStor, press and hold the power Power Button button on the back of the SmartStor enclosure for five seconds (top, right). The system status LED turns red and then goes dark (bottom, right). System Status LED Restarting the SmartStor Power Button... -
Page 36: Setting Up The Smartstor (Advanced)
SmartStor DS4600 Product Manual Setting Up the SmartStor (Advanced) SmartStor has three setup options: • One Click Setup (below) • Advanced Setup (page 31) One Click Setup One Click Setup loads a collection of default settings. Recommended for most users. The Setup Wizard creates and formats your RAID volume automatically. -
Page 37: Advanced Setup
Chapter 3: SmartNAVI Advanced Setup Advanced Setup enables you to make your own settings. Recommended for advanced users. To perform an advanced setup: Open the SmartNAVI Main Window. See “Opening the Main Window” on page 13. Click the Setup Wizard icon and click the Advanced Setup button: Choose the Partition Scheme you want for your RAID volume. - Page 38 SmartStor DS4600 Product Manual Click the Next button to continue. If you chose Manual under Create Volume, choose the type of volume you want. • Maximum Capacity – RAID 0, using all disk drives • Data Protection – Your choice of RAID level, based on the number of disk drives installed: •...
- Page 39 Chapter 3: SmartNAVI • RAID 10 – 4 drives Click the Next button to continue.
- Page 40 SmartStor DS4600 Product Manual Under Partition Setting: • Type a volume name in the field provided. • Choose a file system format from the dropdown menu. Click the Next button to continue.
- Page 41 Chapter 3: SmartNAVI Review your parameters. To make changes, click the Previous button. To accept the parameters and configure your DAS system, click the OK button. In the Final Confirm popup window, click the Yes button.
- Page 42 SmartStor DS4600 Product Manual In the Warning popup window, type yes into the field and click the OK button. The DAS reboots. Then your RAID volume is ready. On a Mac, the SmartStor appears as a removable disk drive. See page 36, Figure 2.
- Page 43 Chapter 3: SmartNAVI Figure 3. SmartStor file structure viewed from a Mac...
-
Page 44: Managing Raid Volumes
SmartStor DS4600 Product Manual Managing RAID Volumes This category includes the following topics: • Viewing a List of RAID Volumes (below) • Viewing RAID Volume Status (page 39) Viewing a List of RAID Volumes To view a list of RAID Volumes: Go to the Main Window. -
Page 45: Viewing Raid Volume Status
Chapter 3: SmartNAVI Viewing RAID Volume Status To view the status of a RAID Volume: Go to the Main Window. See “Opening the Main Window” on page 13. Click the Volume Configuration icon. Click the RAID Status List button. The RAID Status List appears. RAID Status List includes: •... -
Page 46: Managing Backups
SmartStor DS4600 Product Manual Managing Backups This category includes the following topics: • One Touch Backup (below) • Performing a One Touch Backup (page 41) • Viewing Your Backup Files (page 41) • Doing a Backup Now (page 42) •... -
Page 47: Performing A One Touch Backup
Chapter 3: SmartNAVI Performing a One Touch Backup To perform a One Touch Backup, press the One Touch Backup button on the front of the SmartStor. One Touch Backup Button The SmartStor beeps five times to indicate that the backup has begun. If SmartNAVI is open, a message displays the progress of the backup. -
Page 48: Doing A Backup Now
SmartStor DS4600 Product Manual Figure 4. BACKUPDATA folder viewed on a Mac Backup folder of account name Doing a Backup Now This feature enables you to perform an immediate backup of your files from your Mac to the DAS system (SmartStor). -
Page 49: Main Window
Chapter 3: SmartNAVI Main Window If you do not have a backup schedule for your Mac, start your backup from the SmartNAVI Main Window. To backup from the Main Window: Go to the Main Window. See “Opening the Main Window” on page 13. Click the SmartSYNC icon and click the Backup button. - Page 50 SmartStor DS4600 Product Manual Do any of the following actions to choose your backup from folders: • Check the Backup My Data box - Chooses the Documents, Pictures, and Desktop folders with all their contents.
- Page 51 Chapter 3: SmartNAVI • Click the Add to Backup icon - Opens the My Documents folder. Click a folder you want to backup, then click the Choose button. Repeat for additional folders. • Drag and drop the folders you want to backup to the Backup your data from window.
-
Page 52: Device List
SmartStor DS4600 Product Manual Click the Backup button. The backup begins immediately. The amount of time required depends on the size and number of files being backed up. The backed up files will appear on the SmartStor DAS system in a folder named BACKUPDATA_your username. - Page 53 Chapter 3: SmartNAVI The backup begins immediately. • Check the Backup My Data box - Chooses the Documents, Pictures, and Desktop folders with all their contents.
- Page 54 SmartStor DS4600 Product Manual • icon - Opens the My Documents folder. Click a folder you want to backup, then click the Choose button. Repeat for additional folders. • Drag and drop the folders you want to backup to the Backup your data...
- Page 55 Chapter 3: SmartNAVI Click the Schedule button. Click an option button for: • Hour • • Day of the week Choose the corresponding values from the dropdown menus: • Number of hours • Time of day in hours and minutes •...
- Page 56 SmartStor DS4600 Product Manual Click the Add button.
-
Page 57: Scheduling A Backup
Chapter 3: SmartNAVI The newly created schedule appears in the Schedule List. The backed up files will appear on the DAS in a folder named BACKUPDATA_your username. You can also click the Start button to run a scheduled backup immediately. Scheduling a Backup You can schedule backups by the hour, day, or week. - Page 58 SmartStor DS4600 Product Manual • Click the Add to Backup icon – Opens the My Documents folder. Click a folder you want to backup, then click the Choose button. Repeat for additional folders. • Drag and drop the folders you want to backup to the Backup your data from window.
-
Page 59: Viewing Backup Schedules
Chapter 3: SmartNAVI Viewing Backup Schedules To view the list of current schedules: Go to the Main Window. Click the SmartSYNC icon and click the Schedule List button. The list of all backup schedules appears. Changing a Scheduled Backup You can schedule backups by the hour, day, or week. To change the scheduled backup of files from your Mac to the DAS system (SmartStor): Go to the Main Window. - Page 60 SmartStor DS4600 Product Manual Click the Modify button.
- Page 61 Chapter 3: SmartNAVI Click the folder whose contents you want to backup.
- Page 62 SmartStor DS4600 Product Manual Click the Add to Backup icon to expand the tree and narrow your choices. Click the Schedule button. Click an option button for: • Hour • • Day of the week Choose the corresponding values from the dropdown menus: •...
- Page 63 Chapter 3: SmartNAVI Click the Add button. The modified schedule appears in the Schedule List.
-
Page 64: Deleting A Scheduled Backup
SmartStor DS4600 Product Manual You can also click the Start button to run a scheduled backup immediately. Deleting a Scheduled Backup Deleting a scheduled backup has no effect upon any files previously backed-up to the DAS system (SmartStor). To delete a scheduled backup: Go to the Main Window. -
Page 65: Restoring Backed-Up Files
Chapter 3: SmartNAVI Click the Delete button. Click the Yes button in the confirmation box. Restoring Backed-up Files You can restore all or any portion of the files in the BACKUPDATA_your username folder on the DAS system (SmartStor). You can choose to restore the files to: •... - Page 66 SmartStor DS4600 Product Manual The original file structure is maintained during the restoration. Caution If you restore to the original folders on your Mac, the restore function will overwrite the files in those folders. Be careful which files you restore and where on your Mac you direct the backup files.
-
Page 67: Viewing The Backup Event Log
Chapter 3: SmartNAVI Click the Restore button. The restoration begins immediately. The amount of time required depends on the size and number of files being restored. Viewing the Backup Event Log Backup events report on backups, schedules, and file transfers. Events are reported by date, time, severity (information or error) and description. - Page 68 SmartStor DS4600 Product Manual Optional. Click the arrow on the Date/Time header to reverse the chronological order. Note For DAS system events, see “Viewing the System Event Log” on page 23.
-
Page 69: Saving The Event Log
Chapter 3: SmartNAVI Saving the Event Log This function saves a copy of the Backup Event Log as a text file onto your Mac. The text file records the events displayed in the Event Log window. Set the Event Filter dropdown menu to display: •... -
Page 70: Clearing The Event Log
SmartStor DS4600 Product Manual Click the Save button in the Save dialog box. Clearing the Event Log Note Before you clear the Backup Event Log, consider saving a copy for future reference. See “Saving the Event Log” on page 63. - Page 71 Chapter 3: SmartNAVI Click the Clear All button. Click the Yes button in the confirmation box.
- Page 72 SmartStor DS4600 Product Manual...
-
Page 73: Chapter 4: Technology Background
Chapter 4: Technology Background • Introduction to RAID (below) • Choosing a RAID Level (page 72) • Spare Drive (page 73) • Automatic Rebuilding (page 74) • Partition and Format (page 74) Introduction to RAID RAID (Redundant Array of Independent Disks) allows multiple disk drives to be combined together into a RAID Volume. -
Page 74: Raid 0 - Stripe
SmartStor DS4600 Product Manual RAID 0 – Stripe When a RAID Volume is striped, the read and write blocks of data are interleaved between the sectors of multiple disk drives. Performance is increased, since the workload is balanced between drives or “members” that form the RAID Volume. -
Page 75: Raid 1 - Mirror
Chapter 4: Technology Background RAID 1 – Mirror When a RAID Volume is mirrored, identical data is written to a pair of disk drives, while reads are performed in parallel. The reads are performed using elevator seek and load balancing techniques where the workload is distributed in the most efficient manner. -
Page 76: Raid 5 - Block Striping With Distributed Parity
SmartStor DS4600 Product Manual RAID 5 – Block Striping with Distributed Parity RAID 5 organizes block data and parity data across the disk drives. Generally, RAID level 5 tends to exhibit lower random write performance due to the heavy workload of parity recalculation for each I/O. RAID 5 works well for file, database, application and web servers. -
Page 77: Raid 10 - Mirror / Stripe
Chapter 4: Technology Background RAID 10 – Mirror / Stripe Mirror/Stripe combines both of the RAID 0 and RAID 1 types. RAID 10 can increase performance by reading and writing data in parallel while protecting data with duplication. At least four disk drives are needed for RAID 10 to be installed. With a four-disk-drive RAID Volume, one drive pair is mirrored together then striped over a second drive pair. -
Page 78: Choosing A Raid Level
SmartStor DS4600 Product Manual Choosing a RAID Level There are several issues to consider when choosing the RAID level for your Volume. The following discussion summarizes some advantages, disadvantages and applications for each choice. RAID 0 Advantages Disadvantages Implements a striped disk RAID... -
Page 79: Raid 5
Chapter 4: Technology Background RAID 5 Advantages Disadvantages High Read data transaction rate Disk failure has a medium impact on throughput Medium Write data transaction rate Good aggregate transfer rate Most versatile RAID level Recommended applications for RAID 5: • File and Application servers •... -
Page 80: Automatic Rebuilding
SmartStor DS4600 Product Manual You must designate a disk drive as a Spare. By default, and unassigned disk drive is Free. Use PASM to designate the Free disk drive as a Spare. See Maintaining a spare drive is a good precaution to protect your RAID Volume integrity in the event of disk drive failure. -
Page 81: Chapter 5: Troubleshooting
Chapter 5: Troubleshooting • Checking the System Stauts LED (below) • Checking Disk Status LEDs (page 76) • Replacing a Failed Disk Drive (page 76) • SmartStor Lockup (page 77) This chapter deals problems you might encounter with your SmartStor and how to resolve them. -
Page 82: Checking Disk Status Leds
SmartStor DS4600 Product Manual Checking Disk Status LEDs The disk status LEDs report the condition of the disk drives: • Blue – Normal disk drive function • Amber – Rebuilding to this disk drive • Red – Failed disk drive •... -
Page 83: Smartstor Lockup
Chapter 5: Troubleshooting Place the carrier with the new disk drive back into the open slot in the SmartStor. If the failed drive belonged to a RAID Volume, the RAID Volume will begin rebuilding as soon as the new drive is installed. During the Rebuild, the Disk Status LED show amber. - Page 84 SmartStor DS4600 Product Manual If the SmartStor used to appear in the Main Window previously but is no longer there, the SmartStor is probably locked up or frozen and requires a hard reboot. Caution This action is appropriate only when there are no data transfers or installations in progress.
- Page 85 Chapter 5: Troubleshooting Figure 3. SmartStor front and back views Disk Activity LED System Status LED Power Button Power Connection Disconnect the power cable from the SmartStor. Wait 10 seconds, then reconnect the power cable. Press the Power button. It takes about a minute to boot the SmartStor. When fully booted: •...
- Page 86 SmartStor DS4600 Product Manual Verify that the SmartStor now appears in SmartNAVI Main Window. See Figure 2. The SmartStor automatically runs a File System Check due to the abnormal shutdown. During the File System Check, the System Status LED blinks amber and the Disk Activity LEDs blink blue.
-
Page 87: Chapter 6: Support
Chapter 6: Support • Frequently Asked Questions (below) • Contacting Technical Support (page 82) • Limited Warranty (page 85) • Returning Product For Repair (page 87) Frequently Asked Questions Also see “Chapter 5: Troubleshooting” on page 75. I pressed the One Touch Backup button on the DS4600 but no files were backed up. -
Page 88: Contacting Technical Support
SmartStor DS4600 Product Manual Contacting Technical Support Promise Technical Support provides several support options for Promise users to access information and updates. We encourage you to use one of our electronic services, which provide product information updates for the most efficient service and support. - Page 89 +49 (0) 2 31 56 76 48 - 29 Attn: Technical Support Phone Technical Support +49 (0) 2 31 56 76 48 - 10 If you wish to write us for Promise Technology Germany support: Europaplatz 9 44269 Dortmund, Germany Italy...
- Page 90 SmartStor DS4600 Product Manual China – Beijing E-mail Support e-Support On-Line Fax Support +86 10 8857 8015 Attn: Technical Support Phone Support +86 10 8857 8085 or 8095 If you wish to write us for Promise Technology China – Beijing...
-
Page 91: Limited Warranty
Chapter 6: Support Limited Warranty Promise Technology, Inc. (“Promise”) warrants that this product, from the time of the delivery of the product to the original end user: all components, for a period of two (2) years; will conform to Promise’s specifications;... -
Page 92: Your Responsibilities
SmartStor DS4600 Product Manual No other document, statement or representation may be relied on to vary the terms of this limited warranty. Promise’s sole responsibility with respect to any product is to do one of the following: replace the product with a conforming unit of the same or superior product;... -
Page 93: Returning Product For Repair
Return ONLY the specific product covered by the warranty (do not ship cables, manuals, diskettes, etc.), with a copy of your proof of purchase to: USA and Canada: Promise Technology, Inc. Customer Service Dept. Attn.: RMA # ______ 47654 Kato Road... - Page 94 SmartStor DS4600 Product Manual You are responsible for the cost of insurance and shipment of the product to Promise. Note that damage incurred due to improper transport or packaging is not covered under the Limited Warranty. When repairing returned product(s), Promise may replace defective parts with new or reconditioned parts, or replace the entire unit with a new or reconditioned unit.
-
Page 95: Appendix A: Maintenance
To download the upgrade file: Point your browser to http://www.promise.com The firmware was placed in “Support” > “Download” > “SmartStor DS4600” Download the DS4600 firmware upgrade file to your Mac. The firmware upgrade filename will be similar to ds4600_xxxxxx_xx.upg Installing the Firmware Upgrade File... - Page 96 SmartStor DS4600 Product Manual Click the folder icon, navigate to the firmware upgrade file, click the file, and click the Open button. The path and firmware upgrade file appear in the field.
- Page 97 Appendix A: Maintenance Click the Upgrade button. The upgrade takes about two or three minutes. In the Upgrade Success popup message, click the OK button. The firmware upgrade is proceeding.
-
Page 98: Booting The Smartstor In Safe Mode
SmartStor DS4600 Product Manual When the upgrade is done, the SmartStor reboots automatically. When the SmartStor beeps once, it is ready for use. Please click the System Information button to confirm the firmware version successfully upgraded. Error During Upgrade If an error occurs during the firmware upgrade, the SmartStor cannot reboot in normal mode. - Page 99 Appendix A: Maintenance To boot the SmartStor in safe mode: Press the Power button. Use USB 2.0 cable to connect to your Mac. Click the folder icon and choose the firmware upgrade file to boot the SmartStor in Safe Mode.
-
Page 100: Hard Booting The Smartstor
SmartStor DS4600 Product Manual It takes about a minute to boot the SmartStor. When fully booted: • The System Status LED turns blue. • The buzzer beeps one time. At this point, the SmartStor is in Safe Mode. Repeat the procedure under “Installing the Firmware Upgrade File” on page 89. -
Page 101: Removing Disk Drives
Appendix A: Maintenance Figure 1. SmartStor front and back views Disk Activity LED System Status LED Power Button Reset Button Power Connection Removing Disk Drives To remove disk drives: Open the SmartStor’s front door. Pull out the drive carrier from the enclosure. Carefully remove the disk drive from the drive carrier, so that the screw holes on the sides of the carrier align with the screw holes in the drive. -
Page 102: Installing Disk Drives
Close the door on the front of the SmartStor. Installing Disk Drives You can populate the SmartStor DS4600 with SATA 1.5 Gb/s or 3.0 Gb/s disk drives. For optimal performance, install disk drives of the same model and capacity. Your disk drives will become a RAID Volume on the SmartStor. - Page 103 Appendix A: Maintenance Figure 3. Disk drive installed in a drive carrier SATA Data and Power Connectors Disk Carrier Handle Insert the screws through the holes in the drive carrier and into the sides of the disk drive. • Install only the counter-sink screws supplied with the SmartStor. •...
-
Page 104: Replacing The Power Supply
Replacing the Power Supply Important If your SmartStor is still under warranty, contact Technical Support for repair under RMA. See page 82. The SmartStor DS4600 uses the following power supply: • Make and model: Edac EA11003E • Input: 100 to 240 V, 2.5 A, 50-60 Hz •... -
Page 105: Installing The Power Supply
Appendix A: Maintenance Motherboard EMI core power connector Power Supply Power Supply Retainer Installing the Power Supply To install the new power supply: Plug in the motherboard power connector. Lay the power supply into its cradle and slide it back into position. Be sure the pads on the power supply are downward and the retainer is holding the power supply in place. -
Page 106: Replacing The Cooling Fan
Important If your SmartStor is still under warranty, contact Technical Support for repair under RMA. See page 82. The SmartStor DS4600 uses the following cooling fan: • Make and model: NMB-MAT 3106KL-04W-B39-C50 • Dimensions: 80 x 80 x 15mm •... -
Page 107: Installing The Cooling Fan
Appendix A: Maintenance Screw Screw Screw Screw Unplug the three-wire fan power connector at the motherboard. Gently press outward on the two retainer clips to release the fan. Fan power connector Cooling Fan Retainer clip Retainer clip Connector holes Installing the Cooling Fan To install the new cooling fan: Gently press the new fan into position between the retainer clips on the back cover. - Page 108 SmartStor DS4600 Product Manual Boot the SmartStor. See “Connecting the Power” on page 9.
-
Page 109: Appendix B: Important Information
Appendix B: Important Information GNU General Public License This product includes copyrighted third-party software licensed under the terms of the GNU General Public License. Please see the GNU General Public License (“GPL”) for the exact terms and conditions of this license at www.gnu.org. The GPL source code incorporated into the product is available for free download at our web site www.promise.com. - Page 110 SmartStor NS4600N Product Manual...
-
Page 111: Index
Index about this manual 1 dimensions 3 architecture, DS4600 2 disk drive installing 98 replace 78 SATA 98 backup disk status LED 78 change schedule 55 drag and drop 54 clear event log 66 delete schedule 60 files, restore 61 files, view 41 ESD warning 5 immediate 42... - Page 112 SmartStor DS4600 Product Manual color definitions 77 RAID Volume disk activity 6 automatic rebuilding 76 disk status 6, 78 from disk drives 98 Ethernet activity 6 partition and format 76 status, three blinks 22 status 39 system status 6, 29, 77...
- Page 113 Index disk drives 78 UPS 77 RAID volume 39 USB connector 7 SmartStor 77 utility OS support 4 system 77 stripe RAID 70, 74 system status LED 29, 77 view backup event log 63 backup files 41 test email 25 backup schedules 55 event log 23 unpacking the SmartStor 5...
Need help?
Do you have a question about the SmartStor DS4600 and is the answer not in the manual?
Questions and answers