Table of Contents
Advertisement
Advertisement
Table of Contents

Related Manuals for Promise Technology Apollo Cloud 2 Duo


Summary of Contents for Promise Technology Apollo Cloud 2 Duo
- Page 1 Apollo Cloud 2 Duo Storage and Sharing. Reinvented.
-
Page 2: Table Of Contents
Welcome to Apollo Introduction Unpacking your Apollo Requirements for Apollo use Detailed Specifications Back of Apollo Cloud 2 Duo Front of Apollo Cloud 2 Duo LED Definitions Hardware Setup Connecting Apollo Connecting the Power Connecting the Network Cable Example Hardware Setup... - Page 3 Sharing Folders with Members Sharing Public Folders How to View Shared Files Delete a Member from Apollo Cloud Using the Trash Can Delete Files How to Open the Trash Folder How to Restore Files from the Trash Folder How to Permanently Delete Files USB Operations with Apollo USB Drive Requirements for Apollo Backup/Restore Backing up Apollo Content to USB Storage...
- Page 4 Drag and Drop File Transfers USB Transfer, Backup and Restore with Apollo Utility Using Quickview for Picture Files Using Apollo Music Player Changing the Device Name in Apollo Utility Changing the Sync folder in Apollo Utility Viewing Events in Apollo Utility Viewing Software Version and Settings Reset Apollo Hardware Repair...
-
Page 5: Welcome To Apollo
Welcome to Apollo Introduction Thank you for purchasing the Promise Apollo Cloud 2 Duo. This user document is intended as a basic guide to setting up and using your new Apollo. In addition to this material, Promise provides several How-To videos available online. You can access these videos and other user support through the Apollo Cloud interface on your iPhone, Mac, PC, or Android device. -
Page 6: Detailed Specifications
Detailed Specifications Specification Description Storage Disks Two 3.5” Hard Disk Drives, 4 TB each Storage Capacity RAID1: 4 TB / RAID0: 8 TB AC power adapter Input: 100~240V 50-60Hz , 0.9A (AC) Maximum Output: 12V, 3A (DC) Maximum System Fan 4000 RPM;... -
Page 7: Back Of Apollo Cloud 2 Duo
Back of Apollo Cloud 2 Duo Link LED Yellow light indicates a connection. If there is no connection, this is dark. Check both ends of the USB 3.0 port cable to make sure they You can use this to back are securely attached to up data on your Apollo. -
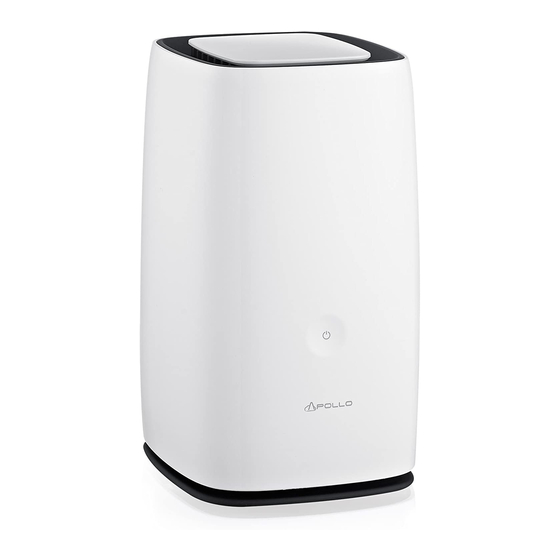
Page 8: Front Of Apollo Cloud 2 Duo
Front of Apollo Cloud 2 Duo Capacitive touch LED button. Did you know When the Apollo is in sleep mode, the LED changes from dim to bright slowly in a repeating pattern. -
Page 9: Led Definitions
LED Definitions Color Description Green Green light indicates the unit is powered on. A flashing green light indicates it is booting up or trying to connect to the public server. When the Apollo is in sleep mode, the LED changes from dim to bright slowly in a repeating pattern. To wake up the Apollo when it is in sleep mode, you can access it remotely using the Apollo Cloud App. -
Page 10: Connecting The Network Cable
Connecting the Network Cable Use the included Ethernet cable to connect to the network port on the back of the device. Connect the other end to a networking device that allows the Apollo to connect to the Internet, such as a broadband router, or office Ethernet LAN that is connected to the Internet. The Apollo does not require configuration of network settings or any other settings for initial system setup. -
Page 11: Using The Apollo Cloud App
Apollo package, please see instructions in “Claiming Apollo: QR Code” on page 9. • The automatic search method. Please read “Claiming Apollo Cloud 2 Duo: Auto Search” on page 14 for instructions. • If you are unable to scan the QR code or if the Auto Search does not discover the... -
Page 12: How To Download And Launch Apollo Cloud App
How to Download and Launch Apollo Cloud App To claim the Apollo using your iOS or Android device, first download the APP from the Apple Store, Google Play or go to: http://www.promise.com/Apollo/Downloads Run the App, you will see the login screen. Touch on link labeled “+ Apollo” (add Apollo) to begin the claiming procedure. -
Page 13: Claiming Apollo With Qr Code
Claiming Apollo with QR Code It is possible that your Apollo will not be recognized during the automatic discovery process. It is necessary to provide the unique Serial Number and Key code for the Apollo unit you are going to claim. An easy way to do this with a mobile device is to use the scanner utility that is embedded in Apollo Cloud App exclusively for this purpose. - Page 14 2. Hold the phone so it can scan the QR code included with your Apollo. A successful scan will change the menu to list the Serial Number and Key Code for the Apollo. When you see the Serial Number and Key Code appear, touch the Claim button. ...
- Page 15 3. In the new menu, choose the RAID level used for the hard disk drives. RAID 1 (mirrored RAID) is recommended. You also have an option to select RAID 0. Keep in mind that RAID 0 does not offer any redundancy, so if a drive fails, all data will be lost. If you choose the RAID 0 option, make sure to backup Apollo frequently.
- Page 16 5. In the new menu, enter the Email address you will use for this account, the owner account. This Email address is the will be the login name you use to login and manage the device. Type the same Email address again to confirm it is typed correctly. Then touch the Send Code button.
- Page 17 8. Now create a password for the owner account login. The password must be at least 6 characters in length, and contain at least one numeral. Make sure to create a password that is difficult to guess. Type the same password again to confirm it is typed correctly. 9.
-
Page 18: Claiming Apollo With Auto Search
Claiming Apollo with Auto Search 1. Touch to select + Apollo. A new menu appears with a dialog box asking if you want to allow the App to have access to the camera. For Auto Search, it does not matter which option you choose. - Page 19 4. In the new menu, choose the RAID level used for the hard disk drives. RAID 1 (mirrored RAID) is recommended. You also have an option to select RAID 0. Keep in mind that RAID 0 does not offer any redundancy, so if a drive fails, all data will be lost. If you choose the RAID 0 option, make sure to backup Apollo frequently.
- Page 20 6. In the new menu, enter the Email address you will use for this account, the owner account. This Email address is the will be the login name you use to login and manage the device. Type the same Email address again to confirm it is typed correctly. Then touch the Send Code button.
- Page 21 9. Now create a password for the owner account login. The password must be at least 6 characters in length, and contain at least one numeral. Make sure to create a password that is difficult to guess. Type the same password again to confirm it is typed correctly. 10.
-
Page 22: Claiming Apollo With Manual Find
Claiming Apollo with Manual Find It is possible that your Apollo will not be recognized during the automatic discovery process. In this case, you need to provide the unique Serial Number and Key code for the Apollo unit you are going to claim. You can find the Serial Number and Key code on a card that should have been included in the Apollo packaging, or look on the bottom of the Apollo. - Page 23 2. In the Search For Apollo menu, select the Find Manually option near the bottom. 3. In the new menu type the Serial Number and Key in the spaces provided, and touch the Claim button. Type the Serial Number and Key Choose “Find Manually”...
- Page 24 4. In the new menu, choose the RAID level used for the hard disk drives. RAID 1 (mirrored RAID) is recommended. You also have an option to select RAID 0. Keep in mind that RAID 0 does not offer any redundancy, so if a drive fails, all data will be lost. If you choose the RAID 0 option, make sure to backup Apollo frequently.
- Page 25 6. In the new menu, enter the Email address you will use for this account, the owner account. This Email address is the will be the login name you use to login and manage the device. Type the same Email address again to confirm it is typed correctly. Then touch the Send Code button.
- Page 26 9. Now create a password for the owner account login. The password must be at least 6 characters in length, and contain at least one numeral. Make sure to create a password that is difficult to guess. Type the same password again to confirm it is typed correctly. 10.
-
Page 27: Apollo Cloud App 2.0
Apollo Cloud App 2.0 The Apollo Cloud App user interface is easy to use and intuitive. It will look familar if you have used photo management or file management Apps before. Even if you are an experienced App user, you might want to take a minute or two to get familiar with the Apollo Cloud App. Here is a brief introduction to get you started using the App. -
Page 28: Add Content, Create Folders And Manage Files
Add Content, Create Folders and Manage Files You can start manually adding content from your mobile device or computer by touching + near the top of the Apollo Cloud Photos menu, or the Folders menus. You can also sync photos in the Camera Roll of your smart phone to the Apollo. For instructions to do this, please go to “Using Camera Rolls”. - Page 29 3. Select the photos in the folder you want to upload. The menu works like other photo management Apps. Touch Select to begin selecting photo files, scroll up and down through the folder. When you have chosen the files you want, touch Complete to being uploading. The time it takes to upload depends on the amount of data (photos) you selected and the speed of your WiFi or Wireless Data connection.
-
Page 30: Files By Category
Files by Category The icons at the bottom of the Apollo Cloud Folder menu link to menus for All (all file types), Recent (within the past week), and Shared (content you have shared with other members). Use these to go to files and content in that category. All files and folders... -
Page 31: Using Camera Rolls
Using Camera Rolls Photos and videos can be automatically uploaded to Apollo using the Camera Rolls feature. When Apollo Cloud is running and connected, any videos or photos you create will be automatically uploaded and stored. Note that Camera Rolls can be used when you are not in range of a WiFi connection to the Internet, but your mobile device must support a wireless Internet data connection via a 3G and 4G network. -
Page 32: Using Smart Albums
Using Smart Albums When enabled, the Smart Album feature helps you manage picture and video files created on your phone. Pictures and videos you take are organized according to time created and location data. In order to use this, you must have location tracking or GPS tracking enabled on the phone. -
Page 33: Managing Members
Managing Members You can create Apollo member users in order to easily share pictures, videos, and other content among the member group. Apollo member users have complete control over the files in their account. It is up to each user to select the fellow Apollo members that can view videos or pictures that are shared. - Page 34 2. Enter a name for the new Apollo member to whom you will send an invitation, and select OK to create the new member account. Enter name for new member Choose method to send invitation 3. Now you are asked to send an invitation to the new member. The link is copied to the clipboard and you can choose how to share it.
- Page 35 4. Send the invitation. You can use the prepared message containing the link, or type your own message and paste the link into it. Then send it. A new menu appears indicating that the procedure is completed. Automatically generated Invitation has been sent invitation message 5.
-
Page 36: Removing A Member From Apollo Cloud
Removing a Member from Apollo Cloud The Apollo owner can delete a member from the Apollo user group. Deleting a member will permanently remove all content stored by that member. To delete a member from the Apollo user group, go to the Members menu, select the member that you want removed, and choose the Delete option. -
Page 37: Setting A Storage Quota For Members
Setting a Storage Quota for Members The Apollo owner can manage how much storage capacity Apollo members are allowed to use. By default, no storage capacity quota is set for any member. Storage quotas are set using either the App or Apollo Utility. Quotas go into effect as soon as they are created. To set a member storage quota with the App, go to the Members list, choose the member you want to adjust and touch Max Capacity to see the quota menu. -
Page 38: Sharing Files
Sharing Files Sharing photos, videos and other files with friends and family is what Apollo Cloud is all about. Apollo member users have complete control over the files in their account. It is up to each user to select the fellow Apollo members that can view videos or pictures that are shared. Users also have the option to share their own user content with the public. - Page 39 2. Select the More option. 3. Select the Share option. A new menu appears. 4. Select Member Sharing. A list of members appears. Choose Share Choose Member Sharing...
- Page 40 5. You can now customize how to share content in the folder. You can turn sharing On or Off, and allow Read & Write or Read Only privilege. Choose members and type of sharing for folder...
-
Page 41: Sharing Public Folders
Sharing Public Folders A public link can be used to share content in a shared folder. The files can be viewed or downloaded. The public link is copied to your clipboard for pasting into a social media site or email. You can also choose an App for sharing the link. To create a public share: 1. - Page 42 4. Select Public Sharing. A new menu appears. 5. You can choose to share with Anyone, None, or People with this password (type password in space provided). You can also customize how long the link to the shared content remains valid using the slider bar (up to 30 days).
-
Page 43: How To View Shared Files
How to View Shared Files To see what you are currently sharing, with members and publicly shared content links, go to the Shares menu, and choose Member or Public Sharing to see what you are currently sharing. To disable sharing, choose the file to see details, and slide the Sharing switch left to turn off. Display current shared Public files Change sharing options... -
Page 44: Delete A Member From Apollo Cloud
Delete a Member from Apollo Cloud The Apollo owner can delete a member from the Apollo user group. Deleting a member will permanently remove all content stored by that member. To delete a member from the Apollo user group, go to the Members menu, select the member that you want removed, and choose the Delete member option. -
Page 45: Using The Trash Can
Using the Trash Can The Trash folder is used to store files that you want to delete from view in any of your folders. Users can delete their own files in folders that are not shared with other users. The deleted files are sent to the Trash folder. -
Page 46: How To Open The Trash Folder
How to Open the Trash Folder If you sent files to the Trash folder you wish to restore to the original folder, or if you just want to see what is in the Trash folder, you can go to the Apollo device menu. To see what is in the Trash, got to the Settings menu, touch the Trash icon to open the Trash contents folder. -
Page 47: How To Restore Files From The Trash Folder
How to Restore Files from the Trash Folder To restore files to the location they were placed previously, select the files from the content listed in Trash, and touch the Restore icon. You need to confirm that you want the files restored in a pop-up menu. -
Page 48: How To Permanently Delete Files
How to Permanently Delete Files To permanently remove files in the Trash, go to the Trash contents, choose the files to remove permanently, and click the Trash icon at the bottom of the menu. If you remove these files at this point, they cannot be recovered, they are gone from Apollo. -
Page 49: Usb Operations With Apollo
USB Operations with Apollo Apollo features a USB 3.0 port that can be used for various functions using a USB storage drive. You can use a USB storage drive to Backup or Restore data from the Apollo (see requirements for USB storage drive below). You can also transfer data from a USB drive to the Apollo. -
Page 50: Backing Up Apollo Content To Usb Storage
Backing up Apollo Content to USB Storage Connect a USB storage device to the Apollo, then follow these steps: 1. Go to Device menu, select the Settings menu, then select the Backup & Restore option. Device > Settings > Backup & Restore, Backup choose Backup... - Page 51 2. In the Backup menu you have the option to setup scheduled backups, or start a one time backup immediately. If you would like to configure daily backups, move the Schedule daily backup slider to the right, then choose a time for the daily backup. This will perform a backup everyday at the chosen time.
- Page 52 3. The percentage of data transferred displays in real time. The more data there is to back up, the longer it will take to complete the transfer. For this reason, it is recommended to use a USB 3.0 device since the transfer speed is much faster than legacy USB storage devices. When the backup is completed, 100% displays under the progress bar.
-
Page 53: Restoring Content From A Usb Storage Device
Restoring Content from a USB Storage Device To restore previously saved content from a USB storage device, attach the USB storage device that holds your backups to the Apollo, and follow the instructions below. Connect the USB storage device with your previously saved backups to the Apollo, then follow these steps: 1. - Page 54 4. During the restore process, progress is displayed. Do not unplug the USB device. Restore in progress Restore in progress 5. When the restore is completed, touch the Done to go back to the Settings menu. ...
-
Page 55: Transferring Content From A Usb Storage Device
Transferring Content from a USB Storage Device To save data on a USB storage drive to the Apollo, you can use the Apollo Utility or the Apollo App. The USB Transfer procedure is described in this section, first using the Apollo Utility, followed by instructions for the Apollo App. - Page 56 USB Transfer in progress 3. After a few seconds, a progress bar appears, this represents how much of the transfer has been completed. DO NOT DISCONNECT the USB storage device while the transfer is in progress. 4. When the USB transfer is completed, a message appears informing you that it is done.
-
Page 57: Usb Transfer With Apollo Utility
USB Transfer with Apollo Utility To begin a USB Transfer to Apollo, attach a USB storage device to the USB port on Apollo, and use the Apollo Utility to perform the steps below. See also “Using the Apollo Utility” on page 74 for instructions on using the Apollo Utility for various operations. - Page 58 3. A pop-up dialog appears asking for confirmation. If you want to proceed with the transfer, click OK. 4. In the new USB Transfer menu, click on the Start button to begin. After a few seconds, a progress bar appears, this represents how much of the transfer has been completed.
-
Page 59: Using Apollo Mirror
Mirroring to another device is a good idea if you choose not to mirror the hard drives in the initial setup. To mirror the Apollo Cloud 2 Duo, use a new Apollo Cloud 2 Duo or use one that has been reset not yet claimed. If you are using a device that was previously claimed, backup all data on the Apollo that will be the mirror, make sure the firmware is up to date, then reset... - Page 60 2. In the Search For Apollo menu, select the Auto Search option near the bottom. 3. If there are more than one unclaimed Apollo on your network, you will see a list of Serial Numbers for the unclaimed Apollo devices that have been discovered. If you do not know which one is yours, check the Serial Number on the bottom of the Apollo unit.
- Page 61 5. Check your Email inbox for the validation code. Use this to verify your account and bind your Email address as the Apollo owner. If you do not see the Email, check your spam folder. It might be mistaken by your Email service to be an advertisement. 6.
- Page 62 7. Progress of the replicating process is displayed as a percentage of completion. When the task is done, another menu appears informing you the mirroring has been completed. The mirror device will now duplicate data as it is added or deleted on the Apollo. Replication progress is displayed until When mirroring is done, the Mirror completion.
-
Page 63: Using Apollo Mirror With Apollo Utility
Using Apollo Mirror with Apollo Utility Apollo Mirror can be done using a new Apollo Cloud 2 Duo or one that is not claimed. If you are using a device that was previously claimed, backup all data on the Apollo that will be the mirror, make sure the firmware is up to date, then reset the Apollo so the it is unclaimed. - Page 64 3. The mirroring process will delete everything currently in the Trash. If you are confident there is nothing in the Trash that you need to keep, click on the Continue button. 4. Since your email address is already known, you are sent a Validation Code to the email account of record.
- Page 65 6. The progress so far appears in the menu until the mirroring is completed. You can cancel the procedure at any time if you wish. To cancel Apollo Mirror, click on Stop Mirroring. 7. A message informs you when the mirror is complete.
-
Page 66: Apollo Maintenance
Apollo Maintenance Use the Apollo device menu to view information about the Apollo device such as how much storage capacity is being used, if the device is online, etc. Also use this menu to change the appearance of the Apollo LED indicator, and to update Apollo firmware. How to view device status information To see some basic information about the Apollo, go to the device menu (go to Settings then touch the device name near the bottom of the menu). -
Page 67: How To Change Device Name
How to Change Device Name To change the name of the Apollo from the default name, or from any previously assigned name, first go to the Settings menu. Follow these steps starting in the Settings menu to change the device name. 1. - Page 68 3. In the Rename menu, enter the new device name for the Apollo, and touch OK to make the change. Enter new device name...
-
Page 69: Updating Apollo Firmware
Updating Apollo Firmware It is a good idea to keep the Apollo firmware up to date. If you want to check to see if Apollo firmware is the most current, you can do a quick check in the Apollo device menu. To check firmware version running on the Apollo, open the device menu, and touch the Check firmware version button near the bottom of the menu. -
Page 70: How To Get Notifications
How to Get Notifications Periodically the Apollo generates event notifications for system and device events such as a USB backup or a firmware change. You can see these by touching the notifications link just below the owner avatar pic in the Settings menu. Access notifications View Apollo notifications... -
Page 71: Sign Out Of Apollo Cloud App
Sign Out of Apollo Cloud App To sign out of Apollo Cloud, go to the Settings menu, scroll to the bottom, and touch Sign Out. You will need to login again the next time you want to use Apollo Cloud. If you do not sign out, you remain logged in, even if you turn off... -
Page 72: Using The Apollo Utility
Using the Apollo Utility Mac and Windows users can use the Apollo Utility to share and store files from their computer. The Apollo Utility is used the same way you use the Apollo Cloud App. The key difference is that the Apollo Utility includes the ability to “Sync” contents to a folder on your computer. The Selective Sync function of Apollo is described later in this chapter. -
Page 73: Navigating The Apollo Utility User Interface
Navigating the Apollo Utility User Interface The user interface of the Apollo Utility is nearly identical for the Mac and Windows versions. The main differences are how the different operating systems present icons and menu access for applications in general. For Windows, an Apollo icon appears in the System Tray, and in Mac the Apollo icon appear in the Dock, as well as in the menu bar (on the top of the desktop in default Mac settings) ... -
Page 74: Using The Apollo Utility Desktop Icons
Using the Apollo Utility Desktop Icons Some basic functions are available by right-clicking on the Apollo icon in the System Tray (Windows) or in the Menu Bar (Mac). Right-click and select the following options: • Open Apollo (i.e. launch Apollo Utility) •... -
Page 75: Content In The Apollo Folder
Content in the Apollo Folder When you install the Apollo Utility, a folder is created on your computer. This is the Apollo folder. Inside Mac Finder or Windows Explorer, it appears and functions the same as any normal folder, you can drag or copy content, create folders, delete content, etc. You can also add content with Apollo Utility from the Files menu. -
Page 76: Searching Content To View In Apollo Utility
Searching Content to View in Apollo Utility Use the Search function in Apollo to quickly locate a file or folder using a keyword search. Just type a keyword search term in the Search entry field and press the Enter key. File search on Apollo Sorting Content to View in the Apollo Utility Sorting content in Apollo works the same as it does in your operating system. -
Page 77: Keyboard Shortcuts For Handling Files
Keyboard Shortcuts for Handling Files Basic file handling in Apollo Utility works much the same as in the operating system you are using, including the keyboard shortcuts to copy and paste. You can copy from your Mac or Windows computer and paste into a folder on Apollo; or copy and paste from Apollo to a location on your computer. -
Page 78: Using Apollo Music Player
Using Apollo Music Player The Apollo Music Player is used for playing audio files located on the Apollo. The player interface is features basic playback controls including Play, Pause, Skip to next, Skip to previous, Shuffle play, Repeat play in sequence, and Repeat play single file. To begin using the player, just click on an audio file (supported audio formats: .mp3, .aac, .au, .m4a, .m4r, .wav), the music player launches automatically. -
Page 79: Changing The Device Name In Apollo Utility
Changing the Device Name in Apollo Utility The Apollo owner can change the name of the Apollo device using the Settings menu. The name given to the Apollo is also used for the sync folder. When this happens, the sync folder for all members will change to that name. -
Page 80: Changing The Sync Folder In Apollo Utility
Changing the Sync folder in Apollo Utility To change the location of the Apollo Sync folder on your computer, follow these steps: 1. Click the Settings icon in the side panel. 2. Click on the Apollo Sync icon. A new menu appears. 3. -
Page 81: Viewing Events In Apollo Utility
Viewing Events in Apollo Utility Click the Notifications icon in the side menu to see event notifications, invitation acceptances, firmware updates, etc. Only the Apollo owner can view the Apollo Notifications menu. Members will see only the Invitations list. Event Notifications display... -
Page 82: Viewing Software Version And Settings
Viewing Software Version and Settings To see what version of the Apollo Utility is installed, click the Settings icon in the side panel, then the Settings icon in the Preferences menu. This menu is also where you can change default settings to enable or disable automatic launch of the Apollo Utility on system startup, to display event notifications, and enable automatic firmware updates. -
Page 83: Reset Apollo
Reset Apollo In order to remove the Apollo owner’s claim on an Apollo device, you must perform a Reset of the device. Note that this is not merely a device settings reset. Resetting the Apollo will DELETE ALL DATA on the device. Then you will need to go through the claiming procedure again. -
Page 84: Hardware Repair
Hard Drive Replacement 1. Lift the cover on the top of the Apollo Cloud 2 Duo. It will require a light force to remove it. No tool is required for the removal of the cover. ... - Page 85 2. Use a Philips screwdriver to remove the two small screws on either side of the fan. Then gently lift the fan assembly out. Remove screws Lift fan assembly...
- Page 86 3. The hard drives have a plastic tab on the top of each drive. Carefully lift up on the hard drive to remove it. Remove the hard drive...
-
Page 87: Drive Failure Indicators
Drive Failure Indicators After the cover of the Apollo Cloud 2 Duo is off, you will see two LED indicators numbered 1 and 2. In the event of a hard drive failure, this light will illuminate indicating which drive has the failure. ... -
Page 88: Contacting Technical Support
Contacting Technical Support PROMISE Technical Support provides several support options for PROMISE users to access information and updates. We encourage you to use one of our electronic services, which provide product information updates for the most efficient service and support. Promise offers free phone and web support for the first 90 days after purchase of the product. - Page 89 In the HELP DESK link you will find: CALL US, LIVE CHAT, ONLINE SUPPORT and WE WILL CALL YOU links. Please choose the option that best suits your schedule and needs. When you contact Technical Support, please have the following information available: •...
-
Page 90: Limited Warranty
Limited Warranty PROMISE Technology, Inc. (“PROMISE”) warrants that this product, from the time of the delivery of the product to the original end user: a) all components for a period of two (2) years; b) will conform to PROMISE’s specifications;... -
Page 91: Your Responsibilities
PROMISE shall not be liable for the cost of procuring substitute goods, services, lost profits, unrealized savings, equipment damage, costs of recovering, reprogramming, or reproducing of programs or data stored in or used with the products, or for any other general, special, consequential, indirect, incidental, or punitive damages, whether in contract, tort, or otherwise, notwithstanding the failure of the essential purpose of the foregoing remedy and regardless of whether PROMISE has been advised of the possibility of such damages. - Page 92 Products received without the RMA number clearly displayed on the package may be returned unopened and unprocessed to the sender. To contact Technical Support use the link: https://getsupport.promise.com/Home Copyright ©2017 Promise Technology Inc. All rights reserved.
Need help?
Do you have a question about the Apollo Cloud 2 Duo and is the answer not in the manual?
Questions and answers