Table of Contents
Advertisement
Advertisement
Table of Contents

Related Manuals for Wincor Nixdorf BEETLE /M-III


Summary of Contents for Wincor Nixdorf BEETLE /M-III
- Page 1 BEETLE /M-III Modular POS System User Guide...
- Page 2 Please send us a copy of this page if you have any constructive criticism. We would like to thank you in advance for your comments. With kind regards, Your opinion: Wincor Nixdorf International GmbH Documentation R&D SAT36 Wohlrabedamm 31 D-13629 Berlin E-Mail: retail.documentation@wincor-nixdorf.com...
- Page 3 BEETLE /M-III Modular POS System (K1/K2- Motherboard, 80-Plus Gold Power Supply) User Manual Edition July 2014...
- Page 4 All brand and product names mentioned in this document are trademarks of their respective owners. Copyright © Wincor Nixdorf International GmbH, 2014 The reproduction, transmission or use of this document or its contents is not permitted without express authority. Offenders will be liable for damages. All rights, including rights created by patent grant or registration of a utility model or design, are reserved.
-
Page 5: Table Of Contents
Care Of the BEETLE /M-III ..............5 Recycling the BEETLE /M-III ............... 5 Warranty .................... 6 BEETLE /M-III - The Modular POS System ........7 Overview .................... 7 Before Switching On the System ............ 8 Unpacking And Checking the System ..........8 Setting Up the Device ................ - Page 6 COM5 -COM6 - Interfaces (optional) ........36 Changing RAM Module ..............37 Starting Up the System ..............39 Appendix ..................41 Technical Data BEETLE /M-III ............41 Interfaces ..................42 Total Current Consumption of Interfaces ........43 Abbreviations ................44...
-
Page 7: Manufacturer´s Certification
The device may only be repaired by authorized qualified person- nel. Unauthorized opening of the device and inexpertly carried-out repairs may not only seriously jeopardize the safety of the user, but also cancel all warranty and liability agreements. BEETLE /M-III User Manual... -
Page 8: Important Notes
Never touch pins or conductors on boards fitted with ESDs. Important Notes The modular POS system BEETLE /M-III conforms to the current safety standards for data processing equipment. If this device is taken from a cold environment into the operating ... - Page 9 Customer Service of Wincor Nixdorf or your dealer must be notified. The lithium battery must be disposed of in accordance with local regu- ...
-
Page 10: Introduction
Optionally there is a second SATA Hard Disk Drive available for your BEETLE /M-III. The choice of the software is not limited to a certain product. This provides you with a considerable degree of flexibility when arranging the configuration of your POS system. -
Page 11: Care Of The Beetle /M-Iii
Recycling Center, which is certified pursuant to ISO 9001 and ISO 14001. So, when your BEETLE /M-III it has served its time take advantage of the environmentally smart, up-to-date recycling methods! BEETLE /M-III User Manual... -
Page 12: Warranty
All parts of the product which are subject to wear and tear are not includ- ed in the warranty engagement. For detailed warranty arrangements please consult your contract documents. Please order spare parts at the Wincor Nixdorf customer service. BEETLE /M-III User Manual... -
Page 13: Beetle /M-Iii - The Modular Pos System
BEETLE /M-III in a network and upgrade the BEETLE /M-III, since it can accommodate expansion cards (1x PCI Express x1 + 1x PCI-Express x16). This means that the BEETLE /M-III can meet your requirements at all times. BEETLE /M-III User Manual... -
Page 14: Before Switching On The System
Should you notice any transport damages or discrepancies between pack- age contents and delivery ticket or functional defects please inform your contracting parties or the branch office of Wincor Nixdorf immediately. Please indicate the number of your delivery ticket and delivery ticket posi- tion and serial numbers of the respective devices. -
Page 15: Setting Up The Device
Setting Up the Device Set up the BEETLE /M-III system where it will not be exposed to extreme environmental conditions. Protect the device from vibrations, dust, moisture, heat and strong magnetic fields. Horizontal Installation Mind the minimum distances indicated below! If the equipment is to be fitted, you also must ensure that the specified minimum distances are maintained and constant ventilation is provided. -
Page 16: Mounting The Cable Cover
This depends on the cables which you wish to lay. Tools are not required as the plastic parts can be removed by hand. To mount the cover, insert the two bars into the tabs on the back side of the BEETLE. tabs BEETLE /M-III User Manual... - Page 17 Attach the cable cover to the left. bars Put the bar in the tab on the other side and press it until the cable cover is lying flat. BEETLE /M-III User Manual...
-
Page 18: Cabling Of The Beetle /M-Iii
Make sure that all data cables at the system unit and the peripherals are plugged. Plug one end of the AC cable into the socket of the BEETLE /M-III and the other end to the wall socket. Never connect data cables when the system is switched on. -
Page 19: Basic Settings
Switching off during operation is possible (just press the Power button again for approx. 5 sec.). Basic Settings Ex works, the BEETLE /M-III is configured to your order. Your configuration must be subsequently adapted to support supplementary devices such as scanners. -
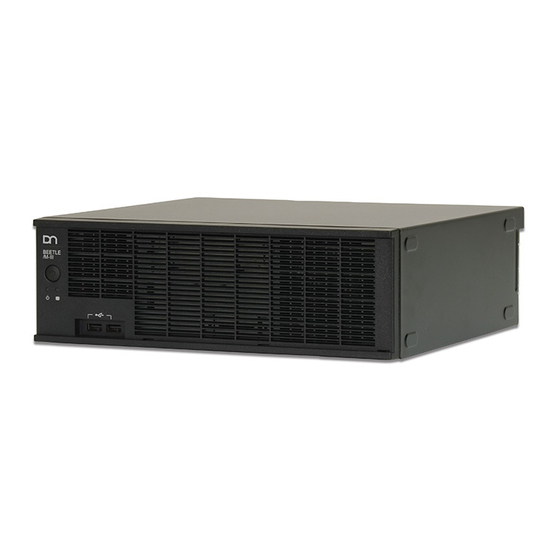
Page 20: The System Beetle /M-Iii
The System BEETLE /M-III Front Side View ① ②③ ④ ⑤ Power Button Power-LED HDD/SSD-LED 2 USB Interfaces ⑤ Ventilation Slots (Do not cover!) Power Button You switch on the system with the power button if the power pack is power supplied. -
Page 21: Light-Emitting Diode (Led)
USB (Universal Serial Bus)- A, USB 2.0 You can connect several USB peripheral devices to the USB or powered USB interface (12V or 24V). Only connect devices and cables that comply with the valid USB specification. BEETLE /M-III User Manual... -
Page 22: Interior View
④ ⑤ ⑥ Power supply with ventilator Air duct PoweredUSB hub (optional) Hard disk(s) (2.5” or 3.5”) with carrier 2 front USB Expansion card with 3 PoweredUSB interfaces (Retail Card) BEETLE /M-III User Manual... -
Page 23: Connector Panel
Only replace power packs released by Wincor Nixdorf. To disconnect the device from the supply voltage completely, switch off the device and disconnect the power plug. PoweredUSB 24V RJ12 (Cash Drawer) Power Connector BEETLE /M-III User Manual... -
Page 24: Poweredusb
Connecting daisy chained cash drawers and 12V OEM-drawers is prohibited! Power Connector This connector provides the power. Connect the according end of the power cable to this port and the other end to the power socket. Pull the mains plug to power-off the device. BEETLE /M-III User Manual... -
Page 25: System Unit
Always make sure that the system is switched off when you do cabling works. Connecting peripherals with the system switched on is not allowed. Example for a connector panel of the BEETLE /M-III: ⑩ ⑥ ⑦ ⑧ ⑨... -
Page 26: D- Sub- Socket Power Supplied (Com2*-Com4*)
PS/2 mouse via a Y connector. If scales which are not supplied by Wincor Nixdorf International GmbH are connected to the BEETLE /M-III, you must obtain a Wincor Nixdorf license for the driver software. Make sure that the connector is plugged firmly into the socket to prevent malfunctioning. -
Page 27: Mini- Din (Kybd)
Mini- DIN (KYBD) The BEETLE /M-III has a 6-pin mini-DIN jack for connecting a keyboard. Power is supplied to the keyboard via this socket. If you wish to connect an older standard PC keyboard with DIN connector, you must use a special adapter cable, obtainable from the WN branch office responsible for your area. -
Page 28: Jack Plug 3.5 Mm (In/Out/Microphone)
PoweredUSB The PoweredUSB interface is qualified for connections of peripheral devices such as barcode scanners or customer displays. The power supply is either 12V (green marked). This interface can also be used as a USB-A socket. BEETLE /M-III User Manual... -
Page 29: Disconnecting Cables
Unplug all data communication cables from the sockets of the data networks. Unplug all cables from the devices. With MINI-DIN plugs (Wincor Nixdorf keyboards), the plug remains inserted until released. Pull the plastic covering from the connecting socket with your thumb. The lock is released. - Page 30 The P- USB connector is disengaged by pressing the spring that is marked by an arrow. Manually loosen the knurled screws of the COM or DVI interface connector. To release a RJ45 plug push down the latch (see arrow). BEETLE /M-III User Manual...
-
Page 31: Opening Beetle /M-Iii
First ensure that the device is switched off and that the power connector is disconnected. Open your BEETLE /M-III by removing the housing cover. Loosen the two screws at the back side (see arrows). Pull the cover out of the front guide. - Page 32 Lift the top cover at the back side. BEETLE /M-III User Manual...
-
Page 33: Storage Media
Change of one 3.5” Data Store First ensure that the device is switched off and that the power connector is disconnected. Open the BEETLE /M-III (see chapter “Opening BEETLE /M-III”). Lift up the carrier. Loosen the connecting cables. Power supply cable... - Page 34 Fix the hard disk with the four screws. Please pay regard to the correct fitting position. As shown in the figure, the board of the HDD is on top and the connector bar to the right. Circuit board Connector bar Insert the hard disk in reverse order. BEETLE /M-III User Manual...
-
Page 35: Change Of One Or Two 2.5" Data Store/S
Change of one or two 2.5” Data Store/s First ensure that the device is switched off and that the power connector is disconnected. Open the BEETLE /M-III (see chapter “Opening BEETLE /M-III”). Lift up the carrier. Loosen and disconnect the cables. Power supply... - Page 36 Loosen and remove the four screws of both hard disks with a Torx screw- driver. When loosening the screws, support the hard drive with one hand. Handle the hard disk with care when installing it and never touch bare electronics. BEETLE /M-III User Manual...
- Page 37 Fix each hard disk with the four screws. Please pay regard to the correct fitting position. Connector bar Make sure that each connector bar is corresponding to the opening of the hard disk carrier. Connector bars Insert the hard disk in reverse order. BEETLE /M-III User Manual...
-
Page 38: Change Of One Or Two 2.5" Data Store/S With Frontal Disk Access
Change of one or two 2.5” Data Store/s with Frontal Disk Access First ensure that the device is switched off and that the power connector is disconnected. Open the front cover by pushing the release latch forward and slide the panel as shown in the lower illustration. BEETLE /M-III User Manual... - Page 39 Remove the front cover. Unlock the hard drives with the supplied key (pay attention to the symbol at the lock). Pull out the carrier with the hard drive at the green ear. BEETLE /M-III User Manual...
- Page 40 2nd hard disk drive accordingly. Lock the hard disk drive(s) with the key. Replace the front cover, press it and slide it to the left. Plug all disconnected cables and switch on the system. BEETLE /M-III User Manual...
-
Page 41: Poweredusb- Hub (Optional)
Devices like hard disks may also be connected via a USB interface. This in- terface can also be used as a USB-A socket. Always use this onboard PoweredUSB 12V (*) to connect a BA82 or BA83 with additional options or any other multifunctional screens. BEETLE /M-III User Manual... -
Page 42: Com5 (*) -Com6 (*) - Interfaces (Optional)
The interface connection is a 9-pin D-sub jack. Power (5V or 12V) is supplied via this jack. Make sure that the connector for the customer display is screwed firmly to the socket to prevent possible malfunctioning. BEETLE /M-III User Manual... -
Page 43: Changing Ram Module
Shut down the system. Unplug the power cord. Use an ESD equipment. Remove the housing cover (see chapter “Opening BEETLE /M-III”). Loosen the two screws at the back side. Disconnect the cables overlaying the air duct at the right side of the moth- erboard. - Page 44 Slide housing cover of the BEETLE system into the front guide and secure it with the thumbscrews. Plug the power cable into the main socket of the indoor electric installa- tions and switch on the device. BEETLE /M-III User Manual...
-
Page 45: Starting Up The System
Starting Up the System After installing the BEETLE /M-III, switch on the POS system using the ON/OFF button on the front panel. The system first performs an automatic self-test to test its basic functions. For example, you may see the following message on the monitor: WN „ID xx/xx Date“... - Page 46 If the operating system has started up without an error, the application software is automatically booted, if necessary. A message is displayed as soon as the BEETLE /M-III is ready for operation. For more detailed information see the description of your application pro- gram.
-
Page 47: Appendix
Appendix Technical Data BEETLE /M-III Dimensions Width 311.5 mm 302.9 mm (w/o cable cover, Depth incl. screws) 366.5 mm (with cable cover) Height 102.1 mm Weight approx. 5 kg Climatic category Class 3K3 DIN IEC 721-3-3 Class 2K2 DIN IEC 721-3-2... -
Page 48: Interfaces
Cash drawer RJ45/ LAN 10/100/1000 Mbit/s Optional 1 x PCI-Bus/PCIe Optional 1 x PCIe x1 and 1 x PCIe x16 K1: 3 x SATA III Serial ATA K2: 2 x SATA III and 1 x SATA II BEETLE /M-III User Manual... -
Page 49: Total Current Consumption Of Interfaces
The total current consumption at 24V interfaces must not exceed 3A. each PoweredUSB 24V = 3A Max. 3A @ 24V Power input of additionally implemented PCI- and PCIe- Controllers is – for thermic reasons - limited to 10W for each slot and all together to 20W. BEETLE /M-III User Manual... -
Page 50: Abbreviations
Hard Disk Drive International Electrotechnical Commission International Organization for Standardization, Local Area Network Light Emitting Diode Peripheral Component Interconnect PCIe Peripheral Component Interconnect express Protective Earth Neutral Conductor Point Of Sales Random Access Memory Registered Jack, e.g. RJ45 BEETLE /M-III User Manual... - Page 51 SATA Serial Advanced Technology Attachment Solid State Disk (flash medium) Thin Film Transistor TN-S Terre Neutre- Separé Underwriters Laboratory Universal Serial Bus Video Graphics Adapter Wincor Nixdorf International GmbH BEETLE /M-III User Manual...
- Page 52 Wincor Nixdorf International GmbH D-33094 Paderborn Order No.: 01750262070A...
Need help?
Do you have a question about the BEETLE /M-III and is the answer not in the manual?
Questions and answers