
Subscribe to Our Youtube Channel
Related Manuals for Wincor Nixdorf BEETLE /moPOS


Summary of Contents for Wincor Nixdorf BEETLE /moPOS
- Page 1 BEETLE /moPOS Mobile POS Solution End User’s Guide Software - Getting Started (December 2015)
- Page 2 - the contents - the layout - the product. We would like to thank you in advance for your comments. With kind regards, Wincor Nixdorf International GmbH R&D, SAT36 Wohlrabedamm 31 D-13629 Berlin E-Mail: retail.documentation@wincor-nixdorf.com _________________________________________________________________________________________________________________ Your opinion...
- Page 3 All product names mentioned in this document are registered trademarks. Copyright ©Wincor Nixdorf International GmbH, 2015 The reproduction, transmission or use of this document or its contents is not permitted without express authority.Offenders will be liable for damages. All rights, including rights created by patent grant or registration of a utility model or design, are reserved.
-
Page 4: Table Of Contents
General ..........................3 Abbreviations ........................ 3 Trademarks ........................3 Summary ........................4 Introduction and Architecture: What is BEETLE /moPOS? ..........5 Getting Started ........................6 Overview Steps for configuring the several devices ............. 7 Tablet: Perform the 1 setup (Windows related part) ..........8 WiFI router: Configuring .................... - Page 5 POSPrinter settings ..................... 29 Operating the Demo1 application ................29 5.6.1 Retrieving the list of POS Device HUBs ..............29 5.6.2 Connecting to the first configured POS Device HUB by approaching an NFC tag 31 5.6.3 Available operations panels ................. 31 5.6.4 End of transaction processing ................
- Page 6 10.10 Miscellaneous settings .................... 61 10.11 BEETLE /moPOS Admin server ................. 63 10.12 Factory settings ....................... 64 10.13 Production ....................... 64 10.14 Logoff ........................65 Diagnostics via WebGUI ....................66 11.1 System diagnostics ....................66 11.2 Service report ......................66 11.3...
-
Page 7: Important Notes
Should you have any questions, please contact your dealer or our service department. Devices supplied by Wincor Nixdorf International GmbH (WN) comply with the respective safety regulations for data-processing devices and information technology devices, including electrical office equipment for use within an office or store environment. -
Page 8: Lcd Displays
15 minutes, using soap or alcohol. If the liquid comes into contact with your eyes, consult a medical doctor immediately. Before opening the device, make sure, that the device is disconnected from the main power supply. Only authorized personnel is permitted to open the device. BEETLE /moPOS "Getting Started"... -
Page 9: General
Google™ Chrome is a trademark of Google Inc, USA. Safari® is a registered trademark of Apple Inc. in the United States and in other countries. BEETLE™ is a registered trademark of Wincor Nixdorf GmbH. Java is a registered trademark of Oracle and/or its affiliates. -
Page 10: Summary
BEETLE /moPOS concept and product. Chapter 5 describes the necessary SW installations on tablet and configurations for POS De- vice HUB when setting up the participating devices of the BEETLE /moPOS environment to make the configuration run. -
Page 11: Introduction And Architecture: What Is Beetle /Mopos
Introduction and Architecture: What is BEETLE /moPOS? 3 Introduction and Architecture: What is BEETLE /moPOS? The Chapter “4 Introduction and Architecture: What is BEETLE /moPOS?” is provided as a separate document. BEETLE /moPOS "Getting Started"... -
Page 12: Getting Started
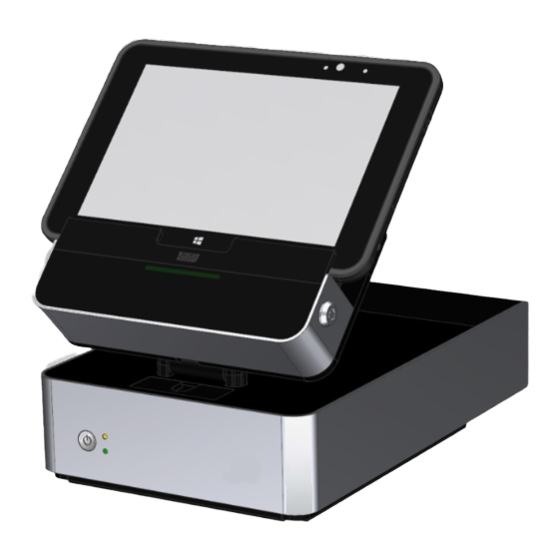
Getting Started 4 Getting Started This chapter describes how to setup a complete set of devices for performing mobile applications of the BEETLE /moPOS. For a complete environment you will need at least the following moPOS components: tablet router docking unit POS Device HUB 1. -
Page 13: Overview Steps For Configuring The Several Devices
Getting Started Each of the four components needs to be configured properly. Overview Steps for configuring the several devices For configuring the several participating devices in the BEETLE /moPOS concept you need to perform the following step: 1. Perform the 1 setup of the tablet (Windows related part) 2. -
Page 14: Tablet: Perform The 1 St Setup (Windows Related Part)
6. Your account: Type in your user name. The user name is mandatory. If you want to protect the user with a password, you can type in your password. The password is optional ? click on [Finish] to finalize the set-up. Now, the tablet will be restarted. 7. Done! BEETLE /moPOS "Getting Started"... -
Page 15: Wifi Router: Configuring
Getting Started WiFI router: Configuring The WiFi router is not a Wincor Nixdorf product. Therefore, a typical WiFi router can be used as long as it meets the requirements for usage with the mobile tablet: • The WiFi router shall use a strong encryption such as WPA/WPA2 with at least AES. -
Page 16: Tablet: Installation And Configuring Mopos Sw Layer On The Tablet
Tablet: Installation and configuring moPOS SW layer on the tablet This chapter describes how to install the tablet with the BEETLE /moPOS SW layer. For installation of the interface SW on the tablet you need to install several installation packages. Please note all packages have to be installed as User Administrator. -
Page 17: Installing The Java Virtual Machine
The demo package needs to be configured in a proper way for connection to the POS Device Hub. During installation you will be queried to enter the IP address of the BEETLE /moPOS where the Admin Server is running. For a complete description on how to configure the Demo1 application please look into chapter “5 JavaPOS Demo Application: Getting Started, page 25”. - Page 18 You may enter the values for the Admin Server here during installation or later by calling the Demo1 configuration tool. When installation has been finished the following window is shown: After installation in the Program Start Menu Folder you find a sub directory the following Icons can be found: BEETLE /moPOS "Getting Started"...
-
Page 19: Configuration The Demo Package
There are two ways of configuring the demo: • Editing with text editor the property file C:\Retail\Software\Demos\demo1\wn\properties\demo1.properties. • Or using the configuration tool by selecting the icon "configure BEETLE /moPOS Demo1" The configuration tool allows it much easier to adjust the settings. - Page 20 To start the demo there is a start icon in the Windows program start menu folder under Wincor Nixdorf moPOS \ moPOS Demo1 \ launch BEETLE /moPOS Demo1 4.4.4.2 Configuration tool The configuration tool is a GUI-based tool which allows configuring the demo1.properties file in a more comfortable way.
- Page 21 POS Device HUB. The demo does not change the DataEventEnabled property of such Uified POS devices. • Use Sign On: should always be unset BEETLE /moPOS "Getting Started"...
- Page 22 Getting Started • Use Admin Server: If set, the BEETLE /moPOS Admin Server is used by the demo to handle the several POS Device HUB. Then also the name and the valid IP address have to be entered. If not set, the BEETLE /moPOS Admin Server is not used. All names and IP addresses of participating POS Device HUBs have to be named in the lists.
-
Page 23: Configuring Pos Device Hub
POS Device HUB. Please note that you need to use the HTTPS protocol. During the first access to the POS Device HUB you need usually to confirm the exchange of a certificate as sent by the POS Device HUB via HTTPS protocol. BEETLE /moPOS "Getting Started"... -
Page 24: Login Webgui
It is strongly recommended to change the default passwords when using the POS • Device HUB in an operational environment. 4.5.2 Start Up Screen of WebGUI After that you come to the main page of the remote WebGUI: BEETLE /moPOS "Getting Started"... -
Page 25: Configure Network Settings
• Make sure that the network host name is unique in your network and is not used also on another POS Device HUB. This is essential for working with the BEETLE /moPOS. Additionally make sure that the “network domain name” is the same for all POS De- vice HUB’s as used in the network environment. -
Page 26: Enabling Admin Server On One Pos Device Hub
On one designated POS Device HUB you need to activate and configure the BEETLE /moPOS /Admin Server in the sub dialog “moPOS Admin Server”. Select for the item “Enable Admin Server Tool on this POS Device Hub” the state “ON” and press the “change settings”... -
Page 27: Configuring The Admin Server
Admin Server. 4.5.6 Configuring the Admin Server For this, you have to go into the sub dialog “moPOS Admin Server” and add all tablets and POS Device HUBs you want to use in the table: BEETLE /moPOS "Getting Started"... - Page 28 This IP address is to be entered in the field “IP Address” of the dialog in the WebGUI o Field “Tablet ID”: This is the unique hardware ID of the desired tablet. The field “Tablet ID” usually already contains the tablet ID of the currently BEETLE /moPOS "Getting Started"...
- Page 29 - when having a line display BA63 or BA66 USB or COM connected to the desired POS Device HUB and rebooting the POS Device HUB. During boot the assigned IP Address is shown on the display. - additionally in the WebGUI the IP Address is also shown. BEETLE /moPOS "Getting Started"...
- Page 30 POS Device HUB’s. The table of “POS device HUB’s”” is extended by an additional row. • Repeat the procedure for each participating POS device HUB in your environment. After adding all POS Device HUB’s and tablets the BEETLE /moPOS /Admin Server configura- tion is completed. BEETLE /moPOS "Getting Started"...
-
Page 31: Javapos Demo Application: Getting Started
On the tablets, you have per default a resolution of 1920 x 1200. So you may want to use 1920. • WindowHeight This configuration parameter defines the height (in pixels) of the application window BEETLE /moPOS "Getting Started"... -
Page 32: Pos Devices To Be Used With Demo1
POS Device HUB. We strongly advise to leave this value to “yes”. UDMConnectionHandler.servers: put here the name, IP address and port of the POS Device HUBs, with the following format: BEETLE /moPOS "Getting Started"... -
Page 33: Adminserver Connection Handler Configuration
NFC Tag and cannot differentiate if one differs to the other. 5.3.3 Dummy Admin Server implementation As mentioned above, you may choose to activate the Dummy Admin Server implementation in the Demo1 application. The Dummy Admin Server will then do the following: BEETLE /moPOS "Getting Started"... -
Page 34: The Difference In Using The Mopos Admin Server And A Dummy Admin Server
When not having the Admin Server the automatic notification when docking a tablet into one POS Device HUB also does not occur. However, simultaneous connections from multiple tablets are then avoided alone by the Unified Device Manager of a POS Device HUB. BEETLE /moPOS "Getting Started"... -
Page 35: Posprinter Settings
Under Windows, you should see two created shortcuts for the Demo1 application. Please use the shortcut “Wincor Nixdorf JavaPOS Demo1” to launch the application. For manually start – using DOS command line - of the Demo1 open a cmd box and enter the following commands (note: don’t forget to pass the argument scale which is unfortunately in... - Page 36 Please notice that on the upper right corner of the application window, you should now see: After clicking OK on the message box, the POS devices on the POS device HUB will activate themselves and see on the Operator display window of the application, which POS device is currently being activated: BEETLE /moPOS "Getting Started"...
-
Page 37: Connecting To The First Configured Pos Device Hub By Approaching An Nfc Tag
You can then connect to the mentioned POS Device HUB by clicking on the “Connect” button, or ignore this message. 5.6.3 Available operations panels To see the different operating panels, click on the “more…” button on the bottom right panel of the application: BEETLE /moPOS "Getting Started"... - Page 38 JavaPOS Demo Application: Getting Started This will iterate through the different available panels 1. Welcome panel: 2. Digits panel (to enter the article/item codes yourself): 3. Short-list article panel (where only the first 8 articles are listed): BEETLE /moPOS "Getting Started"...
- Page 39 JavaPOS Demo Application: Getting Started 4. Complete list of articles panel (which you can scroll and select): 5. Admin Server panel: or here, when the checkbox is selected: 6. UDM Connection Handler panel: BEETLE /moPOS "Getting Started"...
-
Page 40: End Of Transaction Processing
If tablet A is connected to a POS Device HUB and another tablet B wants to connect to the same POS Device HUB a message box may (in case it is configured in the demo1.properties configuration file) pop up to query the user if the current connection shall be closed: BEETLE /moPOS "Getting Started"... -
Page 41: Reconnecting To The Pos Device Hub
POS Device HUB, and you will then see the following message box: Click on the OK button to make the message box disappear and you can then try again man- ually to reconnect to the desired POS Device HUB. BEETLE /moPOS "Getting Started"... -
Page 42: Programmers Guide For Application Providers
Programmers Guide for Application Providers 6 Programmers Guide for Application Providers The Programmers Guide, the API description is provided in a separate document. BEETLE /moPOS "Getting Started"... -
Page 43: Led Service Menu During Boot And Operational Led States
POS Device HUB enters the LED Service Menu and indicates this by showing a blink- ing green state on the LED bar at the front of the POS device HUB. With the Menu Button you can navigate through the different menu items by pressing the Menu Button shortly. BEETLE /moPOS "Getting Started"... -
Page 44: Led Service Menu Of Pos Device Hub
Menu Button shortly. When pressing the Menu Button longer than 2 seconds the menu item gets selected. The scheme below may show how to navigate through the different items. 7.1.1 Service Menu: Main menu BEETLE /moPOS "Getting Started"... -
Page 45: Service Menu: Sub Menu 1 - Change Parameter
Note: the changes done by this menu item will be done permanently Change Parameter: This menu item restores all configuration parameters which are Reset Firmware Pa- changeable in the admin WebGUI to the defaults and starts the POS rameters to Defaults device HUB. Defaults are e.g.: BEETLE /moPOS "Getting Started"... - Page 46 TCP/IP addresses instead of dynamic TCP/IP addresses as as- signed by a DHCP server. In case your network infrastructure does not have a DHCP server: 1. You need to create a one to one peer connection between a BEETLE /moPOS "Getting Started"...
- Page 47 POS Device HUB to your network infrastructure and switch on the POS Device HUB again. After booting the POS Device HUB will use the new assigned TCP/IP address as desired. Note: the changes performed by this menu item will be done per- manently. BEETLE /moPOS "Getting Started"...
-
Page 48: Operational Led States
________________________________________________ FW update in process Tablet docked ______________________________________________________ claimed and not present Tablet undocked & present & _____________________________________________________ (claimed or not claimed) (this state is only an interims state in case tablet is not yet taken) BEETLE /moPOS "Getting Started"... -
Page 49: Update Of Pos Device Hub Firmware And Other Files
This log file can be ob- tained from the POS Device HUB with the same secure copy tools as been used for down- loading the firmware. BEETLE /moPOS "Getting Started"... - Page 50 • Download the firmware files with the tool WinSCP to the POS Device HUB • Reboot the POS Device hub with the remote admin HTML WebGUI When using the tool WinSCP make sure that • the protocol SFTP is selected • the user upload-fw is used BEETLE /moPOS "Getting Started"...
-
Page 51: Firmware Update From A Linux Based Host
You will get asked to enter the current password, which by default is fw4mopos. Then change directory to fw-update/: cd fw-update and copy the new firmware file with the mput command: mput /location/of/file/ mopos-fw-update-20150601-V1.0-1.img Then reboot with the remote admin WebGUI for updating the firmware. BEETLE /moPOS "Getting Started"... -
Page 52: Firmware Update Via Usb Stick
____________________________________________________________ Now you may use the unplugged USB stick and plug in to the next POS Device HUB for up- dating its firmware. After firmware update the POS device HUB performs a reboot. Some notes: BEETLE /moPOS "Getting Started"... - Page 53 (to indicate a free POS Device HUB) or to permanent red color (to indicate a tablet has been docked) The copy process may take about one minute. the USB stick needs only to be plugged for copying the file but not for the firmware update itself. BEETLE /moPOS "Getting Started"...
-
Page 54: Recommendations For Configuration Of Wifi Routers
Some recommendations and prerequisites need to be fulfilled to have a working con- figuration. The WiFi router is not a Wincor Nixdorf product. Usual WiFi routers from the market can be used as long as they meet the requirements and recommendation for communication with mobile tablets. -
Page 55: Using The Webgui Interface Of The Pos Device Hub
“admin” and the default password is “mopos1234”. Please Note: It is strongly recommended to change the default password when using the POS Device HUB in an operational environment to make sure that modifying the settings is only allowed to designated users. BEETLE /moPOS "Getting Started"... -
Page 56: Start Up Screen
• Tablet: In case a table is docked the tablet ID and the current state is shown here To modify the setting of the POS Device HUB you need to go through some dialogs selectable at the left side. Those are explained in the next chapters. BEETLE /moPOS "Getting Started"... -
Page 57: Network Settings
The field “number of probes” defines how often an attempt of reconnecting shall be performed. The field “interval between two probes” defines the wait timeout between two probes in case a previous reconnection BEETLE /moPOS "Getting Started"... - Page 58 Usually the network connection timeout have a good presetting and do not need to be ad- justed. When doing all changes you have to confirm your changes, the button “change settings” needs to be clicked and the system must be rebooted. BEETLE /moPOS "Getting Started"...
-
Page 59: System Passwords
10.4 System passwords MoPOS webGUI password: Assign a password for the webGUI login. The default password when delivering the BEETLE /moPOS / POS Device HUB or when re- storing factory setting is mopos1234. MoPOS Firmware upload password: Assign a password to perform firmware updates via SSH copy with the user upload-fw. -
Page 60: Peripheral - Settings
The number of stop bits is set always to 1. Depending on the device type automatically CTS/RTS or another protocol is assigned. To confirm your changes, the button “change settings” needs to be clicked. The settings are valid after rebooting the system. BEETLE /moPOS "Getting Started"... -
Page 61: Peripheral - Testing
When pressing the button “Test CashDrawer” the cash drawer will be opened and when closing it in time of at most 10 seconds the state changing of the cash drawer shall be shown in the Web GUI. BEETLE /moPOS "Getting Started"... -
Page 62: Boot Behaviour
(media files) and graphical output as done by customer plugins. This setting need to be activated (switch to on) to start on the POS Device HUB also the graphical sub system. BEETLE /moPOS "Getting Started"... - Page 63 Per default or when resetting the POS Device HUB to factory setting this feature is disabled. To confirm your changes click the button “change settings”, but the system needs be re- started to activate the modified settings. BEETLE /moPOS "Getting Started"...
-
Page 64: Plugins
In case a plugin has been uploaded and refreshing this page the plugin is shown. Please note after uploading the plugins the POS Device HUB needs to be restarted to start activated plugins. Therefore it is necessary to activate explicitly the plugin. BEETLE /moPOS "Getting Started"... -
Page 65: Security Settings
Software - Plugin Guide", section " Getting information about a tablet and an iBut- ton" and defines the interface for accessing the state of the docking unit, the tablet id, and others from inside a plugin. BEETLE /moPOS "Getting Started"... -
Page 66: Security Settings Network Ports
UDM, Admin Server and others. All other ports are closed and cannot be accessed from outside. In case you are using plugins which need additional network ports for communication you have to open those in this table. BEETLE /moPOS "Getting Started"... -
Page 67: Miscellaneous Settings
Time Server during boot",add a valid URL of a time server in the text field and press the [change settings] button. During the next boot of the POS Device HUB the POS Device HUB tries to obtain a valid time from a time server. BEETLE /moPOS "Getting Started"... - Page 68 • or only in case no tablet is docked, or • or only in case no tablet has access to the POS Device HUB ( "claimed") • or only in case no tablet is docked or has access to the POS Device HUB BEETLE /moPOS "Getting Started"...
-
Page 69: Beetle /Mopos Admin Server
Using the WebGUI interface of the POS Device HUB 10.11 BEETLE /moPOS Admin server Enable Admin Server Tool on this POS Device Hub: The Admin Server Tool is not running on this POS Device HUB but on another one. The IP Address of the other network device run- ning the Admin Server has to be entered here. -
Page 70: Factory Settings
So after pressing this button, the POS Device HUB is clean and has the state as delivered from factory. 10.13 Production This page is not intended for end users but only for internal production. Please omit this page. BEETLE /moPOS "Getting Started"... -
Page 71: Logoff
Using the WebGUI interface of the POS Device HUB 10.14 Logoff If all changes and settings are done, you should log yourself out. Therefore you need to click on the logoff-button and this window should appear. BEETLE /moPOS "Getting Started"... -
Page 72: Diagnostics Via Webgui
This menu is mainly created for service purposes. The system can be rebooted, a service re- port can be printed and the IP address may be explicitly displayed on a connected line display BA63 or BA66 via USB or via COM2. BEETLE /moPOS "Getting Started"... -
Page 73: Peripheral Diagnostics
The scanning of peripheral devices will be done in the boot phase. If you connect a new device or disconnect another one you need to reboot the POS Device HUB to see the changings in the table. BEETLE /moPOS "Getting Started"... -
Page 74: Logfiles
This page allows you to get some system log information for several features in the embed- ded Linux OS of the POS Device HUB. Those log files can be shown by several settings: Select the type of log file in the choice box of the page: BEETLE /moPOS "Getting Started"... -
Page 75: Download Diagnostics Files
Log files will be truncated to an appropriate length during each reboot and once a day. 11.5 Download diagnostics files This page may be used in case there is a problem reported to Wincor Nixdorf and it is re- quired to get diagnostic data of the POS Device HUB. -
Page 76: Licences Documents And Software
Diagnostics via WebGUI 11.6 Licences documents and software Here you can download from the POS Device HUB documentation and software for the Windows 8.1 tablet. BEETLE /moPOS "Getting Started"... -
Page 77: Plugin Usage On Pos Device Hub
ZIP or a TGZ file following a defined format. A more detailed description for plugin usage is not part of this documentation but a separate Documentation “BEETLE /moPOS / End User Guide Software - Plugin Guide” BEETLE /moPOS "Getting Started"... -
Page 78: Future Enhancements For Html5 Based Pos Application
POS Device HUB. This interface is currently under discussion and will define an interface for accessing peripheral devices such as POS printers, line display, scanners, cash drawers, fiscal printers and EFT devices for remote access from a tablet. BEETLE /moPOS "Getting Started"... -
Page 79: Appendix
Cet appareil numerique de la classe A est conforme à la norme NMB-003 du Canada. 14.4 Warranty Wincor Nixdorf generally guarantees a warranty engagement for 12 months beginning with the date of delivery. This warranty engagement covers all damages which occur despite a normal use of the product. -
Page 80: Unpacking And Checking The System
• functional defects, please inform your contracting parties or the branch office of Wincor Nixdorf immediately. Please indicate the number of your delivery ticket and delivery ticket position and serial number of the respective device. - Page 81 Wincor Nixdorf International GmbH D-33094 Paderborn Order No.: 01750280021A...
Need help?
Do you have a question about the BEETLE /moPOS and is the answer not in the manual?
Questions and answers