Table of Contents
Advertisement
Quick Links
Advertisement
Table of Contents

Subscribe to Our Youtube Channel
Related Manuals for Wincor Nixdorf BEETLE /iPOS plus


Summary of Contents for Wincor Nixdorf BEETLE /iPOS plus
- Page 1 BEETLE /iPOS plus All-in-one POS System User Manual...
- Page 2 Please send us a copy of this page if you have any constructive criticism. We would like to thank you in advance for your comments. With kind regards, Your opinion: Wincor Nixdorf International GmbH Technical Documentation R&D SAT22 Wohlrabedamm 31 D-13629 Berlin E-Mail: retail.documentation@wincor-nixdorf.com...
- Page 3 User Manual All brand and product names mentioned in this document are trademarks of their respective owners. Copyright © Wincor Nixdorf International GmbH, 2016 The reproduction, transmission or use of this document or its contents is not permitted without express authority.
-
Page 4: Table Of Contents
FCC Radiation Exposure Statement ..........5 FCC-Class A Declaration ..............5 BSMI (EMC for Taiwan) ..............6 Energy Efficiency ................6 Care of the BEETLE /iPOS plus ............7 Recycling the BEETLE /iPOS plus ............. 8 Warranty ..................9 Important Notes ................9 Safety Notes ................. - Page 5 Instructions for Using the Touch Screen ........23 Cleaning Instructions ..............24 Resistive Touch Screen ..............25 General Information ..............25 Construction of the Resistive Touch Screen ........25 Instructions for using the Touch Screen ........26 Cleaning Instructions ..............26 Replacement of the RAM module ..........
- Page 6 Fix wall mount front plate to the system ........59 Secure the system to the wall ........... 60 iPOS plus Port Extender..............61 Starting Up the System ..............63 Operating the RFID/NFC reader............ 64 Powering Down the System ............65 Error reporting ................
-
Page 7: About This Manual
Notes in the manual are marked by this symbol. This symbol is used for warnings. The type and scope of application programs depend on the customer’s own selection; therefore, software will not be discussed further in this manual. BEETLE /iPOS plus User Manual... -
Page 8: Introduction
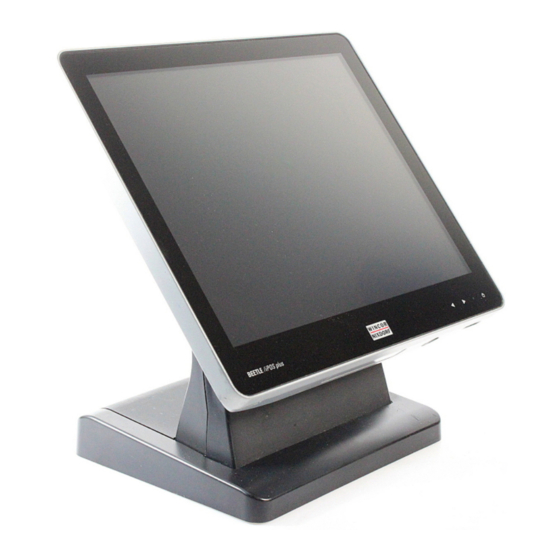
Introduction The BEETLE /iPOS plus comes in two variants, one with the Projected Ca- pacitive and the other with Resistive touch. Its key features are the bezel-free design with multi-touch capabilities and the elegantly designed aluminum back housing coupled with its support for the Celeron DC N3060 and the higher performance Pentium QC N3710 processors. -
Page 9: Manufacturer´s Certification
In addition, the BEETLE /iPOS plus has received the UL symbol and cUL symbol. Europe-EU Declaration of Conformity Hereby, Wincor Nixdorf declares that this device is in compliance with the essential requirements and other relevant provisions of Directive 1999/5/EC. Csěky [Czech]: Wincor Nixdorf tímto prohlašuje, že tento zařízení... - Page 10 Wincor Nixdorf declara que este dispositivo está conforme guese]: com os requisitos essenciais e outras disposições da Directiva 1999/5/CE. Slovensko [Slovenian]: Wincor Nixdorf izjavlja, da je ta Naprava v skladu z bistven- imi zahtevami in ostalimi relevantnimi določili direktive 1999/5/ES. Slovensky [Slovak]: Wincor Nixdorf týmto vyhlasuje, že zariadenie spĺňa zá-...
-
Page 11: Fcc Radiation Exposure Statement
Modifications not authorized by the manufacturer may void user’s authority to operate this device. CAN ICES-3 (A)/NMB-3(A). BEETLE /iPOS plus User Manual... -
Page 12: Bsmi (Emc For Taiwan)
Eligibility Crite- ria for Integrated Desktop laid down in ENERGY STAR version 6.0 for Com- puters. On a request basis, an application can be made to Energy Star for listing. BEETLE /iPOS plus User Manual... -
Page 13: Care Of The Beetle /Ipos Plus
Clean your system’s housing at regular intervals with a dry, lint-free cloth. If this does not suffice please use a suitable plastic-surface cleaner which you can order from Wincor Nixdorf International GmbH. For more information about cleaning read the chapter “Projective Capaci- tive Touch Screen”... -
Page 14: Recycling The Beetle /Ipos Plus
“Environmental conscious product design and development”. The BEETLE /iPOS plus system is manufactured without the use of CFC and CHC and is produced mainly from reusable components and materials. Please do not stick labels onto plastic case parts. This would help us to re- use components and material. -
Page 15: Warranty
Make sure that only cables and devices may be connected which are admitted by Wincor Nixdorf. The user is responsible for any malfunctions that emerge from the actions mentioned before. -
Page 16: Safety Notes
Never touch any terminal pins of the strip conductors on such compo- nents. Safety Notes The BEETLE /iPOS plus conforms to the current safety standards for data processing equipment. If this device is taken from a cold environment into the operating room, moisture condensation may form. - Page 17 Customer Service of Wincor Nixdorf or your dealer must be notified. Your BEETLE system is the result of modern technical innovation. So please see for according structural and technical surroundings to guar- antee a faultless and efficient work of your BEETLE.
-
Page 18: Overview
Overview Front View with Stand Display Stand Brightness adjustment LEDs Power status indicator On/off button BEETLE /iPOS plus User Manual... -
Page 19: Back View With Stand
*Back cover of stand Frame cover of stand Side-attach peripheral connection cover RAM/mini-PCIe cover Side-attach peripheral connection cover Cable connection cover *Observe the safety precaution mentioned on the next page when you remove the back cover of stand. BEETLE /iPOS plus User Manual... -
Page 20: Important Note For Removal Of Back Cover
1. Insert a flat head screw driver into groove on the stand as shown and twist to open. 2. Do the same to the other side of the stand. 3. Remove stand back cover. BEETLE /iPOS plus User Manual... -
Page 21: Ac Power Adapter
AC Power Adapter Power Connector DC Power Out Power LED The external power supply is applicable for common line voltage. It automatically adjusts itself to the particular voltage (for grid input voltage and power supply see appendix). BEETLE /iPOS plus User Manual... -
Page 22: Front Panel
OFF = AC main is switched off. Dimly lighted = Standby. Brightly lighted = Powered On. Blinking at 0.5Hz = Sleep or Hibernate Power button Single press will switch on/off. The duration depends on the BIOS setting. BEETLE /iPOS plus User Manual... -
Page 23: Initial Setup
Wincor Nixdorf sales outlet. Transport the device only in its original packaging (to protect it against impact and shock). BEETLE /iPOS plus User Manual... -
Page 24: Setting Up The Device
Set up the BEETLE /iPOS plus system where it will not be exposed to ex- treme environmental conditions. Protect the device from vibrations, dust, moisture, heat and strong magnetic fields. - Page 25 Position the screen within Permitted range of vision a preferred and permit ted range of vision, so that you can look onto the screen from above. Preferred range of vision BEETLE /iPOS plus User Manual...
-
Page 26: Basic Settings
Basic settings The BEETLE /iPOS plus is configured to your order. Additional peripheral devices are delivered separately, for example the swipe card reader. The modules must still be mounted to the system. Components The BEETLE /iPOS plus configuration can consist of the following... -
Page 27: Replacing The Lithium Battery
Make sure that you insert the Battery the right way round by the indicated polarity in the picture below. Follow the following steps to replace the Lithium battery. WARNING Always make sure that the system is switched off before you replace the battery. BEETLE /iPOS plus User Manual... - Page 28 Push the spring latch (1) and remove the Lithium Battery from its Socket (2). Insert and press a new Lithium Battery of same type in the Socket. Make sure that you insert the battery the right way round, by the indicated polarity in the picture above. BEETLE /iPOS plus User Manual...
-
Page 29: Projected Capacitive Touch Screen
With a circular motion of the fingers the element on the dis- play can be rotated. This function must be supported by either the operating system or by the application. BEETLE /iPOS plus User Manual... -
Page 30: Cleaning Instructions
Use a soft, fine-meshed cloth to clean the surface. Dampen the cloth slightly and then clean the screen. A wrong maintenance may cause damages to the screen, which are not covered by warranty. BEETLE /iPOS plus User Manual... -
Page 31: Resistive Touch Screen
Construction of the Resistive Touch Screen BEETLE /iPOS plus User Manual... -
Page 32: Instructions For Using The Touch Screen
Use a soft, fine-meshed cloth to clean the surface. Dampen the cloth slightly and then clean the screen. A wrong maintenance may cause damages to the screen, which are not covered by warranty. BEETLE /iPOS plus User Manual... -
Page 33: Replacement Of The Ram Module
RAM holder and pull out the RAM module. 3. Replace with new RAM mod- ule and fix it back to the hold- 4. Repeat steps 1 and 2 in the reverse order. The replacement is complete. BEETLE /iPOS plus User Manual... -
Page 34: Installing The Antenna (Option)
Installing the antenna (option) This is an orderable kit from Wincor Nixdorf. Please contact your sales rep- resentative for details. The kit consists of: An antenna module A flap with antenna holes Steps to install: First ensure that the device is switched off and that the power connector is disconnected. - Page 35 1. Remove the right flap using a screw driver. 2. Remove the RAM cover. Unscrew the antenna module to separate the cover (1) from the antenna (2). BEETLE /iPOS plus User Manual...
- Page 36 (1) through the hole on the flap. 5. Route the antenna cable (1) through the cable channel on the inside of the back cover. Connect the antenna cable to the “Main” connector (2) on the Wi-Fi module. BEETLE /iPOS plus User Manual...
- Page 37 7. Replace the flap (1) and screw in the antenna cover (2). Replace the RAM cover (3). The installation is complete. BEETLE /iPOS plus User Manual...
-
Page 38: Installing The Wi-Fi Flexible Antenna (Option)
Installing the Wi-Fi flexible antenna (option) This is an orderable kit from Wincor Nixdorf. Please contact your sales rep- resentative for details. The kit consists of: A Wi-Fi flexible antenna assembly. A Wi-Fi module and mini PCIe adapter assembly. Steps to install: First ensure that the device is switched off and that the power connector is disconnected. - Page 39 2. Remove the RAM cover. Attach the antenna to the back of the flap, in the location as shown. For details of assembly, please refer to Chapter “Appendix: Wi-Fi flexi- ble antenna”. BEETLE /iPOS plus User Manual...
- Page 40 5. Route the antenna cable (1) through the cable channel on the inside of the back cover. Connect the antenna cable to the “Main” connector (1) on the Wi-Fi module and mini PCIe adapter assembly. BEETLE /iPOS plus User Manual...
- Page 41 7. Replace the flap. Replace the RAM cover. The installation is complete. BEETLE /iPOS plus User Manual...
-
Page 42: Planning The Installation
Dimensions Please refer to the drawings below for dimensions of the desktop and wall mount versions. All dimensions are specified in millimeters. The views of the systems are not drawn to scale. Desktop version BEETLE /iPOS plus User Manual... -
Page 43: Wall Mount Version
Wall mount version Required operation space Wall BEETLE/iPOS Plus Braswell System 50 mm 50 mm Maintain at least 50 mm from the side of the system to ensure proper ventilation during the operation of the system. BEETLE /iPOS plus User Manual... -
Page 44: Installation Site Requirements
The mounting method must be able to support the combined weight of the system and the suspended weight of all cables attached to the system. The system must be mounted to a solid concrete or brick wall with flat smooth surface. BEETLE /iPOS plus User Manual... -
Page 45: Lnstalling To A Stand
From the stand: 1. Remove the base cover. 2. *Remove the back cover. 3. Remove the frame cover. * Observe the safety precaution mentioned on page 14 when you remove the back cover of the stand. BEETLE /iPOS plus User Manual... -
Page 46: Preparing The Display
Connect cables. The types of cables to connect depend on requirements. Please refer to section “Full cables connection“below for instructions to prepare a fully connected display. BEETLE /iPOS plus User Manual... - Page 47 7. Secure them with the cable clamps. 8. Fit the flanges (1) and (2) on the cable connection cover to the two holes (3) and (4) as indicated by the arrows. 9. Slide in the cable con- nection cover. BEETLE /iPOS plus User Manual...
-
Page 48: Full Cables Connection
5. Connect cables. Please ensure that all cables are connected snugly into the space. Pay attention to how the power connector (1) and ferrite core (2) should be routed. BEETLE /iPOS plus User Manual... - Page 49 6. Fit the flanges (1) and (2) on the cable connection cover to the two holes (3) and (4) as indicated by the arrows. 7. Slide in the cable con- nection cover. BEETLE /iPOS plus User Manual...
-
Page 50: Installing The Stand
Connect the power supply unit to the power socket at the I/O hub. From the I/O hub, connect the power cable of to the power socket and the usb cable to the USB5 port on the connector panel. BEETLE /iPOS plus User Manual... - Page 51 Tighten the four Torx screws to secure the display to the stand. 5. Place in the frame cover. Place in the back cover, routing the cables through the bottom. BEETLE /iPOS plus User Manual...
- Page 52 Place in the base cover. The installation is complete. To uninstall, follow the steps in the reverse order. When uninstalling the stand always make sure that all cables are disconnected. Never connect data cables when the system is switched on. BEETLE /iPOS plus User Manual...
-
Page 53: User Accessible I/O
2 x USB 2.0 (USB4 and USB5) 2 x USB 3.0 (USB2 and USB3) LAN (RJ45) 12V Powered USB Standard COM (COM1, DB9 male) Mass storage (HDD/SSD) Make sure that all additional devices have a CE certificate. BEETLE /iPOS plus User Manual... -
Page 54: Connecting Cables
Connect the system as described below. Tilt the system to the back. Pull down the cable con- nection cover to uncover the connector panel. Connect cables to their assigned connectors. BEETLE /iPOS plus User Manual... -
Page 55: Disconnecting Cables
The lock is released. The metal of the plug is visible. To release a RJ12 plug push the latch under the plug to the top. You loosen the USB-A- connector by pushing the covering of the connector. BEETLE /iPOS plus User Manual... - Page 56 The P- USB connector is disengaged by pressing the spring that is marked by an arrow. Manually loosen the knurled screws of the COM or DVI interface connector. To release a RJ45 plug push down the latch (see arrow). BEETLE /iPOS plus User Manual...
-
Page 57: Storage Media
The most SSDs are flash memory based. Replacement of the Hard Disk Drive First ensure that the device is switched off and that the power connector is disconnected. Tilt the display to the back. BEETLE /iPOS plus User Manual... - Page 58 The HDD or SDD is in the drive carrier located on the left. Remove the screw that fix the drive carrier to the connector panel and pull out the drive carrier. BEETLE /iPOS plus User Manual...
- Page 59 Replace the new hard disk and fix it back to the drive carrier. Insert the disk carrier into the connector panel. Fix it with the screw, re- moved previously. The replacement is com- plete. BEETLE /iPOS plus User Manual...
-
Page 60: Installing To A Wall
Unpack the parts from the wall mount kit and check whether the delivery matches the details of the delivery note. You will need: From the kit: Wall mount back plate Quantity: 1 piece Wall mount front plate Quantity: 1 piece M4x8 Torx screws Quantity: 4 pieces BEETLE /iPOS plus User Manual... - Page 61 Recommended Screw for wall is Pan head Wood Screw TGS-C3- 4.8 x 38L Drill Diameter: 6 mm Min Hole Depth: 40 mm Load per anchor for concrete: 40 kg Load per anchor for Solid brick: 30 kg Safety factor: 6 Fasteners Quantity: 4 pieces BEETLE /iPOS plus User Manual...
-
Page 62: Preparation
4. Remove the cable connec- tion cover at the bottom of the display. 5. Connect cables. The types of cables to connect depend on requirements. The illustration above shows a case where only two types of cables are connected. BEETLE /iPOS plus User Manual... -
Page 63: Mounting Height
1370mm height. It is also recommended that the system is approximately 122 cm (48 in) from the floor to the center of the display when the user is in the standing position. BEETLE /iPOS plus User Manual... -
Page 64: Mounting Location
Use only Wincor Nixdorf wall mount plate. Fix wall mount back plate to the wall Prepare the mounting points penetrating from the wall according to the dimension of the mounting holes on the back of the system. -
Page 65: Fix Wall Mount Front Plate To The System
Ensure that the wall mount back plate is firmly and securely attached to the wall. Fix wall mount front plate to the system Align the 4 mounting holes of the wall mount front plate onto the mounting holes at the back of the display. BEETLE /iPOS plus User Manual... -
Page 66: Secure The System To The Wall
Tighten the thumb screw on the top of the wall mount front plate to secure the hooks of the wall mount plates. Dress the cables routing according to the store set up or the overall in- stallation site plan BEETLE /iPOS plus User Manual... -
Page 67: Ipos Plus Port Extender
2x powered USB, rated 3A PSUB24V 1x powered USB, rated 3A Power output DC24V Out 24V DC (connect to iPOS plus Advanced) USB Upstream USB Type B (connect to iPOS plus Advanced) HDD Power For optional second hard disk BEETLE /iPOS plus User Manual... - Page 68 BEETLE /iPOS plus User Manual...
-
Page 69: Starting Up The System
Starting Up the System Install the BEETLE /iPOS plus and switch on the system with the Power but- ton located on the left side of the lower right corner of the unit. The sys- tem will start booting up displaying a BIOS boot up screen . The following message is shown for a brief duration during which you may press <F2>... -
Page 70: Operating The Rfid/Nfc Reader
When system is powered ON, the RF logo is illuminated. When in reading mode and a tag is brought within range the RF logo indicator will blink to signify reading in progress. blue lighted RF logo region where the antenna is located. BEETLE /iPOS plus User Manual... -
Page 71: Powering Down The System
In case you switch off the AC main, wait at least 5 seconds before switching it on again to allow the residual charge to drain completely otherwise the system might not respond to the power button. BEETLE /iPOS plus User Manual... -
Page 72: Error Reporting
LED. Decode by counting the number of blinks in a train and check against the error code table below. Number of pulses Error description Not used Not used Not used Not used Capacitive Sense board is faulty Ambient Light/Proximity Sensor faulty BEETLE /iPOS plus User Manual... -
Page 73: Technical Data
ISO/IEC 18092 ISO/IEC 14443A/MIFARE ISO/IEC 14443B User Accessible I/O 1x Powered COM (COM1) 1x Standard COM (COM2) 2x USB 2.0 2x USB 3.0 1x 12V Powered USB 1x LAN 1x Cash drawer 1x PLINK2/DVI-D BEETLE /iPOS plus User Manual... - Page 74 IP Rating IP54 at the front surface Certifications CE Class B, FCC Class A, UL, CCC, BSMI Wi-Fi: R&TTE Dimensions Refer to chapter “Planning the installation” Weight 3 kg (without stand) 5 kg (with stand) BEETLE /iPOS plus User Manual...
-
Page 75: Ac Power Adapter
47-63 Hz Rated output voltage 24V ± 5% Rated output current 5.0A Max. output power 120W at ambient of 45 degree C, 100W at ambient of 55 degree C Approvals and Certification UL Listed, TÜV-GS, CE BEETLE /iPOS plus User Manual... -
Page 76: Ipos Plus Port Extender (For Desktop Stand)
Port Extender (Standalone) Power input DC24V IN 24V DC (connect to 24V power supply) User interface PSUB12V 7x 12V powered USB Combined Ratings: 12V/3A and 5V/3A PSUB24V 1x 24V powered USB, rated 24V/3A BEETLE /iPOS plus User Manual... -
Page 77: Power Budgeting
30W is budgeted for the Base Unit, what’s remaining is 90W to be shared among the available ports. It has to be noted that the rating of each port does not mean that’s the power available and all the ports can be loaded to BEETLE /iPOS plus User Manual... - Page 78 POS peripherals. System inte- grators are not restricted to the stated budgeted powers but are free to al- locate according to their system configuration, limited by the 90W maxi- mum available continuous power. BEETLE /iPOS plus User Manual...
-
Page 79: Appendix
Appendix Approved Printers List The following are the approved printers that are allowed to be connected to the BEETLE /iPOS plus +24Vdc Powered USB port: Model Manufacturer TH180 series Wincor Nixdorf TH230 series Wincor Nixdorf TH320 series Wincor Nixdorf TH420 series... -
Page 80: Wi-Fi Flexible Antenna
Assembling the Wi-Fi module to mini PCIe adapter Assembling Information Assemble the Wi-Fi module (1) to the mini PCIe adapter (2). Tighten with the two screws provided (3) and (4). BEETLE /iPOS plus User Manual... -
Page 81: Abbreviations
Light Emitting Diode Protective Earth Neutral Conductor Random Access Memory Solid State Disk (flash medium) TN-S Terre Neutre- Separé Underwriters Laboratory (standards) Universal Serial Bus Video Graphics Adapter VESA Video Electronics Standards Association Wincor Nixdorf International GmbH BEETLE /iPOS plus User Manual... - Page 83 Wincor Nixdorf Pte Ltd 151 Lorong Chuan New Tech Park #05-01A/B Singapore 556741 Order No.: 01750284105 A...
Need help?
Do you have a question about the BEETLE /iPOS plus and is the answer not in the manual?
Questions and answers