
Subscribe to Our Youtube Channel
Related Manuals for Promise Technology VTrak S3000


Summary of Contents for Promise Technology VTrak S3000
-
Page 1: Quick Start Guide
S3000 Quick Start Guide Version 1.0 © 2010 PROMISE Technology, Inc. All Rights Reserved. -
Page 2: Table Of Contents
Task 13: Setting-up High Availability (page 62) • Contacting Technical Support (page 68) Thank you for your purchase of the VTrak S3000 storage solution. This Quick Start Guide is designed to help you unpack, install, connect, configure, and run your VTrak S3000 system. - Page 3 Task 1: Unpacking the Box Warning The electronic components within the VTrak appliances and subsystems are sensitive to damage from Electro-Static Discharge (ESD). Observe appropriate precautions at all times when handling the VTrak or its subassemblies. Important To run the PROMISE Management Console, your PC must have the latest version of Java Runtime Environment (JRE).
-
Page 4: Task 2: Mounting The Appliance In A Rack
VTrak S3000 Quick Start Guide Task 2: Mounting the Appliance in a Rack Identifying the Sections of the Rack Rails The chassis package includes two rack rail assemblies in the rack mounting kit. Each assembly consists of two sections: •... - Page 5 Task 2: Mounting the Appliance in a Rack Figure 2. Assembling the chassis rails Aligning hooks Attaching screw Inner rail extension Attaching screw Inner rail Installing the Rack Rails into the Rack Attach the longer section of the rack rail to the shorter section of the rack rail. Align the pins with the slides.
- Page 6 VTrak S3000 Quick Start Guide Repeat steps 1 through 3 for the remaining rack rail. Figure 4. Installing the rack rails M5 attaching screws Rack front post Rack rear post Pick up the appliance and line-up the chassis rails on the rear of the appliance with the front rack rails.
- Page 7 Task 2: Mounting the Appliance in a Rack Figure 5. Appliance rack mount assembly diagram Rack rails Chassis rails Locking tab (both sides)
-
Page 8: Task 3: Configuring The Vtrak Appliance
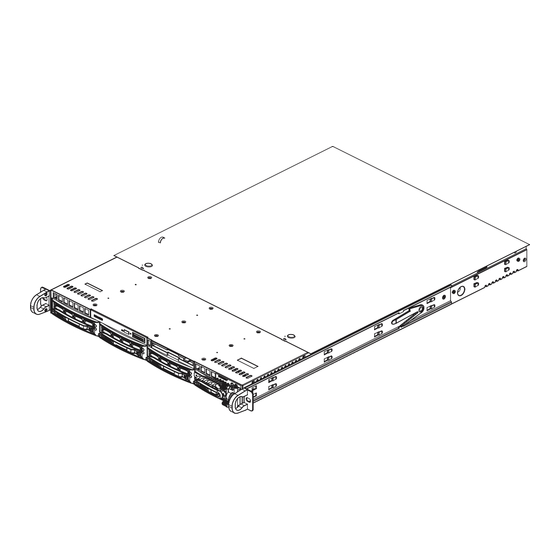
VTrak S3000 Quick Start Guide Task 3: Configuring the VTrak Appliance VTrak appliance configuration is done through the PROMISE Management Console over a network connection. This process takes about 15 minutes. When you add the VTrak appliance to your network, be sure the Host PC, where you plan to run the Management Console, can connect with the VTrak appliance over the network. - Page 9 Reset button Power button As the appliance boots, the GRUB screen shows a choice of kernels. Choose Promise VTrak S3000 2.6.18-128.el5. When the login appears, type root for the user name and password1 for the password. Logging into the Management Console The PROMISE Management Console is your interface with the software running on the VTrak appliance.
- Page 10 VTrak S3000 Quick Start Guide The Opening launch.jnlp dialog box appears. In the Opening launch.jnlp dialog box, choose the Open with option, choose Java Web Start Launcher from the dropdown menu, and click the OK button. JRE launches on your PC.
- Page 11 Task 3: Configuring the VTrak Appliance Review the agreement, then click the Accept button to continue. You must accept the agreement to run the Management Console. The agreement only appears the first time you log in. After the Management Console opens, you can close your browser. Right-click Servers at the top of the Tree and choose Add.
- Page 12 VTrak S3000 Quick Start Guide Click the OK button. The VTrak appliance is added to the Tree in the Management Console. The first time you connect to a VTrak appliance, the Configure VTrak dialog box appears. In the dialog box, click the Next button to begin configuration.
- Page 13 Task 3: Configuring the VTrak Appliance Step 1: Entering License Keycodes Caution Before you continue, be sure that no RAID subsystems are connected, through network or fabric, to the VTrak appliance. Keycodes are used to enable functions on the VTrak appliance. Each VTrak appliance comes with a set of printed keycodes.
- Page 14 VTrak S3000 Quick Start Guide The License Information dialog box displays your keycode and the options or features this license enables. The Basic license enables: • 8 iSCSI ports • Failover • Mirror • Email Alerts • Replication with Encryption/Compression •...
- Page 15 Task 3: Configuring the VTrak Appliance The VTrak Configure dialog box appears, ready for Step 2. • If the icon left of the license keycode is yellow, and it says No - 60 days left under Registration, you might be required to register the license manually.
- Page 16 VTrak S3000 Quick Start Guide In the dialog box, click the ... button, navigate to a location to save the data file, click the Open button, then click the Save button. In your browser, log into the PROMISE Support Center.
-
Page 17: Domain Name – See
Task 3: Configuring the VTrak Appliance Step 2: Setting up the Network When you click the Next button in the Configure VTrak dialog box, the Network Configuration dialog box appears. Several settings are made here: • Domain name – See page 17. •... - Page 18 VTrak S3000 Quick Start Guide If you entered a domain name and you want to append the suffix to the DNS server, check the Append suffix to DNS lookup box. Adding a DNS Server If your network has Domain Name Server (DNS) and you want VTrak to work with it, enter the DNS IP address here.
-
Page 19: Telnet – See
The recommended setting is to uncheck the Telnet box to disable Telnet. If you want to use Telnet, see the VTrak S3000 User Manual on the software DVD. Making FTP Settings FTP is enabled by default. - Page 20 VTrak S3000 Quick Start Guide Step 3: Hostname Caution If you plan to change the hostname, do so before you connect to your storage devices. If your storage is set up already and you change the hostname, you must reconfigure your storage to recognize the new hostname.
- Page 21 Task 3: Configuring the VTrak Appliance Step 4: IPMI Configuration When you click the Next button in the Configure VTrak dialog box, the Configure IPMI dialog box appears. There is only one channel, channel #1. The default IPMI address is 192.168.253.101. In the dialog box, do any of the following actions: •...
- Page 22 If all four steps show done and you are satisfied with your settings, click the Finish button. To quit the Management Console, choose File > Exit. For more information about the Management Console, see the VTrak S3000 User Manual on the software DVD. Note If you have any unregistered licenses, when log into the VTrak appliance, the Console Login dialog box appears.
-
Page 23: Task 4: Mounting The Subsystem In A Rack
PROMISE VTrak unit when properly installed. Additional loading on the rails is at the customer’s risk. • PROMISE Technology, Inc. cannot guarantee that the mounting rails will support your PROMISE VTrak unit unless you install them as instructed. Note To lighten the VTrak enclosure, remove the power supplies. - Page 24 VTrak S3000 Quick Start Guide Figure 9. VTrak subsystem mounted in a rack with the supplied rails Vertical Rack Post VTrak E610f/s Attaching screw & flange nut Upper hole only Handles mount Mounting rails (included) outside the rack post mount outside the rack post To install the VTrak subsystem into a rack with the supplied mounting rails: Check the fit of the mounting rails in your rack system.
- Page 25 Task 4: Mounting the Subsystem in a Rack Figure 10.Subsystem rack mount assembly diagram Rack front post Rack rear post Alignment pins two on each flange Rear rail Front rail Support for subsystem Inside of post Rail attaching screws Inside of post (not included) Note that only the front rail has a support for the subsystem.
-
Page 26: Task 5: Installing Disk Drives In The Subsystem
VTrak S3000 Quick Start Guide Task 5: Installing Disk Drives in the Subsystem The VTrak appliance ships with physical drives already installed in the chassis. VTrak RAID subsystems and JBOD enclosures ship without physical drives. For optimal performance, use physical drives of the same model and capacity. - Page 27 Task 5: Installing Disk Drives in the Subsystem Caution VTrak supports disk drive hot-swapping. To avoid hand contact with an electrical hazard, do not remove more than one drive carrier a time. Important If your subsystem has SATA disk drives, an AAMUX adapter is installed in the carrier with each drive.
-
Page 28: Task 6: Making Data Connections
VTrak S3000 Quick Start Guide Task 6: Making Data Connections Connecting the RAID Subsystem The VTrak RAID subsystem connects to the VTrak appliance using a Fibre Channel (FC) or a SAS data connection. Fibre Channel Interface The VTrak FC subsystem uses four (4) 8-Gb SFP+ transceivers, two per RAID controller on its two FC ports. -
Page 29: Sas Interface
Task 6: Making Data Connections SAS Interface The VTrak SAS subsystem has two SAS IN ports and two SAS OUT ports on each RAID controller. The connection requires two (2) SAS SFF-8088 to SFF- 8088 cables, available from PROMISE. SAS Expansion Port SAS I/O Port SAS I/O Port Mgmt... - Page 30 VTrak S3000 Quick Start Guide Connecting the PC Workstation To connect the PC workstation: Connect the FC HBA card in the PC workstation to the FC switch. See the diagram, below. FC HBA card 8 4 2 PC workstation FC switch...
-
Page 31: Fibre Channel Interface
Task 6: Making Data Connections Connecting the VTrak Appliance Upstream connections to VTrak appliance are either: • Fibre Channel Interface (page 31) • iSCSI Interface (page 32) Fibre Channel Interface A Fibre Channel (FC) upstream configuration is commonly used in VMware, Microsoft Exchange, and Microsoft SQL environments. - Page 32 If you connect multiple network ports, you can implement IP bonding (port aggregation) for a higher bandwidth data connection. For more information, see Chapter 17 of the VTrak S3000 User Manual. To connect the VTrak appliance: • Gigabit iSCSI – Connect one or more upstream data ports in the VTrak appliance to your network switch.
- Page 33 Task 6: Making Data Connections SAS Expansion Connections (Optional) You can expand the storage capacity of the VTrak RAID subsystem by adding VTrak JBOD enclosures. Connecting a pair of subsystems requires two (2) SAS SFF-8088 to SFF-8088 cables, available from PROMISE. A VTrak RAID subsystem supports up to four (4) VTrak JBOD enclosures.
-
Page 34: Task 7: Making Management Connections
VTrak S3000 Quick Start Guide Task 7: Making Management Connections Connecting the RAID Subsystem The management connection is the same for Fiber Channel and SAS VTrak subsystems. To connect the RAID subsystem: Connect the Management port on the left RAID controller to your network switch. - Page 35 Task 7: Making Management Connections Connecting the PC Workstation To connect the PC workstation: Connect the network port on the PC to your network switch. See the diagram, below. 8 4 2 8 4 2 PC workstation Network port Network switch...
- Page 36 VTrak S3000 Quick Start Guide Connecting the VTrak Appliance The network management connection is totally separate from the iSCSI data connection, described on page 32. To connect the VTrak appliance: Connect one of the network ports on the VTrak appliance to the network switch.
-
Page 37: Task 8: Setting-Up Serial Cable Connections
Task 8: Setting-up Serial Cable Connections Task 8: Setting-up Serial Cable Connections Serial communication enables the Command Line Interface (CLI) and Command Line Utility (CLU) on your PC to monitor to control the VTrak. The VTrak package includes one RJ11-to-DB9 serial data cable for each controller. All VTrak models have the same serial connection. -
Page 38: Task 9: Powering-On The Subsystem
VTrak S3000 Quick Start Guide Task 9: Powering-on the Subsystem Plug the power cords and turn on the switches on both power supplies. Important Always power on the JBOD enclosures first. Then power on the RAID subsystem. When the power is switched on, the LEDs on the front of the VTrak light up. - Page 39 Task 9: Powering-on the Subsystem Figure 14.VTrak disk drive carrier LEDs Disk Status Power/Activity After a few moments the Power/Activity LED should display Green. If there is no disk drive in the carrier, the Power/Activity LED remain dark. The Power/Activity LED flashes during drive activity. The Disk Status LED displays Green when a drive is present and configured.
-
Page 40: Task 10: Setting-Up The Subsystem
VTrak S3000 Quick Start Guide Task 10: Setting-up the Subsystem Setting up the subsystem consists of the following actions: • Setting up the Serial Connection (below) • Choosing DHCP or a Static IP Address (page 40) • VTrak Default IP Addresses (page 41) •... -
Page 41: Setting Up Vtrak With The Cli
Task 10: Setting-up the Subsystem If you choose to enable DHCP, have your Network Administrator dedicate an IP address for the VTrak, linked to the VTrak’s MAC address. This action prevents the DHCP server from assigning a new IP address when the VTrak restarts, with the result that users can no longer log in. - Page 42 VTrak S3000 Quick Start Guide The settings above are included as an example. Your values will be different. To make the Virtual Management Port network settings automatically, type the following string, then press Enter. administrator@cli> net -a mod -t mgmt -s "dhcp=enable"...
-
Page 43: Setting Up Vtrak With The Clu
Task 10: Setting-up the Subsystem To verify the maintenance mode settings, type net -m and press Enter. administrator@cli> net -m – – – – – – – – – – – – – – – – – – – – – – – – – – – – – – – – – – – – – – CtrlId: 1 Port: 1 Type: Management Ethernet... -
Page 44: Making Controller Maintenance Mode Settings
VTrak S3000 Quick Start Guide Setting system date and time Press the arrow keys to highlight System Date. Press the backspace key to erase the current date. Type the new date. Follow the same procedure to set the System Time. -
Page 45: Exiting The Clu
Task 10: Setting-up the Subsystem Making Automatic Settings From the CLU Main Menu, highlight Network Management and press Enter. Highlight Maintenance Mode Network Configuration and press Enter. Highlight the controller you want and press Enter. Highlight DHCP and press the spacebar to toggle to Enabled. Press Ctrl-A to save your settings. -
Page 46: Task 11: Configuring Storage On The Subsystem
VTrak S3000 Quick Start Guide Task 11: Configuring Storage on the Subsystem Setting up your subsystem with WebPAM PROe consists of the following actions: • Logging into WebPAM PROe (below) • Choosing a Language (page 48) • Making Subsystem Settings (page 48) •... - Page 47 Task 11: Configuring Storage on the Subsystem When the log-in screen appears: • Type administrator in the User Name field. • Type password in the Password field. • Click the Login button. The User Name and Password are case sensitive. Click the Login button.
-
Page 48: Choosing A Language
VTrak S3000 Quick Start Guide Choosing a Language WebPAM PROe displays in English, German, French, Italian, Japanese, Korean, Traditional Chinese, and Simplified Chinese. Click Language on the WebPAM PROe Header. The language list appears in the Header. Click the language you prefer. -
Page 49: Making Controller Settings
Task 11: Configuring Storage on the Subsystem When the controller shuts down, your WebPAM PROe connection is lost. Wait about two minutes. In your browser, click Logout in the Header, then log into WebPAM PROe once again. If you cannot log in, wait 30 seconds and try again. Making Controller Settings Your subsystem has two controllers. -
Page 50: Making Global Physical Drive Settings
VTrak S3000 Quick Start Guide Making Global Physical Drive Settings To make the recommended physical drive settings: Click the Subsystem icon in Tree View. Click the Enclosures icon. Click the Enclosure icon of the Head Unit. Click the Physical Drives icon. - Page 51 Task 11: Configuring Storage on the Subsystem Figure 18.Recommended logical drive configurations Data 1 Data 1 Data 2 Data 2 Spare Spare VTrak RAID subsystem or JBOD enclosure You create disk arrays one at a time. You can create multiple logical drives at the same time on the same disk array.
- Page 52 VTrak S3000 Quick Start Guide Check the boxes to enable Media Patrol, PDM, or Power Management. Choose the Physical Drives Type from the dropdown menu. • HDD – Hard Disk Drives • SSD – Solid State Drive You cannot mix HDDs and SSDs in the same array.
-
Page 53: Logging Out Of Webpam Proe
You must partition and format your logical drives to work with your operating system. • Make the two DATA logical drives Service-Enabled. For more information, see Chapter 5 of the VTrak S3000 User Manual on the software DVD. Creating Spare Drives Create two global spare drives in the RAID subsystem. -
Page 54: Task 12: Setting-Up Basic Storage
VTrak S3000 Quick Start Guide Task 12: Setting-up Basic Storage Use the PROMISE Management Console to set up your storage. The word storage refers to a LUN or logical drive on your VTrak RAID subsystem or JBOD enclosure. For basic storage, there are five steps. - Page 55 Next button. The Thin Provisioning Option dialog box opens. See Chapter 5 of the VTrak S3000 Server User Manual for more information about Thin Provisioning. In the dialog box, enter the resource size in MB you want in Full Disk Size field.
- Page 56 VTrak S3000 Quick Start Guide Batch If you chose Batch, the Specify Batch Mode Information dialog box opens. • Accept the default a SAN Resource Prefix or enter a new one in the field provided. • Enter a Resource Size in MB if the field provided.
- Page 57 Task 12: Setting-up Basic Storage Click the Next button to continue. Either the Set Client Fibre Channel Properties or the Set Client iSCSI Properties dialog box opens. In the dialog box, click Add button. The Add Initiator WWPN dialog box opens. In the dialog box, enter your initiator WWPN and click the OK button to continue.
- Page 58 VTrak S3000 Quick Start Guide Creating an iSCSI SAN Client To create an iSCSI SAN client: In the Tree, right-click the VTrak server icon and choose Options > Enable iSCSI from the popup menu. In the Tree, right-click SAN Clients and choose Add from the popup menu.
- Page 59 Task 12: Setting-up Basic Storage Enter the CHAP secret and Mutual CHAP secret again in the Confirm fields. Click the Next button to continue. The Enter the Generic Client Name dialog box opens. In the dialog box, • Accept the default client name or enter a new one. •...
- Page 60 VTrak S3000 Quick Start Guide The Select a WWPN Port Mapping Type dialog box opens. In the dialog box, choose the appropriate mapping type for your system. • One to One – You do not use multipathing. • All to All – You use multipathing, such as PerfectPath on Windows.
- Page 61 Task 12: Setting-up Basic Storage In the dialog box, enter the Target Name in the field provided. Check the boxes of the Target IP addresses you want to use. From the Access Mode dropdown menu, choose a level of user access. Click the Next button to continue.
-
Page 62: Task 13: Setting-Up High Availability
VTrak S3000 Quick Start Guide Task 13: Setting-up High Availability High Availability (HA) refers to establishing redundant paths between the VTrak S3000 appliance (server) and the client. HA also builds fault tolerance and scalability into the storage solution. Use the PROMISE Management Console to set up your HA storage. There are four steps. - Page 63 Task 13: Setting-up High Availability The Enable Configuration Repository wizard opens. Click the Next button to continue. The Select Physical Resource(s) for the Virtual Device(s) dialog box opens. In the dialog box, check the physical devices you prepared in the previous steps, and click the Next button.
- Page 64 VTrak S3000 Quick Start Guide The IP Address Configuration dialog box opens. In the dialog box, click the OK button. The Network Configuration dialog box opens. In the dialog box, click the OK button. The network service restarts. Your connection to the appliance is lost.
- Page 65 Task 13: Setting-up High Availability The wizard automatically creates a configuration repository on the secondary server. Click the Next button to continue. The Users List opens. In the Users List, examine the user names for both VTrak appliances. • If all names are identical, click the OK button. •...
- Page 66 VTrak S3000 Quick Start Guide You must choose secondary standby WWPNs for: • VTrak S3000-01 adapter 1 • VTrak S3000-01 adapter 2 • VTrak S3000-02 adapter 1 • VTrak S3000-02 adapter 2 Choose the secondary standby WWPN for the first adapter and click the Next button.
- Page 67 Task 13: Setting-up High Availability Click the Next button to continue. The Select Physical Resources dialog box opens. In the dialog box, check the boxes beside the resource you want to use and click the Next button. The Select a Physical Device dialog box opens. In the dialog box, highlight the device you want to use and click the Next button.
-
Page 68: Contacting Technical Support
VTrak S3000 Quick Start Guide Contacting Technical Support For assistance or more information: • Go to the PROMISE Support Website at http://www.promise.com/support/support_eng.asp • Go to PROMISE Online Support at e-Support On-Line • Contact the nearest PROMISE Technical Support Office United States...
Need help?
Do you have a question about the VTrak S3000 and is the answer not in the manual?
Questions and answers