Sign In
Upload
Download
Table of Contents
Contents
Add to my manuals
Delete from my manuals
Share
URL of this page:
HTML Link:
Bookmark this page
Add
Manual will be automatically added to "My Manuals"
Print this page
×
Bookmark added
×
Added to my manuals
Manuals
Brands
Promise Technology Manuals
Storage
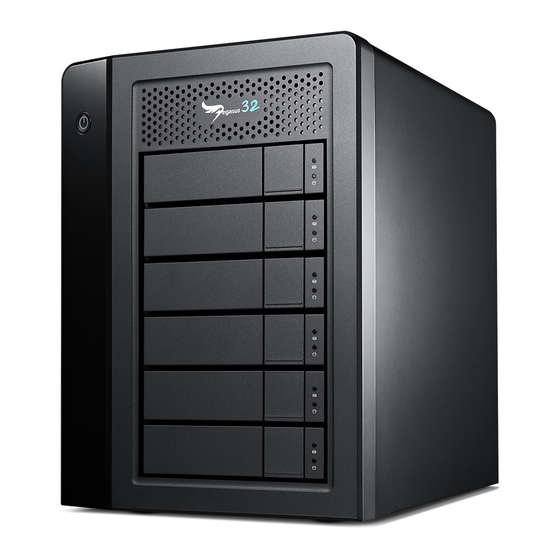
Pegasus32 R6
Product manual
Promise Technology Pegasus32 R6 Product Manual
Hide thumbs
1
2
3
4
5
6
7
8
9
10
Table Of Contents
11
12
13
14
15
16
17
18
19
20
21
22
23
24
25
26
27
28
29
30
31
32
33
34
35
36
37
38
39
40
41
42
43
44
45
46
47
48
49
50
51
52
53
54
55
56
57
58
59
60
61
62
63
64
65
66
67
68
69
70
71
72
73
74
75
76
77
78
79
80
81
82
83
84
85
86
87
88
89
90
91
92
93
94
95
96
97
98
99
100
101
102
103
104
105
106
107
108
109
110
111
112
113
114
115
116
117
118
119
120
121
122
123
124
125
126
127
128
129
130
131
132
133
134
135
136
137
138
139
140
141
142
143
144
145
146
147
148
149
150
151
152
153
154
155
156
157
158
159
160
161
162
163
164
165
166
167
168
169
170
171
172
173
174
175
176
177
178
179
180
181
182
183
184
185
186
187
188
189
190
191
192
193
194
195
196
197
198
199
200
201
202
203
204
205
206
207
208
209
210
211
212
213
214
215
216
217
218
219
220
221
222
223
224
225
226
227
228
229
230
231
232
233
234
235
236
237
238
239
240
241
242
243
244
245
246
247
248
249
250
251
252
253
254
255
256
257
258
259
260
261
262
263
264
265
266
267
page
of
267
Go
/
267
Contents
Table of Contents
Bookmarks
Table of Contents
Table of Contents
• "Step 6: Format with Pegasus Utility
• "Safely Remove Pegasus32 on Windows
S Hutdown the P Egasus
Indows
F Ormat P Egasus 32 on W
Unlocking the UI in Mac
Displaying Multiple Pegasus Units
Perusing the Promise Utility Interface
Toolbar Icons
Customizing the Toolbar
Device Menus
Component List
Physical Drive Menu
Front View
Back View
Managing Subsystems
Iewing S Ubsystem I Nformation
Aking S Ubsystem S Ettings
Clearing Statistics
Estoring F Actory D Efault S Ettings
Aving a S Ervice R Eport
Updating Firmware
Managing the RAID Controller
Controller Information
Controller Statistics
Aking C Ontroller S Ettings
Aking B Uzzer S Ettings
Managing Enclosures
List of Disk Arrays
Iewing D Isk a Rray I Nformation
C Reating a D Isk a Rray M
C Reating a D Isk a Rray and L
C Hoosing a Utomatic C
C Hoosing E Xpress C
C Hoosing a Dvanced C
Aking D Isk a Rray S Ettings
Deleting a Disk Array
Locating a Disk Array
P Reparing a D Isk a Rray for R Ebuilding a D Isk a Rray
P Ausing and R Esuming a R
Stopping a Rebuild
Managing Logical Drives
L Ogical D Rive I
Iewing L Ogical D Rive S Tatistics
Aking L Ogical D Rive S Ettings
L Ogical D Rive C
C Reating a L Ogical D Rive M
F Ormatting y Our L Ogical D
Locating a Logical Drive
Deleting a Logical Drive
Initializing a Logical Drive
P Ausing and R Esuming an S Topping an I Nitialization
R Edundancy C Heck on a L
P Ausing and R Esuming a R
S Topping a R Edundancy C
Migrating a Logical Drive
R Unning Pdm on a L Ogical
P Ausing and R Esuming
Managing Spare Drives
Iewing a L ist of S Pare D Rives
Iewing S Pare D Rive I Nformation
Creating a Spare Drive Manually
Running Spare Check
Deleting a Spare Drive
Running a Transition on a Spare Drive
Running a Transition
Pausing and Resuming a Transition
Stopping, Pausing or Resuming a Transition
Setting up Email Notifications
Responding to an Audible Alarm
Checking Leds
Subsystem Leds
Drive Carrier Leds
Event Severity Descriptions
Physical Drive Problems
Diagnosis Using the Pegasus Utility
Locating a Physical Drive
Replacing a Physical Drive
Physical Drive Warning Message
Disk Array and Logical Drive Problems
Disk Array Degraded / Logical Drive Critical
Disk Array Offline / Logical Drive Offline
Rebuilding a Disk Array
Incomplete Array
Unreadable Disk Warning
Subsystem Problems
Diagnosing a Subsystem Problem
Disk Arrays
Media Patrol
Technology Background
Logical Drives
RAID Levels
RAID 0 - Stripe
RAID 1 - Mirror
RAID 1E - Enhanced Mirror
RAID 5 - Block and Parity Stripe
RAID 6 - Block and Double Parity Stripe
RAID 10 - Mirror + Stripe
RAID 50 - Striping of Distributed Parity
RAID 60 - Double Parity + Stripe
RAID Level Migration
Migration Requirements
Source and Target RAID Levels
Stripe Size
Sector Size
Formatting Logical Drives
Egasus U Tility with D Efault S Ettings
Disk Utility
Spare Drives
Equirements
Running a Transition
RAID Controllers
Ead C Ache P Olicy
Write Cache Policy
Apacity C Oercion
C Ontacting T Echnical S
L Imitations
Rma M Ethods
L Imited W Arranty
D Isclaimer of Other Warranties
Y Our R Esponsibilities
Eturning the P Roduct F
File System Conversion
Formatting Hard Drives
For Windows
For Mac
F Ormat Drives for M Ac Jhfs
Advertisement
Quick Links
1
• "Step 6: Format with Pegasus Utility
2
S Hutdown the P Egasus
Download this manual
32
P
egasus
R4, R6, R8
Product Manual
Version 1.1
©2020 Promise Technology, Inc. All Rights Reserved.
Table of
Contents
Previous
Page
Next
Page
1
2
3
4
5
Advertisement
Table of Contents
Need help?
Do you have a question about the Pegasus32 R6 and is the answer not in the manual?
Ask a question
Questions and answers
Subscribe to Our Youtube Channel
Related Manuals for Promise Technology Pegasus32 R6
Storage Promise Technology Pegasus2 R2+ Product Manual
(78 pages)
Storage Promise Technology Pegasus3 R4 Product Manual
(232 pages)
Storage Promise Technology Pegasus3 R6 Product Manual
(232 pages)
Storage Promise Technology Pegasus3 R8 Product Manual
(232 pages)
Storage Promise Technology Pegasus2 R4 Quick Start Manual
(1 page)
Storage Promise Technology Pegasus32 R8 Product Manual
(267 pages)
Storage Promise Technology Pegasus32 R4 Product Manual
(267 pages)
Storage Promise Technology VTrak J830s Product Manual
Promise vtrak external disk subsystem (64 pages)
Storage Promise Technology Pegasus 2 R4 Installation Manual
(31 pages)
Storage Promise Technology VTrak E610f Product Manual
E-class external disk array subsystem (434 pages)
Storage Promise Technology PEGASUS R6 Product Manual
(148 pages)
Storage Promise Technology Apollo Cloud 2 Duo Manual
(92 pages)
Storage Promise Technology VTRAK E610f Product Manual
E-class (340 pages)
Storage Promise Technology SmartStor NAS Product Manual
Smartstor nas disk storage system (246 pages)
Storage Promise Technology Vess R3600 Series Product Manual
(337 pages)
Storage Promise Technology VTrak D5000 Series Product Manual
High-availability storage system (245 pages)
This manual is also suitable for:
Pegasus32 r8
Pegasus32 r4
Table of Contents
Print
Rename the bookmark
Delete bookmark?
Delete from my manuals?
Login
Sign In
OR
Sign in with Facebook
Sign in with Google
Upload manual
Upload from disk
Upload from URL


Need help?
Do you have a question about the Pegasus32 R6 and is the answer not in the manual?
Questions and answers