
Related Manuals for Promise Technology VTrak M500f


Summary of Contents for Promise Technology VTrak M500f
- Page 1 M-Class M500f, M500i, M500p, M300f, M300i, M300p, M200f, M200i, M200p UICK TART UIDE Version 1.4 © 2005 Promise Technology, Inc. All Rights Reserved.
-
Page 2: Step 1: Unpack The Vtrak
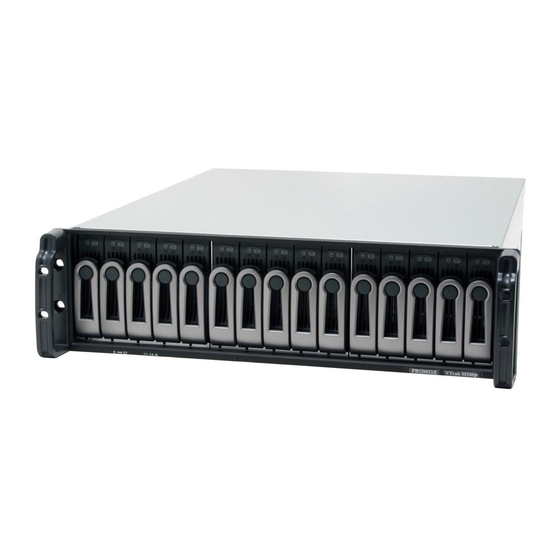
VTrak M-Class Quick Start Guide VTrak M-Class Task List Step 1: Unpack the VTrak (below). Step 2: Mount VTrak in a Rack (page 5) Step 3: Install Disk Drives (page 5) Step 4: Network and Data Cable Connections (page 7) Step 5: Set Up Serial Cable Connections (page 12) Step 6: Connect the Power (page 12) Step 7: Set IP Address with CLI or CLU (page 14) - Page 3 PROMISE Power Logical Drive FC/iSCSI/ FC/iSCSI/ Controller Status Status SCSI-1 SCSI-2 Heartbeat Activity Activity Figure 1. VTrak M500f/i/p Front View Power FRU Status Disk Array Status FC/iSCSI/SCSI-1 Activity FC/iSCSI/SCSI-2 Activity Controller Heartbeat Figure 2. VTrak M300f/i/p and M200f/i/p Front View...
- Page 4 Mgmt FC 1 FC 2 IOIOI Power Supply Cooling Unit Cooling Unit Power Supply with Battery Figure 3. VTrak M500f Rear View (M500i and M500p have different controllers) Cooling Unit with Battery Controller iSCSI 1 iSCSI 2 Mgmt IOIOI Power Supply 1...
-
Page 5: Step 2: Mount Vtrak In A Rack
Step 2: Mount VTrak in a Rack Step 2: Mount VTrak in a Rack The VTrak M-Class subsytems install directly to the rack with or without using the supplied mounting rails. Refer to Chapter 2 of the VTrak Product Manual for instructions on installing the rails and mounting your VTrak. - Page 6 Serial ATA Disk Drive Figure 7. SATA Disk Drives mount at the front of the carrier A VTrak M500f/i/p carrier is shown above. The VTrak M300f/i/p and M200f/i/p carrier is similar in appearance but the two carrier designs are NOT...
- Page 7 Step 4: Network and Data Cable Connections Step 4: Network and Data Cable Connections The VTrak M500f, M300f and M200f share the same RAID controller design and use Fibre Channel (FC) connections for the data ports. The VTrak M500i, M300i and M200i share the same RAID controller design and use iSCSI connections for the data ports.
- Page 8 FC 2 IOIOI VTrak VTrak FC HBA Card FC Port (1 of 2) Figure 9. VTrak M500f DAS connections (M300f and M200f are similar) This arrangement requires: • A Fibre Channel HBA card in the Host PC • A network switch •...
- Page 9 Step 4: Network and Data Cable Connections iSCSI Storage Area Network Network Switch GbE Switch Management Port Controller iSCSI 1 iSCSI 2 Mgmt IOIOI VTrak GbE NIC iSCSI Port (1 of 2) Figure 10. VTrak M300i and M200i SAN connections (M500i is similar) This arrangement requires: •...
- Page 10 VTrak M-Class Quick Start Guide iSCSI Direct Attached Storage Network Switch Management Port Controller iSCSI 1 iSCSI 2 Mgmt IOIOI VTrak GbE NIC iSCSI Port (1 of 2) Figure 11. VTrak M300i and M200i DAS connections (M500i is similar) This arrangement requires: •...
- Page 11 Step 4: Network and Data Cable Connections SCSI Direct Attached Storage Network Switch Management Port Controller IOIOI Mgmt VTrak SCSI HBA In connector Card SCSI Channel (1 of 2) Figure 12. VTrak M300p and M200p DAS connections (M500p is similar) This arrangement requires: •...
-
Page 12: Step 5: Set Up Serial Cable Connections
2 Mgmt IOIOI Figure 13. Serial connectors for VTrak M500f (left) and M300i (right) Step 6: Connect the Power Plug the power cords and switch on both power supplies on. When the power is switched on, the LEDs on the front of the VTrak will light up. - Page 13 Fibre Channel/iSCSI/SCSI LEDs flash green if there is activity on that channel. There are two LEDs on each Drive Carrier. They report the presence of power and a disk drive, and the current condition of the drive. Power/ Disk Status Activity Figure 16.VTrak M500f/i/p disk carrier LEDs...
- Page 14 VTrak M-Class Quick Start Guide Disk Status Power/Activity Figure 17.VTrak M300f/i/p and M200f/i/p disk carrier LEDs After a few moments the Power/Activity should display Green. If there is no disk drive in the carrier, the Disk Status LED and the Power/Activity LED will remain dark.
- Page 15 Step 7: Set IP Address with CLI or CLU CLI: Fibre Channel and SCSI Models (M500f/p, M300f/p, M200f/p) Type the following string to set the Management Port IP address and other settings, then press Enter. administrator@cli> net -a mod -t mgmt -s "primaryip=192.168.10.87, primaryipmask=255.255.255.0, gateway=192.168.10.3"...
- Page 16 VTrak M-Class Quick Start Guide To verify the settings, type net and press Enter. administrator@cli> net =========================================== CId Port Type Mask Gateway Link =========================================== Mgmt 192.168.10.87 255.255.255.0 192.168.10.3 iSCSI 0.0.0.0 0.0.0.0 0.0.0.0 Down iSCSI 0.0.0.0 0.0.0.0 0.0.0.0 Down Type the following string to set the iSCSI Port IP address and other settings, then press Enter.
- Page 17 Step 7: Set IP Address with CLI or CLU CLU: Fibre Channel and SCSI Models (M500f/p, M300f/p, M200f/p) At the admin@cli prompt, type menu and press Enter. The CLU main menu appears. With Quick Setup highlighted, press Enter. The first Quick Setup screen enables you to make Date and Time settings. System Date and Time Press the arrow keys to highlight System Date.
- Page 18 VTrak M-Class Quick Start Guide Press Ctrl-A to save these settings and move to the Management Port configuration screen. Management Port By default, DHCP is enabled on VTrak (above). To set Managment Port settings manually, or to view the current settings, you must disable DHCP. To view the current Management Port settings: Press the arrow keys to highlight DHCP.
- Page 19 Step 7: Set IP Address with CLI or CLU Press Ctrl-A to save these settings and move to the RAID configuration screen. To make Management Port settings manually: Press the arrow keys to highlight DHCP. Press the spacebar to toggle to Disabled. Press the arrow keys to highlight IP Address.
- Page 20 VTrak M-Class Quick Start Guide System Date and Time Press the arrow keys to highlight System Date. Press the backspace key to erase the current date. Type the new date. Follow the same procedure to set the System Time. Press Ctrl-A to save these settings and move to the Management Port configuration screen.
- Page 21 Step 7: Set IP Address with CLI or CLU Press the arrow keys to highlight DHCP. Press the spacebar to toggle to Disabled. The current Management Port settings are displayed (above). Record the information on this screen. Press the spacebar to toggle DHCP back to Enable. Press Ctrl-A to save these settings and move to the iSCSI Port 1screen.
- Page 22 VTrak M-Class Quick Start Guide iSCSI Ports By default, DHCP is enabled on VTrak (above). To set iSCSI Port settings manually, or to view the current settings, you must disable DHCP. To view the current iSCSI Port settings: Press the arrow keys to highlight DHCP. Press the spacebar to toggle to Disabled.
- Page 23 Step 7: Set IP Address with CLI or CLU The current iSCSI Port settings are displayed (above). To make iSCSI Port settings manually: Press the arrow keys to highlight DHCP. Press the spacebar to toggle to Disabled. Press the arrow keys to highlight IP Address. Press the backspace key to erase the current IP Address.
- Page 24 VTrak M-Class Quick Start Guide Step 8: Install iSCSI Initiator on the Host PC This step applies to the M500i, M300i and M200i models only. To access the iSCSI data ports, you must have the iSCSI Initiator installed on your Host PC. You can use a Gigabit Ethernet network interface card (GbE NIC) with hardware-based iSCSI initiator from such vendors as: •...
-
Page 25: Log-In To Webpam
Step 9: VTrak Setup with Embedded WebPAM After the iSCSI Initiator is installed, follow the installation and setup instructions that come with your GbE NIC card. Note Setup of an actual iSCSI initiator takes place after the disk array and logical drive are configured on the VTrak. If you plan to use LUN Masking, enable this feature and specify your LUNs before setting up your iSCSI initiator. - Page 26 VTrak M-Class Quick Start Guide Secure Connection • WebPAM uses a secure HTTP connection ....https:// • Enter the VTrak’s Management Port IP address ..192.168.10.87 Together, your entry looks like this: https://192.168.10.87 Note...
- Page 27 Step 9: VTrak Setup with Embedded WebPAM After sign-in, the WebPAM opening screen appears (next page). If there are any unconfigured physical drives in the enclosure, the Array Configuration menu will also appear (see page 28). Important As soon as possible, assign the Administrator's password. Make the change under User Management.
-
Page 28: Language Selection
VTrak M-Class Quick Start Guide The first time you log in to WebPAM, there will be no Users except for “administrator”. There will be no disk arrays or logical drives. Logged-in User Subsystem (IP address) Administration Tools User Management Network Management FC / iSCSI / SCSI Management Storage Services Software Management... - Page 29 Step 9: VTrak Setup with Embedded WebPAM There are three options: Automatic, Express and Advanced. Select one and click the Next button. Or select one from the dropdown menu on the Create tab. Automatic The Disk Array Automatic Creation option enables you to create a new disk array following a default set of parameters.
- Page 30 VTrak M-Class Quick Start Guide you can create multiple logical drives at the same time you create your disk array. However, all of the logical drives will be the same size and RAID level. If you prefer to specifiy the parameters directly, use the Advanced option to create your disk array.
- Page 31 Step 9: VTrak Setup with Embedded WebPAM The maximum possible number of logical drives appears to the right of this field. From the Application Type menu, select an application that best describes your intended use for this disk array: • File Server •...
- Page 32 VTrak M-Class Quick Start Guide To create a new disk array: Enter a name for the disk array in the field provided. Check the box to enable the following features. • Media Patrol – A routine maintenance procedure that checks the magnetic media on each disk drive.
- Page 33 Step 9: VTrak Setup with Embedded WebPAM On this screen you will specify your logical drives. Specify one logical drive at a time until the full capacity of the disk array is allocated. Enter an Alias (name) for the first logical drive. Choose a RAID level from the dropdown menu.
- Page 34 VTrak M-Class Quick Start Guide 10. Choose a Read Cache policy: • ReadCache • ReadAhead • No Cache 11. Choose a Write Cache policy: • WriteThru • WriteBack 12. Click the Update button. When you click the Update button, WebPAM sets up one logical drive and adds it to the New Logical Drive lists at the bottom of the window.
- Page 35 Step 9: VTrak Setup with Embedded WebPAM If you want to change a logical drive setting, click on the logical drive at the bottom of the window. The entry and the capacity usage are highlighted. Make your changes to the parameters and click the Update button.
- Page 36 VTrak M-Class Quick Start Guide 13. When you have finished specifying logical drives, click the Next button.
- Page 37 Step 9: VTrak Setup with Embedded WebPAM The proposed disk array appears with the logical drive(s) you specified. 14. If you agree with the proposed disk array and logical drive(s), click the Submit button. If you disagree, click the Back button and make changes as needed. Additional Logical Drives If you want to create additional logical drives and there is unused space on the current disk array, click on the Disk Array...
-
Page 38: Frequently Asked Questions
VTrak M-Class Quick Start Guide Internet Connection using WebPAM The above instructions cover connections between VTrak and your company network. It is also possible to connect to a VTrak from the Internet. Your MIS Administrator can tell you how to access your network from outside the firewall. - Page 39 Frequently Asked Questions My WebPAM connection was working OK. But later on, it timed out. What do I do now? The network condition can time-out for several reasons. When an open connection has no action for a specific amount of time (the Administrator can change it), the connection times-out automatically for security reasons.
-
Page 40: Contact Technical Support
VTrak M-Class Quick Start Guide How can I be sure everything is working OK on the VTrak? Locally: The VTrak enclosure has LEDs on the front to monitor the status of power, field replaceable units (FRUs) and logical drives. When these are green, VTrak is functioning normally. - Page 41 Fax Support +31 (0) 40 256 9463 Attn: Technical Support Phone Support +31 (0) 40 235 2600 If you wish to write us for Promise Technology Europe B.V. support: Sciene Park Eindhoven 5542 5692 EL Son, The Netherlands Germany E-mail Support support-de@promise-emea.com...
- Page 42 Fax Support +886 3 578 2390 Attn: Technical Support Phone Support +886 3 578 2395 (ext. 8811) If you wish to write us for Promise Technology, Inc. support: 2F, No. 30, Industry E. Rd. IX Science-based Industrial Park Hsinchu, Taiwan, R.O.C.
Need help?
Do you have a question about the VTrak M500f and is the answer not in the manual?
Questions and answers