Raven Cruizer II Operation Manual
Software version 3.0
Hide thumbs
Also See for Cruizer II:
- (28 pages) ,
- Operation manual (16 pages) ,
- Operation manual (8 pages)
Table of Contents
Advertisement
Advertisement
Table of Contents

Related Manuals for Raven Cruizer II


Summary of Contents for Raven Cruizer II
-
Page 1: Operation Guide
Operation Guide Cruizer II™ (Software Version 3.0) - Page 2 Raven Industries shall not be held responsible for any modifications or repairs made outside our...
-
Page 3: Table Of Contents
Ending a Job ......16 Powering Down the Cruizer II... 16 Standby Mode . -
Page 4: Overview
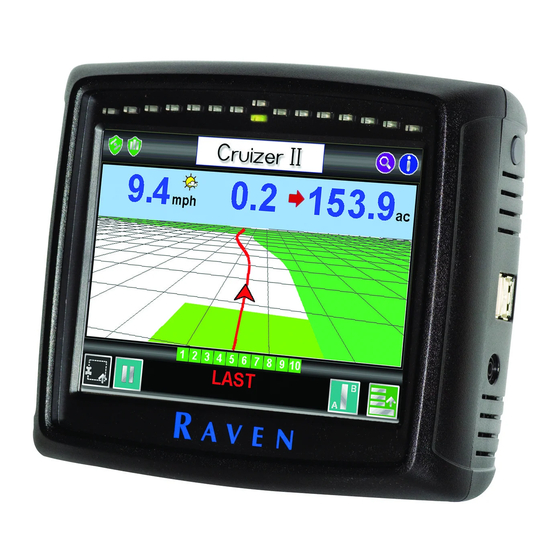
Overview The Cruizer II™ guidance system offers advanced guidance with an easy-to- use touch screen. In addition, the Cruizer II simulates radar for speed- compensated applications and supplies Differential GPS data to other controllers or optional systems. The Cruizer II may be used with: •... -
Page 5: Care And Maintenance
2. Route the antenna cable to the back of the Cruizer II console and connect it to the antenna port. 3. Connect the power cable to the power port on the Cruizer II and plug the adaptor into the vehicle accessory port or cigarette lighter socket. -
Page 6: Initial Startup
The Setup Wizard helps with the configuration process and is only required the first time the Cruizer II is started. Any settings selected or calibration values entered in the Setup Wizard may be adjusted at... -
Page 7: Home Screen
It is recommended to check settings before starting jobs to ensure the console is configured properly. Shutdown - Powers down the Cruizer II console. The Shutdown icon is displayed each time the console is powered up or when guidance is not active. -
Page 8: Gps Status Icon
Gl1de or e-Dif Note: Touch the shield icon to display the GPS Status screen. The standard GPS shield is displayed if the Cruizer II console cannot determine the type of corrections received. GPS Status Icon on the Home screen will display: if the status of DGPS is O.K. -
Page 9: Starting Guidance
Starting Guidance After completing the initial setup, the Cruizer II may be used to provide guidance for field operations. Note: Settings may need to be adjusted within the Tools Menu before proceeding with an actual guidance application. See the Tools Menu section on page 17 for more information. - Page 10 (implement history must be turned on). Note: An applied area must be present from a previous swath before Cruizer II will display the next guidance path in Last Pass mode. Straight (A-B) Line Mode - Allows the operator to select a starting (A) point and an ending (B) point or compass heading through which Cruizer II draws a straight line as the guidance path.
-
Page 11: Resume A Saved Job And Delete Jobs
1. From the Home Screen, touch Start Job 2. To open the job with coverage history and guidance information from a previous job opened on the Cruizer II console, select the Resume option. Note: Touch Cancel to return to the Home Screen without starting the job. -
Page 12: Guidance Screen
Zoom - Zooms in each time it is pressed until maximum zoom is reached then zooms out. Menu - Touch to access other guidance views, available path tools, or return to the Cruizer II Home Screen. Refer to Guidance Menu section on page 12 for more information. - Page 13 Rate Display Note: A serial cable (P/N 115-0172-054) is required connect the Cruizer II to the DB-9 connector on the SCS console. Contact a local Raven dealer for details and purchasing information.
-
Page 14: Guidance Menu
Guidance Menu Touch the Guidance Menu icon to access other guidance views, available path tools, or return to the Cruizer II Home Screen. Home Screen - Touch to return to the Cruizer II Home Screen. Guidance Screen Modes 3-D View - Displays a down field view of the vehicle position. -
Page 15: A-B Guidance Path Tools
Boundary Mapping Menu Recording a field boundary allows the operator to define the field area. Once a field boundary is completed, the Cruizer II displays the shape of the field and will also calculate the total area within the field boundary. -
Page 16: Field Area Display
5. Select the desired marker location which the Cruizer II will use to record the boundary. The marker location may be set to the left, right or center of the configured guidance width. Note: Select the Pause when not Applying option to allow the Cruizer II to automatically pause boundary recording if the coverage History is toggled off. -
Page 17: Field Review Mode
During the application, Cruizer II will display the distance between each marker and the current vehicle location. To place a field marker, touch the Marker at the bottom of the screen. -
Page 18: Ending A Job
2. To save a report for the job, see the Coverage Maps section on page 24. Powering Down the Cruizer II Use the following steps to power down and shut off the Cruizer II. From the Home Screen: 1. Touch the End Job icon if a job is in progress. -
Page 19: Tools Menu
TM-1 Tilt Module. Touch the Information icon for detailed information for this feature. Note: The baud rate for Port B must be set to 19200 to allow Cruizer II to communicate with the TM-1. See the Baud Rate Settings section on page 27 for information on other configurations with SmarTrax. -
Page 20: Vehicle
SmartBoom system with the Cruizer II console. AccuRow/SmartRow - If an optional AccuRow or SmartRow system is detected by the Cruizer II, this icon will be displayed in the System menu. Refer to the Calibration and Operation Manual provided with these optional systems for more information. -
Page 21: Gps
• Enter an authorization code for the e-Dif or L-Dif correction signal. • Enable or disable Coverage Map Outputs. See the Coverage Maps section on page 24 for details. • Select and authorize the operating region for the Cruizer II console. Demo - While in Demo Mode, the Guidance Screen Tools... -
Page 22: Favorites Menu
Note: When used with the SCS 4400 or SCS 4600, the Cruizer II must have software version 2.3 or later. If the Cruizer II console is connected to a Raven rate control console (e.g. - Page 23 Screen, select Tools Menu Vehicle Sections Note: The Sections icon is only available in the Tools Menu if the Cruizer II detects the AccuBoom node on the CANbus. If the appropriate hardware has been installed, review the CANbus Troubleshooting section on page 30 to troubleshoot the node.
- Page 24 AccuBoom Sprayer Setup The Sprayer screen allows the operator to customize the response of the AccuBoom system for the specific control hardware installed on the implement. 1. From the Home Screen, select Tools Menu System Sprayer 2. Use the sliders or touch the keypad icons to set the following settings: Note: Touch the Home icon at any...
-
Page 25: Display
Note: Section 1 corresponds to the left most section (as observed from the operator cabin facing forward) in a standard boom configuration. 4. Verify that the Raven Compatible option is selected. 5. Touch the Accept icon to save the displayed settings and return to the Sprayer screen. -
Page 26: Coverage Maps
PC. When output of coverage map files is enabled, maps are saved to a flash drive inserted in the USB port on the side of the Cruizer II console. Enabling Coverage Map Output To setup output of coverage map files: 1. -
Page 27: Coverage Map Output
It is possible to obtain coverage map files for closed jobs as long as the job file is available on the Cruizer II console or a USB flash drive. For example, if the coverage map outputs are not configured correctly when a job is closed, or if a different file type is desired: 1. -
Page 28: Using Rtk Corrections
(RTK) differential correction source, such as a Slingshot Field Hub™, during field operations. RTK Differential Source Setup To set up the Cruizer II RTK console to receive RTK corrections from the Cruizer II Home screen: 1. Touch... -
Page 29: Baud Rate Settings
Baud Rate Settings Baud rate settings allow the Cruizer II console to communicate with other equipment such as steering, section control or DGPS systems or components. 1. From the Home Screen, select: Tools Menu Output 2. When connecting the products... -
Page 30: Can Diagnostics
To download the latest version of Cruizer II software, unzip or extract the download to a flash drive. Note: Cruizer II will not locate the update files if the files are moved on the flash drive. Un-zip the files to the root directory (“X:\” where X represents the letter of the flash drive), making sure to preserve the directory structure of the zipped archive. -
Page 31: Troubleshooting
Cruizer II guidance system. Issue Solution • Turn the Cruizer II console power off, wait a few seconds and turn the power back on. When the Cruizer II logo appears, touch the Touch screen does screen to start the recalibration process. Follow the instructions on not properly power up the screen. - Page 32 • Connect the clean ground - 16 gauge white wire and the high current ground - 12 gauge white Node is not properly wire to a good, quality ground source. Raven grounded recommends grounding the wires to the negative terminal of the battery.
-
Page 33: System Connection Diagrams
System Connection Diagrams Additional diagrams are available on the Raven Applied Technology Division web site: www.ravenhelp.com FIGURE 2. Cruizer II with SmartSteer 3D... - Page 34 FIGURE 3. Cruizer II with SmartSteer 3D, SmartBoom and SCS 440...
- Page 35 FIGURE 4. Cruizer II RTK with Slingshot and SmarTrax...
-
Page 39: Limited Warranty
How Can I Get Service? Bring the defective part and proof of purchase to your Raven dealer. If your dealer agrees with the warranty claim, the dealer will send the part and proof of purchase to their distributor or to Raven Industries for final approval. - Page 40 Fax: 605-331-0426 www.ravenprecision.com www.ravenhelp.com Notice: This document and the information provided are the property of Raven Industries, Inc. and may only be used as authorized by Raven Industries, Inc. All rights reserved under copyright laws. ©Raven Industries, Inc. 2010, 2011, 2012...
Need help?
Do you have a question about the Cruizer II and is the answer not in the manual?
Questions and answers