Table of Contents
Advertisement
Quick Links
To ensure safe usage and full performance of this product, please be sure to read through this manual completely.
To ensure immediate access whenever needed, store this manual in a safe location.
Unauthorized copying, quotation, or translation of this manual, in whole or in part, without the written approval of Roland
DG Corp., is prohibited.
The contents of this document and the specifications of this product are subject to change without notice.
Roland DG Corp. assumes no responsibility for any loss or damage relating to this product, regardless of any defect in this
product or this manual. Such loss or damage, whether direct or indirect, includes, but is not limited to, that arising from the
specifications or performance of this product, that due to failure of the product to perform, and that arising from any article
made using this product.
USER'S MANUAL
Advertisement
Table of Contents

Related Manuals for Roland Metaza MPX-90


Summary of Contents for Roland Metaza MPX-90
- Page 1 The contents of this document and the specifications of this product are subject to change without notice. Roland DG Corp. assumes no responsibility for any loss or damage relating to this product, regardless of any defect in this product or this manual.
-
Page 2: For California
For EU Countries Manufacturer: ROLAND DG CORPORATION 1-6-4 Shinmiyakoda, Kita-ku, Hamamatsu-shi, Shizuoka-ken, 431-2103 JAPAN The authorized representative in the EU: Roland DG Corporation, German Office Halskestr. 7, 47877 Willich, Germany Roland DG Corp. has licensed the MMP technology from the TPL Group. -
Page 3: Table Of Contents
Contents To Ensure Safe Use ..................4 Important Notes on Handling and Use...............9 About Operation Manuals .................10 Documentation Included with the Machine ................10 How to Display Help for Software ....................10 How to Display Help for METAZA Driver ................11 Chapter 1 Getting Started .................13 1-1 About the Machine ................14 Features ..............................14 1-2 Names and Functions ................15... - Page 4 Contents Step3 : Enter the Text........................47 Step4 : Save Printing Data ......................47 3-4 Starting and Stopping Printing ..............49 Starting Printing ..........................49 Stopping Printing Operations ....................51 Chapter 4 More Advanced Operations .............53 4-1 Tips and Tricks for Image Layout ............54 Keeping Only the Required Portion of an Image (Trimming) ........54 Adjusting the Location, Size, or Angle of an Image ............55 Enclosing an Image in a Frame ....................58 4-2 Tips and Tricks for Text Layout..............60...
- Page 5 System Requirements for USB Connection ................ 110 Windows® is a registered trademark or trademark of Microsoft® Corporation in the United States and/or other countries. Company names and product names are trademarks or registered trademarks of their respective holders. http://www.rolanddg.com Copyright © 2009 Roland DG Corporation...
-
Page 6: To Ensure Safe Use
To Ensure Safe Use Improper handling or operation of this machine may result in injury or damage to property. Points which must be observed to prevent such injury or damage are described as follows. About WARNING and CAUTION Notices Used for instructions intended to alert the user to the risk of death or severe injury WARNING should the unit be used improperly. - Page 7 Continuing to use the machine may result electrical shock. If anything gets inside, in fire, electrical shock, or injury. Con- immediately disconnect the power cord tact your authorized Roland DG Corp. and contact your authorized Roland DG dealer. Corp. dealer.
- Page 8 To Ensure Safe Use Important notes about the power cord, plug, and electrical outlet Never allow to get wet. Never place any object on top or subject to damage. Never bend or twist with undue force. Never make hot. Never pull with undue force. Dust may cause fire.
- Page 9 To Ensure Safe Use The head area becomes hot WARNING Never touch the head immediately after printing has finished. Doing so may cause burns.
-
Page 10: Warning Label
To Ensure Safe Use Warning Label Warning label is affixed to make areas of danger immediately clear. The meaning of the label is as follows. Be sure to heed its warnings. Also, never remove the label or allow it to become obscured. Caution: High Temperature Never touch immediately after printing. -
Page 11: Important Notes On Handling And Use
Important Notes on Handling and Use This machine is a precision device. To ensure the full performance of this machine, be sure to observe the following important points. Failure to observe these may not only result in loss of performance, but may also cause malfunction or breakdown. This Machine is a Precision Device. -
Page 12: About Operation Manuals
It also explains how to install and operate included software. Be sure to read it first. METAZA Driver Online Help Roland METAZAStudio Online Help Roland SFEdit2 Online Help Dr. Engrave Online Help You view this documentation on your computer screen. Installing the respective programs makes these available for viewing. -
Page 13: How To Display Help For Metaza Driver
From [Start] menu, click [Control Panel] → [Hardware and Sound] → [Printers]. Windows XP From [Start] menu, click [Control Panel] → [Printers and Other Hardware] → [Print- ers and Faxes]. Right click [Roland MPX-90]. Click [Printing Preferences]. The setting window appears. Click [Help]. -
Page 15: Chapter 1 Getting Started
Chapter 1 Getting Started... -
Page 16: About The Machine
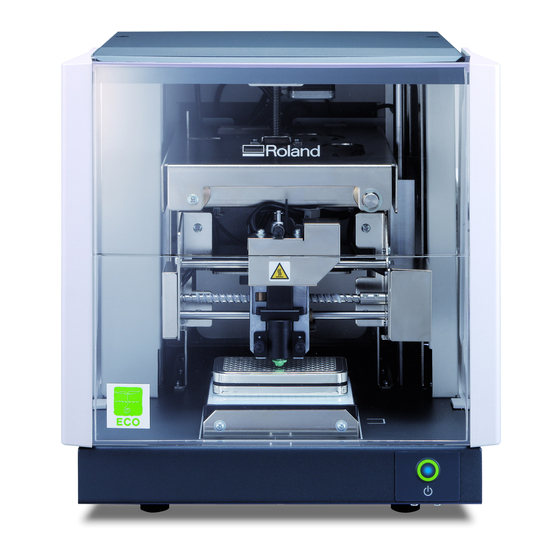
1-1 About the Machine Features This machine is a metal printer. It prints images by striking detailed points using a marking pin mounted in a head. Chapter 1 Getting Started... -
Page 17: Names And Functions
1-2 Names and Functions This Machine Main Unit Cover Close the cover when making print.. Head unit Move the head unit and align the Knob end handle (marking pins) of the head to the surface of material. Determine the h e a d p o s i t i o n based on the sur- face height of the m ate r ia l w he n... - Page 18 1-2 Names and Functions Head (MPH-90) Printing is performed on material using marking pins. Diamond is attached to the tip of the marking pins. Since the head is a consumable part, replace it at an appropri- ate timing. P. 94, “The Replacement Cycle for the Head” Marking pins Material Retainers This is used to fix material on a table.
-
Page 19: Checking The Included Items
Power cord Head caps (One installed on the unit by default) Center vise Adhesive sheet Table USB cable Roland Software Package Head (MPH-90) CD-ROM (Installed on the unit by default) Test-use printing material User’s manual (Brass-plated plates) (This document) Chapter 1 Getting Started... -
Page 21: Chapter 2 Installation And Setup
Chapter 2 Installation and Setup... -
Page 22: Installation
2-1 Installation Installation Environment Install in a quiet, stable location offering good operating conditions. An unsuitable location can cause ac- cident, fire, faulty operation, or breakdown. CAUTION Install in a location that is level and stable. Installation in an unsuitable location may cause an accident, including a fall or tipover. -
Page 23: Removing And Storing The Retainers
2-1 Installation Removing and storing the retainers Retaining materials are attached to protect the machine from vibration during shipment. Remove these after emplacement. Remove all Retaining materials. Any that remain may cause faulty operation or breakdown when the power is switched on. ... -
Page 24: Cable Connections
2-2 Cable Connections Connecting the machine to a power supply At this time, the connection to the computer must not be made yet. Failure to follow the correct procedure may make installation impossible. You make the connection to the computer when you install METAZA driver. ... -
Page 25: Installing The Software
Free hard-disk space required for instal- 25MB lation For the latest information, see the Roland DG Corp. website (http://www.rolanddg.com). The Software You Can Install and Set Up This is a program for creating printing data. It enables you import METAZAStudio and crop images to print, and perform editing to add text, boxes, and the like. -
Page 26: Installing Metaza Driver
Log on to Windows as “Administrators.” Insert the Roland Software Package CD-ROM into the computer. (Windows Vista only: When the automatic playback window appears, click [Run menu.exe].) The install menu appears automatically. Click [METAZA Driver Install]. -
Page 27: Installing The Software
2-3 Installing the Software Installing the Software Procedure Display the window for the install menu of the software. Click [Install] of the program you want to install. Follow the messages to install the software. (Windows Vista only: The [User Account Control] appears, click [Allow], and install the softwares.) ... -
Page 28: Metazastudio Settings
After you finish installing and setting up METAZAStudio, continue by making the setting for the printer. Be sure to make the setting before use. Procedure From [Start] menu, click [All Pro- grams] (or [Programs]) → [Roland METAZAStudio] → [METAZAStu- dio]. METAZAStudio starts. ... -
Page 29: Chapter 3 Making Prints
Chapter 3 Making Prints... -
Page 30: Switching The Power On And Off
3-1 Switching the Power On and Off Switching On the Power Procedure Make sure that the stopper contacts Ring the ring and the knob is tightened as shown in the figure In the case as shown in the figure , loosen Knob the knob to make it into the state shown in... -
Page 31: Getting Ready
3-2 Getting Ready The Printable Area The machine's printable area is as follows. Top view of the table Printable Area 50mm × 50mm Center line Center line Maximum Printable Area (80mm × 80mm) The setting by METAZA Driver is required. If an image exceeds the printable area, the print result might become uneven in the outside of the printable area. -
Page 32: Preparing Material To Print
3-2 Getting Ready Preparing Material to Print Prepare material that meets all of the following conditions. Thickness *1 0.3 to 40 mm (0.012 to 1.5 in.) Size *1 When using the adhesive sheet: 100mm (3.9 in.) (W) × 200mm (7.9 in.) (L) or less, or 200mm (7.9 in.) (W)×... - Page 33 3-2 Getting Ready Cross-section of printing material When using an adhesive sheet or a center vice. There must be no unevenness on the print surface. *4 Not OK Not OK Edge of the material is L-shape too high. Materials that cannot be used are those of which unevenness comes into contact with the moving part of the machine when material is set or when printing is made.
- Page 34 3-2 Getting Ready Conditions for Material When Printing Curved Surfaces *5 The table and figure below show the printing-assured area and the area reached by the marking pins with respect to the diameter of the cylinder. Note, however, that the following conditions are assumed. ...
-
Page 35: Loading Material Using The Adhesive Sheet
3-2 Getting Ready Loading Material Using the Adhesive Sheet Procedure Switch on the power P. 28 "Switching On the Power" Make sure that the stopper contacts the ring and the knob is tightened as Ring shown in the figure. Tighten the knob if it is loose. - Page 36 3-2 Getting Ready Affix the adhesive sheet to the table. Mount the material on the sheet. Press down lightly on the material to secure it in place. Mounting the Adhesive Sheet Place it straight, aligned with the scale marks on the table. ...
- Page 37 3-2 Getting Ready When material is too large to be placed within the table Place the material in a way that the center of the printing area comes to the center of the scale on the table. If the material tilts, place a support in order Adhesive to keep the material horizontal.
- Page 38 3-2 Getting Ready As shown in the figure, move the knob to the lowest position. Tighten the knob. Knob Stopper Press the Power/Movement button. The head moves to the left rear. Detach the head cap. Support the head. Head cap Chapter 3 Making Prints...
-
Page 39: Using The Center Vise
3-2 Getting Ready Using the Center Vise With the center vise, you secure material in place by clamping it in the vise. You can also vary the orien- tation and front and back sides of the vise when using it. Use it in a way matched to the size and shape of the material. -
Page 40: Loading Material Using The Center Vise
3-2 Getting Ready Loading Material Using the Center Vise Procedure Switch on the power. P. 28 "Switching On the Power" Make sure that the knob is tightened in the state shown in the figure. Ring If it is not in the state shown in the figure, loosen the knob, and then tighten it as it is in the state shown in the figure. - Page 41 3-2 Getting Ready Fit the tabs here in the case Mount the center vise. of horizontal mounting. Fit the tabs on the bottom of the center vise into the holes in the table on the unit. If the material tilts, place a support in order to keep the material horizontal.
- Page 42 3-2 Getting Ready Move the knob to the lowest posi- tion as shown in the figure. Tighten the knob. Knob Stopper Press the Power/Movement button. The head moves to the left rear. Detach the head cap. Support the head.
-
Page 43: Preparing Print Data (Metazastudio)
3-3 Preparing Print Data (METAZAStudio) Starting METAZAStudio From the [Start] menu, click [All Programs] (or Program) → [Roland METAZAStudio] → [METAZAStu- dio]. METAZAStudio starts. P. 42, "METAZAStudio Screen" Chapter 3 Making Prints... -
Page 44: Metazastudio Screen
3-3 Preparing Print Data (METAZAStudio) METAZAStudio Screen Toolbar The toolbar is provided with buttons for Menu Bar running METAZAStudio commands such Runs the various commands for METAZAStudio. as [Material] and [Open]. METAZAStudio online help ("Commands") METAZAStudio online help ("Commands" >... -
Page 45: Step1 : Determine The Shape And Size Of Material
3-3 Preparing Print Data (METAZAStudio) Step1 : Determine the shape and size of material. This section explains the shape and size of material to be determined by METAZAStudio when using the plate as explained below. METAZAStudio has a number of different types of material preregistered. Use the material with the “tag”... - Page 46 3-3 Preparing Print Data (METAZAStudio) Click the icon with the “tag” Material window name. Click The [Material Size] dialog box appears. Enter the values for the size of the material. Click [OK]. The material you selected appears in the Edit window.
-
Page 47: Step2 : Import The Image
3-3 Preparing Print Data (METAZAStudio) Set “Margin” to “1 mm.” Click [OK]. For printing on a flat plate, make the margin at least one millimeter. Otherwise the mark- ing pins may strike and damage the edge of the material. Step2 : Import the Image Here you import an image (such as photograph or drawing) for printing. - Page 48 3-3 Preparing Print Data (METAZAStudio) At [Look in], select the location of the file. At [Files of type], select either [Picture file] or [Adobe Illustrator file]. Select the file you want. Click [Open]. The specified image is imported and dis- played with the margins you set.
-
Page 49: Step3 : Enter The Text
3-3 Preparing Print Data (METAZAStudio) Step3 : Enter the Text Here you type in the text to print. Procedure Click Click on the printing area. Type in the text. You can change the size and orientation of the typed text and fill it. ... - Page 50 3-3 Preparing Print Data (METAZAStudio) For [Save in], specify where to save the file. Type in a file name. Click [Save]. Chapter 3 Making Prints...
-
Page 51: Starting And Stopping Printing
P. 33, "Loading Material Using the Adhesive Sheet," p. 38, "Loading Material Using the Center Vise" Procedure Close the cover. Click The [Print] dialog box appears. Make sure [Roland MPX-90] is chosen as the printer name. Click [Properties]. Chapter 3 Making Prints... - Page 52 3-4 Starting and Stopping Print Click the [Image Correction] tab. Select [Material]. Select either the composition or the product code of the material. You can adjust and register the striking force. P. 88, "Registering a Composition and Adjusting the Striking Force"...
-
Page 53: Stopping Printing Operations
From [Start] menu, click [Control Panel] → [Hardware and Sound] → [Printers]. Windows XP From [Start] menu, click [Control Panel] → [Printers and Other Hardware] → [Print- ers and Faxes]. Double-click the [Roland MPX-90] icon. At the [Printer] menu, click [Cancel All Documents] (or [Purge Print Documents]). -
Page 55: Chapter 4 More Advanced Operations
Chapter 4 More Advanced Operations... -
Page 56: Tips And Tricks For Image Layout
4-1 Tips and Tricks for Image Layout Keeping Only the Required Portion of an Image (Trimming) METAZAStudio can cut an original image to remove unneeded areas and keep just the required portion. This operation is called “trimming. ” In this example, you use the printing data created from page 43 to 46. Procedure ... -
Page 57: Adjusting The Location, Size, Or Angle Of An Image
4-1 Tips and Tricks for Image Layout Adjusting the Location, Size, or Angle of an Image METAZAStudio can change the location, size, and angle of a placed image to achieve the layout you want. In this example, you use the printing data created at page 54, “Keeping Only the Required Portion of an Image (Trimming). - Page 58 4-1 Tips and Tricks for Image Layout Drag the handles at the four corners of the image to adjust the size. Handles With the handles present at the four corners of the image, click the image a second time. The shape of the handles at the four corners changes to (●).
- Page 59 4-1 Tips and Tricks for Image Layout Drag to adjust the angle of the im- age. Holding down the keyboard’s SHIFT key as you drag makes the angle change by 45 degrees at a time. Using this method can be convenient at times such as when you want to perform rotation by precisely 90 degrees.
-
Page 60: Enclosing An Image In A Frame
4-1 Tips and Tricks for Image Layout Enclosing an Image in a Frame You can change the arrangement of printing data by placing a frame around an image. You use frames registered in what’s called METAZAStudio’s “library. ” The library contains a number of preregistered frames, and you can also register new ones. - Page 61 4-1 Tips and Tricks for Image Layout Adjust the size and location of the frame. When the size of the frame is larger than that of material, the result becomes as shown in the figure. The adjustment methods are the same as the methods for adjusting the location and size of an image.
-
Page 62: Tips And Tricks For Text Layout
4-2 Tips and Tricks for Text Layout Adjusting the Location, Size, or Angle of a Text You can change the location, size, and angle of a placed text same as image. Procedure Arrange the text horizontally. P. 47, “Step3 : Enter the Text” Click Click the laid-out text. - Page 63 4-2 Tips and Tricks for Text Layout Click on the text and hold until the shape of the handles at the 4 corners changes to [●]. Line up the pointer with a han- dle. The shape changes to a pointer for rota- tion.
-
Page 64: Arranging A Text To A Fan Layout
4-2 Tips and Tricks for Text Layout Arranging a Text to a Fan Layout You can arrange a text to a fan layout. Procedure Enter text. P. 47, “Step3 : Enter the Text” Click The [Properties] dialog box appears. ... -
Page 65: Laying Out Text Along A Shape
4-2 Tips and Tricks for Text Layout Laying Out Text along a Shape Here you lay out text along a shape you have made using the drawing tools. Procedure Click a drawing tool. In this example you use In the editing window, create a shape on the material. -
Page 66: Filling Text
4-2 Tips and Tricks for Text Layout Enter text. P. 47, “Step3 : Enter the Text” The text is laid out along the shape. Important! Layout on an integrated polyline is not possible. METAZAStudio METAZAStudio online help (“Commands” > “[Object] menu” > “Convert to Polyline,“ “Integrate Polyline”... - Page 67 4-2 Tips and Tricks for Text Layout Procedure Enter the text. P. 47, “Step3 : Enter the Text” Click The [Properties] dialog box appears. Click the [Fill and Contour] tab. Select the [Fill] check box. Select [Fill] or [Island Fill]. When you select [Island Fill], you need to en- ter Pitch as well.
-
Page 68: Creating And Editing Line Text
4-3 Creating and Editing Line Text SFEdit2 is software to create and edit stroke character fonts. On METAZAStudio, you can use the stroke character fonts that are created and edited by SFEdit2. SFEdit2 window Toolbar Menu Bar The toolbar is provided with buttons for Runs the various commands for SFEdit2. -
Page 69: Creating A Stroke Character Font
4-3 Creating and Editing Line Text Creating a Stroke Character Font The method of creating and saving a stroke character font is explained below. Procedure Starting METAZAStudio. P. 41, “Starting METAZAStudio” Click [Edit] → [Stroke character] → [Run SFEdit2…]. - Page 70 4-3 Creating and Editing Line Text Click [Save] dialog box appears. Enter a name of the created stroke character font. Click [OK]. The created stroke character font is saved. Click Chapter 4 More Advanced Operations...
-
Page 71: Changing Input Characters Into Stroke Characters
4-3 Creating and Editing Line Text Changing Input Characters into Stroke Characters This section explains the method of changing input characters into stroke characters using a stroke char- acter font. To use a stroke character font, either of the following operations must be done in advance. ... -
Page 72: Editing Stroke Character
4-3 Creating and Editing Line Text Editing Stroke character Using SFEdit2, you can edit the shape of a created stroke character. The procedure to edit a stroke character using SFEdit2 is explained below. Procedure Change an input character to a stroke character. ... -
Page 73: Checking And Adjusting Finished Result Of An Image
4-4 Checking and Adjusting Finished Result of an Image Checking the Finished Results in the Preview Window Checking the Finished Results in the Preview Window Click Preview window appears. Preview window Chapter 4 More Advanced Operations... -
Page 74: Adjusting The Finished Result In The Preview Window
4-4 Checking and Adjusting Finished Result of an Image Adjusting the Finished Result in the Preview Window At the preview window, you can adjust the brightness, contrast, and gamma correction. An image with clearly defined light and dark areas produces attractive printed results. Brightness This adjusts the overall brightness. -
Page 75: Printing On A Curved Surface
4-5 Printing on a Curved Surface With this machine, using a head cap lets you perform printing on cylinders and other examples of material whose surface height is not uniform. This section describes how to create data, using printing on a cylindri- cal material like the one shown below as an example. - Page 76 4-5 Printing on a Curved Surface Set “Margin” to “0 mm.” When you’re printing on cylindrical mate- rial, set the margins to zero millimeters. When printing on cylindrical material, the makeable area is limited, and so a sufficient printing area must be ensured by making the margins zero millimeters in size.
- Page 77 4-5 Printing on a Curved Surface Make sure [Roland MPX-90] is chosen as the printer name. Click [Properties]. Click the [Material] tab. Set [Diameter] to 10 millimeters. Select [Direction]. Make horizontal writing on portrait mate- rial. Vertical Horizontal In this example, select (vertical).
-
Page 78: Step2 : Make Horizontal Writing On Portrait Material
4-5 Printing on a Curved Surface Step2 : Make horizontal writing on portrait material. After the printing area is determined, place images and text on the area. This section explains the method of inputting characters horizontally on portrait material. Procedure ... - Page 79 4-5 Printing on a Curved Surface Click Press the <→> key on the key- board. The result becomes as shown in the figure. Enter text remained. Move the text to any position of your preference. P. 60, “Adjusting the Location, Size, or Angle of a Text”...
-
Page 80: Register New Material
4-6 Register New Material How to Register Wide Variety of Material METAZAStudio includes preregistered material of four shapes. To print material not registered in METAZAStu- dio, first register it as a new material. This prevents the printing area from being limited and the marking pins from being damaged as the result of hitting the edge of material. -
Page 81: Metaza Driver Settings
Windows XP From [Start] menu, click [Control Panel] → [Printers and Other Hardware] → [Print- ers and Faxes]. Right-click [Roland MPX-90]. Click [Printing Preferences]. The setting window for METAZA Driver appears. Going to the METAZAStudio [File] menu and clicking [Print Setup], then, in the [Print Setup] window, click- ing [Properties], displays the same window as the one that appears using “Displaying the Setting Window, ”... -
Page 82: About Dr. Engrave
4-8 About Dr. Engrave What is Dr. Engrave? Dr. Engrave is printing software for plate materials. It can read a text file in which data is separated by commas or tabs into the character field. You can use the files created with spreadsheet software and database software which have the text write function. For more information, see Help of Dr. -
Page 83: More Advanced Other Operations
4-9 More Advanced Other Operations More Advanced Other Operations You Can Accomplish with METAZAStudio METAZAStudio has some further useful functions, which are not explained in this document. Major func- tions are given below. For more information on how to operate METAZAStudio, refer to the online help for the program. -
Page 85: Chapter 5 Maintenance And Adjustment
Chapter 5 Maintenance and Ad- justment... -
Page 86: Daily Care
5-1 Daily Care Points to Note on Daily Care WARNING Never use gasoline, alcohol, thinner, or any other flammable mate- rial. Doing so may cause fire. CAUTION Never touch the heads immediately after printing has finished. Doing so may cause burns. ... -
Page 87: Cleaning The Body And Cover
5-1 Daily Care Cleaning the Body and Cover Use a cloth moistened with water then wrung well, and wipe gently to clean. The surface of the cover is easily scratched, so use a soft cloth. Cleaning of the Head Cap Detach the head cap mounted on the machine and remove dirt and dust inside the head cap. -
Page 88: Adjusting Marking Pins
5-2 Adjusting Marking Pins Checking the State of the Marking Pins MPX-90 Head Manager shows the amount of pin usage. If the indicator for the pin you're using is red, then replace it with a new head. If attractive printing is impos- sible or printed images are uneven even though the scale is not red, then change to a new head. -
Page 89: Adjusting The Striking Force Of The Pins
5-2 Adjusting Marking Pins Adjusting the Striking Force of the Pins You can adjust the striking force of pins by using MPX-90 Head Manager. Pin adjustment involves striking the pattern shown in the figure. Prepare a piece of test-use printing material (brass) or other material measuring about 60 mm (2.3 in.) by 60 mm (2.3 in.). -
Page 90: Composition Registration And Striking-Force Adjustment
From [Start], click [Control Panel] → [Hardware and Sound] → [Printers]. Windows XP From [Start], click [Control Panel] → [Printers and Other Hardware] → [Printers and Faxes]. Right-click [Roland MPX-90]. Click [Properties]. Setting Window for METAZA driver ap- pears. ... - Page 91 5-3 Composition Registration and Striking-force Adjustment Enter a name for the composition you’re registering. Enter [Speed/Impact] The printing results vary according to the hardness of the material. Adjust to match the material. METAZA Driver online help ("[Correction] tab" >...
- Page 92 5-3 Composition Registration and Striking-force Adjustment Click [OK]. METAZA Driver setting window closes. This is the end of registration of a material and the striking force suitable for it. To obtain printing results of higher quality, repeat to perform test print or to strike a same material, and adjust the value of print impact, etc.
-
Page 93: Adjustment Of The Origin-Point Location
5-4 Adjustment of the Origin-point Location Adjusting the Location of the Machine's Origin Point The origin point of the machine must be the center of the scale on the table. You can check the origin-point location by printing calibration data. Adjust the origin point if it is displaced. Prepare a plate-shaped material larger than 20 millimeters square. - Page 94 From [Start] menu, click [Control Panel] → [Printers and Other Hardware] → [Print- ers and Faxes]. The [Printers] folder opens. Right-click [Roland MPX-90]. Click [Printing Preferences]. The setting window of METAZA Driver ap- pears. Continue on the next page.
- Page 95 5-4 Adjustment of the Origin-point Location Click the [Material] tab. In the width and length fields for [Offset], enter the displacement val- ues you noted in step In the case of the figure in step , enter -0.5 in [Width] and 0.5 in [Length].
-
Page 96: The Replacement Of The Head Cap
5-5 The Replacement of the Head Cap The Replacement Cycle for the Head Cap The head cap is due for replacement when the triangle at its tip is worn away as shown in the figure. Replace it with a new head cap. The degree of wear may vary according to printing conditions. -
Page 97: Head Replacement
A General Guide of Head Life About 7,000 plates can be printed under the following conditions. Conditions of Use Material used : MD-NI (Roland nickel-plated plate) Printing area : 30 mm (1.1 in.) X 23 mm (0.9 in.) Print Mode : Photo... -
Page 98: How To Replace The Head
(brass), which is supplied with a replacement head (MPH-90), or a material equal to or larger than 60 mm (2.3 in.) x 60 mm (2.3 in.). A replacement head is sold separately. Consult your authorized Roland DG Corp. dealer. Do not stop the replacement operation halfway. - Page 99 5-6 Head Replacement When you have finished, click The window closes. Chapter 5 Maintenance and Adjustment...
-
Page 101: Chapter 6 Appendix
Chapter 6 Appendix... -
Page 102: What To Do If
6-1 What to Do If The power supply light is blinking. printable materials and select a material again. P. 30, "Preparing Material to Print," p. 51, "Stopping Printing Do you turn ON the power as the head posi- Operations" tion is set? If the power is turned ON as the head position is set, Do you set a material without using the sup-... -
Page 103: The Printed Location Isn't Where Desired
6-1 What to Do If The printed location isn't where desired Is the material loaded at the correct loca- tion? If striking is being performed at a location other than Not bent or Bent or broken Bent or broken where the material is loaded, then reload the material. broken ... -
Page 104: The Image Is Uneven
6-1 What to Do If More Information about Overstriking METAZA Driver online help ([Material] tab) The various setting values determined with overstriking are effective only when performing overstriking under Is the marking pin worn? identical conditions. The same results are not necessarily Attractive printing may be impossible if the marking pin obtained when printing is performed with a new piece becomes worn. -
Page 105: Installation For Metaza Driver Is Impossible
6-1 What to Do If Installation for METAZA driver is Impossible 2. Go into the [Printers] folder. 3. Right-click the [Roland MPX-90] and open If installation quits partway through, or if the wizard the setting screen for METAZA driver. Click does not appear when you make the connection with [Printing Preferences]. -
Page 106: Uninstalling Metaza Driver
[Printer] folder opens. D:\Drivers\25D\WINVISTA 4. Click the model name’s icon you are using. If you're not using the CD-ROM, go to the Roland DG From the [Organize] menu, click [Delete]. The Corp. website (http://www.rolanddg.com/) and down- [User Account Control] appears, click [Con- load the driver for the machine you want to delete, tinue]. - Page 107 (*) When using the CD-ROM, specify the folder as shown below (assuming your CD-ROM drive is the D drive). D:\Drivers\25D\WIN2KXP If you're not using the CD-ROM, go to the Roland DG Corp. web-site (http://www.rolanddg.com/) and down- load the driver for the machine you want to delete, then specify the folder where you want to expand the downloaded file.
-
Page 108: When Moving The Machine
6-2 When Moving the Machine Attach the retaining materials to the machine. When moving the machine, be sure to attach the retaining materials. Moving the machine without attach- ing the retaining materials may result in damage to the machine. Procedure ... - Page 109 6-2 When Moving the Machine Hold down the Power/Movement but- ton for ten seconds or longer. The head moves as shown in the figure. Power / Move- ment button Loosen the knob Loosen Knob Tighten the knob as lifting the head.
- Page 110 6-2 When Moving the Machine Unplug the cables. Attach the retaining materi- als. Screws Retainer Screws Retainer Close the cover and repack the machine in the original package. Chapter 6 Appendix...
-
Page 111: Locations Of The Power Rating And Serial Number Labels
6-3 Locations of the Power Rating and Serial Number Labels Serial Number This is required when you seek mainte- nance, servicing, or support. Never peel off the label or let it get dirty. Power Rating Use an electrical outlet that meets the requirements for voltage, frequency, and amperage given here. -
Page 112: Specification
6-4 Specification Main Unit Specifications MPX-90 Printable material Gold, silver, copper, platinum, brass, aluminium, iron, stainless steel, etc. (Vickers hardness [HV] of the printing surface must be 200 or less.) Loadable material size Maximum 100 mm (width) x 200 mm (length) x 40 mm (thickness), or 200 mm (width) x 100 mm (length) x 40 mm (thickness) (3.9 in. -
Page 120: Software License Agreement
Please read this Agreement before unpacking the media. Software license agreement Roland DG Corporation (hereinafter referred to as the “Company”) shall grant you a non-transferable, nonexclusive right to use the Software supplied with this Agreement, on the condition that you agree to the following provi- sions.
Need help?
Do you have a question about the Metaza MPX-90 and is the answer not in the manual?
Questions and answers
On start up, i get a slow flashing light until the print head positions on the xy corner then the light flashes rapidly and everything freezes. The same happens when I attempt to power down and position the print head for storage. It seems the movement along the z axis triggers the shutdown.
The Roland Metaza MPX-90 may freeze and display a flashing light during startup if the head position is incorrectly set or if a material with a low surface height is used without the supplied table or center vise. This causes the machine to detect the material as out of printable range. Also, if the head position does not match the material's surface height or the head cap is not used and the head contacts the material, the light will blink. To fix this, turn off the power, stop printing, adjust the head position based on the material height, and tighten the knob securely.
This answer is automatically generated