Table of Contents
Advertisement
Quick Links
USER'S MANUAL
To ensure safe usage and full performance of this product, please be sure to read through this manual com-
pletely.
To ensure immediate access whenever needed, store this manual in a safe location.
Unauthorized copying, quotation, or translation of this manual, in whole or in part, without the written approval
of Roland DG Corp., is prohibited.
The contents of this document and the specifications of this product are subject to change without notice.
Roland DG Corp. assumes no responsibility for any loss or damage relating to this product, regardless of any
defect in this product or this manual. Such loss or damage, whether direct or indirect, includes, but is not lim-
ited to, that arising from the specifications or performance of this product, that due to failure of the product
to perform, and that arising from any article made using this product.
Advertisement
Table of Contents

Related Manuals for Roland Metaza MPX-90M


Summary of Contents for Roland Metaza MPX-90M
- Page 1 The contents of this document and the specifications of this product are subject to change without notice. Roland DG Corp. assumes no responsibility for any loss or damage relating to this product, regardless of any defect in this product or this manual. Such loss or damage, whether direct or indirect, includes, but is not lim- ited to, that arising from the specifications or performance of this product, that due to failure of the product to perform, and that arising from any article made using this product.
-
Page 2: For Usa
Caution - Use of controls or adjustments or performance of procedures other than those specified herein may result in radiation exposure. [Laser Specifications of This System] (Including Main Frame) Max. output: 46.5 μW, Pulse duration: 3.0 μs, Wavelength: 655 nm Roland DG Corp. has licensed the MMP technology from the TPL Group. -
Page 3: Table Of Contents
Contents Contents ......................1 To Ensure Safe Use ..................3 Important Notes on Handling and Use...............8 About Operation Manuals ...................9 Documentation Included with the Machine ................9 Chapter 1 Getting Started ................. 11 1-1 About the Machine ................12 Features ..............................12 Names of Components .........................12 Checking the Included Items .....................14 1-2 Installation .....................15 Installation Environment ......................15... - Page 4 System Requirements for USB Connection ................84 Windows® is a registered trademark or trademark of Microsoft® Corporation in the United States and/or other countries. Company names and product names are trademarks or registered trademarks of their respective holders. Copyright © 2011 Roland DG Corporation http://www.rolanddg.com...
-
Page 5: To Ensure Safe Use
To Ensure Safe Use Improper handling or operation of this machine may result in injury or damage to property. Points which must be observed to prevent such injury or damage are described as follows. About WARNING and CAUTION Notices Used for instructions intended to alert the user to the risk of death or severe injury WARNING should the unit be used improperly. - Page 6 To Ensure Safe Use Incorrect operation may cause injury WARNING CAUTION Keep children away from the machine. Install in a location that is level and The machine includes areas and compo- stable. nents that pose a hazard to children and Installation in an unsuitable location may may result in injury, blindness, choking, or cause an accident, including a fall or tip...
- Page 7 Continuing to use the machine may result in the ventilation ports may result in fire or fire, electrical shock, or injury. Contact your electrical shock. If anything gets inside, authorized Roland DG Corp. dealer. immediately disconnect the power cord and contact your authorized Roland DG Corp. dealer.
- Page 8 To Ensure Safe Use Important notes about the power cord, plug, and electrical outlet Never place any object on top Never allow to get wet. or subject to damage. Never bend or twist with undue force. Never make hot. Never pull with undue force. Dust may cause fire.
-
Page 9: Warning Label
To Ensure Safe Use The head area becomes hot WARNING Never touch the head immediately after printing has finished. Doing so may cause burns. Warning Label Warning label is affixed to make areas of danger immediately clear. The meaning of the label is as follows. -
Page 10: Important Notes On Handling And Use
Important Notes on Handling and Use This machine is a precision device. To ensure the full performance of this machine, be sure to observe the following important points. Failure to observe these may not only result in loss of performance, but may also cause malfunction or breakdown. This Machine is a Precision Device. -
Page 11: About Operation Manuals
Be sure to read it first. METAZA Driver Online Help Roland METAZAStudio Online Help Roland SFEdit2 Online Help You view this documentation on your computer screen. Installing the respective programs makes these avail- able for viewing. -
Page 13: Chapter 1 Getting Started
Chapter 1 Getting Started 1-1 About the Machine ..............12 Features ..................12 Names of Components ..............12 Checking the Included Items .............14 1-2 Installation ................15 Installation Environment ............15 Removing and storing the retainers...........15 Power Cord Connection ............16 1-3 Installing the Software ............17 System Requirements ...............17 The Software You Can Install and Set Up .........17 Installing the Driver and the Software........18... -
Page 14: About The Machine
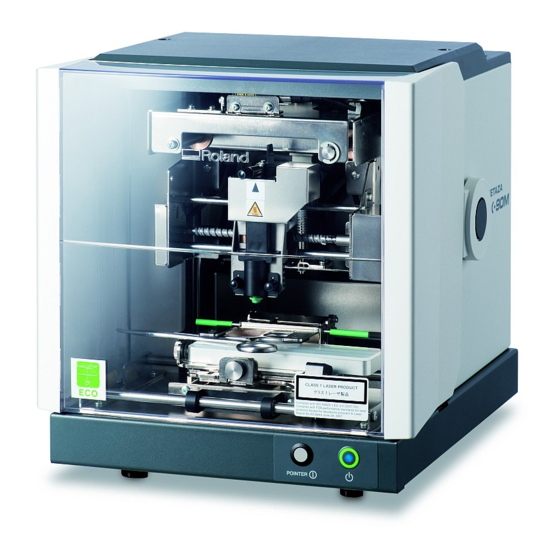
1-1 About the Machine Features This machine is a direct marking printer. It prints images by striking detailed points using a marking pin mounted in a head. You can print Data Matrix ECC200 and QR codes on small steel objects used for medical purposes. Even when printing different multiple codes in a row, you can continue printing without stopping to enter data for each instrument to be imprinted (Variable Printing). - Page 15 1-1 About the Machine Head (MPH-90) Printing is performed on material using with a marking pin. Diamond is attached to the tip of the marking pin. Since the head is a consumable part, replace it at an appropriate timing. P. 52, “Head Replacement” Marking pin Material Retainers Vise...
-
Page 16: Checking The Included Items
Head caps (flat bottom) (10) (One installed on the unit by default) Head (MPH-90) (1) Test-use printing material (4) Hexagonal wrench (1) (Brass-plated plates) (Installed on the unit by default) Roland Software Package User’s manual (1) CD-ROM (1) (This document) Chapter 1 Getting Started... -
Page 17: Installation
1-2 Installation Installation Environment Install in a quiet, stable location offering good operating conditions. An unsuitable location can cause accident, fire, faulty operation, or breakdown. CAUTION Install in a location that is level and stable. Installation in an unsuitable location may cause an accident, including a fall or tip over. -
Page 18: Power Cord Connection
1-2 Installation Power Cord Connection At this time, the connection to the computer must not be made yet. Failure to follow the correct procedure may make installation impossible. You make the connection to the computer when you install METAZA driver. ... -
Page 19: Installing The Software
* As this software is a 32-bit application, it runs on WOW64 (or Windows-On-Windows 64) under the 64-bit version of Windows. For the latest information, see the Roland DG Corp. website (http://www.rolanddg.com). The Software You Can Install and Set Up This is a program for creating printing data. -
Page 20: Installing The Driver And The Software
Before you start installation and setup, make sure the USB cable is NOT connected. Log on to Windows as “Administrators.” Insert the Roland Software Package CD-ROM into the computer. Windows Vista/7: When the automatic playback window appears, click [Run menu.exe]. The install menu appears automatically. ... - Page 21 Installation information for each software item will be displayed automatically as needed. When installation is complete, click in the installation menu. Remove the Roland Software Package CD-ROM from the computer. Switch on the power to the machine. P. 27, “STEP 1: Switching On the Power” ...
- Page 22 Select [Install the software automati- cally], and then click [Next]. Click [Finish]. If this screen appears during installation Click [Continue Anyway]. Remove the Roland Software Pack- age CD-ROM from the computer, click [Back], and start over from the previous screen. Chapter 1 Getting Started...
- Page 23 From [start] menu ( ), click [Devices and Printers] (or [Printers and Faxes]). Right-click the [Roland MPX-90M] icon, and then click [Printing Preferences]. The METAZA driver's Printing Preferences screen opens. Printing Preferences dialog box Chapter 1 Getting Started...
- Page 24 1-3 Installing the Software How to Open the METAZA Driver Help Open the METAZA driver's Printing Preferences screen, and then click [Help]. P. 21 "How to Open the METAZA Driver's Printing Preferences Screen" How to Start The Software ), click [All Programs] → [software you want to use] → [software you want to use]. From start menu ( Chapter 1 Getting Started...
- Page 25 1-3 Installing the Software How to display help for software Start the software, and then click [Help] → [Table of Contents] from the menu. P. 22, "How to Start The Software" Chapter 1 Getting Started...
-
Page 27: Chapter 2 Printing
Chapter 2 Printing 2-1 Preparing for Printing .............26 Getting Started: Checking Print Workflow .........26 STEP 1: Switching On the Power ..........27 STEP 2: Specifying Output Destination for METAZAStudio ..28 STEP 3: Preparing Instrument to be Imprinted ......28 STEP 4: Preparing Print Data ............30 2-2 Starting Printing ..............35 STEP 1: Loading the Instrument to be Imprinted ......35 STEP 2: Making Prints ..............43... -
Page 28: Preparing For Printing
2-1 Preparing for Printing Getting Started: Checking Print Workflow Preparing the MPX-90M machine Switch on the power of the machine and select it as the output destination for the computer. P. 27, "STEP 1: Switching On the Power," p. 28, "STEP 2: Specifying Output Destination for METAZAStudio" Preparing an instrument to be imprinted Check the several conditions for thickness, hardness, and the like that an instrument to be imprinted needs to meet. -
Page 29: Step 1: Switching On The Power
2-1 Preparing for Printing STEP 1: Switching On the Power Procedure Open the cover and loosen the head's stopper. Stopper Tighten Press the Power/Movement button. The Head moves to the left rear, and the lamp of the Power/Movement button is turned ON. This opera- tion is called initialization. -
Page 30: Step 2: Specifying Output Destination For Metazastudio
2-1 Preparing for Printing STEP 2: Specifying Output Destination for METAZAStudio Procedure Start METAZAStudio. P. 22, "How to Start The Software" Click [File] → [Set up the printer]. The [Print Setup] dialog box appears. Select [MPX-90M]. Click [OK]. - Page 31 2-1 Preparing for Printing Hardness of surface to print Hardness of surface to print Vickers hardness (HV) of 200 or less Materials which may crack or split by printing (such as glass, stone, precious stones, china, and porcelain) cannot be printed even if hardness is within the preceding range. Attempting to print such materials may damage the machine.
-
Page 32: Step 4: Preparing Print Data
2-1 Preparing for Printing STEP 4: Preparing Print Data The method of preparing print data for [Variable Printing] is explained below. Variable Printing needs a CSV file. You can create a CSV file using database files. For information on creating a CSV file, contact the admin- istrator of databases. - Page 33 2-1 Preparing for Printing Click [OK]. In the case of [2D Symbol] Click and then In the case of [Text] Click and then Drag the mouse (move while holding down the left button of the mouse) diagonally downward on the work area* in METAZAStudio.
- Page 34 2-1 Preparing for Printing Click [Object] > [Move to Center]. The center of the Variable field moves to the center of the work area. This work is important, being related to the actual printing position. In the machine, the center in printing operation is defined as the reference point in printing opera- tion.
- Page 35 2-1 Preparing for Printing Make the settings for properties including [Size] of the Variable field. The setting items you can specify are different between [2D Symbol] and [Text]. For details on each setting, refer to the help for METAZAStudio ([Commands]-[Object] menu-[Properties]-[Properties] dialog. ...
- Page 36 2-1 Preparing for Printing Specify a CSV file and click [Open]. The specified CSV file is imported into METAZAStu- dio. Drag and drop the column title of the imported CSV file into the [Variable Field] [2D Symbol] or [Text] is displayed in the [Variable Field]. You can display each symbol in turn by clicking .
-
Page 37: Starting Printing
2-2 Starting Printing STEP 1: Loading the Instrument to be Imprinted Decide whether you use the vise or table as a retainer depending on the size or shape of the instrument to be imprinted. The criteria used to select the vise or table are as follows: ... - Page 38 2-2 Starting Printing Attach a head cap to the tip of head. Mount it as lightly holding the head as shown in Tighten Hold the head. the figure. The head cap is attached correctly when its tab clicks. Head Head cap About the shape of head cap There are two different types of head caps with a different shape.
- Page 39 2-2 Starting Printing Load the instrument to be imprinted on the vise. When using the table, go to P. 40. Push the rear side of the vise (where the handle is placed) against the main unit. Align the sides of the vise with the alignment marks and lower the front side of the vise.
- Page 40 2-2 Starting Printing Raise the vise binder. When raising or lowering the binder, be sure to hold its handle. Handle Binder Place the instrument to be imprinted on the table of the vise and lower the binder. Follow the instructions below and determine the position of the instrument. ...
- Page 41 2-2 Starting Printing Press the laser pointer button. The laser pointer is irradiated. If the machine is idle for 5 minutes, the laser pointer is automatically turned off. Laser pointer button Raise the lock lever. Move the table so that the laser pointer points at the center of the area to be im- printed.
- Page 42 2-2 Starting Printing Load the instrument to be imprinted on the table. When using the vise, go to P. 37. Set the table. Place the table by aligning it with the frame on the unit. When the tabs on the bottom of the table fit into the holes on the unit, this completes setting of the table.
- Page 43 2-2 Starting Printing Load the instrument to be imprinted on the adhesive sheet. Move the table so that laser pointer points at the center of the area to be imprinted. Gently press the instrument to be imprinted in a way that you affix it to the adhesive sheet. If the instrument protrudes from the table and the instrument tilts, place a support in order to keep the instrument horizontal.
- Page 44 2-2 Starting Printing Fix the height of the head. (Only when no head cap is used) Press the Power/Movement button. The head moves and stops at the position where the tip of the head cap rides on the surface of the instrument to be imprinted.
-
Page 45: Step 2: Making Prints
2-2 Starting Printing Press the Power/Movement button. The head moves to the left rear. Power/Movement button Detach the head cap. Support the head Head cap Putting your fingers on the projecting rim of the head cap eases removal. STEP 2: Making Prints After you complete "Preparing for Printing"... - Page 46 Set and confirm the preferences below. P r i n t e r Roland MPX-90M name P r i n t i n g To restrict records (individual data included in a set of data used in Variable Printing) range to be printed, specify the record (page) that you wish to print.
-
Page 47: Step 3: Finishing Printing (Switching Off The Power)
* Depending on the type of your scanner, it may be unable to read the 2D symbol imprinted by the machine, because it is unsuitable for the 2D symbol. For information on scanners suitable for the machine, consult your authorized Roland DG Corp. dealer or us. When you wish to print only the record being displayed: Click The [Print] dialog box appears. -
Page 48: Finishing And Stopping Printing Operations
Windows XP From [start] menu ( ), click [Control Panel] → [Printers and Other Hardware] → [Printers and Faxes]. Double-click the [Roland MPX-90M] icon. At the [Printer] menu, click [Cancel All Docu- ments] (or [Purge Print Documents]). ... -
Page 49: Chapter 3 Maintenance And Adjustment
Chapter 3 Maintenance and Adjust- ment 3-1 Maintenance and Adjustment ..........48 Points to Note on Daily Care .............48 Cleaning the Body/Vise/Table ............48 Cleaning the Adhesive Sheet ............48 Cleaning of the Head Cap ............48 3-2 Adjustment ................49 Adjusting the Striking Force of the Pin ........49 Adjustment of Origin Point ............50 3-3 The Replacement of the Consumable Parts ......51 The Replacement Cycle for the Head Cap ........51... -
Page 50: Maintenance And Adjustment
3-1 Maintenance and Adjustment Points to Note on Daily Care WARNING Never use gasoline, alcohol, thinner, or any other flammable material. Doing so may cause fire. CAUTION Never touch the heads immediately after printing has finished. Doing so may cause burns. ... -
Page 51: Adjustment
3-2 Adjustment Adjusting the Striking Force of the Pin You can adjust the striking force of the pin by using MPX-90M Head Manager. Pin adjustment involves striking the pattern shown in the figure. Prepare a piece of test-use printing material (brass) or other material measur- ing about 60 mm (2.3 in.) by 60 mm (2.3 in.). -
Page 52: Adjustment Of Origin Point
3-2 Adjustment Adjustment of Origin Point If printed text or image is placed at a position that does not coincide with the desired position, the origin point of the machine is displaced. Adjust the origin point using the method described below. Procedure ... -
Page 53: The Replacement Of The Consumable Parts
3-3 The Replacement of the Consumable Parts The Replacement Cycle for the Head Cap When the head cap becomes worn away as shown in the figure below, it is time for replacement. Replace the head cap with a new one appropriately. The degree of wear may vary according to printing conditions. -
Page 54: Head Replacement
The marking pin is worn out. A General Guide of Head Life About 4,000 plates can be printed under the following conditions. Material used : MD-NI (Roland nickel-plated plate) Printing area : 30 mm (1.1 in.) X 23 mm (0.9 in.) Print Mode : Photo... - Page 55 You need to prepare a test print material (brass), which is supplied with a replacement head (MPH-90), or a material equal to or larger than 60 mm (2.3 in.) x 60 mm (2.3 in.). Note : A replacement head is sold separately. Consult your authorized Roland DG Corp. dealer. Adjustment pattern Important ...
- Page 56 3-3 The Replacement of the Consumable Parts Switch on the power to the machine. P. 27, "STEP1: Switching On the Power" Click [Replace Head]. Follow the on-screen instructions to perform adjust- ment for the pin. Set a material to be imprinted with a test pattern using the adhesive sheet and table.
-
Page 57: Chapter 4 Appendix
Chapter 4 Appendix 4-1 More Advanced Operations ...........56 Directly Creating 2D Symbol .............56 Registering a Composition and Adjusting the Striking Force..59 Changing Basic Settings of METAZA Driver ......60 Creating and Editing Line Text ...........61 Other operations available with METAZAStuido ......65 4-2 What to Do If ................66 The [Power/Movement] button is blinking. -
Page 58: More Advanced Operations
4-1 More Advanced Operations Directly Creating 2D Symbol You can create 2D symbol not only from a CSV file but also directly from METAZAStudio. Based on a 2D symbol you create, you can edit the code using METAZAStudio and create another 2D sym- bol. - Page 59 4-1 More Advanced Operations Drag the mouse (move while holding down the left button of the mouse) diagonally downward on the work area* in METAZAStudio. The drawing area for a 2D symbol is created and the [Code Input] dialog box appears. * Work area = black area on the screen ...
- Page 60 4-1 More Advanced Operations Click The [Properties] dialog box appears. If the drawing area for the 2D symbol is not selected, you cannot click . If you cannot click , click and then click (select) the drawing area for the 2D symbol. ...
-
Page 61: Registering A Composition And Adjusting The Striking Force
4-1 More Advanced Operations Registering a Composition and Adjusting the Striking Force With the machine, performing printing using a striking force appropriate to the material of the instrument to be imprinted can obtain printing results of even higher quality. The METAZA driver for the machine has premade settings for a number of materials and their appropriate striking forces, but you can also register materials and their optimal striking forces yourself. -
Page 62: Changing Basic Settings Of Metaza Driver
4-1 More Advanced Operations Enter a name for the composition you’re registering. Enter [Speed/Impact] The printing results vary according to the hardness of the material. Adjust to match the material. METAZA Driver online help ("[Correction] tab" > "[Details] dialog box") You can set the minimum value of print impact for an image. -
Page 63: Creating And Editing Line Text
4-1 More Advanced Operations Right-click the [Roland MPX-90M] icon, Click [Printing Preferences]. The setting window for METAZA Driver appears. Change the settings to suit your needs. After completing the setting, click [OK]. Description METAZA Driver allows you to make the basic settings for a variety of items including the size of material and the unit used for display. - Page 64 4-1 More Advanced Operations Creating and saving stroke character fonts Procedure Start SFEdit2. P.23, “How to Display Help for Software“ Click [File] → [New…]. [Select Base Font] dialog box appears. Select a font which is used as a base of a stroke character font to be created.
- Page 65 4-1 More Advanced Operations Click Using a stroke character font in METAZAStudio Make sure that either of the following operations are completed in advance. Create a stroke character font before SFEdit2 is installed. The window shown in the figure appears when you install it. If you did not create a stroke character font at the time of installation, reinstall SFEdit2 and create a stroke character font.
-
Page 66: Editing Stroke Character
4-1 More Advanced Operations Clikck [Format] tab. Select [RSF]. The option of [Font] becomes Stroke character only. Select Stroke character. Click [OK]. Entered characters are changed into stroke characters. The stroke character font selected in is used for the stroke characters. Editing Stroke character ... -
Page 67: Other Operations Available With Metazastuido
4-1 More Advanced Operations From Character List, click stroke character you want to edit. The stroke character you want to edit is displayed in the virtual body and the stroke character becomes editable. Change the position and shape of the stroke character. ... -
Page 68: What To Do If
4-2 What to Do If The [Power/Movement] button is blinking. Do you switch on the power as the height of the head position is fixed? As the power is switched on while the height of the head position is fixed, the initial operation is stopped. If the machine continues the initial operation while the instrument to be imprinted is loaded, the instrument's surface may be scratched and/or the marking pin may be damaged. -
Page 69: The Machine Doesn't Run Even When Printing Data Is Sent
4-2 What to Do If Do you set an instrument to be imprinted without using the supplied vise or the table? Switch off the power by holding down the [Power/Movement] button for one second or longer. If you set an instrument of which surface height is low without using the supplied table or the vise, the machine considers that the surface height of the instrument does not meet the requirement for carrying out printing operation. -
Page 70: Using Metazastudio
4-2 What to Do If Striking is performed, but nothing is printed. Does the instrument to be imprinted meet the requirements for instruments that can be imprinted? Prepare and use an instrument that can be imprinted. P. 28, "STEP 3: Preparing Instrument to be Imprinted" If you’re not using a head cap, does the head position match the surface height of the instrument to be imprinted? Check if the head position matches the surface height of the instrument in the case that you do not use the... -
Page 71: The Printed Image Is Unattractive
4-2 What to Do If The printed image is unattractive. Are the settings for the material correct? Choose the material of the loaded instrument in METAZAStudio. Even if the composition of the material is the same, the hardness of the printed surface may vary greatly depending on the casting method, the composition of impurities, the presence of plating, and so on. -
Page 72: The Image Is Always Faint At The Same Location
4-2 What to Do If Is the image darkness uneven? Performing overstriking may improve the image quality. With the instrument left loaded, try performing overstriking with different settings for [Gamma], [Brightness], or [Contrast] in the preview window. METAZAStudio online help>“Commands” >[File] menu>Print Preview Was bidirectional printing performed? Bidirectional printing can shorten the printing time, but the image quality may suffer. - Page 73 4-2 What to Do If Right-click the "Roland MPX-90M" icon, and then click Printing Preferences. The METAZA driver's Printing Preferences screen opens. Click [Test Print] in the [Option] tab. The test pattern is printed on the material. ...
-
Page 74: To Install Metaza Driver Separately
Log on to Windows as an administrator or as a member of the Administrators group. Insert the Roland Software Package CD-ROM into the computer. (Windows Vista/7 only: When the automatic playback window appears, click [Run menu.exe].) The setup menu appears automatically. - Page 75 4-2 What to Do If Click [Install] of "METAZA Driver". Select [Install], select [Roland MPX-90M] as the model name, select [USB] as the port, and then click [Start]." Driver installation starts. Follow the on-screen in- structions and continue with the installation.
- Page 76 4-2 What to Do If When the screen shown here is displayed, click [finish]. Click of the setup menu. Remove the CD-ROM from the CD-ROM drive. Connect the machine and the computer with a USB cable. Please use the included USB cable.
- Page 77 4-2 What to Do If Click [Finish]. If the following screen is displayed during installation Click [Continue Anyway]. Eject and remove the CD-ROM, and then click [Back] and repeat from the last screen. Chapter 4 Appendix...
-
Page 78: To Install Software Separately
Log on to Windows as an administrator or as a member of the Administrators group. Insert the Roland Software Package CD-ROM into the computer. (Windows Vista/7 only: When the automatic playback window appears, click [Run menu.exe].) The setup menu appears automatically. -
Page 79: The Metaza Driver Cannot Be Installed
4-2 What to Do If The METAZA Driver Cannot Be Installed If the driver installation stops partway through or if the wizard does not appear when you use a USB cable to connect the PC to the machine, follow the appropriate procedure shown below. Windows 7 1. -
Page 80: Uninstalling The Metaza Driver
D:\Drivers\WIN7X64 (64-bit version) D:\Drivers\WIN7X86 (32-bit version) If you're not using the CD-ROM, go to the Roland DG Corp. website (http://www.rolanddg.com/), and download the driver for the machine you want to delete. Then, specify the folder where you extracted the downloaded file to. - Page 81 D:\Drivers\WINVISTAX64 (64-bit version) D:\Drivers\WINVISTAX86 (32-bit version) If you're not using the CD-ROM, go to the Roland DG Corp. website (http://www.rolanddg.com/), and download the driver for the machine you want to delete. Then, specify the folder where you extracted the downloaded file to.
-
Page 82: When Moving The Machine
4-3 When Moving the Machine Attaching retainers When moving the machine, be sure to attach the retaining materials. Moving the machine without attaching the retaining materials may result in damage to the machine. Procedure Switching on the power. P. 27, "STEP 1: Switching On the Power" ... - Page 83 4-3 When Moving the Machine Fix the head at the highest position. After loosening the knob, lift the head to the highest position and tighten the knob. Loosen Tighten The center of the knob must be posi- tioned immediately above the top of the triangle.
-
Page 84: Main Unit Specifications
4-4 Main Unit Specifications Printable Area Vise Binder Unprintable area Printable area Unprintable area Printable area * The 10 mm area from the binder of the vice is unprintable because the head comes into contact with the binder. Table Printable Area Top view of the table 50 mm ×... -
Page 85: Location Of Power Rating And Serial Number Label
4-4 Main Unit Specifications Location of Power Rating and Serial Number Label Rear Serial number This is required when you seek maintenance or support. Never remove the label. Power rating Use an electrical outlet that meets the requirements for voltage, frequency, and amperage given here. -
Page 86: Specifications
(H)) Weight 11 kg (24.2 lb.) Accessories AC adapter, power cord, test-use printing material, vise, USB cable, Roland Software Pacakge CD-ROM, user's manual, etc. System Requirements for USB Connection Computer A model preinstalled with the 32- or 64-bit edition of Windows XP, Windows Vista, or... - Page 92 R1-111229...
Need help?
Do you have a question about the Metaza MPX-90M and is the answer not in the manual?
Questions and answers