Table of Contents
Advertisement
Quick Links
User's Manual
Thank you very much for purchasing this product.
To ensure correct and safe usage with a full understanding of this product's performance, please be
sure to read through this manual completely and store it in a safe location.
Unauthorized copying or transferral, in whole or in part, of this manual is prohibited.
The contents of this operation manual and the specifications of this product are subject to change
without notice.
The operation manual and the product have been prepared and tested as much as possible. If you
find any misprint or error, please inform us.
Roland DG Corp. assumes no responsibility for any direct or indirect loss or damage which may
occur through use of this product, regardless of any failure to perform on the part of this product.
Roland DG Corp. assumes no responsibility for any direct or indirect loss or damage which may
occur with respect to any article made using this product.
Advertisement
Table of Contents

Related Manuals for Roland METAZA MPX-70


Summary of Contents for Roland METAZA MPX-70
- Page 1 Roland DG Corp. assumes no responsibility for any direct or indirect loss or damage which may occur through use of this product, regardless of any failure to perform on the part of this product.
-
Page 2: For Canada
AVIS Cet appareil numérique de la classe A respecte toutes les exigences du Règlement sur le matériel brouilleur du Canada. ROLAND DG CORPORATION 1-6-4 Shinmiyakoda, Hamamatsu-shi, Shizuoka-ken, JAPAN 431-2103 MODEL NAME : See the MODEL given on the rating plate. -
Page 3: Table Of Contents
Contents To Ensure Safe Use ........................3 Important Notes on Handling and Use ........................7 Chapter 1 Getting Started ........................9 1-1 About the Machine .............................. 10 Features ............................10 Names and Functions ........................11 1-2 About the Documentation..........................13 Included Documentation ...................... - Page 4 6-5 Main Unit Specifications ............................. 80 ® ® Windows is a registered trademark or trademark of Microsoft Corporation in the United States and/or other countries. Company names and product names are trademarks or registered trademarks of their respective holders. http://www.rolanddg.com/ Copyright© 2005 Roland DG Corporation...
-
Page 5: To Ensure Safe Use
To Ensure Safe Use Improper handling or operation of this machine may result in injury or damage to property. Points which must be observed to prevent such injury or damage are described as follows. About WARNING and CAUTION Notices Used for instructions intended to alert the user to the risk of death or severe WARNING injury should the unit be used improperly. - Page 6 Failure to do so may result in fire, electrical any other flammable material near the shock, or electrocution. Immediately disconnect machine, or use an aerosol spray close to the power cord and contact your Roland DG the machine. Corp. service center. Doing so may cause fire.
- Page 7 To Ensure Safe Use The head area becomes hot WARNING Never touch the head immediately after printing has finished. Doing so may cause burns.
-
Page 8: Warning Label
To Ensure Safe Use Warning Label Warning label is affixed to make areas of danger immediately clear. The meaning of the label is as follows. Be sure to heed its warnings. Also, never remove the label or allow it to become obscured. Caution: High Temperature Never touch immediately after printing. -
Page 9: Important Notes On Handling And Use
Important Notes on Handling and Use This machine is a precision device. To ensure the full performance of this machine, be sure to observe the following important points. Failure to observe these may not only result in loss of performance, but may also cause malfunction or breakdown. This machine is a precision device. -
Page 11: Chapter 1 Getting Started
Chapter 1 Getting Started... -
Page 12: About The Machine
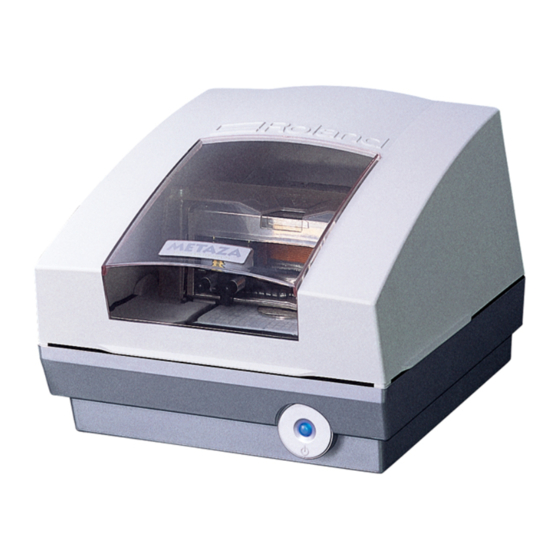
1-1 About the Machine Features This machine is a metal printer. It prints images by striking detailed points using a marking pin mounted in a head. Chapter 1 Getting Started... -
Page 13: Names And Functions
1-1 About the Machine Names and Functions Main Unit Cover Head unit This moves up and down, bringing the tip of the head (the marking pin) in line with the surface of the material. Head Knob This secures the head unit in place. Brush Table Adhesive sheet... - Page 14 1-1 About the Machine Head Marking pins Nine pins are arranged in the head. Printing is performed using one of these pins. Chapter 1 Getting Started...
-
Page 15: About The Documentation
This is the operation manual for the Dr. METAZA2 program included with the machine. Installing and setting up the software enables you to view the documentation. To view the online help, follow the procedure below. From the [Start] menu, click [All Programs] (or [Programs]). Click [Roland Dr. METAZA2], then click [Dr. METAZA2 Help]. Chapter 1 Getting Started... -
Page 16: Checking The Included Items
1-3 Checking the Included Items The following items are included with the machine. Make sure they are all present and accounted for. AC adapter Power cord Test-use printing material USB cable CD-ROM User's manual (This document) Chapter 1 Getting Started... -
Page 17: Chapter 2 Getting Ready To Print
Chapter 2 Getting Ready to Print... -
Page 18: Installation
2-1 Installation Deciding On an Installation Site Install the machine on a stable base in a stable location. Also, use the machine in a location having the correct operating environment (temperature of 10 to 30 C and relative humidity of 35 to 80% [with no condensation]). Use in an unsuitable location may result in malfunction or breakdown. -
Page 19: Removing The Protective Material
2-1 Installation Removing the Protective Material Protective material is attached to protect the machine from vibration and the like during transportation. Remove this once the machine is installed. Be sure to remove the protective material. Any that remains may cause breakdown when the power is switched The protective material is required when moving the machine. -
Page 20: Connecting The Cables
2-2 Connecting the Cables Connecting the Power Cord Do not use with any electrical power supply that does not meet the ratings dis- WARNING played on the AC adapter. Use with any other power supply may lead to fire or electrocution. AC adapter Power-cord connector Power cord... -
Page 21: Connecting To The Computer
2-2 Connecting the Cables Connecting to the Computer You make the connection to the computer using the included USB cable. Be sure to make the connection between the machine to the computer during the course of installing the driver. Driver installation may fail and the machine may become unusable if you connect a USB cable before starting install- ing the driver. -
Page 22: Installing And Setting Up The Software
2-3 Installing and Setting Up the Software Overview of the Included Software The included CD-ROM contains the following software. Dr. METAZA2 This is a program for printing images on the surface of printing material using this machine. It enables you import and crop images to print, and perform editing to add text, boxes, and the like. -
Page 23: Installing The Driver
2-3 Installing and Setting Up the Software Installing the Driver Never make the connection to the computer before installing. Keep the machine and the computer unconnected until you carry out this installation operation. Failure to follow the correct procedure may make installation impossible. p 75 "What to Do If Installation Is Impossible"... -
Page 24: Installing Dr.metaza2
2-3 Installing and Setting Up the Software Installing Dr.METAZA2 Procedure Display the setup menu. Click [Dr.METAZA2 Install]. Thereafter, follow the instructions in the messages to complete installation and setup. Installing MPX-70 Head Manager Procedure Display the setup menu. Click [MPX-70 Head Manager Install]. Thereafter, follow the instructions in the messages to complete installation and setup. -
Page 25: Dr. Metaza2 Settings
Procedure Click [Start], then click [All Programs] (or [Pro- grams]). Click [Roland Dr. METAZA2], then click [Dr. METAZA2]. Go to the [File] menu and click [Print Setup]. The [Print Setup] dialog box appears. Click the arrow shown in the figure, then select [Roland MPX-70]. -
Page 27: Chapter 3 Performing Printing
Chapter 3 Performing Printing... -
Page 28: Switching The Power On And Off
3-1 Switching the Power On and Off Switching the Power On and Off Before You Switch On the Power Before you switch on the power, be sure to loosen the knob and raise the head. Otherwise the head may scrape and damage the adhesive sheet. Switching On the Power Open the cover. -
Page 29: Starting Dr. Metaza2
3-2 Starting Dr. METAZA2 Starting Dr. METAZA2 Click [Start], then click [All Programs] (or [Pro- grams]). Click [Roland Dr. METAZA2], then click [Dr. METAZA2]. After the opening screen, the screen for Dr. METAZA2 appears. Names and Functions of Dr. METAZA2 Screen Items Menu Bar Runs the various commands for Dr.METAZA2. -
Page 30: Getting Ready To Print
3-3 Getting Ready to Print The Printing Area The machine's printing area is as follows. Expanded printing area Top view of the table (80 x 80 mm (3-1/8 x 3-1/8 in.)) Printing area Center line (50 x 50 mm (1-15/16 x 1-15/16 in.)) Center 50 mm 80 mm... -
Page 31: Preparing The Image
3-3 Getting Ready to Print Hardness of surface Vickers hardness (HV) of 200 or less to print * Note that materials which may crack or split by printing (such as glass, stone, precious stones, china, and porcelain) cannot be printed even if hardness is within the preceding range. Attempting to print such materials may damage the machine. -
Page 32: Loading Material
3-4 Loading Material Mounting Material on the Table Procedure Open the cover. Loosen the knob. Loosen just enough for the head unit to rise. Press the Power/Movement button to move the table to the front of the machine. Cover Knob Head unit Power/Movement button Place the material on the table and press down on it gently... - Page 33 3-4 Loading Material Press the Power/Movement button. The table moves to the center. Power/Movement button Press the location shown in the figure to lower the head unit slowly to where it touches the material. Keeping the area shown in the figure clamped, turn the knob to secure the head unit in place.
-
Page 34: Creating Printing Data
3-5 Creating Printing Data This section describes how to create data, using printing of a plate like the one shown below as an example. 1 mm(0.039in.) (Margin) 27 mm (1-1/16 in) 24 mm (15/16 in) Step 1 : Decide on the Size and Shape of the Material Important Notes on Printing Be sure to ensure a margin of 1 mm or more at each edge of the material. -
Page 35: Step 2 : Import The Image
3-5 Creating Printing Data Step 2 : Import the Image Here you import the image to print. Prepare an image file to import. Procedure Go to the [File] menu and click [Import]. The [Open] dialog box appears. At [Look in], select the location of the file. At [Files of type], select either [Bitmap file] or [JPEG file]. -
Page 36: Step 3 : Save The File
3-5 Creating Printing Data Step 3 : Save the File Save the printing data in a file. Procedure Go to the [File] menu and click [Save As]. The [Save As] dialog box appears. For [Save in], specify where to save the file. Type in a file name. -
Page 37: Starting Printing
3-6 Starting Printing Starting Printing Procedure Go to the [File] menu and click [Print]. The [Print] dialog box appears. Make sure [Roland MPX-70] is chosen as the printer name. Click [Properties]. Click the [Image Correction] tab. Select [Material]. Select either the composition or the product code of the material. - Page 38 3-6 Starting Printing Click [OK]. The printing data is sent to the machine and printing starts. After printing has finished, open the cover. Loosen the knob. Cover Detach the material. If the material is difficult to detach, inserting a thin, flat object (such as a piece of stiff paper or cardboard) between the adhesive sheet and the material may make it easier to dislodge.
-
Page 39: Stopping Printing Operations
Windows 98 SE/Me/2000 Click [Start]. Click [Settings], then click [Printers]. Double-click the [Roland MPX-70] icon. At the [Printers] menu, click [Cancel All Documents] (or [Purge Print Documents]). If you're using Windows XP, then click [Yes]. Make sure the printing data has disappeared from the window and operation of the machine has stopped. -
Page 41: Chapter 4 More Advanced Operations
Chapter 4 More Advanced Operations... -
Page 42: Tips And Tricks For Image Layout
4-1 Tips and Tricks for Image Layout Tips and Tricks for Image Layout Lay out the image and create data like the following. Original image Trim away everything except the area to print. Import the image. Step 1 : Cut Out the Required Image p 33 "Step 2 : Import the Image"... -
Page 43: Step 1 : Cut Out The Required Image
4-1 Tips and Tricks for Image Layout Step 1 : Cut Out the Required Image Trim the original image to leave just the required portion. Click Click the image. At the [Object] menu, click [Trimming]. The [Trimming Picture] dialog box appears. Click [Free]. -
Page 44: Step 2 : Adjust The Location And Size Of The Image
4-1 Tips and Tricks for Image Layout Step 2 : Adjust the Location and Size of the Image Adjust the layout and the size of the image. Keep adjusting the location and size until you achieve the layout you want. Adjusting the Location Click , then click the image. -
Page 45: Step 3 : Enclose The Image In A Circle
4-1 Tips and Tricks for Image Layout Step 3 : Enclose the Image in a Circle Use a frame to enclose the image in a circle. At the [Object] menu, click [Frame]. The [Frame] dialog box appears. For the frame, select [03]. Click [Insert]. -
Page 46: Tips And Tricks For Text Layout
4-2 Tips and Tricks for Text Layout Tips and Tricks for Text Layout Arrange text and create data like that shown in the figure. Dr. METAZA2 screen Completed view 1. Lay out the text horizontally. p 45 "1. Arranging Text Horizontally" Dr. -
Page 47: Arranging Text Horizontally
4-2 Tips and Tricks for Text Layout 1. Arranging Text Horizontally Type in the text to arrange horizontally in the image. Procedure Go to [Object] menu, click [Text]. Select [Horizontal Text]. Click the location where you want to insert text. The [Text] dialog box appears. - Page 48 4-2 Tips and Tricks for Text Layout Adjusting the Layout and Size of Text Changing the Size Dragging the pointers ( ) of the text box changes the size. Changing the Layout Dragging the center of the text moves it up, down, or to the left or right. You can rotate the text by dragging it at a location to either the left or right of its center.
- Page 49 4-2 Tips and Tricks for Text Layout Changing the Font Style Procedure Double-click the text string. The [Text] dialog box appears. Click [Change]. The [Font] dialog box appears. Make the selections for the font, style, and size. Click [OK]. The [Text] dialog box appears again. Click [OK].
-
Page 50: Arranging In The Shape Of A Fan
4-2 Tips and Tricks for Text Layout 2. Arranging in the Shape of a Fan Procedure Go to [Object] menu, click [Text]. Select [Fan Text]. Click the location where you want to insert text. The [Fan Text] dialog box appears. Line up the pointer with the location where you want to insert. - Page 51 4-2 Tips and Tricks for Text Layout Adjusting the Layout and Size of Text Changing the Size Dragging the pointers ( ) of the text box changes the size. Changing the Layout Dragging the support point moves up, down, or to the left or right. Dragging inside the text box rotates the support point around the reference.
- Page 52 4-2 Tips and Tricks for Text Layout Changing the Font Style Procedure Double-click the text string. The [Fan Text] dialog box appears. Click [Change]. The [Font] dialog box appears. Make the selections for the font, style, and size. Click [OK]. The [Fan Text] dialog box appears again.
-
Page 53: Adjusting Brightness And Contrast
4-3 Adjusting Brightness and Contrast Checking the Finished Results in the Preview Window At the preview window, you can adjust the brightness, contrast, and gamma correction. An image with clearly defined light and dark areas produces attractive printed results. Adjust to match the image. Procedure Go to the [File] menu and click [Print Preview]. -
Page 54: Tips And Tricks For Image Adjustment
4-3 Adjusting Brightness and Contrast Tips and Tricks for Image Adjustment What You Can Do in the Preview Window Brightness This adjusts the overall brightness. Making the value too large can destroy the balance, so it may be a good idea to adjust it to the absolute minimum necessary. -
Page 55: Printing Materials Of A Wide Variety Of Shapes
4-4 Printing Materials of a Wide Variety of Shapes About the Size and Shape of the Printing Area The size of the image to print must always fit within the size of the material. Printing an image that is larger than the material may cause the marking pin to strike the edge of the material and break. -
Page 56: Adding A Material Shape
4-4 Printing Materials of a Wide Variety of Shapes Adding a Material Shape When you want to use material of a shape other than a circle (ellipse), quadrilateral, or diamond, add the shape. Creating a Shape Using a Third-party Program You can use a commercial paint-type program to create a shape, then register it with Dr. -
Page 57: Other Handy Features
4-5 Other Handy Features A Wide Variety of Operations You Can Accomplish with Dr. METAZA2 Dr. METAZA2 offers a wide variety of features for editing imported images and creating printing data. For more information on how to operate Dr. METAZA2, refer to the online help for the program. p 13 "Included Documentation"... - Page 58 4-5 Other Handy Features Inverting Gradations This inverts the gradations of all images displayed in Dr. METAZA2. You use this when you want to insert a logo or text and print it with black and white reversed. How to display the editing screen : At the [Edit] menu, click [Invert]. Adding Handwritten Text and Hand-drawn Images You can use the pen tool to add hand-drawn figures and handwritten text to an image.
-
Page 59: Items You Can Set Using The Driver
Click [Printers and Other Hardware], then click [Printers and Faxes]. Windows 98 SE/Me/2000 Click [Start]. Click [Settings], then click [Printers]. Right-click [Roland MPX-70]. If you're using Windows XP/2000, click [Printing Preferences]. If you're using Windows 98SE/Me, click [Properties]. The setting window appears. - Page 60 4-6 Items You Can Set Using the Driver Material Tab Enter the size of the printing area. This corrects misalignment of the center point. p 70 "Adjusting the Location of the Machine's Origin Point" This chooses the units of measurement for the width and length.
-
Page 61: Option Tab
4-6 Items You Can Set Using the Driver Option Tab This adjusts the tilt of the table. Enter the values taken from the results of printing the test pattern. This prints the test pattern for adjusting tilt using the machine. p 75 "The image is always faint at the same location."... -
Page 63: Chapter 5 Maintenance And Adjustment
Chapter 5 Maintenance and Adjustment... -
Page 64: Daily Care
5-1 Daily Care Daily Care Never use gasoline, alcohol, thinner, or any other flammable material. WARNING Doing so may cause fire. CAUTION Never touch the heads immediately after printing has finished. Doing so may cause burns. This machine is a precision device, and is sensitive to dust and dirt. Be sure to carry out day-to-day cleaning. Never use solvents such as thinner, benzine, or alcohol. - Page 65 5-1 Daily Care While submersing the adhesive sheet in water, gently stroke the surface of the sheet with your fingers. Allow the adhesive sheet to dry. Allow to dry completely, out of direct sunlight. It must not be mounted on the table while wet. Place the adhesive sheet on the table.
-
Page 66: Head Cleaning
5-1 Daily Care Head Cleaning Clean away any fine grime around the head. Perform cleaning periodically. Press the Power/Movement button to move the table to the front of the machine. Power/Movement button Remove the adhesive sheet. Adhesive sheet Switch off the power. Loosen the knob. -
Page 67: Cleaning The Body And Cover
5-1 Daily Care Press the Power/Movement button to switch on the power. The head moves and cleaning is performed. After cleaning has finished, loosen the knob. Knob Cleaning the Body and Cover Use a cloth moistened with water then wrung well, and wipe gently to clean. The surface of the cover is easily scratched, so use a soft cloth. -
Page 68: Maintenance Of The Marking Pins
You carry out all of these maintenance activities using the included [MPX-70 Head Manager] program. Starting MPX-70 Head Manager Click [Start], then click [All Programs] (or [Pro- grams]). Click [Roland Dr. METAZA2], then click [MPX- 70 Head Manager]. Switch on the power to the machine. Checking the State of the Marking Pins The state of each pin is shown. -
Page 69: Changing The Pin Used For Marking
5-2 Maintenance of the Marking Pins Changing the Pin Used for Marking Follow the steps below to change the marking pin. Procedure Start MPX-70 Head Manager. p 66 "Starting MPX-70 Head Manager" Choose the number of the pin to use next. Click [Apply Pin Change]. -
Page 70: Adjusting The Striking Force Of The Pins
5-2 Maintenance of the Marking Pins Adjusting the Striking Force of the Pins You can individually adjust the striking force of each separate pin. Pin adjustment involves striking the pattern shown in the figure. Prepare a piece of test-use printing material (brass) or other material measuring about 60 mm (2-3/8 in.) by 60 mm(2-3/8 in.) . -
Page 71: Head Replacement
Prepare a piece of test-use printing material (brass) included with the replacement head (MPH-70), or another piece of material measuring about 60 mm (2-3/8 in.) by 60 mm (2-3/8 in.). The replacement head is sold separately. Consult your authorized Roland DG Corp. dealer or Call Center. Adjustment pattern Procedure Never quit the replacement operation while partway through. -
Page 72: Adjustment Of The Origin-Point Location
5-4 Adjustment of the Origin-point Location Adjusting the Location of the Machine's Origin Point The machine's printing origin point is at the center of the table's scale. When you want to adjust the origin-point location, output calibration data to verify the location of the origin point. Print calibration data. - Page 73 5-4 Adjustment of the Origin-point Location Right-click [Roland MPX-70]. If you're using Windows XP/2000, click [Printing Preferences]. If you're using Windows 98SE/Me, click [Properties]. The setting window appears. Click the [Material] tab. In the width and length fields for [Offset], en- ter the displacement values you noted in step 1.
-
Page 74: Registration Of Custom Material
Click [Printers and Other Hardware], then click [Printers and Faxes]. Windows 98 SE/Me/2000 Click [Start]. Point to [Settings], then click [Printers]. Right-click [Roland MPX-70]. If you're using Windows XP/2000, click [Printing Preferences]. If you're using Windows 98SE/Me, click [Properties]. Click the [Image Correction] tab. -
Page 75: Chapter 6 Appendix
Chapter 6 Appendix... -
Page 76: What To Do If
6-1 What to Do If The machine doesn't run even when printing data is sent. on the casting method, the composition of impurities, the presence of plating, and so on. In such cases, perform fine adjustment of the striking force to match the material. Is the power switched on? Make sure the Power/Movement button light is on. -
Page 77: The Image Is Always Faint At The Same Location
Windows XP p 30 "Mounting Material on the Table" Click the [Start] menu, then right-click [My Computer]. Click 2.Go into the [Printers] folder. Right-click the [Roland MPX- [Properties]. 70] and open the setting screen for the METAZA driver. Windows 2000 If you are using Windows XP/2000, click [Printing Prefer- Right-click [My Computer] on the desktop. -
Page 78: Uninstalling The Driver
5.In the list, find [Printers] or [Other device], then double- click [OK]. click it. Windows XP/2000 When [Roland MPX-70] or [Unknown device] appears be- (CD-ROM drive letter ):\Drivers\WIN2K\SETUP.EXE low the item you selected, click it to choose it. Windows 98 SE/Me (CD-ROM drive letter):\Drivers\WIN9X\SETUP.EXE... -
Page 79: When Moving The Machine
6-2 When Moving the Machine When moving the machine, be sure to attach the protective material. Moving the machine without attaching the protective material may result in damage to the machine. Procedure Loosen the knob. Loosen just enough for the head unit to rise. Press the Power/Movement button to move the table to the front of the machine. -
Page 80: Head Life
As a general guide to its useful life, about 3,600 plates can be printed under the following conditions. Conditions of Use Material used : MD-NI (Roland nickel-plated plate) Printing area : 30 mm (1-3/16 in.) X 23 mm (15/16 in.) -
Page 81: Locations Of The Power Rating And Serial Number Labels
6-4 Locations of the Power Rating and Serial Number Labels Serial Number This is require when you seek maintenance, servicing, or support. Never peel off the label or let it get dirty. Power Rating Use an electrical outlet that meets the re- quirements for voltage, frequency, and am- perage given here. -
Page 82: Main Unit Specifications
6-5 Main Unit Specifications MPX-70 Printable material Gold, silver, copper, platinum, brass, aluminium, iron, stainless steel, etc. (Vickers hardness [HV] of the printing surface must be 200 or less.) Loadable material size Maximum 90 mm (width) x 90 mm (height) x 20 mm (thickness) (3-1/2 in. - Page 88 Roland may change the specifications of this Software or its material without notice. Roland shall not be liable for any damage that may caused by the use of the Software or by exercise of the right licensed by this agreement.
Need help?
Do you have a question about the METAZA MPX-70 and is the answer not in the manual?
Questions and answers
makine yazım yaparken bir anda yazmamamya başladı ve makine iğnesi olan kısmın ışıkları söndü
The Roland METAZA MPX-70 may have stopped writing suddenly and the lights on the needle section may have turned off due to one of the following reasons:
1. Power is Off: Ensure the Power/Movement button light is on. If it is dark, press the button to turn on the power.
2. Power Cord Connection: Check if the power cord is properly connected. If not, reconnect it correctly.
3. Marking Pin Issues: If the marking pin is worn out or damaged, it may need to be replaced. Use the MPX-70 Head Manager to check the pin status.
4. Head Positioning Problem: If the head was not raised before switching on the power, it may have caused an issue. Loosen the knob slightly to allow the head unit to rise.
Check these factors to resolve the issue.
This answer is automatically generated
Bana Roland mph70 kafası iğnesi lazım ama Türkiye'ye gelmesi lazım yardımcı olursanız sevinirim
Mpx70 makine ucu lazım Türkiyede bulamadım yardımcı olursanız sevinirim