Nikon D300 User Manual
Hide thumbs
Also See for D300:
- Complete manual (769 pages) ,
- User manual (511 pages) ,
- Manual del usuario (448 pages)
Table of Contents
Advertisement
Quick Links
Advertisement
Chapters
Table of Contents

Related Manuals for Nikon D300


Summary of Contents for Nikon D300
- Page 2 Rocky Nook Inc. Library of Congress Cataloging-in-Publication Data Young, Darrell, 1958- Mastering the Nikon D300/D300S / Darrell Young. -- 1st ed. p. cm. ISBN 978-1-933952-64-2 (soft cover : alk. paper) 1. Nikon digital cameras. 2. Single-lens reflex cameras. 3. Photography--Di...
- Page 3 TR263.N5Y67 2011 771.3'2--dc22 2010028380 Distributed by O‘Reilly Media 1005 Gravenstein Highway North Sebastopol, CA 95472 Many of the designations in this book used by manufacturers and sellers to distinguish their products are claimed as trademarks of their respective companies. Where those designations appear in this book, and Rocky Nook was aware of a trademark claim, the designations have been printed in caps or initial caps.
- Page 4 Nikonians.org, the world’s best Nikon User’s Community ... The wonderful staff of Rocky Nook, including Joan Dixon, Jocelyn Howell, and Matthias Rossmanith ... And, finally, to Nikon, who makes the world’s best cameras and lenses.
- Page 5 He’s been an avid photographer since 1968 when his mother gave him a Brownie Hawkeye camera. Darrell has used Nikon cameras and Nikkor lenses since 1980. He has an incurable case of Nikon Acquisition Syndrome (NAS) and delights in working with Nikon’s newest digital cameras.
- Page 6 250,000 members from nearly 150 countries. Providing educational books—such as Mastering the Nikon D300/D300S—is a way to confirm our Nikonians vocation in education. Additional ways include: our more than 80 interactive forums, The Nikonian eZine, Nikonians Academy Workshops, Nikonians News Blog, Nikonians podcasts, our Wiki, and eBooks.
- Page 7 Darrell’s penchant for improving the quality of his books to the benefit of his readers. If you are one of the many satisfied owners of the original Mastering the Nikon D300 authored by Darrell you will quickly see this is not just a mere update to accommodate the D300s.
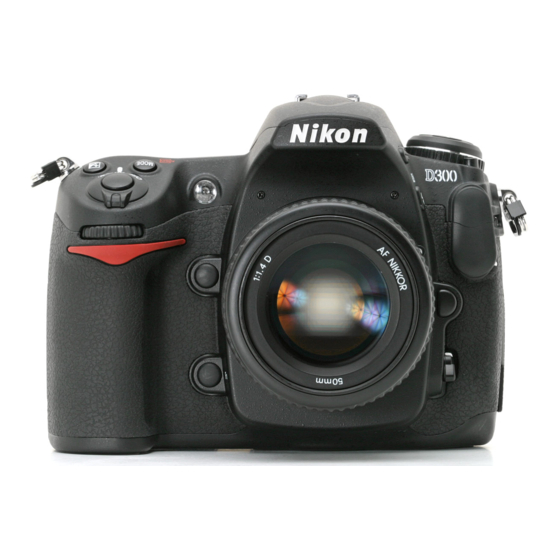
- Page 8 Camera Body Reference Fig 1 (1–11) Release mode dial lock release QUAL button WB Button ISO Button Release mode dial Accessory shoe (hot shoe) Control panel MODE button Exposure compensation button Shutter-releasebutton Power switch...
- Page 9 Fig 2 (12-18) Flash pup-up button Flash mode button Built-in microphone Flash sync terminal (cover) Ten-pin remote terminal (cover) Lens release button Focus-mode selector...
- Page 10 Fig 3 (19-22) Sub-command dial AF-assist illuminator Depth-of-field preview button FN (FUNC.) Button...
- Page 11 Fig 4 (23–32) Connector cover Playback button Delete button Viewfinder eyepiece MENU button Protect/Help Button (info – D300) Thumbnail/Playback zoom out btn. Playback zoom in button OK button Monitor...
- Page 12 Fig 5 (33-46) Diopter adjustment control Metering selector AE-L/AF-L Button AF-ON button Main command dial Multi Selector Multi selector center button (D300S) Focus selector lock Memory card access lamp Memory card slot cover (D300S) Speaker AF-area mode selector Info button (D300S)
- Page 13 Live view mode button (D300S) Note: Special D300 information in Colors and Wording Legend Figure 1. Top of camera (1–11)
- Page 14 Figure 2. Left front of camera (12–18) Figure 3. Right front of camera (19–22)
- Page 15 Figure 4. Left back of camera (23–32)
- Page 16 Figure 5. Right back of camera (33–46)
- Page 17 Colors and Wording Legend Throughout this book you will be presented with words displayed in two colors along with the use of italics. The two colors are blue and green, and are used as follows. ▪ The camera’s physical features are listed in blue. ▪...
- Page 18 Memory card slot cover, and Multi selector center button work differently or have different locations. Below is a picture of the back of a D300, with the differences noted. The Multi Selector on the D300 does not have the newer style...
- Page 19 Chapter 1. Basic Camera Setup Apples – Courtesy of Neale Dyster (Digitwized)
- Page 20 Congratulations! You’ve purchased, or are about to purchase, Nikon’s flagship DX format camera—the Nikon D300 or D300S. While no digital camera is inexpensive, the D300/D300S provides passionate photographers genuine professional-level camera at an attractive price. It is weather and dust sealed with a magnesium-alloy body and frame and a rubberized coating that makes it strong and reliable for years of faithful service.
- Page 21 I’ll do my best to help guide you as you fully master your new Nikon D300 or D300S. D300S and D300 Reference Material The two cameras covered in this book are very similar.
- Page 22 Instead, I’ll use Nikon’s official name for the controls, as found in the user’s manual. If you’re unsure of a button, dial, or switch location, simply use the reference images specific to your camera to find its location.
- Page 23 To keep from having to type D300 or D300S, or even D300/ D300S, and wasting book space, I’ll refer to both cameras as D300(S) unless I am talking about a feature specific to one camera type. First-Time DSLR Users Surprisingly, quite a few brand-new digital single lens reflex (DSLR) users are buying these advanced cameras.
- Page 24 There are literally hundreds of things to configure on this professional-level camera. In this chapter, I’ll give a new user of the D300(S) camera a place to start. Later, as you progress through this book, we’ll look at all the buttons, switches, dials, and menu settings in detail.
- Page 25 Later chapters will cover virtually all camera settings. Accessing the Camera Menus To access the various configurable menus in the D300(S), you’ll use the MENU button found on the back of the camera at the top left of the Monitor.
- Page 26 The name at the top of the menu will help you figure out which one you’re currently using. Figure 1-1. Six primary camera menus (optional Recent Settings menu not shown) The six menus that are found under the D300(S) menu system are, in order, as follows (see Figure 1-1):...
- Page 27 Notice that the sixth menu called My Menu can be toggled with an alternate menu called Recent Settings, a seventh menu. These two menus can’t be active at the same time. The menu called My Menu is much more functional for most people, so I showed it in the list of menus in Figure 1-1.
-
Page 28: Setup Menu
Camera Functions for Initial Configuration Setup Menu ▪ Time zone and date (D300S) or World time (D300) – Time Zone and Date or World Time ▪ Format memory card – See Format Memory Card ▪ LCD brightness – See LCD Brightness ▪... -
Page 29: Playback Menu
File Number Sequence Two Additional Functions In addition to the camera functions listed above, it is important to understand and configure the two following functions. The D300(S) has four Shooting menu banks four Custom settings banks. These individual banks can be used to completely change how the camera works, by simply switching banks. - Page 30 The configuration you have just completed, by using the functions list above, was installed into only one of each of these two bank types. You can do this same configuration in all four Shooting menu banks Custom setting banks. When you are done, you can give each one a different name and switch between them at will.
- Page 31 These are suggestions based upon my own personal shooting style and experience with Nikon cameras. You may eventually decide to configure things in a different way, according to your own needs and style. However, these recommendations are good starting points while you become familiar with the camera.
- Page 32 D300 and a Sigma 18-50mm f/2.8 EX HSM lens. F8 at 1/125s, 200 ISO, Matrix meter.
- Page 33 The Nikon D300(S) is a professional camera in all respects. It is designed so that you can take it places that lesser cameras shouldn’t go. The imaging capability in this complex but powerful DSLR is one that could only be dreamed of a few years ago.
- Page 34 Chapter 2. Playback Menu Red-Tailed Hawk – Courtesy of Doug Sipes (Dsipes) Chapter 1 you configured your camera for picture-taking your way. This chapter, and the next several chapters, will consider the camera’s menu systems. The D300(S) has seven...
- Page 35 10 selections in the D300S and 9 in the D300. They are as follows: ▪ Delete – Allows you to delete all or selected images from your camera’s memory card(s).
- Page 36 Technical LCD Monitor Information! The D300(S) has a Monitor screen with enough resolution, size, and viewing angle to really enjoy using it for previewing images. It has full VGA resolution (640×480), based on a 920,000 dot liquid crystal display (LCD).
- Page 37 ⅓ of 920,000 dots, or 307,200 pixels of real image resolution. The VGA standard has 640×480 pixels, and since 640 × 480 = 307,200, the Monitor screen on your D300(S) has VGA resolution. Delete (User’s Manual: D300S page 221;...
- Page 38 If you have it set to All, the D300(S) will display all the images it can find in all the folders on your camera’s memory card(s). There are two selections on the Delete screen—Selected...
- Page 39 Multi Selector. The D300S uses the small button in the middle of the Multi Selector to select an image, while the D300 requires that you press the entire Multi Selector without tilting it off...
- Page 40 On the D300, I’ve found it best to use the pad of your thumb over the whole Multi Selector instead of sticking the end of your thumb into the middle of it. You’ll have to press the entire Multi Selector smoothly.
- Page 41 Figure 2-2. D300S Delete all images Figure 2-3. D300 Delete all images All – This is like a card format, except that it will not delete existing folders, only images. As mentioned previously, it will not delete protected or hidden images. This is a quick way to “format”...
- Page 42 2-2, image 3). On the D300S, you must select either the SD or CF memory card slot for image deletion. The D300 is simpler since it only has one memory card, so there is one less screen to step through, as shown in Figure 2-3.
- Page 43 Monitor by pressing the Playback button and then press the Delete button on the top left of the camera back (marked by a garbage can symbol). You have several ways to rid yourself of unwanted images with the D300(S).
-
Page 44: Playback Folder
Playback Folder (User’s Manual: D300S page 245; D300 page 249) If you regularly use your memory card(s) in multiple cameras like I do and sometimes forget to transfer images, adjusting Playback folder setting is a good idea. I use a D300S and a D2X on a fairly regular basis. Often, I’ll grab an 8- or 16-gigabyte card out of one camera and stick it in another for a few shots. - Page 45 D300(S) only. If there are folders from other cameras on the memory card, those images will not appear during playback.
- Page 46 If you don’t have any other Nikon cameras around, this may not be a critical issue. However, if you’re like me, you’ll have a series of older Nikons around and you may be switching memory cards between them.
-
Page 47: Hide Image
Hide Image (User’s Manual: D300S page 245; D300 page 249) If you sometimes take images that wouldn’t be appropriate for others to view, this setting is for you. You can hide one or many images, and once hidden, they cannot be viewed on the camera’s... - Page 48 Multi selector center button on the D300S or the center of the Multi Selector on the D300. This selects an image for hiding and places a small symbol in the upper-right corner of the image thumbnail (see Figure 2-5, image 3, red arrow). The hide symbol looks like a slash with a dotted box around it.
- Page 49 If you hide all the images on the card and then try to view images, the D300(S) will tersely inform you, All images are hidden. Hide Images Obeys the Playback Folder Setting The display of images to select from for hiding purposes obeys the Playback Menu >...
- Page 50 Figure 2-6. Hide image screens – Deselect All? option Note: If you unhide images that are both hidden and protected, the protection is also removed at the same time. You protect/unprotect an image by displaying it on the Monitor and then pressing the Protect button, which is marked by a key symbol on the back of the camera (next to...
-
Page 51: Display Mode
Display mode selection allows you to customize how the D300(S) displays all those histogram and data screens for each image. If you want to see a lot of information on each image, you can select it here. Or, if you would rather take a minimalist approach to image information, turn off some of the screens. - Page 52 Figure 2-7): ▪ Basic photo info • Focus point ▪ Detailed photo info • Highlights • RGB histogram • Data Figure 2-8. D300 Display mode menu screens D300 Display mode screens (see Figure 2-8): ▪ Basic photo info • Highlights...
- Page 53 2-12). Remember that there will be a slight difference in setting locations since the D300S and D300 place them in a different arrangement. I am following the D300S order since the camera is newer, although I’ve provided screens for both cameras.
- Page 54 Figure 2-9. Display mode screens – Focus point option Highlights – If you put a check mark next to the Highlights selection, as shown in Figure 2-10, you will turn on what I call the “blinky” mode of the camera. You’ll see the word Highlights at the bottom left of the image (see Figure...
- Page 55 When you have Highlights enabled and you see a blinking white-to-black-to-white area in an image on the Monitor, it means that area of the image has lost all detail, or has “blown out”. In Figure 2-11 you’ll see a red arrow pointing to where the sky is completely blown out to white.
- Page 56 The D300S stacks the four histograms all on the right side of the screen, with the luminance on top (white histogram) and the RGB color histograms underneath. The D300 displays the RGB histograms on the right side and places the luminance histogram under the small picture.
- Page 57 Figure 2-13. Display mode screens – Data option The data found on these screens is shown in Figure 2-13 includes the following information: Image Data, Screen 1 ▪ Light meter in use (Matrix, Spot, or Averaging), Shutter speed, and Aperture ▪...
- Page 58 ▪ Artist ▪ Copyright Figure 2-14. Display mode screens – main and summary If you took a picture with a GPS unit attached and active on your D300(S), then you’ll have an additional screen available—even if you don’t have Data selected.
- Page 59 2-14), give me all the information I normally need. If you’re a data-oriented person, Nikon is happy to oblige you. Turn all these data screens on and examine how each shot’s settings were configured. This sure beats the old days of writing data...
- Page 60 CF card slots. This doesn’t apply to the D300 since it only has one card. If you’ve been shooting and suddenly want a backup on the other card, want to hand off images on one of your cards to someone else, or only have a card reader for one of the card formats, you can use this function to copy images between the two card types.
- Page 61 1. There are images on only one of the cards. Think about this for a moment. If only one card has images on it, you have no real reason to choose a source card, do you? Only one card has images, so it has to be the source. This is the most likely scenario.
- Page 62 card, you can skip the source card selection step. Refer to Figure 2-15 (or the camera’s actual menu) and follow these steps to select a source card: 1. Select Copy image(s) from the Playback Menu. 2. Choose Select source from the Copy image(s) menu.
- Page 63 2-16, image 2). My D300S happens to be using the default folder, 100D300S. If you are using a D300, it may be 100ND300 instead. Or you might have more folders with different names. 4. Now you have three choices to select from, and each has a slightly different way of doing things.
- Page 64 D300S or the center of the Multi Selector on the D300. When you select an image, you’ll see a small white check mark surrounded by a black box appear in the top-right corner of the image thumbnail.
- Page 65 Multi selector center button on the D300S or the center of the Multi Selector on the D300. This action will remove the check mark from the image thumbnail. Once you’ve unchecked the images you don’t want to copy, move on to step 5.
- Page 66 Figure 2-19. Select protected images function If you’ve previously used the Protect button to mark images as protected, they’ll show up with a little key symbol in the list of images and will already be checked for copying. Figure 2-19, image 2 shows the only image selected (number 100-89).
- Page 67 Figure 2-20. Select destination Select folder by number (see Figure 2-21) – Choose Select folder by number from the Select destination folder menu and scroll to the right. The next screen will show a folder number that can be changed to any number between and 999.
- Page 68 Figure 2-21. Select folder by number Select folder from list (see Figure 2-22) – If there are no existing folders on the destination memory card, this selection will be grayed out. Obviously, you can’t copy images to a folder that doesn’t exist. If this selection is grayed out, use Select folder by number to create a new folder.
- Page 69 All that’s left is selecting Copy image(s)? and scrolling to the right (see Figure 2-23). Figure 2-23. Copying images Figure 2-23 show the screens for steps 7 and 8. Once you’ve selected Copy image(s)?, you’ll see a screen asking for verification. Mine says Copy? 112 images (see Figure 2-23, image 2).
- Page 70 thumbnails and decide whether or not you want to choose Replace existing image, Replace all, Skip, or Cancel. Figure 2-24. File already exists...
-
Page 71: Image Review
This saves battery life. However, the camera’s battery is long-lived since the D300(S) does not use a lot of power. If you prefer to review, or “chimp”, each image after you take it, then you’ll need to set this feature to On. - Page 72 10 minutes. We’ll discuss this in more detail in the chapter titled Chapter There are two Image review settings, as shown in Figure 2-25: ▪ On – Shows a picture on the Monitor after each shutter release. ▪ Off – Monitor stays off when you take pictures.
- Page 73 Are You a Chimper Too? “Chimping” means reviewing images on the Monitor after each shot. I guess people think you look like a monkey if you review each image. Well, I do it anyway! Sometimes I even make monkey noises when I’m chimping my images. Try saying, “Oo, Oo, Oo, Ah, Ah, Ah”...
-
Page 74: After Delete
Monitor. If you delete the last image on the card, the previous image will be displayed. Show next is the factory default behavior of the D300(S) since most people... - Page 75 Show next method listed above to display the next image. Since the computer in your D300(S) is aware of the direction in which you are scrolling, if you happen to be scrolling to the left (opposite from the order in which the images were taken)
- Page 76 For instance, some sports or wildlife shooters might like to move backwards through a long sequence of images, starting with the last image taken. They can then delete the images that are not usable in the sequence and the camera will immediately show the previous image for review.
-
Page 77: Rotate Tall
Rotate Tall (User’s Manual: D300S page 251; D300 page 251) When you shoot a portrait-orientation (vertical) image, with the camera turned sideways, the image can later be viewed as a horizontal image lying on its side or as a smaller, upright (tall) image on the camera’s horizontal (wide) Monitor. - Page 78 If you would rather the camera leave the image lying on its side in a horizontal view, forcing you to turn the camera 90 degrees to view it, you’ll need to choose Off. Here are the two available settings on the Rotate tall menu (see...
- Page 79 discuss this function more deeply in the chapter titled Chapter Auto image rotation causes the camera to record the angle at which you are holding it as part of the image’s metadata. Auto image rotation should be set to so that an image will report how it should be displayed on the camera’s Monitor and on your computer later.
-
Page 80: Slide Show
Slide Show (User’s Manual: D300S page 252; D300 page 252) I used to do slide shows back in the old film days. I’d set up my screen, warm up my projector, load my slides, and watch everyone fall asleep by the hundredth slide. For that reason, I hadn’t been using the... - Page 81 Figure 2-28. Slide show screens With this camera’s big three-inch monitor and VGA resolution, it should be a satisfying experience for any tourist. How much should I charge for the show? As shown in Figure 2-28, the easy way to start a Slide show to simply select the Playback Menu >...
- Page 82 To start the slide show, repeat the steps shown in Figure 2-28 after you’ve made the time change as shown in Figure 2-29. The slide show will now run at your new speed. My Recommendation: I usually set the Frame interval to 3s.
- Page 83 button, the slide show is suspended and you are presented with the Pause screen, as shown in Figure 2-30. Figure 2-30. Slide show screens – Pause option Using the screens shown in Figure 2-30, you can select: ▪ Restart – Selecting OK, or scrolling to the right with the Multi Selector continues the slide show from the image following the one last viewed.
- Page 84 These days, instead of hauling out a slide projector and a box of slides, you can just plug your D300(S) into the closest High Definition (HD) device, such as an HD television. The camera has a cool HDMI port on the left side, under a rubber flap.
- Page 85 Print Set (DPOF) (User’s Manual: D300S page 228; D300 page 230) At first I thought it odd that Nikon chose to put image printing functions in the Playback Menu. Then I thought about it and realized that printing is a permanent form of image playback.
- Page 86 how in a detailed document called Print Set (DPOF) at the download site. Note: Print set (DPOF) is only for use with JPEG images. It does not apply to NEF (RAW.)
- Page 87 My Conclusions Wow! The D300(S) sure does have a lot of playback screens and menus. I remember the old days when to play back some images, you’d have to find the old shoebox full of pictures, or open an album and flip pages. Sometimes, I miss photo albums.
- Page 88 Chapter 3. Shooting Menu...
- Page 89 F-22 Raptor – Courtesy of Norman Paratore (carlysgranddad)
- Page 90 They affect how your camera takes pictures in all sorts of ways. Here’s a list and overview of the items found on the D300(S) Shooting Menu—22 items on the D300S, and 19 on the D300.
- Page 91 ▪ Image size – Choose to shoot Large (4288×2848, 12.2MP), Medium (3216×2136, 6.9MP), or Small (2144×1424, 3.1MP) images. ▪ JPEG compression – Select Size priority Optimal quality for your best JPEG images. ▪ NEF (RAW) recording – Set the compression type and bit-depth for NEF (RAW) files.
- Page 92 Most Nikons have a Shooting Menu, but only the best have multiple Shooting menu banks. Using the four banks, your D300(S) can change from a pro camera to a snapshooter with just a few button presses.
- Page 93 These are only two variations of the many available combinations of bank settings you can design. The D300(S) has not only four Shooting menu banks, but also four Custom setting banks (covered in the next chapter).
-
Page 94: Shooting Menu Bank
Just repeat the process for each bank, with different settings. Shooting Menu Bank (User’s Manual: D300S page 254; D300 page 255) Use the Multi Selector to select the Shooting menu bank item. - Page 95 A. If any letter other than showing, you are using a different Shooting menu bank. Let’s give the D300(S) Shooting menu bank A a new label so that you’ll be able to see at a glance what this particular bank is set up to accomplish. Scroll right using Multi Selector.
- Page 96 D300S or the center of the Multi Selector on the D300 to select a character. Keep scrolling around and selecting new characters until you have the entire new bank name in place. If you make a mistake, hold down the...
- Page 97 shooting. You may want to use different names and settings in each bank; however, you could learn something from how I configure each of mine: ▪ Bank A – General Purpose: Bank is my general purpose bank. I use it when I’m just walking around with my camera doing general photography.
- Page 98 Banks Can you see how flexible having these four Shooting menu banks will make your D300(S)? You can create your own bank names and apply the underlying settings however you wish. If you want, you can match these Shooting menu...
- Page 99 Shooting menu bank A as our example and now must set up the camera functionality for this bank. We have 21 more selections in the D300S and 18 in the D300. Let’s scroll down and set each individual line item available under the Shooting Menu.
- Page 100 Each bank can be completely configured with these items having different settings. Your D300(S) can act like four different cameras since you can select four different banks, each having different configurations.
- Page 101 Choose the Shoot A (bank A-D) selection as shown in Figure 3-3, image 1. We’ll now consider what the other 21 (or 18) configurable Shooting Menu functions do so that you can decide how to set Shooting menu bank A. You can, of course, configure each of these items in a completely different way using Shooting menu banks...
-
Page 102: Reset Shooting Menu
Reset Shooting Menu (User’s Manual: D300S page 256; D300 page 257) Be careful with this selection. Reset shooting menu does what it says—it resets the Shooting Menu for the currently selected bank (only), back to factory default settings (see Figure 3-4). - Page 103 Figure 3-4. Reset the current Shooting menu bank My Recommendation: This is an easy way to start fresh with a particular Shooting menu bank. Since it’s a full reset of all the values in the one bank, including the two special settings—Multiple exposure Interval...
-
Page 104: Active Folder
Active Folder (User’s Manual: D300S page 256; D300 page 258) The D300(S) automatically creates a folder on its primary memory card called 100D300S, while the D300 uses the name 100ND300 on its single CF memory card. This folder can contain up to 999 images. - Page 105 camera doesn’t give you a warning; it simply switches to the already existing folder. Let’s look at how to create a new folder with a number of your choice, from 101 to 999 (101D300S or 999D300S). Figure 3-5. Creating a New folder number Here are the screens and steps used to create a new folder (see Figure 3-5):...
- Page 106 D300(S) makes that easy with the following screens and steps (see Figure 3-6): Figure 3-6. Selecting an existing folder number 1. Refer to Figure 3-6, images 1 and 2. Scroll down to Select folder and then scroll right. You’ll see the...
- Page 107 Last year I shot around 100 GB of image files. With the newest memory cards now hitting 64 GB, I can foresee a time when the card(s) in my camera will become a yearlong backup source. At the present time, I do not use the Active folder functionality all that much, but I guarantee you I will in the near future.
-
Page 108: File Naming
9999. Instead, it rolls back over to 0001 for the 10,000th image. When I first got my D300, I changed the three default characters from DSC to 1DY. The “1” tells me how many times my camera has passed 9999 images, and “DY” are my initials, thereby helping me protect the copyright of my image in case it is ever stolen and misused. - Page 109 “o” instead (0DY9999), you could count up to 99,990 images. If Nikon would ever give us just one extra digit in our image counter, we could count in sequences of just under 100,000 images instead of 10,000 images. I suppose that many of us will have traded on up to the next Nikon DSLR before we reach enough images that this really becomes a constraint.
- Page 110 If File number sequence is set to Off, the D300(S) will reset the four-digit number—after the first three custom characters File naming—to 0001 each time you format your camera’s memory card. I set...
- Page 111 DSC. I recommend at least using your initials so that you can easily identify these images as yours. With my family of five Nikon shooters it sure makes it easier for me! If you use my method, just be sure to watch for the images to roll over 9999 so that you can rename the first character for the next sequence of 9999 images.
- Page 112 Primary Slot Selection (D300S Only) (User’s Manual: D300S page 72) Primary slot selection is only available in the D300S camera. The D300 only has one memory card slot, while the D300S has two. This function and the next, Secondary slot function, are concerned with where your camera stores its image files.
- Page 113 My Recommendation: I happen to prefer the smaller SD cards, merely because I can carry more of them and they can be used in more Nikon cameras, like my D90 or D5000. So I set my primary slot to SD card slot.
- Page 114 (User’s Manual: D300S page 72) Secondary slot function is available on the Nikon D300S but not the D300. It’s designed to let you do image flow control. Here is a description of the three different ways you can configure the...
- Page 115 mirroring. Since your camera is very much a computer, a function like this is great to have. Be sure that both cards are of equal capacity or that the secondary card is larger than the primary when you use this function. Otherwise, you’ll have reduced capacity shown for the primary card.
- Page 116 Here are the screens and steps to choose one of the Secondary slot functions, including Overflow, Backup, or RAW primary, JPEG secondary (see Figure 3-9): Figure 3-9. D300S Choosing the Secondary slot function 1. Select Secondary slot function from the Shooting Menu and scroll to the right.
- Page 117 of both worlds when card capacity is not worrisome. This, too, allows a measure of redundancy, like the Backup method. In a sense you are still backing up the same image, they are just in different formats—one RAW and one JPEG. I use each of these three selections from time to time, but my favorite is Overflow.
-
Page 118: Image Quality
Image Quality (User’s Manual: D300S page 68; D300 page 56) Image quality is simply the type of image your camera can create, along with the amount of image compression that modifies picture storage sizes. Figure 3-10. Choosing an Image quality You can shoot several distinct image formats with your D300(S). - Page 119 3. Press the OK button to select the format. You can also use the QUAL button on the Release mode dial to set the Image quality. Here are the controls and steps to do Figure 3-11. Setting Image quality with external controls 1.
- Page 120 ▪ NEF (RAW) + JPEG fine ▪ NEF (RAW) + JPEG normal ▪ NEF (RAW) + JPEG basic ▪ NEF (RAW) ▪ TIFF (RGB) ▪ JPEG fine ▪ JPEG normal ▪ JPEG basic Let’s look at each of these formats and see which you might want to use regularly.
- Page 121 NEF (RAW) Image Quality Format The Nikon NEF proprietary format stores raw image data directly to the camera’s memory card. Most of the time, photographers refer to a NEF file simply as a RAW file. These RAW files can easily be recognized because the file name ends with NEF.
- Page 122 If I take more pictures on the same memory card, Nikon Transfer will transfer only the new ones when I reconnect to the computer. In a sense, Nikon Transfer acts like a one-way, memory-card-to-computer synchronizer.
- Page 123 Nikon ViewNX RAW conversion software is supplied free with the D300(S), while Nikon Capture NX2 requires a separate purchase. Capture NX2 has become my favorite conversion software, along with Adobe Photoshop. I use ViewNX to look at my images because it has an excellent browser-type interface, and then I push my images to Capture NX2 for final post-processing.
- Page 124 But it does not apply the camera setting information to the image. In your computer’s post-processing software, the image will appear on-screen using the settings you initially configured in your D300(S). However, these settings are only applied in a temporary manner for your computer viewing pleasure.
- Page 125 image in the computer after taking it with the camera. A conversion to JPEG sets image markers permanently, while a conversion to TIFF sets the markers but allows you to modify the image later. Unfortunately, TIFF format has very large file sizes.
- Page 126 Now, let’s examine the most popular format on the planet, JPEG. JPEG Image Quality Format As shown in Figure 3-10, image 2, the D300(S) has three JPEG modes. Each mode affects the final quality of the image. Let’s look at each mode in detail: ▪ JPEG fine (Compression approximately 1:4) ▪...
- Page 127 25 percent of the original size. In this mode, a normal 20-megabyte D300(S) file can be compressed down to as little as 5 megabytes without significant loss of image quality. If you decide to shoot in JPEG, this mode will give you the best-quality JPEG your camera can produce.
- Page 128 D300S tells me it can store a whopping 4,300 JPEG basic files on my 8-gigabyte CF card. Note: It’s hard to specify an exact number of images that a particular card size will hold. My D300S reports that a little over 300 lossless-compressed NEF (RAW) images will fit on...
- Page 129 While nature photographers might want to use (RAW), since they have more time for processing images and wringing the last drop of quality out of them, event or journalist photographers may not have the time or interest in processing images, so they’ll often use JPEG. Here are the pros and cons of using JPEG mode: JPEG Positives ▪...
- Page 130 ▪ You cannot manipulate a JPEG image more than once or twice before it degrades to an unusable state. Every time you modify and resave a JPEG image, it loses more data and quality. TIFF Image Quality Format TIFF (RGB) format creates images that do not require post-processing but can easily be manipulated later if desired.
- Page 131 ▪ Excellent compatibility with the publishing industry. ▪ Is considered a lossless format since the image normally uses no compression and loses no more data than the initial camera conversion from 12 or 14 bits to 8 bits. ▪ Images can be modified and resaved an endless number of times without losing image data.
- Page 132 Combined NEF and JPEG Shooting (Two Images at Once) Some shooters use the three storage modes at the beginning of Figure 3-10, image 2, whereby the D300(S) takes two images at the same time—NEF (RAW) + JPEG fine, normal, or basic.
- Page 133 Image Compression Information Two of the three Image quality file formats that the D300(S) provides will allow you to compress the image file into a smaller file size. We’ll discuss several image compression types like JPEG fine/normal/basic, JPEG Size priority/Optimal quality, and NEF (RAW) Lossless/ Compressed in later sections of this chapter.
- Page 134 Shooting menu bank specific, which means that you can control it separately for each of your camera’s four Shooting menu banks. TIFF (RGB) files are not compressed in the D300(S), which is one reason the file sizes are so large for the TIFF format. Final Image Format Ramblings Which format do I prefer? Why, RAW, of course! But, it does require a bit of a commitment to shoot in this format.
- Page 135 closest thing to a film negative or a transparency that your digital camera can make. That’s important if you would like to modify the image later. If you are concerned with maximum quality, you should probably shoot and store your images in RAW (or even TIFF) format.
-
Page 136: Image Size
Image Size (User’s Manual: D300S page 71; D300 page 60) Image size lets you shoot with your camera set to various megapixel ratings. The default Image size setting for the D300(S) is Large, or 12.2 M (12.2 megapixels). You can change this rating from 12.2 M... - Page 137 ▪ Large – 4288×2848 – 12.2 M ▪ Medium – 3216×2136 – 6.9 M ▪ Small – 2144×1424 – 3.1 M Here are the steps to select an Image size (see Figure 3-12): 1. Select Image size from the Shooting Menu and scroll to the right.
- Page 138 small print but will seriously limit your ability to enlarge your images. I recommend leaving your camera set to Large unless you have a specific reason to shoot smaller images.
-
Page 139: Jpeg Compression
JPEG Compression (User’s Manual: D300S page 70; D300 page 58) JPEG compression allows you to further fine-tune the level of compression of your JPEG images. The JPEG format is always a compressed format. The Image quality settings for JPEG images include fine, normal, and basic. Each of these settings provides a certain level of compression of the file size. - Page 140 JPEGs you shoot. Let’s say the camera wants to use a4.5-megabyte file size. The D300(S) will do its best to keep all JPEGs set to that particular file size by altering the level of compression according to content. If a JPEG file has lots of fine detail, it will require more compression than a file with less detail in order to maintain the same file size.
- Page 141 ▪ Optimal quality – This setting really doesn’t do anything extra to your images; the camera simply uses less compression on complex subjects. In effect, you are telling the camera to go ahead and vary the file size so that image quality will be good for any subject, complex or plain.
- Page 142 2. Choose Size priority Optimal quality. Figure 3-13 shows Optimal quality as the selected compression type. 3. Press the OK button to choose the compression type. My Recommendation: I normally use Optimal quality when I shoot JPEGs since the whole JPEG concept is one of lossy image compression and I don’t want the potentially heavier compression of Size priority...
- Page 143 NEF (RAW) Recording (User’s Manual: D300S page 70; D300 page 58) NEF (RAW) recording is composed of two menu choices—Type NEF (RAW) bit depth. Type is concerned with image compression, while bit depth deals with color quality. We’ll look into both of these choices and see how our photography can benefit from them.
- Page 144 ▪ NEF (RAW) Compressed – Before the newest generation of cameras, including the D300(S), this mode was known as “visually lossless”. The image is compressed and the size is reduced by 40 to 55 percent, depending on the amount of detail in the image.
- Page 145 (20 to 40 percent) but is guaranteed by Nikon to be a reversible compression that in no way affects the image. ▪ NEF (RAW) Uncompressed – No compression is applied to the image. The main drawback to this mode is that your images will be quite large to store.
- Page 146 Control panel in compressed modes is because the D300(S) has no idea how well it will be able to compress a particular image. An image with a large amount of blank space, such as an expanse of sky, will compress a lot more efficiently than an image of a forest with lots of detail.
- Page 147 With the D300(S), you can select the bit depth stored in an image. More bit depth equals better color gradations. The default for the D300(S) is 12-bits, or 4,096 colors per RGB channel.
- Page 148 available: 12-bit (4,096 colors per channel) or 14-bit (16,385 colors per channel). Here are the screens and steps to choose a NEF (RAW) bit depth (see Figure 3-15): Figure 3-15. NEF (RAW) bit depth 1. Select NEF (RAW) recording from the Shooting Menu and scroll to the right.
- Page 149 12-bit. There is a lot more color information is being stored, after all. There’s another drawback to the 14-bit mode that some may find quite objectionable. The maximum frame advance rate in mode—continuous high on the Release mode dial—drops from the normal 6 or 7 frames per second to only 2.5 frames per second.
- Page 150 Shooting a TIFF or JPEG image in-camera (as opposed to a RAW image) means that the D300(S) converts from a 14-bit RGB file down to an 8-bit file. An 8-bit image file can hold 256 different colors per RGB channel—over 16,000,000...
- Page 151 industry-standard format that will fully contain all image color information from a RAW file. It’s important that you learn to use your camera’s histogram so that you can visually examine the various RGB channels at a glance. We’ll discuss the histogram in an upcoming chapter titled Chapter 9.
- Page 152 bottom represent the red, green, and blue color channels, as can easily be seen. The top, white histogram is not an additional channel. This is called a luminance histogram, and it represents an average histogram for the three channels. It is also known as a brightness histogram.
-
Page 153: White Balance
White Balance (User’s Manual: D300S page 134; D300 page 126) White balance is designed to let you capture accurate colors in each of your camera’s RGB color channels. Your images can reflect reality if you understand how to use the... - Page 154 For many of us this isn’t a problem. However, if you are shooting in-studio for a product shot, I’m sure your client will want the pictures to be the same color as the product. White balance lets you control that carefully, when needed. Here are the screens and steps to select a White balance setting (see...
- Page 155 just press the OK button as soon as we see the fine-tuning screen so as not to change the default settings for this particular White balance. You’ll also find it convenient to change the White balance settings by using external camera controls. We’ll examine how next.
- Page 156 to understand this setting by reading the dedicated chapter carefully. Understanding white balance especially important if you plan on shooting JPEGs regularly.
-
Page 157: Set Picture Control
Picture Controls. Or, you can simply use the provided Nikon Picture Controls to control your images. We’ll discuss how to modify a Nikon Picture Control later in this section. In the next section we’ll discuss how to save a modified Picture Control under your own Custom Picture Control name. - Page 158 Shutter-release button until you print the picture using a program like Nikon Capture NX2. Here are the screens and steps to choose a Picture Control from the...
- Page 159 If you do choose to modify the control, it is not yet a Custom Picture Control, since you haven’t saved it under a new name. Instead, it’s merely a modified Nikon Picture Control. Figure 3-20. An adjusted Nikon Picture Control We’ll discuss how to name and save your own Custom...
- Page 160 Now, let’s look closer at the Picture Control system. As shown in Figure 3-19, image 2, there are a series of Picture Control selections that modify how your D300(S) captures an image: ▪ SD, or Standard ▪ NL, or Neutral ▪...
- Page 161 D300(S) captures the image. If you are shooting in RAW mode, the D300(S) does not apply these settings to the image but stores them with the image so that you can later change them in-computer. Let’s examine each of the Picture Controls, and then we’ll look at how to select them.
- Page 162 Below is an overview of what Nikon says about Picture Controls and what I see in my sample image taken with the various controls. Also included in this list are two optional Picture Controls, which you can download from Nikon for...
- Page 163 primary colors for intense imagery. The contrast is higher for striking shadow contrast, and the sharpness is higher too. If you are shooting JPEGs and want to try to imitate a saturated transparency film like Velvia, this mode is for you! If you look at the red block under the control in Figure 3-21, you’ll see that it’s pushed into...
- Page 164 Neutral control. The results are very similar. I’m sure that Nikon has included some software enhancements specifically for skin tones in this control, so I’d use this for portraits of people. The results from Portrait control look a bit like smooth Kodak Portra (or Fuji NPS) negative film to me.
- Page 165 The last two Nikon Picture Controls (Portrait and Landscape) are not included on the camera from the factory. You have to download them from Nikon. You can then use the section titled Manage Picture Control to learn how to install the two optional controls.
- Page 166 Green (G) is often used in black-and-white portrait work to change the appearance of skin tones. You don’t have to go buy filters for your lenses; they’re included free in your D300(S). Figure 3-22. Monochrome Filter effects screen...
- Page 167 Figure 3-23. Monochrome Filter effects samples Figure 3-23 you’ll see an untouched sample of a color Picture Control (for comparison) alongside the five shades of Monochrome (black-and-white) Filter effects. The Filter effects are mildly different and are hard to see due to tone range limitations of a printed book.
- Page 168 You can shoot a basic black-and-white image, use filters to change how colors appear, or tone the image in experimental ways. Can you see the potential for a lot of fun with these tones? Figure 3-24, notice that to the right of Toning, there is a row of 10 tiny rectangles with arrowhead pointers on each end.
- Page 169 Figure 3-24. Monochrome Toning screen and samples Use the Multi Selector to move around in the Filter effects Toning settings. Press the OK button to select one of them.
- Page 170 Picture Control Grid Screen Each Picture Control has a Picture Control Grid that allows you to compare the selected control to the other Nikon Picture Controls (see Figure 3-25). You access the Grid by scrolling to the screen shown in...
- Page 171 Worry not! Nikon has given us an easy way to reset a control. Any time you’ve modified a control, you can reset it by pressing the garbage can...
- Page 172 The fact that you must check the Monochrome box proves that a D300(S) black-and-white image is really just a color image with the colors desaturated to levels of gray. The good thing about this is that you now have room to play with the three color channels similar to how you use filters when shooting black-and-white film.
- Page 173 As shown in Figure 3-27, there is an alternate way to access Set Picture Control menu screens in the D300S. You can use the Information display edit screen by pressing the Info button twice, then scrolling to the Set Picture Control position and pressing the button.
-
Page 174: Manage Picture Control
Manage Picture Control (User’s Manual: D300S page 160; D300 pages 156) Manage Picture Control section of your camera’s Shooting Menu is designed to allow you to create and store Custom Picture Control settings for future use. If you modify them under the... - Page 175 Figure 3-28. Save/edit a Custom Picture Control 1. Select Manage Picture Control from the Shooting Menu and scroll to the right (see Figure 3-28, image 1). 2. Highlight Save/edit and scroll to the right (see Figure 3-28, image 2). 3. Choose a Picture Control that you want to use as a base for your new settings and then scroll to the right (see...
- Page 176 Multi selector center button on the D300S—or the center of the Multi Selector on the D300—to choose the highlighted character (see Figure 3-28, image 6). To correct an error, hold down Thumbnail/playback zoom out button and use the...
- Page 177 NOP and can be copied to the NIKON folder on your memory card for later uploading to the camera. Rename a Custom Picture Control If you decide to rename an existing Custom Picture Control,...
- Page 178 D300S or the center of the Multi Selector on the D300. The character that is under the yellow cursor will appear on the name line below, at the position of the gray cursor. If there is already a character under the gray cursor, it will be pushed to the right.
- Page 179 When a Custom Picture Control is no longer needed, you can easily delete it. Delete a Custom Picture Control You cannot delete a base Nikon Picture Control (SD, NL, VI, or MC). They don’t even appear in the Manage Picture Control menu.
- Page 180 Figure 3-30. Delete a Custom Picture Control 3. Select one of the nine available Custom Picture Controls and scroll to the right (see Figure 3-30, image 3). I selected NEUTRAL-EXSHARP for deletion. 4. Choose from the Delete menu (see Figure 3-30, image 4).
- Page 181 When I mention copying or deleting controls from the memory card, I’m speaking of the primary card slot on the D300S and, of course, the one CF card that the D300 uses. You cannot copy or delete controls from the secondary card slot on the D300S.
- Page 182 will display up to 99 control locations on any single memory card. Let’s examine each of these selections and see how to best use them. Copy to Camera Once you’ve transferred a Custom Picture Control from your memory card to your camera, it will show up in the Shooting Menu >...
- Page 183 NEUTRAL-03. Select a control from the list and press button. (If you scroll to the right instead, you will be able to examine and adjust the control’s settings before saving it to your camera. If you don’t want to modify it, simply press the button.) 3.
- Page 184 D300S or the center of Multi Selector on the D300. The character that is under the yellow cursor will appear on the name line below, at the position of the gray cursor. If there is already a character under the gray cursor, it will be pushed to the right.
- Page 185 ▪ Microsoft Windows Installation Instructions: http://www.nikonimglib.com/opc/manual/en/ opc_win_en_ABF.html ▪ Apple Macintosh Installation Instructions: http://www.nikonimglib.com/opc/manual/en/ opc_mac_en_ABF.html 2. The installation instructions that you’ve downloaded will explain how to get the optional Picture Control files (ending in .nop) into a folder called NIKON on your...
- Page 186 Shooting Menu > Set Picture Control list for future use. Delete from Card Once you’ve finished loading Custom Picture Controls or optional Nikon Picture Controls to your camera, you may be ready to delete a control or two from the memory card. You...
- Page 187 could format the memory card, but that will blow away all images and Picture Controls on the card. A less drastic method that allows you to be more selective in removing Picture Controls is the Delete from card function. Here are the screens and steps used to remove Picture Controls from your camera’s memory card (see Figure 3-35):...
-
Page 188: Copy To Card
Once they are on a memory card, you can share your custom controls with friends who have compatible Nikon cameras. As soon as your Custom Picture Controls are ready to go, use... - Page 189 It’s a 13-page, 4.6 MB file named PicCon.pdf. I really enjoyed reading it since it explains Nikon Picture Controls well and even mentions software that will work with them. You’ll need Adobe Reader, which you can download for free from www.Adobe.com, to read PDF files.
-
Page 190: Color Space
The two color spaces available on the Nikon D300(S) have different gamuts, or ranges of color. - Page 191 3. Press the OK button to lock in your choice. The D300S also allows you to access the Color space settings via the shortcut Information display edit screen. You simply press the Info button twice and select the color space location, then press the OK button (see...
- Page 192 If you shoot in RAW format a lot, you may want to consider using Adobe RGB to store the maximum number of colors in your image files for later reuse. Remember that a (RAW) image file can contain 4,096 levels of color per RGB channel in 12-bit mode and 16,385 levels in...
- Page 193 My Recommendation: I personally use Adobe RGB most of the time since I shoot a lot of nature with a wide range of color. I want as accurate color as my camera will give me. Adobe RGB has a wider range of colors, so it can be more accurate when a wide range of colors is present in my subject.
- Page 194 (we’ll discuss how in a later chapter)—some of the image detail will be lost in the shadows. The D300(S) allows you to “D-Light” the image and bring out additional shadow detail, or in other words, lower the image contrast.
- Page 195 to choose an Active D-Lighting level (see Figure 3-39 Figure 3-40): Figure 3-39. Choosing Active D-Lighting’s level 1. Choose Active D-Lighting from the Shooting Menu scroll to the right. 2. Select one of the Active D-Lighting levels. Refer to Figure 3-40 to see how those levels affect the image.
- Page 196 Active D-Lighting set to its various levels. Note that the D300S provides two more levels than the D300. My Recommendation: You’ll need to experiment with the Active D-Lighting settings to see which you like best. It has...
- Page 197 low-contrast images. Also, anytime you recover lost detail from shadows, there will be extra noise in the recovered areas. So watch the noise! This function can be useful for JPEG shooters in particular. Since you really shouldn’t modify a JPEG file after shooting it, it’s important that the image is created exactly right in the first place.
- Page 198 Experiment with this by shooting images in a high-contrast and a low-contrast setting at all the various levels of Active D-Lighting. You’ll see how the camera reacts and can better decide how you’ll use this functionality.
- Page 199 It’s the digital equivalent of static in music. Who wants static in their images? Nikon knows its imaging sensors well, and feels that images taken at exposures longer than 8 seconds may exhibit more noise than is acceptable for normal use. The imaging sensor can start to warm up a little when longer exposures are used.
- Page 200 image to get rid of noise. I’ve taken exposures of around 30 seconds and had perfectly usable results. The only drawback is that the exposure time is doubled since two images are taken. The black frame image is not written to the memory card, so you’ll only have one image, with much less noise, in the end.
- Page 201 Figure 3-42. Long exp. NR sample image It can be a lot of fun to capture lightning images, but be sure that you have a safe place to shoot from so that you won’t attract the lightning. I was shooting from my upstairs bedroom window.
- Page 202 Figure 3-43. Enabling or disabling Long exp. NR Here are the steps to choose a Long exp. NR setting. See the screens in Figure 3-43 Figure 3-44. The Information edit display screen for the D300S only is shown in Figure 3-44.
- Page 203 My Recommendation: I personally like the benefits of Long exp. NR. I shoot a lot of waterfall and stream shots where I need exposures longer than 8 seconds to really blur the water. Also, I like to take midnight shots of the sky, and even shots of city scenes at night.
-
Page 204: High Iso Nr
High ISO NR (User’s Manual: D300S page 259; D300 page 263) High ISO NR (High ISO Noise Reduction) lessens the effects of visual digital noise in your images when you use sensitivity (exposure gain) settings above 800. Have you ever tried to watch TV while children are playing in the same room? The louder you turn the TV, the louder the kids get, it seems. - Page 205 Figure 3-45. High ISO NR sample images Noise in a digital image is somewhat similar. You want pure, clean images when you take pictures, but instead, you have some digital noise interfering with the clarity. The higher you turn the camera’s sensitivity, the more the grainy digital noise degrades your image.
- Page 206 The D300(S) has better noise control than most cameras, so it’s able to shoot up to ISO 800 with little noise. However, no digital camera is completely without noise (that I know of), so it’s a good idea to use some noise reduction above a certain level of sensitivity.
- Page 207 Even if you set High ISO NR to Off, the camera will still apply when you exceed ISO 3200 (Hi 0.3 1). The official starting point for forced High ISO NR 0.3, which is between ISO 3200 and 6400 1), with Hi 0.3 being one-third stop above 3200 (about ISO 4250).
- Page 208 Press the Info button twice, select the High ISO NR position, press the button, and then use steps 2 and 3. Figure 3-46’s second screen is the same as Figure 3-47’s second screen. Figure 3-47. D300S Info. display edit screen – High ISO NR My Recommendation: I leave High ISO NR set to Low.
-
Page 209: Iso Sensitivity Settings
ISO sensitivity ranges they will have to deal with. Standards are good! In the D300(S), the ISO numbers are sensitivity equivalents. To make it very simple, ISO sensitivity is the digital equivalent of film speed. - Page 210 ISO sensitivity settings, from Lo 1 (~100 ISO) to Hi 1 (~6400 ISO). The “normal” ISO range for the D300(S) is ISO to 3200. Select your needed ISO sensitivity from the list of available ISO sensitivity settings.
- Page 211 ISO sensitivity setting. The standard minimum ISO sensitivity for the D300(S) is ISO 200. You may adjust the camera in a range from ISO 100–6400, in one-third steps. You can set Custom setting b1 to 1/3, 1/2, or step.
- Page 212 3-49, image 2, that there’s another setting available, ISO sensitivity auto control, which defaults to Off. This was known on earlier Nikon cameras as ISO-AUTO. This setting allows the camera to control the ISO sensitivity and shutter speed according to the light levels sensed by the camera.
- Page 213 lowest ISO sensitivity it can to get the picture. However, if needed, it can rapidly rise to the Maximum sensitivity level. This setting overrides the normal ISO sensitivity settings. If you would prefer that the Maximum sensitivity not exceed a certain ISO value, simply select from the list shown in Figure 3-51, image 3.
-
Page 214: Minimum Shutter Speed
remember that you have a maximum range from ISO Hi 1 (ISO 6400), and the EV steps in between these two values are decided by the camera. What happens when the camera reaches its Maximum sensitivity and there still isn’t enough light for a good exposure? Let’s find out. - Page 215 This is the answer to our question in the last section about what happens when there is not enough light and the camera has maxed out the Maximum sensitivity level. Even though you’ve selected a Minimum shutter speed, the camera will go below the Minimum shutter speed when the...
- Page 216 For fun, let’s listen to the camera talk to itself while you take pictures in low light with ISO sensitivity auto control enabled. As we listen in on the D300(S) thinking—in the next paragraph—we need to know that the current Maximum sensitivity...
- Page 217 Note: The other exposure modes, S – Shutter priority M – Manual, allow you to control the camera in a way that overrides certain parts of the ISO sensitivity auto control. M – Manual mode the camera completely relinquishes all control of the shutter and aperture.
- Page 218 Normally, you will set your camera to a particular ISO number, such as or 400, and shoot your images. As the light gets darker, or in the deep shade, you might increase ISO sensitivity to continue taking handheld images. If you absolutely must get the shot, ISO sensitivity auto control will...
- Page 219 These scenarios present excellent environments for sensitivity auto control. The camera will use your normal settings, such as your normal ISO, shutter speed, and aperture, until the light will not allow those settings to provide an accurate exposure. Only then will the camera raise the ISO or lower the shutter speed to keep functioning within the shutter/aperture parameters you have set.
- Page 220 ISO sensitivity auto control is yet another feature of our powerful Nikon cameras. Maybe not everyone needs this failsafe feature, but for those who do it must be there. I will use it myself in circumstances where getting the shot is the most important thing and where light levels may get too low for normal ISO image-making.
-
Page 221: Live View Mode
LCD to frame pictures? How sharp can a picture be when one is holding the camera out in mid air snapping pictures? Using a heavier camera like the D300(S) this way would tire the arms more quickly and make sharpness even worse. - Page 222 In this section, we’ll look at how to select Live view mode, with a brief description of how the Hand-held Tripod modes work. have devoted part another chapter—Chapter 8—to Live view mode and will go into much more detail on all of this mode’s capabilities. Here are the steps to select one of the Live view mode settings (see the...
- Page 223 Figure 3-54. Identifying the Live view modes Now, let’s briefly discuss how each of these modes work. ▪ Hand-held – This mode uses the same phase-detection autofocus system as when you are looking through the Viewfinder. When you take a picture in this mode, it works pretty fast since it focuses using the normal reflex mirror and autofocus system.
- Page 224 If you came over from the point-and-shoot world, and the D300(S) is your first DSLR, it may seem like a godsend to you. If you are an old-time photographer, you may just roll your eyes and say,...
- Page 225 “Not for me!” However, in using Live view mode more often myself, I’m learning to like it. I don’t use it off-tripod very often, but on-tripod it makes certain styles of shooting much easier. I like the extreme focusing accuracy of Tripod mode when shooting macros and general close-ups—especially...
-
Page 226: Multiple Exposure
In other words, if you are going to do a non-masked double exposure, your background will need two exposures at half the normal exposure value to equal one normal exposure. The D300(S) allows us to figure our own exposure settings and do them manually, and it gives us Auto gain to help us with exposure calculations. - Page 227 Let’s consider each of the screens and steps, as shown in Figure 3-55, and discover how to set up the Multiple exposure system. 1. Select Multiple exposure from the Shooting Menu scroll to the right (see Figure 3-55, image 1). Figure 3-55.
- Page 228 7. Shoot your images from a tripod. Once you’ve selected a Number of shots, the camera remembers the value and comes back to it for the next session. To repeat another Multiple exposure series with the same settings, you’ll have to use screen 2 again. Select Done and press the button.
- Page 229 quarter of a normal exposure for each shot so that I’ll have a normally exposed background when the four shots are taken. The reason I mentioned this in such a repetitive fashion is that it took me a little while to wrap my brain around the confusing presentation of this fact in the user’s manual.
- Page 230 Figure 3-56. Two sample multiple exposures My Recommendation: Multiple exposure images can be a lot of fun to create (see Figure 3-56). I often shoot Multiple exposure images with two people in the frame. One person leaves after the first half of the exposure is taken, while the other stays carefully still.
- Page 231 Finally, be sure you are using a tripod when creating a Multiple exposure image, unless you are masking part of the frame. Otherwise, the background will be completely blurred from camera movement between shots.
- Page 232 Movie Settings (D300S Only) (User’s Manual: D300S page 62) Movie settings are only available in the D300S. This set of functions allows you to adjust three specific things about how the D-Movie mode works: Figure 3-57. Initial D-Movie mode screens ▪...
- Page 233 You have three choices available: 1280×720 (or 720p HD), along with two SD modes, 640×424 and 320×216. The numbers following the resolution numbers—16:9 3:2—are format sizes. 16:9 is the standard HD format and will display on an SDTV in the wide-screen format, with a black band on the top and bottom of the screen.
- Page 234 Now, let’s look into the Microphone settings (see Figure 3-59). The D300S has a built-in Microphone, which you can see by looking for the three small holes just below D300S logo on the front of the camera. Be careful not to block them when recording.
- Page 235 below the card slot selections you will see something like 49s. This is the total recording time the particular card will hold. The HD mode, which I have selected, creates surprisingly large files. As shown in Figure 3-60, image 2, I can only hold about 35-45 minutes on an 8 GB Compact Flash card.
- Page 236 that the Apple iPad supports 720p HD video too! Even YouTube.com is changing over to HD. The smallest format (320×216) is good for basic videos that you’ll only display on an iPhone, iPod, PDA, or cell phone.
-
Page 237: Interval Timer Shooting
Interval Timer Shooting (User’s Manual: D300S page 189; D300 page 191) Interval timer shooting allows you to set your camera up to shoot a series of images over time. Make sure you have a full battery or are connected to a full-time power source for images taken over long periods of time. - Page 238 The screens in Figure 3-61 look a little daunting, but it might help you to realize that the bottom half of screens 2-6 is informational in nature. It shows the settings you create with the top half of each screen. There are four steps involved in configuring Interval timer shooting:...
- Page 239 Enter the time at which you want the intervals to begin. If I wanted to start at 3:30 p.m., I would insert the following: ▪ 15:30 Once you’ve entered the time, scroll to the right. 3. You will now see the Interval screen with hours : minutes’...
- Page 240 Control panel you will see the word INTVL on the D300S, or INTERVAL on the D300, flashing. This will keep flashing as long as the Interval timer is in operation. Figure 3-62. Timer is active If you’re shooting a timed interval during daylight hours, be...
- Page 241 and scroll to the right (see Figure 3-63). This won’t work if your intervals are very close together. Notice how Figure 3-63, image 1, shows that Interval timer shooting is, proving that an interval is in progress. After scrolling to the right, you can select Pause from the screen with the bright green In progress bar (see...
- Page 242 Bracketing overrides Number of shots, so you may not get what you expected if any kind of bracketing is active. My Recommendation: Please learn to use this function! It is complicated, but if you read this section carefully and practice using Interval timer shooting as you read, you’ll learn it...
- Page 243 My Conclusions Congratulations! You’ve fully configured one of the camera’s four Shooting menu banks. Now, set up another bank or three! Configure the others and your chameleon camera is at your command! Using the camera’s four Shooting menu banks allows you a great deal of flexibility in how your camera operates.
- Page 244 Chapter 4. Custom Setting Menu Bikes Catch Air – Courtesy of Ken Rutt (raxafarian)
- Page 245 Menu. It’s the third menu down on the left-hand toolbar, and its yellow icon looks like small pencil. I count no less than 50 Custom Settings in the D300S and 48 in the D300. We’ve got a lot of ground to cover, and we will, in great detail.
- Page 246 Figure 4-1. Custom Setting Menu When finished with this chapter, you’ll have a much deeper knowledge of this camera’s inner workings and capabilities. Without further ado, let’s dive right into the settings and see what they do. There are a couple of initial items on the menu before we get into the primary Custom Settings.
- Page 247 Figure 4-2. Renaming Custom setting bank A Here are the steps to rename a Custom setting bank (see the screens in Figure 4-2): 1. Select Custom setting bank from the Custom Setting Menu and scroll to the right. 2. Notice that in the first screen of Figure 4-2, Custom...
- Page 248 D300S or the center of the Multi Selector on the D300 to select a character. Keep selecting new characters until you have the entire bank name in place. If you make a mistake, hold down Thumbnail/playback zoom out button...
- Page 249 Note: The D300S provides a selection on the Information display edit screen for choosing or renaming a Custom setting bank. Press the Info button twice. Choose Custom A-D, then select or rename the bank. Figure 4-3. D300S Info. display edit screen – Custom setting bank...
-
Page 250: Reset Custom Settings
Reset Custom Settings If you ever get a hankering to start fresh with a particular bank, you can return to the factory default settings with Reset custom settings. Make sure that you are resetting the correct bank before you use this function. The bank name that appears just above Reset custom settings—next to Custom setting... - Page 251 You’ll find this method at the start of each section: ▪ Setting name – Exposure delay mode ▪ Setting numbers – Custom setting d10 (D300S) and d9 (D300) Since it would greatly lengthen this book to add graphics (screens) for both the D300S and D300, I included graphics...
- Page 252 D300S unless something could not be explained for the D300 without its own graphic. The main difference you’ll find is that some of the graphics will not match the D300’s Custom Setting number since they are based on the setting number of the D300S.
-
Page 253: Table Of Contents
Custom Settings a1 to a10 You’ll find 10 distinct settings within the Autofocus menu in both the D300S and D300. There are no numbering variances between the two cameras in this section: ▪ AF-C priority selection in both D300/D300S) ▪ AF-S priority selection in both D300/D300S) ▪... -
Page 254: Af-C Priority Selection
Please be sure to read that chapter well. AF-C Priority Selection Custom setting a1 (D300S and D300) (User’s Manual – D300S page 263; D300 page 267) AF-C priority selection is designed to let you choose how your... - Page 255 It simply means that your camera must focus on something before it will allow the shutter to release. Nikon cameras do a very good job with autofocus, so you can usually depend on the AF module to perform well.
-
Page 256: Af-S Priority Selection
Focus. Read the section called Using Custom settings a1 and a2 before you make your final choice. The safe choice is Focus. AF-S Priority Selection Custom setting a2 (D300S and D300) (User’s Manual – D300S page 264; D300 page 268) - Page 257 AF-S priority selection is very similar to AF-C priority selection. It, too, allows you to choose whether the camera will take a picture without something in focus. With this function, you set a shutter-release priority for Single-servo autofocus mode (AF-S). Set it wrong for your style of shooting and many of your pictures may be out of focus.
-
Page 258: Using Custom Settings A1 And A
Figure 4-6. Choosing a shutter release priority for AF-S mode 1. Select a Autofocus from the Custom Setting Menu scroll to the right (see Figure 4-6, image 1). 2. Highlight AF-S priority selection and scroll to the right (see Figure 4-6, image 2). - Page 259 Now, you might ask yourself, “Why is there such a setting as Release priority?” Well, many professional photographers shoot high-speed events at high frame rates—taking hundreds of images—and use depth of field (or experience and luck) to compensate for less than accurate focus. They are in complete control of their camera’s systems since they have a huge amount of practice in getting the focus right where they want it to be.
-
Page 260: Dynamic Af Area
We’ll discuss this even more in the chapter titled Chapter Dynamic AF Area Custom setting a3 (D300S and D300) (User’s Manual – D300S page 264; D300 page 269) Dynamic AF area lets you choose the number of AF points used when you put your camera in Dynamic-area AF mode. - Page 261 AF point among the 51 points in the Viewfinder by using the Multi Selector. Once good focus has been achieved with your selected AF point, the camera can track the subject, even if your selected AF point loses focus on the subject. It does this by allowing you to select patterns of extra AF points surrounding your single selected AF point.
- Page 262 Let’s examine the 9, 21, 51, and 51 point (3D-tracking) patterns: ▪ 9 points – Use this setting when the movement of your subject is predictable. This setting uses an array of 8 AF points surrounding your selected and viewable AF point. Good subjects for this mode may be a car race or air show.
- Page 263 My Recommendation: I’ve experimented with outdoor and indoor subjects using both a D300S and D300. Both cameras have an amazingly fast and accurate autofocus system. The D300S has an edge due to the extra processing power it has from its ability to shoot video.
-
Page 264: Focus Tracking With Lock-On
The D300S has a more powerful microprocessor base than the D300, since it also has to process D-Movies. It performs better in low-light environments when you have 51 points selected. If the light is low and you are shooting events like a wedding or graduation, you’ll need to make sure that the 51-point... - Page 265 That would be quite aggravating, wouldn’t it? The D300(S) provides Focus tracking with lock-on to prevent this from happening. The “lock-on” portion of this function helps your camera keep its focus on your subject, even if something briefly comes between the camera and subject.
- Page 266 Figure 4-9. Focus tracking with lock-on 1. Select a Autofocus from the Custom Setting Menu scroll to the right (see Figure 4-9, image 1). 2. Highlight Focus tracking with lock-on and scroll to the right (see Figure 4-9, image 2). 3.
- Page 267 With Dynamic-area AF Auto-area AF Focus tracking with lock-on enabled, I was amused at how adamant the camera was about staying with the current subject. I’d focus on a map on the wall and then cover most of the focusing points with the user’s manual.
- Page 268 But, this “sluggishness” is really a feature designed to keep you from losing your subject’s tracked focus. Once the camera locks on to a subject’s area of focus, it tries its best to stay with that subject even if it briefly loses the subject. This keeps the lens from racking in and out and searching for a new subject as soon as the previous subject is no longer under an AF point.
-
Page 269: Af Activation
When I’m tracking a moving subject, I don’t want my camera to be distracted by every bright object that gets in between me and the subject. Nikon gives us variable focus lock time-outs so we can change how long the camera will keep seeking the old subject, when we switch to a new one. - Page 270 will be activated when you press the Shutter-release button halfway down or if you press the AF-ON button. You can also select the setting that allows only the AF-ON button initiate autofocus and the Shutter-release button will not activate autofocus. The primary purpose of this function is to allow a very experienced photographer to separate shutter release and autofocus operations.
- Page 271 3. Choose one of the two choices from the menu. In Figure 4-10, image 3, Shutter/AF-ON has been selected. 4. Press the OK button to lock in the setting. Here’s a description of the two selections: ▪ Shutter / AF-ON – Autofocus will be activated if you press the Shutter-release button halfway or if you press...
-
Page 272: Af Point Illumination
AF Point Illumination Custom setting a6 (D300S and D300) (User’s Manual – D300S page 266; D300 page 271) AF point illumination helps you see the currently active AF points when you first start autofocus. You’ve seen the little squares—representing the active AF point or points—in the... - Page 273 ▪ Auto – If the Viewfinder’s background is dark, the selected AF point(s) will briefly flash red when you press the Shutter-release button or the AF-ON button start autofocus. If the background is bright, you’ll have no trouble seeing your AF point’s little black squares, so they don’t flash red when you start autofocus.
-
Page 274: Focus Point Wrap-Around
Viewfinder good contrast. Focus Point Wrap-Around Custom setting a7 (D300S and D300) (User’s Manual – D300S page 267; D300 page 272) Focus point wrap-around allows you to control how AF point scrolling on the Viewfinder works. - Page 275 Here are the screens and steps used to configure Focus point wrap-around (see Figure 4-12): Figure 4-12. Focus point wrap-around 1. Select a Autofocus from the Custom Setting Menu scroll to the right (see Figure 4-12, image 1). 2. Highlight Focus point wrap-around and scroll to the right (see...
-
Page 276: Af Point Selection
Selector. If you move your AF point often, it might get tiring to scroll through the full 51 focus points. In older Nikon cameras, we had a maximum of 11 sensors to scroll through, so it wasn’t too bad. However, with 51 AF points, it could take longer... - Page 277 Dynamic-area AF modes. This means that you cannot choose “in-between” sensors as selected AF points, so you have a smaller choice of sensors to start autofocus. Figure 4-13. 11 AF points vs. 51 AF points When using Auto-area AF, the camera does not allow you to move the AF points.
- Page 278 2. Highlight AF point selection and scroll to the right (see Figure 4-14, image 2). 3. Choose one of the two choices from the menu. In Figure 4-14, image 3, 51 points has been selected. 4. Press the OK button to lock in the setting.
-
Page 279: Built-In Af Assist Illuminator
(User’s Manual – D300S page 268; D300 page 273) You’ve seen the little AF-assist illuminator light on the front of the D300(S), near the grip. Well, this setting allows you to control when that little light comes on. Nikon calls this function the Built-in AF-assist... - Page 280 4. Press the OK button to lock in the setting. Here are descriptions of how affects the AF-assist illuminator: ▪ On (default) – If the light level is low, the AF-assist illuminator lights up to help light the subject enough for autofocus.
-
Page 281: Af-On For Mb-D10
AF-ON for MB-D10 Custom setting aio (D300S and D300) (User’s Manual – D300S page 269; D300 page 274) AF-ON for MB-D10 will only be used by those who have an MB-D10 battery pack attached to their camera body. This... - Page 282 ▪ AF-ON – This setting, left the way it is, means that the AF-ON button on the MB-D10 battery pack will work exactly like the regular AF-ON button on the D300(S) body. ▪ AE/AF lock – The MB-D10’s AF-ON button executes focus and exposure lock instead of normal AF-ON.
- Page 283 Custom Setting called Assign Fn button (Custom setting f5 in D300S and in D300). My Recommendation: When I’m using the MB-D10 on my camera, I want the extra AF-ON button to perform just like AF-ON button...
- Page 284 Exposure: Custom Settings b1 to You’ll find 6 settings within the Metering/exposure menu in both the D300S and D300. There are no numbering variances between the two cameras in this section: ▪ ISO sensitivity step value in both D300/D300S) ▪ EV steps for exposure cntrl.
-
Page 285: Iso Sensitivity Step Value
Germany back in the 1950s. Interesting, huh? ISO Sensitivity Step Value Custom setting b1 (D300S and D300) (User’s Manual – D300S page 270; D300 page 275) ISO sensitivity step value allows you to change the way the camera handles its progression of exposure values for ISO. In other words, the camera’s ISO “step”... - Page 286 If you are concerned with maximum ISO control, then use the 1/3 step setting. It takes longer to scroll through the ISO selections if you manually set your ISO value in steps. 1/3 step setting is the factory default value for b1. Here are the screens and steps to change the ISO sensitivity step value...
-
Page 287: Ev Steps For Exposure Cntrl
EV Steps for Exposure Cntrl. Custom setting b2 (D300S and D300) (User’s Manual – D300S page 270; D300 page 275) EV steps for exposure cntrl. refers to the number of steps in the shutter speed and aperture since those are your main exposure controls. - Page 288 ▪ 1/3 step (EV is 1/3 step; bracketing can be 1/3, 1/2, or 1 ▪ 1/2 step (EV is 1/2 step; bracketing can be 1/2 or 1 EV) ▪ 1 step (EV and bracketing are 1 EV each) Here are the screens and steps used to adjust EV steps for exposure cntrl.
- Page 289 1/2 step EV: Bracket: 0.5, 1.0 (or 1/2 and 1 EV steps) 1 step EV: Bracket: 1.0 (or 1 EV step) Nikon chose to lump shutter speed, aperture, and bracketing all under Custom setting b2. The factory default value for steps for exposure cntrl.
-
Page 290: Exp Comp/Fine Tune
Exp Comp/Fine Tune Custom setting b3 (D300S and D300) (User’s Manual – D300S page 270; D300 page 275) Exp comp/fine tune is concerned with the granularity of exposure or flash compensation. Most of us will use the exposure or flash compensation system at one time or another. - Page 291 configured by setting so that they work in a finer or coarser way for exposure fine-tuning. Compensation can be added or subtracted in 1/3, 1/2, or 1 EV steps—up to 5 EV (5 stops). Here are the screens and steps used to adjust Exp comp/fine tune (see...
-
Page 292: Easy Exposure Compensation
Easy Exposure Compensation Custom setting b4 (D300S and D300) (User’s Manual – D300S page 271; D300 page 276) Easy exposure compensation took me a bit of thinking to wrap my brain around. The bottom line is that you can set the... - Page 293 Figure 4-20. Easy exposure compensation 1. Select b Metering/exposure from the Custom Setting Menu and scroll to the right (see Figure 4-20, image 1). 2. Highlight Easy exposure compensation and scroll to the right (see Figure 4-20, image 2). 3. Choose one of the three items on the menu. In Figure 4-20, image 3, has been selected.
- Page 294 Figure 4-21. Exp. compensation Notice in Figure 4-21 how the Control panel uses the icon to show that compensation value has been dialed into the camera. Here are the values, and how they work: ▪ Reset On (Auto reset) – Using the Sub-command dial P-Program S-Shutter Priority...
-
Page 295: Center-Weighted Area
Back in the good old days, we all had averaging or partially averaging meters or none at all. If you prefer not to use Nikon’s built-in database of image scenes, otherwise know as Matrix metering, and you only use... - Page 296 Center-weighted area meter. It’s cool that Nikon gives us a choice. You have three meter styles in your camera, thereby adding to its chameleon status. On the camera’s back, between the Viewfinder eyepiece and AF-ON button, you’ll find the AE-L/AF-L button...
- Page 297 Here are the five settings used by the camera’s Center-weighted area metering system: ▪ ▪ ▪ 10mm ▪ 13mm ▪ Average Here are the screens and steps used to choose a Center-weighted area metering mode (see Figure 4-23): Figure 4-23. Center-weighted area 1.
- Page 298 for each step of the Center-weighted area meter. The pink circle is the most sensitive area for metering, and it gets larger for each setting. In the final frame of Figure 4-24, the entire frame is equally sensitive and averages everything seen in the Viewfinder.
-
Page 299: Fine Tune Optimal Exposure
Fine Tune Optimal Exposure Custom setting b6 (D300S and D300) (User’s Manual – D300S page 272; D300 page 277) Nikon has taken the stance that most major camera systems should allow the user to fine-tune them. The exposure system is no exception. - Page 300 and you want to force it to add 1/2 step exposure, you simply EV to the compensation system for that metering system. (Remember basic fractions—where 1/2 equals 3/6?) This works like the normal compensation system, except it only allows you one EV of compensation. As screen 3 of Figure 4-25 shows, an ominous looking warning appears, telling you that your camera will not show a compensation...
- Page 301 Figure 4-25. Center-weighted area fine-tuning screens 1. Select b Metering/exposure from the Custom Setting Menu and scroll to the right (Figure 4-25, image 1). 2. Select Fine tune optimal exposure and scroll to the right (Figure 4-25, image 2). 3. Select from the warning screen and scroll to the right (Figure...
- Page 302 I had exactly the same results from my original D300, and now also with my newer D300S. My reaction is simply to increase the exposure just a little and force the histogram to the right edge.
- Page 303 effects with a more aggressive Matrix meter. It certainly won’t hurt you to play with these settings, as long as you remember to set them back too when you’re done—if it doesn’t perform the way you expect.
-
Page 304: In Both D300/D300S)
Lock: Custom Settings c1 to c4 You’ll find 4 distinct settings within the Timers/AE lock menu in both the D300S and D300. There are no numbering variances between the two cameras in this section: ▪ Shutter-release button AE-L in both D300/D300S) ▪... - Page 305 This function allows you to meter from one area of the scene and then recompose to another area without losing the meter reading from the first area—as long as you hold the Shutter-release button halfway down. Looking at this from another direction, when you have Shutter-release button AE-L set to Off, exposure will only lock when you have the...
- Page 306 AE-L/AF-L lock button. Auto Meter-Off Delay Custom setting C2 (D300S and D300) (User’s Manual – D300S page 273; D300 page 279) Auto meter-off delay controls the amount of time that your camera’s light meter stays on after you press the Shutter-release button halfway and then release it.
- Page 307 ▪ – 8 seconds ▪ – 16 seconds ▪ – 30 seconds ▪ 1 min – 1 minute ▪ 5 min – 5 minutes ▪ 10 min – 10 minutes ▪ 30 min – 30 minutes ▪ ∞ – No limit (meter stays on) Here are the screens and steps to set the Auto meter-off delay (see...
- Page 308 Self-Timer (Delay) Custom setting C3 (D300S and D300) (User’s Manual – D300S page 273; D300 page 280) The D300S and D300 vary the name of this setting by one word. The D300S calls it Self-timer, while the D300 calls it Self-timer delay.
- Page 309 1. Select c Timers/AE lock from the Custom Setting Menu and scroll to the right (see Figure 4-28, image 1). 2. Highlight Self-timer on the D300S or Self-timer delay the D300, and scroll to the right (see Figure 4-28, image...
-
Page 310: Custom Setting C4 (D300S And D)
Self-timer delay to 2 or 5 seconds. This lets the D300(S) make a hands-off exposure to keep from shaking the camera or tripod. If I must run to get into position for a group shot, I’ll often increase the delay to at least (10 seconds) to keep from looking like an idiot as I trip while running and plow up grass with my nose. - Page 311 I love to look at each image. If it looks good, I move on to another image opportunity. The D300S and D300 have a major variation in the way they handle this time-out. The D300S allows you to select individual display time-outs for the following: ▪...
- Page 312 First, let’s examine the D300S method, with individual time-outs, and then we’ll look at how the D300 does it with its single time-out value. D300S Only – Monitor Off Delay The D300S has more functionality built into the Monitor off delay section than the D300 does.
- Page 313 D300 Only – Monitor Off Delay The D300 uses the same Monitor off delay time-outs for all displays that use the Monitor. Here are the screens and steps to set Monitor off delay (see Figure 4-30): Figure 4-30. Monitor off delay – D300 only...
- Page 314 I like to scroll around for longer periods as I set various settings in the menus. With my D300, I select min, which sets that time-out for all display types. If you want to conserve battery power, leave the...
-
Page 315: In Both D300/D300S)
12 settings in the D300S and 11 in the D300. The Custom Setting numbers within this section differ in the D300S and D300, as explained in the parentheses following the setting name: ▪ Beep in both D300/D300S) ▪... -
Page 316: Beep
▪ Battery order (d12 in D300S and D300) Beep Custom setting d1 (D300S and D300) (User’s Manual – D300S page 275; D300 page 281) Beep setting allows your camera to inform you of good autofocus by beeping. During Self-timer operations, the... - Page 317 Beep is enabled, the camera will let you know when you have focused successfully in Single-servo Autofocus (AF-S) by beeping once. It does not beep in Continuous-servo Autofocus (AF-C) since it would be beeping constantly as the focus adjusts to the subject. Also, if you have Custom setting >...
-
Page 318: Viewfinder Grid Display
Beep is automatically disabled when you’re using the new Quiet-shutter release mode on the D300S—regardless of how this Custom Setting is configured. Viewfinder Grid Display Custom setting d2 (D300S and D300) (User’s Manual – D300S page 275; D300 page 281) - Page 319 A few years ago, the 35mm film Nikon N80/F80 was released with a viewfinder grid display, and I was hooked. Later, as I bought more professional cameras, I was chagrined to find that they did not have the on-demand gridlines that I had grown to love.
-
Page 320: Viewfinder Warning Display
Viewfinder Warning Display Custom setting d3 (D300S and D300) (User’s Manual – D300S page 275; D300 page 282) Viewfinder warning display puts a low-battery warning in the Viewfinder, so we’ll know when our camera’s battery is getting low on power. - Page 321 Figure 4-33. Low battery warning However, if the low-battery Viewfinder warning bugs you, just turn it off! Here are the screens and steps used to turn Viewfinder warning display on or off (see Figure 4-34): Figure 4-34. Viewfinder warning display configuration 1.
-
Page 322: Screen Tips (D300S Only)
The normal battery power-level display always shows on the Control panel, but it only shows in the Viewfinder when you have Viewfinder warning display turned On. You won’t see the low-battery warning appear in the Viewfinder until your camera’s battery is actually low. My Recommendation: I think it’s a great idea to have the Viewfinder warn me when my camera’s battery is getting... - Page 323 Information Display. It takes a closer look at these two displays. The D300 has a similar screen called the Shooting info display, but it has no extra functionality for editing the settings. It only displays the current shooting information and...
-
Page 324: Cl Mode Shooting Speed
On. These little tips don’t get in the way of anything and may be helpful to remind you which setting you’re looking at on the Information display edit screen. CL Mode Shooting Speed Custom setting d5 (D300S) and d4 (D300) (User’s Manual – D300S page 276; D300 page 282) - Page 325 CL mode shooting speed controls how many frames per second (fps) the camera can take. At this point, the D300S and D300 deviate in their Custom Setting numbers for the first time. The D300S uses Custom setting d5 CL mode...
-
Page 326: Max. Continuous Release
Max. Continuous Release Custom setting d6 (D300S) and d5 (D300) (User’s Manual – D300S page 276; D300 page 282) Max. continuous release sets the maximum number of images you can shoot in a single burst. It sounds like you can just start blasting away with your camera—shooting in a single... - Page 327 In case you’re interested in the raw buffer capacity data, the D300S list is on manual page 394, while the D300 list is on manual page 402. Here’s a summary of what the two user’s manuals report: ▪...
- Page 328 Figure 4-38. Max. continuous release 1. Select d Shooting/display from the Custom Setting Menu and scroll to the right (see Figure 4-38, image 1). 2. Highlight Max. continuous release and scroll to the right (see Figure 4-38, image 2). 3. Use the Multi Selector to scroll up or down and set the number of images you want in each burst.
-
Page 329: File Number Sequence
File Number Sequence Custom setting d7 (D300S) and d6 (D300) (User’s Manual – D300S page 277; D300 page 283) File number sequence allows your camera to keep count of the image file numbers for each picture you take, in a running sequence from 0001 to 9999. - Page 330 ▪ Off – Whenever you format or insert a new a memory card, the number sequence starts over at 0001. If you exceed 999 images in a single folder, the camera creates a new folder and starts counting images at 0001 again. ▪...
- Page 331 File number sequence to On. After much experience with Nikon DSLR cameras, and many years of storing thousands of files, I’ve found that the fewer number of files with similar image numbers, the better. Why take a chance on accidentally...
- Page 332 Information display in the D300S, or Shooting info display the D300, is a function that allows your camera to automatically sense how much ambient light is in the area where you are shooting. If the ambient light is bright, the...
-
Page 333: Information (Shooting Info)
The D300S and D300 vary the name of this setting significantly. The D300S calls this function Information display to more closely match newer sibling cameras, while the older D300 simply calls it Shooting info display. - Page 334 Figure 4-40. Comparing the D300S and D300 Info buttons Both of these buttons bring up a similar screen that shows current shooting information. As mentioned in the beginning of this section, the extremely cool thing about this Information (Shooting info)
- Page 335 ▪ Auto – The D300(S) decides through its capless lens or uncovered eyepiece how much ambient light there is and changes the color and contrast of the Information display (Shooting info display) screen accordingly. ▪ Manual – This manual setting allows you to select the...
-
Page 336: Lcd Illumination
B-Manual for the normal bright blue, light-on-dark screen, and it will stay that way all the time. Or you could select W-Manual for the darker, less-colorful screen. LCD Illumination Custom setting d9 (D300S) and d8 (D300) - Page 337 (User’s Manual – D300S page 278; D300 page 285) LCD illumination is a simple setting that allows you to set how the illumination of the Control panel LCD backlight works. When it’s on, the Control panel lights up in green.
-
Page 338: Custom Setting D10 (D300S) And D9 (D)
You always have the Power switch (On/Off/Backlight)—surrounding the Shutter-release button—to manually turn the light on when needed. Exposure Delay Mode Custom setting d10 (D300S) and d9 (D300) (User’s Manual – D300S page 278; D300 page 285) - Page 339 Exposure delay mode introduces a delay of about one second after the Shutter-release button is pressed—and the reflex mirror raised—before the shutter is actually released. Hopefully, during the one-second delay, camera vibrations will die down and the image will be sharper. There are two settings available in Exposure delay mode (see...
- Page 340 30-second delay. MB-D10 Battery Type Custom setting d11 (D300S) and d10 (D300) (User’s Manual – D300S page 279; D300 page 285) MB-D10 battery type applies only when you choose to use AA-sized batteries of various types in your optional MB-D10 battery pack.
- Page 341 If you have an MB-D10 and plan on using cheap AA batteries, then you’ll need to tell the camera what type of AA batteries you’re using for this session. It certainly is not a good idea to mix AA battery types. These are the battery types the camera will accept: ▪...
- Page 342 If you do choose to use AA batteries, why not stick with Lithium types (FR6) since that is the same type of cell used in the normal Nikon EN-EL batteries and is not affected as much by a low ambient temperature. You can also use the Ni-MH (HR6 –...
- Page 343 That way, if I remove the MB-D 10, my camera won’t suddenly go dead due to a depleted battery. Nikon thinks the same way, evidently, since the camera defaults to Use MB-D10 batteries first.
- Page 344 Section Five – (e) Bracketing/ Flash: Custom Settings e1 to e7 Within the Bracketing/flash menu, you’ll find 7 settings in the D300S and D300. There are no variances between the two cameras’ Custom Setting numbers in this section: ▪ Flash sync speed in both D300/D300S) ▪...
- Page 345 FP). These Auto modes are available only with certain external Speedlights and not with the built-in pop-up Speedlight. At the time of writing this book, the four Nikon Speedlights that can be used with the D300(S) in Auto FP high-speed sync mode are as follows: ▪...
-
Page 346: Flash Sync Speed
▪ 1/100 s ▪ 1/80 s ▪ 1/60 s Here are the screens and steps used to adjust your camera’s Flash sync speed (Figure 4-48): Figure 4-48. Flash sync speed 1. Select e Bracketing/flash from the Custom Setting Menu and scroll to the right (see Figure 4-48, image 1). - Page 347 What happens to your external Nikon Speedlight to allow it to follow that slit of light moving across the sensor? It changes into a pulsing strobe unit instead of a normal flash unit. Have you ever danced under a strobe light? A strobe works by firing a series of light pulses.
- Page 348 and over as the slit between the shutter curtains travels in front of the image sensor. The Speedlight can fire thousands of bursts per second. To a photographer or subject it still looks like one big flash of light, even though, in reality, it is hundreds or thousands of bursts of light, one right after the other.
- Page 349 However, now you can use wide apertures to isolate your subject in direct sunlight—which requires high shutter speeds. The flash will adjust and provide great fill light, if you’re using Auto FP high-speed sync mode. One thing to note: If your flash fires at full power in normal modes, it will blink the flash indicator in the Viewfinder to let...
- Page 350 Which Flash Units for Auto FP High-Speed Sync Mode? If you are using the camera’s built-in pop-up Speedlight, or the small Nikon SB-400, your camera’s maximum flash shutter speed is limited to 1/320 s. If you use the external Speedlights SB-900, SB-800, SB-600, or SB-R200, you...
-
Page 351: Flash Shutter Speed
Flash Shutter Speed Custom setting e2 (D300S and D300) (User’s Manual – D300S page 282; D300 page 291) Flash shutter speed controls the minimum shutter speed your camera can use in various flash modes. You can select... - Page 352 The user’s manual is a bit confusing on this subject, but the mode and minimum shutter speed information in the previous list is evident after study and testing. Therefore, Custom setting e2 is only partially used by the flash modes, because the default is preset to 30 seconds in Shutter priority auto Manual...
-
Page 353: Flash Cntrl For Built-In Flash
Flash Cntrl for Built-in Flash Custom setting e3 (D300S and D300) (User’s Manual – D300S page 283; D300 page 291) Flash cntrl for built-in flash provides four distinct ways to control the pop-up Speedlight’s flash output. This... - Page 354 2. Highlight Flash cntrl for built-in flash and scroll to the right (see Figure 4-50, image 2). 3. Choose one of the four choices on the list. In Figure 4-50, image 3, has been selected. The other choices will be detailed in Figure 4-51-Figure 4-53.
- Page 355 Figure 4-52. Flash cntrl for built-in flash – Repeating flash mode RPT – Repeating flash (see Figure 4-52) – This setting turns your flash into a strobe unit that you can see pulsing (unlike Auto FP high-speed sync mode), allowing you to get creative with stroboscopic multiple flashes.
- Page 356 • 1/128: 2–10, 15, 20, 25, 30, or 35 times ▪ Times – This setting controls the number of times the flash will strobe per second, between 2 and 10 in one-step increments, and then from 10 to 50 (at 1/128) by five-step increments.
- Page 357 Figure 4-53. Flash cntrl for built-in flash – Commander mode C – Commander Mode (see Figure 4-53) – This mode allows your camera to become a commander or controller of up to banks unlimited number external CLS-compatible Speedlight flash units, with four available channels (1-4).
- Page 358 – These groups represent groups of an unlimited number of remote mode (slaved) Speedlights that your camera can control and fire under the Nikon Creative Lighting System (CLS). Each group has four settings that apply to each flash unit in that group...
-
Page 359: Commander Mode Notes
You just each choose a different channel. An upcoming chapter of this book titled Chapter 12 devoted to using Nikon’s Creative Lighting System (CLS) and covers each of the Commander modes and flash unit types in more detail than the summary found here. -
Page 360: Modeling Flash
33 feet (10.05m) from the camera. That’s the maximum distance Nikon supports for the D300(S) pop-up flash in Commander mode. If these issues bother you, then invest in the Nikon SU-800 Wireless Infrared Controller unit that replaces the pop-up flash/Commander mode combo. You mount it onto the... - Page 361 Modeling flash to On. This function works with Nikon’s main Speedlight flash unit group: SB-900, SB-800, SB-600, or SB-R.200. It also works with the pop-up flash for limited periods. My SB-400 flash unit does not work with Modeling flash.
-
Page 362: Auto Bracketing Set
Auto Bracketing Set Custom setting e5 (D300S and D300) (User’s Manual – D300S page 289 & 120; D300 page 298 & 118) Auto bracketing set lets you choose how bracketing works for each of the camera’s bracketing methods. - Page 363 Let’s start by reviewing the five types of bracketing on the D300S and the four on the D300. I’ll explain how to use bracketing in an upcoming section: ▪ AE & flash – When you set up a session for bracketing,...
- Page 364 Active D-Lighting. ADL bracketing is not available on the D300. 4. Press the OK button to lock in the setting. Now, let’s look into how the various bracketing systems work. We’ll first examine which button to use when starting...
- Page 365 Six – (f) Controls: Custom Settings f1 to f11: ▪ Assign Fn (FUNC.) button – Custom setting f5 (D300S) Custom setting f4 (D300) ▪ Assign preview button – Custom setting f6 (D300S) or Custom setting f5 (D300) ▪ Assign AE-L/AF-L button –...
- Page 366 Figure 4-56. Controls for Auto bracketing 1. Choose AE & flash, only, or Flash only from the Auto bracketing set screen, as shown in Figure 4-55, image 3. 2. Next, press and hold the (FUNC.) button on the right front of the camera (see Figure 4-56, image 1, red arrow) and turn the rear...
- Page 367 exposure in the bracket. This value appears on the top right of each screen in Figure 4-57 as 1.0, 0.3, and 0.3. Figure 4-57. Auto bracketing (AE & flash) 4. While holding the (FUNC.) button, rotate the front Sub-command dial to change the EV value of each image in the bracket, in steps of 1/3, 1/2, or EV.
- Page 368 Figure 4-57, image 1, shows a five-shot bracket with both over- and underexposure of EV step per image. You can tell by the at the top left of the Control panel, along with the number of lines hanging below the scale. The means that there is 1.0 EV step (1 stop) between each exposure in the bracket.
- Page 369 1 stop. This type of bracketing allows me to combine detail from the highlight and dark areas in-computer for the HDR exposures everyone is experimenting with these days. Figure 4-58. Nikon D300S, AF-S Nikkor 16-85mm f/3.5-5.6G ED lens...
- Page 370 WB Bracketing You can also do WB bracketing (white balance) in a way similar to flash or exposure bracketing, using the controls shown in Figure 4-56. If you want to bracket your camera’s white balance, you must Custom setting e5 >...
- Page 371 dial left or right, up to nine shots total. The symbol shows the number of images (3), as do the lines hanging below the scale—just above the WB-BKT symbol. You control the white balance color differences by bracketing toward amber or blue or b).
- Page 372 the bracket, and then saves each image as a separate image file with a new consecutive file number and bracketed color value. This works very differently from flash bracketing, where you have to fire off each individual frame of the bracket. WB bracketing is very easy since you only have to set the bracket in the...
- Page 373 ADL Bracketing (D300S only) ADL bracketing (ADL Active D-Lighting) is available only in the D300S (not the D300). It is designed to let you shoot a normal image and then a series of up to four additional images with Active D-Lighting applied at progressively higher levels to each.
- Page 374 2. Hold down the (FUNC.) button and turn the rear Main command dial to select the number of frames you want in the bracket (1 to 5 images). You’ll see the top left of the Control panel and the number of frames in the bracket series on the top right (5F).
-
Page 375: Auto Bracketing (Mode M)
I do. Auto Bracketing (Mode M) Custom setting e6 (D300S and D300) (User’s Manual – D300S page 290; D300 page 299) Auto bracketing (Mode M) is a series of four selections that let you, or the camera, control the flash, shutter speed, and... - Page 376 Figure 4-61. Auto bracketing (Mode M) 1. Select e Bracketing/flash from the Custom Setting Menu and scroll to the right (see Figure 4-61, image 1). 2. Highlight Auto bracketing (Mode M) and scroll to the right (see Figure 4-61, image 2). 3.
- Page 377 ▪ Flash/speed/aperture – This setting is for those who want the camera to control the shutter speed, aperture, and flash while still doing bracketing. If Custom setting > Auto bracketing set is set to AE & flash, the camera will vary the shutter speed, aperture, and flash level to expose the bracketed images.
-
Page 378: Bracketing Order
Bracketing Order Custom setting e7 (D300S and D300) (User’s Manual – D300S page 290; D300 page 300) Bracketing order allows you to choose the order of your exposure settings (normal, overexposed, and underexposed) during a bracketing operation. - Page 379 Next, let’s see how these are used during bracketing: ▪ MTR > under > over – With this setting, the normal exposure (MTR) is taken first, followed by the underexposed image, then the overexposed image. If you are taking a group of five images in your bracket (see Custom setting e5), the camera will take the images like this: normal exposure >...
- Page 380 2. Highlight Bracketing order and scroll to the right (see Figure 4-62, image 2). 3. Choose one of the two bracketing orders on the list. In Figure 4-62, image 3, Under > MTR > over has been selected. 4. Press the OK button to lock in the setting.
- Page 381 11 settings in the D300S and 10 in the D300. The Custom Setting numbers within this section differ in the D300S and D300, as explained in the parentheses following the setting name: ▪ Backlight switch in D300S only) ▪...
-
Page 382: Custom Setting F1 (D300S Only)
D300) Switch (Backlight) Custom setting f1 (D300S only) (User’s Manual – D300S page 291) Backlight switch setting is new on the D300S. Nikon has used this same control for many years on the Power switch—controlling the backlight for the Control panel. - Page 383 When you push the switch, as shown in Figure 4-63, you’ll turn on the backlight for just the Control panel or both it and Information display. I’ve greatly enlarged the Backlight switch’s icon in Figure 4-63, image 2 so that you can see it better.
-
Page 384: Backlight Switch
I want access to the Information display on the rear monitor. Multi Selector Center Button Custom setting f2 (D300S) and f1 (D300) (User’s Manual – D300S page 291; D300 page 301) This Custom Setting called—not surprisingly—Multi selector center button... - Page 385 The D300S and D300 are different in how the Multi Selector is made. Nikon added an actual button to the center of the Multi Selector on the D300S. The D300 requires that you...
-
Page 386: Shooting Mode
Shooting Mode First, let’s see how pressing the center of the Multi Selector works in Shooting mode. Here are the screens and steps used to configure Multi selector center button Shooting mode (see Figure 4-65): 1. Select f Controls from the Custom Setting Menu scroll to the right (see Figure... - Page 387 Multi selector center button, the AF point lights up in red for easy viewing of its current location. When using the D300, be careful because the Multi Selector is sensitive to sideways movement and it is easy to move the sensor while trying to find it.
-
Page 388: Playback Mode
Not used is selected. D300 (Only) Multi Selector Usage Clue When you’re using the Multi Selector on the D300, even a little sideways pressure on the center of the button causes it to perform some other function than what was intended. - Page 389 Zoom on/off). If you select Choose slot and folder in the D300S, or Choose folder in the D300, you’ll need to be aware of some additional screens your camera can present. See Figure 4-68 Figure 4-69 in the upcoming sub-sections called...
- Page 390 There are four selections in Playback mode, as follows (see Figure 4-66, image 4): Thumbnail on/off This feature allows you to switch from viewing one image on your camera’s Monitor to viewing multiple thumbnails instead. It’s a toggle, so you can press the Multi selector center button to turn thumbnail view on and off.
- Page 391 Multi selector center button the image zoom jumps immediately to one of three levels of zoom, skipping the middle steps. The three levels are shown in Figure 4-67, which starts where Figure 4-66, image 4 leaves off: Figure 4-67. Multi selector center button (Zoom on/off settings) ▪...
- Page 392 The D300S and D300 have slightly different menus for the next function. The D300S has a function called Choose slot folder, while the D300 has Choose folder. The cameras’ menus are different under this setting because the D300 has no extra SD memory card slot, while the D300S has both an SD and CF card slot.
-
Page 393: Choose Folder (D)
The same applies if you try to select a memory card slot with no card in the slot. Choose folder (D300) When you select Choose folder you’ll have an extra screen... -
Page 394: Multi Selector
You may want to use one of those instead of my favorites. Multi Selector Custom setting f3 (D300S) and f2 (D300) (User’s Manual – D300S page 292; D300 page 302) Multi selector function allows you to set the camera’s Multi Selector... - Page 395 Here are the screens and steps used to configure the Multi selector function (Figure 4-70): Figure 4-70. Multi selector 1. Select f Controls from the Custom Setting Menu scroll to the right (see Figure 4-70, image 1). 2. Highlight Multi selector and scroll to the right (see Figure 4-70, image 2).
-
Page 396: Photo Info/Playback
The only drawback is shorter battery life, since this will tend to keep the meter on longer. Photo Info/Playback Custom setting f4 (D300S) and f3 (D300) (User’s Manual – D300S page 292; D300 page 302) Photo info/playback determines how the Multi Selector... - Page 397 My Recommendation: Nikon seems to want to make the D300(S) very flexible so that it can meet the needs of a wide range of user preferences. I like the factory default of left-right for image...
-
Page 398: Assign Fn Button
Assign Fn (FUNC.) Button – Custom Setting f5 (D300S) and f4 (D300) (User’s Manual – D300S page 292; D300 page 303) Assign Preview Button – Custom Setting f6 (D300S) and f5 (D300) (User’s Manual – D300S page 296; D300 page 306) Assign AE-L/AF- L Button –... - Page 399 settings we are about to review are designed to let you customize the usage of the Selected button alone or the Selected button + Command dials. Here is a list of the screens followed by the steps used to configure the Selected button: ▪...
- Page 400 Figure 4-73. Assign preview button Figure 4-74. Assign AE-L/AF-L button Remember that the next nine steps are designed to explain any of the three buttons to which you can assign a function. Selected button represents the button you are currently assigning.
- Page 401 1. See Figure 4-72 to 47C for individual button assignment screens: ▪ Figure 4-72 (FUNC.) button ▪ Figure 4-73 Preview button (a.k.a., Depth-of-field preview button) ▪ Figure 4-74 AE-L/AF-L button 2. Select f Controls from the Custom Setting Menu scroll to the right (see Figure 4-72, Figure...
- Page 402 9. Press the OK button to lock in the setting for Selected button + command dials. Note: For some reason, Nikon chose to call the (FUNC.) button plus “command dials” selection by a different name. Notice that in Figure 4-72, image 3, the second setting is...
- Page 403 Fn (FUNC) button will activate depth of field preview instead. Setting this function disables other functionality in the D300(S). Please see the** note at the end of this section. ▪ FV lock** – If you set Selected button to lock, the...
- Page 404 AE Lock just like pressing the Selected button a second time does. Setting this function disables other functionality in the D300(S). Please see the** note at the end of this section. ▪ AE lock (Hold)** – Enabling this function causes (exposure) to lock on the last meter reading when the Selected button is pressed once.
- Page 405 be able to take a non-flash picture. While you hold down the Selected button, the flash is disabled. ▪ Bracketing burst – Normally, during a bracketing sequence with the shutter release set to Single Frame Release Mode—the next to on the Release mode dial—you have to press the...
- Page 406 Nikon included this so that you could play back images when using a big telephoto lens that requires two hands to use. Setting this function disables other functionality in the D300(S). Please see the** note at the end of this section. This function applies to the D300S only.
- Page 407 JPEG mode. Setting this function disables other functionality in the D300(S). Please see the** note at the end of this section. This function applies to the D300S only. ▪ None (default) – When this setting is enabled, the Selected button does nothing.
- Page 408 occasionally. By setting 1 step spd/aperture, you can hold down the Selected button and the camera will then allow you to change the shutter speed or aperture in step increments (1 EV step) instead of the normal step. Example shutter speeds in 1/3 EV steps are: 1/60, 1/80, 1/100, 1/125, 1/160.
-
Page 409: Customize Command Dials
I hope you’ll experiment with each of these settings and see if you like others better. Nikon has given us amazing configurability for our assignable buttons, so why not test each one? Customize Command Dials Custom setting f8 (D300S) and f7 (D300) (User’s Manual – D300S page 297; D300 page 308) - Page 410 Customize command dials does what it sounds like—it lets you change how the Command dials operate. There are several operations you can modify: ▪ Reverse rotation ▪ Change main/sub ▪ Aperture setting ▪ Menus and playback Let’s examine each of these items and the screens and steps used to change them (see Figure 4-75):...
- Page 411 Command dials. There are two selections: ▪ – The Command dials are reversed. An example is this: Normally, when the D300(S) is set to Aperture priority auto, and you rotate the Sub-command dial the right, the aperture decreases, like this: f/5.6...
- Page 412 1. Continuing from Figure 4-75, image 3, select Reverse rotation and scroll to the right (see Figure 4-76, image 2. Select from the list (see Figure 4-76, image 3. Press the OK button to lock in the setting. My Recommendation: I leave the Command dials rotation set to factory default.
-
Page 413: Aperture Setting
Figure 4-77. Customize command dials (Change main/sub) 1. Select from the list (see Figure 4-77, image 2). 2. Press the OK button to lock in the setting. My Recommendation: I leave the Command dials set to factory default (Off). I’ve been using Nikons for too many years to change Command dial functionality now! - Page 414 Here are the screens and steps to change the style of Aperture setting (see Figure 4-78): 1. Continuing from Figure 4-75, image 3, select Aperture setting and then scroll to the right (see Figure 4-78, image 1). Figure 4-78. Customize command dials (Aperture...
- Page 415 apertures. I don’t adjust apertures with the old aperture ring on the lens unless I’m using older non-CPU, manual focus AI or AI-S lenses. Menus and playback This setting is designed for those who do not like to use the Multi Selector for viewing image Playback...
-
Page 416: Release Button To Use Dial
Try this one out; you may like it too! Release Button to Use Dial Custom setting f9 (D300S) and f8 (D300) (User’s Manual – D300S page 298; D300 page 309) - Page 417 Release button to use dial allows those who hate holding down buttons and turning Command dials at the same time to change to a different method. It would be very useful to a person with limited hand strength, allowing them operate the camera more easily.
-
Page 418: No Memory Card
No Memory Card? Custom setting f10 (D300S) and f9 (D300) (User’s Manual – D300S page 299; D300 page 310) No memory card? defaults to locking the shutter when you try to take an image without a memory card inserted in the camera. - Page 419 The only useful reason I can see for doing so is when you are using Nikon Camera Control Pro software to send pictures directly to your computer (that software is not included with the camera). Here are the two settings: ▪...
-
Page 420: Reverse Indicators
I can find no way to write any of the images in the buffer out to a memory card. If you are the curious type, I hope this saves you some time. Reverse Indicators Custom setting f11 (D300S) and f10 (D300) - Page 421 (User’s Manual – D300S page 299; D300 page 311) Reverse indicators lets you change the direction of your camera’s exposure displays. Normally, anytime you see the exposure indicators in your camera’s Control panel, Viewfinder, or the Information display, the is on the left, and the is on the right.
- Page 422 Figure 4-83. Reverse indicators screens 1. Select f Controls from the Custom Setting Menu scroll to the right (see Figure 4-83, image 1). 2. Highlight Reverse indicators and scroll to the right (see Figure 4-83, image 2). 3. Choose one of the two selections from the list. In Figure 4-83, image 3, the normal exposure indicator direction has been selected.
- Page 423 My Conclusions Using the Shooting Banks and Custom Banks Together Now that you have set up and named each of the banks you are interested in using, you are ready to make your camera act like a chameleon (or herd of chameleons). You know how each Shooting menu bank Custom setting bank...
-
Page 424: Passionate Photography
Think of the ways you most often take pictures, and configure your D300(S) for each of those ways. Your camera will be customized to you! Passionate Photography As I’ve often mentioned, I’m a nature photographer. - Page 425 Parkway West, Great Smoky Mountains National Park, Tennessee, USA. Image details: Nikon D300; Sigma 10-20mm f/4-5.6 HSM lens at 10mm; 1/2 second at f/22; Spot metering on distant mountains; Aperture priority exposure mode; ISO Lo 1.0 (100); SD Picture Control...
- Page 426 Figure 4-85. Foothills Parkway West, Great Smoky Mountains National Park, Tennessee, USA. Image details: Nikon D300; AI Nikkor 35mm f/2 lens; 1/250 second at f/8; Matrix metering; Aperture priority exposure mode; ISO Lo 1.0 (100); SD Picture Control...
- Page 427 Chapter 5. Setup Menu Dawn on El Capitan – Courtesy of Russ Glindmeier (russg)
- Page 428 Setup Menu icon location. Here is a list of all the functions available in the Setup Menu of the D300(S). There are 22 in the D300S, and 20 in the D300: Figure 5-1. Setup Menu...
- Page 429 (NTSC or PAL). ▪ HDMI – Select various HDMI sync rates for interfacing with an HDTV or monitor. ▪ Time zone and date (D300S) or World time (D300) – Set the Time zone, Date and...
- Page 430 Monitor and later on your computer’s monitor. ▪ USB (D300 only) – Allows you to choose between protocol options MTP/PTP Mass Storage before connecting your D300 to various USB devices. The...
- Page 431 ▪ GPS – If you own a GPS that can be connected to the Nikon D300(S)—such as the Accessory shoe-mounted Nikon GP-1 or another GPS unit—you can record Latitude, Longitude, Altitude, Heading, and (Coordinated Universal Time) into the metadata of each image.
-
Page 432: Format Memory Card
Format memory card allows you to prepare your memory cards for use in your new camera. The D300S has two memory card slots, while the D300 has one. Since the cameras have a different number of card slots, the Setup Menu screens are different. - Page 433 If you don’t like using the external camera controls to format a memory card, the D300(S) allows you to use the Shooting menu instead. We’ll examine both methods. The D300S has both a CF and SD memory card slot, so you’ll have to choose which card you want to format when you use Setup Menu >...
- Page 434 Choose the one you want to format and scroll to the right. You’ll need to repeat this action to format the second slot. ▪ D300: Since the D300 only has one CF card, the middle screen in Figure 5-2 will not show.
- Page 435 Camera Button Format Method This is the fastest method to format the memory card, and is a no-brainer for the D300. For the D300S, it is a little more complicated since it only formats the current primary card slot and not the secondary.
- Page 436 Figure 5-4. Camera buttons and Control panel – formatting ▪ D300: Since the D300 only has the one CF card slot, the camera knows what to format, so go directly to step # 2 when is flashing. 2. Once is flashing on the...
- Page 437 My Recommendation: You can repeat the operation for the other slot on the D300S if needed. Both the Setup Menu > Format memory card and the camera button format methods are easy to use. Most of us learn to use the camera button method since it’s so fast.
-
Page 438: Lcd Brightness
LCD Brightness (User’s Manual – D300S page 301; D300 page 313) LCD brightness is more important than many people realize. If the Monitor is too dim, you’ll have trouble seeing your images in bright light. If it is too bright, you might allow some images to be underexposed, thinking that they look fine on the Monitor. - Page 439 Otherwise, you may find that you are allowing the camera to slightly underexpose your images. The D300(S) has one of the best exposure meters I’ve seen in a camera, yet it is not perfect and needs your help sometimes.
-
Page 440: Clean Image Sensor
Dust is everywhere and will eventually get on your camera’s sensor. Well, it doesn’t really get on the sensor itself, since there are filters in front of the sensor. The D300(S) cleans the sensor by vibrating the entire sensor unit, which includes the low-pass filter in front of the sensor. - Page 441 Clean now – This option allows you to clean the sensor anytime you feel like it. If you detect a dust spot, or just get nervous because you are in a dusty environment with your D300(S), you can simply select Clean now, and the camera will execute a cleaning cycle.
- Page 442 camera. A screen will appear that says Cleaning image sensor. When the process is complete, another screen will appear that says Done. Then the camera switches back to the Setup Menu. Now, let’s look at how we can select an active method for regular sensor cleaning (see Figure 5-7).
- Page 443 4. Press the OK button to lock in your choice. My Recommendation: Nikon suggests that you hold the camera at the same angle as when you are taking pictures (bottom down) while you use these modes to clean the sensor.
-
Page 444: Lock Mirror Up For Cleaning
I remember having to do this with my Nikon D100 in 2002, and I was always afraid I might ruin the shutter if I did it incorrectly. With the D100, I had to hold the shutter open in bulb mode with one hand while I blew off the sensor with the other. - Page 445 If even an air blower fails to remove stubborn dust or pollen, you will either have to get your sensor professionally cleaned or do it yourself. Nikon states that you will void your warranty if you touch the low-pass filter. However, many...
- Page 446 I’ll never admit it! (Oops!) If all of this makes you nervous, then send your camera off to Nikon for approved cleaning, or use a professional service. Fortunately, a few puffs of air will often remove dust too stubborn for the high-frequency vibration methods.
-
Page 447: Video Mode
Video Mode (User’s Manual – D300S page 301; D300 page 314) If you plan on connecting your D300(S) to a video device, like a standard-definition television (SDTV) or VCR, you’ll need to use the correct Video mode for communication with the device. - Page 448 ® Figure 5-9. Giottos Rocket-Air blower for sensor cleaning Make sure that you have the correct Video mode selected for your area of the world. There are two video modes available in the D300(S): NTSC and PAL.
- Page 449 Figure 5-10. Video mode selections Figure 5-10 are the screens and following are the steps used to select a Video mode: 1. Select Video mode from the Shooting Menu and scroll to the right. 2. Choose NTSC or PAL from the menu shown in Figure 5-10, image 2, and then scroll to the right.
- Page 450 HDMI (User’s Manual – D300S page 302; D300 page 315) HDMI (High-Definition Multimedia Interface) allows you to display your images and video (D300S only) on a high-definition monitor or television (HDTV). The camera’s Monitor shuts off when you are connected to an HD device.
- Page 451 Figure 5-12. HDMI screens Before you connect the camera to your HDMI display, you’ll need to set one of these HDMI formats: ▪ Auto (default) – This allows the camera to select the most appropriate format for displaying your image on the currently connected device.
- Page 452 HDMI. The D300(S) can interface with both progressive and interlaced devices. The HDMI display will take the place of the Monitor on the back of your D300(S). The camera monitor will turn off as soon as you connect an HDMI device.
- Page 453 Figure 5-13 shows the two slightly different Setup Menu screens, one for the D300S and the other for the D300. After this initial textual difference, both cameras have almost identical time and date screens, which include the following functions: ▪...
- Page 454 ▪ Daylight saving time Figure 5-13. D300S and D300 Time zone and date screens Time zone – Figure 5-14 shows the Time zone configuration screens, as a continuation of Figure 5-13. The screen used to set the time zone displays a familiar world map from which you will select the area of the world where you are using the camera.
- Page 455 Figure 5-14. Time zone screens 2. To set the Time zone, use the Multi Selector to scroll left or right until your time zone is under the yellow vertical bar in the center or is marked with a small red dot. 3.
- Page 456 Figure 5-15. Date and time screens 3. Press the OK button to lock in the Date and time. Please note that the time setting uses the 24-hour military-style clock. To set 3 p.m., you would set the settings to 15:00. See the upcoming 12- to 24-Hour Time Conversion Chart for your convenience.
- Page 457 05:00 a.m. = 05:00 11:00 a.m. = 11:00 P.M. Settings: 12:00 p.m. = 12:00 (noon) 06:00 p.m. = 18:00 01:00 p.m. = 13:00 07:00 p.m. = 19:00 02:00 p.m. = 14:00 08:00 p.m. = 20:00 03:00 p.m. = 15:00 09:00 p.m. = 21:00 04:00 p.m.
- Page 458 familiar to Americans. Other areas of the world can select their favorite date format. Figure 5-16. Date format screens Here are the steps to set the Date format (see Figure 5-16; continues from Figure 5-13): 1. Choose Date format from the Time zone and date screen and scroll to the right (see...
- Page 459 Figure 5-17. Daylight saving time screens 1. Choose Daylight saving time from the Time zone and date screen and scroll to the right (see Figure 5-17, image 1). Figure 5-17, image 2, shows you the two choices for Daylight saving time: On or Off.
- Page 460 Nikon is a company that sells cameras and lenses around the world. For that reason, the D300S can display its screens and menus in up to 17 languages, and the D300 has 15. The camera includes the following languages on its Setup Menu >...
- Page 461 ▪ Simplified Chinese ▪ Japanese ▪ Korean Here are the screens and steps used to select your preferred Language (Figure 5-18): 1. Select Language from the Setup Menu and scroll to the right. Figure 5-18. Selecting a language for your camera 2.
-
Page 462: Image Comment
Image Comment (User’s Manual – D300S page 303; D300 page 317) Image comment is a useful setting that allows you to attach a 36-character comment to each image you shoot. The comment is embedded in the picture’s internal metadata and does not show up on the image itself. - Page 463 5. Press the Multi selector center button (D300S) or center of the Multi Selector (D300) to select a character. Keep selecting new characters until you have the entire new name in place. I added “Copyright Darrell Young” to my camera’s Image comment field.
- Page 464 Setup Menu selection called Copyright information in the D300S only that allows you to add your personal copyright. We’ll consider this function later in the chapter. The D300 does not have the Copyright information selection, so Image comment is a good place to enter a copyright notice for that camera.
-
Page 465: Auto Image Rotation
Auto Image Rotation (User’s Manual – D300S page 304; D300 page 318) Auto image rotation is concerned with how a vertical image is displayed on your camera’s Monitor and later on your computer. Horizontal images are not affected by this setting. - Page 466 ▪ Off – If Auto image rotation is turned Off, the vertical image will be displayed as a horizontal image lying on its side in your computer software. The top of the image will be on the left or right according to how you held the hand grip—up or down—when you took the picture.
- Page 467 My Recommendation: If you want your images to be displayed correctly on your camera’s Monitor and in your computer, you’ll need to be sure that Auto image rotation set to On. I always keep mine set that way.
- Page 468 ▪ Mass Storage – first protocol is Mass Storage (MSC), which makes your D300 act like a portable hard drive when attached to your computer with a USB cable. It will show up as a drive letter in your computer’s hard drive browser (Windows Explorer, etc.).
- Page 469 I know that should allow us to connect/ disconnect at will, but I will not endanger my camera by doing so, especially if using the Mass Storage protocol (D300 only). How wise do you think it is to unplug a...
- Page 470 It would be a shame to blow out the electronics on an expensive camera like the D300 over a static electricity spark. Windows 2000 (specifically) – Do not use...
- Page 471 “device” instead of a hard drive letter assignment. I choose MTP/PTP for my D300 because it appears as a little camera device in my computer’s file browser. That’s a lot easier to find! What about the D300S and USB? The D300S has no USB menu selection.
-
Page 472: Image Dust Off Ref Photo
Image Dust Off Ref Photo (User’s Manual – D300S page 305; D300 page 319) Often, you may go out and do an expensive shoot only to return and find that some dust spots have appeared in the worst possible place in your images. If you immediately... - Page 473 Finding a Subject for the Dust-Off Reference Photo First, we need to select a featureless subject to make a photograph for the Image Dust Off ref photo. The key here is to use a material that has no graininess, such as bright-white, slick plastic or a white card.
- Page 474 1. Select Image Dust Off ref photo (D300S) or Dust Off ref photo (D300) from the Setup Menu and scroll to the right. There is also a Clean sensor and then start selection. However, since I want to remove dust on current pictures, I won’t use this setting.
- Page 475 too much brightness, use a gray surface instead of white. Most of the time this error is caused by insufficient light. Figure 5-23. Incorrect exposure 4. If you don’t see the screen in Figure 5-23, and the shutter fires, you have successfully created an Image Dust Off photo.
- Page 476 Image Dust Off ref photo. You can now use Nikon Capture NX2 to remove the dust spot from all the images covered by this Image Dust Off ref photo.
- Page 477 If you hold your camera too far away from the white surface you are photographing, you will get a warning that says, The selected Dust Off reference photo contains too much dust and could cause image details to be lost. Do you want to use it anyway? When your lens is a distance away from the surface, you might actually be photographing small dirt on the surface of...
-
Page 478: Battery Info
Battery Info (User’s Manual – D300S page 307; D300 page 322) Battery info screens, as seen in Figure 5-25, will let you know how much battery voltage charge has been used (Bat. meter), how many images have been taken with this battery since the last charge (Pic. - Page 479 OK button to exit. The D300(S) goes a step farther than most cameras. Not only does it keep you informed of the amount of “charge” left in your battery, it also lets you know how much “life” is left.
- Page 480 The battery charger (MH-18A) for the Nikon D300(S) does not have a calibration feature, so many D300(S) users will have little knowledge of it. The battery charger (MH-21 and MH-22) for the EN-EL4 and EN-EL4a battery does have calibration.
-
Page 481: Wireless Transmitter
You can also use Nikon’s Camera Control 2.x software to control the D300(S) remotely. Here are the four modes found in the D300(S) with a WT-4 attached: ▪ Transfer mode – Using this mode, you can upload new or existing images to a computer or even to a File Transfer Protocol (FTP) server. - Page 482 This book won’t cover the use of the WT-4 transmitter in any more detail since the transmitter has its own comprehensive feature set and manual and this book is about the Nikon D300(S). Low-Cost Wireless Image Transmission for Your D300S...
-
Page 483: Image Authentication
Image Authentication (User’s Manual – D300S page 308; D300 page 324) Image authentication is a method used in conjunction with Nikon software to guarantee that an image has not been modified in any way. With film, one can easily detect whether a printed image has been modified from the original. - Page 484 This merely shows that an image has been shot with Image authentication enabled. It takes the Nikon software to prove whether or not it has been modified. Figure 5-27. Playback screen with authentication stamp There are two settings in the Image authentication...
- Page 485 Pulitzer Prize, I’ll want to be able to prove later that the images I took have not been modified in any way. I’ll have to buy the Nikon Image Authentication software to prove it, but with the money I’ll make from these images, it’ll be worth it.
- Page 486 various sorts—turn this on immediately. Later you can prove that you have not modified the image.
- Page 487 D300S. It allows you to embed Artist Copyright data into each image. Use Shooting Menu > Image comment for the D300 since it has no Copyright information setting. Refer to Figure 5-29 and use the following steps to add...
- Page 488 Multi selector center button the D300S or the center of the Multi Selector in the D300. You correct errors within the text you’ve already entered by holding down the Thumbnail/playback zoom out button and scrolling left or right with the Multi Selector.
- Page 489 Digital Millennium Copyright Act (DMCA). Once you’ve taken a picture, you hold the copyright to that image. You must be able to prove you took it. This is one convenient way. D300 users should add similar information under the Image comment...
- Page 490 Save/Load Settings (User’s Manual – D300S page 310; D300 page 325) Do you have your D300(S) set up exactly the way you like it? Have you spent hours and hours with this book and the user’s manual, or simply exploring menus, and finally got all the...
- Page 491 D300(S). Here is a list of settings saved or loaded when you make use of these functions. It doesn’t save or load every last setting in the D300(S), only the ones listed here: ▪ Playback Menu • Display mode •...
- Page 492 • File naming • Image quality • Image size • JPEG compression • NEF (RAW) recording • White balance (includes fine-tuning adjustments and presets d-0 to d-4) • Set picture control • Color space • Active D-Lighting • Long exp. NR •...
- Page 493 (D300S only) If you change the name of the NCSETUP5.BIN (or NCSETUP1) file, the D300(S) will not be able to reload your settings from it. Also, if you save the settings when an existing file is on the memory card, it will be overwritten without prompting you for permission.
- Page 494 backed-up settings file on a memory card, pop it into the camera, hit Load settings, and I’m back in business.
- Page 495 Now when you shoot a spectacular travel image, you can rest assured that you’ll be able to find that exact spot next year. The D300(S) will record the following GPS information about your location in the metadata of each image: ▪...
- Page 496 I deliberately put the curl in the cable to keep it from sticking out awkwardly. One thing to note about the Nikon GP-1 GPS unit is that it doesn’t have a built-in digital compass, so it will not report Heading information to the camera.
- Page 497 GPS unit plugs into the data cable. Newer handheld GPS units use USB cables, and even though the D300(S) has a USB port, it is not designed to work with aftermarket GPS units. If you decide to use an aftermarket GPS, just make sure you can get a data cable for it with a D-sub 9-pin connector to plug into the Nikon MC-35 cable.
- Page 498 The Nikon GP-1 GPS unit has a port on its side that allows you to plug in the optional MC-DC2 shutter-release cable. I suggest you get one of these at the same time you buy your Nikon GP-1 GPS unit.
- Page 499 Preparing the Camera for GPS Usage There are several screens used in setting up the D300(S) for GPS use. First, a decision should be made about the exposure meter when a GPS unit is plugged into the camera. While the GPS is plugged in, the camera’s exposure meter must be...
- Page 500 Once a GPS is attached, the next screen after Position shows the actual GPS location data being detected by the D300(S), as shown in Figure 5-35. When the camera establishes communication with your GPS, it does three things:...
- Page 501 GPS is searching for a signal. If you take a picture with icon flashing, no GPS data will be recorded. If the icon is not flashing, it means that the D300(S) is receiving good GPS data and is ready to record data to a picture.
- Page 502 Heading information will not be accurate. This does not apply to the Nikon GP-1 GPS unit, which has no digital compass. It only records Latitude, Longitude, Altitude, and time, not the...
- Page 503 Legend mapping GPS on Amazon.com for just over $100 USD. It came with a D-sub 9-pin data cable. I had to buy the Nikon MC-35 cable, and I was all set! Primarily, just be aware that the GPS unit must have a way to connect to the Nikon MC-35 cable in order to interface with the D300(S).
- Page 504 USB connector on our cameras with a USB-based GPS. Nikon, are you listening?
- Page 505 Virtual Horizon (D300S only) (User’s Manual – D300S page 311) Virtual horizon is a new feature for the Nikon D300S camera only. This particular selection is not for live picture-taking use, however. All it does is bring up the Virtual horizon indicator on the camera’s Monitor.
- Page 506 2. The following screen shows the Virtual horizon indicator. You can now use it to level the camera on your tripod. My Recommendation: Honestly, I don’t use Virtual horizon very often. Instead I have Custom setting d2 (Viewfinder grid display) turned on. The grid lines allow me to look at my subject while leveling my camera.
- Page 507 Lens manufacturers like Zeiss and Nikkor are still making MF lenses, and because some of them do not have a CPU (electronic chip) that communicates with the camera, it’s important to have a way to let the D300(S) know something about the lens in use. This...
- Page 508 1. Select Non-CPU lens data from the Setup Menu and then scroll to the right. 2. Scroll down to Lens number and scroll left or right until you find the number you want to use for this particular lens. 3. Scroll down to Focal length (mm) and scroll left or right to select the focal length of the lens.
- Page 509 Your lens data will be saved within the D300(S). Later, you can put a non-CPU lens on your camera and select it from the list of nine lenses. You can use external camera controls or the Non-CPU lens data menu to change to your current lens.
-
Page 510: Lens Menu
Selecting a Non-CPU Lens by Using External Camera Controls The D300(S) allows you to customize its buttons to do things the way you want them to be done. You may only have one or two non-CPU lenses, so it may be sufficient to just use the Non-CPU lens data menu to select a lens. - Page 511 AE-L/AF-L button combination with the front Sub-command dial to select my non-CPU lenses. You can map any of several D300(S) buttons, in combination with a command dial, to select non-CPU lenses. Please refer to the chapter titled Chapter 4 and the sections on button assignment (e.g., Assign Fn button) for instructions on how to map the camera’s...
-
Page 512: Af Fine Tune
One thing that really impresses me about the D300(S) is its ability to be fine-tuned in critical areas like metering and autofocus. Previous to the D300(S), if an AF lens had a back focus problem, you just had to tolerate it or send it off to be fixed by Nikon. - Page 513 Figure 5-39. AF Fine tune, first two screens Following are the screens and steps to configure AF fine tune for lenses you own, if needed (see Figure 5-39 through Figure 5-43). There are four selections on the AF fine tune menu: ▪...
- Page 514 ▪ On – This setting turns the AF fine tune system on. Without this enabled, the D300(S) focuses like a factory default D300(S). ▪ Off – This default setting disables the AF fine tune system.
- Page 515 If you are convinced that your particular camera always has a back or fore focus problem, and you are not able or ready to ship it off to Nikon for repair, you can use the Default...
- Page 516 D300(S) if no value already exists in the Saved value the lens. Moving the pointer up on the scale pushes the focal point away from the camera (front focus), while moving it down pulls the focal point toward the camera (back focus).
- Page 517 List saved values helps you remember which lenses you’ve fine-tuned the D300(S) to use. It also allows you to set an identification number for a particular lens. Many people use the last two digits of the lens’s serial number as the List saved values number for that lens.
- Page 518 Eye-Fi Upload (D300S only) (User’s Manual – D300S page 313) Eye-Fi upload only shows on the Setup Menu of your D300S when you have an Eye-Fi card inserted. The Eye-Fi company makes several of these tiny SD/ SDHC cards with built-in Wi-Fi transmitters. Figure 5-44 shows my personal Eye-Fi 8GB Pro X2 high-speed “Class 6”...
- Page 519 You can also ask the card to simultaneously transfer the images to file-sharing websites like Flickr and Facebook (plus 23 more). Most lower-cost Eye-Fi cards require a wireless network to transfer the images. However, recently Eye-Fi came out with a card that will do “Ad Hoc” transfers, meaning that they don’t need a wireless network connection and will send pictures directly to a computer with wireless capability.
- Page 520 Web: http://rockynook.com/NikonD300S. My Recommendation: I wanted to buy a nice Nikon WT-4 transmitter until I saw the price. Whew! I think I’d rather buy that AF-S Nikkor 200-400mm F/2.8 ED VR lens I crave mightily.
- Page 521 Now, I can do a photographic walkabout downtown and stop in at a McDonalds or Starbucks for a burger, coffee, and a free wireless connection—and transfer my images to the home computer while I eat. I really like this little Eye-Fi card!
-
Page 522: Firmware Version
Firmware Version (User’s Manual – D300S page 314; D300 page 328) Firmware version is a simple informational screen, like the Battery info screen. It informs you which version of the camera’s operating system (firmware) you are running. Figure 5-46 shows the firmware version after I updated from 1.00. - Page 523 Upgrading Your Camera’s Firmware From time to time, Nikon will release a firmware upgrade for your camera. You may want to install this upgrade because it often fixes bugs, speeds things up, and even adds features to your camera. Here are the screens and steps for actually doing...
- Page 524 (see Figure 5-47, image 2). Do not turn the camera off during the firmware upgrade process or it may need to be repaired by Nikon before it will work again! You will receive instructions on the camera’s Monitor when it is safe to turn the camera off.
- Page 525 The reason I always upgrade my camera is because I figure that Nikon is not going to publish every little bug it has fixed in each firmware upgrade, and I want all mine fixed. I’ve never yet—in 8 years of upgrading the firmware on my Nikons—had a failure or problem.
- Page 526 My Conclusions Whew! The D300(S) may seem like a complicated little beast, but that’s what you get when you fold professional-level functionality into a relatively small DSLR body. Complex as it is, I’m certainly delighted with it. Next, we’ll consider how to use the camera’s Retouch Menu to adjust images without using a computer.
- Page 527 Chapter 6. Retouch Menu Free Climber – Courtesy of Octavian Radu Topai (Tavi)
- Page 528 You can crop the image in several aspect ratios in the D300S, including 1:1, 3:2, 4:3, 5:4, and 16:9. The D300 only has 3:2, 4:3, and 5:4. ▪ Monochrome – Lets you convert your color images into monochrome. There are three tints available,...
- Page 529 There are limitations imposed when you are working on an image that has already been retouched. Here’s a look at the Retouch Menu for both the D300S and D300 (see Figure 6-1).
- Page 530 DSC_0047, the resulting new JPEG image will have the number DSC_0101—or is now the 101st image. The D300(S) looked to see how many images were on the memory card (100) and then added the retouched image like it was a brand-new exposure, assigning it the next available image number.
- Page 531 selections. The most comprehensive retouch selections are available directly under the Retouch Menu. Figure 6-2. Retouching from Playback preview Since both the Playback Retouch Menu and direct Retouch Menu methods have the same functions, we’ll discuss them as if you were using the Retouch Menu.
- Page 532 Playback retouching. To use the Retouch Menu options, you’ll follow four basic steps (see Figure 6-2): 1. Press the Playback button and choose a picture by displaying it on the Monitor (see Figure 6-2, images 1 and 2). You’ll now have a picture ready for retouching. I chose a picture of my parents in Figure 6-2, image 2.
- Page 533 It lowers the overall image contrast, so it should be used sparingly. The D300(S) is not aggressive with its D-Lighting, so you can use it quickly if needed. Also, please remember that...
- Page 534 OK button to save the new file. The D300(S) will display a brief Image saved notice and then display the new file on the Monitor. My Recommendation: There is no one setting that is correct for all images. I often use...
- Page 535 Figure 6-4. Red-eye correction screens If you try to run Red-eye correction on an image for which flash was not used, the camera will inform you, Cannot select this file. Here are the screens and steps to execute the Red-eye correction function on an image (see Figure...
- Page 536 On larger subjects (close-ups) it does well, but on smaller ones, sometimes not so well. However, it’s a good function to have for quick Red-eye correction on critical images you need to use immediately. Trim (User’s Manual – D300S page 321; D300 page 336)
- Page 537 Trim function allows you to crop an image in-camera, change its aspect ratio, and save the file as a new image. Your original image is not modified. This is a useful function if you need to cut out, or crop, the most useful area of an image to remove distracting elements from the background.
- Page 538 (1:1) and an HD format (16:9). Monochrome (User’s Manual – D300S page 322; D300 page 337) Monochrome function in the D300(S) is fun to play with and can make some nice images. You have the choice of three...
- Page 539 Cyanotype, you can fine-tune the tint from almost nothing to pretty saturated in three levels. On the following page are the screens and steps to create a Monochrome image from one of your color images (see Figure 6-6): 1. Select Monochrome from the Retouch Menu...
-
Page 540: Filter Effects
Cyanotype. New Sepia-toned images can look very old if you dress people accordingly. Filter Effects (User’s Manual – D300S page 322; D300 page 338) Many times when you shoot images outdoors under an overcast sky or under certain types of artificial lighting, they can have a bluish cast, or look “cool”. - Page 541 – Provides an even stronger warming effect by adding a reddish tint to the image. This is sort of like an 81A or Nikon A2 warming filter. Here are the screens and steps to warm up the image a bit (see...
-
Page 542: Color Balance
Warm filter does add some significant warmth to the image and is very similar to an 81A warming filter (Nikon A2), so it’s more useful for when you simply want to warm up a somewhat cool image without using your computer. - Page 543 ▪ Blue ▪ Amber ▪ Magenta Here are the screens and steps to modify the Color balance your image (see Figure 6-8): Figure 6-8. Color balance screens 1. Select Color balance from the Retouch Menu and scroll to the right (see Figure 6-8, image 1).
-
Page 544: Image Overlay
Very flexible camera, eh? Image Overlay (User’s Manual – D300S page 324; D300 page 339) Image overlay function is a nice way to combine two RAW images as if they were taken as a multiple exposure. - Page 545 Figure 6-9. Image overlay screens 1. Select Image overlay from the Retouch Menu and scroll to the right (see Figure 6-9, image 1). 2. Insert the first RAW image in the Image 1 box (outlined in yellow) by pressing the OK button and selecting an image from the selection screen.
- Page 546 Save. Choose one of them (see Figure 6-9, image 8). 5. If you select Overlay, the D300(S) will temporarily combine the images and present you with another screen that allows you to see the images more closely. You can press the...
- Page 547 NEF (RAW) processing is only available on the D300S, not the D300. And it only works on images taken with the D300S, so you can’t insert a card from your Nikon D90 and expect to process its images.
- Page 548 ▪ Picture control – With this setting you can apply a different Picture Control to the image. It shows an abbreviation like SD, NL, VI, or for each Nikon Picture Control, plus any Custom Picture Controls you might have created with the designation of C-1, C-2, C-3, etc.
- Page 549 ▪ High ISO noise reduction – You can change the amount of High ISO noise reduction applied to the image. The camera offers you H, N, L, or settings, which are equivalent to the Shooting Menu > High ISO settings called High, Normal, Low, and Off. ▪...
- Page 550 image 2). Now we’ll look closely at each setting found on the screen shown in Figure 6-10, image 3. 3. Select one of the Image quality settings—FINE, NORM, or BASIC—from the Image quality menu (see Figure 6-11). FINE gives you the best possible quality in a JPEG image.
- Page 551 Figure 6-12. Image size Figure 6-13. White balance Figure 6-14. White balance – Fluorescent Figure 6-15. White balance – K or Choose color temp.
- Page 552 Figure 6-16. White balance – PRE or Preset manual 5. Select one of the White balance settings for your new JPEG (see Figure 6-13-Figure 6-16). You can choose from AUTO, Incandescent, Fluorescent, Direct sunlight, Flash, Cloudy, Shade, K-Choose color temp., or PRE –...
- Page 553 K-Choose color temp. (see Figure 6-15) – This extra screen gives you a list of color temperatures to choose from. Remember that color temperatures change how the image color looks by warming it (reddish) or cooling it (bluish). You can choose from a range of color temperatures: 2500K to 10,000K.
- Page 554 Figure 6-17. Exposure compensation Figure 6-18. White balance – Choosing and adjusting a Picture Control 7. Next you can apply a Nikon Picture Control or one of your own Custom Picture Controls, if you’ve created any, from the list shown (see Figure 6-18).
- Page 555 In fact, you can even modify the current Picture Control’s settings by using the final fine-tuning screen, as shown in Figure 6-18, image 3. Choose from SD-Standard, NL-Neutral, VI-Vivid, MC-Monochrome, PT-Portrait, LS-Landscape, or any of your custom controls (CS-1 to CS-9) that appear on the list. If you want to fine-tune the image in the final screen, you can make changes with the Multi...
- Page 556 Figure 6-19. High ISO noise reduction Color space lets you choose one of the camera’s two color space settings (see Figure 6-20). You can select from Adobe or sRGB. Adobe is the same as Adobe RGB. Choose one and press the OK button to return to the main...
- Page 557 Figure 6-21. Saving the new JPEG 10. Now, scroll down to the selection (EXE = Execute) and press the OK button (see Figure 6-21). The hourglass will show for a few seconds while the new JPEG is being created with your carefully crafted settings.
- Page 558 four available megapixel sizes. This is only available on the D300S. There are three selections involved: ▪ Select image – Allows you to choose one or more images for resizing. ▪ Choose destination – Lets you to choose a destination for the resized pictures.
- Page 559 images and press the button. This selection will be grayed out if one of the memory card slots is empty. 2. Next, select Choose size and scroll to the right (see Figure 6-23). You’ll see four available sizes, from 2.5 M down to M.
- Page 560 Figure 6-24. Saving the new JPEG When all the images are set, press the button. A final screen will show asking you, Create resized copy? N images, as shown in Figure 6-24, image 3. Select and press the OK button to create the resized image(s).
- Page 561 studied earlier. Instead, it simply reduces the image size in the same aspect ratio as the original, except it has a smaller megapixel size. Edit Movie (D300S only) (User’s Manual – D300S page 64) Edit movie gives you a two-step process to cut a section out of the middle of a D300S-created movie.
- Page 562 2. Select Choose start point Choose end point and scroll to the right. 3. Choose one of the available movies and then press the button. 4. The selected movie will show up on the Monitor await your input. Press the Multi selector center button to start playing the movie.
- Page 563 Playback Retouch Menu. Just remember that it’s a two-step process. Side-By-Side Comparison (User’s Manual – D300S page 331; D300 page 342) Side-by-side comparison allows you to compare an image you’ve retouched with its original source image. Interestingly, this function is not available on the Retouch Menu.
- Page 564 Figure 6-27. Comparing original and retouched images side by side 1. Press the Playback button and find the image you want to compare (see Figure 6-27, image 1). 2. Press the OK button to bring up the Playback Retouch Menu. 3.
- Page 565 Side-by-side comparison. You can tell an image is retouched by looking for the retouch symbol in the upper-left corner of the image. See Figure 6-27, image 1, which shows a retouched image as my choice for comparison.
- Page 566 My Conclusions Nikon has given camera users who dislike computers a way to work with their images in-camera. While not as fully featured as a computer graphics program, it does allow you to do quick one-off conversions for convenience. I didn’t think this group of...
- Page 567 Chapter 7. My Menu and Recent Settings Maine Coon Cat – Courtesy of Cindie Fearnall (Gipsi) As you have read through this book and experimented with your camera, you’ve surely noticed that the D300(S) has a...
- Page 568 We need a shortcut menu for our most-used settings—a place to keep the functions we’re constantly changing. Nikon has given us two specialty menus in the D300S and one in the D300. My Menu...
- Page 569 We’ll consider both menus in this chapter, with heavy emphasis on configuring Menu. My Menu (User’s Manual – D300S page 333; D300 page 344) My Menu is my menu! I can add or remove virtually any camera setting found on one...
- Page 570 Figure 7-1. Blank My Menu screens for D300S and D300 When you first look at My Menu you’ll see nothing but the selections shown in Figure 7-1: ▪ Add items ▪ Remove items ▪ Rank items ▪ Choose tab (D300S only)
- Page 571 Add Items To add an item to Menu, you’ll need to locate the item first. Search through the menus until you find the setting you want to add, and then make note of where it’s located. You could do this from within the Add items menu, but I find that it’s harder to locate what I’m looking for if I’ve not already...
- Page 572 D300(S) except Menu/Recent Settings (see Figure 7-2, image 2). Let’s add one of my favorites, the Exposure delay mode function (see Figure 7-3). Figure 7-3 picks up where Figure 7-2 left off. I’ve...
- Page 573 7-3, image 3, shows the Exposure delay mode function that I wanted to add. All I have to do is highlight it and press the button. Once I’ve done that the D300(S) switches to the Choose position screens (see Figure 7-3, image 4, and Figure 7-4).
- Page 574 Remove Items Now that we’ve figured out how to items, let’s examine how to Remove items. I’ve decided that one of my items, Active D-Lighting, is not used often enough to warrant a spot Menu, so I’ll remove it. Here’s how: 1.
- Page 575 Delete selected item? 4. Press the OK button again, and the setting is removed from Menu. A box pops up informing you that the item has been deleted, and then the D300(S) switches back to the My Menu screen.
- Page 576 Rank Items Ranking items works very similarly to positioning new additions in Menu. All the Rank items selection does is move an item up or down Menu. You can switch your most-used My Menu items to the top of the list. Use these steps: Figure 7-6.
- Page 577 Figure 7-7. My Menu – Rank items – Move Set Picture Control to a lower position 3. I highlighted Set Picture Control and pressed the button and a yellow box appeared around that item. Move appeared at the bottom of the screen (see Figure 7-7, image 1).
- Page 578 Choose Tab Choose tab allows you to switch between using My Menu Recent Settings. Both menus have the Choose tab selection as their last menu choice. Here are the screens and steps to switch between these two menus (see Figure 7-8): 1.
- Page 579 The last item on the list will simply disappear. Let’s now take a look at Recent Settings in a little more detail. The next section only applies to the D300S since the D300 has no Recent Settings screen.
- Page 580 Recent Settings (D300S only) (User’s Manual – D300S page 337) Recent Settings is very simple. This menu remembers the last 20 distinct changes you’ve made to your D300S camera. Each menu selection that was modified is stored in a temporary place called Recent Settings.
- Page 581 My Recommendation: If you want a more permanent menu for your favorite changes to the D300S, you’ll need to enable My Menu system instead of the Recent Settings menu. Recent Settings are fine, but I want to directly control what settings I have quick access to without searching.
- Page 582 D300(S). We’ve been through a lot of menu screens in the last several chapters! Now, let’s examine the powerful Live View (Lv) mode found in the D300S and D300. No longer are we bound to using just the camera’s Viewfinder—we can use the Monitor screen instead.
- Page 583 Five-image color HDR, tone mapped in Photomatix Pro 3 and converted to monochrome in Photoshop CS4 (channel mixer), with extreme red channel emphasis. Nikon D300S, AF-S Nikkor 16-8smm f/3.5-5.6 G ED VR lens at 16mm. Camera settings: Shutter speed – varies (five-exposures), Aperture –...
- Page 584 Chapter 8. Live View and D-Movie Modes...
- Page 585 Sol Duc Valley Stream – Courtesy of Daniel Stainer (spiritualized67)
- Page 586 View. I think you’ll find that your work improves, and your back feels much better too. If you’ve come over from the point-and-shoot world with your new D300(S), then use Live View if it makes you comfortable, at first. However, please realize that it is difficult to make sharp images when you are waving a heavy DSLR around at arm’s length while composing a picture on the...
-
Page 587: Live View
First, in section one, we’ll examine Live View since it applies to both the D300S and D300. Of course, the later D-Movie mode, in section two, only applies to the D300S, since the older D300 does not make movies. - Page 588 Figure 8-1. Live View controls for D300S and D300 Live View’s Two Modes Live view mode has two distinct types, Hand-held Tripod. You’ll find them under the Shooting Menu > Live view mode setting. Here are descriptions of how each mode works. I photographed the screens with the lens cap on (black background) so that you could easily see all the features.
- Page 589 8-2, image 1) – This mode is for those who want to use the Monitor to compose general images. This is sort of like a point-and-shoot image composition mode for the D300(S), since this is how point-and-shoot camera users are accustomed to taking pictures. Hand-held mode...
- Page 590 autofocus. Once you have good focus, the red square turns green. You are not limited to the central 51-point AF area, like Hand-held mode. The screen does not black out while autofocus is active since the camera is focusing by detecting contrast changes at the pixel level on the image sensor.
- Page 591 Figure 8-3. Live view modes 3. Press the OK button to lock in the mode. Auto vs. Manual Focus in Live View or D-Movie Modes You can also use the Focus mode selector on the front of the camera to choose Manual mode (M) and then focus manually.
- Page 592 and autofocus happens. You can re-autofocus at any time in Hand-held mode by holding the Shutter-release button halfway down. You must press the Shutter-release button the way down, and wait a moment, for the camera to take the image. In order to get a picture in either of the Live View modes, listen for three distinct clicks as you hold down the...
- Page 593 (and maybe confusing) symbols that allow you to control various features like Monitor brightness (D300S and D300), along with microphone volume level and movie recording (D300S only). To simplify the symbols shown, I’ve zoomed in on this screen in...
- Page 594 Figure 8-4. Live View – Hand-held mode ▪ LV Screen 2 (Figure 8-4 Figure 8-5, image 2) – This is a much cleaner screen with an almost blank area at the top and a single line of information along the bottom. You can see the autofocus type, which is determined by Live View mode you have selected.
- Page 595 Figure 8-5. Live View – Tripod mode ▪ LV Screen 3 (Figure 8-4 Figure 8-5, image 3) – This screen is similar to the previous screen, except that grid lines are added. Hand-held mode (Figure 8-4, image 3) only shows the grid lines outside the 51-point AF area, while Tripod mode...
- Page 596 single-axis horizontal direction. If you are a private or commercial pilot, you’ll feel right at home with this new tool since it resembles the artificial horizon you use to keep the wings level. All the other symbols are also displayed in this screen, as described in Figure 8-6.
- Page 597 Figure 8-6. Live View – Understanding the symbols ▪ B – This symbol shows the current Image quality setting—RAW, TIFF, FINE, NORM, or BASIC, plus the three RAW + JPEG fine, normal, or basic modes (RAW+F, RAW+N, RAW+B). You can change between these Image quality settings by holding down the...
- Page 598 Interestingly, when you have PRE White balance (PrE) selected, you can hold down the WB button and turn the front Sub-command dial to select one of the five stored PRE-measured white balances (d-o to d-4). See the upcoming chapter titled Chapter 10 to better understand PRE (PrE)
- Page 599 51-points in the normal phase-detection autofocus grid. ▪ H – This line of symbols varies according to whether you are using a D300S or D300. In the D300S (shown in Figure 8-6) the symbols are a somewhat confusing description of how to execute D (mic volume) and F (monitor brightness) in our list.
- Page 600 (F). The next show that when you press the MENU button the camera will exit the Live View mode. ▪ I – This symbol reflects the current light meter mode you have selected—Matrix, Center-weighted, or Spot. The same three symbols are on the back of the camera, next to the Viewfinder’s eyepiece.
- Page 601 minimum aperture is F/22, shown as F22. The aperture is controlled with the front Sub-command dial. ▪ M – This symbol shows the camera’s current sensitivity setting. This can vary from L 1.0 (100 ISO) to H 1.0 (6400 ISO). The camera’s normal ISO range is to 3200, with the extended settings.
- Page 602 I don’t want to get into deep theory in this chapter because most people are not really interested in reading a technical manual. However, since the Nikon D300S is also a video camera, it’s good to understand some basics—if for no other reason than to impress your friends and to make your videos look great.
- Page 603 HDTV’s (High-Definition Television) broadcast resolutions. In the good old days of SDTV (Standard-Definition Television) that we all grew up watching, there was even less resolution. Would you believe that the old TV you have stored in the garage displays only 345,600 pixels, or 0.3 megapixels? I’ve been talking about the number of megapixels, but that’s not normally how HD devices are rated.
- Page 604 (lines 2, 4, 6, 8 ... 720, then 1, 3, 5, 7... 719, etc.). Progressive output provides a higher-quality image with less flicker and a more cinematic look. I’m sure that’s why Nikon chose to make the D300S shoot progressive video. Now, let’s...
- Page 605 very little quality difference between the two encoding methods. Here are the Setup Menu screens and steps used to select the encoding mode (see Figure 8-7): 1. Select Video mode from the Setup Menu and scroll to the right. 2. Select NTSC encoding mode, per your hardware standard.
- Page 606 shoot high-definition video for display on HD devices. The other settings—640×424 320×216—are standard-definition modes for display on SD devices. Here are the screens and steps used to select a D-Movie Quality setting (see Figure 8-8): Figure 8-8. D-Movie Quality settings 1.
- Page 607 ▪ 640×424 mode: 248 MB for a 5-minute video, 992 MB for 20 minutes, 826 KB per second. Full-length movie can be stored on a DVD only. ▪ 320×216 mode: 119 MB for a 5-minute video, 447 MB for 20 minutes, 398 KB per second. Full-length movie can be stored on a DVD or CD.
- Page 608 A computer should display any of the video formats, as will a standard TV (SDTV). Any of the video modes, including the 720p HD 1280×720, will play on your SDTV through the included-in-the-box AV cable. The HD mode displays in the wide-screen format, with a black space at the top and bottom of the picture.
- Page 609 Dealing with Sound on D-Movies Sound recording on the D300S is accomplished either with the monaural sound pickup mic on the front of the camera or with an optional stereo mic that will plug into the camera’s stereo sound port. The built-in mono mic looks like three tiny holes in a straight line just below the D300S logo (see Figure...
- Page 610 the ability to plug in an optional stereo microphone. It disables the built-in mono mic and overcomes some of its limitations. There are several microphones available for the D300S, including a few that mount onto the camera’s Accessory shoe like a flash unit does. You can choose your favorite at online camera stores.
- Page 611 High sensitivity (3). You can also select or Auto. Auto lets the camera decide which sound recording level best fits the situation. Here are the screens and steps used to choose a sound level for recording (see Figure 8-11): Figure 8-11. D-Movie Microphone sensitivity 1.
- Page 612 Figure 8-12. D-Movie Destination card slot 1. Select Movie settings from the Shooting Menu and scroll to the right. 2. Select Destination and scroll to the right. 3. Select one of the two memory card slots, paying attention to how much recording time is available at the camera’s current video frame size.
- Page 613 Figure 8-13. D-Movie external camera controls 1. Turn the camera on and remove the lens cap. 2. Press the LV button on the back of the camera (see Figure 8-13, image 1). 3. Using the Multi Selector, move the little red focus square to an appropriate part of your subject.
- Page 614 Using Camera Controls during a Video Recording Session You can refocus the camera at any time during the video recording session by moving the little red focus square to an appropriate place on the screen and then pressing the AF-ON button until the focus square turns solid green (stops flashing).
- Page 615 You can also control certain aspects of the “look” of the video. Let’s see how. Using Picture Controls You can use the included Nikon Picture Controls, or even your own Custom Picture Controls, to control the “look” of your D-Movies. I’m not going to go into a great deal of information here on using or modifying picture controls, since this subject is covered very well in other chapters.
- Page 616 Landscape Picture Control (free download from Nikon) and your video will be optimized for beautiful scenery. Just as with the aperture, you must select the Picture Control before you start recording the video. Refer to the section...
- Page 617 ▪ Use an HDMI cable that you’ve purchased to connect the camera to an HDTV. Let’s talk about each of these three display methods. Displaying a D-Movie on the Camera LCD Screen The method used to view a movie on the D300S’s Monitor simplicity itself, just like capturing a video.
- Page 618 Figure 8-14. Viewing a video on the Monitor Monitor on the D300S is big enough for several people to enjoy one of your videos. Don’t be afraid to show off a bit since your camera creates excellent high-resolution videos. Displaying a D-Movie on a Standard Definition TV (SDTV) You can plug in the standard AV cable that was included in the box with your D300S and display videos directly on your...
- Page 619 to find the small round A/V OUT port. Be careful that you don’t insert the black plug into the port accidentally. The A/V OUT port is on top (see Figure 8-16, red arrow). Figure 8-15. A/V cable for connecting to an SDTV Here are the steps to display a video on your SDTV: 1.
- Page 620 Figure 8-16. A/V OUT port 2. Open the rubber flap on the left side of your D300S and insert the A/V cable mini stereo plug into the A/V OUT port (see Figure 8-16). 3. Insert the RCA jacks into their respective ports on the display device.
- Page 621 first, since I had everything hooked up and no video would show on my TV. I left the room and was about to give up when my sweet wife called from the living room, “Darrell, I figured it out! I found a TV/Video button on the remote”.
- Page 622 HDMI output frequencies. Before you attempt to connect your Nikon D300S to your HDTV, be sure that you’ve correctly configured your HDMI output to match what your HDTV needs, or you won’t get a picture.
- Page 623 Figure 8-17. HDMI output format 2. Select one of the five available modes. (Not sure? Select Auto!) 3. Press the button. Figure 8-18. HDMI mini and standard cable ends Now your camera is ready to output video on a compatible HDTV.
- Page 624 Figure 8-19. Mini HDMI port on D300S Once plugged in, here are the steps to display a video on your HDTV: 1. Turn your camera off temporarily. Why take a chance on blowing up your camera from a static spark? 2.
- Page 625 6. Press the Multi selector center button to play the video on your HDTV. The Nikon D300S can interface with both progressive and interlaced devices. The HDMI display will take the place of the small Monitor on the back of your D300S, which will turn off as soon as you connect an HDMI device.
- Page 626 Rolling shutters are used by video cameras that have CMOS sensors, like the Nikon D300S. Most dedicated video cameras have CCD sensors, with global shutters that do not scan the...
- Page 627 image. They are mostly immune to the effects we are about to discuss. Here is a list of the effects that can be experienced in extreme circumstances when using a CMOS sensor’s rolling shutter: ▪ Skew – The image leans in one direction or another as the camera or subject moves.
- Page 628 The D300S records video in a similar manner, except it is much faster than a scanner. It records a frame of video in 1/24 second, or 24 fps. Since the Nikon D300S scans the image the lens sees at 24 fps, there’s not a problem in most cases. Most movement is too slow to be zigzagged (wobble) or off-angled (skew).
- Page 629 It truly is best to use the D300S on a nice fluid-head video tripod if you want great results. I’ve found that Nikon’s vibration reduction (VR) lenses help when you don’t want to use a tripod, since they stabilize the camera a little.
- Page 630 three separate CCD sensors—one for each basic RGB color—and nice global shutters for no jellywobbles. And they’ll pay several thousand dollars for the privilege of owning that equipment. You, however, realize that the D300S is primarily a very high-quality still camera with added video capabilities. Since video is combined with still-image capability, you’ll have both with you when carrying your camera.
- Page 631 How well does D-Movie mode work? ▪ It works quite well, is easy to use, and is always with you when you have your Nikon D300S in your bag. What are the pros and cons of using the D300S compared to...
- Page 632 ▪ Short 5-minute video clips in HD mode. ▪ Limited storage on memory cards. Can the D300S’s D-Movie mode replace a dedicated video camera? ▪ Yes and no. The fact that it’s always with you means that you have it to take video when you otherwise wouldn’t. On the other hand, a dedicated video camera will record for hours and hours without stopping.
- Page 633 Then, my favorites, a list of freeware or shareware video editing software that you can download online: ▪ Microsoft Windows Movie Maker (easiest to get since it is built into Microsoft Windows XP Service Pack 3 or is available as a free download and is easy to use; Google “Download Windows Movie Maker”) ▪...
- Page 634 Go make some great videos!
- Page 635 Chapter 9. Metering, Exposure Modes, and Histogram...
-
Page 636: Metering Systems
Father and Son – Courtesy of LaDonna France Huizinga (Cookies35) My first Nikon was an FM back in about 1980. It used a basic center-weighted meter, and everything else was completely manual. In a way, I miss those simple days of old. - Page 637 D300(S) cameras set to Matrix metering and enjoy excellent results. Let’s look more closely at each of the Nikon D300(S)’s exposure meters. Figure 9-1 shows the exposure Metering selector set to Matrix metering mode. You can turn the small ring surrounding the AE-L/AF-L button to one of the three settings.
- Page 638 Figure 9-2. Metering selector dial set to Matrix There are characteristics for many thousands of images stored in the camera. These characteristics are used (along with proprietary Nikon software complex evaluative computations) to analyze the image that appears in your Viewfinder.
- Page 639 However, I’d like to qualify that with the following considerations. Fine-Tuning Matrix Metering Like all digital cameras, the Nikon D300(S) tends to be a bit conservative when light values get too bright. If the camera encounters a situation where the light values exceed the range of the sensor, it tends to expose for the highlights and let the darker areas of the image lose detail.
- Page 640 D300). This setting allows you to fine-tune each of the exposure meters individually in 1/6 stops. I leave my D300(S) set to 3/6 stops overexposure, which equals 1/2 stop. Don’t be afraid to experiment with your D300(S), since you can always change your fine-tuning back to zero.
- Page 641 Center-Weighted Meter If you were raised on a classic center-weighted meter and still prefer that type, the D300(S)’s exposure meter can be transformed into a flexible center-weighted meter with a variable-sized weighting that you can control. Center-weighted meter in the D300(S) meters the entire...
- Page 642 adjust this size to one of the five size settings shown on the next page. Center-weighted meter is a pretty simple concept. The part of your subject that’s in the center of your camera’s Viewfinder influences the meter more than the parts that appear close to the edges of the frame.
- Page 643 inch. The 13mm maximum size circle, at .51 inches, is about 1/2 inch wide. Primarily, just remember that the center area of the Viewfinder provides the most important metering area and you’ll fine. information fine-tuning Center-weighted metering, refer to the section called Fine Tune Optimal Exposure in the chapter titled...
- Page 644 In situations where you must get an accurate exposure for a very small section of the frame or must get several meter readings from different small areas, the D300(S) can, once again, be adjusted to fit your needs. The D300(S)’s Spot meter...
- Page 645 How big is the 3mm spot? Well, the Spot meter barely surrounds the little AF point rectangle in your Viewfinder. It is rather small at .11 inches. When your D300(S) is in Spot meter mode and you move the AF point to some small section of your subject, you can rest assured that you’re getting a true...
- Page 646 If you spot-meter for the shadows instead, the person’s face is likely to blow out to solid white. We’ll discuss this in more detail in a later section of this chapter when we explore the histogram. Use your Spot meter to get specific meter readings of small areas on and around your subject, make some exposure decisions yourself, and your subject should be well exposed.
-
Page 647: Exposure Modes
It was a camera with only one mode—M, or Manual. Later on, I bought a Nikon FE and was amazed to use its A mode, or Aperture priority. I could set the aperture manually and the camera would adjust the shutter speed for me. - Page 648 I’ve ever used! Let’s examine how we can use that complexity and express it as flexibility for our benefit. The D300(S) is also a P, S, A, M camera, which is the abbreviated progression of modes. We’ll look at those modes next.
- Page 649 Figure 9-8. Control panel with P-Programmed auto mode This mode is called Programmed auto because it uses an internal software program built into the D300(S). It tries its best to create optimal images in most situations. However, even Nikon’s User’s Manual calls this a “snapshot” mode.
- Page 650 With only seconds to spare, you turn your Main command dial to the left. The D300(S) realizes that it is being called upon to leave snapshot mode and give you some control. It throws an asterisk up next to the...
- Page 651 Counting Clicks in P Mode If your D300(S) is in P mode and you turn the Main command dial to the right, the camera goes into P* mode and starts counting clicks to the right. In order to get back...
- Page 652 order for me to get back into P mode, and remove the asterisk from the P*, I had to turn the Main command dial back to the left the exact number of clicks I turned to the right (up to 15 clicks). You can also turn the camera off or change modes to get out of Flexible program mode.
- Page 653 (30s). For more information on x250, see Custom setting e1 on page 281 of the D300(S) User’s Manual or page 288 of the D300 User’s Manual. A – Aperture Priority Auto Mode Nature and macro shooters, and anyone concerned with...
- Page 654 – Aperture priority auto mode lets you control the aperture while the D300(S) takes care of the shutter speed for optimal exposures. With newer AF-S and G lenses, you’ll use the Sub-command dial to select an aperture. You can control the...
- Page 655 M – Manual Mode Manual mode takes a big step backwards to days of old. It gives you complete control of your camera’s shutter and aperture so that you can make all exposure decisions, with suggestions from the exposure meter. Figure 9-11 shows the Manual...
- Page 656 Note on Lens Types – With newer G lenses, you can control the aperture from maximum to minimum by using the Sub-command dial on the D300(S). If you use an older AF lens with an aperture ring, set it to the smallest aperture on the lens, then use the...
- Page 657 With the exposure meter/histogram combination found in the D300(S), and the ability to zoom into our images with the high-resolution Monitor on the back, the success rate we can experience is much higher than ever before.
- Page 658 Monitor. Now, let’s discuss the use of a histogram in detail. Understanding the Histogram Using your D300(S)’s histogram screens will guarantee you a much higher percentage of well-exposed images. It is well...
- Page 659 Although this overview is brief, it will present enough knowledge to improve your technique immediately. Light Range The D300(S)’s sensor can only record a certain range of light values—about 5 to 7 usable EV steps. Unfortunately, many of the higher-contrast subjects we shoot can contain over 12 stops of light values.
- Page 660 Figure 9-14. A basic histogram The histogram is basically a graph that represents the maximum range of light values your camera can capture, in 256 steps (o = pure black, and 255 = pure white). In the middle of the histogram are the mid-range values that represent middle colors like grays, light browns, and greens.
- Page 661 have to do with the amount of color information. I repeated this for emphasis! The left (dark) and right (light) directions are very important for your picture taking. If the image is too dark, the histogram will show that by clipping off the light values on the left; or if it’s too light, by clipping on the right.
- Page 662 Histogram Shape Look at the image in Figure 9-16. It is well exposed with no serious problems. The entire light range of this particular image fits within the histogram window, which means that it’s not too light or too dark and will take very little or no adjustment to view or print.
- Page 663 Look at the image in Figure 9-17. This is from an image that exceeds the range of the D300(S)’s digital sensor. Notice that, overall, this image is dark and looks underexposed. The histogram in Figure 9-17 is crammed to the left, effectively being clipped off.
- Page 664 Figure 9-17. Histogram showing underexposure (dark side) The most important thing to understand when you see a histogram like the one in Figure 9-17, with part of the peak clipped off on the left, is that some or all of the image is significantly underexposed.
- Page 665 How Does the Eye React to Light Values? The D300(S) camera, with its imaging sensor and glass lenses, is only a weak imitation of our marvelously designed...
- Page 666 eye and brain combination. There are very few situations in which our eyes cannot adjust to the available light range. So, as photographers, we are always seeking ways to record even a small portion of what our eye and mind can see. Since our eyes tend to know that shadows are black, and expect that, it is usually better to expose for the highlights.
- Page 667 is too great to be captured by a digital sensor but is exposed in such a way that we can get a usable photo later. Notice in Figure 9-19 how the dark values are clipped off and dark detail is lost. But look to the right side of the histogram and notice how the light values are not clipped off.
- Page 668 How this computer post-processing was done is outside the scope of this book, but it is not very hard. Buy a program like Nikon Capture NX, Photoshop, Photoshop Elements, Lightroom, or another fine graphics program designed for photographers. Your digital camera and your computer are a powerful imaging combination—a digital darkroom, where...
- Page 669 Figure 9-20. Post-processed cabin picture and its histogram (in-computer manipulation) The photographer must be the judge. The greater apparent detail in this image is the result of compressing the mid-range of the light values a bit in the computer. If you compress or make the mid-range light values smaller, that will tend to pull the dark values toward the light side and the light values toward the dark side.
- Page 670 With a RAW image you can use controls in Capture NX, Photoshop, or even the basic Nikon Picture Project software included with the D300(S) to select from the range of light within the big RAW image file. It’s like moving the histogram window to the left or right over all that wide range of RAW image data.
- Page 671 images, but is the most pronounced in pure RAW images. That is why many choose to shoot in RAW mode instead of JPEG or TIFF.
- Page 672 My Conclusions The Nikon D300(S) has a Multi Selector that can be pressed right or left to scroll through the images you have already taken. You can also press the Multi Selector up or down to scroll through the various informational modes, such as the histogram screen.
- Page 673 Ansel Adams’s black and white Zone System, but it is represented visually on the Monitor of your D300(S). The manipulation of the histogram levels in-computer is a detailed study in itself. It’s part of having a digital darkroom.
- Page 674 Chapter 10. White Balance...
- Page 675 Hello Cutie – Courtesy of Stephen J. Weston (stevezz1)
- Page 676 Back in the “good old days” we’d buy special rolls of film or filters to meet the challenges of color casts that come from indoor lighting, overcast days, or special situations. The D300(S)’s method for balancing the camera to the available light comes with the White balance (WB) controls.
- Page 677 Or, we can allow a color cast to enter the image by unbalancing the settings. In this chapter, we will discuss this from the standpoint of the D300(S)’s camera controls and how they deal with...
-
Page 678: Color Temperature
Color Temperature (User’s Manual – D300S page 133; D300 page 127) The D300(S) WB range can vary from a very cool 2500K to a very warm 10,000K. Figure 10-1 shows the same picture adjusted in Photoshop, with the use of Photo Filters, to three WB settings. - Page 679 10,000K (very warm or reddish) and any major value in between. There’s no need to carry different film emulsions or filters to deal with light color range. The D300(S) has very easy-to-use color temperature controls and a full range of color temperatures available.
- Page 680 Method 1 – Manual White Balance Using the WB Button (User’s Manual – D300S page 134; D300 page 128) Sometimes we might simply want to control the WB in a totally manual way. This method and the next are basically the same thing, except one sets the WB using a button and dial and the other uses the camera’s menu system.
- Page 681 1. Press and hold the WB button on the top left of your D300(S) (see Figure 10-2). 2. Rotate the Main command dial. The symbols shown below will appear one at a time on the Control panel. Each click of the dial will change the display to the next WB setting.
- Page 682 Manually Selecting a Color Temperature between 2,500 and 10,000 K (User’s Manual – D300S page 142; D300 page 136) The K, or Choose color temp. selection is a flexible one that allows you to manually select a WB value between 2,500 and 10,000 K.
- Page 683 Measuring Actual Ambient Light and Using PRE This method allows you to measure ambient light values and set the camera’s WB. It’s not hard to learn and is very accurate since it’s an actual through-the-lens measurement of the source light’s Kelvin temperature. You’ll need a white or gray card to accomplish this measurement.
- Page 684 4. Press and hold the WB button again until starts flashing. 5. Point the camera at a white or neutral gray card in the light source under which you will be taking pictures. It does not have to focus on the card; it can just be pointed at the card so that it fills the frame.
- Page 685 Figure 10-4. PRE measurement...
- Page 686 It is only possible to copy a value from into one of the four storage locations. I suppose Nikon was concerned that one might accidentally overwrite a carefully prepared White balance setting, so it added a copy step between the measurement and long-term storage.
- Page 687 Figure 10-5. Stored WB values In effect, you may have up to five White balance values stored in your camera. One is the current temporary setting, and the other four are in memory for long-term reuse. Figure 10-6 shows the steps and menus used to copy the current White balance value from memory location...
- Page 688 Figure 10-6. Starting White balance PRE maintenance 2. Use the screens shown in Figure 10-6 to start the WB maintenance process. Select White balance from the Shooting Menu screen and scroll to the right (see Figure 10-6, image 1). 3. Select Preset manual and scroll to the right (see Figure...
- Page 689 5. Scroll down to Copy d-0 and press the button. The camera will then write a copy of into the memory location you selected (see Figure 10-7, image 3). Once you’ve written a WB value to one of the memory locations d-1-d-4, it will remain there for future use as needed.
- Page 690 Editing the Comment Field As shown in Figure 10-8, you can rename the memory location in which you just stored a White balance setting by selecting it with the Multi selector center button and then selecting Edit comment from the menu (see Figure 10-8, image 2).
- Page 691 Using the White Balance from a Previously Captured Image It is also quite possible to select a White balance setting from an image you have already successfully taken. This image’s value can be applied to the picture you are about to take or can be copied to memory locations (using the method described previously) for later use.
- Page 692 Figure 10-9. Screens to recover a White balance setting from an image 2. Use the Multi Selector to scroll to the memory location you want to set with the value from an image (see Figure 10-9, image 1). You must select d-1–d-4 only.
- Page 693 Adjusting a Saved White Balance’s Color Values If you want to fine-tune a previously saved White balance value, you can do it with the function. The value in any of memory locations can be manually changed. The color balance can be moved toward G-Green, A-Amber, M-Magenta, or B-Blue, or toward intermediate combinations of those colors.
- Page 694 to the currently stored White balance. If you change your mind, return the little black square to the center of the color box. You’ll see the color mired values changing on the right side of the screen in the fields next to G-M.
-
Page 695: Using The Shooting Menu
Method 2 – Manual White Balance Using the Shooting Menu This method is similar to Method 1, but it uses the Shooting Menu screens to select the Kelvin range. Instead of using the WB button Sub-command dial, you’ll open up your menus and set the color temperature by selecting from them. - Page 696 OK button on the final screen, without changing anything. Figure 10-11 shows Direct sunlight as an example. Note that the Fluorescent selection allows you to choose one of seven different light sources, covering a wide spectrum. If you choose to fine-tune any of the color temperature settings after you have selected one of the preset WB values, the color box in the last screen of Figure 10-11...
-
Page 697: White Balance Bracketing
White Balance Bracketing (User’s Manual – D300S page 125; D300 page 123) You can also do WB bracketing similar to how you would do flash exposure bracketing. If you want to bracket your camera’s white balance, you must set Custom setting e5 bracketing. - Page 698 (BKT) with Custom setting F5 (D300S) or Custom setting f4 (D300). If you assigned a different button to bracketing, use it instead. Choose the number of shots in the bracket (up to nine shots total) by pressing and holding the (FUNC.)
- Page 699 Figure 10-14. WB bracketing Table of Values - No bracketing selected - Three shots – normal exposure and two blue exposures - Three shots – normal exposure and two amber exposures - Two shots – normal exposure and one blue exposure - Two shots –...
- Page 700 2, or 10 mired, in Figure 10-14 (top-right value). The D300(S) will expose the sequence of shots according to what you’ve selected in step # 2. You can only adjust the bracket along the blue (b) to amber (A) values (cool to warm).
- Page 701 23 pictures on the card. Three pictures in one shutter press! Be sure to set your D300(S) back to normal bracketing in Custom setting e5 when you’re done, unless you use bracketing frequently. My Recommendation: Personally, I prefer to shoot in...
-
Page 702: Auto White Balance
Auto White Balance Auto White balance works pretty well in the D300(S). As the camera’s RGB meter senses colors, it does its best to balance to any white or mid-range grays it can find in the image. However, the color will vary a little on each shot. If you shoot... - Page 703 The D300(S) is very good at Auto WB, but I still shoot at a pre-defined WB setting most of the time. Call me old-fashioned! If I’m at a party and I’m shooting images of friends for small snapshot prints, I’ll often put my camera in...
- Page 704 simply change it in the conversion software and the image looks as if you used the new setting when you took the picture. Does that mean I am not concerned about my WB settings since I shoot RAW most of the time? No. The human brain can quickly adjust to an image’s colors and perceive them as normal, even when they are not.
- Page 705 White Balance Tips and Tricks When measuring WB with a gray or white card, keep in mind that your camera does not need to focus on the card. In mode, it will not focus anyway, since it is only trying to read light values, not take a picture.
- Page 706 Kelvin color temperature range of your camera’s white balance system. The D300(S) can be adjusted to shoot with a value as cool as 2500K, as warm as 10,000K, and any place in between. Pro-level flexibility and control! Figure 10-15.
- Page 707 With these simple tips and some practice, you can become a D300(S) WB expert. Pages 133-152 of your D300S User’s Manual, or 127-146 of the D300 manual, have extensive WB information if you want another persepctive on Nikon WB. Learn to use the color temperature features of your camera to make superior images.
- Page 708 Chapter 11. Multi-CAM 3500DX Autofocus...
- Page 709 AF system. For instance, the Nikon D100’s Multi-CAM 900 AF module has 5 AF points and two area modes, and the Nikon D200’s Multi-CAM 1000 has 11 AF points and four area modes. The D300(S)’s Multi-CAM 3500DX has 51 AF points, but only...
- Page 710 Focus modes as how it focuses. The D300(S) also allows you to control how fast and how often a picture is taken. We’ll look at how the shutter frame rate (was called motor drive) works in relation to the AF system.
- Page 711 In fact, one of the important features of the near-professional D300(S) is the fact that the camera will happily use older lenses. Many of us have our old favorites, such as the AI-S Nikkor 105mm f/2.5 portrait lens or the AI-S 35mm f/2.
- Page 712 Viewfinder compose or use Live View mode (Lv), which allows you to use the Monitor on the back of the D300(S) instead of the Viewfinder to compose the image. The AF Module supports 10 Custom settings, a1-a10. We’ve examined each of those...
- Page 713 Modes (User’s Manual – D300S page 61; D300 page 61) The D300(S) has distinct modes for how and when to focus. We’ll examine each of those modes as a starting point in our understanding of autofocus with the Multi-CAM 3500DX AF Module.
- Page 714 (3) AF-area mode selector, and (4) Multi Selector Be aware that 15 of the 51 AF points on the D300(S) are cross-type sensors, which means that they will initiate focus in either a horizontal or a vertical direction. The center three columns by five rows of AF points are cross-type.
- Page 715 Viewfinder, although a little less so, as I used sensors closer to the edges on my D300. In older Nikon cameras, the AF point’s sensitive area was actually considerably wider than the brackets shown in the Viewfinder.
- Page 716 camera to “lock” focus on a subject that is not moving or is moving very slowly. They also allow your camera to “follow” focus on an actively moving subject. Let’s consider the two servo-based Focus modes to see when and how you might use them best.
- Page 717 Single-servo AF Mode (S) Single-servo AF works best when you select the proper mode for your subject. Is the subject moving or standing still? Subject is not moving: When you press the Shutter-release button halfway down, the AF Module quickly locks focus on your subject and waits for you to fire the shutter.
- Page 718 Continuous-servo AF Mode (C) Similar to Single-servo AF, you must be sensitive to the status of your subject to get the best results. Using Continuous-servo AF is slightly more complex. Subject is not moving: When the subject is standing still, Continuous-servo AF acts a lot like Single-servo AF...
- Page 719 That takes about 45 milliseconds in the D300(S). In the time it takes for the camera to respond to your press of the Shutter-release...
- Page 720 Nikon says that there are special algorithms in predictive focus tracking that allow it to notice sideways or up and down movement and shut this process down. So, predictive focus tracking is not activated by the D300(S) for sideways or up and down subject movement or panning.
- Page 721 AF-Area Modes in Detail AF-area modes are designed to give you control over how many AF points are in use at one time. These modes offer various ways to track subject movement. Figure 11-4 shows the AF-area mode selector in the Single-point AF position.
- Page 722 Figure 11-5. Center AF point selected If two people are standing next to each other, with a gap in the middle, the single center AF point will examine the space between the two subjects. You can do one of two things to overcome this problem: ▪...
- Page 723 Shutter-release button halfway down to get good focus and the rest of the way down to take the picture. Either of these methods will solve the age-old autofocus problem of having a perfectly focused background with out-of-focus subjects caused by the center AF point concentrating on the background between the subjects.
- Page 724 I’ve got the shot! Release Priority Settings When you switch your D300(S) out of Single frame (S) release mode, you must be aware of how Custom settings a1 and a2 are configured. These two Custom settings are for Focus priority and Release priority.
- Page 725 Figure 11-6. AF-area mode selector set to Dynamic-area AF You can select the three different sensor patterns in Custom setting a3 (see Figure 11-8). The three primary patterns are represented in Figure 11-7. The first image shows 9 AF points in use.
- Page 726 AF point of the pattern, even though you have points, points, or 51 points selected. The AF point you can see in the Viewfinder provides the primary autofocus; however, the surrounding sensors (in the pattern you’ve selected in Custom setting a3) are also active.
- Page 727 AF points in the pattern of 51 to maintain focus on the bird. You press the Shutter-release button all the way down and the images start pouring into your memory card. You are panning with the bird, firing bursts until it moves out of range.
- Page 728 Nikon Coolpix point-and-shoot camera! Figure 11-9. AF-area mode selector set to Auto-area AF According to Nikon, if you are using a D or G lens, there is a bit of “human recognition technology” built into this mode, similar to the Coolpix. Since most of us will only be using...
- Page 729 usually detect a human and help you avoid shots with perfectly focused backgrounds and blurry human subjects. We’ve covered the Focus AF-area modes pretty well, so let’s move on to the Release modes.
- Page 730 Release Modes in Detail The D300(S) has several Release modes, which decide how many images can be taken and how fast. In Figure 11-10, we see the Release mode dial with its lock release button (press lock release button and turn the dial).
- Page 731 This mode allows you to select a frame rate between 1 frame per second and 6 frames per second (FPS). If you have an MB-D10 battery pack mounted on your D300(S), you can also select 7 FPS. The camera cannot shoot over 6 FPS without the MB-D10 battery pack, although it will allow you to select 7 FPS.
- Page 732 Lv button on the D300S, there was no more need for the LV Release mode setting. Nikon took advantage of the gap left on the Release mode dial and gave D300S users a new mode.
- Page 733 In reality, the noise is not much quieter, but since it is broken into two parts, it sounds quieter. Try it! Live View (Lv) Mode (D300 only) Live view mode (Lv) uses the Monitor to display the subject instead of the Viewfinder.
- Page 734 (or left on factory defaults): 1. Use the Release mode dial to select Self-timer mode (the little symbol between modes on the D300 and between the (Quiet) and modes on the D300S). 2. Frame the photograph and focus the camera. If Focus...
- Page 735 If you don’t read and understand this special section, you may get quite a few out-of-focus images as a result. Don’t Touch That Shutter Release! Please buy yourself an electronic shutter-release cable (e.g., Nikon MC-30) so that you’re not using your finger to press...
- Page 736 Shutter-release button when the camera is on a tripod and mode. Touching the camera seems a bit silly after going to all that trouble to stabilize the camera and raise the mirror. A finger press could shake the entire tripod! If you do not have an electronic cable release, simply wait 30 seconds after raising the mirror and the camera will fire on its own.
- Page 737 Viewfinder. Anytime you need to take pictures up high or down low, or even on a tripod, the D300(S) will happily give you that power with its mode.
- Page 738 Figure 11-11. Entering Live view with external camera controls The D300S has a dedicated Lv button that simplifies the process considerably. Press the Lv button and the camera is immediately in Live view mode (see Figure 11-11, image 2). Selecting Hand-held or Tripod Modes Next, you’ll need to set the Shooting Menu >...
- Page 739 On the D300, you’ll set the Shooting Menu > Live view > Release mode selection to Single frame, Continuous low-speed, or Continuous high-speed (see Figure 11-14). The cameras are quite different in how they initialize Live view mode and in the screens used for its adjustment. Use...
- Page 740 Figure 11-14. Choosing a Live view and Release mode on the D300 LV Hand-Held Mode (uses phase-detection AF): 1. Point your camera toward your subject. With the D300 you’ll need to press the Shutter-release button fully to raise the mirror and enter Live view mode.
- Page 741 Viewfinder mode by turning away from the setting on the Release mode dial (D300) or by pressing the button again (D300S) LV Tripod Mode (uses Contrast-detection AF): 1. Enter Live view mode, frame your subject, and press the AF-ON button to initiate autofocus.
- Page 742 will go up and down twice to take the picture. It sounds entirely weird but it works!
- Page 743 “Wow!” This is a powerful leap forward. Autofocus with the D300(S) is a real pleasure. It has a more powerful AF system than any camera before it and yet is somewhat simplified in its operation by comparison.
- Page 744 Chapter 12. Speedlight Flash Photography...
- Page 745 We need a Speedlight! Fortunately, your D300(S) has a built-in Speedlight. The little pop-up unit that’s always with the camera is a Nikon Speedlight flash. That’s Nikon’s name for its flash units, large and small.
- Page 746 System (CLS). We’ll look at CLS later in the chapter. First let’s examine some general flash information and explore how the D300(S) uses flash. How can you determine just which flash will work best for your style of shooting? Will...
- Page 747 Be careful when you are deciding on an external flash unit to use, whether it is a genuine Nikon Speedlight or an aftermarket unit. Simply comparing the GN is not enough. You must understand the settings the GN is based upon.
- Page 748 ▪ Temperature of ambient air In reality, the camera has little to do with figuring the GN other than providing an aperture f-stop number and ISO sensitivity. So, how can you decide what GN is best without whipping out a scientific calculator? Just look at the flash unit advertisement to see what the GN is based on.
- Page 749 GN! The Super-Duper unit must have its zoom head set to 80mm, a much narrower beam, and have twice the camera ISO sensitivity to equal the Nikon SB-400 unit. Mr. Super-Duper is hoping you won’t check the fine print at the bottom of the advertisement so that you’ll...
- Page 750 For comparison purposes, the GN of the D300(S)’s pop-up Speedlight is 56 (feet) or 17 (meters) at ISO 200. Nikon’s flagship Speedlight, the SB-900, is 157.5 (feet) or 48 (meters) at ISO 200. Obviously, the larger external flash unit has a lot more power and can light up subjects that are farther away.
-
Page 751: Flash Modes
Flash Modes (User’s Manual – D300S page 169; D300 page 171) The built-in pop-up flash has two types of flash metering: ▪ i-TTL Balanced Fill Flash – The flash fires in two stages. Nikon calls stage 1 “monitor preflash”. The built-in flash emits a series of almost invisible flashes before the main flash burst fires (stage 2). - Page 752 Your D300(S) exposes the sensor to light for specific periods of time. This is controlled by the camera’s shutter speed. The actual exposure is handled by two moving objects called curtains.
- Page 753 12-2): Figure 12-2. Flash mode controls 1. Hold down the Flash mode button on the front of your camera, just below the D300 or D300S logo (see Figure 12-2, image 1). 2. Turn the rear Main command dial while watching the...
- Page 754 Front-Curtain Sync Front-curtain sync mode (also known as Fill flash in Nikon litereature), the camera tries its best to balance the light if you’re using a lens that has a CPU in it (see Figure 12-3). Older non-CPU lenses cause the camera to ignore the ambient light completely and use only the flash to expose the subject.
-
Page 755: Red-Eye Reduction
subject as soon as the front curtain gets out of the way, but the ambient light continues exposing the subject before the rear curtain closes, and since it is moving you may see a ghostlike blur before or in front of the well-exposed moving subject in the picture. -
Page 756: Slow Sync
Figure 12-5. Red-eye with slow sync Slow Sync Slow sync mode lets the camera use ambient light to make a good exposure and then fires the flash to add some extra light, rounding out the shadows or better exposing a foreground subject (see Figure 12-6). - Page 757 Figure 12-6. Slow sync Rear-Curtain Sync Rear-curtain sync is the reverse of Front-curtain sync (see Figure 12-7). The flash waits to fire just before the rear curtain starts to close. The entire shutter speed time is just ending when the flash fires. This causes a ghosting effect for moving subjects in higher ambient light with slow shutter speeds.
- Page 758 External Speedlight flash units offer modes like TTL BL FP, or just TTL. stand for through-the-lens, and represents an i-TTL mode (intelligent though-the-lens). stands for balanced. stands for Auto FP high-speed sync mode. Refer to your flash unit’s user’s manual for exact details on how to switch between modes on the flash unit.
- Page 759 (CLS), which allows your camera to control multiple flash units in a wireless array. Auto FP High-Speed Sync The D300(S) has an additional mode that lets it exceed the normal flash sync speed of i/250s. This is called Auto FP high-speed sync mode. Remember how normally both the...
- Page 760 No wires are used since the CLS-compatible remote flash units are controlled by a “commander device”, or what Nikon refers to as a “master flash unit”. You can use the Commander mode built into the D300(S), or you can use an...
- Page 761 D300(S). Nikon’s Creative Lighting System is world-class in power and not too difficult to use. The Nikon D300(S) camera contains everything you need to control a simple or complex CLS setup. Let’s learn how to use it!
- Page 762 Speedlights. The cool thing about the D300(S) is that it can serve as a CLS flash commander device or use Nikon’s other CLS flash commander devices at will. You have great control with this...
- Page 763 Figure 12-8. Commander mode setup screen If you leave Custom setting e4 > Modeling flash set to the factory default ON, you can test-fire your Speedlight’s built-in modeling light by pressing and holding the camera’s Depth-of-field preview button. Or, if you prefer, simply take a picture and look at it.
- Page 764 Figure 12-9. J. Ramón Palacios used a Commander device and two SB-800 Speedlights to take this CLS photo. Isn’t it more fun to simply enter some initial settings into your Commander mode screen and then take a test shot? If it doesn’t look right, change the settings and do it again.
- Page 765 Figure 12-10. Commander mode setup screens When your camera is controlling external Speedlights using its built-in Commander mode, you must always raise the built-in flash on your D300(S). The camera communicates...
- Page 766 with the external flash units during the monitor pre-flash cycle. Always position the sensor windows on the external Speedlights where they will pick up the monitor pre-flashes from the built-in flash. Take particular care when not using a tripod. Commander Mode Settings Basically, the Mode fields on the...
- Page 767 With the SB-900 or SB-800, it is used primarily by cameras not compatible with the Creative Lighting System. It is not available for the built-in Speedlight on the D300(S), or for the SB-600. You can safely ignore the mode, unless you want to experiment with it.
- Page 768 (factory default) is the communication channel your D300(S) expects to use to talk to the external flash groups. There are four channels available, just in case you happen to be working in the vicinity of another Nikon user who is also...
- Page 769 Each external Speedlight flash will have its own method for selecting a Group and Channel. You’ll need to acquire Mike Hagen’s book, or read the user’s manual for your flash unit. Now, let’s look at the flash units you can choose for your Nikon D300(S).
- Page 770 Selecting a Nikon Speedlight Flash Unit Nikon makes several Speedlight units that work very well with the Nikon D300(S). I personally have used the SB-400, SB-600, SB-800, and SB-900 units with the D300(S). There are also the R1C1 flash units (SB-R200), which are designed to be used in small groups, such as for a ring-light arrangement.
- Page 771 I really enjoy using the Nikon SB-900 Speedlight unit (see Figure 12-13). It is very powerful and easy to use in the CLS arrangement because it has external controls for setting remote mode. It can also be used as a CLS commander when needed.
- Page 772 12-15). Buying several of these won’t set you back much and will allow you to set up a great CLS system with your D300(S). If you are just getting started in CLS, these might be your best investment. The SB-600 does not have a...
- Page 773 Figure 12-16). These are primarily designed to use in special arrangements on brackets that Nikon created for them. You’ll see these Speedlights in use if you watch many crime dramas on TV because the investigators often use them for close-up flashes of crime scene evidence.
- Page 774 Figure 12-17. SU-800 Wireless Speedlight Commander Unit While not a Speedlight flash, I wanted to show you the Nikon SU-800 Wireless Speedlight Commander Unit (see Figure 12-17). This unit can be used when you need extra range (up to 66 feet) or need to control more than two banks of flash units—it can control three.
- Page 775 My Conclusions The Nikon D300(S) gives you control over the world-class Nikon Creative Lighting System. It is the envy of many other camera brand manufacturers users. Rockynook/ Nikonians Press has an excellent book dedicated to this subject. Check Amazon.com and book stores for the title.
- Page 777 Buy a couple of light stands and some cheap white flash umbrellas and set up some portrait sessions of your family, or even some product shots. With the Nikon D300(S) and even one extra Speedlight, you can create some very impressive...
- Page 778 Figure 12-19. Single-flash Nikon CLS compared to direct flash The really nice thing is that the Nikon Creative Lighting System—executed by your camera’s Commander mode external Speedlight flashes—will allow you to shoot without worrying so much about detailed exposure issues. Instead,...
- Page 779 I’d like to express my personal appreciation to you for buying this book, and for sticking with me all the way to the end of it. I sincerely hope that is has been useful to you and that you’ll recommend my books to your Nikon-using friends. Keep on capturing time...
- Page 780 Credits for Chapter Opening Images Chapter 1 Apples – Courtesy of Neale Dyster (Digitwized) Tamar Valley in Northern Tasmania, Australia. These are my favourite of the many varieties of apples in our next door neighbour’s extensive orchard.
- Page 781 Chapter 2 Red-Tailed Hawk – Courtesy of Doug Sipes (Dsipes). Rocky Mountain National Arsenal (now a wildlife refuge) near Denver, CO, USA. This image is of a year old female Red-Tailed Hawk, taken just outside a lean-to that was sheltering the birds from the sun.
- Page 782 Chapter 3 F-22 Raptor – Courtesy Norman Paratore (carlysgranddad). Naval Air Station Oceana air show in Virginia Beach, VA, USA. I got lucky with this shot and had blue sky as a back ground. Weather was windy and humidity high, thus the condensation accumulating on the front of the plane.
- Page 783 Chapter 4 Bikes Catch Air – Courtesy of Ken Rutt (raxafarian). Wild Rat Raceway near Colorado Springs, CO, USA. Motocross riders catching some air.
- Page 784 Chapter 5 Dawn on El Capitan – Courtesy of Russ Glindmeier (russg). Valley View, in Yosemite Valley, CA, USA. This is a High Dynamic Range (HDR) image combining three exposures, two stops apart, each with a minus one stop exposure compensation.
- Page 785 Chapter 6 Free Climber – Courtesy of Octavian Radu Topai (Tavi). Retezat National Park in Romania. My colleague (climbing with no rope on a granite wall) had an interesting silhouette over the defocused background, the valley behind.
- Page 786 Chapter 7 Maine Coon Cat – Courtesy of Cindie Fearnall (Gipsi). This photo was taken indoors on an overcast day using only window light. “Sir Galahad” was positioned next to a South facing window and in front of a black backdrop.
- Page 787 Chapter 8 Sol Duc Valley Stream – Courtesy of Daniel Stainer (spiritualized67). Sol Duc Valley Stream in Olympic National Park, Washington State, USA. It had just rained and the sky was starting to brighten when I captured this iconic scene. Rainforest location makes natural vibrant greens.
- Page 788 Chapter 9 Father and Son – Courtesy of LaDonna France Huizinga (Cookies35). My brother-in-law is sheltering the head of his second-born in his dimly-lit living room. The extra hand in the picture is his grandmother’s. I didn’t even realize there was one too many hands until book submission time.
- Page 789 Chapter 10 Hello Cutie – Courtesy of Stephen J. Weston (stevezz1). My furniture-making workshop is situated on a farm having a small pond with a few Mallard ducks. First brood for this little chap’s Mom.
- Page 790 Chapter 11 Bald Eagle Fishing – Courtesy of David Summers (dm1dave). I captured this eagle checking his catch over the Mississippi. The D300 with its AF system and its fast frame rate allows me to capture these great birds in action.
- Page 791 Chapter 12 Contemplation – Courtesy Richerd Reynolds (slartybartfast). This is a portrait of my daughter. She came over and began pretending the legs of my light stand was a mountain for her toys to climb. I captured the moment.
- Page 792 Nikonians Gold Membership...
- Page 794 Additional Downloadable Resources Website As a final reminder, we have a downloadable resources webpage for this book. It contains several additional chapter sections that provide added information on camera operation and even a few photo technique basics. http://rockynook.com/NikonD300S Also, please see the Nikonians Gold membership 50 percent discount coupon on the preceeding page.
- Page 795 Index A note on the digital index ? A link in an index entry is displayed as the section title in which that entry appears. Because some sections have multiple index markers, it is not unusual for an entry to have several links to the same section.
- Page 796 720p HD video (D300S), D-Movie Mode – Section Two 999 images in a folder, Active Folder 9999 images in sequence, Custom setting d6 (D300S) and d5 (D300) White Balance symbols, Method 1 – Manual White Balance Using the WB Button...
- Page 798 File Naming, Color Space File naming for, File Naming AF activation (a5), Custom setting a5 (D300S and D300) AF fine tune, Selecting a Non-CPU Lens by Using External Camera Controls AF point illumination (a6), Custom setting a5 (D300S and D300)
- Page 799 After Delete Show previous, After Delete Aperture priority auto mode (A), S – Shutter Priority Auto Mode Assign AE-L/AF-L button (f6–D300), Custom setting f4 (D300S) and f3 (D300) Assign AE-L/AF-L button (f7–D300S), Custom setting f4 (D300S) and f3 (D300) Assign Fn button (f5),...
- Page 800 Bracketing, Custom setting e5 (D300S and D300) Bracketing (Mode M), Custom setting e6 (D300S and D300) Custom setting e1 (D300S and D300) Gain (multiple exposure), Multiple Exposure Image rotation, Rotate Tall, HDMI Information display color, Custom setting d8 (D300S) and d7 (D300)
- Page 801 (S), Continuous-servo Mode (C), Continuous-servo AF Mode (C), Dynamic-area AF AF activation, Custom setting a5 (D300S and D300) AF point illumination, Custom setting a5 (D300S and D300) AF point selection, Custom setting a8 (D300S and D300) AF-C priority selection, Custom setting a1 (D300S and...
- Page 803 Finding a Subject for the Dust-Off Reference Photo Battery order (d12–D300S, d11–D300), Custom setting d11 (D300S) and d10 (D300) Beep (d1), Custom setting d1 (D300S and D300) Bit depth tutorial, NEF (RAW) Bit Depth Body reference (Camera), Fig 1 (1–11) Bracketing,...
- Page 804 Commander Mode Notes, Custom setting e5 (D300S and D300), Custom setting e6 (D300S and D300), Custom setting e6 (D300S and D300) Auto bracketing (Mode M), Custom setting e6 (D300S and D300) Auto bracketing set, Custom setting e5 (D300S and D300)
- Page 806 Center-weighted meter, Fine-Tuning Matrix Metering Channel and bit depth, NEF (RAW) Bit Depth Choose slot and folder, Choose slot and folder (D300S) CL mode shooting speed (d5–D300S, d4–D300), Custom setting d4 (D300S Only) Clean image sensor, Clean Image Sensor, Clean Image...
- Page 807 Commander mode, How Does the D300(S) Fit into the Scheme?, Commander Mode Settings, Commander Mode Settings, Commander Mode Settings, Commander Mode Settings -- mode, Commander Mode Settings AA mode, Commander Mode Settings M mode, Commander Mode Settings TTL mode, Commander Mode Settings...
- Page 808 Assign AE-L/AF-L button, Custom setting f4 (D300S) and f3 (D300) Assign Fn (FUNC.)button, Custom setting f4 (D300S) and f3 (D300) Assign preview button, Custom setting f4 (D300S) and f3 (D300) Backlight switch, Section Six – (f) Controls: Custom Settings f1 to f11...
- Page 809 D300) (c) Timers/AE Lock, Section Three – (c) Timers/AE Lock: Custom Settings c1 to c4 (d) Shooting/Display, D300 Only – Monitor Off Delay (e) Bracketing/Flash, Section Five – (e) Bracketing/ Flash: Custom Settings e1 to e7 (f) Controls, Section Six – (f) Controls: Custom...
- Page 810 (D300S and D300), Custom setting a6 (D300S D300), Custom setting a8 (D300S and D300), Custom setting a8 (D300S and D300), Custom setting aio (D300S D300), Section Two – (b) Metering/Exposure: Custom Settings b1 to Custom setting b1 (D300S and...
- Page 811 Assignable Function List, Assignable Function List, Menus and playback, Menus and playback, Custom setting f9 (D300S) and f8 (D300), Custom setting f9 (D300S) and f8 (D300), Custom setting f11 (D300S) and f10 (D300), Custom setting f11 (D300S) and f10 (D300)
- Page 812 Custom setting c1 (D300S and D300) Custom setting C2 (D300S and D300) Custom setting C4 (D300S and D300) Custom setting d1 (D300S and D300) d10 (D300), Custom setting d10 (D300S) and d9 (D300) d10 (D300S), Custom setting d10 (D300S) and d9 (D300) d11 (D300),...
- Page 813 (D300), Custom setting d4 (D300S Only) d4 (D300S), Custom setting d3 (D300S and D300) d5 (D300), Custom setting d6 (D300S) and d5 (D300) d5 (D300S), Custom setting d4 (D300S Only) d6 (D300), Custom setting d6 (D300S) and d5 (D300)
- Page 814 (D300), Custom setting f4 (D300S) and f3 (D300) f4 (D300S), Custom setting f3 (D300S) and f2 (D300) f5 (D300), Custom setting f4 (D300S) and f3 (D300) f5 (D300S), Custom setting f4 (D300S) and f3 (D300) f6 (D300), Custom setting f4 (D300S) and f3 (D300)
- Page 816 D-Lighting (Retouch), Playback Retouching D-Movie editing software, Video Editing Software D-Movie mode, D-Movie Mode – Section Two, Displaying a D-Movie on a High Definition TV (HDTV), Displaying a D-Movie on a High Definition TV (HDTV), How the Rolling Shutter Works in D-Movie Mode Avoiding “jellywobble”, How the Rolling Shutter Works in D-Movie Mode...
- Page 817 On an SDTV (Standard definition), Displaying D-Movies On the LCD screen (Monitor), Displaying D-Movies Downloadable resources, D300S and D300 Reference Material Dust off ref photo, USB (D300 only) Dynamic AF area (a3), Using Custom settings a1 and Custom setting a3 (D300S and...
- Page 818 Custom setting b1 (D300S and D300) Exp comp/fine tune (b3), Custom setting b3 (D300S and D300) Exposure delay mode (d10–D300S, d9–D300), Custom setting d10 (D300S) and d9 (D300) Exposure modes, Spot Meter, P – Programmed Auto Mode, Get Down Grandpa!, S –...
- Page 820 File Number Sequence used with File Naming Number sequence, File Naming File number sequence (d7–D300S, d6–D300), File Naming, Custom setting d6 (D300S) and d5 (D300) File naming, File Naming Filter effects (Retouch), Monochrome Fine tune optimal exposure (b6), Custom setting b6...
- Page 821 Active Folder Folder selection, Active Folder Foreword, Foreword Format memory card(s), Setup Menu Front-curtain sync, Custom setting e2 (D300S and D300) GPS, Display Mode, Save/Load Settings Grid, MC Picture Control Filter Effects and Toning, Custom setting d1 (D300S and D300)
- Page 822 Image compression, Combined NEF and JPEG Shooting (Two Images at Once) Image data, Display Mode Image deletion, Playback Menu Image dust off ref photo, USB (D300 only) Image overlay (Retouch), Color Balance Image quality, Secondary Slot Function (D300S Only), Image Quality,...
- Page 823 Image rotation, auto, Rotate Tall Image size, Final Image Format Ramblings, Final Image Format Ramblings Large (L), Medium (M), Small (S), Final Image Format Ramblings Information display (d8-D300S), Custom setting d7 (D300S) and d6 (D300) Initial camera configuration, Setup Menu...
-
Page 824: Interval Timer
Interval timer shooting, Movie Settings (D300S Only), Interval Timer Shooting, Interval Timer Shooting, Interval Timer Shooting Interval, Interval Timer Shooting Select intvls x no. of shots, Interval Timer Shooting Start time, Interval Timer Shooting ISO Auto, Setting the ISO Sensitivity Settings ISO sensitivity auto control, Setting the ISO Sensitivity Settings... - Page 825 JPEG compression, Image Size, JPEG Compression Size priority vs. Optimal quality, JPEG Compression JPEG image quality, NEF (RAW) Negatives, NEF (RAW) Negatives, JPEG Image Quality Format, TIFF Negatives Combined with NEF (RAW), TIFF Negatives Fine, normal, and basic, NEF (RAW) Negatives Positives vs.
- Page 826 Large (L) image size, Final Image Format Ramblings LCD brightness, LCD Brightness LCD illumination (d9–D300S, d8–D300), Custom setting d9 (D300S) and d8 (D300) LCD monitor information, Playback Menu Live view mode, Are there any drawbacks to using ISO sensitivity auto...
-
Page 828: Matrix Metering
Using the WB Button Matrix metering, Metering, Exposure Modes, and Histogram Max. continuous release (d6–D300S, d5–D300), Custom setting d6 (D300S) and d5 (D300) MB-D10 battery type (d11–D300S, d10–D300), Custom setting d10 (D300S) and d9 (D300) Medium (M) image size, Final Image Format Ramblings... - Page 829 Custom setting b3 (D300S and D300), Custom setting b3 (D300S and D300), Custom setting b5 (D300S and D300), Custom setting b6 (D300S and D300) Center-weighted area, Custom setting b5 (D300S and D300) Easy exposure compensation, Custom setting b3 (D300S and D300) EV steps for exposure cntrl.,...
- Page 830 (D300S), Choose folder (D300), Custom setting f3 (D300S) and f2 (D300) Do nothing, Custom setting f3 (D300S) and f2 (D300) Reset meter-off delay, Choose slot and folder (D300S) Multi selector center button (f2–D300S, f1–D300), Custom setting f1 (D300S only),...
- Page 831 AF-Area modes, Continuous-servo AF Mode (C) Auto-area AF, Dynamic-area AF Continuous-servo AF mode, Single-servo AF Mode (S) Dynamic-area AF, Single-Point AF Example of Use Focus modes, What Is the Multi-CAM 3500DX Autofocus Module? Mirror up mode, Self-Timer Mode Release modes, Dynamic-area AF Self-timer mode, Quiet (Q) Mode (D300S only)
- Page 832 Controls New folder number, Active Folder Nikon creative lighting system, Nikon Creative Lighting System (CLS) No memory card? (f10–D300S, f9–D300), Custom setting f9 (D300S) and f8 (D300) Non-CPU lens data, Preparing the Camera for GPS Usage NTSC vs. PAL, Lock Mirror Up For Cleaning Optimal quality vs.
- Page 834 PAL vs. NTSC, Lock Mirror Up For Cleaning Photo info/playback (f4–D300S, f3–D300), Custom setting f3 (D300S) and f2 (D300) PictBridge printing, Print Set (DPOF) Picture Controls, Set Picture Control, Examining Picture Controls, Examining Picture Controls, Examining Picture Controls, Examining Picture...
- Page 835 Examining Picture Controls Grid, MC Picture Control Filter Effects and Toning Load/Save, Delete a Custom Picture Control Managing, Resetting a Nikon Picture Control Optional Picture Controls, Copy to Camera Rename, Save/Edit a Custom Picture Control Resetting a Picture Control, Picture Control Grid...
- Page 836 All, Playback Folder Current, Playback Folder D300S, Playback Folder Hide images, Hide Image ND300, Playback Folder Playback Menu, Playback Menu, Playback Menu, Delete, Playback Folder, Hide Image, Display Mode, Copy Images (D300S Only), Copy Images (D300S Only), Image Review, Rotate Tall, Rotate Tall,...
- Page 837 Red-eye correction (Retouch), D-Lighting Red-eye reduction, Custom setting e2 (D300S and D300) Red-eye reduction with slow sync, Custom setting e2 (D300S and D300) Release button to use dial (f9–D300S, f8–D300), Menus and playback Rename, Shooting Menu, Custom Setting Menu Custom setting bank,...
- Page 838 Tall, Rotate Tall On or Off, Rotate Tall Save/Load settings, Copyright Information (D300S Only) Screen tips (d4), Custom setting d3 (D300S and D300) SD card capacity reporting, NEF (RAW) Type Secondary slot function (D300S only), Secondary Slot Function (D300S Only),...
- Page 839 Sensor, Lock Mirror Up For Cleaning, Video Mode, HDMI, Time Zone and Date or World Time, Language, Auto Image Rotation, USB (D300 only), (D300 only), Finding a Subject for the Dust-Off Reference Photo, Image Authentication, Image Authentication, Copyright Information (D300S...
- Page 840 Copyright Information (D300S Only) Time zone and date, HDMI USB (D300 only), USB (D300 only) Virtual horizon, Preparing the Camera for GPS Usage Shooting info display (d7–D300), Custom setting d7 (D300S) and d6 (D300) Shooting Menu, Shooting Menu, Shooting Menu,...
- Page 841 Only), Final Image Format Ramblings, Image Size, JPEG Compression, Channel and Bit Depth Tutorial, White Balance, Resetting a Nikon Picture Control, Color Space, Color Space, Active D-Lighting, High ISO High ISO Are there any drawbacks to using ISO sensitivity auto...
- Page 842 Are there any drawbacks to using ISO sensitivity auto control?, Live View and D-Movie Modes Long Exp. NR, Active D-Lighting Manage picture control, Resetting a Nikon Picture Control Movie settings, Understanding Auto Gain Multiple exposure, Live View Mode NEF (RAW) recording, JPEG Compression...
- Page 843 Shooting Menu Bank Renaming banks, Shooting Menu Shooting menu reset, Shooting Menu Bank Shooting mode, Custom setting f2 (D300S) and f1 (D300) Shooting/Display, D300 Only – Monitor Off Delay, Custom setting d1 (D300S and D300), Custom setting d1 (D300S and...
- Page 844 Battery order, Custom setting d11 (D300S) and d10 (D300) Beep, Custom setting d1 (D300S and D300) CL mode shooting speed, Custom setting d4 (D300S Only) Exposure delay mode, Custom setting d10 (D300S) and d9 (D300) File number sequence, Custom setting d6 (D300S) and...
- Page 845 Skip back/Skip ahead, Slide Show View additional photo info, Slide Show Slow rear-curtain sync, Custom setting e2 (D300S and D300) Slow sync, Custom setting e2 (D300S and D300) Small (S) image size, Final Image Format Ramblings Sound (D-Movie–D300S), Dealing with Sound...
- Page 846 Lock: Custom Settings c1 to Custom setting c1 (D300S D300), Custom setting C2 (D300S and D300), Custom setting C4 (D300S and D300) Auto meter-off delay, Custom setting c1 (D300S and D300) Monitor off delay, Custom setting C4 (D300S and D300)
- Page 847 Which Video Encoding Method? Viewfinder grid display (d2), Custom setting d1 (D300S and D300) Viewfinder warning display (d3), Custom setting d2 (D300S and D300) Virtual horizon (D300S), Preparing the Camera for GPS Usage Vivid (VI) Picture Control, Examining Picture Controls...
- Page 848 the Shooting Menu, Method 2 – Manual White Balance Using the Shooting Menu, White Balance Bracketing, Opinion about Auto White Balance Tips and Tricks, White Balance Tips and Tricks Adjusting a saved WB value, Adjusting a Saved White Balance’s Color Values Auto white balance, White Balance Bracketing Bracketing,...
- Page 849 World time (D300), HDMI Wrap-around (Focus point), Custom setting a6 (D300S and D300) Zoom on/off, View histograms...
- Page 850 He's been an avid photographer since 1968 when his mother gave him a Brownie Hawkeye camera. Darrell has used Nikon cameras and Nikkor lenses since 1980. He has an incurable case of Nikon Acquisition Syndrom (NAS) and delights in working with Nikon's newest digital cameras.
Need help?
Do you have a question about the D300 and is the answer not in the manual?
Questions and answers