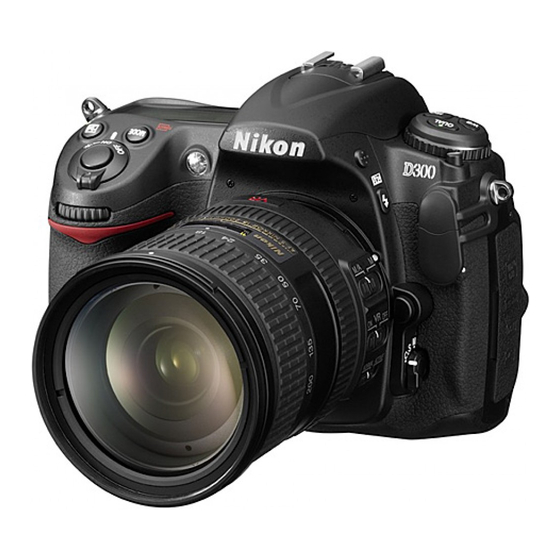
Nikon D300 User Manual
Hide thumbs
Also See for D300:
- User manual (850 pages) ,
- Complete manual (769 pages) ,
- Manual del usuario (448 pages)
Table of Contents
Advertisement
Quick Links
Advertisement
Chapters
Table of Contents

Related Manuals for Nikon D300


Summary of Contents for Nikon D300
- Page 1 Nikon DIGITAL CAMERA User's Manual...
- Page 2 The setup menu contains the options listed below. information on using the setup menu, see "Tutorial: Camera Menus" (pg. 24). Format memory card LCD brightness Clean image sensor Lock mirror up for cleaning Video mode HDMI World time Language Image comment Auto image rotation Dust off ref photo Battery info...
-
Page 3: Format Memory Card
Format Memory Card Format the card. Note that formatting permanently deletes all pictures and other data on the card. Before formatting, be sure to make backup copies as required. _I_ During Formatting Do no t turn the camera off or remove memory cards during formatting. Two-Button Format Memory cards can also be formatted by pressing the ,0_ (#and MODE) buttons for more than two seconds (pg. -
Page 4: Video Mode
Clean Image Sensor Select this option to remove dust from the image sensor or to choose options for automatic image sensor cleaning (pg. 373). Lock Mirror up for Cleaning Lock the mirror in the up position to allow inspection or manual cleaning of the low-pass filter that protects the camera image sensor (pg. -
Page 5: Hdmi
HDMI The camera is equipped with an HDMI (High-Definition Multimedia Interface) connector, allowing pictures to be played back on high-definition televisions or monitors using a type A cable (available separately from commercial suppliers). Before connecting the camera to high-definition device, choose the HDMI format from the options below. -
Page 6: World Time
World Time Change time zones, set the camera clock, choose the date display order, and turn daylight saving time on or off. Description Choose a time zone. The camera clock is automatically Time zone set to the time in the new time zone. Date and time Set the camera clock (pg. -
Page 7: Image Comment
Image Comment Add a comment to new photographs as they are taken. Comments can be viewed in ViewNX version 1.2.0 or later or in Capture NX version 1.3.5 or later or Capture NX 2 version 2.1.0 or later (available separately_ pg. 368). The comment is also visible on the third shooting data page in the photo information... -
Page 8: Auto Image Rotation
Auto Image Rotation Photographs taken while [On] (the default option) is selected contain information on camera orientation, allowing them to be rotated automatically during playback (pg. 251 ) or when viewed ViewNX version 1.2.0 or later or in Capture NX version 1.3.5 or later or Capture NX 2 verson... -
Page 9: Dust Off Ref Photo
Camera Control Pro 2 (available separately; see page 368). See page 225 for information on selecting a USB option for use with Nikon Transfer. Dust off Ref Photo Acquire reference data for the Image Dust Off option in Capture NX version 1.3.5 or later or Capture NX 2 version 2.1.0 or... - Page 10 Choose a start option. Highlight one of the following options and press 0. To exit I/_ll without acquiring image dust off data, press MENU. • [Start]: The message shown at right will be displayed and "rEF" will appear in the viewfinder and control panel displays.
- Page 11 Acquire dust off reference data. Press the shutter-release button the rest of the way down to acquire Image Dust Off reference data. The monitor turns off when the shutter-release button is pressed. If the reference object is too bright or too dark, the camera may be unable...
-
Page 12: Battery Info
Battery Info View information on the battery currently inserted in the camera. Item Description Bat. meter The current battery level expressed as a percentage. The number of times the shutter has been released with the current battery since the battery was last charged. -
Page 13: Wireless Transmitter 2
The MB-DIO Battery Pack The information displayed when the camera is powered by an optional MB-DIO battery pack depends on the type of batteries used: Wireless Transmitter This option is used to adjust settings for connection to a wireless network, using an optional WT-4 wireless... -
Page 14: Image Authentication
Image Authentication Choose whether to embed image authentication information new photographs as they are taken, allowing alterations to be detected using Nikon's optional Image Authentication software. Image authentication information can not be embedded existing photographs. Photographs taken with image authentication... -
Page 15: Copyright Information
[Attach copyright information] is not selected and that the [Artist] and [Copyright] fields are blank before lending or transferring the camera to another person. Nikon does not accept liability for any damages or disputes arising from the use of the [Copyright information]... -
Page 16: Save/Load Settings
Save/Load Settings Select [Save settings] to save the following settings to the camera memory card (if the memory card is full, an error will be displayed; pg. 394). _-_i'_"i_Me_nu ='u' _'_'I_' Option Display mode Image review Playback After delete Rotate ta II Shooting menu bank File naming... -
Page 17: Non-Cpu Lens Data
___:,_,,i_,Menu_O,U, _,_,,i_, ..... =...._p_ ion ..............Clean image sensor Video mode HDMI World time (excepting date and time) Language Image comment Setup Auto image rotation Image authentication Copyright information Non-CPU lens data All My Menu items My Menu/ All recent settings Recent Settings Choose tab... -
Page 18: Af Fine Tune
Non-CPU Lens Data By specifying lens data (lens focal length and maximum aperture) for up to nine non-CPU lenses, the user can gain access to a variety of CPU lens functions (pg. 196). AF Fine Tune Fine-tune focus for up to 12 lens types. AF tuning is not recommended... - Page 19 Option Description List previously saved AF tuning values. Ira value exists for the current lens, it will be shown with a _ icon. To delete a lens from the list, highlight the desired lens and press #. To change a lens identifier (for example, to choose an identifier that is the same as...
-
Page 20: Menus" (Pg
The options intheretouch menu areused tocreate trimmed, or retouched copies o fthephotographs onthememory c ard. T he retouch menu isonlydisplayed when amemory c ard containing photographs isinserted i nthecamera. For i nformation onusing theretouch m enu, s ee "Tutorial: Camera Menus" (pg. 2 4). - = 0 . - Page 21 Creating Retouched Copies Except in the case of [Image overlay] (pg. 339) and [Side-by-side comparison] (pg. 342), the photographs to be retouched can be selected in full-frame playback as well as from the retouch menu. II Creating RetouchedCopiesin Full-FramePlayback Choose a picture.
- Page 22 Create a retouched copy. Press 0 to create a retouched copy. Retouched copies are indicated by a icon. II Creating Retouched Copiesfrom the Retouch Menu Select an item in the retouch menu. Press • or • to highlight item, I_ to select. Depending on the option selected, a menu may be displayed;...
- Page 23 :3 Displayretouchoptions. Press @ to display retouch options (see the section for the selected option for details). To exit without creating a retouched copy, press MENU. Create a retouched copy. Press @ to create a retouched copy. Retouched copies are indicated by a icon.
- Page 24 _I_ Retouching Copies Copies created with [Trim] can not be further modified. D-lighting, red-eye correction, filter effects, and color balance can not be applied monochrome copies. Otherwise the options in the retouch menu can each be applied once to existing copies, although this may result in loss of detail.
- Page 25 D-Lighting D-lighting brightens shadows, making it ideal for dark or backlit photographs. Before After Press • or • to choose the amount of correction performed. The effect can be previewed in the edit display. Press 0 to copy the photograph.
- Page 26 Red-Eye Correction This option is used to correct "red-eye" caused by the flash, and is available only with photographs taken using the flash. The photograph selected for red-eye correction previewed as shown at right. Confirm the effects of red-eye correction and create a copy as described in the following table.
- Page 27 Trim Create a cropped copy of the selected photograph. The selected photograph displayed with the selected crop shown yellow; create a cropped copy as described the following table. _=_::':"_:"_:"_:"_o:_::"_:"_:"__ °:°-dse =_- Description Press the q[] button to reduce the size Reduce size of crop of the crop.
- Page 28 _I_ Trim: Image Quality and Size Copies created from NEF (RAW), NEF (RAW) + JPEG, or TIFF (RGB) photos have an image quality (pg. 56) of JPEG fine; cropped copies created from JPEG photos have the same image quality as the original. The size of the copy varies with crop size and aspect ratio.
- Page 29 Filter Effects Choose from the following color filter effects. After adjusting filter effects as described below, press @ to copy the photograph. Description Creates the effect of a skylight filter, making the picture less blue. The effect can be Skylight previewed in the monitor shown at right.
- Page 30 Image Overlay Image overlay combines two existing NEF (RAW) photographs create a single picture that is saved separately from the originals with results that are noticeably better than photographs combined in an imaging application because they make use of RAW data from the camera image sensor. The new picture is saved at current image quality and size settings;...
- Page 31 Select the highlighted photograph. Press O to select the highlighted photograph return to the preview display. The selected image will appear as [Image 1]. Set gain. Optimize exposure for the overlay by pressing • or • to /<_A_ select the gain for image 1 from values between 0.1 and 2.0.
- Page 32 Previewthe overlay. Press • or • to highlight [Overlay] and press 0 (to save /,_111 the overlay without displaying a preview, highlight [Save] and press 0). To return to Step and select new photos or adjust gain, press 91_. Savethe overlay. Press _ while the preview is displayed to save the overlay.
- Page 33 Side-by-Side Comparison Compare retouched copies to the original photographs. II Making a Side-by-Side Comparison Select a picture. Use the multi selector to select a picture and press 0. Only retouched copies (shown by a icon) or photographs that have been retouched can be selected.
- Page 34 Compare the copy with the Options used to create copy original. The source image is displayed on the left, the retouched copy © on the right, with the options used to create the copy listed at the top of the display. Press Source Retouched...
- Page 35 The [My Menu] option can be used to create and edit a customized list of options from the playback, shooting, Custom Settings, setup, and retouch menus for quick access (up to 20 items). If desired, recent settings can be displayed in place of My Menu (pg.
- Page 36 Position the new item. Press • or • to move the new item up or down in My Menu. Press 0 to add the new item. Add more items. The items currently displayed in My Menu are indicated bya check mark. Items indicated by a [] icon can not be selected.
- Page 37 Deleting Options from My Menu Select [Remove items]. In My Menu (_), highlight [Remove items] and press I_. Select items. Highlight items and press I_to select or deselect. Selected items are indicated by a check mark. Select [Done]. Highlight [Done] and press 0. A confirmation dialog will be displayed.
- Page 38 Reordering Options in My Menu Select [Rank items]. In My Menu (_), highlight [Rank items] and press I_. Select an item. Highlight the item you wish to move and press 0. Position the item. Press • or • to move the item up or down in My Menu and press _).
- Page 39 Displaying Recent Settings To display the twenty most recently used settings, select [Recent settings] for [My Menu] > [Choose tab]. Select [Choose tab]. In My Menu (_), highlight [Choose tab] and press I_. Select [Recent settings]. Highlight [Recent settings] and press 0.
-
Page 40: Table Of Contents
Technical N otes - Camera Core, Options, and Resources This chapter covers the following topics: Compatible Lenses ............pg. 350 Optional Flash Units (Speedlights) ......pg. 357 Other Accessories ..........pg. 365 Caring for the Camera ........... pg. 372 Storage ..................pg. -
Page 41: Compatible Lenses
Compatible Lenses Camera settinc Focusmode I Meter ng system ..:_ ....... Z mo°de J....M (with _ p T- A ..o_=_[°_I electronic M I S _M Lens/accessory rangeflnder) Type G or D AF Nikkor c__PC Micro 85mm f/2.8D 4 _odified, Nikkor v, lo... - Page 42 9 When focusing at minimum focus distance with AF 80-200mm f/2.8, AF 35- 70mm f/2.8, AF 28-85mm f/3.5-4.5 <New>, or AF 28-85mm f/3.5-4.5 lens at maximum zoom, in-focus indicator may be displayed when image on matte screen in viewfinder is not in focus. Adjust focus manually until image in...
- Page 43 [I_ Incompatible Accessories and Non-CPU Lenses The following accessories and non-CPU lenses can NOT be used with the D300: • TC-16AS AF teleconverter • AF lensesforthe F3AF (AF 80mm • Non-AI lenses f/2.8, AF 200mm f/3.5 AF Teleconverter TC-16) • Lenses that require the AU-1 focusing...
- Page 44 The AF-S/AF-I Teleconverter The AF-S/AF-I teleconverter can be used with the following AF-S and AF-I lenses: AF-S VR Micro 105mm f/2.8G ED 1 AF-S 500mm f/4D ED 2 AF-1500mm f/4D ED 2 AF-S VR 200mm f/2G ED AF-S VR 300mm f/2.8G ED AF-S 600mm f/4D ED II 2 AF-S 300mm f/2.8D ED II AF-S 600mm f/4D ED 2...
- Page 45 ED, the flash will be unable to light the entire subject at all ranges. The built-in flash can also be used with AI-, AI-modified Nikkor, Nikon Series Eand non-CPU lenses with a focal length of 18-300mm. AI 50- 300mm f/4.5, modified...
- Page 46 _I_ Red-Eye Reduction Lenses that block the subject's view of the AF-assist illuminator interfere with red-eye reduction. _I_ AF-Assist Illumination AF-assist illumination is not available with the following lenses: • AF-S VR 200ram f/2G ED • AF-S VR 200-400ram f/4G ED At ranges under 0.7 m (2ft.
- Page 47 Calculating Picture Angle The size of the area exposed by a 35mm camera is 36 x 24 mm. The size of the area exposed by the D300, in contrast, is approximately 23.6 x 15.8 ram, meaning that the diagonal picture angle of a 35ram camera is approximately 1.5 times that of the D300.
-
Page 48: Optional Flash Units (Speedlights)
The D300 can be used with CLS-compatible flash units. The Nikon Creative Lighting System (CLS) Nikon's advanced Creative Lighting System (CLS) offers improved communication between the camera and compatible flash units for improved flash photography. The Creative Lighting System supports the following features: •... - Page 49 II CLS-Compatible FlashUnits The D300 can be used with the following CLS compatible flash units: the SB 900, SB 800, SB 600, SB 400, SB R200, and SU800 The SB-900, SB-800, SB-600, SB-400, and SB-R200 The principal features of these flash units are listed below. SB_800 SB-600 SB-400...
- Page 50 Guide Number To calculate the range of the flash at full power, divide the Guide Number by the aperture. For example, at ISO I00 the SB-800 has a Guide Number of 38 m or 125 ft.; its range atan aperture of f/5.6 is 38+5.6 or about 6.8 meters (or in feet, 125+5.6=approximately...
- Page 51 The following features are available with the SB-900, SB-800, SB-600, SB-400, SB-R200, and SU-800: :::::: ::: sBi9oo sB:6oo Flash mode/feature U SB-800 i-TTL i-TTLbalanced fiIFflash for digital SLR Autoaperture Non-TTLauto i v-0 Range-priority manual Manual RP'[ Repeating flash Auto FPHigh-Speed Sync 7 FVlock AF-assistfor multi-area AF8 FlashColorInformation...
- Page 52 Other Flash Units The following flash units can be used in non-TTL auto and manual modes. If they are set to TTL, the camera shutter-release button will lock and no photographs can be taken. _-s°B_8ODX_° T" SB-30,SB-27 !, SB.22SlSB.22' SB-23,SB,292, SB-21B 2, SB-20, SB.29s 2...
- Page 53 Speedlights Refer to the Speedlight manual for detailed instructions. If the Speedlight supports the Nikon Creative Lighting System, refer to the section on CLS- compatible digital SLR cameras. The D300 is not included in the "digital SLR" category in the SB-80DX, SB-28DX, and SB-50DX manuals.
- Page 54 250 V applied to the accessory shoe could not only prevent normal operation, but damage the sync circuitry of the camera or flash. Before using a Nikon Speedlight not listed in this section, contact a Nikon-authorized service representative for more information.
- Page 55 Flash Contacts The D300 is equipped with an accessory shoe for attaching optional flash units directly to the camera and a sync terminal that allows flash units to be connected via a sync cable. II The AccessoryShoe Use the accessory shoe to mount optional flash units directly on the camera without sync cable (pg.
-
Page 56: Other Accessories
The EN-EL3e can be recharged using an MH-18a or MH-18 quick charger. • Multi-PowerBattery PackMB-DIO:The MB-D 10 takes one rechargeable Nikon EN-EL3e, EN-EL4a, or EN-EL4 Li-ion battery or eight AA alkaline, NiMH, lithium, or nickel- manganese batteries. A BL-3 battery-chamber cover is Powersources required when using EN-EL4a or EN-EL4 batteries. - Page 57 _-i_i_ _ '_ • Diopter-AdjustmentViewfinder LensDK-20C: T o accommodate individual differences in vision, viewfinder lenses are available with diopters of-5, -4, -3, -2, O, +0.5, +1, +2, and +3 m 1. Use diopter adjustment lenses onlyifthe desired focus can not be achieved with the built-in diopter adjustment...
- Page 58 Use Nikon filters; filters manufactured by other makers may interfere with autofocus or electronic range finding. The D300 can not be used with linear polarizing filters. Use the C-PL circular polarizing filter instead. Use NC and L37C filters to protect the lens.
- Page 59 Software Image Authentication:Determine whether photographs taken with image authentication (pg. 323) on have been modified after shooting. Note: Use the latest versions of Nikon software. Most Nikon software offers an auto update feature when the computer connected to the Internet.
- Page 60 _o_, ooc__oo_ The D300 is equipped with a ten- pin remote terminal for remote control and automatic photography. The terminal provided with a cap, which protects the contacts when the terminal not in use. The following accessories can be used (all lengths are approximate): •...
- Page 61 AdapterCordMC-25:Ten-pin to two-pin adapter cord for connection to devices with two-pin terminals, including the MW-2 radio control set, MT-2 intervalometer, and ML- 2 modulite control set (length 20 cm/8 in.). GPSAdapterCord MC-35(pg. 199): Connects GPS devices to Remote D300 via PC cable supplied by manufacturer of GPS terminal...
- Page 62 II Approved MemoryCards The following cards have been tested and approved for use in the D300: SanDisk Lexar Media Professional Extreme IV SDCFX4 UDMA SDCFX3 Platinum II Extreme 512MB Ultra II SDCFH Professional SDCFB 512MB Standard Microdrive DSCM-11000 3K4-2 3K4-4 Other cards have not been tested.
-
Page 63: Caring For The Camera
Storage When the camera will not be used for an extended period, replace the monitor cover, remove the battery, and store the battery in a cool, dry area with the terminal cover in place. To prevent mold or mildew, store the camera in a dry, well-ventilated area. -
Page 64: The Low-Passfilter
The Low-Pass Filter The image sensor that acts as the camera's picture element is fitted with a low-pass filter to prevent moire. If you suspect that dirt or dust on the filter is appearing in photographs, you can clean the filter using the [Clean image sensor] option in the setup menu. -
Page 65: Cleanat Startup/Shutdown
:3 Select[Clean now]. Highlight [Clean now] and press I_. The message shown at right will be displayed while cleaning is in progress. The message shown at right will be displayed when cleaning is complete. II "Cleanat Startup/Shutdown" Select [Clean at startup/ shutdown]. - Page 66 If dust can not be fully removed using the options in the [Clean image sensor] menu, clean the image sensor manually [pg. 376) or consult a Nikon-authorized service representative. If image sensor cleaning is performed several times in succession, image...
-
Page 67: Manual Cleaning
Note, however, that the filter is extremely delicate and easily damaged. Nikon recommends that the filter be cleaned only by Nikon-authorized service personnel. Charge the battery or connect an AC adapter. A reliable power source is required when inspecting cleaning the low-pass filter. - Page 68 Remove any dust and lint from the filter with a blower. Do not use a blower- brush, as the bristles could damage the filter. Dirt that can not be removed with a blower can only be removed by Nikon- authorized service personnel. Under no circumstances should you touch or wipe the filter.
- Page 69 End cleaning inspection immediately. Foreign Matter on the Low-Pass Filter Nikon takes every possible precaution to prevent foreign matter from coming into contact with the low-pass filter during production shipping.
-
Page 70: Caring For The Camera And Battery: Cautions
Keepaway from strongmagneticfields: Donot drop:The product Do not use or store this device in malfunction if subjected to strong shocks or vibration. the vicinity of equipment that generates strong electromagnetic Keepdry: This product is not radiation or magnetic fields. waterproof, and may malfunction Strong static charges or the if immersed... - Page 71 Donot touchthe shutter curtain:The Cleaning:When cleaning the camera body, use a blower to gently shutter curtain is extremely thin remove dust and lint, then wipe and easily damaged. Under no gently with a soft, dry cloth. After circumstances should you exert using the camera at the beach or pressure on the curtain, poke it...
- Page 72 Noteson the monitor:The monitor Turnthe productoff beforeremovingor disconnecting the powersource:Do not may contain a few pixels that are unplug the product or remove the always lit or that do not light. This is common to all TFT LCD monitors battery while the product is on or and does not indicate a...
- Page 73 Batteries: Dirt on the battery Charge the battery before use. terminals can prevent the camera When taking photographs from functioning and should important occasions, ready a spare removed with a soft, dry cloth EN-EL3e battery and keep it fully before use. charged.
-
Page 74: Troubleshooting
In the event of continued malfunction, contact your retailer or Nikon-authorized service representative. Note that disconnecting the power source as described above may result in loss of any data not recorded... - Page 75 II Shooting Problem " Solution Page Camera takes time to turn Delete files or folders. Memory card is full or not 39, 45 inserted. CPU lens with aperture ring attached but aperture not locked at highest f-numben IfFE E is displayed in control panel, select...
- Page 76 _°_'_i_obie_ i_ i_ ..Solutio. Image size can not be [Image quality] set to [NEF [RAW)]. changed. Unlock focus selector lock. Auto-area AF selected for focus mode: choose another mode. The camera is in playback mode. Can not select focus point The camera is in menu operation.
- Page 77 Problem _°:_' _i_:'_i'_"i_i' _"i_i' _'S_u°t:_i°on_°i_;_°°_= _-'T °_°_- Page Camera is in focus mode C. Center focus point is not selected for single-point AF or dynamic- area AF. [Off] selected for Custom Setting AF-assist illuminator does a9 ([Built-in AF-assist not light. illuminator]).
- Page 78 Problem Solution Page A (auto) is selected for sharpening, Effects of Picture Control contrast, or saturation. consistent results over a series of differ from image to image. photographs, choose a setting other than A (auto). Metering can not be Autoexposure lock is in effect.
- Page 79 II Playback Problem Solution '°'_'°'°'°'°'°'°i°'°'°'°'°'°'°'°'°'°i°'°'°'°'°'°'°'°'°'=°_° P a_ Flashing areas appear in images Press • or • to choose photo Shooting data appear information displayed, or change 206, 250 on images settings for [Display mode]. A graph appears during playback. NEF [RAW) image is Photo was taken at image quality of NEF + JPEG.
- Page 80 Picture Controls or active NEF (RAW) images D-Lighting. Use ViewNX version 1.2.0 or differently from later or optional Nikon software such as camera. Capture NX version 1.3.5 or later or Capture NX 2 version 2.1.0 or later.
- Page 81 II Miscellaneous Solution Page Date of recording Set camera clock. not correct. Some options are not available at certain combinations of settings or when no Menu item can not be memory card is inserted. Notethat [Battery selected. info] option is not available when camera is powered by an optional AC adapter.
-
Page 82: Error Messages
(largest (blinks) f-number). aperture. Ready a fully-charged Low battery, spare battery. Battery exhausted. Recharge or replace battery. Contact Nikon- Battery can not be used. authorized service representative. An extremely Replace the battery, xxiii, 30, exhausted or recharge (blinks) rechargeable... - Page 83 i! ¸¸ Contro '=v=ew f7 Solution Problem Page panel No lens attached, non-CPU lens attached without specifying Aperture value will be maximum aperture. displayed if maximum Aperture shown in aperture is specified. stops from maximum aperture. Camera unable to focus using autofocus. Focus manually.
- Page 84 Indicator C_=ontr- oTl_°uv _= ewe- = _ Solution panel Page Use a higher sensitivity In exposure mode: P Use flash Subject too dark; photo .5 Lower shutter will be underexposed. speed R Choose a larger aperture (smaller f-number) Change shutter speed _,u L b selected _=1p_I p___l...
- Page 85 Fu_._ Delete photographs. at current settings, or (blinks) (blinks) camera has run out of Insert new memory file or folder numbers. card. Release shutter. If error persists or appears frequently, consult Camera malfunction. Nikon-authorized service representative.
- Page 86 Check that contacts be used. are clean. If card is Cardmay be [5 HRI damaged, contact damaged. (blinks) retailer or Nikon Insert representative. anothercard. Unable to create Delete files or insert 39, 248 new folder, new memory card.
- Page 87 Solution Page Monitor panel Thiscardisnot Memory card has Format memory card formatted. F Q r not been formatted 39,41 or insert new memory Formatthe (blinks) for use in camera. card. card. Select folder No images on containing images Folder memory card or in from [Playback folder] contains no 39,249...
- Page 88 Indicator _:! i i ii _ i_i:iiii!il i _i:i_i iii:i_ii i_ £ £ Control Monitor panel Solution Page Memory card does Images created with Cannotselect not contain images other devices can not thisfile. that can be be retouched. retouched. Check printer. resume, select 231 * Printer error.
- Page 89 _Co=nt r_=o_ Monitor panel Check ink. To Check ink Ink error, resume, select 231 * supply. [Continue]. Printer is out of ink. Replace inkand select 231 . Outof ink. [Continue]. * See printer manual for more information.
-
Page 90: Appendix
The Appendix c overs t hefollowing t opics: • Defaults ................pg.400 • Memory C ard Capacity ............pg.405 • Exposure Program ..............pg.407 • Aperture, Sensitivity, andFlash Range ........pg.408... -
Page 91: Defaults
Defaults The following defaults are restored either with a two-button reset or using [Reset shooting menu] or [Reset custom settings]. II Defaults Restored with a Two-ButtonReset(pg. 182)7 Option °_!_i"_-i)_efa_uJt ...... [ISO sensitivity] (pg. 94) mage quality] (pg. 56) JPEG normal Shooting [Image size] (pg. - Page 92 II Defaults Restored with [Reset Shooting Menu] (pg. 257) 1 =o_ ........ Option Default [File naming] (pg. 260) [Image quality] (pg. 56) JPEG normal [Image size] (pg. 60) Large [JPEG compression] (pg. 58) Size priority [NEF (RAW) recording] (pg. 58) [White balance] (pg.
- Page 93 Defaults Restoredwith [ResetCustomSettings] (pg.266) _ Option Default [AF-C priority selection] (pg. 267) Release a2 [AF-S priority selection] (pg. 268) Focus a3 [Dynamic AF area] (pg. 269) 9 points a4 Focus tracking with lock-on] (pg. 270) Normal a5 [AF activation] (pg. 271 ) Shutter/AF-ON a6 [AF point illumination] (pg.
- Page 94 Option Default [Beep] (pg. 281) High d2 [Viewfinder grid display] (pg. 281) d3 [Viewfinder warning display] (pg. 282) d4 [CL mode shooting speed (pg---_282i ..........................[Max. continuous release] (pg. 282) [File number sequence] (pg, 283) Auto [Shooting info display] (pg. 284) [LCD illumination] (pg.
- Page 95 _-_i_ _°°_ _°_°T'_°_° _° °O_pt[o°n-_T'T'°_°°'°°'°_ _7_--I?TI Default ..Multi selector center button] (pg. 300) Select center focus point [Shooting mode] Thumbnail on/off [Playback mode] Do nothing Multi selector] (pg. 301) [Assign FUNC. button] (pg. 302) [Assign preview button] (pg. 305) Preview None J[Preview+command...
-
Page 96: Memory Card Capacity
Memory Card Capacity The following table shows the approximate number of pictures that can be stored on a 2 GB SanDisk Extreme III (SDCFX) card at different image quality and size settings. _"!_ii°esizeT_ °N°o_°_i°images T gu_e_pacE_;T: ..!ooo i_OOma_-_g¥_lu_oali-_ _..:,_mageOsi_e_! NEF (RAW), Lossless 13.6 MB compressed, 12-bit... - Page 97 I All figures are approximate. File size varies with scene recorded. 2 Maximum number of exposures that can be stored in memory buffer at ISO 200. Drops if ]Optimal quality] is selected for [JPEG compression], ISO sensitivity is set to M 8.3 or higher, [High ISO NR] is on when auto ISO sensitivity control is on or...
-
Page 98: Exposure Program
Exposure Program The exposure program for programmed auto is shown in the following graph: minimum ISO200; lens with maximum aperture off/1.4 and aperture of f/16 (e.g.,AF 50mm f/1.4 D) 8" 4" 125 250 5001000200040008000 Shutter speed The maximum and minimum values for EV vary with ISO sensitivity;... -
Page 99: Aperture, Sensitivity, Andflash Range
Aperture, Sensitivity, and Flash Range The range of the built-in flash varies with sensitivity (ISO equivalency) and aperture. The built-in flash has a minimum range ofO.6 m (2 ft.). In programmed auto exposure mode (mode P), the maximum aperture (minimum f-number) is limited according to ISO... -
Page 100: Specifications
II NikonD300 Digital Camera Single-lens reflex digital camera Lensmount Nikon F mount (with AF coupling and AF contacts) Effective picture angle Approx. 1.5 × lens focal length (Nikon DX format) Effective pixels 12.3 million M_g_sellsor Image sensor 23.6× 15.8 mm CMOS sensor Total pixels 13.1 million... - Page 101 Viewfinder Eye-level pentaprism single-lens reflex viewfinder Frame coverage Approx. I00% horizontal and I00% vertical Magnification Approx. 0.94 × (50-ram f/1.4 lens at infinity, -I .0 m i) Eyepoint 19.5 mm (-1.0 m i) Diopter adjustment -2-+I Focusing s creen Ships with type B BriteView Clear Matte Mark II screen with AF area brackets (framing grid can be displayed) Reflexmirror...
- Page 102 Type Electronically-controlled vertical-travel focal-plane shutter Speed I/8ooo-30sinstepsofl/3,1/2, EV, bulb, X250 Flashsyncspeed X=1/250 s; synchronizes with shutter at 1/320s or slower (flash range drops at speeds between 1/250 and 1/320s) Release mode S (single frame), CL(continuous low speed), CH (continuous high speed), [] (live view), Q (self-timer), MuP(mirror up) Frameadvance rate •...
- Page 103 ISO 200 or to approx. 0.3, 0.5, 0.7, or 1 EV(ISO 6400 equivalent) above ISO 3200. ActiveD-Lighting Can be selected from [High], [Normal], or [Low] Autof0cus Nikon Multi-CAM 3500DX autofocus sensor module with TTL phase detection, fine-tuning, 51 focus points (including 15 cross-type sensors), and AF-assist illuminator (range approx.
- Page 104 Flashcontrol • TTL:i-TTL balanced fill-flash and standard i-TTL flash for digital SLR using 1,005-segment RGB sensor are available with built-in flash and SB-900, SB-800, I, or SB-400 • Auto aperture: Available with SB-900 or SB-800 and CPU lens • N0n-TTL auto: Supported flash units include SB-900, SB-800, SB-28, SB-27, and SB-22s •...
- Page 105 Li-ion EN-EL3e battery Batterypack Optional MB-DI 0 multi-power battery pack with one rechargeable Nikon EN-EL3e, EN-EL4a, or EN-EL4 Li-ion battery or eight AA alkaline, NiMH, lithium, or nickel- manganese batteries; EN-EL4a/EN-EL4 and AA batteries available separately; A BL-3 battery-chamber cover is required when using EN-EL4a or EN-EL4 batteries.
- Page 106 20 °C (68 °F). • Nikon reserves the right to change the specifications of the hardware software described in this manual at any time...
- Page 107 Supported Standards • DCFVersion 2.0: The Design Rule for Camera File System (DCF)is a standard widely used in the digital camera industry to ensure compatibility among different makes of camera. • DPOF: D igital Print Order Format (DPOF) is an industry-wide standard that allows pictures to be printed...
- Page 108 Battery Life The number of shots that can be taken with fully-charged batteries varies with the condition of the battery, temperature, and how the camera is used. In the case of AA batteries, capacity also varies with make and storage conditions; some batteries can not be used.
- Page 109 Using the optional GP-1 GPS unit Using VR (vibration reduction) mode with VR lenses To ensure that you get the most from rechargeable Nikon EN-EL3e batteries: • Keep the battery contacts clean. Soiled contacts can reduce battery performance. • Use batteries immediately after charging.
- Page 110 Menu items and options in the camera monitor are shown in brackets ([ ]). auto-area AF, 64, 65 Symbols D3 (Single-point AF), 64, 65 dynamic-area AF, 64, 65, 269 single-point AF, 64, 65 _:,-3(Dynamic-area AF), 64, 65, 269 [AF-C priority selection[, C_3(Auto-area AF), 64, 65...
- Page 111 Menu items and options in the camera monitor are shown in brackets ([ ]). Bracketing, 116, 297, 298 [Delete], [All], 248 exposure, 116, 297, 298 flash, 116, 297, 298 [Selected], 248 white balance, 116, 121 Delete, 54, 222, 248 ]Bracketing order], all images, 248 [Built-in...
-
Page 112: Firmware Version
[File n aming], single-servo AF, 62, 68, 268 [File n umber sequence], point, 64, 66, 84, 250, 269, 272 ]Filter effects], contrast-detect, [Skylight], tracking, 63, 270 [Warm filter], 338 3D, 64, 270 [Fine tune optimal exposure], predictive, 62, 63 ]Firmware version], ]Focus point wrap-around],... - Page 113 Menu items and options in the camera monitor are shown in brackets ([ ]). [Interval timer shooting], [Live view mode], 80, 83 [Hand-held], Interval timer shooting, [Tripod], 83 ISO sensitivity, 93, 94, 96 ]Release mode], 80 [ISO sensitivity settings], Live view, 79-88 [ISO sensitivity], LO, 95 [ISO sensitivity...
- Page 114 [14-bit], 59 [Time stamp], 238 [Type], 58 ]Print set (DPOF)], 230 ]Compressed], Printing, [Lossless compressed], Programmed auto, 104 [Uncompressed], Protecting photographs, Nikon Transfer, 224, 225 [No memory card?], 309 Rear-curtain sync, 175 [Non-CPU lens data], [Red-eye correction], Red-eye reduction, ]-Optional...
- Page 115 Menu items and options in the camera monitor are shown in brackets ([ ]). Two-button reset, 182 S, 60 [Save/load settings], [USB], 225, 318 Saving camera settings, [Mass Storage], 225 [Self-timer delay], [MTP/PTP], 225,318 Sensitivity, 93, 94, 96 USB, 224, 225, 232, 318 [Set Picture Control], cable, i, 226, 228, 232 [Monochrome],...
- Page 116 [Daylight saving time], 37, 31S [Time zone], 37, 315 WT-4, 229, 365...
- Page 117 No reproduction in any form of this manual, in whole or in part (except for brief quotation in critical articles or reviews), may be made without written authorization from NIKON CORPORATION. NIKONCORPORATION Fuji Bldg., Marunouchi 3-chome, Printed in Europe Chiyoda-ku,Tokyo...
Need help?
Do you have a question about the D300 and is the answer not in the manual?
Questions and answers