
Related Manuals for Advantech PCI-1706U


Summary of Contents for Advantech PCI-1706U
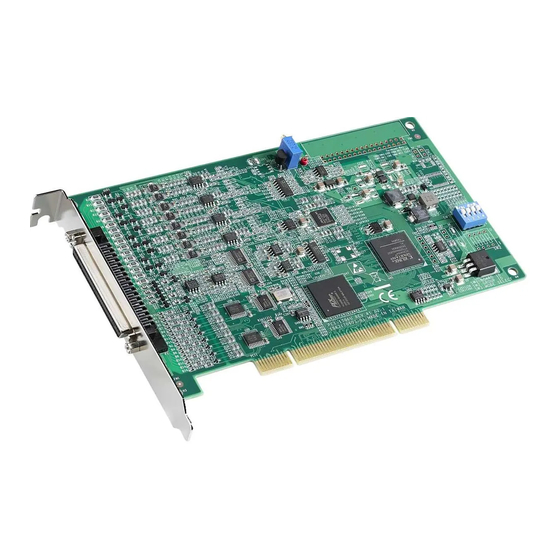
- Page 1 User Manual PCI-1706U 250 kS/s, 16-bit, Simultaneous 8-ch Universal PCI Multifunction Card with Multiple Synchronization...
- Page 2 No part of this manual may be reproduced, copied, translated or transmitted in any form or by any means without the prior written permission of Advantech Co., Ltd. Information provided in this manual is intended to be accurate and reliable. How- ever, Advantech Co., Ltd.
-
Page 3: Declaration Of Conformity
This product has passed the CE test for environmental specifications when shielded cables are used for external wiring. We recommend the use of shielded cables. This kind of cable is available from Advantech. Please contact your local supplier for ordering information. - Page 4 PCI-1706U User Manual...
-
Page 5: Table Of Contents
Unpacking ....................8 Driver Installation ..................8 2.2.1 Device Auto Installation (Recommended)........9 Figure 2.1 The Setup Screenof Advantech Automation Software9 Figure 2.2 Contents of the CD ........... 10 Figure 2.3 Select Drivers ............10 Figure 2.4 Items of DAQNavi............. 11 Figure 2.5 Select Device Series .......... - Page 6 Switch and Jumper Settings ..............22 Figure 3.1 Connector and Switch Locations......22 Table 3.1: Board ID Settings ............. 23 Signal Connections ................. 23 Figure 3.2 I/O Connector Pin Assignments for the PCI-1706U Se- ries................23 3.3.1 I/O Connector Signal Description ..........24 3.3.2...
-
Page 7: Chapter 1 Introduction
Chapter Introduction This chapter will provide informa- tion on the features of the PCI- 1706U cards, a quick installation- guide, together with some brief information on software and accessories. Sections include: Features Applications Installation Guide Software Overview ... -
Page 8: Introduction
1.2.4 On-board FIFO Memory There is 8k of FIFO sample memory on PCI-1706U. This is an important feature for faster data transfers and more predictable performance under Windows systems. PCI-1706U User Manual... -
Page 9: Auto Calibration
1.2.6 D/A Output The PCI-1706U goes further with 2 analog output channels, It is for users to differen- tiate according to what they really need as the best solution 1.2.7 Digital Inputs and Digital Outputs The PCI-1706U provides16 digital input channels and 16 digital output channels. -
Page 10: Installation Guide
Installation Guide Before you install your PCI-1706U card, please make sure you have the following necessary components: PCI-1706U DA&C card PCI-1706U User Manual Driver software Advantech DAQNavi SDK and drivers (included in the companion CD-ROM) Wiring cables PCL-10168-1, PCL-10168-2 (optional) ... -
Page 11: Device Drivers
1.5.2 Device Drivers The Advantech Device Drivers software is included on the companion CD-ROM. It also comes with all Advantech DA&C cards. Advantech’s device drivers feature a complete I/O function library to help boost your application performance. The Advan- tech Device Drivers for Windows 2000, XP, Vista or Windows 7 works seamlessly with development tools such as Visual C++, Visual C#, Visual Basic.NET, Borland... -
Page 12: Programming With Daqnavi Sdk
1.6.2 Programming with DAQNavi SDK Advantech DAQNavi SDK offers a rich function library to be utilized in various appli- cation programs. This function library consists of numerous APIs that support many development tools, such as Visual C++, C#, Visual Basic.NET, Delphi and C++ Builder. -
Page 13: Chapter 2 Installation
Chapter Installation... -
Page 14: Unpacking
Unpacking After receiving your PCI-1706U package, please inspect its contents first. The package should contain the following items: PCI-1706U card Companion CD-ROM (DLL driver included) User Manual The PCI-1706U cards harbors certain electronic components vulnerable to electro- static discharge (ESD). -
Page 15: Device Auto Installation (Recommended)
Touch the metal part on the surface of your computer to neutralize the static electricity that might be on your body. Insert the PCI-1706U card into a PCI slot. Hold the card only by its edges and carefully align it with the slot. Insert the card firmly into place. Use of excessive force must be avoided, otherwise the card might be damaged. -
Page 16: Figure 2.3 Select Drivers
(2) Push the "CONTINUE" button to go to the next screen. Figure 2.2 Contents of the CD (3) Select the “Installation” option. Figure 2.3 Select Drivers PCI-1706U User Manual... -
Page 17: Figure 2.4 Items Of Daqnavi
(4) Select the “DAQNavi” option. Figure 2.4 Items of DAQNavi (5) Select the “Individual Drivers” option. After driver installation, we recommend you to install BioDAQ SDK for further development. Figure 2.5 Select Device Series PCI-1706U User Manual... -
Page 18: Figure 2.6 Different Options For Driver Setup
(6) Select the "PCI Series" option. Figure 2.6 Different Options for Driver Setup (7) Select the “PCI1706s” option to Run the PCI-1706 BioDAQ Driver package. Figure 2.7 Driver Install 1 PCI-1706U User Manual... -
Page 19: Figure 2.8 Driver Installation 2
(8) Push the “Next” button to finish step. Figure 2.8 Driver Installation 2 (9) Click “Finish”. The installer detects and installs PCI-1706 device on the sys- tem automatically. The device driver files and driver manual can be found at: System disk\Advantech\BioDAQ\Driver\PCI1706s. PCI-1706U User Manual... -
Page 20: Figure 2.9 The Device Name Listed In The Device Manager
System Device Manager: (1) Access the System Device Manager. (2) The device name of the PCI-1706 should be listed on the Advantech DAQ Devices tab. Figure 2.9 The Device Name Listed in the Device Manager 2.2.2... -
Page 21: Device Uninstallation
These settings will be used when you call the DAQNavi SDK to manipulate functions of Device Configu- ration assists to use Advantech DAQ cards more efficiently and easily. PCI-1706U User Manual... -
Page 22: Daqnavi Navigator
Click the “+” on the left to unfold the content. If the software and hardware installation are completed, the PCI-1706U is listed under DAQNavi - Devices - Installed Devices. Select Device Setting to open PCI-1706U device setting dialog box on the right. -
Page 23: System Device Manager
2.3.2 System Device Manager If the software and hardware installation are completed, you will see PCI-1706U name in the System Device Manager. Figure 2.11 Windows Device Manager On the “Device Manager” window, right click the device name and select “Properties”... - Page 24 Select “Device Configuration” tab. PCI-1706U device driver provides a device setting dialog box for users to set the device property values, and these values will be saved in the system. The device property will be referenced by the device driver functions.
- Page 25 When you check the check box of “Update System Database”, after click the “OK” button, configuration information will be set into system registry. Click the “OK” button to exit the configure dialog and accept the changes. Click the “Cancel” button to exit the configure dialog without save. PCI-1706U User Manual...
- Page 26 PCI-1706U User Manual...
-
Page 27: Signal Connections
Chapter Signal Connections This chapter provides useful information about how to connect input and output signals to the PCI-1706U cards via the I/O con- nector. Sections include: Overview Switch and Jumper Settings Signal Connections Field Wiring Considerations... -
Page 28: Overview
ID. We set the PCI-1706U board ID as 0 at the factory. If you need to adjust it to other board ID, set the SW1 by referring to DIP switch setting. -
Page 29: Signal Connections
Table 3.1: Board ID Settings BoardID Signal Connections Pin Assignment Figure 3-2 shows the pin assignments for the 68-pin I/O connector on the PCI- 1706U. Figure 3.2 I/O Connector Pin Assignments for the PCI-1706U Series PCI-1706U User Manual... -
Page 30: I/O Connector Signal Description
Analog, software, as set by software +12 V Source +12V DGND Output +5 V Source DGND Output 3.3.2 Analog Input Connections 3.3.2.1 Instant AI and Buffered AI Channel Connections Figure 3.3 Differential input channel connection - ground reference signal source PCI-1706U User Manual... -
Page 31: Floating Signal Source
Internal A/D clock derived from 32-bit divider External A/D clock from terminal board With PCI-1706U, user can define the type of trigger source as rising-edge or falling- edge. The Trigger has several sources. External digital (TTL) trigger from terminal board Soft trigger ... -
Page 32: Analog Output Connections
(TTL) trigger from terminal board. Figure 3.6 Analog Output Channel Connection 3.3.4 Digital Input/Output Connections PCI-1706 provides 16 channels DIO and the direction can be set by software. 3.3.4.1 Digital Input Channel Connections Figure 3.7 Digital Input Channel Connections PCI-1706U User Manual... -
Page 33: Counter Connections
Digital Output Channel Connections Figure 3.8 Digital Output Channel Connections 3.3.5 Counter Connections 3.3.5.1 Event Counter Connection Figure 3.9 Event Counter Connection 3.3.5.2 Frequency Measurement Connection Figure 3.10 Frequency Measurement Connection 3.3.5.3 Time Pulse Connection Figure 3.11 Time Pulse Connection PCI-1706U User Manual... -
Page 34: Figure 3.12One Shot Connection
The Out pin output a pulse or Toggled signal after the counter count the number of delay count that can be set by user. Figure 3.12 One shot Connection 3.3.5.5 PwMeter Connection (PWM_IN) Figure 3.13 PwMeter Connection (PWM_IN) 3.3.5.6 PwModulator Connection (PWM_OUT) Figure 3.14 PwModulator Connection (PWM_OUT) PCI-1706U User Manual... -
Page 35: Field Wiring Considerations
Field Wiring Considerations When you use PCI-1706U cards to acquire data from outside, noises in the environ- ment might significantly affect the accuracy of your measurements if due cautions are not taken. The following measures will be helpful to reduce possible interference run- ning signal wires between signal sources and the PCI-1706U card. - Page 36 PCI-1706U User Manual...
-
Page 37: Appendix A Specifications
Appendix Specifications... -
Page 38: General
Gain ± ± ± ± Range 10 V 2.5 V 1.25 V ± DNLE ± INLE Offset Error Accuracy 0.01 0.01 0.02 0.02 (%FSR) Gain Error 0.04 0.04 0.06 0.08 (%FSR) SINAD 78.1 dB ENOB 12.68 bits PCI-1706U User Manual... -
Page 39: Analog Output
Input Voltage High 2.4 V min. 0.4 V max. @ -0.2mA Input Load µ High 2.7 V min. @ 20 0.4 V max. @ + 8.0 mA (sink) Output Voltage High 2.4 V min. @ -0.4 mA (source) PCI-1706U User Manual... -
Page 40: Counter/Timer
Table A.2: PCI-1706 Analog Output Gain Code Output Range 0 ~ +5 V 0 ~ +10 V -5 ~ +5 V -10 ~ +10 V 4 ~ 20 mA 0 ~ 20 mA 0 ~ 24 mA PCI-1706U User Manual... -
Page 41: Appendix B Block Diagram
Appendix Block Diagram... -
Page 42: Block Diagram
Block Diagram Figure B.1 PCI-1706U Block Diagram PCI-1706U User Manual... - Page 43 Appendix Calibration This appendix provides brief information on PCI-1706U card calibration.Regular calibration checks are important to maintain accuracy in data acquisition and control applications.
-
Page 44: Appendix C Calibration
Calibration The PCI-1706U has been calibrated at the factory for initial use. You are not required to calibrate the PCI-1706U in normal conditions. However, if in other conditions users need to calibrate the PCI-1706U, users can follow the process list below. -
Page 45: A/D Calibration Wizard
(See this page for the position of TP1/VR1.) Select channels in the following list. Hold CTRL key and left chick the list item while selecting multiple channels. All channels are selected for default. Item 2: Display the calibration status and result during the process. PCI-1706U User Manual... - Page 46 Item 1: Connect a 0V DC to the channel(s) selected above and click Start button. Item 2: Display some values during calibration process. These values are for internal use, send them to Advantech if calibration fails. Item 3: Display the calibration result. If success the status is Done otherwise is "Failed".
- Page 47 Item 2: Click "Start" button to start calibrating. Item 3: Display some values during calibration process. These values are for internal use, send them to Advantech if calibration fails. Item 4: Display the calibration result. If success the status is Done otherwise is “Failed”.
- Page 48 Item 1: Display some channels which fails in calibration process. Item 2: Select the failed channels and re-click "Start" button to try again. Restore to factory default: Item 1: Click "Stop" button to stop calibration process. Item 2: Click "Default" button to restore factory settings. PCI-1706U User Manual...
-
Page 49: D/A Calibration Wizard
Connect AO channel 0/1 to AI channel 0/1 as described in the dialog. See this page for pin assignment of the connector. Select channels in the following list. Hold CTRL key and left chick the list item while selecting multiple channels. All channels are selected for default. PCI-1706U User Manual... - Page 50 Item 1: Click "Start" button to start D/A calibration process. Item 2: Display some values during calibration process. These values are for internal use, send them to Advantech if calibration fails. Item 1: Display some channels which fails in calibration process.
- Page 51 Item 1: Click "Stop" button to stop calibration process. Item 2: Click "Default" button to restore factory settings. PCI-1706U User Manual...
- Page 52 No part of this publication may be reproduced in any form or by any means, electronic, photocopying, recording or otherwise, without prior written permis- sion of the publisher. All brand and product names are trademarks or registered trademarks of their respective companies. © Advantech Co., Ltd. 2012...
Need help?
Do you have a question about the PCI-1706U and is the answer not in the manual?
Questions and answers