Advertisement
Table of Contents
- 1 Table of Contents
- 2 General Description
- 3 Warning
- 4 Cautions
- 5 Camera Body Display and Parts
- 6 Quick Overview
- 7 Advanced Operations
- 8 General Description Camera Feature
- 9 Software Upgrade
- 10 Mounting the SG-660 Series
- 11 SG-660 Series Trail Camera Default Setting List
- 12 Faq
- 13 Technical Specifications
- 14 Parts List
- 15 14: SG - 660M GPRS Setting
- 16 15: GPRS Notice
- Download this manual
12.0mp Infrared Digital Scouting Camera
SG-660/SG-660V/SG-660M
User's Manual
For making best use of all the functions of this camera, please read this
user's manual carefully before you use the camera and keep it as handy
reference.
According to the instruction to use SG-660V
SG-660M Software keep upgrading, it will be adding some new
features, new instruction maybe a little different.
Version_5.0
08/2011
- 0 -
Advertisement
Table of Contents

Related Manuals for ScoutGuard SG-660


Summary of Contents for ScoutGuard SG-660
- Page 1 12.0mp Infrared Digital Scouting Camera SG-660/SG-660V/SG-660M User’s Manual For making best use of all the functions of this camera, please read this user’s manual carefully before you use the camera and keep it as handy reference. According to the instruction to use SG-660V SG-660M Software keep upgrading, it will be adding some new features, new instruction maybe a little different.
-
Page 2: Table Of Contents
5:Quick Overview…………………………………………………..6-9 6:Advanced Operations …………………………………………10-18 7:General Description Camera Feature …………………………...19 8:Software Upgrade …………………………………………………20 9:Mounting the SG-660 series ……………………………………...21 10:SG-660 Series Trail Camera Default Setting List ………………22 11:FAQ …………………………………………………………….23-28 12:Technical Specifications ……………………………………….….29 13:Parts List ……………………………………………………….….30 14: SG - 660M GPRS Setting……………………………………..…31-36 15: GPRS Notice ………………………………………………….…36-37... -
Page 3: General Description
1. General Description The camera SG-660 Series is designed, developed and produced in China, We have patents for it, the patent No:200920131285.7,201030504272.8, 201030201364.9. It is a surveillance device working automatically; it is a beautiful style, pretend color, convenient for mount, including digital camera function. -
Page 4: Warning
If your product is out of our service guarantee period, we can still provide paid service like repairing or parts replacements and shipping costs therefore brought. SG-660 Series is covered by one year Limited Warranty on parts and labor from the date of original purchase, and purchases must be made through an authorized dealer. -
Page 5: Cautions
3. Cautions Be sure the camera’s power is switched off before inserting or removing SD card or batteries. It is recommended to use new high-performance alkaline AA batteries or rechargeable batteries, for prevent the liquid rot the battery depot. Please make sure that the battery polarity matches that on the battery cover. Make sure the polarities are correct. -
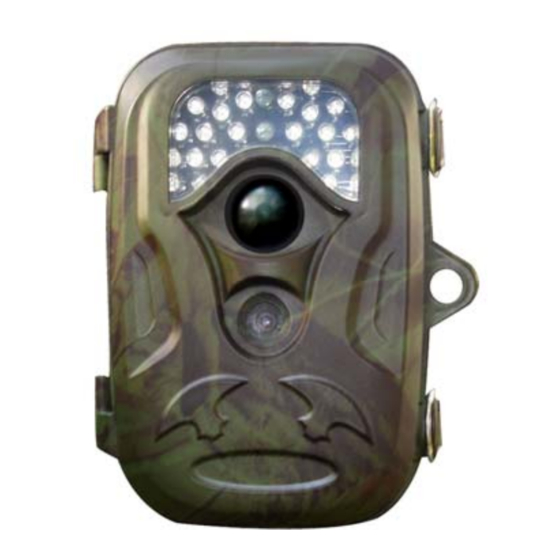
Page 6: Camera Body Display And Parts
LCD, Keyboard, Speaker, SD card slot, SIM card port, Mic port, USB port, TV out, AA Battery depot, and External DC power in. SG-660 Series Camera front as shown in fig.a; Display and keyboard as shown in fig.b; installing the batteries as shown in fig.c, Connections as shown in fig.d; Bottom cover as shown in fig.e... -
Page 7: Quick Overview
5、Quick Overview The trail camera uses a standard SD (secure digital)memory card to save photo (in jpg format) and / or videos(in .ASF format) The supported card size of the device is from 8MB to 32GB, and the file format supported is FAT12 and FAT16. - Page 8 In Test mode: The camera will shut down automatically after one minute if no key is 5.2.) pressed, for saving the battery. Indicator LED: When the power switch to the ON mode/Live mode, the motion indication LED (green) a、 will blink for 15s then enter into live position. Set mode : Red LED b、...
- Page 9 Capture video: In Test mode, can recording the video depend on the battery and memory capability; press OK for stop recording, saving the video to the SD card automatically 5.5.) ON/Live mode 1. Switch OFF position to ON position/Live mode Avoid temperature and motion disturbances in front of the camera such as big leaf, curtain, air-conditioner, air outlet of the chimney and other heat sources to prevent from false triggering.
- Page 10 A、USB review: after take back the camera, switch OFF the device, connect the device to the PC with a USB extension cable, and then run a commercial program with an image browser or an image browser built in the operation system to view images (or video clip) saved in the SD-card under the directory of \DCIM).
-
Page 11: Advanced Operations
6、Advanced Operations After you are familiar with the basic operation of the trail camera, you are now ready for advanced operation, In principle, the advanced operations in this chapter are very similar to the basic operations, only that options and parameters of the trail camera are explained in more detail. Parameters Setting You may set parameter with the guide information shown on the LCD or using a TV makes Parameter setting convenient step by step. - Page 12 In camera mode, On the top of Screen “0000/0000”, left “0000”digits means number of images. Right “0000” digits mean available space. The limited digits: 9999. It affect by the Memory Card. In video mode, On the top of “00:00:00”digits, means available space time to take the videos. It affect by the Memory Card.
- Page 13 22Frequency SG-660M trail camera: GPRS setting on last page C、Press MENU enter into menu setting. (Press Up/Down select ,press OK for finishing setting,press “Exit” for cancel. please operation as follow : Menu = Left= ⑴ Setting the camera Mode Two ways are available for setting this parameter. One is to use the shortcut key and the other is through the Menu.
- Page 14 delete one or Delete all. Continued press OK key 5s, then return to Test mode. (During capture picture/video, if power interrupt occurs or store issue, the file will show: file error when you playback it.) ⑵ Digital Zoom : (2X/3X/4X) Default setting: “NO”...
- Page 15 ⑹ Video Length: 5s-60s. This parameter is effective and can adjusted only when the device in the video mode for the Live mode. Default setting: 5s In Video Length mode: a) Press Up or Down to select 5-60s b) Press OK to save the current setting c) Press Left for cancel setting operation without any saving and return to last step.
- Page 16 A. When the human (or animals) move to PIR area (PIR 100°),but they didn’t enter into Camera view area (62°), the camera start taking photos ,SG-660series have been increased the PIR and camera lens angle. The camera range is more width. Maybe the image looks like empty same as false triggering.
- Page 17 d) Press Menu return toTest mode ⑽ Time stamp : ON/OFF This parameter defines whether the time should be stamped in the pictures and videos clips or not. Default setting: “ON” In Time Stamp mode: a) Press Up or Down to select ON/OFF b) Press OK to save the current setting c) Press Left for cancel setting operation without any saving and return to last step.
- Page 18 Default setting: “ON ” In IR LED mode: a) Press Up or Down to select ON/OFF b) Press OK to save the current setting c) Press Left for cancel setting operation without any saving and return to last step. d) Press Menu return to Test mode ⒁...
- Page 19 ⒅ Default Set : No/Yes Default set is the trail camera original factory default setting. Default setting: “No” In Default set mode: a) Press Up or Down to select no/yes b) Press OK to save all current setting c) Press Left for cancel setting operation without any saving and return to last step.
-
Page 20: General Description Camera Feature
7. General Description the camera Feature 7.1.) IR Live mode, enter into Live mode, before entering into the Live mode, the motion indication LED(green) will blink about 15s,this time let you make preparation for monitoring, for example, you can mount and lock the cover, fix up the trail camera and then walk away. In this waiting time, the PIR indication light (green) will blink for 15s continuously, after the light is put off, the PIR starts to work. -
Page 21: Software Upgrade
SG-660 Series & Software Updates Software is a key component to the function of trail camera product. To make certain that you have the latest software update for your SG-660 Series, please read below. Notice: 1. Insert AA battery or connect DC power, make sure that no power interrupt occurs during software upgrade. -
Page 22: Mounting The Sg-660 Series
SG-660 series, design with skid sawtooth, a belt hole, a steel cable hole, security lock hole. Mount the trail camera using those compositions. -
Page 23: Sg-660 Series Trail Camera Default Setting List
10、SG-660 Series trail camera default setting list MENU Setup Default Set Camera Mode Camera Digital Zoom Image Size Capture Number Video Size Video Lengths Audio Recording Interval Video Frames 30fps Time Stamp Set Clock 01/12/2010 .12:01:01 Sensor Level Normal IR LED... -
Page 24: Faq
Q: Battery life short on SG-660 Series. A: 1. Expected battery life depends on temperature and number of images. SG-660 Series expects the camera to take several thousand images before the batteries would die. 2. Check to make sure you has used new alkaline or lithium AA batteries. Recommend 8 Energizer Lithium AA batteries in all SG-660 Series. - Page 25 Q: SG-660 Series can’t switch on A: 1. Make sure that you have installed at least 4 batteries in the battery compartment all stocked together at the top of the compartment. Recommend 8 Energizer Lithium AA batteries in all SG-660 Series.
- Page 26 Didn’t recommend to turn on the IR LED at indoor, daytime, but it must turn on the IR LED at night. Q: SG-660 Series date/time Stamp not appearing on images A: Make sure that the “Time Stamp” setting is set to “On” in the Menu.
- Page 27 SD card, due to it is only designed for picture or video stored. There are many poor or fake SD cards in current market Q: On the front or last several images, SG-660 Series will occur some poor images (fuzzy or too white) A:1:When you switch ON position, mounting the camera, the camera will shake by hand, after the camera fix, then can solve this problem.
- Page 28 2:In GPRS Setting mode. Please input the correct data according to the user’s manual and the information from your local communication provider. Before using MMS function, It is recommended to use the network service provider which have wide fraction of coverage for making high quality signal, and get correct inputs information from them.
- Page 29 first one as 640*480 image size ,and send to your email or mobile ,due to the MMS only accept less than 50K photo. Q: Open GPRS function, it saved 10pcs 640*480 photos in SD card , but we only received 8pcs photos in the mobile or email? A: the cell phone signal in different area will be different although it supplied by same telecommunication operator, taken as example, when you start to have a call, initially the...
-
Page 30: Technical Specifications
Q:Will SG-660 series connect to an external solar or battery powered? A: Yes, as long as the input camera 6V/1A power supply can be, our factory SG-660 series are ordered to produce Extra DC wire (1000CM or180CM) connected to solar or storage battery 12. -
Page 31: Parts List
6V DC external Operation Temperature -20 - 60°C (Storage temperature: -30 - 70°C) Mounting Rope/Belt/Python lock Operation Humidity 5% - 90% Waterproof spec IP54 Security authentication CE FCC ROSH 13:Parts List Part name Quantity Digital camera USB cable TV out cable Belt User manual Warranty card... -
Page 32: 14: Sg - 660M Gprs Setting
14. SG-660M GPRS Setting 1. Power OFF. SIM card(unlocked) 2. Please make sure you have insert SIM card, SD card and Batteries or external DC Power (6V/1A), before using SG-660M.It is recommended to use new high-performance alkaline AA batteries or rechargeable lithium batteries. 3. - Page 33 Please note that this is only an example ,for more details please contact your network service provider, and there are only 4 parameters needs to be edited, do please not change other parameters expect these 4 parameters to avoid operation failure. No need key in “http://”,...
- Page 34 Port Setting = 8080 3.)In Germany provider Name: T-Mobile URL Setting = mms.t-mobile.de/servlets/mms APN Setting =mms.t-d1.de IP Setting =172.28.023.131 Port Setting =8008 Provider Name:O2 URL Setting = 10.81.0.7:8002 APN Setting = internet IP Setting = 195.182.114.52 Port Setting = 8080 4.)In Bulgaria provider Name: mtel URL Setting =mmsc APN Setting =mms-gprs.mtel.bg...
- Page 35 URL=mms.gprs.rogers.com APN=media.com IP=172.025.000.107 Port=80 7)In GPRS setting South Africa Provider Name:Vodacom URL= mmsc.vodacom4me.co.za APN= internet IP= 196.006.128.013 Port=8080 URL=mmsc.vodacom4me.co.za APN=internet IP=196.6.128.13 Port=8080 8) )In Ukraine GPRS setting Operator: KyivStar URL=mms.kyivstar.net APN=mms.kyivstar.net IP=010.010.010.010 Port=8080 Operator: Beeline UA URL= mms/ APN= mms.beeline.ua IP= 172.29.18.192 Port=8080 Operator: MTS Ukraine...
- Page 36 Provider Name: OPTUS URL= mmsc.optus.com.au:8002 APN= mms IP= 61.88.190.10 Port=8070 10)In Lithuanian GPRS setting Provider Name: omnitel URL=mms.omnitel.net:8002 APN=gprs.mms.lt IP=194.176.32.149 Port=8080 11) In Estonia GPRS setting Provider Name: Elisa URL=194.204.2.10 APN=mms IP=194.204.002.006 Port=8000 12) In Spain GPRS setting Provider Name: telefonica URL=mms.movistar.com APN=telefonica.es IP=10.138.255.005...
-
Page 37: 15: Gprs Notice
5. Enter into Send To mode, enter the phone number or email which the MMS to be sent In Send To mode, there are two inputs, Phone and Email. Suggested to input 3 or more cell phone number and e-mail box each to avoid any images missing, due to the mobile operators are different, and signal is not so stable per different cell phone, as well as mailbox server are different. - Page 38 Tel3= Tel4= Email1= Email2= Email3= Email4= Test SG-660M in China,if we key international code “+86”and“86” in front of mobile number. Or we only key the mobile number,we test result successfully with sending MMS. In China, no need key “0”, for another country phone number setting,it is recommended to try both of them with “0”...
- Page 39 6: Be sure that PIN of SIM card is disabled before inserting the SIM card.(you can disable the PIN of a SIM card via your mobile phone) 7: Before search the signal; please make sure that GPRS function is perfect and correct. 8: Please make sure that your batteries is enough, if batteries is low, it will bring the search signal failed.
Need help?
Do you have a question about the SG-660 and is the answer not in the manual?
Questions and answers