Table of Contents
Advertisement
Advertisement
Table of Contents

Related Manuals for ScoutGuard SG880MK-18mHD


Summary of Contents for ScoutGuard SG880MK-18mHD
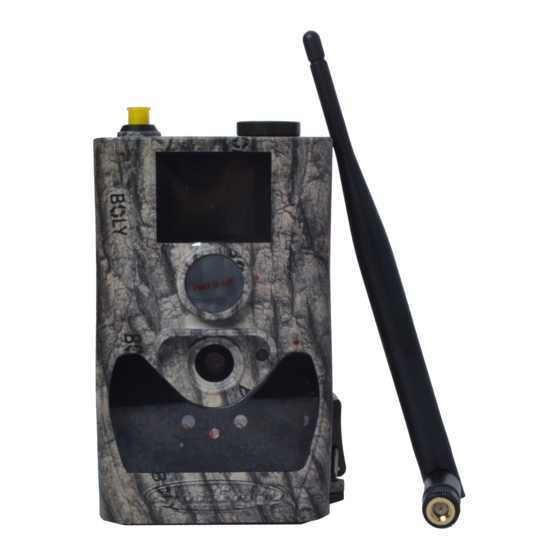
- Page 1 Infrared Mobile Digital Scouting Camera User Manual SG880MK-18mHD...
-
Page 3: Table Of Contents
Table of Content 1.Getting Started............. 1 2.Camera Operations........... 2 2.1 Batteries/ Power Supply ....... 2 2.2 SD Card Information........2 2.3 SIM Card Information........3 2.4 Camera Modes ..........4 2.5 Trigger Modes...........4 2.6 Manual Image / Video Capturing.....6 2.7 Manage Images and/or Videos ....6 2.8 Sending Images.......... -
Page 4: Getting Started
1.Getting Started Latch Battery tray Battery tray handle When mounting the camera outdoors, use the strap that was included with the camera. Periodically clean the camera lens and PIR sensor to avoid dust build up that can reduce picture quality and check to make sure the mounting strap is not loose. -
Page 5: Camera Operations
2.Camera Operations 2.1 Batteries/ Power Supply The camera is powered by four or eight AA batteries High-density, high-performance alkaline, rechargeable Alkaline or NiMH batteries are recommended,each battery need 1.5V. When the batteries are low, the indication LED will blink twice then the camera will automatically shut down. A DC 6-Volt, 2 Amp external power supply adapter can also be used to power the camera (not included). -
Page 6: Sim Card Information
card and has no built-in internal memory. The camera will not function without the SD card properly inserted into the camera. ●Make sure the SD card is unlocked before inserting the SD card into the camera The camera will power off with a locked SD card inserted. -
Page 7: Camera Modes
2.4 Camera Modes The different modes are accessed by sliding the power switch to the different positions marked on the camera: ●OFF Mode Turns the camera off. The camera will still consume a small amount of power while in OFF mode. It is recommended to remove the batteries if the camera will not be used for a long period of time. - Page 8 combined PIR/Time Lapse mode. These modes are activated by three different menu options (PIR Trigger/Sensitivity, PIR Interval, and Time Lapse). Trigger/Sensitivity: camera will activate when motion is detected. If the PIR Trigger/Sensitivity option is set to OFF, the camera will not respond to any motion within the camera’s range.
-
Page 9: Manual Image / Video Capturing
this interval time, the camera will not react to any detected motion or activate at the scheduled Time Lapse interval. Further detailed information about the trigger modes can be found in section 3.2 of the manual. 2.6 Manual Image / Video Capturing Place the camera in ON mode and press ►... -
Page 10: Sending Images
2.8 Sending Images Images can be sent directly to your wireless device or email, based on the Send Mode settings. Email and wireless device information need to be set up while the camera is in TEST/SETUP Mode in the Menu options. Images can only be sent when a correctly setup SIM card is recognized, installed and the wireless signal strength is adequate. -
Page 11: Camera Setup Settings And Display
3 Camera Setup Settings and Display The remote control is required for initial setup and changing any camera settings. When powering on the camera, please allow 10-20 seconds for the camera to recognize the remote. An icon on the LCD screen will appear once the camera has recognized the remote. -
Page 12: Mobile Communication
3.2 Mobile Communication The camera can receive and respond to commands sent via SMS, MMS, GRPS and the Apple or Android application, as long as the camera is correctly connected to a wireless carrier. Supported wireless carrier bands: GSM (MHz): 850, 900, 1800, 1900 WCDMA (MHz): 850, 900, 1900, 2100 To enable the SMS functionality using the mobile application, complete the following steps. -
Page 13: Camera Setup Software
menu Setup options will need to be set: MMS set GPRS set Send to Phone The settings for these options vary between service providers. You will need to contact your SIM service provider for specifics on these settings. - Page 14 First, select your country and carriers (step1) according to your SIM card and input your receiving phone number in “administrator number” and receiving e-mail address in “ Receive Email 1 ” (step3). For first time use, we suggest you to use default settings (step2), any settings you want to change, please click “Change Setting”...
-
Page 15: Mobile Applications
3.4 Mobile Applications When the camera is switched to the ON mode, you can change some of the basic camera settings through the mobile application. mobile application currently supported by Android and Apple devices. Charges or fees may be incurred through your cellular provider when sending text messages to the camera. - Page 16 Function SMS Command Supper #SG880MK-18mHD#0518#13800138 User 000# (#Model Name#0518#Admin phone number#) http://mmsc.cingular.com#66.2 Parameters 09.11.32#8080#wap.cingular# account#password# (The example parameters are for the carrier of AT&T) GPRS #s#bmctest123@163.com#bmc12 Parameters 3#25#cmnet#smtp.163.com#acco unt#password# (The example parameters are for 163 email) Set Normal #n#13800138001#13800138002 User’s...
-
Page 17: Camera Setup Options
V60: video length, t: set clock, l10m: time lapse, pn: pir trigger, i5s: PIR interval, mp: send to, Hon: work hour) Format SD Card 10 Help Change #P#1234# (1234 New Password) Password 12 Query Battery Power Note all sms commands are only available by admin number, each camera has only one admin number. - Page 18 Choose language you need. It supports four languages: English, Language Finnish, German, Swedish. Default:English Choose capturing Photo, Video or Camera Pic+Video. Mode Default:Photo Set camera date and time. You can change the date and time of the device by setting this parameter when necessary, e.g., after every battery Set Clock change.
- Page 19 step of one second. The default value is 10 seconds. Press LEFT and RIGHT to decrease or increase the value by 1 second. Default:10 sec Time lapse means the camera can capture images or videos at a preset time interval regardless of whether motions are detected.
- Page 20 sensitivity outdoor environment with lots of interference like hot wind, smoke, near window etc. Furthermore, the sensitivity of the PIR is strongly related to the temperature. Higher temperature leads to lower sensitivity. Therefore it is suggested to set a higher sensitivity for high temperature environment.
- Page 21 camera is sleeping. Set Work Hour as off means the camera works all day. Default:off The camera sends MMS message through GPRS network, so before using this function, you need to open GPRS service from your service provider. You should set the right MMS Set MMS setting parameters.
- Page 22 properly; Please note, only photos can be sent, video information can’t be sent in TEST mode. 2)“Daily Report”: Daily Report works only in the ON mode, which means that the camera will report the summarized information at the preset time (if the preset time is, eg.20:00PM) on how many pictures it had taken per day.
- Page 23 the MAX number is 10, the camera will send 10 MMS within 24 hours .And then it continues to capture photos and save them on the SD card. After 24 hours, the camera will send MMS again when it captures photos.
- Page 24 Default:Off It means camera position. You can set A-Z position for your camera, so that Position you can distinguish which photo is taken by which camera. Default:Off This parameter shows Version information about Firmware and IMEI of this camera. Deletes all images and videos in the SD card.Make sure you have made a Format SD backup of important data before...
-
Page 25: Trouble Shooting
4 Trouble Shooting 1 There is something in front of the camera lens. Is the camera broken? A: The camera is not broken. It’s an IR-cut filter. When the camera is powered on, the IR-cut will be reset and cover the lens. Only when the camera is powered off, the IR-cut will be at a random place 2 The camera display screen is not working anymore. -
Page 26: Pir Detection Zone
5 PIR Detection Zone This camera has a new design of PIR and the new PIR is patented. The new patented PIR’s detection range can reach to 90ft in good environments. Following picture shows the compared detection zone between normal PIR and the new patented PIR. -
Page 27: Technical Specifications
6 Technical Specifications 5MP Color CMOS, Image Sensor 12MP, 18MP Interpolation F/NO=2.4 Lens FOV(Field of View)=57° PIR detection 90ft range Display Screen 1.44” LCD Memory Card From 8 MB to 32 GB 18MP = 4864x3648 Picture 12MP = 4032×3024 Resolution 5MP = 2560×1920 Video Resolution 1920x1080 ,1280x720,640×480... -
Page 28: Parts List
7 Parts List Part Name Quantity Digital Camera Wireless Remote USB Cable Belt User Manual Enhanced Antenna Warranty Card Page 25... - Page 29 Download the camera setup software from here: http://www.bolymedia.com/index/Support For Mobile applications: Android: Visit our website @ www.bolymedia.com Apple: Download the authorized application using the Apple Apps online store. Version 1.1 Page 26...
Need help?
Do you have a question about the SG880MK-18mHD and is the answer not in the manual?
Questions and answers