Table of Contents
Advertisement
Quick Links
Advertisement
Table of Contents

Related Manuals for ScoutGuard SG565FV


Summary of Contents for ScoutGuard SG565FV
- Page 1 Digital Scouting Camera User’s Manual SG565FV...
-
Page 2: Table Of Contents
Content Instruction ..........................1 General Description ......................1 Camera Body Interfaces ....................1 Shooting Information Display ..................3 Supported Format ......................3 Cautions ........................... 4 Easy Operations ........................5 Power Supply ........................5 Insert the SD-card ......................5 Power on and Entering into the ON Mode ..............5 Enter into the TEST Mode ..................... -
Page 3: Instruction
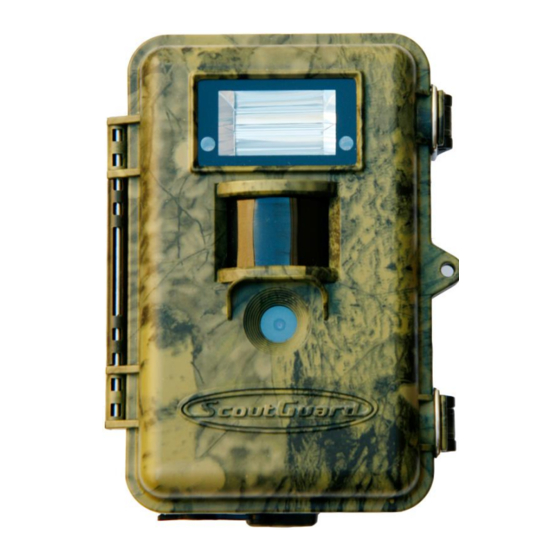
Scouting Camera SG565FV 1 Instruction 1 Instruction 1.1 General Description This camera is a digital scouting camera with Incandescent Flash It can be triggered at once by any movement of human (or animals) in a certain region of interested (ROI) monitored by a high sensitive Passive Infrared (PIR) motion sensor, and then automatically captures high quality pictures (up to 5M pixels) or records video clips (VGA) according to default settings or preset customer settings. - Page 4 Scouting Camera SG565FV 1 Instruction Page...
-
Page 5: Shooting Information Display
Scouting Camera SG565FV 1 Instruction 1.4 Shooting Information Display When the camera is turned on (the power switch is slid to ON position), the shooting information will be displayed in the monitor. 3. Image size 4. SD card 5. Battery level 2. -
Page 6: Cautions
Scouting Camera SG565FV 2 Cautions 2 Cautions ★ The working voltage of the camera is 6V. The camera is supplied by four AA batteries. ★ Please insert the SD-card when the power switch is at OFF position before testing the camera. The camera has no internal memory for saving images or videos. If no SD-card is inserted, the camera will shut down automatically after a continuous indication sound. -
Page 7: Easy Operations
Scouting Camera SG565FV 3 Quick Introductions 3 Easy Operations 3.1 Power Supply To supply power for the camera, four AA size batteries are needed. Open the bottom cover. Confirm that the power switch is at the OFF position. Install the fully charged batteries into the depot according the polarities sign shown below. -
Page 8: Enter Into The Test Mode
Scouting Camera SG565FV 3 Quick Introductions to prevent from false triggering. 2. The height from ground for placing the camera should vary with the object size appropriately. In general, one to two meters are preferred. Slide the power switch to the ON position to power on the camera and enter into the ON mode. - Page 9 Scouting Camera SG565FV 3 Quick Introductions please remove the battery if the camera will not be used for a long time. Page...
-
Page 10: Advanced Operations
Scouting Camera SG565FV 4 Advanced Operations 4 Advanced Operations From the basic operations of the camera in previous chapter, we know that the camera has three basic operation modes: de: Power switch is at OFF position. 1. OFF 2. ON mode: Power switch is at ON position. -
Page 11: Default Settings
Scouting Camera SG565FV 4 Advanced Operations 4.1.1 Default Settings Default settings are listed below: Setting Items Default Options Submenu Camera Mode Image Video Format Enter Yes, No Image Size 5M Pixel 3M Pixel Video Size × × Set Clock Enter... -
Page 12: Set Image Size
Scouting Camera SG565FV 4 Advanced Operations 4.1.4 Set Image Size This parameter has two values: 5 mega pixels (5M Pixel or 5MP) and 3 mega pixels (3M Pixel or 3MP). The following shows how to set pixel size as 3M Pixel provided that the previous option is 5M Pixel: a) Press MENU to display the setting menu. -
Page 13: Set Video Length
Scouting Camera SG565FV 4 Advanced Operations a) Press MENU to display the setting menu. b) Press UP or DOWN to select Capture Number or Photo Burst. c) Press RIGHT to select 3 Photos. d) Press OK to save the current setting and the option will be un-highlighted. -
Page 14: Set Date And Time Stamp
Scouting Camera SG565FV 4 Advanced Operations The following shows how to set PIR sensitivity as Low provided that the previous option is Normal. a) Press MENU to display the setting menu. b) Press UP or DOWN to select Sense Level. -
Page 15: Delete Image Or Video
Scouting Camera SG565FV 4 Advanced Operations d) Press NEXT to stop playing and return to playback mode. e) Press UP to view the next picture (or video) and DOWN for the previous. f) Press OK to return to info display. - Page 16 Scouting Camera SG565FV 4 Advanced Operations Take the belt toes to go through the two back holes of the camera. At the end, tie the two toes to the tree to finish fixing. Using bottom screw. Page...
-
Page 17: Appendixⅰ: Technical Specifications
Scouting Camera SG565FV AppendixⅠ: Technical Specifications AppendixⅠ: Technical Specifications 5MP Color CMOS Image Sensor F/NO=3.0mm Lens FOV(Field of View)=52° Detection sensitivity 2m to 10m From 8 MB to 8 GB Memory Card 5MP = 2560 1920 × Picture Resolution 3MP = 2048 1536 ×... -
Page 18: Appendixⅱ: Parts List
Scouting Camera SG565FV Appendix Ⅱ: Parts List AppendixⅡ: Parts List Part Name Quantity Digital Camera Wired control USB Cable Mounting Strap User Manual...
Need help?
Do you have a question about the SG565FV and is the answer not in the manual?
Questions and answers