Table of Contents
Advertisement
Quick Links
Advertisement
Table of Contents

Related Manuals for ScoutGuard HC-SG550M


Summary of Contents for ScoutGuard HC-SG550M
- Page 1 Infrared Mobile Digital Scouting Camera User’s Manual HC-SG550M...
-
Page 2: Table Of Contents
Content 1 Instruction ..........1 1.1 Camera Body Interfaces ....1 1.2 General Description......1 1.3 Remote Control........ 2 1.4 Shooting Information Display ..3 1.5 MMS/GPRS Function ....... 4 1.6 Cautions .......... 4 2 Quick Start Guide ........6 2.1 Power Supply........ -
Page 3: Instruction
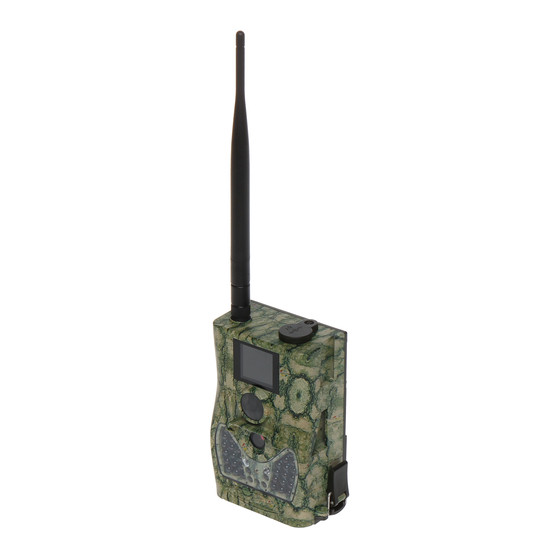
HC-SG550M 1 Instruction 1 Instruction 1.1 Camera Body Interfaces 1.2 General Description This camera, a digital scouting camera with black IR and communication function, is a digital infrared surveillance camera, triggered by any movement of humans or animals monitored by a high sensitive... -
Page 4: Remote Control
HC-SG550M 1 Instruction camera and a sound recorder embedded in the camera. A laser pointer is used to help target the photo area of the camera. It is resistant against water and snow. The camera can also be used as a portable digital camera. -
Page 5: Shooting Information Display
HC-SG550M 1 Instruction Menu Menu Cancel Cancel pqrs pqrs wxyz wxyz 1.4 Shooting Information Display When the camera is turned on (power switch is slid to TEST position), the current settings will be displayed on the screen. Page 3... -
Page 6: Mms/Gprs Function
HC-SG550M 1 Instruction 1.5 MMS/GPRS Function This camera can send pictures instantly to your mobile device via GSM/GPRS network. You’ll be alerted just when a picture or video has been taken. The camera sends MMS message through GPRS network, so before using this function, you need to open GPRS service from your service provider. - Page 7 HC-SG550M 1 Instruction adapter with output of 6V. Please install batteries according to shown polarity. ★Please insert the SD card when the power switch is in the OFF position before testing the camera. The camera has no internal memory for saving images or videos.
-
Page 8: Quick Start Guide
HC-SG550M 2 Quick Start Guide 2 Quick Start Guide 2.1 Power Supply To supply power for the camera, four or eight size AA batteries are needed. 1. High-density and high-performance alkaline batteries (Recommended) 2. Rechargeable alkaline batteries 3. Rechargeable NiMH batteries... -
Page 9: Insert The Sd Card And Sim Card
HC-SG550M 2 Quick Start Guide environmental safe recycling. 2.2 Insert the SD card and SIM card Open the bottom cover. Insert SD card and SIM card into the card slot. Please note that the SD card is on the “write” (not locked) position otherwise the camera will not function correctly. -
Page 10: Enter Into Test Mode
HC-SG550M 2 Quick Start Guide First, select your country and carriers (step1) according to your SIM card and input your receiving phone number in “administrator number” and receiving e-mail address in “Receive Email 1” (step3). For first time use, we suggest you to use default settings (step2), any settings you want to change, please click “Change Setting”... -
Page 11: Custom Settings
HC-SG550M 2 Quick Start Guide enter into TEST mode, default the camera in menu setting. There are some functions in TEST mode: Custom settings, manual capture, preview or send MMS manually. The remote control is needed in this mode. 2.5 Custom Settings Press MENU on the remote control to enter into the menu setting. -
Page 12: Power Off
HC-SG550M 2 Quick Start Guide The 10s is a buffering time before automatically capturing photos or videos, e.g. for closing and locking the bottom cover, fixing the camera on a tree and walking away. The camera has the sound recording function, so the sound will be embedded in the video clip while capturing a video. -
Page 13: Item Settings
HC-SG550M 3 Item Settings 3 Item Settings 3.1 Camera Menu To view the camera settings menu, press MENU in TEST mode. With the remote, use “▲” or “▼” key to select the sub-menu, use “◄” or “►” key to select the different options. - Page 14 HC-SG550M 3 Item Settings Photo Choose the continuous shooting numbers Burst after each triggering. Video Choose the video size: 1280x720 or Size 640x480. Choose duration of recording video. This parameter is effective and can be adjusted only when the device in the video mode under ON mode.
- Page 15 HC-SG550M 3 Item Settings easily to be triggered by motion, taking more pictures or recording more videos. It is recommended to use high sensitivity degree in room or environment with little interference, and to use lower sensitivity for outdoor or environment with lots of interference like hot wind, smoke, near window etc.
- Page 16 HC-SG550M 3 Item Settings rest of the time the camera is sleeping. Set Work Hour as off means the camera works all day. The camera sends MMS message through GPRS network, so before using this function, you need to open GPRS service from your service provider.
- Page 17 HC-SG550M 3 Item Settings 2)“Daily Report”: Daily Report works only in the ON mode, which means that the camera will report the summarized information at the preset time (if the preset time is, eg.20:00PM) on how many pictures it had taken per day. So, you will get a summarized text message with the last picture taken until 20:00PM.
-
Page 18: Default Setting
HC-SG550M 3 Item Settings the Camera will send only SMS instead of MMS. 4) “OFF”: To disable communication function. Choose sending the image to your Phone or to Email. Phone[MMS]:Send the image to cell phone via WAP. Send Email[MMS]:Send the image to Email address via WAP. - Page 19 HC-SG550M 3 Item Settings Suomi Language English Deutsch Svenska Camera Video Photo Mode Pic+Video Set Clock Enter Adjust Clock Photo Size 12MP Photo 2 Photos 1 Photo Burst 3 Photos Video Size 1280x720 640x480 Video 10 sec 5–60 sec Length Time 5–55Min...
-
Page 20: Playback Mode
HC-SG550M 3 Item Settings Email[GPR Position Firmware Version Enter IMEI Format Enter Yes, No Default Save 3.3 Playback Mode In playback mode, images or videos can be viewed and deleted. An image can also be manually sent by MMS or GPRS. It can only be done in TEST mode. -
Page 21: Laser Pointer
HC-SG550M 3 Item Settings 3.4 Laser Pointer The laser light pointer beam can be turned on as an additional function for pointing to an object or a certain region of interested (ROI) by pressing ﹡of the remote. NOTE: Please the laser could be harmful to eyes if pointed at another person. -
Page 22: Trouble Shooting
HC-SG550M 4 Trouble Shooting 4 Trouble Shooting 1 There is something in front of the camera lens. Is the camera broken? A: The camera is not broken. It’s an IR-cut filter. When the camera is powered on, the IR-cut will be reset and cover the lens. -
Page 23: Pir Detection Zone
HC-SG550M 5 PIR Detection Zone 5 PIR Detection Zone This camera has a new design of PIR and the new PIR is patented. The new patented PIR’s detection range can reach to 85ft in good environments. Following picture shows the compared detection zone between normal PIR and the new patented PIR. -
Page 24: Technical Specifications
HC-SG550M 6 Technical Specifications 6 Technical Specifications 5MP Color CMOS, Image Sensor 8MP, 12MP Interpolation F/NO=2.2 Lens FOV(Field of View)=60° PIR detection 85ft range Display Screen 1.5” LCD Memory Card From 8 MB to 32 GB 12MP=4032×3024 Picture 8MP = 3264×2448 Resolution 5MP = 2560×1920... - Page 25 HC-SG550M 7 Parts List Page 23...
-
Page 26: Parts List
HC-SG550M 7 Parts List 7 Parts List Part Name Quantity Digital Camera Wireless Remote USB Cable Belt User Manual Enhanced Antenna Warranty Card Page 24...
Need help?
Do you have a question about the HC-SG550M and is the answer not in the manual?
Questions and answers