Table of Contents
Advertisement
Advertisement
Table of Contents

Related Manuals for Evo 423T


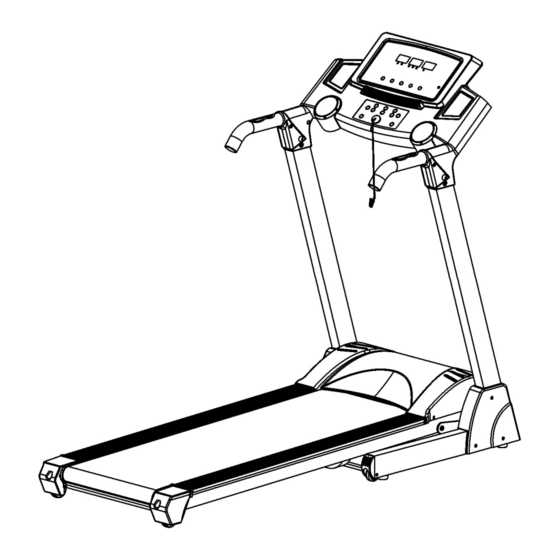
Summary of Contents for Evo 423T
- Page 1 www.evofitness.net.au...
-
Page 2: Important Safety Instructions
IMPORTANT SAFETY INSTRUCTIONS Important-: Please read all instructions carefully before using your treadmill. Retain this owner’s manual for your future reference: WARNING: 1. Position the treadmill on a clear level surface. Do not place the treadmill on thick carpet as it may interfere with proper ventilation. -
Page 3: Assembly Step
TOOLS: 5# ALLEN WRENCH 5mm 1pcs WRENCH W/SCREW DRIVER S=13 14 15 1pcs Notice: Do not plug into main power before completing assembly. ASSEMBLY STEP 1: Open the carton and remove all foam and cardboard packaging. Place the treadmill on the ground as per diagram ASSEMBLY STEP 2: Lift up the computer section and upright... - Page 4 ASSEMBLY STEP 4: Slide right upright (4) onto MAIN FRAME (1) To attach the upright posts (4) to the frame use bolt (49) and lock washer (70) using the 5# Allen wrench Note: Support the right upright with your hand to avoid injury. ASSEMBLY STEP 5: Take bolt (49) and Lock washer (70) and insert them into R&L upright (3,...
-
Page 5: Folding Instruction
FOLDING INSTRUCTION Pulling up: Hold support place A with hand, then pull up based on the arrow direction, until the hydraulic bar (11) slides into the tube Pulling down: Hold support place A, use your feet firmly at place B to release the hydraulic mechanism www.evofitness.net.au... -
Page 6: Technical Parameter
TECHNICAL PARAMETER 1665*765*1370 INCLINE LEVELS BUILT UP SIZE (mm) 895*765*1510 1.0-18KM/h SPEED RANGE FOLDABLE SIZE (mm) RUNNING BOARD 1290*454 SIZE (mm) 72KG NET WEIGHT 120KG MAX USER WEIGHT SPEED, TIME, DISTANCE, CALORIES, PULSE and INCLINE 3 LED DISPLAY www.evofitness.net.au... -
Page 7: Window Display
OPERATION GUIDE WINDOW DISPLAY: 1. “INCL/PULSE” window: This will display the user’s incline level and user’s pulse; the incline range is from 0 to 12%. The default setting will start at 0%. When the user places both hands over the palm pulse, it can track and display the user’s pulse after 5 seconds, the LED will indicate the pulse function. -
Page 8: Manual Mode
Manual mode is the default program; the default speed is set to 1km/h. (Manual mode, pre-set program: P1-P15), and U1-U3 are the user programs followed by the ‘’FAT’’ function. 2. “MODE” Button: The mode can be used to scroll through the time, distance and calorie functions before commencing in the manual setting. -
Page 9: Program Exercise Chart
count down you will begin your workout. PROGRAM EXERCISE CHART Each program will divide into 10 grades for the exercise time and each time sect has the speed and inclines accordingly. Time Interval Mode Time SPEED INCLINE SPEED INCLINE SPEED INCLINE SPEED INCLINE... -
Page 10: User Programs
USER PROGRAMS U1, U2, U3. Besides the 15 preset programs, we also set up another 3 user’s programs for the user’s needs: U1, U2, and U3. 1. Users programs tune Press the button “PROGRAM” until it shows the users program U1-U3, press the “mode” button then enter the set-up for the first time set-up. -
Page 11: Body Fat Program
Press the “START” button after all parameters are done. In the “HP1-HP2-HP3” program, the system will control the speed and incline based on a default pulse if we don’t press the “START” button. The first minutes after running is the warm up phase, and the system won’t adjust the speed and incline automatically but manually. -
Page 12: Exercise Instructions
After power is turned on power and connected MP3 or other audio equipment, the console can play music. You can control sound via audio equipment, please adjust sound so as not to affect sound quality and built-in audio circuits. CAUTION: 1. -
Page 13: Maintenance Instructions
This stage should last for a minimum of 12 minutes though most people start at about 15-20 minutes 3. The Cool Down Phase This stage is to let your Cardio-vascular System and muscles wind down. This is a repeat of the warm up exercise e.g. -
Page 14: Walking Belt And Deck Lubrication
1/2 turn clockwise and the right adjusting bolt 1/2 turn counterclockwise See pic B PIC B PIC A Picture A If the belts has drifted to the LEFT Picture B if the belts has drifted to the RIGHT WARNING: ALWAYS UNPLUG THE TREADMILL FROM THE ELECTRICAL OUTLET BEFORE CLEANING OR SERVICING THE UNIT CLEANING General cleaning or servicing the unit will greatly prolong the treadmill. - Page 15 NOTE: APPLY HEALTHSTREAM TREADMILL LUBRICANT AS INSTRUCTED ABOVE. EXPLODED DRAWING www.evofitness.net.au...
-
Page 16: Parts List
PARTS LIST DESCRIPTION SPECIFICATION QTY NO DESCRIPTION SPECIFICATION MAIN FRAME WHEELS BASE FRAME ADJUSTING ROLLER LEFT UPRIGHT FOOT PAD RIGHT UPRIGHT RING PROTECTING WIRE PLUG COMPUTER POWER WIRE BUCKLE MOTOR BRACKET SAFETY KEY SPRING BALL INCLINE SUPPORT ROUND TUBE PLUG SCREW M4*12 FOAM... - Page 17 COVER BOTTOM BOARD HEX HEAD BOLTS M8*45 FANS HEAD COUNTERBORE BOLT M6*35 UPRIGHT COVER L CROSS HEAD BOLTS M3*8 UPRIGHT COVER R CROSS HEAD BOLTS M6*16 LEFT BACK COVER CROSS HEAD BOLTS M5*8 RIGHT BACK COVER SCREW ST3.5*35 SIDE RAIL SCREW ST2.9*6.5 SAFETY MAT...
-
Page 18: Troubleshooting Guide
TROUBLESHOOTING GUIDE Probable reason for the computer not working: The wire from computer to bottom control board is not correctly connected. Check the each wire from computer to control board, make sure they are connected well. If the wire is destroyed, change it. If the above cannot fix the problem call our service centre on 1300 796 636. - Page 19 is broken; the safety pipe is broken or disconnected; the motor wire is not connected well; the IGBT on bottom control board is burnt out. Test the above reasons and change the relevant part. If this does not fix the problem call our service number 1300 796 636. www.evofitness.net.au...
Need help?
Do you have a question about the 423T and is the answer not in the manual?
Questions and answers