Hitachi CL 10SA Technical Data And Service Manual
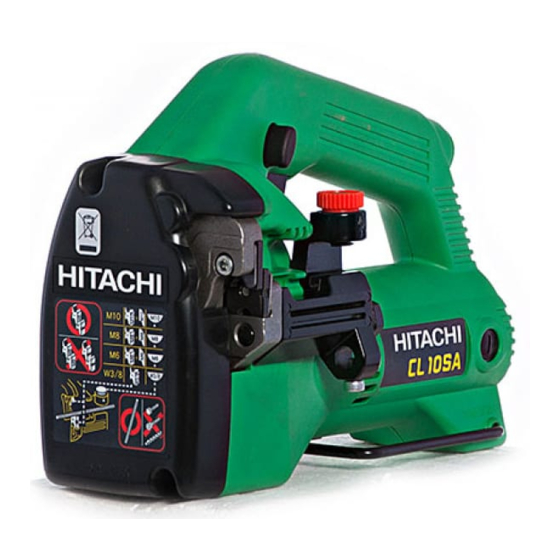
Stud cutter
Hide thumbs
Also See for CL 10SA:
- Technical data and service manual (5 pages) ,
- Handling instructions manual (44 pages) ,
- Handling instructions manual (20 pages)

Related Manuals for Hitachi CL 10SA


Summary of Contents for Hitachi CL 10SA
- Page 1 MODEL CL 10SA POWER TOOLS TECHNICAL DATA STUD CUTTER CL 10SA SERVICE MANUAL LIST No. 0789 Jan. 2001 SPECIFICATIONS AND PARTS ARE SUBJECT TO CHANGE FOR IMPROVEMENT...
- Page 2 Notice for use Specifications and parts are subject to change for improvement. Refer to Hitachi Power Tool Technical News for further information.
-
Page 3: Table Of Contents
7-1. Safety Instructions ........................9 8. REPAIR GUIDE ..........................12 8-1. Precautions in Disassembly and Reassembly ................12 8-2. Reassembly ..........................17 8-3. Insulation Tests ........................... 25 8-4. No-load Current Value ........................ 25 9. STANDARD REPAIR TIME (UNIT) SCHEDULES ..............26 Assembly Diagram for CL 10SA... -
Page 4: Product Name
The current Model CL 10D stud cutter is, however, expensive because it is cordless and there is an increasing demand for a low-price stud cutter with cord. The new Model CL 10SA is a light-weight and low-price stud cutter adopting the same cam system as that of the Model CL 10D and sharing components with the Model CL 10D2 that is an upgraded version of the Model CL 10D. -
Page 5: Selling Points
A safer and better working environment without fear of fire or scattering of chips and dust is ensured because the Model CL 10SA does not produce the chips, dust, and sparks unlike cut-off machines and disc grinders. Shearing force: 2500 kg... - Page 6 This means that the cut-off machine must be moved from one spot to another over a wide area. The Model CL 10SA is compact, lightweight, so it is easily transportable and particularly convenient for cutting off hanged studs.
- Page 7 In conventional cutting with a cut-off machine or disc grinder, considerable time is required for deburring after the studs have been cut. In actual tests, the Model CL 10SA is approximately three times more efficient than cut-off machines or disc grinders.
- Page 8 Before cutting a stud, when setting the open cutter to the desired cutting position, setting can be easily accomplished by turning on the switch at "Low speed". Also, as the Model CL 10SA is equipped with a brake that stops the cutter movement in an instant, the cutting operation can be stopped instantly at any desired condition without worry of unwanted inertial movement after the switch is turned off.
- Page 9 (9) Convenient stud mounting hole facilitates cutting studs to specified lengths The stud mounting hole is very convenient when cutting many studs to the same length at floor level. The adjustable stud mounting hole permits mounting of M6 to M10 studs, and can be used as an accurate cutting length guide for the full range of applicable studs.
-
Page 10: Specifications
5. SPECIFICATIONS 5-1. Specifications Model CL 10SA Capacity Mild steel studs (size of studs for cutting): M10, M8, M6 or W3/8" Type of motor AC single-phase series commutator motor Enclosure Main body : Glass fiber reinforced polyamide resin Cover: Glass fiber reinforced polyamide resin... -
Page 11: Comparisons With Similar Products
6. COMPARISONS WITH SIMILAR PRODUCTS 6-1. Specification Comparisons Hitachi Maker • Model Item CL 10SA CL 10D CL 10D2 M10 x 1.5 M10 x 1.5 M10 x 1.5 Capacity: M8 x 1.25 M8 x 1.25 M8 x 1.25 Soft steel studs (Size of studs for cutting) -
Page 12: Precautions In Sales Promotion
7. PRECAUTIONS IN SALES PROMOTION 7-1. Safety Instructions In the interest of promoting the safest and most efficient use of these tools by all of our customers, it is very important that at the time of sale the salesperson carefully ensures that the buyer seriously recognizes the importance of the contents of the Handling Instructions, and fully understands the meaning of the precautions listed on the Caution Plate and Name Plate attached to each tool. - Page 13 Stud L-shaped angle (30 mm L-shaped angle) (25 mm L-shaped angle) 8 mm or more Fig. 14 (4) Precautions in cutter replacement The cutters must be mounted in the proper directions. Instruct the customers to ensure that the notched grooves on the side surfaces of the cutters are in a "Yes" and "No" relationship when viewed from the front end of the main body, as illustrated in Fig.
- Page 14 (6) The Model CL 10SA is designed for cutting mild steel studs. If the tool is used for cutting brass or stainless steel studs, the threads of the studs will be deformed so that nuts cannot be applied. In addition, as use of the tool to cut hardened bolts, different-sized studs, reinforcing rods, etc.
-
Page 15: Repair Guide
8-1. Precautions in Disassembly and Reassembly The [Bold] numbers in the description below correspond to the item numbers in the Parts List and exploded assembly diagram for the Model CL 10SA. 8-1-1. Preparation to disassembly (Fig. 18) Before disassembly, depress the trigger switch until Bracket (A) [54] opens and release the trigger switch. Then disconnect the power cord plug from the power source. - Page 16 8-1-2. Disassembly (1) Bracket ass'y section (a) Removal of the Cover [50] (Fig. 18) Remove the two Machine Screws (W/Washers) M4 x 20 (Black) [49] from the Cover [50] and remove the Cover [50]. (b) Removal of the Return Plate [53] (Fig. 20) Remove the two Seal Lock Screws (W/SP.
- Page 17 (e) Removal of the bracket ass'y (Figs. 23 and 24) Remove the three Hex. Socket Hd. Bolts M5 x 12 [46] from Bracket (B) [56] with the Hex. Bar Wrench 4 mm [17]. Holding Bracket (A) [54] and Bracket (B) [56], remove the bracket ass'y being careful not to make the Return Spring [32] jump up.
- Page 18 (ii) Removal of Roller (A) [65] (Fig. 26) The Roller Pin [66] that secures Roller (A) [65] is press-fitted into Bracket (A) [54]. Remove the Roller Pin [66] by pushing in either direction with a hand press. Then Roller (A) [65] can be removed. [54] [66] [65]...
- Page 19 (3) Power supply unit section (a) Remove the two Tapping Screws (W/Flange) D4 x 16 [12] from the inside of the main body. Remove the Cord Clip [11] and the Cord Armor [9]. (b) Then the decelerating mechanism and the power supply unit can be removed together. (c) Removal of the Switch [6] To disconnect the two internal wires (red and blue) coming from the Brush Block Ass'y [25], two internal wires (black) coming from the Noise Suppressor [8] and three internal wires (black, yellow and white) coming from...
-
Page 20: Reassembly
8-2. Reassembly Reassembly can be accomplished by following the disassembly procedures in reverse. However, particular attention should be given to the following items. (1) Reassembly of the power supply unit section Be sure to perform wiring connections as indicated in the wiring diagram below (Fig. 31). When connecting the internal wires to the terminals of the Switch [6], check that the flat springs of each terminal are not deformed (Fig. - Page 21 (2) Reassembly of the housing section (a) Second Pinion [41] (Fig. 32) Before inserting the Needle [43] in the Second Pinion [41], apply grease (Nippeco SEP-3A) to the inner circumference of the two Idle Gears [42]. Mount the Washer [44] facing its smaller diameter side to the Ball Bearing 6001VVCMPS2L [45].
- Page 22 (c) Power supply unit (Fig. 34) Blue [11] [12] [34] Earth terminal [25] [13] Fig. 34 (a) Mount the Cord [10] to Housing (A) [2] and mount the Cord Clip [11] facing its protrusion to the cord. Secure them with the two Tapping Screws (W/Flange) D4 x 16 [12]. (b) Push the earth terminal of the Noise Suppressor [8] as far as it will go along the ribs of the Stator [22] and Housing (A).
- Page 23 (d) Mount the Pushing Button (A) [3] mating its groove to the protrusion on the lever of the Switch [6] (Fig. 35). (e) Mount the Spring (A) [4] to the Pushing Button Groove (A) [3] (Fig. 34). Protrusion (f) Mount the Wrench Holder [13] to Housing (A) [2] Groove (Fig.
- Page 24 (b) Mounting Roller (A) [65] Check the position of the smaller diameter end of the Roller Pin [66] and insert the Roller Pin [66] in the hole of Bracket (A) [54] in the proper direction as shown in Fig. 37. Align Roller (A) [65] with the hole of Bracket (A) [54] and press-fit the Roller Pin [66] until it becomes flush with the end surface of Bracket (A) [54] (Fig.
- Page 25 Face the side where the boss portion is lower than the end surface of the [34] gear to the Retaining Ring for D18 Shaft [48]. [47] [68] [46] [67] [48] [33] Fig. 39 Fig. 40 [47] (f) Mounting the assembly to the main body (i) Insert the Ball Bearing 608VVC2PS2L [20] in the ball bearing chamber of Housing (A) [2] (Fig.
- Page 26 (g) Reassembly of the Return Plate [53] Align the Return Plate [53] with the Roller Pin [66] and Bolt (A) [51]. Insert the pin of the Cam Shaft [67] in the hole of the Return Plate [53] and secure them with the two Seal Lock Screws (W/SP. Washer) M4 x 12 [52] (Fig.
- Page 27 (g) Mounting the Cover [50] or the Cutter Ass'y M8 [64] Disconnect the power cord plug from the power source, and fasten the Cover [50] with the two Machine Screws (W/Washers) M4 x 20 (Black) [49]. The Cutter Ass'y M8 [64] must be mounted in the proper directions. As shown in Fig. 44, they must be mounted so that if the groove in the side of one cutter is present (Yes), the groove in the side of the outer cutter is not present (No).
-
Page 28: Insulation Tests
8-3. Insulation Tests On completion of disassembly and repair, measure the insulation resistance, and conduct the dielectric strength test. Insulation resistance: 7 M Ω or more with DC 500 V Megohm Tester Dielectric strength test: AC 4,000 V/1 minute, with no abnormalities ......220 V --- 240 V products 8-4. -
Page 29: Standard Repair Time (Unit) Schedules
9. STANDARD REPAIR TIME (UNIT) SCHEDULES Variable 60 min. MODEL Fixed Work Flow CL 10SA Second Pinion Ball Bearing (6001VV) Washer x 2 Ball Bearing (609VV) Retaining Ring for D15 Shaft Ring Gear Needle x 2 Hook Idle Gear x 2... - Page 30 LIST NO. 0789 ELECTRIC TOOL PARTS LIST STUD CUTTER 2001 • • Model CL 10SA (E1)
- Page 31 PARTS CL 10SA ITEM CODE NO. DESCRIPTION REMARKS USED CAUTION PLATE (E) 319-411 HOUSING (A).(B) SET 319-402 PUSHING BUTTON (A) 319-403 SPRING (A) 981-373 TUBE (D) FOR CORD 319-412 SWITCH 992-635 EARTH TERMINAL 994-273 NOISE SUPPRESSOR 953-327 CORD ARMOR D8.8 938-051 CORD ARMOR D10.1...
- Page 32 PARTS CL 10SA ITEM CODE NO. DESCRIPTION REMARKS USED 307-606 MACHINE SCREW (W/WASHERS) M4X20 (BLACK) 319-838 COVER 319-396 BOLT (A) 987-203 SEAL LOCK SCREW (W/SP. WASHER) M4X12 319-398 RETURN PLATE 319-397 BRACKET (A) 931-875 TAPPING SCREW D5X35 319-395 BRACKET (B) 949-574 LOCK NUT M12 (10 PCS.)
-
Page 33: Standard Accessories
CL 10SA STANDARD ACCESSORIES ITEM CODE NO. DESCRIPTION REMARKS USED 308-569 TRIMMER M8 OPTIONAL ACCESSORIES ITEM CODE NO. DESCRIPTION REMARKS USED 308-563 CUTTER ASS’Y M6 (1 PAIR) INCLUD.602 309-181 SPACER M6 (10 PCS.) 308-565 CUTTER ASS’Y M10 (1 PAIR) INCLUD.604 308-780 SPACER M10 (10 PCS.)
Need help?
Do you have a question about the CL 10SA and is the answer not in the manual?
Questions and answers