
Related Manuals for Basler A400K


Summary of Contents for Basler A400K
- Page 1 Basler A400k USER’S MANUAL Document Number: DA00062410 Release Date: 27 September 2007...
- Page 2 Basler customers using or selling these products for use in such applications do so at their own risk and agree to fully indemnify Basler for any damages resulting from such improper use or sale. Warranty Note...
- Page 3 Contacting Basler Support Worldwide Europe: Basler AG An der Strusbek 60 - 62 22926 Ahrensburg Germany Tel.: +49-4102-463-500 Fax.: +49-4102-463-599 vc.support.europe@baslerweb.com Americas: Basler, Inc. 855 Springdale Drive, Suite 160 Exton, PA 19341 U.S.A. Tel.: +1-877-934-8472 Fax.: +1-877-934-7608 vc.support.usa@baslerweb.com Asia: Basler Asia Pte. Ltd...
-
Page 5: Table Of Contents
2.2.2 Power Cable ..........2-7 2.3 Camera Link Implementation in the A400k ....... 2-8 2.4 Input Signals . - Page 6 3.10 Mirror Image ........... . 3-35 Basler A400k...
- Page 7 4.2.3.2 Bulk Data Control and Status Register Details ....4-41 4.3 Using Binary Read/Write Commands on the A400k ..... . 4-45 4.3.1 The Binary Read/Write Command Protocol...
- Page 8 6.2.4 RS-644 Serial Communication ........6-7 6.3 Before Calling Basler Technical Support ....... . 6-8 Revision History.
-
Page 9: Introduction
Features on cameras with a lower or a higher ID number may not operate exactly as described in this manual. An easy way to see the camera version ID number for an A400k camera is by using the CCT+. To see the camera version ID number: ⇒... -
Page 10: Camera Versions
Camera Link interface. All versions are available in monochrome models (A402k, A403k, A404k) and in color models (A402kc, A403kc, A404kc). Throughout the manual, the camera will be called the A400k. Passages that are only valid for a specific version will be so indicated. -
Page 11: Performance Specifications
Camera Link LVDS Type Base configuration Medium configuration Medium configuration (in 4 tap mode) RS-644 LVDS when used with the optional Camera Link LVDS Basler Interface Con- Full configuration verter (k-BIC) (in 8 tap mode) Table 1-2: A400k Performance Specifications Basler A400k... - Page 12 With F-mount adapter: 85.3 mm x 90 mm x 90 mm Including Connec- tors Weight without lens ~ 500 g ~ 510 g ~ 510 g adapter: ~ 605 g ~ 615 g ~ 615 g with F-mount adapter: Conformity CE, FCC Table 1-2: A400k Performance Specifications Basler A400k...
-
Page 13: Spectral Response
DRAFT Introduction 1.4 Spectral Response Figure 1-2: Quantum Efficiency for A400k Cameras; Peak at 46% at 620 nm MV-40 COLOR Quantum Efficiency Blue Green Wave Length (nm) Figure 1-3: Color Quantum Efficiencies for A400kc Cameras Basler A400k... - Page 14 To obtain best performance regarding the camera’s blooming, smearing and dark signal non-uniformity characteristics, use of a dielectric IR cut-off filter is recommended. The filter should transmit in a range of 400 nm to 700...720 nm, and it should cut off from 700...720 nm to 1100 nm. Basler A400k...
-
Page 15: Environmental Requirements
Allow sufficient air circulation around the camera to prevent internal heat build-up in your system and to keep the camera housing temperature during operation below the maximum shown above. Provide additional cooling such as fans or heat sinks if necessary. Basler A400k... -
Page 16: Precautions
To clean the surface of the camera housing, use a soft, dry cloth. To remove severe stains, use a soft cloth dampened with a small quantity of neutral detergent, then wipe dry. Do not use volatile solvents such as benzine and thinners; they can damage the surface finish. Basler A400k... -
Page 17: Camera Interface
2.1 Connections 2.1.1 General Description All A400k area scan cameras are interfaced to external circuitry via three connectors located on the back of the camera: • a 26 pin, 0.050 inch Mini D Ribbon (MDR) female connector used to transmit video data, control data, and configuration data, •... - Page 18 Second Camera Link (A403k & A404k only) 12 VDC Power Figure 2-1: A400k Connectors and LED The camera housing is not grounded and is electrically isolated from the circuit boards inside of the camera. Note that the connectors at the camera are described, NOT the connectors re- quired at the connecting cables.
-
Page 19: Pin Assignments For The 26-Pin Mdr Connector(S)
ExFlash: External Flash Trigger LVDS CC3+ CC4+ Input RS-644 Not used LVDS CC4- Pins 1, 13, 14, and 26 are all tied together to Gnd inside of the camera. Table 2-1: A400k Pin Assignments for the (First) 26-pin MDR Connector Basler A400k... - Page 20 Camera Link Transmit Clock from Camera Link Transmitter LVDS ZClk+ Pins 1, 13, 14, and 26 are all tied together to Gnd inside of the camera. Table 2-2: A403k and A404k Pin Assignments for the Second 26-pin MDR Connector Basler A400k...
-
Page 21: Pin Assignments For The 6-Pin Micro-Miniature Receptacle
Pins 1, and 2 are tied together inside of the camera. Pins 5, and 6 are tied together inside of the camera. Table 2-3: A400k Pin Assignments for the 6-pin Micro-miniature Receptacle The recommended mating connector is the Hirose micro-miniature locking plug (part # HR10A- 7P-6S). - Page 22 The schematic shows a sample cir- cuit for your flash device. Calculate your devices so that the maximum output current is 50 mA. Figure 2-4: Flash Trigger Output Schematics Basler A400k...
-
Page 23: Cable Information
2.2 Cable Information 2.2.1 Camera Link Cable A Camera Link compatible MDR cable assembly is available from Basler as a stock item (part # 1000013905 for a 3 meter cable and part # 1000013906 for a 5 meter cable). Alternatively, you can use the cable assembly manufactured by 3M (part # 14X26-SZLB-XXX-0LC). -
Page 24: Camera Link Implementation In The A400K
Camera Interface 2.3 Camera Link Implementation in the A400k The A400k uses a National Semiconductor DS90CR287 as a Camera Link transmitter. For a Camera Link receiver, we recommend that you use the National Semiconductor DS90CR288, the National Semiconductor DS90CR288A or an equivalent. Detailed data sheets for these components are available at the National Semiconductor web site (www.national.com). - Page 25 DRAFT Camera Interface Figure 2-5: A402k Camera / Frame Grabber Interface Basler A400k...
- Page 26 DRAFT Camera Interface Figure 2-6: A403k Camera / Frame Grabber Interface 2-10 Basler A400k...
- Page 27 DRAFT Camera Interface Figure 2-7: A404k Camera / Frame Grabber Interface Basler A400k 2-11...
-
Page 28: Input Signals
2.4.1 ExSync: Controls Frame Readout and Exposure Time The ExSync input signal is used to control exposure and readout of the A400k. ExSync is an LVDS signal as specified for RS-644. The ExSync input corresponds to the camera control signal CC1 as defined in the Camera Link standard. -
Page 29: Output Signals
Camera Interface 2.5 Output Signals Data is output from the A400k using the Camera Link standard. The Pixel Clock signal is described in Section 2.5.1, the Line Valid signal in Section 2.5.2, the Frame Valid signal in Section 2.5.3, and the video data in Section 2.5.4. Video Data output is described in Sections 2.5.5... -
Page 30: Video Data (Bit Assignments)
X, Y and Z Camera Link transmitters in an A404k camera. They also show the assignments for the corresponding output pins on the X, Y and Z Camera Link receivers in a frame grabber. The assignments for the frame valid bit and the line valid bit are also listed. 2-14 Basler A400k... - Page 31 Frame Valid Frame Valid DVAL TxIN26 RxOUT26 Not Used Not Used Spare TxIN23 RxOUT23 Not Used Not Used Strobe TxINCLK RxOUTCLK Pixel Clock Pixel Clock Table 2-5: Bit Assignments for Transmitter X in an A402k (Base Configuration) Basler A400k 2-15...
- Page 32 Frame Valid DVAL TxIN26 RxOUT26 Not Used Not Used Spare TxIN23 RxOUT23 Not Used Not Used Strobe TxINCLK RxOUTCLK Pixel Clock Pixel Clock Table 2-6: Bit Assignments for Plug 1, Transmitter X in an A403k (Medium Configuration) 2-16 Basler A400k...
- Page 33 Frame Valid DVAL TxIN26 RxOUT26 Not Used Not Used Spare TxIN23 RxOUT23 Not Used Not Used Strobe TxINCLK RxOUTCLK Pixel Clock Pixel Clock Table 2-7: Bit Assignments for Plug 2, Transmitter Y in an A403k (Medium Configuration) Basler A400k 2-17...
- Page 34 Not Used Not Used Not Used Spare TxIN23 RxOUT23 Not Used Not Used Not Used Strobe TxINCLK RxOUTCLK Pixel Clock Pixel Clock Pixel Clock Table 2-8: Bit Assignments for Plug 1, Transmitter X in an A404k (Full Configuration) 2-18 Basler A400k...
- Page 35 Not Used Not Used Not Used Spare TxIN23 RxOUT23 Not Used Not Used Not Used Strobe TxINCLK RxOUTCLK Pixel Clock Pixel Clock Pixel Clock Table 2-9: Bit Assignments for Plug 2, Transmitter Y in an A404k (Full Configuration) Basler A400k 2-19...
- Page 36 Not Used Not Used Not Used Spare TxIN23 RxOUT23 Not Used Not Used Not Used Strobe TxINCLK RxOUTCLK Pixel Clock Pixel Clock Pixel Clock Table 2-10: Bit Assignments for Plug 2, Transmitter Z in an A404k (Full Configuration) 2-20 Basler A400k...
-
Page 37: Video Data Output For The A402K
• On the next cycle of the pixel clock, the line valid bit will be high. On this clock cycle, data stream D0 will transmit data for pixel three in line one and data stream D1 will transmit data for pixel four in line one. Basler A400k 2-21... - Page 38 Figure shows the data sequence when the camera is operating in edge-controlled or level- controlled exposure mode and Figure shows the data sequence when the camera is operating in programmable exposure mode. 2-22 Basler A400k...
- Page 39 The diagram assumes that the area of interest feature is not being used. With the area of interest feature enabled, the number of pixels transferred could be smaller. Figure 2-9: A402k 2 Tap Output with Programmable Exposure Basler A400k 2-23...
-
Page 40: Video Data Output For The A403K
• On the next cycle of the pixel clock, the line valid bit will be high. On this clock cycle, data stream D0 will transmit data for pixel five in line one. Data stream D1 will transmit data for 2-24 Basler A400k... - Page 41 Figure 2-10 shows the data sequence when the camera is operating in edge-controlled or level- controlled exposure mode and Figure 2-11 shows the data sequence when the camera is operating in programmable exposure mode. Basler A400k 2-25...
- Page 42 The diagram assumes that the area of interest feature is not being used. With the area of interest feature enabled, the number of pixels transferred could be smaller. Figure 2-10: A403k or A404k 4 Tap Output with Edge or Level Controlled Exposure 2-26 Basler A400k...
- Page 43 The diagram assumes that the area of interest feature is not being used. With the area of interest feature enabled, the number of pixels transferred could be smaller. Figure 2-11: A403k or A404k 4 Tap Output with Programmable Exposure Basler A400k 2-27...
-
Page 44: Video Data Output For The A404K
Also, some devices are available which let you select either rising edge or falling edge sampling. Please consult the data sheet for the re- ceiver that you are using for specific timing information. 2-28 Basler A400k... - Page 45 Figure 2-12 shows the data sequence when the camera is operating in edge-controlled or level- controlled exposure mode and figure 2-13 shows the data sequence when the camera is operating in programmable exposure mode. Basler A400k 2-29...
- Page 46 The diagram assumes that the area of interest feature is not being used. With the area of interest feature enabled, the number of pixels transferred could be smaller. Figure 2-12: A404k 8 Tap Output with Edge or Level Controlled Exposure 2-30 Basler A400k...
- Page 47 The diagram assumes that the area of interest feature is not being used. With the area of interest feature enabled, the number of pixels transferred could be smaller. Figure 2-13: A404k 8 Tap Output with Programmable Exposure Basler A400k 2-31...
-
Page 48: Flash Trigger Signal
Camera Interface 2.5.8 Flash Trigger Signal A400k cameras output a flash trigger signal that can be used to trigger a flash exposure. The flash trigger output connector is described in Section 2.1.4. The flash trigger signal can be programmed to operate in five different modes: •... -
Page 49: Serial Communication
Camera Interface 2.6 RS-644 Serial Communication The A400k is equipped for RS-644 serial communication via the frame grabber as specified in the Camera Link standard. The RS-644 serial connection (SerTC/SerTFG) in the Camera Link interface is used to issue commands to the camera for changing modes and parameters. The serial link can also be used to query the camera about its current setup. -
Page 50: Dc Power
(A402 Only) On the A400k, video data is output from the camera in Camera Link LVDS format and parameter change commands are issued to the camera using RS-644 serial communication via the frame grabber. On older cameras, video data was output using an RS-644 LVDS format and commands were issued using RS-232 serial communication via the host PC. - Page 51 Do not reverse the polarity of the input power to the camera. Reversing the po- larity of the input power can severely damage the camera and leave it non-op- erational. The polarity of the input power to the camera must be as shown in Table 2-3. Basler A400k 2-35...
- Page 52 DRAFT Camera Interface 2-36 Basler A400k...
-
Page 53: Basic Operation And Features
3 Basic Operation and Features 3.1 Functional Description BASLER A400k area scan cameras employ a CMOS-sensor chip which provides features such as an electronic rolling shutter and electronic exposure time control. Exposure time is controlled either internally via an internal sync signal (free-run mode) or externally via an external trigger (ExSync) signal. - Page 54 Line 3 Line 4 Line 1726 Line Memory Timing Controller Block ADC Register SRAM Output Output Register Read Ports Control 16 x Column Decoder 10-bit Digitized Pixel Data Figure 3-1: A400k Sensor Architecture Figure 3-2: A400k Block Diagram Basler A400k...
-
Page 55: Video Data Output Modes
You can select the video data output mode by writing a value to the Mode field of the Video Data Output Mode CSR (see page 4-15). See Section 4.2.2 for an explanation of CSRs. See Section 4.3.1 for an explanation of using read/ write commands. Basler A400k... -
Page 56: Exposure Time Control Modes
Basic Operation and Features 3.3 Exposure Time Control Modes A400k cameras can operate under the control of an external trigger signal (ExSync signal) or can operate in “free-run”. In free-run, the camera generates its own internal control signal and does not require an ExSync signal. -
Page 57: Guidelines When Using An Exsync Signal
If you select the ExSync programmable mode, you will also need to set the exposure time. You can set the exposure time by writing a value to the Raw Exposure Time field or to the Absolute Exposure Time field of the Exposure Time CSR (see page 4-16). Basler A400k... -
Page 58: Free Run
The Frame Period setting determines the control signal period. The frame is read out and transferred on the rising edge of the internal control signal. See Figure 3-7. Basler A400k... -
Page 59: Guidelines When Using Free-Run
Raw Exposure Time field or to the Absolute Exposure Time field of the Exposure Time CSR (see page 4-16). Section 4.2.2 explains CSRs and the difference between using the “raw” field and the “absolute” field in a CSR. Section 4.3.1 explains using read/write commands. Basler A400k... -
Page 60: Rolling Shutter
Reset Readout (Start of Exposure) Exposure Time (End of Exposure) Readout Column 1 Column 2352 Runtime Line 1 4.56 µs 4.56 µs Line 1726 Reset Runtime Total Runtime Figure 3-8: Rolling Shutter Basler A400k... -
Page 61: Guidelines For Successful Use Of The Rolling Shutter
Flash window width [µs] = Exposure time [µs] - (AOI Height x 4.56 µs) A400k cameras output a flash trigger signal that can be used to trigger flash exposure. The flash trigger signal can be programmed to be high as long as the flash window is open, that is, all pixel lines are exposed to light and the flash should occur (see Section 2.5.8... - Page 62 • The light intensity of the flash must be considerably higher than the light intensity in the scene when no flash is present. • Exposure of the next frame can be started while the previous frame is still being read out. Figure 3-9: Flash Window 3-10 Basler A400k...
-
Page 63: Gain And Offset
DRAFT Basic Operation and Features 3.5 Gain and Offset 3.5.1 Gain Gain on A400k cameras is adjustable within a range from 0% to 100% where 0 % correspond to the minimum gain and 100 % correspond to the maximum gain. -
Page 64: Offset
Basic Operation and Features 3.5.2 Offset Offset on A400k cameras is adjustable within a range from 0% to 100% where 0% correspond to an offset of 0 gray values and 100% correspond to an offset of approximately 32 gray values (8 bit output mode) or 128 gray values (10 bit output mode). -
Page 65: Shading Correction
A400k cameras are equipped with a shading correction feature that lets the camera correct the captured image for variations caused by optics, lighting, and sensor variations. - Page 66 A400k cameras can save the current column FPN values in the volatile memory to a file in the camera’s non-volatile memory. Files saved in the non-volatile memory are not lost at reset or power off.
-
Page 67: Dsnu Shading Correction
This variation is known as Dark Signal Non-uniformity (DSNU). The DSNU shading correction feature on A400k cameras can correct for the variations caused by DSNU. - Page 68 A400k cameras can save the current DSNU values in the volatile memory to a file in the camera’s non-volatile memory. Files saved in the non-volatile memory are not lost at reset or power off. You can save only one set of DSNU values to file in the non-volatile memory.
-
Page 69: Prnu Shading Correction
This variation is know as Photo Response Non-uniformity (PRNU). The PRNU shading correction feature on A400k cameras can correct for the variations caused by PRNU. In the color version, PRNU shading correction is executed for each color separately. - Page 70 You can enable PRNU shading correction by writing a value to the Mode field of the DSNU and/ or PRNU Shading Correction Enable CSR (see page 4-24). Section 4.2.2 explains CSRs. Section 4.3.1 explains using read/write commands. 3-18 Basler A400k...
-
Page 71: Guidelines When Using Shading Correction
A400k cameras can save the current PRNU values in the volatile memory to a file in the camera’s non-volatile memory. Files saved in the non-volatile memory are not lost at reset or power off. You can save only one set of PRNU values to file in the non-volatile memory. -
Page 72: Digital Shift
Before you use digital shift, also observe the precautions described in Section 3.7.3. 3.7.1 Digital Shift in 10 Bit Output Mode No Shift As mentioned in Section 3.1, the A400k uses 10 bit ADCs to digitize the output from the CMOS sensor. When the camera is operating in 10 bit output mode, by default, the camera transmits the 10 bits that are output from each ADC. - Page 73 256. Since the shift twice setting requires that the two least significant bits always be "0", the gray value scale will only include every 4th gray value. For example, 4, 8, 16 and so forth. Basler A400k 3-21...
-
Page 74: Digital Shift In 8 Bit Output Mode
Basic Operation and Features 3.7.2 Digital Shift in 8 Bit Output Mode No Shift As mentioned in Section 3.1, the A400k uses 10 bit ADCs to digitize the output from the CMOS sensor. When the camera is operating in 8 bit output mode,... -
Page 75: Precautions When Using Digital Shift
You can enable/disable digital shift by writing a value to the Mode field of the Digital Shift CSR (see page 4-25). See Section 4.2.2 for an explanation of CSRs. See Section 4.3.1 for an explanation of using read/ write commands. Basler A400k 3-23... -
Page 76: Area Of Interest (Aoi)
In normal operation, the camera is set to use all of the pixels in the array. To use all of the pixels, the starting column should be set to 1, the width in columns to 2352, the starting line to 1 and the height in lines to 1726. 3-24 Basler A400k... -
Page 77: Area Of Interest Setup Rules
With the AOI Editor You can set an AOI using the AOI Editor (see Section 3.8.4.2). This involves entering the settings of one AOI in the AOI list of the AOI Editor. Basler A400k 3-25... -
Page 78: Changes To The Max Frame Rate With Area Of Interest
In some exposure modes, you must set the frame period in [µs]. To convert the calculated frame rate (frames per second) into the frame period [µs], use the following formula: × ------------------------------------ - Frame period [µs] 1 000 000 Frame rate [s] 3-26 Basler A400k... -
Page 79: Programmable Aoi Sequencer
When the AOI list is complete, you upload the list to the camera (Section 3.8.4.3). To actually run the camera according to the defined sequence, you must finally enable the AOI sequencer feature by enabling one of three trigger modes (Section 3.8.4.4). Basler A400k 3-27... -
Page 80: Setting Up An Aoi List
AOI sequencer feature is active, the modifications will be saved but will only become active after the AOI sequencer feature is disabled. • The area of interest setup guidelines described in Section 3.8.1 must be observed. 3-28 Basler A400k... -
Page 81: Creating An Aoi List
1. Open the hexadecimal editor. 2. Enter the settings of the AOI list one after the other in hexadecimal numbers. For example, to enter the list shown in Figure 3-15, you would enter the hexadecimal numbers as shown in Figure 3-16. Basler A400k 3-29... - Page 82 Figure 3-16: AOI List in Hexadecimal Editor Note that AOI, runs and flash trigger must be 16 bit settings while exposure time and delay time must be 32 bit settings. 3. Save the file. 4. Proceed with Section 3.8.4.3. 3-30 Basler A400k...
-
Page 83: Uploading An Aoi List To The Camera
• in a graphical way by drag & drop. This can be done with reference to a full image taken by the camera. You can downlad the AOI Editor and the pertinent User’s Manual free of charge from www.basler- vc.com. -
Page 84: Enabling/Disabling The Aoi List
You can set mode 1, 2, 3 or 4 by writing a value to the Mode field of the Programmable AOI Sequencer CSR (see page 4-30). See Section 4.2.2 for an explanation of CSRs. See Section 4.3.1 for an explanation of using read/ write commands. 3-32 Basler A400k... -
Page 85: Stamp
When the camera is operating in a 10 bit output mode, the stamp pixels will be 10 bit values but only the 8 LSBs will carry information. The two MSBs will be packed with zeros. Basler A400k 3-33... - Page 86 You can enable/disable the stamp feature by writing a value to the Mode field of the Stamp CSR (see page 4-30). See Section 4.2.2 for an explanation of CSRs. See Section 4.3.1 for an explanation of using read/ write commands. 3-34 Basler A400k...
-
Page 87: Mirror Image
You can enable/disable the mirror image feature by writing a value to the Mirror Mode field of the Mirror Image Mode CSR (see page 4-32). See Section 4.2.2 for an explanation of CSRs. See Section 4.3.1 for an explanation of using read/ write commands. Basler A400k 3-35... -
Page 88: Color Creation In The A400Kc
RGB color information for a given pixel in the image, you must perform a color interpolation using the information from the surrounding pixels. Some frame grabbers are capable of performing the color interpolation and many algorithms are available for performing the interpolation in your host PC. 3-36 Basler A400k... -
Page 89: Test Images
A third stripe begins in column 512. The pixels in column 512 have a gray value of 0, the pixels in column 513 have a value of 1, the pixels in column 514 have a value of 2, and so on. This pattern continues until column 2352 where the pixels have a value of 48. Basler A400k 3-37... -
Page 90: Test Image Two (Still Diagonal Stripe Pattern)
According to the Figure 3-21: Test Image Two (10 Bit) number of pixels present, x ranges in steps of 1 from 1 to 1726 and y ranges in steps of 1 from 1 to 2352. 3-38 Basler A400k... -
Page 91: Test Image Three (Moving Diagonal Stripe Pattern)
If the camera is set for free-run, each cycle of the camera’s internal control signal will cause the pattern of the test image to move up by one pixel. Figure 3-23: Test Image Three (8 Bit) Figure 3-24: Test Image Three (10 Bit) Basler A400k 3-39... -
Page 92: Test Image Four (Horizontal Stripe Pattern)
1025 have a value of 1, the pixels in line 1026 have a value of 2, and so on. This pattern continues until line 1726 where the pixels have a value of 702. Figure 3-26: Test Image Four (10 bit) 3-40 Basler A400k... -
Page 93: Guidelines When Using Test Images
You can enable/disable a test image by writing a value to the Mode field of the Test Image Mode CSR (see page 4-32). See Section 4.2.2 for an explanation of CSRs. See Section 4.3.1 for an explanation of using read/ write commands. Basler A400k 3-41... -
Page 94: Camera Temperature
Basic Operation and Features 3.13 Camera Temperature A400k series cameras include a sensor that measures the temperature on one of the electronic boards inside of the camera. The sensor’s readings let you monitor whether ventilation is working correctly. The camera’s allowed inner temperature is stated in Section 1.5. -
Page 95: Configuration Sets
As mentioned above, the work configuration set is located in the camera’s volatile memory and the settings are lost if the camera is reset or if power is switched off. A400k cameras can save the current work set values in the volatile memory to a file in the camera’s non-volatile memory. Files saved in the non-volatile memory are not lost at reset or power off. -
Page 96: Activating" A Saved User Set File
• A link is created between the factory set file and the camera’s volatile memory. The values in the factory set will now be automatically copied into the work set whenever the camera is powered up or reset. 3-44 Basler A400k... -
Page 97: Which Configuration Set File Will Load At Startup Or At Reset
The bulk data “download” process is used to save a user set to PC. The bulk data “upload” process is used to load a user set from PC. Section 4.2.3 explains bulk data CSRs and using the bulk data download and upload processes. Section 4.3.1 explains using read/write commands. Basler A400k 3-45... -
Page 98: Parameter Set Cache
You can enable/disable parameter set cache by writing a value to the Mode field of the Parameter Set Cache CSR (see page 4-34). See Section 4.2.2 for an explanation of CSRs and Section 4.3.1 for an explanation of using read/ write commands. 3-46 Basler A400k... -
Page 99: Parameter Validation
LED will blink (see Section 6.1). 3.18 Status LED The A400k has a status LED on the back of the camera. The LED is used to indicate that power is present and to indicate an error condition if one is detected. See Section for details. -
Page 100: Resetting The Camera
Basic Operation and Features 3.19 Resetting the Camera A400k cameras let the user initiate a camera reset. A reset is the equivalent of switching off power to the camera and switching power back on. You can initiate a camera reset by using the Camera Configuration Tool Plus (CCT+) or by using binary write commands from within your own application to set the camera’s control and status... -
Page 101: Configuring The Camera
Configuring the Camera 4 Configuring the Camera A400k cameras come with a factory set of configuration parameters and they will work properly for most applications with only minor changes to the configuration. For normal operation, the following parameters are usually configured by the user: •... -
Page 102: Configuring The Camera With The Camera Configuration Tool Plus (Cct+)
1. Make sure that the properties for the RS-644 serial port on your frame grabber are properly configured and that the camera has power. 2. To start the CCT+, click Start , click All Programs , click Basler Vision Technologies , and click CCT+ (default installation). -
Page 103: Configuration Tool Help
It also explains how to copy the work set to a saved user set file and how to copy a saved user set file or the factory set file to the work set. To access on-line help, press the F1 key whenever the configuration tool is active. Basler A400k... -
Page 104: Configuring The Camera By Setting Registers
Configuring the Camera 4.2 Configuring the Camera By Setting Registers A400k cameras have blocks of mapped memory space known as registers. By reading values from the registers, you can determine basic information about the camera and information about the camera’s current parameter settings. By writing values to the registers, you can set camera parameters and control how the camera’s features will operate. -
Page 105: Inquiry Registers
0x0101 (the base address of 0x0100 plus an offset of 0x0001). By reading the data at address 0x0101, you can get information about the camera vendor’s name. Section 4.2.1.1 lists the inquiry registers in A400k cameras and shows detailed information about the use of each field within the registers. - Page 106 Description: The value in this field indicates the camera’s version information. The bytes in the field are interpreted as follows: Byte 1 = Low byte of the camera version (BCD coded) Byte 2 = High byte of the camera version (BCD coded) Byte 3 = Register layout ID (BCD coded) Basler A400k...
- Page 107 The bytes in the field are inter- preted as follows: Byte 1 = Low byte of the firmware version (BCD coded) Byte 2 = High byte of the firmware version (BCD coded) Byte 3 = Register layout ID (BCD coded) Basler A400k...
- Page 108 0x01 = The register is available Field Name: Camera Temperature Offset: 0x0001 Size: 1 Byte Type: Read only Description: The value in this field indicates the camera’s inner temperature. The result is given in °C as 8 bit signed number. Basler A400k...
- Page 109 (The process should be performed in darkness or in very low light conditions.) This bit will clear when you perform a successful shading value generation procedure. 20 ... 31 Reserved Basler A400k...
- Page 110 There is no ExSync signal. The FPGA is not ready. Parameter error, for example, a parameter has been set to a value that is out of range or not allowed or in conflict with other settings. Reserved Reserved 4-10 Basler A400k...
- Page 111 The last shading value generation process failed. The FPGA is not ready. Parameter error, for example, a parameter has been set to a value that is out of range or not allowed or in conflict with other settings. Reserved Basler A400k 4-11...
- Page 112 A binary command with no BFE was received (see Section 4.3.1). A binary command with an incorrect BCC was received (see Section 4.3.1). A binary command with an address error was received (see Section 4.3.1). Reserved An unknown error has occurred. 4-12 Basler A400k...
-
Page 113: Feature Control And Status Registers
They may also have read only fields that contain information about the minimum and maximum allowed setting for each parameter. Section 4.2.2.2 lists the feature CSRs in A400k cameras and shows detailed information about the use of each field within the register. 4.2.2.1 “Raw” Value Fields vs. “Absolute” Value Fields As you look through the descriptions of the feature CSRs, you will notice that some CSRs have a parameter that can be set by writing a value to a “raw”... - Page 114 (unless you entered a „valid“ value). Accordingly, if you read back a value in an absolute field, you may find that it is slightly differ- ent from the value that you entered the field. 4-14 Basler A400k...
-
Page 115: Feature Control And Status Register Details
Description: Writing an integer value to this field sets the exposure time control mode: 0x00 = Free-run programmable 0x02 = Free-run edge-controlled 0x04 = ExSync level-controlled 0x05 = ExSync programmable 0x06 = ExSync edge-controlled See Section for descriptions of the exposure time control modes. Basler A400k 4-15... - Page 116 Byte 1 = Low byte of the raw value Byte 2 = Mid byte of the raw value Byte 3 = High byte of the raw value Byte 4 = Always 0x00 (not used) See Section for more information about exposure time. 4-16 Basler A400k...
- Page 117 The 4 bytes in this field are interpreted as follows: Byte 1 = Low byte of the max value Byte 2 = Mid byte of the max value Byte 3 = High byte of the max value Byte 4 = Always 0x00 (not used) Basler A400k 4-17...
- Page 118 Byte 1 = Low byte of the raw value Byte 2 = Mid byte of the raw value Byte 3 = High byte of the raw value Byte 4 = Always 0x00 (not used) See Section for more information about the frame period. 4-18 Basler A400k...
- Page 119 The 4 bytes in this field are interpreted as follows: Byte 1 = Low byte of the max value Byte 2 = Mid byte of the max value Byte 3 = High byte of the max value Byte 4 = Always 0x00 (not used) Basler A400k 4-19...
- Page 120 The 2 bytes in this field are interpreted as 16 bit signed integer: Byte 1 = Low byte of the minimum raw value Byte 2 = High byte of the minimum raw value 4-20 Basler A400k...
- Page 121 The 2 bytes in this field are interpreted as 16 bit signed integer: Byte 1 = Low byte of the maximum raw value Byte 2 = High byte of the maximum raw value Basler A400k 4-21...
- Page 122 The 2 bytes in this field are interpreted as 16 bit signed integer: Byte 1 = Low byte of the minimum raw value Byte 2 = High byte of the minimum raw value 4-22 Basler A400k...
- Page 123 FPN shading correction values are reset to their original values: 0x00 = Do nothing 0x01 = Generate and use column FPN correction values 0x02 = Reset column FPN correction values See Section for more information about shading correction. Basler A400k 4-23...
- Page 124 Description: Writing an integer value to this field sets the shading correction mode: 0x00 = Shading correction off 0x01 = Enable DSNU shading correction only 0x02 = Enable PRNU shading correction only 0x03 = Enable DSNU and PRNU shading correction See Section for more information about shading correction. 4-24 Basler A400k...
- Page 125 The 2 bytes in this field are interpreted as follows: Byte 1 = Low byte of the min value Byte 2 = High byte of the min value Basler A400k 4-25...
- Page 126 Description: An integer value indicating the increment for the starting column setting. The 2 bytes in this field are interpreted as follows: Byte 1 = Low byte of the max value Byte 2 = Mid byte of the max value 4-26 Basler A400k...
- Page 127 Description: An integer value indicating the increment for the width setting. The 2 bytes in this field are interpreted as follows: Byte 1 = Low byte of the max value Byte 2 = Mid byte of the max value Basler A400k 4-27...
- Page 128 Description: An integer value indicating the increment for the starting line setting. The 2 bytes in this field are interpreted as follows: Byte 1 = Low byte of the max value Byte 2 = Mid byte of the max value 4-28 Basler A400k...
- Page 129 Description: An integer value indicating the increment for the height setting. The 2 bytes in this field are interpreted as follows: Byte 1 = Low byte of the max value Byte 2 = Mid byte of the max value Basler A400k 4-29...
- Page 130 Offset: 0x0001 Size: 1 Byte Type: Read / Write Description: Writing an integer value to this field sets the stamp mode: 0x00 = Stamp off 0x01 = Stamp enabled See Section for more information about the stamp feature. 4-30 Basler A400k...
- Page 131 0x00 = TTL 0x01 = Open collector or Low Side Switch, 5 V max 0x02 = High Side Switch 5 V 0x03 = High impedance (default) See Section 2.5.8 for more information about the flash trigger signal. Basler A400k 4-31...
- Page 132 0x02 = Test image two enabled (still diagonal stripe pattern) 0x03 = Test image three enabled (moving diagonal stripe pattern) 0x04 = Test image four enabled (horizontal stripe pattern) See Section 3.12 for more information about test images. 4-32 Basler A400k...
- Page 133 The RS-644 serial port on some Camera Link frame grabbers will only support a bitrate of 9600. If you are using a Camera Link frame grabber, check the grabber’s documentation before attempting to change the bitrate. At reset or power off/on, the camera returns to the 9600 bps setting. Basler A400k 4-33...
- Page 134 Size: 4 Bytes Type: Read / Write Description: Writing an integer value to this field enables/disables parameter set cache: 0x00 = Parameter set cache disabled 0x01 = Parameter set cache enabled See Section 3.15 for more information about parameter set cache. 4-34 Basler A400k...
-
Page 135: Bulk Data And The Bulk Data Control And Status Registers
In the case of the A400k, there are three types of bulk data: configuration sets, a set of shading values and an AOI list. There is a separate bulk data control and status register for each type of bulk data. -
Page 136: Using A Bulk Data Csr To Work With Bulk Data
This procedure would create a file called UserSet01 in the non-volatile memory and would copy the current work set settings from the camera’s volatile memory into the new file. Sample code that illustrates how to create a bulk data file is available from Basler (see Section 4.4). - Page 137 This procedure would create a file called gainshading in the non-volatile memory and would copy the current PRNU shading values from the camera’s volatile memory into the new file. Sample code that illustrates how to create a bulk data file is available from Basler (see Section 4.4).
- Page 138 If you wanted to enumerate the existing AOI list file stored in the camera, you would use a similar procedure but you would write to and read from the AOI list bulk data CSR instead. Sample code that illustrates how to enumerate bulk data files is available from Basler (see Section 4.4).
- Page 139 If you wanted to download an existing AOI list bulk data file to the host PC, you would use a similar procedure but you would write to and read from the AOI list bulk data CSR instead. Sample code that illustrates how to download bulk data files is available from Basler (see Section 4.4).
- Page 140 If you wanted to upload existing AOI list bulk data files stored in the camera, you would use a similar procedure but you would write to and read from the AOI list bulk data CSR instead. Sample code that illustrates how to download bulk data files is available from Basler (see Section 4.4).
-
Page 141: Bulk Data Control And Status Register Details
Description: Byte-sized register that is used to sequentially write to or read from a bulk data file. You can save up to four configuration set files in the non-volatile memory. There is a restriction on naming the files that hold the saved configuration sets. They must be named UserSet01, UserSet02, UserSet03 or UserSet04. Basler A400k 4-41... - Page 142 You can save up to one DSNU shading value file in the non-volatile memory. There is a restriction on naming the file that holds the saved set of DSNU shading values. The file must be named offsetshading. 4-42 Basler A400k...
- Page 143 You can save up to one PRNU shading value file in the non-volatile memory. There is a restriction on naming the file that holds the saved set of PRNU shading values. The file must be named gainshading. Basler A400k 4-43...
- Page 144 Description: Byte-sized register that is used to sequentially write to or read from a bulk data file. You can save up to one AOI list file in the non-volatile memory. There is a restriction on naming the file that holds the saved AOI list. The file must be named aoilist. 4-44 Basler A400k...
-
Page 145: Using Binary Read/Write Commands On The A400K
4.3 Using Binary Read/Write Commands on the A400k As explained in Section 4.2, each A400k camera has control and status registers with one or more fields that are used to set the values for parameters associated with a camera feature. For example, the stamp control register has several fields used to set the parameters associated with the stamp feature. -
Page 146: The Binary Read/Write Command Protocol
The bits in the FTF field are assigned as follows: OpCode AddrLen Code The MSB of the FTF field is on the left (highest bit of the opcode) and the LSB of the field is on the right (lowest bit of the address length). 4-46 Basler A400k... - Page 147 48 bits (= 6 bytes) 0b11 64 bits (= 8 bytes) On A400k cameras, all CSR addresses are 16 bits. Example of an FTF field: Assume that you are issuing a write command, that you are using a BCC and that the CSR address you are writing to is a 16 bit address.
- Page 148 Positive frame acknowledge/negative frame acknowledge Size = 1 byte The value for a positive frame acknowledgement (ACK) is 0x06 and for a negative frame acknowledgement (NAK) is 0x15. Note All values are formatted as little endian (Intel format). 4-48 Basler A400k...
-
Page 149: Error Checking And Responses
If the data in a write command is not within the allowed range or specified group of allowed val- ues, the camera will not execute the write command. Basler A400k 4-49... -
Page 150: Basic Read/Write Command Explanations
BCC. (Note that the use of a BCC is optional. In this example, we assume that a BCC is used.) is the BFE. 0x03 The value in the BFE field is always 0x03 . 4-50 Basler A400k... -
Page 151: Write Command
0x1801. If you check the table on page 4-32, you will find that 0x1801 is the address for the Mode field the Test Image Mode CSR. (The address for any field within an A400k CSR is equal to the base address for the CSR plus the offset for the CSR field. In this case, the base address of the Test Image Mode CSR is 1800 and the offset for the Mode field is 0001. -
Page 152: Calculating The Block Check Character (Bcc)
Configuring the Camera 4.3.2.3 Calculating the Block Check Character (BCC) The use of a block check character (BCC) in A400k commands is optional (see pages 4-46 4-47). If you choose to use a BCC, the BCC will be the exclusive-or sum (XOR sum) of the bytes in the FTF field, the DataLen field, the Address field and the Data field of the command frame. -
Page 153: Binary Command Sample Code
DRAFT Configuring the Camera 4.4 Binary Command Sample Code Sample code that illustrates how to use binary commands with A400k cameras is available at the Basler web site. Please look for the documentation downloads on the A400 page at: http://www.basler-vc.com... - Page 154 DRAFT Configuring the Camera 4-54 Basler A400k...
-
Page 155: Mechanical Considerations
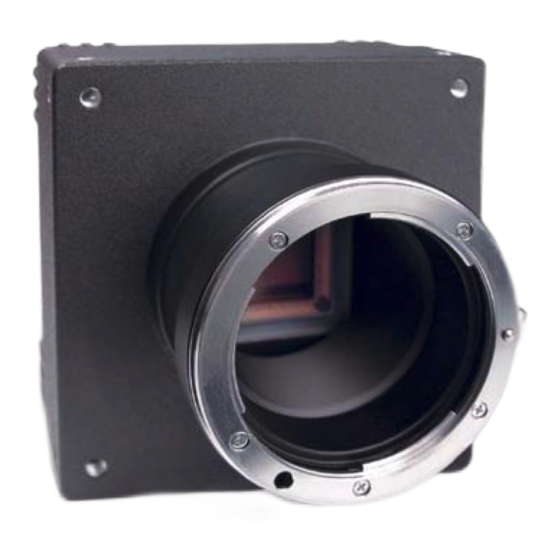
The A400k camera housing is manufactured with high precision. Planar, parallel, and angular sides guarantee precise mounting with high repeatability. A400k cameras are equipped with four M4 mounting holes on the front and two M4 mounting holes on each side as indicated in Figure 5-1. - Page 156 DRAFT Mechanical Considerations Tolerances are typical. Drawings are not to scale. Figure 5-1: A400k Mechanical Dimensions (in mm) Basler A400k...
-
Page 157: F-Mount Adapter Dimensions
DRAFT Mechanical Considerations 5.2 F-Mount Adapter Dimensions Drawings are not to scale. Figure 5-2: F-Mount Adapter Dimensions (in mm) Basler A400k... -
Page 158: Positioning Accuracy Of The Sensor Chip
DRAFT Mechanical Considerations 5.3 Positioning Accuracy of the Sensor Chip Positioning accuracy of the sensor chip is as shown in Figure 5-3. ±0.2 Reference Plane Drawings are not to scale. Figure 5-3: Positioning Accuracy Basler A400k... -
Page 159: Troubleshooting
Section 2.8. Continuous fast General error. pulses Please contact Basler support. Repeated pattern The camera is booting or is busy performing an internal operation of green and (such as generating shading values). When the operation is complete, orange pulses the blinking stops. - Page 160 • No processing board FPGA firmware available. • Firmware available but error when booting the sensor FPGA. • Firmware available but error when booting the processing board FPGA. Please contact Basler support. Repeated pattern An erroneous parameter set has been loaded. of 6 slow pulses Load another parameter set and delete the erroneous set.
-
Page 161: Troubleshooting Charts
Refer to a repeated pattern of Section for information about using several pulses. the pattern to determine the problem. Call Basler Technical Support for No. It is assistance. (The contact numbers appear blinking after the title page of this manual.) continuously. - Page 162 Switch on the test image one. setting. interfacing Is the exposure OK? troubleshooting Can the test image be seen? chart. Go to the Switch on test image one. interfacing troubleshooting Replace the camera. Can the test image be seen? chart. Replace the camera. Basler A400k...
-
Page 163: Poor Quality Image
Exit this chart. Exit this chart. Contact Basler Technical Support. The contact numbers appear after the title page of this manual. Before you call for support, be sure to make note of the camera settings and the frame grabber settings you are using. -
Page 164: Interfacing
Exit this DCF files for many types of frame grabbers are available at the Basler web site: chart. www.basler-vc.com. These files have all been tested with the A400... -
Page 165: Serial Communication
Make sure that no other program has access to the port. port is in use” message appear? You may need to update the CCT+. To download the latest version of the tool, go to the Basler web site at www.basler-vc.com. Does a “This type of camera is not supported”... -
Page 166: Before Calling Basler Technical Support
Troubleshooting 6.3 Before Calling Basler Technical Support To help you as quickly and efficiently as possible when you have a problem with a Basler camera, it is important that you collect several pieces of information before you contact technical support. - Page 167 12 Parameter set It is very important for Basler Technical Support to get a copy of the exact camera parame- ters that you were using when the problem occurred. To make a copy of the parameters, start the CCT+, select the File menu, and click Dump Current Settings to File.
- Page 168 DRAFT Troubleshooting 6-10 Basler A400k...
-
Page 169: Revision History
Replaced "The 4 bytes in this field..." by "The 2 bytes in this field..." in tables "Area of Interest Width in Columns CSR" and "Area of Inter- est Height in Line CSR" in Section 4.2.2.2. Added Section 6.3 ”Before Calling Basler Technical Support”. Basler A400k... - Page 170 Corrected the information for bit 7 in the Camera Status Inquiry Register description on page 4-9. Corrected the offset shown for the Reset field in the Camera Reset CSR description on page 4-34. DA00062410 27 Sep 2007 Removed repeated material regarding calling Basler technical support. Basler A400k...
-
Page 171: Feedback
DRAFT Feedback Feedback Your feedback will help us improve our documentation. Please click the link below to access an online feedback form. Your input is greatly appreciated. http://www.baslerweb.com/umfrage/survey.html Basler A400k... - Page 172 DRAFT Feedback Basler A400k...
-
Page 173: Index
CMOS-sensor ......3-1 firmware versions reading with binary commands ..4-6, 4-7 Basler A400k... - Page 174 ......2-13 low side switch ......2-6 Basler A400k...
- Page 175 ..4-32 troubleshooting ......6-1 Basler A400k...
- Page 176 DRAFT Index Basler A400k viii...
Need help?
Do you have a question about the A400K and is the answer not in the manual?
Questions and answers