Table of Contents
Advertisement
Quick Links
Advertisement
Table of Contents

Subscribe to Our Youtube Channel
Related Manuals for Chenbro ES340


Summary of Contents for Chenbro ES340
- Page 1 ES340 Chassis User’s Manual Chenbro ES340 Chassis User Manual www.chenbro.com...
-
Page 2: Technical Support
Information provided in this manual is intended to be accurate and reliable. However, Chenbro Micom Co., Ltd., assumes no responsibility for its use, nor for any infringements upon the rights of third parties, which may result from its use. Technical Support Chenbro works hard to offer our customers maximum performance from our chassis. -
Page 3: Table Of Contents
ES340 Chassis User’s Manual Content Packing list ……………………………………….…………………………4 Features …………………………………………..……………………………6 Technical specification ………………………..………………………..6 Opening the chassis …………………………..…………………………….7 Installing devices ……………………………..……………………………10 …...………………...………………………..10 Installing Mini-ITX M/B ……...……………..……………………………10 Installing Slim-CDROM …...…...……………………………..11 Installing 3.5” Hot-swap hard drive ……..……………………………………………….12 Installing card reader ………………………..……………………………..13 Installing heatsink ………………………..…………………………….14... -
Page 4: Packing List
ES340 Chassis User’s Manual Packing List ES340 chassis SATA2/SAS Shield USB 2.0 SATA 7-pin Cable, 70mm fans (2) Backplane (2) Cables (1) 260mm (2) Power Distribution Hot-swap HDD Slim-CDROM SATA 7-pin Cable, Board (1) Carrier (4) Carrier (1) 360mm (2) -
Page 5: Optional Kits
ES340 Chassis User’s Manual Accessory pack Screw Pack for Slim ODD Adaptor Cable Tie (1) Front Bezel Key (1) MB (1) Power Cable, Big 4P Screw Pack for Active Heatsink for PCI Add-on Card to Small 4P (1) HDD (1) -
Page 6: Features
ES340 Chassis User’s Manual Features Silver-gray powder coating combined with simple lining Ideal for high storage capacity (Hot-swap HDDs) with RAID-5 functionality Available for multi-media platform 9.5 liters small form factor with Mini-ITX M/B Removable M/B carrier for excellent thermal performance & easy cabling External adapter reduces noise level Optional remote control &... -
Page 7: Opening The Chassis
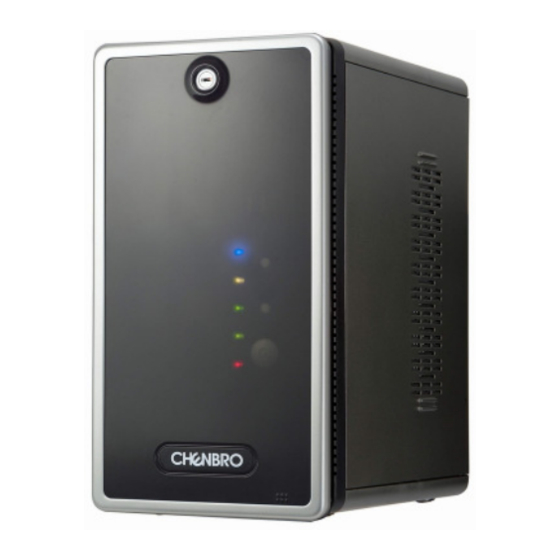
ES340 Chassis User’s Manual Opening the Chassis Overview Side Panel w/Venting Slim CD-ROM Carrier Main Cable Through Hole w/Rubber pad Front Bezel (w/Key Lock) Intrusion Switch USB & Front Control Cables Motherboard Cage Front Card Reader (Option) -- Support MS,SD,Mini-SD,MMC Slim CD-ROM Cover USB 2.0 ports x2... -
Page 8: To Remove The Front Bezel
ES340 Chassis User’s Manual To open the chassis for assembly of internal parts, users need to: Remove the side panel Remove the front bezel To remove the side panel: ■ Release the side panel thumb screw on the rear ■ Push and slide the side panel toward rear to open the... - Page 9 ES340 Chassis User’s Manual To remove the M/B cage: ■ Release the secure screws on the M/B cage ■ Release the two screws around the rear fans ■ Remove the motherboard cage ■ Disconnect the extension fan cables ■ Detach the motherboard cage with System Cables ■...
-
Page 10: Installing Devices
ES340 Chassis User’s Manual Installing Devices: There are other optional devices for ES340, including: Mini-ITX or Mini-DTX Slim Optical Drive Standard SATA2 Hard Drive 4-in-1 Mini Card Reader (Optional) Dedicated Universal Heatsink for AMD/Intel CPU Installing Mini-ITX or Mini-DTX M/B: ■... -
Page 11: Installing 3.5" Hot-Swap Hard Drive
ES340 Chassis User’s Manual ■ Slide in the assembled CD-ROM into the chassis ■ Make sure the holder latch is secured when fully seated Installing 3.5” SATA2 Hard Drive: ■ Remove the HDD Carrier from the chassis and place ■ Attach the HDD screws on both sides the SATA2 HDD into it. -
Page 12: Installing Card Reader
ES340 Chassis User’s Manual Installing Card Reader (optional): ■ Detached the front screw of Card Reader holder ■ Pull out the Card Reader holder ■ Remove the seal on the holder and make sure the ■ Attach screws to fix the Card Reader sockets is right to the opening ■... -
Page 13: Installing Heatsink
ES340 Chassis User’s Manual Installing Dedicated AMD/Intel Heatsink: The Chenbro heatsink for ES340 is designed specifically to support Intel and AMD desktop LV (Low Voltage) CPU in universally. Note the CPU power rating should not over 65W as maximum. ■ Attach the heatsink retainer on to M/B before install ■... -
Page 14: Installing Riser Card
ES340 Chassis User’s Manual Installing Riser Card (optional): ■ The PCI card mounting bracket must be detach and ■ Connect the cables before install. use special one for mounting, (Ex. PCI RAID card) ■ Gently install the PCI card with riser into the slot. -
Page 15: Connecting Devices
ES340 Chassis User’s Manual Connecting Devices: ES340 is pre-installed with several cables inside as factory default, which includes: SATA2 cable for Hot-swap hard drive Power cable for M/B Front panel I/O cables USB 2.0 cable 4-in-1 card reader (optional) To connect SATA2 Hot-swap hard drive: ■... -
Page 16: Connecting Front Panel I/O And Leds
ES340 Chassis User’s Manual To connect front panel I/O and LEDs: a. USB 2.0 cable connection ■ Front USB cable should be connected to on-board USB header properly depends on different M/B. b. Front display cable connection ■ The display fan-out cable with different connection for: ■... - Page 17 ■ Use either standard IDE cable from 3 party M/B, or of DC harness, small 4P is connected to the Slim ODD use optional cable from Chenbro to connect to the Slim adaptor board ODD adaptor board e. Cable management ■...
-
Page 18: Power Adaptor And Backplane
ES340 Chassis User’s Manual Power Adaptor and Backplane Power Adaptor Specification: For electrical specification: Input Characteristics Output Characteristics Item Spec Item Spec Rated Input Voltage 100V / 240V Output Raged Voltage Input Voltage Range 90VAC to 264VAC Output Current 6.32A... -
Page 19: Power Distribution Board
User’s Manual Power Distribution Board: The PDB (Power Distribution Board) inside the ES340 is a specific DC to DC adaptor, which only provides the converting from DC19V to multiple voltages include +5V, +3.3V and +12V for all the devices and boards usage scale up to 180W Power Adaptor. As the... -
Page 20: Sata2 Hot-Swap Backplane
User’s Manual 2-port SATA2 Backplane Introduction: ES340 is integrated with two SATA2 backplanes to support four 3.5” HDD hot-swap feature. With dedicate backplane bracket assembled, users can directly attach the HDD on the tray and plug into the HDD slot. - Page 21 ES340 Chassis User’s Manual [CN12/CN22] : Connect “22+7”pin SAS connector to HDD [CN13/CN23] : SATA connector to Host [FAN1 / FAN2 / FAN3 / FAN4 / FAN5] : Fan connectors [CN1] : Power Connectors [CN2] : PIN HEADE 4x2 PIN * 1...
Need help?
Do you have a question about the ES340 and is the answer not in the manual?
Questions and answers