Table of Contents
Advertisement
Quick Links
Advertisement
Table of Contents

Related Manuals for Konica Minolta 9760


Summary of Contents for Konica Minolta 9760
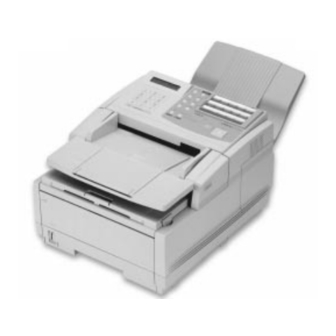
- Page 1 OKIFAX 5400 FACSIMILE KONICA FAX 9760 User's Manual...
- Page 2 Mention of software products manufactured by other companies does not necessarily constitute endorsement by Konica Business Technologies, Inc. Copyright 2000 by Konica Business Technologies, Inc. All Rights Reserved ® As an E...
-
Page 3: Table Of Contents
Contents Introduction .............. 10 Programming Required Information ........25 Features.................10 FCC Telephone Consumer Protection Act ......25 Product Options ..............11 Date and Time ..............26 Installation ..............13 Fax Identification...............26 To Program Your Fax ID: ..........27 For Your Safety: Installation Hints ........13 Getting to Know Your Fax Machine..... - Page 4 Auto Receive Mode [FAX] ..........55 Multiple Page Documents ..........63 Manual Receive Mode [TEL] ..........55 Loading Documents ............63 Telephone/Fax Automatic Switch Mode [T/F] ....55 Using Your Fax with an Answering Machine [TAD] ..56 Memory Reception Mode [MEM] ........56 KONICA FAX 9760...
- Page 5 Sending a Fax to a Single Location ........64 Chain Dialing..............78 Search Key Dialing ............66 Creating a Chain Dial Number ........78 Real-Time Dialing .............66 Using a Chain Dial Number..........79 Redialing ................66 Auto Dial Faxing ...............79 Confirming Results ............66 Programming Auto Dial Numbers ........
- Page 6 Fax on Demand (Bulletin Polling) ......... 106 What information does it provide? ......... 113 Opening a Personal Box for Polling ....... 106 How to Print ..............113 Loading a Document for Polling ........107 How to Interpret .............. 113 KONICA FAX 9760...
- Page 7 Confidential Reception Report ......... 114 Power Outage Report ............119 What is it? ............... 114 What is it? ............... 119 What information does it provide? ......... 114 What information does it provide? ......... 119 How to Print ..............114 How to Print ..............119 How to Interpret ..............
- Page 8 Security ..............148 Your received documents are light or have vertical Confidential Faxes ............148 streaks on them and you are not out of toner....144 Rejecting Unsolicited (Junk) Fax Messages ..... 148 Closed Network Option ..........148 KONICA FAX 9760...
- Page 9 Image Drum Cartridge ............. 152 Emergency First Aid ............152 Service and Support ..........153 Your Dealer ................ 153 Konica Business Technologies, Inc. on the Internet ..153 Contacting Konica Business Technologies, Inc Customer Support ................153 Purchasing Supplies and Options ........154 Supplies................
-
Page 10: Introduction
Introduction Overview Thank you for purchasing this KONICA FAX 9760 . This • A fax forwarding feature that lets your fax machine receive machine uses advanced LED technology to transfer faxed messages into memory and automatically forward the and copied images to plain paper, quickly and sharply. The... -
Page 11: Product Options
Product Options • Advanced memory transmission and reception features, including automatic reception into memory. • Reports to help you keep track of your fax machine’s • Non-battery backup memory expansion cards add to operations and settings existing storage capacity. • High-speed scanning of original documents while dialing, - 2 MB card adds capacity to store up to 160 pages. - Page 12 KONICA FAX 9760...
-
Page 13: Installation
Installation For Your Safety: Installation Hints • The TEL port on the back of the unit is only suitable for two-wire devices. Not all standard telephones will respond to incoming ringing when connected to an extension • Install your fax machine in a dust-free location away from socket. -
Page 14: Where To Install Your Fax Machine
• Make sure that both power and telephone outlets are available nearby. • Choose a location where the relative humidity is between 20% and 80%, and where the temperature is between 50°F (10°C) and 92°F (32°C). KONICA FAX 9760... -
Page 15: Attaching The Document Stacker
Attaching the Document Stacker 1 KONICA FAX 9760 2 Toner cartridge (wrapped) Slip the document stacker indents over the tabs on the rear of 3 Image drum cartridge (inside machine) the unit so that they click into place. 4 Power cord... -
Page 16: Removing The Protective Sheet
4 Remove the protective sheet. Be careful not to touch the 2 Press in the cover release buttons on the side of the copy green surface of the drum. stacker until it clicks open. Lift up the stacker. KONICA FAX 9760... -
Page 17: Installing The Toner Cartridge
5 Replace the image drum cartridge. Warning: Be careful when handling the toner cartridge. Do not let toner spill on your clothing or other porous materials. If you experience any problems with toner, refer to the “Safety, Handling the Consumables, Toner Cartridge”... - Page 18 5 Close the copy stacker—push down until you hear both right, insert the toner cartridge into the image drum unit, sides click into place. left end first. 6 Close the document table. 4 Push the lever forward to secure the cartridge. KONICA FAX 9760...
-
Page 19: Toner Cartridge And Image Drum Unit Handling
Toner Cartridge and Image Drum Unit Toner First Aid Measures Handling Emergency First Aid • Leave unused toner cartridges and image drum units in their packages until needed. • EYE: Flush eyes with plenty or water. If symptoms • When replacing a toner cartridge or image drum unit, re- occur, get medical attention use the packaging to dispose of the old toner cartridge or image drum unit. -
Page 20: Loading Paper
To use a different paper size, change the setting of User Function 13, 1’ST PAPER SIZE to match your new paper size. Refer to the “Setting Basic Features, User Function Settings” section of this user's manual. KONICA FAX 9760... - Page 21 3 If necessary, lift and adjust for the length of your paper. 5 Remove the paper from its wrapper (up to 250 sheets). Note the “print side” notice printed on the label. Fan the paper. 6 Load the paper into the paper tray, print side DOWN. 4 If you are using legal-size paper, pull out the extension at Be sure the paper is under the tabs on the sides of the the back of the paper tray.
-
Page 22: Connecting The Telephone Line
• To connect both an answering machine and a telephone, first connect your answering machine to your fax machine, then plug your external telephone’s cord into the telephone jack on your answering machine. KONICA FAX 9760... -
Page 23: Connecting The External Handset (Option)
You must have the TAD mode feature turned on for an answering machine to work with your fax machine. Refer to the “Answering Mode, Setting the Answering Mode” section of this user's manual. Connecting The External Handset (Option) If you purchased the external handset option with your fax machine, follow these instructions to install it. -
Page 24: Connecting Power
4 Turn on your fax machine. After the unit warms up, the time and current answering mode appear on the display. Your fax machine is now in standby mode, ready to send or receive faxes. KONICA FAX 9760... -
Page 25: Programming Required Information
Programming Required Information Date and Time Fax machines must accurately identify the date, time, sender and the telephone number of the sending fax machine on FCC Telephone Consumer Protection Act each page of every fax they send. You are required by law to The Federal Communications Commission Telephone program this information into your fax machine. -
Page 26: Fax Identification
3 On the numeric keypad, press 4. The display shows TSI/CSI: This is the telephone number of your fax machine; it appears on 4:SYSTEM DATA PRG. the displays of other non-Konica fax machines with whic you communicate. 4 Press the Yes § key. The display shows Call Back Number: NO=<TSI/CSI>, ID=<SENDER ID>. - Page 27 Use the Hyphen key to enter a “+” character for 9 After the display clears, use the numeric keypad to enter international numbers, and use the Space One Touch the telephone number for call back messages. key to enter spaces. Enter up to 20 characters.
- Page 28 KONICA FAX 9760...
-
Page 29: Getting To Know Your Fax Machine
Getting to Know Your Fax Machine Component Identification 1 One Touch Keypad Use for preprogrammed one touch dialing or for setting functions. Front of the Unit 2 Paper Path Icon Load documents here face down. 3 Document Table Covers the copy stacker and holds original documents to be faces or copied. -
Page 30: Back Of The Unit
Jack for connecting to an outside telephone line. 3 TEL 1 Jack 4 TEL 2 Jack Jacks for connecting to an optional handset, external phone, or answering machine. 5 AC Power Inlet Plug the supplied AC power cord into this inlet. KONICA FAX 9760... -
Page 31: Inside The Unit
Inside the Unit 2 Toner Cartridge This black cylinder, installed inside the image drum cartridge, contains the black powder that forms the image on the paper. You need to install a new toner cartridge when the REPLACE TONER CART message appears on the display. -
Page 32: Control Panel Keys And Indicators
Control Panel Keys and Indicators KONICA FAX 9760... - Page 33 1 Display Panel 4 Search key Refer to this display for instructions and information The One Touch keys and Auto Dial numbers can be while your fax machine is performing operations or while programmed to have a name or location ID associated with you are entering information or changing settings.
- Page 34 If you have an optional telephone handset or external telephone connected to your fax machine, you can also use this key to initiate or answer a request for voice communication during a fax communication. Press this KONICA FAX 9760...
- Page 35 12 Numeric keypad 16 Type of Original/No © © © © © key When dialing, these 12 keys work just like the keypad on Use this key to select the document contrast after you load a telephone. Also, use the keypad to enter numbers, letters a document for transmission.
-
Page 36: The Speed Dial (One Touch) Keypad
22 Pause key Use One Touch keys 15 and 30 on the One Touch keypad to enter automatic 3-second pauses in dialing when programming telephone numbers. Pauses in telephone numbers are marked by a “P” symbol. KONICA FAX 9760... -
Page 37: Using The One Touch Keys For Selecting Functions
One Touch Keys available: keys 1– 15 on the main One Refer to the “Sending a Fax to Multiple Locations Touch panel and keys 16–30 beneath the main One (Broadcasting)” section of this user's manual. Touch panel. To access One Touch keys 16–30, simply 3/Confidential TX key lift the main One Touch keypad by the latch on the left Use this key to send a confidential document to a mailbox... -
Page 38: Signal Tones
To turn off Refer to the “Problem Solving, Printing a Cleaning Page” the sound, hang up the handset and press the Stop key. section of this user's manual. KONICA FAX 9760... -
Page 39: Dual Access
Dual Access Your fax machine’s dual access feature allows you to load and prepare to transmit (send) a document while your fax machine is receiving or sending another fax from memory. This feature increases your productivity and reduces the time you spend waiting for operations to finish. - Page 40 KONICA FAX 9760...
-
Page 41: Using Your Fax With Your Computer
Using Your Fax with Your Computer Connect to Your Computer By installing the Multifunction Printer Option (MFP), you may connect your fax machine to your computer and use your fax machine as a scanner or printer. Incoming faxes may 1 Make sure that both the computer and the fax machine are be saved directly to your computer’s hard drive. -
Page 42: Setting Basic Features
15 Transmit Resolution/Yes § key 16 Type of Original/No © key 17 Alarm indicator 18 Stop key 1 Display Panel 19 Start key 2 Copy key 20 Plus key 3 Hyphen key 21 Space key 4 Search key 22 Pause key KONICA FAX 9760... -
Page 43: Navigating Programming Levels
User Function Settings List numbers; in most cases, the settings are determined by the type of telephone service you have. 01 MCF(SINGLE-LOC.) Your Authorized Konica Dealer must change the service This function automatically prints a Message functions. Confirmation Report after each single-location transmission or polling transmission. - Page 44 This feature makes it easier to LOW, MIDDLE (default), and HIGH. identify a fax, but it may present security problems if you are sending sensitive documents. Available settings are ON (default) and OFF. KONICA FAX 9760...
- Page 45 08 CLOSED NETWORK 10 T/F TIMER PROG. This function allows you to program your fax machine to When set to the telephone/fax answering mode, your fax refuse to communicate with locations whose telephone machine automatically distinguishes between incoming numbers have not been programmed into your One Touch voice and fax calls.
- Page 46 SETUP FAX RING This feature may not work properly if you have a CALL FAX NUMBER NOW. telephone other than a genuine Konica optional handset connected to your fax machine. 7 Using a separate telephone line, dial the number Setting Distinctive Ring assigned to the fax machine within 90 seconds—if you...
- Page 47 or RESULT=NG displays. When the fax machine has A5 and B5 size paper into the paper tray. However, reports successfully finished programming its ring pattern, the and standard size faxes (letter, legal, or A4) will not print display shows RESULT=OK. completely on these paper sizes.
- Page 48 This function controls how manual feed call with the same tone, even if you have set function transmissions are performed. Available settings are setting 12, DISTINCTIVE RING to on. FEEDER (the default setting) and MEMORY. KONICA FAX 9760...
- Page 49 To perform a manual feed transmission with FEEDER selected: 21 REMOTE DIAGNOSIS 1 Press Select Function The remote diagnostics feature allows a service person 2 Press BROADCAST FEEDER TX remotely to dial and service your fax machine. The display shows Available settings are ON and OFF (default).
-
Page 50: Changing Your User Function Settings
This function allows your fax machine to wait for and of the next function setting appears in the display. detect a dial tone before proceeding with dialing. 7 Press the Select Function key to finish. Available settings are ON and OFF. Default: OFF. KONICA FAX 9760... - Page 51 4 BUSY TONE DETECT 7 AUTO START This function allows your fax machine to detect a busy When this function is turned on, your fax machine tone when sending a fax. automatically dials as soon as you press a One Touch key Available settings are ON and OFF.
-
Page 52: Changing Your Dial Parameter Settings
When this function is on, the phone number of the way your fax machine operates. To change any of these sending fax machine prints at the top of each page of the settings, contact your Authorized Konica Dealer. message. 5 NO TONER MEM.RX When this function is on, your fax machine automatically receives messages in memory when it is low on toner. -
Page 53: Changing Your Service Function Settings
5 Press the No © key to switch to the other installed language. To change any of these settings, contact your Authorized Konica Dealer. 6 To accept the language change, press the Yes § key. 7 Press the Select Function key to finish. -
Page 54: Answering Mode Options
If you pick up the handset and hear fax tones, press the Start key to receive the fax. If you do not answer the phone and someone tries to send you a fax message, your machine will not accept it. KONICA FAX 9760... -
Page 55: Memory Reception Mode [Mem]
fax machine. Like Telephone/Fax mode, the Telephone Fax Forwarding Mode [FWD] Answering Device mode detects whether an incoming call When set to this mode, your fax machine receives all fax is a fax or voice call. If it is a fax call, your fax machine messages into memory, and then automatically resends receives the fax. -
Page 56: Konica Fax
When set to off, it does Konica optional handset connected to your fax not ring during incoming calls. The available settings are: machine. -
Page 57: Setting Distinctive Ring
Setting Distinctive Ring 7 Using a separate telephone line, dial the number assigned to the fax machine within 90 seconds. To set up your fax machine to recognize another ring pattern: If you have no access to a second line, have someone else 1 Press the Select Function key. -
Page 58: Remote Receive: User Function 17
Option is installed and your fax machine is set to the PC Fax answering mode. In that case, incoming faxes are saved directly to the PC’s disk without being printed. If the PC is turned off or not functioning, the fax machine acts as a stand- KONICA FAX 9760... -
Page 59: Paper Size Settings
Paper Size Settings when you have these or other smaller sizes loaded; this prevents faxes and reports from printing partially. When OTHER is selected, faxes are stored in the fax machine and First Paper Size: User Function 13 only print when you have loaded a standard paper size and This function allows you to specify the size of paper you are changed the 1’ST PAPER SIZE setting to match the paper using in the paper tray. -
Page 60: Connecting To A Pbx
11 Press the Select Function key to finish. Keep in mind that have difficulty with fax communication after following all of the outside telephone numbers you program into these steps, contact your Authorized Konica Dealer. your fax machine have to begin with your PBX’s access 1 Press the Select Function key. - Page 61 User’s Manual...
-
Page 62: Basic Faxing Operations
• Send only documents that are rectangular. Your fax machine can be set to accept documents of • Never use documents that have wet or sticky surfaces, unlimited length—see your Authorized Konica Dealer. wrinkles, staples, or paper clips. However, your fax KONICA FAX 9760... -
Page 63: Multiple Page Documents
Multiple Page Documents 1 Adjust the document guides to the width of the paper you are using. Your fax machine can scan paper with a basis weight between 13 pounds (50 g/m ) and 28 pounds (105 g/m ). You can load up to 30 sheets of standard 20-pound (80 g/m ) paper, such as photocopier paper. -
Page 64: Sending A Fax To A Single Location
• For documents with normal contrast, use NORMAL contrast. • For documents that are too light, use LIGHT contrast. • For documents that are too dark, use DARK contrast. 6 Your documents are now ready for faxing or copying. KONICA FAX 9760... - Page 65 DIALING To dial using an external telephone Pick up the handset of your external telephone and dial Your fax machine is dialing the number. the number of the machine you wish to transmit to. If the receiving fax machine is in automatic reception mode, CALLING you will hear a high-pitched tone.
-
Page 66: Search Key Dialing
If your fax machine is equipped with a handset, you can dial MCF report, press the Copy key a second time. Refer to the in real time by picking up the handset, or you can press the “Reports” section of this user's manual. Hook/Voice Request key. KONICA FAX 9760... -
Page 67: Stopping A Transmission
Stopping a Transmission 3 Press the Copy key. The display shows ONE TOUCH NO.[xx]. To stop a transmission in progress, follow the instructions The number in brackets [xx] is the next unprogrammed below. One Touch key number. 1 Press the Stop key twice. The display shows STOPPED. If all the One Touch keys are programmed, the display 2 If documents are stuck partway through the document shows AUTO DIAL NO.[xx], with the number of the next... -
Page 68: Receiving Faxes
No © keys To receive a fax while in manual receive mode: 1 When your telephone or fax machine rings, pick up the telephone handset connected to it. If a person is on the line, carry on your conversation. KONICA FAX 9760... -
Page 69: Receiving Faxes In Memory
2 If a remote fax machine is on the line, or if a person wishes Press the Auto Rec. key repeatedly until the display shows to fax you a document after a conversation, press the Start AUTO RECEIVE MODE key. 3 When the RECEIVING message appears on the display, The display shows (for a few seconds) hang up the handset. -
Page 70: Canceling Messages Stored In Memory
3 Press the Yes § key. The display shows MSG. IN MEMORY, PRINTING FUNCTION NO. [ ]. Follow the steps above for each message you want to erase. WARNING: You cannot identify which message you are erasing. KONICA FAX 9760... -
Page 71: Power Failures And Memory
Power Failures and Memory 4 Using the numeric keypad, enter 08. The display shows 08:CLOSED NETWORK nnn If power to your fax machine is interrupted, the problems listed below will occur. Where nnn is the current setting of this function. You can prevent these problems by installing an The settings are: RX, T/R, or OFF optional memory expansion board with a battery back-... -
Page 72: Using Voice Request
You cannot use it with memory, delayed, relay, or broadcast faxing. You cannot use the voice request function when your are operating the fax unit at transmission speeds greater than 14,400 bits per second. KONICA FAX 9760... -
Page 73: Programming Your Speed Dial Directory
Programming Your Speed Dial Directory One Touch Faxing Faxing is easier when you program frequently used fax numbers into the One Touch keys and use the Auto Dial numbers available in your fax machine. Your fax machine Programming One Touch Keys also allows you to organize the programmed numbers into groups for easier faxing to multiple locations. - Page 74 OT represents One Touch A/D represents Auto Dial # represents Group 3 Press a One Touch key to program. 4 The display briefly shows NO=<FAX NO.>, ID=<LOCATION ID> or a previously programmed fax number and Location ID. KONICA FAX 9760...
- Page 75 5 After the display clears, enter the main fax number. Refer • To enter a unique character, press the 0/Unique key to the instructions below. repeatedly until the character you want appears in the display. The following characters are available: ! # & ‘ ( •...
-
Page 76: Using The One Touch Keys For Dialing
Refer to the “Sending a Fax to left side of the cover. When you’re finished, close the Multiple Locations (Broadcasting)” section of this user's keypad to continue normal operation and manual. programming. KONICA FAX 9760... - Page 77 3/Confidential TX key 6/Report Print key Use this key to send a confidential document to a mail Use this key to print reports or phone lists manually. Refer box (a secure memory storage area) in the receiving fax to the “Reports” section of this user's manual for details. machine.
-
Page 78: Chain Dialing
3 Program the rest of the number into another One Touch key or Auto Dial number you can leave the second part of the number unprogrammed and enter it manually on the numeric keypad. KONICA FAX 9760... -
Page 79: Using A Chain Dial Number
Auto Dial Faxing Using a Chain Dial Number 1 Select the One Touch key or Auto Dial number Programming Auto Dial Numbers programmed with the first part of the chain dial number. For each Auto Dial number, you can enter a fax number up to 2 The display will show 32 digits long and a Location ID (name) up to 15 characters long. - Page 80 • To enter spaces, press the 14/Space One Touch key • To enter hyphens (-), press the Hyphen key • To enter alphabet characters, locate the character you want on the numeric keypad. Press that key repeatedly until the character appears in the display. KONICA FAX 9760...
-
Page 81: Copying
Copying Quantity and Resolution Making Copies You can use your fax machine as a stand-alone copier to To make copies: make up to 99 copies of a document at one time. 1 Adjust the document guides to the width of the paper you FINE is the default resolution for copies. -
Page 82: Using The Manual Paper Feeder
4 To make multiple copies, enter the number of copies you want to make on the numeric keypad. Then press the Copy key again. Your fax machine begins making copies. 5 To stop the copying process, press the Stop key. KONICA FAX 9760... - Page 83 2 Press in on the lower half of your fax machine’s front panel 4 Adjust the paper guides on the feeder. indents, just above the paper tray. 5 Insert a sheet of paper face up. Adjust the guides again to 3 Pull the manual paper feeder down until it is horizontal.
- Page 84 6 Press the Copy key (refer to the instructions above). If you are making more than one copy, or copying a multi-page document, insert additional sheets when the previous sheet is all the way through the machine. KONICA FAX 9760...
-
Page 85: Performing A Broadcast Operation
Sending a Fax to Multiple Locations (Broadcasting) The broadcasting feature allows you to send one document to 3 Press the 2/BROADCAST FEEDER TX One Touch key. The display shows FEEDER TX. as many as 139 locations at the same time. For each broadcast operation, you can select up to 30 single-location One Touch 4 Press the No ©... - Page 86 No © key to delete it from your transmission. 10 When all of your selections are correct, press the Start key. Your fax machine scans the documents into memory and begins transmitting the message. KONICA FAX 9760...
-
Page 87: Sending A Fax To A Group
Sending A Fax to a Group What is a Group? When would you use a group? Let’s imagine that you must send a weekly status report to all of your co-workers on the A group is a collection of programmed locations. Once you team. -
Page 88: Programming Groups
6 You can now add a location to your group (or delete a 1 Press Auto Dial. location from it). 2 Enter the 2-digit Auto Dial number. 3 Press Yes § to add it to the group. You can also search for a location. Refer to the instructions below. KONICA FAX 9760... -
Page 89: Delete
Delete Sending to a Group Refer to Steps 1 through 6, above. These instructions assume that you have the default To delete a previously added One Touch location, setting for User Function 18 (FEEDER) engaged. If you have the MEMORY setting engaged, skip step 4. •... -
Page 90: Relay Faxing
Relay Faxing is different from group faxing. In Group These 2-digit numbers are the numbers of groups of Faxing, a fax is sent to a preprogrammed group of locations programmed into the relay key station. locations directly from the fax machine. KONICA FAX 9760... -
Page 91: Relay Key Station
Relay Key Station Be sure to program the number in the format the relay key station uses for dialing. For example, be sure to include the access digit, if required. The relay key station is the fax unit that receives the original fax message and then automatically relays or broadcasts the Initiating a Relay Broadcast message to other remote fax machines. - Page 92 If you want to fax to a different list, press the No © key. Then use the numeric keypad to enter the number of the list you want to use. 5 Press the Yes § key. The display shows KONICA FAX 9760...
- Page 93 User’s Manual...
-
Page 94: Advanced Operations
• To change the default setting, you must adjust the below to decide which method you want to use. settings for User Function 18, Mem./Feeder SW. Refer to the “Setting Basic Functions, User Function Settings” of this user's manual. KONICA FAX 9760... -
Page 95: Sending A Delayed Fax From The Document Feeder
Sending a Delayed Fax from the Document 8 Press the Yes § key. The display shows Feeder 1 Load your documents. BROADCAST/MEMORY TX (KONICA FAX 9760). 2 Press the Select Function key. 3 Press the 1/Delayed TX One Touch key. The display shows DELAYED TX [today’s date]... -
Page 96: Sending A Delayed Fax From Memory
6 Press the Yes § key. The display shows document and sending the fax. PRG. START TIME 0-9. 7 Using the numeric keypad, enter the time you wish the transmission to begin, in 24-hour format. Examples: 8:00 am is 08:00; 8:00 pm is 20:00. KONICA FAX 9760... - Page 97 8 Press the Yes § key. The display shows 11 Press the Yes § key to confirm your selection. The display shows BROADCAST/MEMORY TX SELECT LOCATION(S). 9 Press the Yes § key. 12 To continue selecting locations, repeat Steps 11 and 12 as The display shows often as necessary.
-
Page 98: Canceling A Delayed Transmission
Stop key again to remove the document from the Creating a Personal (Confidential) Mailbox document feeder. The KONICA FAX 9760 has 16 personal (confidential) mailboxes. 1 Press the Select Function key. 2 Press the 9/User Program One Touch key. The display shows 1: FUNC. -
Page 99: Changing Your Password
3 Press 5 on the numeric keypad. The display shows 8 Press the Yes § key to continue. 9 Using the numeric keypad, enter the 4-digit password you 5:PERSONAL BOX PRG. want to use with your mailbox. 10 Press the Yes § key to confirm your entry. 4 Press the Yes §... - Page 100 • To continue programming mailboxes, go back to Step delete it. • If you are finished programming, press the Select 7 The display shows Function key. PERSONAL BOX [CONF]. KONICA FAX 9760...
-
Page 101: Closing (Deleting) A Mailbox
Closing (Deleting) a Mailbox 6 The display asks you to confirm the box number. Press the Yes § key if the number is correct. If you want to delete an existing mailbox, follow the instructions below. If ILLEGAL OPERATION displays, the box you have selected contains a message. -
Page 102: Sending Confidential Faxes
5 Press the Yes § key to confirm your entry. The display anyone else, have the person send the message from another shows Konica fax-capable unit as a confidential fax. In order to do this, you must first set up a confidential SELECT LOCATION. -
Page 103: Printing Confidential Messages
Printing Confidential Messages 6 Using the numeric keypad, enter the 4-digit password for the mail box you want to print from. Each time your fax machine receives a confidential message, it automatically prints a confidential reception report that 7 Press the Yes § key. The message prints. tells you which mailbox number received the message. -
Page 104: Polling
4 Press the No © key. The display shows you won’t be able to use the document feeder for other purposes until polling is completed. WAITING TO BE POLLED. KONICA FAX 9760... -
Page 105: To Cancel Polling
To Cancel Polling 2 Press the 5/Polling One Touch key. The display shows 1 Press Stop. The display reads: NO.=<MAIL BOX NO.>. COMMUNICATION CANCEL 3 Press the Start key. The display shows 2 Press the Yes § key. The display reads: POLLING RX, SELECT LOCATION. -
Page 106: Fax On Demand (Bulletin Polling)
11 The fax machine then asks you to enter another mailbox number. To continue programming mailboxes, go back to 4 Press the Yes § key. The display shows step 5. When you are finished, press the Select Function PERSONAL BOX NO. [ ]. key. KONICA FAX 9760... -
Page 107: Loading A Document For Polling
Transmit Preparation Loading a Document for Polling 1 Load the document into the stacker. 2 Press the Select Function key. What is it? 3 Press the 5/Polling One Touch key. The display shows Transmit Preparation is a feature of the fax machine. Transmit preparation “interrupts”... -
Page 108: Konica Fax
2 Press the 9/User Program One Touch key. The display shows 1:FUNC. PROGRAMMING. 3 Using the numeric keypad, press 6. The display shows 6:FORWARDING NO. PRG. 4 Press the Yes § key. The display shows = NO=<FORWARDING NO.>. KONICA FAX 9760... -
Page 109: Working With Dual Access
Working with Dual Access What You Can Do While Receiving a Your fax machine’s dual access feature allows you to load and prepare to transmit (send) a document while your fax machine is receiving or sending another fax from memory. This feature increases your productivity and reduces the time While your unit is receiving a fax, you can: you spend waiting for operations to finish. -
Page 110: What You Can Do While Making Copies
What You Can Do While Making Copies While your unit is making copies, you can: • Continue to receive faxes while copies are printing, if your unit is set to receive faxes into memory. KONICA FAX 9760... -
Page 111: Reports
Reports Activity Report Understanding Reports Your fax machine provides a variety of useful reports. These What is it? help you understand the machine’s current settings, The activity report provides a record of your fax machine’s programming and operations. communications. The reports are: •... -
Page 112: How To Print
“Codes Used in Reports.” • Service codes. Be sure to report these diagnostic codes if Your Authorized Konica Dealer will work with you to you contact your Authorized Konica Dealer about interpret the service codes (if any) that appear on this report. -
Page 113: How To Interpret
Broadcast Entry Report How to Print 1 Press the Select Function key. 2 Press the 6/Report Print One Touch key. The display What is it? shows 1:ACTIVITY REPORT. This report is a confirmation of the entries you have made 3 Using the numeric keypad, press 2. while programming a multiple-location transmission The display shows 2:BROADCAST MCF. -
Page 114: Confidential Reception Report
Refer to “What information does it provide?” for this report. For Service Codes, refer to your Authorized Konica Dealer. What information does it provide? Your dealer will work with you to interpret the service codes •... -
Page 115: What Information Does It Provide
What Information Does it Provide? How to Interpret • The current settings of all user functions (except for One The “What information does it provide?” section for this Touch Parameter settings, which appear in the telephone report explains the information provided in this report. directory). -
Page 116: Message Confirmation Report (Mcf)
User Function 04, Image in MCF, OFF. Refer to This report provides information about your last single- the “Setting Basic Features, User Function Settings” location fax transmission or polling transmission. section of this user's manual. KONICA FAX 9760... -
Page 117: Automatic
How to Print 4 Using the numeric keypad, enter the 2-digit number of the function you want to change. You can set your fax machine to print a message confirmation 01 is for MCF(SINGLE-LOC.) report after every transmission (automatic) or you can print a report only when you want to (manual). -
Page 118: On Demand (Manual)
1 Press the Select Function key. user's manual. 2 Press the 6/Report Print One Touch key. For Service Codes, refer to your Authorized Konica Dealer. The display shows 1:ACTIVITY REPORT. Your dealer will work with you to interpret the service codes 3 Using the numeric keypad, press 3. -
Page 119: Power Outage Report
Power Outage Report What information does it provide? • All faxes received into memory but not printed, • The date and time the faxes were received, What is it? • The Sender ID for each fax. This report automatically prints if power is interrupted. It lists •... -
Page 120: Printing Reports
This report prints automatically each time your fax section, below. machine receives a confidential message into a mailbox. Power Outage Report Configuration Report This report automatically prints if power is interrupted. Refer to the “Using 6/Report Print One Touch Key” section, below. KONICA FAX 9760... -
Page 121: Using 6/Report Print One Touch Key
Codes Used in Reports Using 6/Report Print One Touch key Using this key allows you to print four reports: Activity Three types of codes are used in reports. Report, Broadcast Confirmation Report, Configuration Report, and Phone Directory. • Communication Codes •... -
Page 122: Result Codes
COVER Service Codes The cover was opened during the communication. For Service Codes, refer to your Authorized Konica Dealer. Your dealer will work with you to interpret the service codes (if any) that appear on this report. The transmission or reception failed. -
Page 123: Problem Solving
Problem Solving Clearing a Document Jam 2 Pull out the jammed document. When a document jams while being faxed or scanned, your fax machine beeps, the red Alarm indicator lights, and DOCUMENT JAM appears in the display. If the jammed document looks as if it is positioned straight in your feeder, press the Stop key to try to feed the document the rest of the way through the feeder. -
Page 124: Clearing A Paper Jam
Lift the copy stacker up. into your paper tray. Make sure User Function 13, 1’ST PAPER SIZE is set for the size paper you are using. Refer to the “Setting Basic Features, User Function Settings” section of this user's manual. KONICA FAX 9760... - Page 125 3 Lift the image drum cartridge out and set it aside. 4 Pull out any paper you see jammed inside the machine. 5 Pull out the paper tray. If any paper in the tray is damaged, Warning: Never expose the image drum unit to light for remove and replace it.
- Page 126 10 Close the copy stacker and push down until you hear a click. Be sure both sides are latched. 11 Close the document table. 8 Slide the paper tray all the way back into the fax machine. KONICA FAX 9760...
-
Page 127: Printing A Cleaning
Printing a Cleaning Page If you cannot remove jammed paper using the procedure above and most of the jammed sheet has emerged from the machine, use the following method. If you notice repeating marks or imperfections on your You will probably need someone to help you. printouts, try printing a cleaning page. -
Page 128: Replacing The Toner Cartridge
If the print density becomes low even before your fax machine displays TONER LOW or REPLACE TONER CART., KONICA FAX 9760... - Page 129 2 Push in the cover release buttons on the side of the copy 4 Remove the new toner cartridge from its package and stacker until you hear a click. Lift the copy stacker. gently shake it from side to side to distribute the toner. Then carefully peel the white plastic tape from the bottom of the toner cartridge.
- Page 130 7 Using the cleaning wipe provided with your new toner 9 Close the document table. cartridge, gently wipe back and forth across the full length of the LED array. Let the array dry completely. KONICA FAX 9760...
-
Page 131: For Your Safety: Handling The Toner Cartridge
Working with the Image Drum For Your Safety: Handling the Toner Cartridge Cartridge • Leave unused toner cartridges in their packages until needed. Cautions: • When replacing a toner cartridge, re-use the packaging to dispose of the old toner cartridge. Never expose the image drum unit to light for more than •... -
Page 132: For Your Safety: Handling The Image Drum
Using heated cartridge handy. Replace the drum when print quality water will make removing the stain much more difficult. deteriorates below an acceptable level. KONICA FAX 9760... -
Page 133: When To Replace The Image Drum Cartridge
CHANGE DRUM message. Contact your Authorized Konica Dealer to order one. You must replace the toner cartridge when you replace the image drum. - Page 134 “PUSH.” KONICA FAX 9760...
- Page 135 8 Once the toner cartridge is in place, push the lever all the 10 Close the copy stacker and push down until you hear the way toward the back of the fax machine to secure it and copy stacker click into place. Be sure that the cover release the toner.
-
Page 136: Resetting The Drum Counter
Then press the Select Function key. 2 Press the 7/Counter Display One Touch key. The display shows DRUM COUNT. 3 Press the Yes § ß key to clear the image drum unit counter. 4 Press the Select Function key to finish. KONICA FAX 9760... -
Page 137: Display Panel Messages
Display Panel Messages Error Messages Messages are listed in alphabetical order by the first letter of This section lists the status and error messages that may the message. appear on the fax machine’s display panel, and explains what they mean and how to correct any problem they indicate. CHANGE DRUM SOON The red Alarm indicator lights when there is an error The image drum is nearing the end of its projected life. - Page 138 CHECK PAPER OR PATH the document. Paper is jammed feeding from the paper tray into the printer. Check the paper path and remove any jammed paper. Refer to the “Problem Solving, Clearing a Paper Jam” section of this user's manual. KONICA FAX 9760...
- Page 139 If you run out of paper while printing a fax, the remainder Authorized Konica Dealer for service. Refer to the of the fax is stored in memory, and a MSG IN MEMORY “Service and Support”...
-
Page 140: Reading The Print Counters
Authorized Konica Dealer for service. If your fax machine’s image drum unit has reached the end of its life, you will also use this function to reset the The display is blank. -
Page 141: The Display Tells You To Replace The Paper Currently Loaded
The display tells you to replace the paper currently Your fax machine won’t dial. • Check the power cord and wall outlet. loaded • Make sure that your telephone line (not your external • Make sure that the paper is properly stacked in the tray, telephone or handset) is connected to the LINE outlet on then check for a paper jam in the paper feed path. -
Page 142: The Display Shows A Communication Error
You send a fax but it is received completely blank. particular remote fax machine, try programming the • Make sure that you have loaded your document face number into one of your One Touch keys and then down. KONICA FAX 9760... -
Page 143: You Continue Receiving Unwanted Reports
You continue receiving unwanted reports. After dialing with a One Touch key or an Auto Dial • Message Confirmation Reports can be set to print code, nothing happens. automatically after each single or multiple-location • Make sure that something is programmed into the One transmission;... -
Page 144: Your Fax Machine Does Not Answer The Phone Or Receive Faxes
When you hear the warbling tone, press the and then see if the machine works properly. Refer to the Voice Request key after picking up your handset. “Problem Solving, Replacing the Toner Cartridge” section of this user's manual. KONICA FAX 9760... -
Page 145: Your Fax Machine Will Not Poll A Remote Fax Machine
Your fax machine will not poll a remote fax machine. You want to answer an external telephone but your • Call the person at the remote fax machine and make sure fax machine always answers first. that they have loaded documents and set their fax •... -
Page 146: Your Fax Machine Does Not Immediately Switch To Tel Mode When You Make Or Receive A Voice Call
8 Press the Select Function key to finish. The display shows 1:FUNC. PROGRAMMING. Change the Echo Protection setting to off if you change the location the One Touch key is used for. 3 Press the Yes § key. KONICA FAX 9760... -
Page 147: Firmware
Identifying Your Current Firmware Version You may be asked for the firmware version number if you call for service. Your Authorized Konica Dealer will work with you to identify the firmware version of your fax machine. Upgrading Your Firmware... -
Page 148: Security
(in the machine’s memory) and will not print it until a programmed into One Touch keys or Auto Dial numbers. You password is entered. This is an exclusive Konica Business can also set it to receive faxes only from those programmed Technologies feature;... - Page 149 2 Press the 9/User Program One Touch key. The display T/R: limits both transmission and reception. shows OFF: no limits on transmission or reception. 6 Press the Yes § key to confirm the new setting. 1:FUNC. PROGRAMMING. 7 Press the Select Function key to finish. 3 Press the Yes §...
-
Page 150: Safety
To avoid damage to your effective hand-over of a call from a telephone connected telephone system or to the fax machine, do not plug your to the same line. fax machine into anything other than a standard RJ-11C jack. KONICA FAX 9760... -
Page 151: Operation And Maintenance
• Small amounts of toner spilled on skin or clothing can be disposal. readily removed with soap and cold water. Using heated • When relocating your Konica FAX, always disconnect the water will make removing the stain much more difficult. telephone line before disconnecting the power cord, then reconnect the power cord first. -
Page 152: Image Drum Cartridge
• Small amounts of toner spilled on skin or clothing can be readily removed with soap and cold water. Using heated water will make removing the stain much more difficult. KONICA FAX 9760... -
Page 153: Service And Support
Much of this information is valid for the United States and Canada only. Internet Konica Business Technologies, Inc. is firmly committed to the satisfaction of our customers. If you have a problem that For the latest product information answers to common... -
Page 154: Purchasing Supplies And Options
Please consult your application’s manual for availability of their support. Purchasing Supplies and Options • Consult the Authorized Konica Dealer where you purchased your fax machine. • Call 1-800-825-5664 for the nearest Authorized Sales and Service location. -
Page 155: User Function Settings
User Function Settings User function settings allow you to customize the general Available settings are ON and OFF (default). operation of your fax machine. Refer to the following User 02 MCF(MULTI-LOC.) Function Settings List to determine which settings you may This function automatically prints a Message need to change, then refer to the “Changing Your User Confirmation Report after each multiple-location... - Page 156 ON and have a valid Sender ID programmed in your fax machine. 06 MONITOR VOLUME This function sets the volume for telephone line monitoring during dialing. Available settings are LOW (default), HIGH, and OFF. KONICA FAX 9760...
- Page 157 09 TX MODE DEFAULT 11 RING RESPONSE Your fax machine is set for the STD (standard) resolution This function controls how long your fax machine waits setting and the NORMAL contrast setting. If you before answering an incoming telephone call. The consistently send faxes that require some other available settings are 1 RING (default), 5 SECONDS, 10 combination of transmission modes, use this function...
- Page 158 Oki optional handset connected to your fax machine. 13 1’ST PAPER SIZE This function allows you to specify the size of paper you are using in the paper tray. Available settings are letter (default), A4, legal 13, legal 14, and OTHER. KONICA FAX 9760...
- Page 159 16 INCOMING RING Refer to the “Answering Mode, Using Your Fax with an This function controls the telephone ringing sound your Answering Machine [TAD]” section of this user's manual. fax machine makes when a call comes in. When set to off, Available settings are OFF (default), 00, 11, 22, 33, 44, 55, it does not ring during incoming calls.
-
Page 160: Changing Your User Function Settings
No © © © © © keys 6 Press the Yes § key to confirm your selection. The name of the next function setting appears in the display. 7 Press the Select Function key to complete the setting. KONICA FAX 9760... -
Page 161: Dial Parameter Settings List
Dial Parameter Settings Dial Parameter Settings 2 REDIAL INTERVAL This function controls how long your fax machine waits between each automatic redial attempt. These functions allow you to control the way your fax Available settings are from 1 to 6 minutes. machine dials telephone numbers. - Page 162 Refer to the “Setting Basic Features, Connecting to a Available settings are ON and OFF. PBX” section of this user's manual for instructions on Default: OFF. changing this setting. Available settings are ON and OFF. Default: OFF. KONICA FAX 9760...
-
Page 163: Changing Your Dial Parameter Settings
Changing Your Dial Parameter Settings 1 Press the Select Function key. 2 Press the 9/User Program One Touch key. 3 On the numeric keypad, press 2. The display shows 2:DIAL PARAMETER. 4 Press the Yes § key until the display shows the dial parameter you want to change. -
Page 164: Service Function Settings List
To change any of these This function specifies how the time and date are printed settings, contact your Authorized Konica Dealer. on the fax messages you transmit. Available settings are: do not print date and time, print date and time at the top of... -
Page 165: Glossary
Glossary Automatic reduction. This glossary contains terms and words you may encounter Many fax machines will automatically when discussing or reading about fax machines and fax reduce documents being transmitted to accommodate the communications. Please use these definitions for reference effective printing width of the receiving unit. - Page 166 Great for reducing costs by making fax calls during times, CCD, CIS. Charged coupled device. The scanning mechanism such as late at night or on weekends, when telephone costs used in some fax machines. The CCD “reads” fluorescent are lowest. light bouncing off a document. KONICA FAX 9760...
- Page 167 Digital. Fallback. Using the binary system—i. e., either 0 or 1—to Group 3 fax machines operate at the highest describe everything, so that 0 means off and 1 means on. transmission speed possible on a given telephone line. Your Digital fax machines convert the graphic image of your fax machine features automatic fallback;...
- Page 168 Document is scanned once, then transmitted to multiple locations using a combined list (group) of programmed numbers. Different from relay broadcasting where one fax is sent to a remote machine and then the remote machine relays the fax to a group of fax numbers. KONICA FAX 9760...
- Page 169 ITU-T Test Document 1. Mailbox. Also called the Slerexe (“Slehr- A password protected (secure) area of memory setup rehks”) letter; sometimes erroneously called ITU-T Test Chart by a user for sending and receiving confidential faxes. Also 1. An ITU-T standard document with a known black density referred to as confidential mailbox and personal mailbox.
- Page 170 (in the latter case, only calling machines whose users enter the proper passcode will be able to poll the document.) KONICA FAX 9760...
- Page 171 PBX (or PABX). Private Line. Private branch exchange; privately-owned Also known as a leased line. A service offered telephone equipment serving a particular building, business by many telephone systems; provides an exclusive phone or area. Many PBX systems use digital transmission lines circuit between two geographic points.
- Page 172 Resolution. The resolution of documents transmitted or code. copied by fax machines is measured by the number of horizontal (H) and vertical (V) lines per inch (lpi) the unit can print. KONICA FAX 9760...
- Page 173 Secure Polling. TCR. Polling in which preset passcodes are Transmit confirmation report; this provides proof that checked between two machines before polling is allowed to your fax machine did send the document you set for take place. transmission. Printed after transmission, the TCR also identifies the telephone number to which the fax sent the Speed-dialing.
- Page 174 (clean, noisy, etc.) Any change in any one of these five conditions will affect the speed, perhaps significantly. White-line Skip. A technique used to speed up fax transmission by bypassing redundant areas, such as white space. KONICA FAX 9760...
-
Page 175: Index
Index Symbols 1'st paper size setting, 47 Broadcast confirmation report, 112–113 2'nd paper size setting, 48 Broadcast entry report, 113 Broadcast feeder key, 37 Broadcasting, 85–86 Activity report, 111–112 performing a broadcast operation, 85–86 Add to a group, 88 Bulletin polling, 104 Alarm indicator, 36 Busy tone detect, 51 Answering machine, use with, 56... - Page 176 66 power, 24–25 search key, 66 telephone line, 22 Distinctive ring, 57 Control panel, 32–36, 42–43 setting, 57 Copy Distinctive ring setting, 46 number of copies, 81 Document guides, 30 resolution, 81 Document jams, clearing, 123 KONICA FAX 9760...
- Page 177 Document size, 62 Faxing, auto dial, 79–80 Document stacker, 15, 30 FCC telephone consumer protection act, 25 Document table, 29 Features, 10, 11 Documents Firmware, 147 loading, 63–65 First paper size, 60 multiple page, 63 Function settings preparing for faxing, 62–64 changing, 50–51 Drum counter, resetting, 136 Function settings, 155–160...
- Page 178 Memory messages cancelling, 70 Memory reception mode, 56, 69 Keypad, 30, 35 Memory/Feeder setting, 49 Konica Business Technologies, Inc. customer support, 153– Message confirmation report, 116–118 Message print from memory key, 39 Messages, error, 137–147 Labels, one touch, 34 MFP option, 12...
- Page 179 PC mode, 56 PC/fax switch, 59 Off hook alarm tone, 39 PC/FAX switch setting, 50 One touch Personal mailboxes, 98–99, 103 keypad, 29, 34, 37–39 Phone directory, 118 keys, programming, 37 Plus key, 36 labels, 34 Polling, 104–107 parameters, setting, 50 bulletin, 104 One touch keys cancelling, 105...
- Page 180 Result codes, 122 Redial tries, 51 Results confirmation, 66 Redialing, 66 Ring, incoming, 57 Relay Ring response, 57 broadcast, initiating, 92–93 Ring response setting, 46 broadcast report, 91 initiating station, 91 key station, 91 Relay faxing, 90–93 KONICA FAX 9760...
- Page 181 Safety, 150–152 Telephone/fax auto switch mode, 55 Safety information, 13 Telephone/fax timer program, 45 Search, 88 Time, entering, 26 Search key, 33 Time/Date print setting, 53 Search key dialing, 66 Tone key, 35 Second paper size, 60 Tone/Pulse selection, 51 Security, 148–149 Toner cartridge, 31 Select function key, 33...
- Page 182 User function settings, 43, 44, 155–160 changing, 50–51 User language changing, 54 User language setting, 48 User program key, 38 Voice request, 72 answering, 72 initiating, 72 Voice request key, 34 Voice request tone, 39 Year 2000, 10 Yes key, 35 KONICA FAX 9760...
Need help?
Do you have a question about the 9760 and is the answer not in the manual?
Questions and answers