Table of Contents
Advertisement
Quick Links
Advertisement
Table of Contents

Related Manuals for Konica Minolta 9880


Summary of Contents for Konica Minolta 9880
- Page 2 500 Day Hill Road Business Technologies, Inc. assumes no responsibility for Windsor, CT 06095 the results of errors or omissions beyond its control. Konica also cannot guarantee that changes in software and equipment made by other manufacturers and referred to in...
-
Page 3: Table Of Contents
Where to Install Your Fax Machine ........42 Unpacking ................. 43 Introduction ............20 Setting Up Your Fax Machine ..........44 Konica Business Technologies’ Web Site ......20 Installing the Toner Cartridge ........... 46 Features ................21 Attaching the Document Stacker ........48 Getting to Know Your Machine ...... - Page 4 Telephone Answering Device Mode [TAD] ....66 Paper-Size Setting ............... 75 Memory Reception Mode [MEM] ......... 66 Relay Print ................75 Forwarding Mode [FWD] ..........67 Backup File TX ..............76 PC Fax Mode [PC] ............67 KONICA FAX 9880/9980...
- Page 5 Connecting to a PBX ............77 Sending a Fax ................ 95 Entering a PBX Dial Prefix ........... 78 Using a One-Touch Speed Dial Key ......... 96 Clearing the PBX Dial Prefix ..........78 Using 2- or 3-digit Speed Dial .......... 96 Using the Search Function ..........
- Page 6 Finding a Group ............121 Changing a Password ........... 140 Finding a Group Name ............ 122 Closing a Mailbox ............141 Group Directory Report ..........122 Sending Confidential Faxes ........... 142 Using Speed Dial/Search ..........123 Receiving Confidential Faxes ........143 KONICA FAX 9880/9980...
- Page 7 Knowing You’ve Received a Confidential Fax ....144 Relay Entry Report ............159 Confidential Reception Report ........144 Status of Relay Broadcast Report ........160 Printing Confidential Faxes ..........144 Printing the Relay Fax at the Hub ........161 Deleting Confidential Faxes ..........145 Sending Documents Requested by Another Fax Machine Call Forwarding ..............
- Page 8 MCF (Single-Loc) ............198 List of Reports ..............186 MCF (Multi-Loc) ............198 Printed from the Menu ............ 186 Image in MCF ..............198 Automatically Generated ..........186 Err. Report (MCF) ............198 Power Outage Report ............199 KONICA FAX 9880/9980...
- Page 9 Broadcast Entry Report ............199 Display Panel Messages ............. 219 Confidential Reception Report ..........199 Normal Display in Standby Mode ........219 Codes Used in Reports ............200 Error Messages ..............219 Result Codes ..............200 Counters ................222 Communication Codes ............201 Accessing the Print/Scan Counters .......
- Page 10 You want to answer an external telephone but your Physical Dimensions ............238 machine always answers first........231 Electrical ................239 Problem 18: Environmental ..............239 Your received faxes sometimes look distorted..... 232 Index ..............240 KONICA FAX 9880/9980...
-
Page 11: Help And Helpful Hints
Help and Helpful Hints Your fax machine has many features and capabilities that will The Help button provides valuable information to help you help you operate the machine. This section summarizes the features and capabilities directly operate the machine connected to saving money and time. save money Details for these features and capabilities are provided in save time... -
Page 12: Help Key
The Function List is a printout of the menu structure. The menu is set up in a multilevel structure of functions, options, and settings. For more information, refer to “Selecting Functions and Settings.” KONICA FAX 9880/9980... -
Page 13: Help List
Help List Function List The Help List covers the items listed below. The Function List is a report of the product’s menu programming structure. Program Speed Dial Numbers Use it as a reference while moving through the levels of the Program Groups menu. -
Page 14: Saving Money
This feature allows you to send documents at a specified time For more information, refer to “Advanced Operations, Relay and date. Faxing.” You do not have to manually start the transmission. For more information, refer to “Advanced Operations, Delayed Fax Transmissions.” KONICA FAX 9880/9980... -
Page 15: Control Access To Your Machine
Operations, Changing Operation Functions, Department Code.” Be sure to record all passwords (Department Codes) . Keep the record in a safe place. If you forget a password, you will need to contact an Authorized Konica Service Representative for assistance. User’s Reference Guide... -
Page 16: Saving Time
Konica’s website, www.konicabt.com, provides the most This greatly reduces the number of keystrokes and time current information available for the Konica FAX 9880/9980. required when using these numbers. You can find information at your convenience, at any time. -
Page 17: Helpful Hints
1 through xx Place the document on the feeder. Press Speed Dial/Search. where xx = The machine goes to the next available (not yet 40 (Model 9880) programmed) Speed Dial number. LOC # displays. Press Enter. 80 (Model 9980) -
Page 18: Recording Addresses And Passwords
Keep the record in a safe place. If you forget ENTER twice. a password, you will need to contact an Authorized Konica Service Representative for assistance. Some of the features that use addresses and passwords are: Confidential Faxes See “Advanced Operations, Confidential Faxes.”... -
Page 19: References
References There are four very useful reference documents that you Telephone Directory should print and keep near your fax. This report provides a complete listing of all of the These documents are very helpful when programming your telephone numbers programmed into your machine’s machine. -
Page 20: Introduction
Web Site emitting diode (LED) technology for quick and trouble-free transmission/reception of data and images. In addition to the The Konica Web Site provides the most current information many standard features, options can expand the machine’s available on your product. -
Page 21: Features
There are two types of speed dial numbers: Pressing this button causes the unit to print a Help List one-touch and 2- or 3-digit entry faxing and the Function List. Konica FAX 9880 Control panel 40 one-touch Special programming keys, a 40-key plate for pre- 100 numbers for 2- or 3-digit entry faxing. -
Page 22: Problem
Fast, efficient communications. communications process. Large-capacity memory Advanced memory transmission/reception features Konica FAX 9880 A number of convenient features including automatic 2.5 MB reception into memory without printing—ideal for reception of confidential communications. - Page 23 Closed network Polling Prevents the reception of unsolicited communications. Allows the transmission/reception of documents from remote facsimile machines with polling capabilities. Large Paper Capacity Copier function 250 sheet paper cassette (universal size: legal, letter, A4). A 500 sheet optional second paper tray is available. Make up to 99 copies of a document at one time.
-
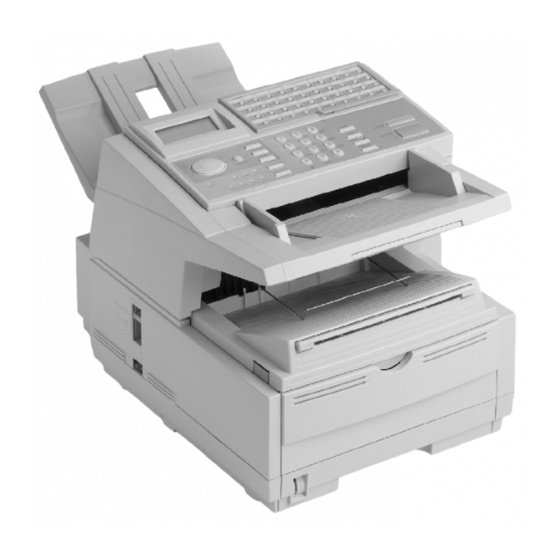
Page 24: Getting To Know Your Machine
Displays status of machine and operation in progress. One-Touch Keypad Use for one-touch dialing of preprogrammed telephone numbers and for entering alphabetic, numeric and special characters for programming and ID entries. Numeric Keypad Use to enter telephone numbers, program information, and manual dialing. Fig_01.eps KONICA FAX 9880/9980... - Page 25 Manual Paper Feeder Tray Fold out for manual paper feed (bypass paper tray). Use this to feed different types of paper directly into the machine. Copy Stacker Release Buttons Press these two buttons (one on each side), to gain entry to the toner/image drum area.
- Page 26 Up position: copies exit the machine face down. Down position: copies exit the machine face up. Use this lever when copying or when using the optional printing capability. Features vary according to the model of your machine. Fig_01.eps KONICA FAX 9880/9980...
- Page 27 17 AC Power Cord Socket Plug the AC power cord (supplied with the unit) into this socket. 18 Line Jack Jack for connection to main outside telephone line. 19 Back Cover Remove this cover to expose the expansion (installation) slots for certain options. Options vary according to the the model of your machine.
- Page 28 LED print head and transfers it to the printing paper. Install a new image drum unit* when Replace Drum appears on the display panel. * Only install image drum units specified by Konica for use in this machine! See “Maintenance.” 25 Toner Cartridge This black cylinder, installed inside the image drum unit, contains the black powder used as the machine’s ink for...
-
Page 29: Control Panel Keys And Indicators
Control Panel Keys and Indicators Fig1_08.eps... - Page 30 Move to the next option in the same operational layer when programming the machine. Move to the lower row from the upper row when data is listed in two rows. KONICA FAX 9880/9980...
- Page 31 Help Key 13 */Tone Key Press this key to print out Help and Function lists. If the machine is set for pulse dialing, pressing this key will switch from pulse to tone dialing during the current Resolution Key (Photo, Ex.fine, Fine, STD indicator call.
- Page 32 After pressing the key, you can hear the dial tone and dialing code through the machine’s speaker. Start transmission of a document after loading the document and selecting the location. Start manual fax transmission or reception. Start the copying function. KONICA FAX 9880/9980...
- Page 33 (Model 9980) cover. The One-Touch Keypad of the KONICA 9980 has two You may need replacement (blank) labels. panels, one above the other. See “Options and Accessories, Obtaining.”...
-
Page 34: One-Touch Keypad
Two telephone numbers can be programmed for each One-Touch key, a primary number that is always dialed first, and an alternate number that is automatically dialed if the first number is busy or the call is not answered. KONICA FAX 9880/9980... - Page 35 Alphabet Keys (One-Touch keys #1-27, except #20) Caps Key (One-Touch key #31) When programming the Sender ID and Location ID, use these Use this key to switch between uppercase and lowercase keys to enter alphabet characters. when entering alphanumeric characters. Unique Key (One-Touch key #20) Space Key (One-Touch key #36) Use the same as the “0”...
- Page 36 If the Internet Fax feature set is installed: Use this key to enter the “-” character when programming ID and PBX, public line, international telephone, or Earthing/Flashing switches. This key is also used to enter the “+” character in TSI/CSI numbers. KONICA FAX 9880/9980...
-
Page 37: One-Touch Keys, Second Panel
KONICA 9980. numbers 1 through xx where xx = Accessing 40 (Model 9880) or To access the second panel of One-Touch keys (41-80), grasp the latch at the bottom of the keypad and lift up on the main 80 (Model 9980). -
Page 38: Signal Tones
To stop the beeping (turn the error tone off), press the Stop the Stop key. key. Then, print a Message Confirmation Report to check the source of the problem. To print the report, press the Enter key twice (with no documents loaded). KONICA FAX 9880/9980... -
Page 39: Installation
Installation To install your fax machine, follow the steps in this section. Setting Up Your Fax Machine Installing the Toner Cartridge Safety Attaching the Document Stacker Installation Hints Connecting to the Telephone Line Operation and Maintenance Connecting Optional External Devices Toner Cartridge and Image Drum Handling Handset Emergency First Aid... -
Page 40: Safety
Your fax machine is intended to be grounded electrically and is equipped with a three-wire grounded power cord. For your safety, do not attempt to defeat your power cord’s grounding plug. KONICA 9880/9980... -
Page 41: Operation And Maintenance
Operation and Maintenance Toner Cartridge and Image Drum Handling Use a dry cloth to clean the control panel and the main Leave unused toner cartridges and image drums in their body of the unit. packages until needed. When replacing a toner cartridge or image drum, re-use the packaging to dispose of the Aside from the instructions specifically mentioned in old toner cartridge or image drum. -
Page 42: Emergency First Aid
Flush eyes with large quantities of cool water for 15 Choose a location where the relative humidity is minutes, keeping eyelids open with fingers. Seek between 20% and 80%, and where the temperature is medical attention. between 50° F (10° C) and 92° F (32° C). KONICA 9880/9980... -
Page 43: Unpacking
Unpacking Remove contents from the carton. Be sure that all the items listed below are included. If any items are missing, contact Konica immediately. Keep your packing materials and carton in case you need to ship or transport the unit. -
Page 44: Setting Up Your Fax Machine
Setting Up Your Fax Machine Press the release buttons (1) located on both sides of the Lift up on the document tray and swing it up and out of copy stacker. Lift up the stacker. the way. Fig4_02.eps Fig4_02.eps KONICA 9880/9980... - Page 45 Move aside the protective sheet and grasp the image Put the image drum cartridge back into place. drum cartridge, then lift it out. Press down at each end of the image drum cartridge to make sure it is installed correctly. Caution: Do not touch the green drum surface! Fig4_04a.eps Fig4_04.eps...
-
Page 46: Installing The Toner Cartridge
Safety guides at the beginning of this section. Important: This machine will only operate using toner cartridges specified by Konica for this facsimile machine. The use of any other toner will result in the Lower the right side down into the toner well. - Page 47 Push the lock lever in the direction of the arrow until it Close the copy stacker and document tray. Make sure the stops. cover is firmly closed. Fig4_11.eps Fig_01.eps User’s Reference Guide...
-
Page 48: Attaching The Document Stacker
Attach the document exit stacker on the back of the machine Insert one end of the telephone cord into the LINE jack using the latching mechanism provided. in the back of the machine. 5759_7.eps 5759_45.tif Insert the other end into your wall telephone jack. KONICA 9880/9980... -
Page 49: Connecting Optional External Devices
Connecting Optional External Devices Handset Telephone If you purchased an external handset to use with your fax Important: Any external telephone or answering machine, follow these instructions to install it. machine connected to your fax machine must be FCC Plug in one end of the handset cord into the handset and (US) or CSA (Canada) approved. -
Page 50: Answering Machine
Plug the other end into a grounded AC power outlet. You must have the TAD mode feature turned on for an Turn on the power switch. answering machine to work with your fax machine. See “Setting Basic Features, Setting the Answering Mode.” KONICA 9880/9980... -
Page 51: Loading Paper
Loading Paper Your fax machine can hold up to 250 sheets of standard- If you are receiving a document created on legal-size weight (20 lb. [75 g/m ]) paper in letter, legal, and A4 sizes. paper, the document will be reduced to fit on letter size For best results, use paper specially made for laser printers or paper. - Page 52 (c) at the back of the tray. 5959_53.eps Remove the paper from its wrapper. Note the “print side” notice printed on the label. Fan the paper. Load the paper into the paper tray, print side down. KONICA 9880/9980...
-
Page 53: Selecting Functions And Settings
Selecting Functions and Settings The display (a) and navigating keys (b) on the control panel simplify setting your machine’s functions. Press Menu/Exit (c) to access the menu. The machine functions are organized in a menu structure. Functions are shown in the display as you navigate through the menu, using the navigation keys. -
Page 54: Navigating The Function Menu
TX and Polling RX. Each of these options includes a number Confidential TX of possible settings. Relay Initiate TX cake.eps Polling TX/RX Menu Structure Print From Memory Function Report Print Location Program Options Setup Counter Settings Printer Cleaning KONICA FAX 9880/9980... -
Page 55: Using The Help Key
Using the Help Key Setting Features To see how the menu is organized, press HELP (1). There are two ways to navigate through the functions. Your machine prints Help and Function Lists, which provide Step Access instructions for accessing menu items. These are helpful The step access method moves through the function when you are setting your machine’s features. -
Page 56: Using Step Access
Press SHIFT LEFT to move to the previous function or to move the cursor to the left. Press SHIFT RIGHT to move the cursor to the right. Press ENTER to set an option. Press CLEAR to clear entered data. KONICA FAX 9880/9980... -
Page 57: Using Speed Access
Using Speed Access Example If a function has a speed access number, type in the number at the menu display prompt to access the function. Here is an example of using speed access. Speed access numbers must be entered in two-digit format To access the Redial Tries function, you only need to press (for example, 00 or 99). -
Page 58: Speed Access Numbers
Machine Settings ID/Password Programming Dial Options 01 TSI/CSI Incoming Options 03 Sender ID Report Options 04 Personal Box LAN Options 05 Memory Password The speed access numbers and their assigned functions are listed in the following sections. KONICA FAX 9880/9980... - Page 59 Machine Settings 21 Closed Network 10 Auto Answer Mode 11 Monitor Volume 22 Toner Save 12 Buzzer Volume 23 Sender ID 24 Width Reduction 13 User Language 25 1st Paper Size 14 Remote Diagnosis 15 TX Mode Default 26 2nd Paper Size 16 No Toner Memory Receive This is active only when the second paper tray is installed.
- Page 60 50 PBX Line 71 MCF (Multiple Loc.) 51 Flash/Earth/Normal * 72 Image in MCF 52 Dial Prefix 73 Error Report (MCF) Settings for 46, 47, 48, 49, and 51 should only be changed by your Authorized Service Representative. KONICA FAX 9880/9980...
- Page 61 LAN Options (for Internet Fax) 80 Auto Tray SW 81 Paper Size Check 82 LAN Print T.O. 83 POP Interval 84 DELET POP MSG. 85 Time Between GMT 86 Text Print 87 Header Print 88 Coding Mode 89 EX.FINE MODE 90 Sender ID (E-Mail) 91 DOMAIN Name 92 Return Receipt...
-
Page 62: Setting Basic Features
Press Menu/Exit to return to standby mode. Enter the current date (xx/xx/xxxx) and time (hh:mm) using the numeric keys (0-9). Press Enter. If invalid data is entered, the Enter key will not operate. Press Menu/Exit to return to standby mode. KONICA FAX 9880/9980... -
Page 63: Setting Your Fax Machine's Id
Setting Your Fax Machine’s ID Setting the TSI/CSI Fax machines must identify the sender (Sender ID) and the sender’s telephone number (TSI/CSI) on each page of every Press Menu/Exit to enter the menu. fax sent. Input speed access number 01. Important: Programming this information into your fax Input up to 20 numbers and characters (0-9/Hyphen/ machine is required by law in the United States. -
Page 64: Setting The Answering Mode
Set the answering mode based on how you want your Memory Reception Mode [MEM] machine to answer calls and what telephone equipment is connected to it. Forwarding Mode [FWD] Choose the mode that best fits your needs. PC Fax Mode [PC] 5759_62.tif KONICA FAX 9880/9980... -
Page 65: Auto Receive Mode [Fax]
Auto Receive Mode [FAX] Telephone/Fax Mode [T/F] Your machine is connected to a telephone line reserved only Incoming calls are a mix of fax and telephone calls. for fax communication. To use this feature, you must have an external, optional This is the factory setting. -
Page 66: Telephone Answering Device Mode [Tad]
This number activates fax reception. Add something like this to your answering machine message: “To send a fax now, press XX [the programmed number].” See “Setting Basic Features, Dial and Incoming Call Parameter Settings, Incoming Call Parameters.” KONICA FAX 9880/9980... -
Page 67: Forwarding Mode [Fwd]
Forwarding Mode [FWD] PC Fax Mode [PC] All fax communications are received into memory, then This mode is available only if an optional MFP Kit is forwarded to another telephone number. installed. When set to this mode, the machine receives all fax communications into memory, and then automatically sends Incoming faxes are stored on you computer’s hard disk the messages to the telephone number programmed into the... -
Page 68: Dial And Incoming Call Parameter Settings
Press Menu/Exit to return to standby mode. Speed access no. 41. The function controls how long your machine waits between each automatic redial attempt. Available settings are from 1 to 6 minutes. The default setting is 3 minutes between dialing attempts. KONICA FAX 9880/9980... -
Page 69: Auto Start
Auto Start Busy Tone Detect Speed Access no. 42. Speed access no. 44 With this function set to ON, the machine automatically This function allows your machine to detect a busy tone when begins dialing as soon as a location is selected by pressing a sending a fax. -
Page 70: Tone (Mf) Duration
PBX to get an Tone duration varies by country. outside line. Available settings are 75, 85, and 100 ms. Available settings are on and OFF. 100 ms is the default setting. OFF is the default setting. KONICA FAX 9880/9980... -
Page 71: Flash/Earth/Normal
FLASH/EARTH/NORMAL DIAL PREFIX Speed access no. 52 This setting can only be changed by an Authorized To change this setting, see “Setting Basic Features, Service Technician. Connecting to a PBX.” If your machine is connected to a PBX, use this function to Speed access no. -
Page 72: Incoming Call Parameters
If the function is set to to DRC, the machine emits a ringing sound for every incoming call, no matter what type of call it is (voice or fax). Available settings are ON, OFF and DRC. ON is the default setting. KONICA FAX 9880/9980... -
Page 73: Continuous Tone
Continuous Tone PC/FAX Switch Speed Access no. 63 Speed Access no. 64 When this function is set to ON, a completion tone is emitted When set to ON, the machine automatically switches to FAX at the end of receiving a fax. Pressing the Stop key turns off when fax reception by a connected personal computer is not the tone. -
Page 74: Other Basic Parameters
LETTER size cradle after use. document. Available settings are Low, Middle and High. Available settings are ON and OFF. Middle is the default setting. OFF is the default setting. KONICA FAX 9880/9980... -
Page 75: Paper-Size Setting
Relay Print The machine can support two different paper settings (when This function is ONLY available for the the 2nd-Tray option is installed). Konica FAX 9980. 1ST Paper Size Speed Access no. 25 Speed Access no. 28 Sets the size of the paper loaded in the standard (built-in) During a Relay Fax transmission, your machine can paper tray. -
Page 76: Backup File Tx
This is One Touch 40. The backup recipient is the fax machine to which copies of your correspondence are sent. Refer to “Advanced Operation, Backup File TX.” Available settings are ON and OFF. OFF is the default setting. KONICA FAX 9880/9980... -
Page 77: Connecting To A Pbx
Connecting to a PBX Private Branch Exchanges (PBXs) are private telephone Service assistance may be required to make changes in systems used to route calls internally (for example, in a some countries. company). When dialing a telephone number, if a prefix Some PBX systems may require additional adjustments (access) number is required to open an outside line, the line is to the machine. -
Page 78: Entering A Pbx Dial Prefix
* Dial Prefix can also be accessed from the main menu by entering its speed access code 52. Remember that all outside telephone numbers programmed into the machine must begin with the dial prefix of the PBX. KONICA FAX 9880/9980... -
Page 79: Programming Speed Dial Numbers
The total number of spaces available for programming varies 3-Digit Speed Dial by model. Group Dial 140 spaces (Model 9880) Each fax number that you enter or program into your 230 spaces (Model 9980) machine can be up to 40 digits long. If you need to dial a number with more digits, use the chain dial feature. -
Page 80: One-Touch Speed Dials
The total number of stored telephone numbers varies by model. 40 (Model 9880) 80 (Model 9980, using the second hidden panel) KONICA FAX 9880/9980... - Page 81 You can program e-mail addresses into One-Touch keys 1 to xx. The total number of one-touch keys varies by model. where xx = 40 (Model 9880) 50 (Model9880) 80 (Model 9980, using the second hidden panel) Each one-touch key may be programmed with:...
-
Page 82: 2- Or 3-Digit Speed Dials
3-Digit Speed Dial Numbers Group Faxing The spaces for 3-Digit Speed Dials vary by model. 100 to 140 (Model 9880) Speed dial numbers can be collected into a group. You can 100 to 230 (Model 9980). quickly and easily use a group to send one fax to several They are called three-digit because you access them by locations during one transmission session. -
Page 83: Programming Instructions
Programming Instructions Collect Information To program your speed dial numbers, follow these instructions. Gather the following information for each Speed Dial number Programming speed dial numbers has two steps. you want to store: collecting the information Name programming the information Primary Telephone Number (LOC#) Alternate Telephone Number (ALT#) Communications Speed... - Page 84 The default setting is OFF. If you are experiencing problems communicating with a remote location in a very noisy telephone area, or with an overseas location, set Echo Protection to ON for the one- touch key assigned to that location. KONICA FAX 9880/9980...
-
Page 85: Program The Information
Program the Information To enter the information for each speed dial number, use one Numeric Keypad of the following input methods. 0-9/*/# Other Keys Use these keys to enter numbers. Numeric Keypad Unique Key One-Touch Keypad Use this key to enter a variety of unique characters. Symbols: ! # &... -
Page 86: One-Touch Keypad
ID, telephone Internet characters: @ “ _% numbers or programming functions. functions as a tilde (~) symbol. 5759_66.tif Umlaut characters: Ä ß Ñ Ö Ü Norwegian characters: Æ Å Ø æ å ø KONICA FAX 9880/9980... - Page 87 See next page. User’s Guide: English...
-
Page 88: Programming A Speed Dial
01 through xx One-Touch Speed Dial Numbers are spaces 01 to xx where xx = where xx = 40 (Model 9880) 40 (Model 9880) 80 (Model 9980) 80 (Model 9980) 2-Digit Speed Dial Numbers are the remaining spaces up For higher Speed Dial numbers, program the number(s) to 99. - Page 89 Input the telephone number (LOC #). programming. This provides a reference of the speed dial numbers already programmed. Press Enter. Input a name if desired (up to 15 characters). Press Enter. See “Reports, Telephone Directory.” Input alternate telephone number (ALT#) [if desired]. Be sure to write the name for any Speed Dial numbers Press Enter.
-
Page 90: Clearing A Speed Dial
Press Menu/Exit to return the machine to standby mode. To program new information, refer to “Programming Speed Dial Numbers.” To use DEL, refer to “Programming Speed Dial Numbers.” When the existing number is displayed, use DEL key to erase the information. KONICA FAX 9880/9980... -
Page 91: Basic Faxing
Basic Faxing Document Guidelines Your machine can transmit documents with normal wear General (staple holes, letter folds and minor corner folds). Try to use good quality documents for your fax If you are not sure how a document will fax, first make a transmission. -
Page 92: Single Page Specifications
Maximum 28 pounds (105 g/m²) Minimum 0.002 inches (0.06 millimeters) Paper Thickness Maximum 0.006 inches (0.15 millimeters) Minimum 0.003 inches (0.08 millimeters) Maximum 0.005 inches (0.13 millimeters) Capacity 50 sheets of standard paper, 20 pound (80 g/m²) KONICA FAX 9880/9980... -
Page 93: Loading Documents
Loading Documents Adjust the document guides (1) to the width of the paper To prevent paper jams and problems during operation: you are using. Stack your documents neatly Fig_01.eps Align document edges before loading Don’t load different size documents at the same time You can load and prepare to transmit a document while your machine is still sending or receiving another message (as long as the document feeder is clear). -
Page 94: Contrast
For normal office documents, use STD (standard) resolution (default). For documents with small type or other fine details, use FINE or EX.FINE resolution. For documents with photos or many shades of gray, use PHOTO resolution. The default resolution is standard (STD). KONICA FAX 9880/9980... -
Page 95: Sending A Fax
Sending a Fax Procedure You may send a fax to a single location or to multiple Load your documents. locations. Select the entry method, referring to the instructions in This section describes faxing to a single location. the following sections. There are two ways to send one fax to multiple locations Entry methods are: using one fax session: group fax or broadcast fax. -
Page 96: Using A One-Touch Speed Dial Key
Using 2- or 3-digit Speed Dial Press the One-Touch key you have programmed. Press the Speed Dial/Search key. Fig1_08a.eps Enter the Speed Dial number (2 or 3-digit) using the numeric keypad. Press the Enter Key. Wait. The document will begin faxing. 5759_74.tif KONICA FAX 9880/9980... -
Page 97: Using The Search Function
Using the Search Function Using the Numeric Keypad Press the Speed Dial/Search key. The display will show Dial as you would on a normal telephone. ENTER 1ST CHAR. If you make a mistake, press the SPACE key to back up Using the One-Touch key, enter the first letter of the name one space. -
Page 98: Rejecting Unsolicited Fax Messages
No limitations (OFF). This is the default setting. If Closed Network is set to TX/RX or RX, your machine will ONLY accept faxes from numbers programmed as Speed Dial Numbers. Any numbers NOT programmed as Speed Dials will be rejected by the fax machine. KONICA FAX 9880/9980... -
Page 99: Power Failures
Power Failures Power Outage Report A battery in your fax machine prevents the loss of data stored in memory at the time of a power outage. Use this report to determine which received messages you Typical memory-backup time with a fully charged battery is may have lost, and which transmissions you may have to 72 hours. -
Page 100: Display Messages
If you see this or another error message, a problem occurred during the communication. Try resending the fax. For more The machine dialled a number (remote location), made information, see “Problem Solving.” contact, and that number is ringing. KONICA FAX 9880/9980... -
Page 101: Basic Faxing Situations
Basic Faxing Situations Confirming Results Real-Time Dialing After transmission, press the Enter key once (with no Occasionally you may want to dial numbers in real time, one documents loaded). A message displays on the control digit at a time. Press the Hook key on your control panel to panel, confirming your transmission. -
Page 102: Stopping A Transmission
Start key. When the RECEIVING message appears on the display, hang up the handset. The machine will emit a tone following disconnection, telling you that the transmission was successful. KONICA FAX 9880/9980... -
Page 103: No Paper Reception
No Paper Reception No Toner Reception When your machine runs out of paper: When your machine is running low on toner it displays TONER LOW, REPLACE TONER CART. A NO PAPER, REPLACE PAPER message appears on the display. If user function 16:NO TONER MEM.RX is set to OFF (default setting), and the print quality is still legible, you The machine continues to receive faxes in memory. -
Page 104: Receiving Faxes To Memory
See “Setting Basic Features, Setting the Answering Mode, Memory Reception Mode.” memory You may want to set your machine for memory reception if the machine runs out of paper you receive faxes containing confidential information. the machine runs out of toner KONICA FAX 9880/9980... -
Page 105: When Are Memory Messages Printed
When Are Memory Messages Printed? Memory Message Limitations When messages are received into memory, they will print The amount of memory installed in your machine determines when how many messages may be stored. You always know how much memory is available to you. paper is replaced, if the machine ran out of paper The amount of available memory is shown on the display you request them, if the machine is set to receive... -
Page 106: Active Memory Files Report
Print all the reports you want, then press Menu/Exit to The name or telephone number of the machine you were return to standby mode. communicating with. The communication mode used for each transmission or reception. The number of pages. KONICA FAX 9880/9980... -
Page 107: Printing Messages Stored In Memory
Printing Messages Stored in Memory Canceling Messages Stored in Memory Press Menu/Exit to enter Menu. Erasing Messages Received in Memory Without to select Print from Memory. Press Printing Them Press Enter. Press Menu/Exit to enter Menu. Press Ä to select Print Memory Msg. Press Ä... -
Page 108: Messages In Memory And Power Losses
If data is in memory when power is restored, the machine continues operations from the point when power was lost. If the data in memory is lost when power is restored, the Power Outage Report prints. KONICA FAX 9880/9980... -
Page 109: Dual Access
Dual Access What You Can Do While Making Copies Your fax machine’s dual access feature allows you to load and prepare to transmit a document while it is receiving or sending While your fax machine is making copies, you can: another fax from memory. -
Page 110: What You Can Do While Sending A Fax
Entering the number before loading the document allows you to see the number when keying. Once the number is entered, place the document (face down) on the feeder. KONICA FAX 9880/9980... -
Page 111: What You Can Do While Receiving A Fax
What You Can Do While Receiving a Fax For situations 1 and 3, TX Prep Activated displays for While your machine is receiving a fax, you can: 2-3 seconds. Do not attempt to load documents during Load another document and prepare it for transmission. this short time! You can continue to load documents as long as memory is available in your machine. -
Page 112: Making Copies
Press Copy. The display shows Number of Copies. If only one copy is required, wait. The machine begins copying. To make multiple copies, enter the number of copies you want. Use the numeric keypad. Press Copy again. The machine begins making copies. KONICA FAX 9880/9980... -
Page 113: Manual Paper Feeder
Manual Paper Feeder Use the manual paper feeder to make a copy on paper different Insert a sheet of paper (face up) on the tray and push into from the paper loaded in the paper tray. the slot until the machine grabs hold of the paper. Load the document in the document tray. -
Page 114: Face Up Stacking/Face Down Stacking
(Face Down) In the top position (1), copies exit the machine face down. In the bottom position (2), copies exit face up. You can use the “face up” position only when copying using PC Print (MFP option) KONICA FAX 9880/9980... -
Page 115: Sending A Fax To Multiple Locations
Sending a Fax to Multiple Locations Group vs. Broadcast There are two ways to send one fax to multiple locations Individual destination numbers included as part of using one fax session. either method may be saved (programmed) into your fax Group machine as One-Touch or 2- or 3–digit Speed Dial numbers. - Page 116 One-Touch or 2- or 3–digit Speed Dial machine as One-Touch or 2- or 3–digit Speed Dial numbers. The Broadcast (a collection of individual numbers. The Group (a collection of individual destination numbers) cannot be saved. destination numbers) can be saved. KONICA FAX 9880/9980...
-
Page 117: Group Faxing
If you often send a fax to many fixed locations, setting up where xxx = these locations as a group will save time. 140 (Model 9880) A group fax is a fax sent to several locations. 230 (Model 9980) A group fax is meant to be repeated. -
Page 118: Programming A Group
Enter locations by pressing either a One-Touch key or Directories.” the Speed Dial number. Press Enter. Continue until all locations are entered. Press Start. Enter a Group ID (name). Press Enter. Press Menu/Exit to return to standby mode. KONICA FAX 9880/9980... -
Page 119: Deleting Groups
Deleting Groups Press Menu/Exit to enter the Menu. Print the Group Directory Report before deleting a to select Location Program. Press Enter. Press Group. This report is a reference of group numbers already programmed. See “Reports.” The cursor will be at Speed Dial. Press to select Group. -
Page 120: Sending A Fax To A Group
For more information, refer to “Sending a Fax to Multiple 2 DELAYED TX Locations, Sending a Fax to a Group, Finding a Group.” 3 DELAYED BATCH TX Press the Start key. Press the Enter key. A list of groups will be displayed. KONICA FAX 9880/9980... -
Page 121: Finding A Group
Finding a Group Scrolling By Number Press the Speed Dial Search key. Press to scroll the group you want to send to. Press the # key, and enter xx (xx is the number for the group). If you are sending to one group, press the Enter key. Press the Enter key. -
Page 122: Finding A Group Name
Press Speed Dial/Search key twice. Then scroll through the list. If you know the name of the group, press the Speed Dial/ Search key, enter the first letter of the name of the group, and scroll through the list. KONICA FAX 9880/9980... -
Page 123: Using Speed Dial/Search
Using Speed Dial/Search Press the Speed Dial/Search key. The display will show The Speed Dial/Search key allows you to access an ENTER 1ST CHAR. alphabetical list of the Speed Dial and Group names Using the One-Touch key, enter the first letter of the name programmed into your machine. -
Page 124: Broadcasting
One-Touch, 2-digit, or 3-digit Speed repeated). Dials before you create a broadcast. Refer to “Programming Speed Dial Numbers.” The broadcast, a collection of destination numbers [where the fax is going to], IS NOT saved (programmed) into the machine. KONICA FAX 9880/9980... -
Page 125: Sending A Broadcast Fax
Sending a Broadcast Fax Load the document. Notes Enter the programmed location. Use a One-Touch key, 2- or 3– Digit Speed Dial, Group Directory, or enter a If Auto Start is set to ON (default setting) you will have number on the numeric keypad. 2 seconds between steps 2 and 3 (if using a Speed Dial and only after the first entry) to input the next location Press Enter. -
Page 126: Deleting A Location From A Broadcast Fax
To delete a location from a broadcast fax (after Step 4 of the previous section, “Sending a Broadcast Fax”), follow these steps. Press Enter. Press Press Enter. Press to move the cursor to the location name. Press Enter or Clear. Press Clear. The location is deleted from the braodcast. KONICA FAX 9880/9980... -
Page 127: Advanced Operations
Advanced Operations The advanced operations are: Call Forwarding Delayed Faxing Delayed Fax Transmission Relay Faxing Delayed Batch Transmission Polling Transmission (sending documents requested by another fax machine) Priority Transmissions Confidential Faxes User’s Reference Guide... -
Page 128: Delayed Fax Vs. Delayed Batch
(salesperson) until a time you specify. When it is the specified time, all held documents are sent to the number. The numbers programmed into One-Touch Keys 31 through 40 are used for delayed batch transmissions. KONICA FAX 9880/9980... -
Page 129: Delayed Faxing
The number of delayed transmission sessions varies according to the model of your fax machine. Your fax machine can be programmed for up to xx sessions. where xx = 20 (Model 9880) 30 (Model 9980) User’s Reference Guide... -
Page 130: Sending A Delayed Fax
= Input the desired date and time using the numeric keypad. 20 (Model 9880) Press Enter. 30 (Model 9980) Enter times following the 24-hour format. For example, 0800 is 8:00AM, 2000 is 8:00PM. -
Page 131: Canceling Delayed Transmissions
Canceling Delayed Transmissions To cancel a delayed transmission before it is sent: Press Stop. The display shows Communication Cancel. The display shows Location ID or Tel. No. of the delayed transmissions currently programmed in the machine. Press to select transmission to cancel. Press Enter. -
Page 132: Delayed Batch Transmission
Locations must be programmed into Speed Dial (One-Touch) numbers 31-40. To perform a delayed batch transmission, you must program the delayed batch destination number (One- Touch numbers 31-40). set the batch TX time function send a fax as part of a delayed batch transmission KONICA FAX 9880/9980... -
Page 133: Setting The Batch Tx Time Function
Setting the Batch TX Time Function Press Menu/Exit to enter the menu. Locations used for Delayed Batch Transmission must be programmed into Speed Dial numbers 31 through 40 to select Location Program. Press Enter. Press before the Batch TX Time may be set. to select Batch TX Time. -
Page 134: Send A Fax As Part Of A Delayed Batch
Speed Dial numbers 31 through 40. Location and transmission time set displays. Press Start. The machine scans the document(s) into memory, and waits until the programmed time to begin transmission. Repeat above steps 1-7 to prepare multiple sessions. KONICA FAX 9880/9980... -
Page 135: Canceling Delayed Batch Transmissions
Canceling Delayed Batch Transmissions To cancel a delayed transmission before it is sent: Press Stop. The display shows Cancel Communication. The display shows Location ID or Tel. No. of the delayed transmissions currently programmed in the machine. Press to select transmission to cancel. Press Enter. -
Page 136: Priority Transmission
(incoming) documents Press the Start key. The machine scans the document(s) into memory and assigns first priority for transmission. If all memory is used, the display shows Memory Overflow, Send Scanned Pages? To send scanned pages, press Enter. KONICA FAX 9880/9980... -
Page 137: Confidential Faxes
Authorized Service Representative for from [sender] and the machine being sent to [receiver]) assistance. support compatible confidential fax standards, i.e. both machines are KONICA FAX (or compatible) products both machines are equipped with a sub-address function Confidential mailbox addresses be shared On your machine, the address is the number (1 to 16) of the confidential mailbox. -
Page 138: Programming Personal (Confidential) Mailboxes
Your machine can be programmed to manage 16 personal mailboxes. When set up, each mailbox is opened as a Confidential Mailbox, Bulletin Polling Mailbox, or Relay Broadcast Mailbox. Messages stored in a mailbox cannot be printed until the correct password is entered. KONICA FAX 9880/9980... -
Page 139: Creating A Personal (Confidential) Mailbox
Creating a Personal (Confidential) Mailbox Press Menu/Exit to enter the Menu. Input speed access number 04, wait. Enter the personal box number (1-16). Press Enter. This is the address. to select Confidential. Press Enter. Press Input a 4-digit numeric password (0000-9999). Press Enter. -
Page 140: Changing A Password
Enter the number of the personal mailbox to be assistance. modified. Press Enter. Press Enter to select Password Change. Input the existing (old) 4-digit numeric password. Press Enter. Input the new 4-digit numeric password. Press Enter. Press Menu/Exit to return to standby mode. KONICA FAX 9880/9980... -
Page 141: Closing A Mailbox
Closing a Mailbox Speed access no. 04. If the message Invalid Operation is displayed, the mailbox selected contains one or more messages. The A mailbox must be empty before it can be closed. mailbox must be empty before a change can be made. To close a mailbox: Press Menu/Exit to enter Menu. -
Page 142: Sending Confidential Faxes
Use a Speed Dial number or the numeric keypad to enter To send a fax to a mailbox, you must know the address the desired location. of the mailbox. For your machine, the address is the Press Start. number (1 to 16) of the mailbox. KONICA FAX 9880/9980... -
Page 143: Receiving Confidential Faxes
You cannot access a mailbox without the address and Your machine can receive confidential faxes from password. KONICA FAX (or compatible) machines A confidential fax is stored in memory and will not print until the proper password is entered. machines with a sub-address function Be sure to record both the address and password of When you receive a confidential fax, it is stored in memory. -
Page 144: Knowing You've Received A Confidential Fax
Enter. Enter a 4-digit password for the mailbox. Press Enter. The message prints, and the machine returns to standby. Tip: If no message is stored in the personal mailbox, No Data in Memory displays. KONICA FAX 9880/9980... -
Page 145: Deleting Confidential Faxes
Deleting Confidential Faxes You must know the address and password of the confidential mailbox you wish to delete from. The Confidential Reception Report has the mailbox address. Press Menu/Exit to enter Menu. Press to select Print from Memory. Press Enter. Press to select Print Personal Box. -
Page 146: Call Forwarding
Location Program. Press Enter. Press set the forwarding number. to select Forwarding No.. Press Enter. Press set the Auto Answer mode to FWD. Enter the telephone number. Press Enter. Press Menu/Exit to return to standby mode. KONICA FAX 9880/9980... -
Page 147: Set The Auto Answer Mode To Fwd
Set the Auto Answer Mode to FWD Clear Forwarding Mode Press Menu/Exit to enter the menu. Press Menu/Exit to enter the menu. to select Setup. Press Enter. to select Setup. Press Enter. Press Press Press to select Machine Settings. Press Enter. Press to select Machine Settings. -
Page 148: Forward On Paper/Toner Error
Enter the telephone number (up to 40 characters (0-9, *, #, Forwarding Mode (FWD) +, Pause, Hyphen, Space). Press Enter. Manual Receive Mode (TEL) Press Menu/Exit to return to standby mode. Memory Reception Mode (MEM) Polled or confidential faxes cannot be forwarded. KONICA FAX 9880/9980... -
Page 149: Backup File Tx
Backup File TX Activate Backup File TX /Set the Password General Information Follow this procedure to Activate the Backup File TX and to Backup File TX is User Function Setting 33. set the password. This feature lets you set up your machine automatically send Press Menu/Exit to enter the Menu. -
Page 150: Program Backup Recipient
Enter the password you set for the backup file feature. Press Enter. Program the fax number and location information for the backup recipient. Program it as you would for any speed dial. Refer to “Programming Speed Dial Numbers”. Press Menu/Exit to return to standby mode. KONICA FAX 9880/9980... -
Page 151: Relay Faxing
(hubs). station and the relay key station (hub). The KONICA FAX 9880 machine can function as an initiating If you cannot access Relay Fax features, contact your station. service dealer. A Service Function setting (Technical The KONICA FAX 9980 machine can function as an initiating Function 36) may require adjustment. -
Page 152: Using Your Machine As A Relay Initiating Station
For this feature to be available, the relay key station (hub) number of the relay initiating station, programmed to a must be a KONICA FAX 9930 or KONICA FAX 9980 special location and in the format used by the relay key fax machine. -
Page 153: Contact Number For Relay Broadcast Report
Contact Number for Relay Broadcast Report The relay key station (hub) can send a confirmation report to Programming the Relay Report Number the relay initiating station when the relay fax session is complete. This confirmation report is called the Relay Press Menu/Exit to enter the menu. -
Page 154: Relay Broadcast Report
Be sure to program the number in the format the relay key station uses for dialing. For example, be sure to the results of each destination fax session include the access digit, if required. KONICA FAX 9880/9980... -
Page 155: Initiating A Relay Broadcast
Initiating a Relay Broadcast Load the document(s). Press Menu/Exit to enter Menu. Press to select Relay Initiate TX. Press Enter. Enter the password (4-digit number) of key relay station. Press Enter. Enter two-digit numbers of remote stations. Press Enter. Enter the desired location using the Speed Dial number or numeric keypad. -
Page 156: Using Your Machine As A Relay Key Station (Hub)
Using Your Machine as a Relay Key Station (Hub) Be sure to record your relay password. Keep the record KONICA FAX 9980 only! in a safe place. If you forget the password, you will need to contact an Authorized Service Representative for assistance. -
Page 157: Program The Destination Numbers
Program the Destination Numbers Create the Destination Group(s) Collect the contact numbers for the destination machines to The Speed Dial numbers of the contact numbers (of the which you will forward the relay fax. destination machines) must be programmed as a group or groups in your machine. -
Page 158: Create The Relay Broadcast Mailbox (Includes Relay Password)
Input a 4-digit numeric password (0000-9999). Press Enter. This password is the Relay Password. You must provide this password to the relay initiating station. The display shows RELAY B.C. ENTRY: 0 SELECT LOCATION(S) PRESS START TO SET ENTER TO CONFIRM KONICA FAX 9880/9980... -
Page 159: Relay Entry Report
Press the appropriate Speed Dial key(s) for the desired Relay Entry Report contact numbers. Your machine can print a report of the locations programmed The display alternates between in a Relay Broadcast Mailbox. the Step 6 display This report is called the Relay Entry Report. To print the Relay Entry Report, you must know the number (01 to 16) of the Relay Broadcast Mailbox. -
Page 160: Status Of Relay Broadcast Report
Be sure to program the number in the format the relay machine key station uses for dialing. For example, be sure to the results of each destination fax session include the access digit, if required. KONICA FAX 9880/9980... -
Page 161: Printing The Relay Fax At The Hub
Printing the Relay Fax at the Hub If you set Speed Access 28, Relay Print to ON, your machine will print any relay fax it receives from a relay initiating station. To change the setting of Relay Print (Speed Access 28): Press Menu/Exit to enter the menu. -
Page 162: Sending Documents Requested By Another Fax Machine (Polling Transmission)
An example of polling transmission is a hospital pharmacy facsimile contacting each unit’s facsimile (Pediatrics, Cardiology, Critical Care, etc.) for prescription orders. Staff can load the prescription orders into the unit facsimile machine. The pharmacy facsimile contacts each unit facsimile and requests the orders. KONICA FAX 9880/9980... -
Page 163: Explanation Of Polling Transmission Types
Explanation of Polling Transmission Types Feeder (Document Tray) Polling Memory Polling In Feeder (Document Tray) Polling, you place the document to Memory Polling is very similar to Feeder (Document Tray) be polled in the document tray. A remote machine will then Polling. - Page 164 Memory Polling (Bulletin) allows you to use your machine remote machines to contact your machine. The remote as a fax-back system. machines can retrieve the document as many times as needed. Memory Polling (Bulletin) is designed to be repeated, by multiple remote machines. KONICA FAX 9880/9980...
-
Page 165: Feeder (Document Tray) Polling
Feeder (Document Tray) Polling During Feeder (Document Tray) Polling, remote machines If you use feeder (document tray) polling, remember request (poll) documents placed in the feeder (document that the document remains in the machine until the unit tray). is polled. To set document tray polling: Only one remote fax can poll your machine if feeder Press Menu/Exit to enter the menu. -
Page 166: Memory Polling
Press to select Polling TX/RX. memory. Press Enter to select Polling TX. to select Memory Poll. Press Enter. Press Load the document(s). Document(s) are scanned and stored in memory, and display shows Waiting to be Polled. KONICA FAX 9880/9980... -
Page 167: Memory Polling (Bulletin)
Memory Polling (Bulletin) During Memory Polling (Bulletin), remote machine(s) contact The Mailboxes (numbers 1 to 16) are used for Personal your fax machine and request (poll) documents. The (Confidential) Mailboxes, Memory Polling (Bulletin), documents are stored in specified personal mailboxes. The and Relay Broadcasting. -
Page 168: Create A Polling Mailbox
Repeat steps 3 and 4 until the desired number of bulletin Print the Personal Box List to see which mailboxes are polling mailboxes has been created (up to 16). available. Refer to “Reports, Box Information.” Press Menu/Exit to return to standby mode. KONICA FAX 9880/9980... -
Page 169: Set Bulletin Polling
Set Bulletin Polling The Mailboxes (numbers 1 to 16) are used for Personal Press Menu/Exit to enter the menu. (Confidential) Mailboxes, Memory Polling (Bulletin), to select Polling TX/RX. Press Enter. Press and Relay Broadcasting. If you are using these features, remember that the total number of available Press Enter to select Polling TX. -
Page 170: Printing Polling Documents In Memory
Enter, press the Stop key to stop the printing process. The message The message prints. Then, the machine returns to Print Personal Box Memory Cancel? displays. Press standby. Enter and the fax will be deleted without printing. KONICA FAX 9880/9980... -
Page 171: Dialing Another Fax Machine To Request Documents (Polling Reception)
Dialing Another Fax Machine to Request Documents (Polling Reception) Press Menu/Exit to enter the menu. Your machine can contact a remote fax machine and request Press to select Polling TX/RX. Press Enter. documents from it. This is called polling or polling to select Polling RX. -
Page 172: Printing Faxes Polled Into Memory
Machine returns to standby mode. Press Menu/Exit to enter the menu. to select Print from Memory. Press to select Print Memory Poll. Press Enter. Press Faxes stored in memory print. The machine returns to standby mode. KONICA FAX 9880/9980... -
Page 173: Customizing Features And Operations
Customizing Features and Operations Identifying Current Settings Many of your fax machine’s features and settings can be changed to suit your needs. This section lists the functions you can change to customize machine operations. The Configuration Report is a list of current settings. When you press the Help button, a Help List and Printing a Configuration Report Function List print. -
Page 174: Changing Operation Functions
Press Menu/Exit to enter the menu. Then press Press to select Report Print. Press Enter. Enter to select Configuration. Press Enter. Press The report prints. Press Stop to cancel printing. Press Menu/Exit to return to standby mode. KONICA FAX 9880/9980... -
Page 175: List Of Operation Functions
List of Operation Functions Transmission (TX) Mode Default Remote Diagnosis Speed access no. 15. Speed access no. 14. The remote diagnostics feature allows service personnel to When you enter speed access number 15, you move remotely dial and service the machine. This setting should directly into the resolution settings. -
Page 176: Memory Full Save
Then, the machine transmits by reading the document from Available settings are ON and OFF. the document tray (without scanning into memory). The default setting is OFF. Available settings are ON and OFF. The default setting is ON. KONICA FAX 9880/9980... -
Page 177: Department Code
Department Code Sender ID Speed access no.19 Speed access no. 23 This function controls whether or not machine operation is This function determines if the Sender ID is to be printed on restricted. the transmitted fax. When set to ON (if Department ID and Department Codes When set to ON, the ID is included on the fax. -
Page 178: Pulse Dial Rate
This setting can only be changed by an Authorized Service Technician. Speed access no. 47 If the machine is set to Dial Pulse, this function controls the make rate of the dialing pulses. Available settings are 33, 39 and 40%. The default setting is 39. KONICA FAX 9880/9980... -
Page 179: T/F Timer Prg
T/F Timer Prg. Ring Response Speed access no. 62 Speed access no. 66 When set to T/F, the machine will automatically distinguish This function controls how long the machine waits before between incoming voice and fax communications. The T/F answering an incoming call. timer controls how long the machine waits for the call to be The available settings are 1 ring, 5, 10, 15 and 20 seconds. -
Page 180: Distinctive Ring
Distinctive Ring. additional charge. Available settings are: This feature may not work properly if you have a telephone other than a genuine Konica optional OFF (not detected) handset connected to your fax machine. ON (detected) SET (programmed) Setting Distinctive Ring The default setting is OFF. -
Page 181: Memory Password
Memory Password Speed access no. 05 Cancelling a Registered Password This is a 4-digit numeric password used when the machine is Press Menu/Exit to enter menu. operating in the Memory Only Reception Mode (MEM). Enter speed dial access no. 05. Wait. When the machine is in this mode, and you don’t know the Enter 4-digit numeric password (0000-9999) using numeric password, you can’t make changes or print memory data. -
Page 182: Department Code
Authorized Service Representative for assistance. For a record of the Department Codes, print the Activity Report or the Message Confirmation Report. Department codes are listed on each report in the column D.Code. Refer to “Reports.” KONICA FAX 9880/9980... - Page 183 To set a Department Code To use a Department Code Enter the 4-digit Department Code (password) at the prompt User Function 19 (Department Code) must be set to ON for Enter ID [xxxx]. before the Department Code may be set. Be sure to record the Department Code(s).
-
Page 184: Service Function Settings
If any of the following settings need to be changed, This setting controls if and how the time and date are printed please contact the nearest Konica dealer and request service. on faxes transmitted by the machine. The machine can be set... -
Page 185: Reports
Reports Understanding Reports Printing Reports Your machine provides useful reports that show the current settings, programming, and operations. Some reports print Printing a Message Confirmation Report automatically after completion of operations. Refer to the After transmission, press the Enter key once (with no reports listing below to determine which reports you may documents loaded) to see a report confirming your want to print. -
Page 186: List Of Reports
Confidential Reception Report Phone Directory Group Directory Configuration Report Function List Box Information Personal Box List Relay Broadcast Entry Report Protocol Dump Only Authorized Service Representatives can access the Protocol Dump, Log. Report, and G3 Log. Report. KONICA FAX 9880/9980... -
Page 187: Activity Report
Activity Report Printing the Activity Report This report provides a record of your machine’s last 50 communications. The Activity Report automatically prints after your Information provided on this report includes: machine completes 50 communications. The total amount of time your machine spent sending Press Menu/Exit to enter the menu. -
Page 188: Active Memory Files Report
The name or telephone number of the machine you were communicating with The communication mode used for each transmission or reception. The number of pages. The result. Department codes (D.CODE) when the Department Code Setting (Speed Access Number 6) is set to ON. KONICA FAX 9880/9980... -
Page 189: Broadcast Confirmation Report
Broadcast Confirmation Report Printing the Broadcast Confirmation Use this report to confirm the results of a multiple-location Report transmission ( broadcast). Information provided on this report includes: Press Menu/Exit to enter the menu. The date and time at which the broadcast started. Press to select Report Print. -
Page 190: Telephone Directory
Touch key and 2- and 3-digit Speed Dial number. display. Press Enter. The alternate number (OR) for each One-Touch key. Print all the reports you want. Then, press Menu/Exit to The parameter settings for each One-Touch key. return to standby mode. KONICA FAX 9880/9980... -
Page 191: Group Directory Report
Group Directory Report Printing the Group Directory This report provides a complete listing of all of the numbers programmed into a specific group. There is a separate report Press Menu/Exit to enter the menu. for each group. The information includes: Press to select Report Print. -
Page 192: Configuration Report
Print all the reports you want. Then, press Menu/Exit to Certain numbers currently programmed into your return to standby mode. machine Sender ID (ID=) TSI/CSI (TEL NO.) Forwarding No. Forward on P-Err. Relay Report No. Your machine’s current dial parameter settings. KONICA FAX 9880/9980... -
Page 193: Function List
Function List Printing the Function List The Function List is a report of the structure of the menu for your product. There are two ways to print the Function List. Use it as a reference while moving through the levels of the menu. -
Page 194: Box Information
Your machine has 16 available boxes, which are shared between several functions. Personal Box List Refer to “Advanced Operations” for more information Relay Broadcast Entry Report on Relay Faxing, Confidential Faxes, and Memory KONICA FAX 9980 only Polling (Bulletin). KONICA FAX 9880/9980... -
Page 195: Personal Box List
This indicates that the mailbox has not been programmed. Printing the Personal Box List Relay Broadcast Press Menu/Exit to enter the menu. KONICA FAX 9980 only Press to select Report Print. Press Enter. This indicates that the mailbox is programmed for a Relay Broadcast. -
Page 196: Relay Entry Report
Relay Entry Report Printing the Relay Entry Report This report is only available on the KONICA FAX 9980. Press Menu/Exit to enter the menu. Your machine can print a report of the locations programmed Press to select Report Print. Press Enter. -
Page 197: Message Confirmation Report
Message Confirmation Report Printing the Message Confirmation Report This report provides information about your last single- location fax transmission or polling transmission. After transmission, press the Enter key once (with no Information in this report includes: documents loaded) to see a report confirming your The date of the communication. -
Page 198: Message Confirmation Report Options
Set to ON, single and multiple location transmission MCFs automatically print. The Service Code 0000 on an MCF Report means that Set to OFF, no report prints. the fax communication was successful. The default setting is ON. KONICA FAX 9880/9980... -
Page 199: Power Outage Report
Power Outage Report Confidential Reception Report Your machine has a 72-hour built-in battery backup in the This report prints automatically each time your machine event of a power failure. If power is interrupted to your receives a confidential message. Information in this report machine, delayed transmissions, messages received into includes. -
Page 200: Codes Used In Reports
CANCL A message was erased after being held in memory for 10 days. COMP. A multiple-location transmission was completed. COVER The cover was opened during the communication. The transmission or reception failed due to a communication error. KONICA FAX 9880/9980... -
Page 201: Communication Codes
Communication Codes The communication was completed successfully. Communication codes indicate the communication mode used for a communication. PUNIT B.C. This error code indicates a problem with the printing unit. Multiple-location transmission (broadcast). Contact your service person. R_JAM A communication initiated by your machine. A paper jam occurred in your machine while it was receiving a fax. -
Page 202: Maintenance
Replacing the Toner Cartridge sensor (a). Open the control panel and gently wipe the area over the scanner. Replacing the Image Drum Fig4_14.eps Resetting the Image Drum Counter KONICA FAX 9880/9980... -
Page 203: Replacing The Toner Cartridge
Replacing the Toner Cartridge Toner Yield This machine will only operate using the toner cartridge specified for this machine. The use of any The number of pages you can print with one toner cartridge other toner will result in the display of an operation depends on the type of documents you usually receive or error and in machine malfunction. - Page 204 Fig4_02.eps Lift up on the document tray and swing it up and out of the way. Fig4_02.eps Pull the lock lever on the toner cartridge in the direction of the arrow. Fig4_11_a.eps KONICA FAX 9880/9980...
- Page 205 Warning: Be careful when handling the toner cartridge. Unwrap the new toner cartridge and gently shake it to Do not let toner spill onto your clothing or other porous distribute the toner. Then carefully peel the tape from the materials. If you experience any problems with toner, bottom of the toner cartridge.
- Page 206 Gently wipe back and forth across the full length of the LED array (1). Use a clean section of the Fig4_11.eps wipe with each pass. Fig1_07.eps 10 Close the copy stacker and document tray. Make sure the cover is firmly closed. Fig_01.eps KONICA FAX 9880/9980...
-
Page 207: Replacing The Image Drum
Image Drum Yield This machine will only operate using the image drum unit specified by Konica for this machine. The use of The life of an image drum depends on a number of factors, any other image drum unit will result in the display of including temperature and humidity, the type of paper you an operation error and in machine malfunction. -
Page 208: Image Drum Replacement Procedure
Turn off the power switch. Press the release buttons (1) located on both sides of the copy stacker. Lift up the stacker. Lift up on the document tray and swing it up and out of the way. Fig4_02.eps Fig4_02.eps KONICA FAX 9880/9980... - Page 209 Firmly lift up to disengage the drum cartridge (with its Insert the new drum cartridge. Press down firmly on both toner cartridge), then lift it out. Wrap it in the packaging ends to lock the drum in place. materials from your new image drum cartridge, and 5759_28.eps discard it.
-
Page 210: Resetting The Drum Counter
CHANGE DRUM message. To reset the image drum counter: Press Menu/Exit to enter the menu. until the > symbol is beside COUNTER. Press Press Enter twice. Press Clear twice. Press Menu/Exit to return to standby mode. KONICA FAX 9880/9980... -
Page 211: Options And Accessories
Order on the Internet at www.konicabt.com Consult the Authorized Konica Dealer or Branch where you purchased your fax machine. o find the Konica dealer or brannch nearest you, visit www.konicabt.com and click on the “Where to Buy” link. User’s Reference Guide... -
Page 212: Part Numbers
Unimessage Pro LAN 10 User 950139 Image Drum (20K Capacity)) Options Part Number Description 950118 2 MB Memory Expansion Kit (9880 only) 950119 4 MB Memory Expansion Kit (9880 only) 950157 8 MB Memory Expansion Kit (9880 only) 950127 Paper Tray Kit (UST-550) -
Page 213: Problem Solving
Here are some general things to check before proceeding with detailed troubleshooting. Konica Business Technologies’ main web site, www.konicabt.com, is the gateway to Konica’s products and Is the machine plugged in and turned on? services. Are the connections (power, telephone, and interface) -
Page 214: Printing A Cleaning Page
Press the Menu/Exit key to activate the menu mode. image drum. continuously until Printer Cleaning Press Cleaning page process displays. Removes residual impurities from printing surfaces. Press Enter. After a moment, the cleaning page prints. Reduces problems such as repeating marks, blotching, and shading. KONICA FAX 9880/9980... -
Page 215: Clearing A Document Jam
Clearing a Document Jam When a document jam occurs, your machine beeps and an Turn off the power switch. error message appears in the display. If the jammed document appears to be positioned straight in your feeder, press the Lift the document tray up (1) and back on its hinges. Stop key to try to feed the document the rest of the way Fig4_01.eps through the feeder. -
Page 216: Clearing A Printing Paper Jam
Be sure to fan the paper before loading it into your paper tray. CAUTION: If you open the top cover, you will see a label that reads: (CAUTION-HOT). This portion is extremely hot—do not touch it under any circumstances. KONICA FAX 9880/9980... - Page 217 Press the release buttons (1) located on both sides of the Firmly lift up to disengage the drum cartridge (with its copy stacker. Lift up the stacker. toner cartridge), then lift it out. Set it aside on a clean, dry surface out of direct sunlight. Fig4_02.eps WARNING: Never expose the image drum cartridge to light for more than 5 minutes.
- Page 218 11 Close the cover to the image drum compartment, pushing down on it until both latches catch. 12 Return the document tray to the working position. 13 Turn the power switch back on. KONICA FAX 9880/9980...
-
Page 219: Display Panel Messages
Display Panel Messages Error Messages This section lists the status and error messages that may 14:14: FAX appear on your machine’s display panel, and explains what CLOSE THE COVER they mean and how to correct any problem they indicate. The upper cover is not closed. Check to be sure that the image drum is seated correctly and Normal Display in Standby Mode the toner cartridge is installed properly. - Page 220 Image drum alarm: The image drum is nearing the end of its projected life. Make sure a new drum is available, and replace the drum when print quality begins to deteriorate. See “Maintenance, Replacing the Image Drum.” KONICA FAX 9880/9980...
- Page 221 PRINTER ALARM 2 INVALID TONER CART. REFER TO USER GUIDE REFER TO USER GUIDE This error will occur if an incorrect toner cartridge is installed. This machine will only operate using toner PRINTER ALARM 3 cartridges specified for use in this machine. If you are using REFER TO USER GUIDE the correct toner cartridge, open and close the cover.
-
Page 222: Counters
> symbol is beside COUNTER. Press Press Menu/Exit to enter the menu. Press Enter twice. Press to select Counter. Press Enter. Press Clear twice. Press to select the counter you want. Press Press Menu/Exit to return to standby mode. Enter. KONICA FAX 9880/9980... -
Page 223: List Of Problems
List of Problems Problem 6: Your fax unit is a complex machine with many features and functions that allow it to operate in different ways. Many problems you The display shows a communication error. experience may be due to improper programming. If you are Problem 7: experiencing a problem, read through the list of problems and solutions before calling your dealer. - Page 224 Your machine is connected to a PBX and you can’t dial out. Problem 17: You want to answer an external telephone but your machine always answers first. Problem 18: Your received faxes sometimes look distorted. KONICA FAX 9880/9980...
-
Page 225: The Display Is Blank
Problem 1: Problem 3: The display is blank. The display tells you to replace paper even though there is paper in the paper tray. Solution: Solution: Check the power cord to make sure that it is firmly plugged in. Verify that the power switch is in the ON position. Check your Make sure that the paper is firmly stacked in the tray. -
Page 226: Your Documents Jam
(pulse or tone) for your area. If you hear changing tones instead of dialing pulses and you know that your area uses pulse dialing, refer to Tone/Pulse (MF/DP) [Speed Access 45] in “Setting Basic Features, Dial and Incoming Call Parameter Settings.” KONICA FAX 9880/9980... -
Page 227: The Display Shows A Communication Error
Problem 6: The display shows a communication error. Solution: If you have frequent problems communicating with a This alarm indicates any of a number of problems: particular remote fax machine, try programming the You may be trying to communicate with an incompatible number into one of your One Touch keys and then fax machine. -
Page 228: You Sent A Fax But The Image The Remote Fax Machine Received Was Very Poor
Copy the document on your machine to see how it will Solution: transmit. Make sure that you have loaded your document face down. The problem may be caused by telephone line interference. Try sending the document again later. KONICA FAX 9880/9980... -
Page 229: The Image Received On Your Machine Was Very Poor
Problem 10: Problem 11: You tried dialing using One-Touch, 2-or 3-digit Speed The image received on your machine was very poor Dial but nothing happened. Solution: Solution: Contact the person sending you the fax and ask them to change their Resolution and Type of Original settings. Ask Make sure that something is programmed into the Speed Dial the person to make a copy of the document on their fax key you are using. -
Page 230: Your Machine Does Not Answer The Phone Or Receive Faxes
Be careful! Some toner may spill from the cartridge. If this does not work, you may need to replace your image drum cartridge. For information on obtaining a replacement image drum cartridge, see “Options and Accessories.” KONICA FAX 9880/9980... -
Page 231: You Set Your Machine For Delayed Transmission But It Did Not Send
Problem 14: Problem 16: You set your machine for delayed transmission but it Your machine is connected to a PBX and you can’t dial did not send. out. Solution: Solution: Check the display to make sure that you have set your You must enter your dial prefix before the telephone number machine’s clock to the correct time. -
Page 232: Your Received Faxes Sometimes Look Distorted
If the document is unreadable, ask the sender to fax the document again. Problem 19: You are constantly receiving unsolicited advertising on your machine. Solution: Try using the closed network function. See “Basic Faxing, Rejecting Unsolicted Fax Messages.” KONICA FAX 9880/9980... -
Page 233: Your Machine Receives Faxes, But Doesn't Print Them
Problem 21: Problem 22: Your machine receives faxes, but doesn’t print them. Your machine doesn’t print the Message Confirmation Report or the Message Confirmation Report doesn’t Solution: print the way you want it to. Your machine may be out of paper. Solution: Check the paper tray. -
Page 234: Shipping Your Machine
One-Touch theKonica Web site: 9880: www.konicabt.com 9980: Auto Dials 9880: 9980: Groups 20, up to x numbers each where x = 140 for the 9880 230 for the 9980 Broadcast Transmissions 9880: 150 locations 9980: 240 locations User’s Reference Guide... -
Page 235: Specifications
Optional Transmission Speed 2, 4, or 8 MB (9880 only) 9880: 3.0 seconds per page (ITU-T Test Chart #1) Only one memory slot is available in your machine. 9980: 2.5 seconds per page (ITU-T Test Chart #1) Therefore, only one of the available memory options Print Speed may be installed at a time. -
Page 236: General
Scanning Consumables Scan Speed Toner Yield 9880: 3 seconds per page The number of pages you can print with one toner cartridge depends on the type of documents you usually receive or 9980: 1.5 seconds per page copy. Scan Resolution... -
Page 237: Scanning
30.9 pounds (14 kilograms) Letter, legal 13 inch, legal 14 inch, Executive, A4, A5, A6, JIS B5 16 to 32 lb. (60 to 121 g/m Envelopes Monarch, COM-10, DL, C5, COM-9 You must use envelopes with a straight-cut flap. KONICA FAX 9880/9980... -
Page 238: Paper Handling
Electrical Environmental Power Temperature 120 VAC +6%, -15% Operating 50/60 Hz +/- 2% 50 to 90 degrees Fahrenheit 10 to 32 degrees Celsius 220/240 VAC +/- 15% Storage 50/60 Hz +/- 2% 14 to 110 degrees Fahrenheit Battery Backup -10 to 43 degrees Celsius 72 hours Humidity Power Modes... -
Page 239: Electrical
Auto Receive Mode [FAX] 65 Activity Report 187 Installation 50 Auto Start 69 Address, Personal Mailbox 138 Remote Receive 66 Automatic Document Feeder 21 Telephone Answering Device Mode Automatic page re-transmission 22 [TAD] 66 Automatic redial 22 KONICA FAX 9880/9980... -
Page 240: Index
Codes Communication 201 B.C. (Communication Code) 201 Call Forwarding 145, 146 Result 200 Back Cover 27 Cancel Coding Scheme 236 Backup File TX 76, 149 CANCL (Result Code) 200 Communication Batch, Delayed Transmission 132 Clear Key 31 Communication Codes 201 Battery Backup 22 Delayed Transmissions 131 Communication Error 227... - Page 241 PBX assistance 77 15, 76, 149 Pulse Dial Rate 178 Control Panel 21, 25, 29 Pulse Dial Type 178 Alarm Indicator 30 Pulse Make Ratio 178 Enter Key 30 Setting the Language 74 COVER (Result Code) 200 KONICA FAX 9880/9980...
- Page 242 Dial Variations by Country Drum Broadcast Transmissions 235 FLASH/EARTH/NORMAL 71 Yield 237 Communication Speed 84 Variations by Country (MF) 70 Dual Access 22, 93, 109 Dial Parameter Settings 68 Display While Copying 109 Factory Defaults 68 Blank Display 225 While Receiving a Fax 111 Programming 68 Display Messages While Sending a Fax 110...
- Page 243 Sending a fax 120 Set a Forwarding Number 146 Fax-back system 164 Specifications 117 Set Paper/Toner Error Number Faxing Speed Dial / Search 123 Document Guidelines 91 vs. Broadcast 115 Setting the Auto Answer Mode General 91 KONICA FAX 9880/9980...
- Page 244 Incoming Call Parameter Settings 68 Half Duplex 236 Call Parameters 72 Half-tone 22 Deleting Characters 35 Incoming Ring 72 Resolution Key 31 ID/Password Programming 58 Programming Call Parameter Handset Space Key 35 Setting 68 Installation 49 Identification Speed Access Options 60 Manual Reception 102 Sender ID 63 Installation 39...
- Page 245 LOC# (Speed Dial Number) 84 Switch to Auto Receive Mode Dial with Hook Key 32 Location Name (ID) Paper Feeder Entering Spaces 35 Memory Password 181 Location 25 Entering Symbols 31 Cancelling 181 Using 113 Find 32 Setting 181 KONICA FAX 9880/9980...
- Page 246 Memory Polling 166 Enter Key 30 NO (Result Code) 200 Memory Polling (Bulletin) 167 Image on Report 198 No paper reception 23 Memory Reception 22, 104 Options 198 NORMAL 71 [MEM] 66 Printing 185 Normal Operation No Paper Reception 103 MF 69 Start/Copy Key 32 No Toner Reception 103...
- Page 247 Paper Indicator 26 General Guidelines 91 Dual Line 212 Location 26 Multiple Page 92 External Telephone, Install 49 Paper Tray Single Page 92 Handset 49, 212 Capacity 26 Memory Expansion 212 Location 26 Obtaining 211 Paper Sizes 26 KONICA FAX 9880/9980...
- Page 248 Parameters Personal (Confidential) Mailboxes Power Incoming Calls 72 Closing 141 Power Cord Password Creating 139 Connecting 50 Backup File TX 76, 149 Programming 138 Location 27 Changing 140 Personal Box List 195 Power Failures 99 Department Code (Restricted Programming Mailboxes Power Outage Battery Backup 22 Access ID) 182 138, 158, 164, 167, 168, 169...
- Page 249 Setting the Answering Mode 64 Remote Diagnosis 175 Shift Down Key 30 Report Options 60 Shift Left Key 30 R_JAM (Result Code) 201 Stop Key 33 Shift Right Key 30 Programming Shift Up Key 30 Alphabet Keys 35 Space Key 35 KONICA FAX 9880/9980...
- Page 250 Real-Time Dialing 101 Redial Tries 68 Printing the Relay Fax 161 Receiving Rejecting Unsolicited Fax Messages 98 Requirements 156 Answering Machine 66 Closed Network 98 Using Your Machine as a 156 Confidential Faxes 23 Relay Relay Password 152 Continuous Tone 73 Relay Broadcast Relay Print 75 Dual Access 111...
- Page 251 Speed Dial Numbers 16 S_JAM (Result Code) 201 Report Options 60 Scanning 237 Status of Relay Broadcast Report Cleaning the Scanner Path 202 Gray Scale 237 Telephone Directory 22, 190 Unwanted 228 Resetting the Drum Counter 210 Resolution Print 236 KONICA FAX 9880/9980...
- Page 252 Length 237 Sender ID TSI Print 184 Resolution 237 Setting 63 Settings, Selecting 53 Speed 237 Speed Access No. 23 177 Shift Keys Width 237 Unique Key 31 Down 30 Search Sending 95 Left 30 by Group Name 122 Blank fax received 228 Right 30 Group 123 Broadcast Fax 125...
- Page 253 Transmission Speed 236 Numeric Keypad 32, 85 TEL Mode 65 Speed One-Touch Keypad 86 Manual Reception 102 Instant Dial 176 Primary Telephone Number 84 Unit doesn't switch 232 Modem 236 Programming 83, 85, 88 Collect Information 83 KONICA FAX 9880/9980...
- Page 254 Telephone Redial Key 32 Delayed 129 External Sender ID 63 Batch 132 Installation 49 TSI/CSI 63 Didn't work 231 Real-Time Dialing 101 Telephone/Fax Mode [T/F] 65 Fax 129 Using to Send a Fax 97 Telephone and Answering Machine Fax vs. Batch 128 Telephone Answering Device Mode External Dial Settings, Programming 68...
- Page 255 Unique Key 31, 35 Unpacking Missing Items 43 Unsolicited Faxes 98, 232 Closed Network 98 Unwanted Faxes 232 Uppercase (Caps Key) 35 User Language, Changing 74 Ventilation Installing the Machine 42 Volume Buzzer Adjustments 74 Speaker Adjustments 74 Warranty KONICA FAX 9880/9980...
Need help?
Do you have a question about the 9880 and is the answer not in the manual?
Questions and answers