Table of Contents
Advertisement
Quick Links
Download this manual
See also:
User Manual
Advertisement
Table of Contents

Related Manuals for Planet UMG-2000


Summary of Contents for Planet UMG-2000
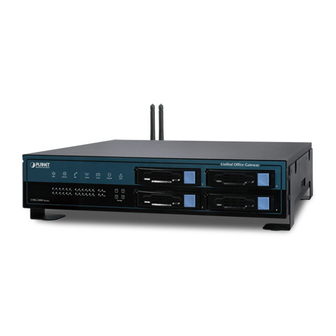
- Page 1 Unified Office Gateway UMG-2000 User's Manual...
- Page 2 PLANET Technology. Disclaimer PLANET Technology does not warrant that the hardware will work properly in all environments and applications, and makes no warranty and representation, either implied or expressed, with respect to the quality, performance, merchantability, or fitness for a particular purpose.
- Page 3 All guidelines of this and of the computer manufacture must therefore be allowed at all times to ensure the safe use of the equipment. Revision User’s Manual for PLANET Unified Office Gateway Model: UMG-2000 Rev: 1.0 (Jun. 2009) Part No.: EM-UMG2000_v1...
-
Page 4: Table Of Contents
1.4.1 Front Panel ....................11 1.4.2 Rear Panel ....................12 1.5 Technical Specifications...................13 2. Installation ........................15 2.1 Hardware Installaion ..................15 2.1.1 Unpack the UMG-2000 ................15 2.1.2 Choosing a Setup Location ...............15 2.1.3 Preparing for Setup ...................16 2.1.4 Precautions ....................16 2.1.5 Installation Consideration................16 2.1.6 The Desktop Brackets Installation.............17... - Page 5 7.3 Updating a Volume ....................51 7.4 Deleting a Volume .....................52 7.5 Creating a Storage Volume................53 7.6 Storage Setting....................55 7.7 Storage Bakcup and Restore ................56 7.8 The Storage Log....................58 8. Web Management - PBX..................59 8.1 IP PBX Overview ....................60 8.2 IP PBX Feature Setting ..................61 8.3 IP PBX Conference....................62 8.4 IP PBX Call Rules ....................63 8.5 IP PBX Channel Setting ..................64...
- Page 6 14.2 System Update ....................102 14.3 Diagnose ......................102 14.4 Remote Service .....................103 15. Persional Account Web Administration .............104 15.1 User Login .....................105 15.2 User Home Page....................106 15.3 Access to Administrator ................107 15.4 Personal Setting....................108 15.5 Contract List ....................109 15.6 Personal Call Records ..................109 15.7 Call Reference ....................
-
Page 7: Introduction
(SMB). It integrates commonly used office appliance features. Provides Internet, telephone, fax, data, and print services. Built into the UMG-2000 is a managed L2 Ethernet switch with 24 Fast Ethernet ports and 2 Gigabit Ethernet ports, a wireless access point, and 4-ports PSTN analog that allows you to connect to various Internet and telephone carriers. - Page 8 E-mail Service Supports POP3, SMTP, IMAP Secured Socket Layer (SSL) Junk Mail Filtering E-mail Storage Quota E-mail Alias Group Assignment Mail Attachment Size Restriction User E-mail Storage Quota E-mail Log Record Management Anti-Virus and Anti-Spam Auto Backup, Auto Reply E-mail Blacklist Based on Domain Name, User Name, and E-mail Address Supports Web Mail Internet Security Service...
-
Page 9: Package Contents
1.2 Package Contents UMG-2000 Unit x 1 AC Power Cord x 1 CD x 1 Quick Installation Guide x 1 Ear Brackets x 2 Desk Brackets x 2 Brackets Fixing Screws x 12 Plug Screws x 4 Disk Carrier Screws x 25... -
Page 10: Application
Highly Integrated IT Services IP-PBX/VoIP, Internet Security, Email/FAX Server, Switch, Wireless AP, and Network Storage, an UMG-2000 features single point of management to improve IT service ability. Lower cost of ownership, quick and easy deployment, low noise, space saving and energy... -
Page 11: Outlook
Disconnect to 25~26 10/100/1000Mbps LAN ports Fault redundant UMG-2000 unit is connected and activated (future feature) FTX LED Fault redundant UMG-2000 unit is not available (future feature) Branch to Branch SSL VPN secure link is established BTB LED Branch to Branch SSL VPN secure link is not enabled... -
Page 12: Rear Panel
1.4.2 Rear Panel Cooling Fans System cooling fans on rear panel Voice (P1) 4 x RJ-11 (4 x FXO) Wireless (P2) 1 x 802.11b/g/n Wireless Access Point, 3 x Antenna Detachable 1~24 ports: 24 x RJ-45 (10/100Base-TX, Auto-Negotiation, Auto MDI/MDI-X) 4, 5 25~26 ports: 2 x RJ-45 (10/100/1000Base-T, Auto-Negotiation, Auto MDI/MDI-X) -
Page 13: Technical Specifications
1.5 Technical Specifications Product Unified Office Gateway Model UMG-2000 Hardware Specification Case 2U high Rack or Desk 1 x RJ-45 (10/100Base-TX, Auto-Negotiation, Auto MDI/MDI-X 2 x RJ-45 (10/100/1000Base-T, Auto-Negotiation, Auto MDI/MDI-X) 24 x RJ-45 (10/100Base-TX, Auto-Negotiation, Auto MDI/MDI-X) SATA support... - Page 14 - FXO interface for PSTN Inbound/outbound - FXO disconnection tone detection - Caller ID detection - In-band/RFC2833/SIP-INFO DTMF translation - Music on hold (MoH), user upload MoH - Direct line Outbound - User PIN - 450 minutes for personal record Voicemail - E-mail notification - Personal reception on unavailability...
-
Page 15: Installation
You should inspect the box which the system was shipped in and note if it was damaged in any way before the unpacking. If the UMG-2000 itself shows damage you should file a damage claim with the carrier to who delivered it. Unpack the UMG-2000 as listed below. -
Page 16: Preparing For Setup
The UMG-2000 system was shipped with desk brackets, ear brackets, and mounting screws, so it is possible to install the UMG-2000 into the mounted rack or on the desk brackets. Please read following sections in its entirety before you begin the installation and follow the steps in the order given to complete the installation process correctly. -
Page 17: The Desktop Brackets Installation
It is strongly recommended to securely fasten the mounting rack to the floor or wall to eliminate any possibility of tipping over the rack. This is especially important if you decide to install several UMG-2000 chassis in the top of the rack. A brief overview of the UMG-2000 installation is as follows: Select an appropriate site in the rack. - Page 18 Mount the server into the rack. Lock the server to the rack by mounting the ear brackets to the rack.
-
Page 19: The Hard Disk Installation
2.1.8 The Hard Disk Installation The SATA subsystem supports four hot-swappable hard drives. The SATA drives are inserted to the SATA backplane that provides power and bus termination. Note: Please install at least one HDD to the No.1 disk carrier before system configurations. For single HDD, please select RAID level to JBOD. -
Page 20: Physical Connection
2.2 Physical Connection 2.2.1 WAN Connection Locate the WAN port on the rear panel. Connect the WAN port with the Ethernet cable. 2.2.2 LAN Port Connection There are 26 Ethernet ports on the rear panel. The port 1 to 24 are 10/100 Mbps Ethernet ports and the port 25 and port 26 are 10/100/1000 Ethernet ports. -
Page 21: Pstn Fxo Port Connection
2.2.3 PSTN FXO Port Connection Locate the voice port of the PSTN adapter on the rear panel. The Analog PSTN port may vary from 4 FXO ports. Connect one or more telephone cables to one of the selected FXO port. -
Page 22: Quick Setup Wizard
Now that the network connection between your PC and UMG-2000 has been established, you must login in order to access PLANET View. Launch a web browser (for example: IE, Firefox etc.) and type the UMG-2000 IP address in the address bar. The default address is “http://192.168.1.1”. -
Page 23: Welcom To Quick Start
“Quick Start” and the other is for “Faster Recovery UMG to UMG” which will be explained in the user’s manual. The quick start includes five steps which will lead administrator to setup the UMG-2000. Check the first radio box and then click the button “Start” to continue. - Page 24 (X=0~9). Step 2: Activating UMG-2000 services The UMG-2000 allows the administrator to activate the service on demand. By default, all services are inactive. The administrator can activate the service in this page by checking the radio box of the corresponding service. The activated services will start up by using the default configuration after the quick start.
- Page 25 “Next” to go to step 4 or click the button “Skip” to skip this step. AUTO DETECT ISP TYPE By clicking the button “Detect”, you can make the UMG-2000 to recognize the ISP type automatically. It may take a while to detect your ISP type. Please wait.
- Page 26 The ISP type will be detected and the result will be presented as follows. If “Network Cable Disconnected” is detected, please recheck the physical connection and repeat the action as shown in Section 4.1 WAN Connection. There could be more than one ISP type recognized, so choose the most suitable type from the list and then click the button “Next”...
- Page 27 MANUAL SETUP INTERNET CONFIURATION: DHCP If your ISP type is “DHCP”, choose it as your ISP type and setup the configuration. Item Description Automatically obtain the DNS address or specify the IP DNS Server Address address of the primary and secondary DNS server. MAC Address Show MAC address information.
- Page 28 MANUAL SETUP INTERNET CONFIURATION: PPTP If your ISP type is “PPTP”, choose it as your ISP type and setup the configuration. Item Description PPTP Server Specify the PPTP server IP address. Login Name Specify the username to login to the PPTP server. Specify the corresponding password to login to the Password PPTP server.
- Page 29 Item Description Access Point (AP) Enable or disable the wireless AP service. Decide whether or not to make the wireless AP SSID Hide SSID visible. Network Name (SSID) Specify the preferred SSID name string. Wireless Region Select the area of location yours. Select the preferred wireless AP mode: Wireless Mode 802.11b / 802.11g / 802.11n.
- Page 30 Step 6: Confirmation Please recheck your input data to ensure the accurate. Click the button “Back” to make changes. Then confirm your data and wait for the accomplishment of the wizard. It will take a couple of minutes. Please “do not” close the browser. The browser will show the RAID building progress.
-
Page 31: Web Management - Home
3. Web Management - Home UMG-2000 provides a basic chassis as the hardware platform, back-end service control software and front-end web-based GUI management tool PLANET View. This chapter gives a general description of UMG-2000. 3.1 Overview The “Overview” screen presents the UMG-2000 system service status summary in one convenient location. - Page 32 UMG SERVICE This section lists the state and status of all the IT services. PBX: Displays the state (enable or disable) and status (up or down) of VoIP service. Wireless: Display the state (enabled or disabled) and status (up or down) of WiFi service.
-
Page 33: Spanning Tree Protocol
Ethernet link. 3.3 Alert Log The screen displays the UMG-2000 alert log list. If the administrator has assigned the alert email address, the messages will be sent to the added email address. Date: Displays the date of the alert log. -
Page 34: Web Management - User
4. Web Management - User The UMG-2000 provides a user based service provisioning with secured access control based on the given privilege. GROUP MANAGEMENT Group management allows the administrator to organize groups and departments similar to the organization of your company and assign different privileges to different groups. It creates a more efficient way of managing and controlling large numbers of users. -
Page 35: Deleting A User Account
4.2 Deleting a User Account Check the radio box and click the “delete” button. You can delete or disable the specific user account. Disabling the user account will freeze all user services without damaging the profile and data of the user. Deleting the user account will clear the entire data and profile of the user. -
Page 36: Creating A User Account
Account Type: Specifies either a common user or admin user privilege. The user with the admin privilege can access the GUI management pages to manage the UMG-2000 except the storage service. Account Status: Indicates whether the user account is in an active or suspended state. -
Page 37: Departments And Groups
USER SERVICES: This section lists all the available settings of the user services: Email: Allows or denies user Email services. PPTP VPN: Allows or denies a user’s VPN remote access privileges. Private Storage: Allows or denies a user’s local storage access. Storage Quota: Specifies the maximum user quota. -
Page 38: Deleting A Group
4.6 Deleting a Group Check the check box “delete” and click the “Apply” button to delete a group. Note: You must delete all the members within the group before you delete the group. -
Page 39: Web Management - Network
Internet interface. The UMG-2000 can also works as the gateway which connects the Internet and the LAN and determines where to direct the package of data that arrive at the UMG-2000. - Page 40 This section lists the current settings of the Internet: ISP Type: Displays the ISP type. IP Address: Displays the IP address of the WAN port of UMG-2000. Subnet Mask Address: Displays the subnet mask address. Default Gateway Address: Displays the IP address of the default gateway.
-
Page 41: Internet
LOCAL NETWORK SETTING This section lists all the available settings of the LAN: Local Server Address: Specifies the LAN IP address of the UMG-2000 Subnet Mask Address: Specifies the LAN subnet mask address. DHCP Server: Specifies the state of the DHCP server, enabled or disabled. -
Page 42: Service
Network Storage: Enables or disables the network storage server (SAMBA) service. LOCAL NETWORK SERVICES This section lists all the available settings of the LAN services: Domain Work Group: Specifies the UMG-2000 Windows workgroup. NTP Server: Enables or disables the NTP service. 5.5 The VPN Log The “VPN Log”... -
Page 43: Web Management - Wireless
6. Web Management - Wireless The UMG-2000 wireless suite integrates the following services: standard access point (AP), multiple layers of wireless security and client blocking. STANDARD WIRELESS ACCESS POINT The UMG-2000 supports three task groups in 802.11 standard working groups: 802.11b/g/n. -
Page 44: Overview
6.1 Overview The wireless “Overview” screen presents the current wireless services status summary. The administrator can quickly view important details of your wireless Access Point services (AP) status. WIRELESS NETWORK This section lists all the current settings of the wireless Access Point (AP). Access Point: Displays the wireless AP service state, enabled or disabled. -
Page 45: Wireless Setting
6.2 Wireless Setting The wireless “Setting” screen enables the administrator to manage the wireless AP. WIRELESS NETWORK This section lists all the available settings to the wireless Access Point (AP). Service is only accessible when enabled. SSID is visible and can be scanned only when “Hide SSID” is disabled. -
Page 46: Wireless Clients
6.3 Wireless Clients The wireless “Clients” screen shows the wireless clients current connection to the UMG-2000 wireless Access Point (AP). Each connected wireless clients information is listed in a tabulated form. The following are the wireless client connection information. WIRELESS CLIENT This section lists the current information on the connected wireless clients. -
Page 47: Wireless Mac Block List
6.5 Wireless MAC Block List The wireless “Block List” screen displays the current block list. The administrator can unblock any or all of the computers currently prohibited to access the shared resources through the wireless AP. CREATE NEW RULE This section lists the settings to block a wireless client to access the wireless AP. MAC Address to Block: Specifies the MAC address to block. -
Page 48: Web Management - Storage
Independent Disks (RAID), Network Storage Server, backup/restore, and remote data synchronizing. RAID AND JBOD The UMG-2000 supports RAID on storage devices. A RAID device is a logical device that has physical devices underlying it. These physical devices are disk partitions. The supported RAID levels are:... - Page 49 It provides a consistent view of the device, but it can build a snapshot of the device on and only on the local UMG-2000. Another way is building a full data copy. It is a safer method to build all your data into a ZIP file; however, it takes much more storage space because of redundancy.
-
Page 50: Storage Overview
7.1 Storage Overview The Storage “Overview” screen presents the current network storage services status summary. The system administrator can quickly view important details of the network storage condition and services. NETWORK STORAGE STAUS This section lists the current status of the storage. Total Capacity: Displays the total storage size in Gigabyte. -
Page 51: View A Volume By Smb
Check the radio box “view” of the specific volume or browse to file://ip/dir (where “ip” stands for the LAN IP address of UMG-2000 and “dir” stands for the volume you want to access) to view the volume by the SAMBA. Note: It is recommended to add a user with the same name and password of the PC Window account to access the Network Shared Storage. -
Page 52: Deleting A Volume
7.4 Deleting a Volume Select the radio button “delete” then click the “Delete” button to delete a volume. Note: All data in this volume will be deleted if the volume is deleted. -
Page 53: Creating A Storage Volume
7.5 Creating a Storage Volume The Storage “Volume” screen allows the administrator to create a network shared storage volume. NETWORK STORAGE This section lists all the available settings for network storage. The system will backup the volume automatically only if “Auto Backup” or “Auto Snapshot” is enabled. Volume Name: Specifies the preferred Volume name. - Page 54 USER LIST The user list displays all users that can be set to access the volume. Only the user specified or in the specified group can access this volume via network. Privilege: Read-Write/Read Only. [Right] button: Selects a group in the User Group drop down menu and click the [right] button to set a privilege to the group.
-
Page 55: Storage Setting
7.6 Storage Setting The Storage “Setting” screen enables the administrator to manage the storage backup policy. SNAPSHOT SCHEDULE This section lists all the available settings of the daily snapshot policy. Daily Snapshot: Specifies whether to allow the system to create a storage snapshot automatically or manually. -
Page 56: Storage Bakcup And Restore
BACKUP/RESTORE This section lists all the volumes and the available backup. Volume List: Displays all the existing volumes in the UMG-2000. Backup List: Displays the date of the available backup point of a volume which is in the format of MM/DD/YYYY HH:MM:SS Backup: Specifies a volume in the volume list and backs up the volume manually. - Page 57 Delete and restore Backup files Select a backup file of a volume in the full backup list and then click the “Restore” button to restore the volume to the file. Click the “Delete” button to delete the backup files. Note: It is strongly recommended that the administrator to perform manually backs up to the current volume, and then restores the volume.
-
Page 58: The Storage Log
7.8 The Storage Log The storage log shows the network storage history. EVENTS Date: Displays the date of the event. Time: Displays the time of the event. Description: Display the detailed description of the event. -
Page 59: Web Management - Pbx
The UMG-2000’s PBX allows end users to place calls using a network instead of the standard telephone infrastructure. UMG-2000’s PBX manages both the Plain Old Telephone Service (POTS) and Voice over IP (VoIP) devices, utilizing VoIP accounts to connect them to telephone proxies. -
Page 60: Ip Pbx Overview
Call Prefix: Displays the call prefix. Fax to Email Address: Displays the fax receiver’s email address EXTENSION LIST This section lists all the extensions with the owner’s information in the UMG-2000. Extension: Displays an extension number. Username: Displays the full name of the specific extension. -
Page 61: Ip Pbx Feature Setting
PBX Service: Enables or disables the IP PBX service Call Forwarding: Enables or disables the feature “Call Forwarding”. Enabling this feature will allow the user in the UMG-2000 to forward the incoming calls to another telephone. The call forwarding extension number can only be set by the individual user in the personal account web administration.(Refer to Section - Personal Account... -
Page 62: Ip Pbx Conference
8.3 IP PBX Conference Click the “Conference” tab in the “VoIP” screen. The VoIP “Conference” screen appears, allowing the administrator to manage the conference features. The conference setting need select the conference room number and then set the room password. Conference room This section need to select the conference room number and set room password. -
Page 63: Ip Pbx Call Rules
8.4 IP PBX Call Rules Additional call rules (call restrictions) can be specified according to each country’s specific rules in the screen “Call Rule”. The blocking call rule setting is to restrict unexpected user calls which may result in additional costs for the business. Another call rule is to add the prefix to the external calls automatically which may help reduce the call charges. -
Page 64: Ip Pbx Channel Setting
8.5 IP PBX Channel Setting The PBX “Channels” allows the administrator to see the list of the PSTN card. Hardware Type This section lists the channels of PSTN Card. Channel1: Shows channel 1 of PSTN. Channel2: Shows channel 2 of PSTN. Channel3: Shows channel 3 of PSTN. -
Page 65: Ip Pbx Call Reference
8.6 IP PBX Call Reference The UMG-2000 IP PBX Call Reference displays the guide to help you configure the call features using your telephone. Call Reference Dial External: Dials 9 and destination number to call the number. Dial Operator: Dials 0 to call the operator. - Page 66 Disable No Answer Forwarding: Dials **93 to disable No answer forwarding. Outbound Call Rules This section lists the guide to call the remote branches visa VoIP. In the UMG-2000 call group, all the extensions can be dialed directly without any long distance charges.
-
Page 67: Ip Pbx Call Log
8.7 IP PBX Call Log The “Call Log” screen enables the administrator to check all the call history. CALL RECORDS This section lists all the information of the history call records. Time: Displays the time the call occurs. From: Displays the calling number. To: Displays the called number. -
Page 68: Web Management - Email
Email Filtering is the Anti-Spam and Anti-Virus of email. Every email sent to or received from the UMG-2000 email server will be verified and filtered according to the standard rules and virus database. This will greatly reduce the potential harm to your private network. The email server uses the common filter standard and builds the virus database which can be updated from the virus server automatically. -
Page 69: Email Overview
9.1 Email Overview The email overview shows the current setting of the Email service. SERVICE The section lists the current settings of the email service. Email Service: Displays the state of Email services, enabled or disabled Spam Guard: Displays the state of the feature “Spam Guard”, enabled or disabled. Auto Backup: Displays the state of the feature “Auto Backup”... -
Page 70: Email Basic Setting
UMG-2000 Email when you send or receive Email. Email Alert: Enables or disables the “Email Alert” feature. Enabling this feature will allow the UMG-2000 to send an email to the pre-assigned address with a detailed event report when the system encounters critical error. - Page 71 ALERT EMAIL ADDRESS This section lists all the email alert mail addresses that the UMG-2000 will send email to when the system encounters critical error. Alert Mail Receiver: Displays the alert email receiver. Add new email alert address: Specifies the alert email receiver.
-
Page 72: Email Blacklist
9.3 Email Blacklist All the email from the email addresses, email accounts, domain names in the email blacklist will be reject by the email server. The administrator can manage the email black list in the “Blacklist” page. EMAIL BLACK LIST SETTING This section allows for the adding of new entities to the email black list Username: Specifies the username that you want to add to the black list. -
Page 73: Email Alias
9.4 Email Alias Administrators can manage the Email alias here. Email alias is not a real email account. Instead, it is an address that forwards all emails that it has received to its email accounts. OVERVIEW This section lists all the existing email alias accounts and their numbers. Select an alias name and its numbers will be shown in the number menu. -
Page 74: Email Forward
DELETING AN EMAIL ALIAS Select an alias from the alias list, and then click the “Delete” button to delete the email alias. UPGRADING AN EMAIL ALIAS Select an alias from the alias list. Use the “Left” and “Right” buttons to add or remove its numbers, and then click the “Upgrade”... -
Page 75: Email Log
To: Displays the full address of the email receiver. Encrypted: Display whether it is an encrypted connection between the email client and the UMG-2000 Email server. Spam: Displays whether it is a junk mail. Virus: Displays whether a virus is existing in the mail. -
Page 76: Web Management - Ftp
The “FTP Server” screen allows the administrator to manage the FTP server. When adding an account to the FTP authorized list, the UMG-2000 will send the email with the suitable account and password information to the specified requested email and the account will expire automatically after the expiration time. -
Page 77: Ftp Account
10.3 FTP Account The “FTP Account” page allows the administrator to manage the FTP User. FTP USER This section lists all the available settings of FTP configuration management: Requested Email: Specifies the email address of the one who requested the FTP service. -
Page 78: Ftp Log
10.4 FTP Log The “FTP Log” page show FTP Log. FTP LOG LIST This section lists the service state of the LAN services: Requested Email: Displays the email address of the one who requested the FTP service. Login Name: Displays the login account. Client IP: Displays the current client IP address. -
Page 79: Web Management - Security
Microsoft dial-up Networking. The UMG-2000 provides the PPTP VPN server to build a secure link to the UMG-2000 from the outside of the office. It is a good choice especially for mobile and remote users who can connect to the Internet and want to securely access the... -
Page 80: Security Overview
11.1 Security Overview The page “Security Overview” shows the current security settings. FIREWALL SECURITY This section lists all the current firewall settings. SPI Firewall: Displays the state of firewall service, enabled or disabled. TCP SYN Cookie: Displays the state of the feature “TCP SYN Cookie”, enabled or disabled. - Page 81 PPTP VPN SECURITY This section lists all the current PPTP VPN settings. PPTP VPN Service: Displays the state of the PPTP VPN service, enabled or disabled. VPN Server Address: Displays the IP address PPTP VPN server. VPN client Address Range: Displays the IP address range which will be granted to PPTP clients by the server.
-
Page 82: Security Setting
Universal Plug and Play (UPnP) protocol. Response to Ping: Enables or disables the “Response to Ping” feature. Enable this feature to make the UMG-2000 respond to the ping request from the Internet. TCP SYN Cookie: Enables or disables the “TCP SYNC Cookie” feature. Enabling this feature will enable the SYN cookie to protect partial SYN-flood DoS attacks. -
Page 83: Content Filter
11.3 Content Filter The “Content Filter” page allows the administrator to set the HTTP content filter rules and assign the trusted IP. URL SITE/KEYWORD TO BLOCK RULES This section allows for the setting of the HTTP content filter rules. Block Site: Specifies the URL site if you want to block all the content of this site. Keyword: Specifies the keyword that you wish to block. -
Page 84: Access Control
11.4 Access Control To control access to Internet of some services in LAN, the administrator can set the access control rules in the page “Access Control”. The specific services of the PC in LAN cannot be accessed through the Internet any more. SERVICE ACCESS CONTROL This section allows for the setting of access rules on the LAN PC. -
Page 85: Port Forwarding
11.5 Port Forwarding To control forward some special internet request from WAN to LAN, the administrator can set the port forwarding rules in the page “Port Forwarding”. The specific internet request can forward from WAN to LAN. SERVICE PORT forward This section allows for the setting of port forward rules. -
Page 86: Security Log
11.6 Security Log The “Security Log” page shows the firewall logs. SECURITY LOG This section lists all the firewall logs. Date: Displays the date of the log. Time: Displays the time of the log. Source: Displays the source IP address of the package. Destination: Displays the destination of the package. -
Page 87: Web Management - System
The UMG-2000 will display all hardware information, including: hardware version, the technical parameter of CPU, Memory, Flash, RTC, Disk etc. COMPANY PROFILE SETUP The UMG-2000 provides the ability to build and update the profile of the customer’s company. SYSTEM EVENT MANAGEMET The UMG-2000 provides the event reporting system that strives for the continued improvement product safety and reliability through the systematic collection and analysis. -
Page 88: System Overview
12.1 System Overview The system “Overview” screen presents a summary of the UMG-2000 system status. VERSION Software Version: Displays the current software version of the UMG-2000. Hardware Version: Displays the current hardware version of the UMG-2000. HARDWARE INFORMATION CPU: Displays the CPU information. -
Page 89: System Setting
12.2 System Setting The page “System Setting” allows the administrator to update the company profile. SYSTEM SETTING This section lists all the settings of company profile. Company: Specifies your company name. Location: Specifies your company location. Country: Specifies the country of your company. Time Zone: Specifies the time zone of your city. -
Page 90: System Event Log
The UMG-2000 system events are classified by its severity which includes Critical, Major, Minor, Notification, Warning, and Informational. • The Critical event shows that the UMG-2000 is in critical, unrecoverable condition and cannot service any more. • The major event shows that the UMG-2000 encountered major error and some services cannot be used any more. -
Page 91: Web Management - Branch-To-Branch
Headquarter is a server or master mode. The UMG-2000 in this mode will be the master node in this group. DIVISION Division is a client or slave mode. The UMG-2000 in this mode will be a slave node in the group and can be managed by its headquarter. 13.1 Branch-to-Branch Setup If you want to setup up Branch-to-Branch, you must connect the UMG-2000 to the Internet or your private network. -
Page 92: Remote Calls
Once the connection is settled, the database of all the branches and the voice link will be setup automatically. This means that users can call the extensions in the UMG-2000 group once the connection is settled. For example, a user of the headquarter named user_hq with the extension “1456”... -
Page 93: Shared Services
After connection, the profile of the headquarter and its divisions will be synchronized. So far, the contact list synchronization is supported. Anyone who can access the UMG-2000 can get the fully detailed contract list which includes all users in the UMG-2000 group in user private web administration. -
Page 94: Branch-To-Branch Overview
13.8 Branch-to-Branch Overview The “Branch–to-Branch Overview” page presents the current Branch-to-Branch settings. STANDALONE Operation mode: Displays the current operation mode. Serial Number: Displays the BTB serial number. Local Time: Displays the local time. Call Prefix: Displays the local call prefix. - Page 95 Headquarter Location: Displays the location of the UMG-2000. Headquarter Serial Number: Displays the BTB serial number. Headquarter Local Time: Displays the local time of the UMG-2000. Headquarter Call Prefix: Displays the call prefix of the UMG-2000. Location: Displays the location of the specific Branch.
- Page 96 Headquarter Location: Displays the location of the headquarter UMG-2000. Headquarter Serial Number: Displays the BTB serial number of the headquarter. Headquarter Local Time: Displays the local time of the headquarter UMG-2000. Headquarter Call Prefix: Displays the call prefix of the headquarter UMG-2000.
-
Page 97: Delete A Branch
13.9 Delete a Branch If the mode of your UMG-2000 is Headquarter, check the “Delete” check box in the page “Overview” and then click the “Delete” button. The selected branch will then be deleted. Note: Delete a branch will delete the entire branch configuration profile. -
Page 98: Branch Users
CONNECT TO HEADQUARTER Serial Number: Specifies the BTB serial number of the headquarter you want to connect. Domain Name/IP: Specifies the host or IP address of the headquarter you want to access. Key: Specifies the key that the headquarter has provided as the authentication password for the branch. -
Page 99: Branch-To-Branch Log
13.12 Branch-to-Branch Log The branch-to-branch log shows the branch-to-branch history. EVENTS Date: Displays the date of the event. Time: Displays the time of the event. Description: Displays the detailed description of the event. -
Page 100: Web Management - Maintenance
BACKUP/RESTORE CONFIGURE The UMG-2000 provides the ability to backup the configuration in case of losing the configuration when abnormal events occur. Users can backup the current configuration to their own PC, file server etc., and avoid monotonous reconfiguration. It is possible for the administrator to restore the configuration to an older one if some mishandling has occurred. -
Page 101: System
System Reboot: Reboots the UMG-2000. Shut Down: Shuts down the UMG-2000. Restore System To Manufacture Default: Restores the UMG-2000 to manufacture default. This will restore all configurations to default and clear all data in the disks. You must backup the configuration and important data first. -
Page 102: System Update
14.2 System Update The “System Update” page allows the administrator to update the software to the latest version. SOFTWARE UPDATE Select Software Image: Selects the update image file on your PC or file server. Uploaded Version Number: Displays the uploaded software version. Download the latest image file to your PC. -
Page 103: Remote Service
Requestor Mail Address: Specifies requester’s email address. Service Login Name: Specifies the username to login to your GUI and access your UMG-2000 via PPTP VPN. The username and password will be sent to the former email address. Service Login Password: Specifies the password corresponding to the user account. -
Page 104: Persional Account Web Administration
UMG-2000 and allows every user to be his own administrator. Once an active user account is added to UMG-2000, the user can login to the personal account web administration. After login, the user can update his or her profile, view the... -
Page 105: User Login
15.1 User Login Any user who wants to access the UMG-2000 web management must login here. Type an authorized username and password and then login. Note: The user login session will be automatically terminated for security reason, If no action is... -
Page 106: User Home Page
15.2 User Home Page The page “My Account” shows the user profile. ACCOUNT INFORMATION This section lists the current user account settings. Username: Displays the username. Fullname: Displays the full name. Department: Displays the department/group that the user belongs to. Account Status: Displays the state of this account, active or suspend. -
Page 107: Access To Administrator
15.3 Access to Administrator If your account is the administrator, there will be an “Admin” button on the left. Click that button to access the UMG-2000 web management. Note: Only one system administrator login session is allowed at any time. -
Page 108: Personal Setting
15.4 Personal Setting Users can update the profile in their own way on the “Personal Setting” page. USER ACCOUNT Username: Displays your account username. Full Name: Specifies your full name. New Password: Specifies your new password. Confirm Password: Confirms and verifies the typed password. CALL SETTING Voice Mail Password: Specifies your voice mail password. -
Page 109: Contract List
15.5 Contract List All users with their extensions and email addresses in the UMG-2000 will be listed in the page “Contact List”. CONTACT LIST Username: Displays a username. Full Name: Displays the full name of the user. Extension: Displays the extension of the user. -
Page 110: Call Reference
15.7 Call Reference Users can get the call reference from the page “Call Reference”. Please refer to Section - IP PBX Call Reference. 15.8 Logout Click the button “sign out” in the right top corner or close the browser to logout the current session. -
Page 111: Appendix A - Fast Recovery
Appendix A - Fast Recovery Welcome to Fast Recovery After logging in, the welcome page appears again. Please select the “Fast Recovery UMG to UMG” and click the “Start” button to continue. -
Page 112: Fast Recovery
Fast Recovery Insert the four disks that you removed from the faulty UMG-2000 into the new system. Click the “Confirm” button and the rebuilding will be implemented. Please do not close the browser and wait patiently for the results. If the following screen appears, it means the fast recovery has completed successfully. -
Page 113: Appendix B - Hard Disk Hot Plug
Appendix B - Hard Disk Hot Plug The UMG-2000 supports the SATA hot plug. The hot plug allows the administrator to replace the faulty device with a new one with the same model at the running time rather than rebooting the system. -
Page 114: Insert A New Disk (Hot-Plug)
Insert a New Disk (Hot-Plug) After the alert LED is turned off, you can plug in the new hard disk. Then the alert LED will flash again. Please do not insert or remove any disks while the LED is flashing. After plugging the new devices into the disk bay, the RAID will rebuilt corrupted data automatically. -
Page 115: Appendix C - Remote Access
Appendix C - Remote Access The UMG-2000 supports remote access. Administrator can access the web management remotely via secure HTTPS. From remote PC, launch a web browser (for example: IE, Firefox etc.) and type “https://ipaddress” in the address bar of browser. - Page 116 *Model Number : UMG-2000 * Produced by: Manufacturer‘s Name : Planet Technology Corp. Manufacturer‘s Address : 11F, No. 96, Min Chuan Road, Hsin Tien Taipei, Taiwan, R.O.C. is herewith confirmed to comply with the requirements set out in the Council Directive on the Approximation of the Laws of the Member States relating to Electromagnetic Compatibility (89/336/EEC, 92/31/EEC, 93/68/EEC).
Need help?
Do you have a question about the UMG-2000 and is the answer not in the manual?
Questions and answers