ATCOM at810 User Manual
Hide thumbs
Also See for at810:
- User manual (43 pages) ,
- Features (2 pages) ,
- Quick start manual (8 pages)
Table of Contents
Advertisement
Advertisement
Table of Contents
Troubleshooting

Related Manuals for ATCOM at810


Summary of Contents for ATCOM at810
- Page 1 AT810 series User Manual Version: 1.2 2013-08-29...
- Page 2 AT810 Series User Manual Release note Version Changed note Editor Date First Release Stefen 2013-1-25 Page 9: Packing List Jessie 2013-5-13 1. Add Ethernet Cable(1.5m) Web Settings -> Account Jason 2013-8-29 Add parameters description: 1.Session Timer Enable 2.Early Update Enable 3.Caller ID Display...
-
Page 3: Table Of Contents
AT810 Series User Manual Content Contact ATCOM ........................5 1. AT810 Series Overview ....................6 1.1 Interfaces ..................6 1.2 Hardware ..................6 1.3 Software ................... 7 1.4 Network ................... 7 1.5 Management and Maintenance ............. 7 1.6 Protocol .................... 8 1.7 Compliant Standard ................ - Page 4 AT810 Series User Manual 5.4.4 Dial Plan .................. 28 5.5 Phone Setting ................... 30 5.5.1 Preference ................30 5.5.2 Features .................. 33 5.5.3 Voice ..................34 5.5.4 Ring ..................35 5.5.5 Tone ..................36 5.6 Update .................... 37 5.6.1 Manual Update ................. 37 5.6.2 Auto Provision ................
-
Page 5: Contact Atcom
Contact ATCOM The Introduction of ATCOM ATCOM is the leading VoIP hardware manufacturer in global market. We have been keeping innovating with customer’s needs oriented , working with partners to establish a total solution for SMB VoIP with IP phone , IP PBX and Asterisk cards. -
Page 6: At810 Series Overview
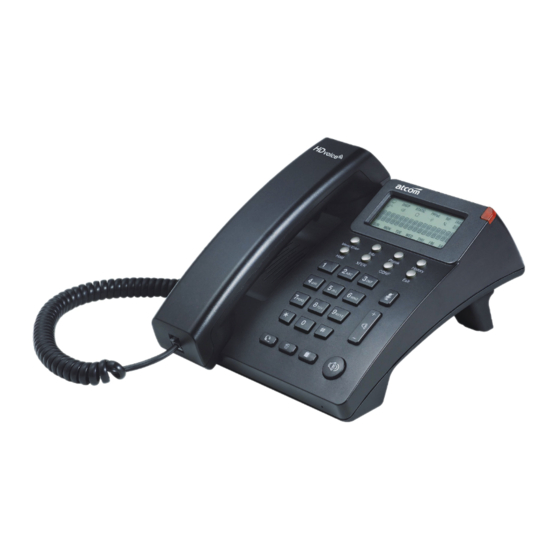
AT810 Series User Manual 1. AT810 Series Overview AT810 is almost the same with AT810P without PoE. AT810/AT810P Type Power adapter AT810 Standard accessory AT810P Optional accessory 1.1 Interfaces Power input: DC 12V, 500mA. WAN: RJ45 port. PC: RJ45 port. -
Page 7: Software
AT810 Series User Manual 1.3 Software Supports Sip 2.0 (RFC3261) and other related SIP RFCs. Supports web control. Supports Syslog. Supports G.711A/U, G722, G.723, G.726, G.729, iLBC Codec. Supports STUN. Supports 1 SIP account. ... -
Page 8: Protocol
AT810 Series User Manual Configuration via web, keyboard. Firmware and configuration file auto provision. Firmware and configuration updating via HTTP, FTP and TFTP. Supports system log and call log. 1.6 Protocol IEEE 802.3 /802.3u 10 Base T/100Base TX. -
Page 9: Packing List
AT810 Series User Manual Humidity: 10 to 90% no dew 1.9 Packing List Model Phone Handset Handse Power Ethernet Manual Feet t line adapter Cable underp AT810 1,Standar 1,1.5m accessory AT810 Optional 1,1.5m accessory Note: Power adapter Input: AC 100~240V, 50/60Hz; Output: 12V, 500mA. -
Page 10: Feet Installation Instruction
AT810 Series User Manual Click on “admin” to configure under admin mode. The default username is admin for administrator and user for user. They were defaults with no password. User can set it in the webpage. 1.11 Feet installation instruction 1.11.1 Desktop position... -
Page 11: Wall Position
AT810 Series User Manual 1.11.2 Wall position A. Put the bottom side of the IP phone upside and push the plate with letter “PUSH” into the slot, please refer the picture as below: B. Push the other plate into the slot in accordance with the direction of the arrow. -
Page 12: Keypad Of Ip Phone
AT810 Series User Manual 2. Keypad of IP Phone Keypad Map of AT810/AT810P Description of indicators and buttons: Number Function description Network status indicator: When the network connection is successful, it’s on; When the network connection is unsuccessful, it blinks. - Page 13 AT810 Series User Manual Number 7 stands for PPPoE, when the IP phone gets IP address in PPPoE mode, the indicator is on, or it blinks. 2. 4. 6 Answering mode indicator: Number 2 stands for answering call with handset;...
-
Page 14: Menu Operation
AT810 Series User Manual press it. Press “Hold” to hold the call when talking, once more to recover. Mute key: Press “Mute”, user could hear the voice from the other end but he could not get any voice from user. -
Page 15: Basic Functions And Operations
AT810 Series User Manual STATIC STATIC NET DNS2 GATEWAY NETMASK PPPoE USER NAME PASSWORD SIP SERVER PORT NUMBER PASSWORD ACCOUNT REGISTER 1 ON 0 OFF SYSTEM TIME REBOOT SET DEFAULT HANDSET VOL HEADSET VOL SPEAKER VOL RING VOL RING TYPE 4. -
Page 16: Make Calls
AT810 Series User Manual Answer by handfree Press the handfree button in the phone and talk with callers by built-in Micro-phone and Speaker. If user wants to switch in handset mode, headset mode and handfree mode, pick up the handset to switch to handset mode, and press the headset button to switch into headset mode. -
Page 17: Hang Up
Attended transfer: Attended transfer allow user to speak to the third part before transfer. If A is using AT810 talking with B, B wants to speak to C with A’s help of transferring. The operation steps are: ATCOM TECHNOLOGY CO., LIMITED... -
Page 18: Mute
Blind transfer do not allow user to talk with the third part instead of ending the call directly, it means to user that the call is over after the blind transfer. If A is using AT810 talking with B, B want to speak to C with A’s transfer. The operation steps are: 1. -
Page 19: Call History
5. Press “Menu/Enter” to save, and press “Exit” to exit the menu and check the time. 4.10 Access Mode There are two kinds of web access mode for AT810 series: admin mode and user mode. User could view and configure all items in admin mode, while user couldn’t change the SIP configuration as well as server address and port but only access and view the ATCOM TECHNOLOGY CO., LIMITED... -
Page 20: Web Settings
AT810 Series User Manual information. User would enter different mode after input different web address and user name and password: A. Administrator mode Web address: the phone’s IP/index.asp. User Name: admin. Password: default password is none. B. User mode Web address: the phone’s IP/user.asp. -
Page 21: Network
5.2 Network 5.2.1 Basic There are 3 ways for AT810 series to connect to the internet: DHCP, Static and PPPoE, please choose one according to the actual situation. A. DHCP: the IP phone will get IP address from DHCP server, user do not have to fill in the data of IP address, net mask etc. -
Page 22: Advance
C. HTTP Port: To set port for HTTP, the default is 80. If change it, user will have to input http://ip-address to open the interface again. For example, AT810’s IP is “192.168.1.201”, and HTTP port was set as 8080. Then user has to type “http://192.168.1.201:8080”... - Page 23 AT810 Series User Manual 5.2.2.3. VLAN A. Use VLAN Tagging: Whether to use VLAN (virtual local area network) or not. B. Voice VLAN Identifier (1..4094): Set voice VLAN ID, range from 1 to 4094. C. Voice VLAN Priority: Set the voice VLAN level, range from 0 to 7.
-
Page 24: Sip Setting
AT810 Series User Manual 5.2.2.6. Syslog A. Enable Syslog: Whether to enable syslog or not. B. Log level: None,Alert,Critical,Error,Warning,Notice,Info,Debug. Debug level is the most detailed. C. Syslog Server: Syslog Server address, which is a domain name or an IP address. -
Page 25: Sdp Payload Types
AT810 Series User Manual A、 RTP Port Min: Minimum port number for RTP transmission and reception. Range from 1 to 65535. Default to 16384. B、 RTP Port Max: Maximum port number for RTP transmission and reception. Range from 1 to 65535. <RTP port Min> and <RTP Port Max> should define a range that contains at least 2 even number ports. -
Page 26: Nat Support Parameters
AT810 Series User Manual 5.3.4 NAT Support Parameters A. Enable Stun: Whether to use stun to discover NAT mapping or not. B. Stun Server: Stun server to contact for NAT mapping discovery. 5.4 Account 5.4.1 SIP Enable: Whether to enable this sip register or not. -
Page 27: Codec Configuration
ISP. Outbound Proxy Port: Set outbound proxy server port. Register Expires: Set register expires time, default is 300s. AT810 will auto configure this expires time to the server recommended setting if it is different from the SIP server. -
Page 28: Call Feature Setting
AT810 Series User Manual RFC2833, and INFO. Defaults to RFC2833. 5.4.3 Call Feature Setting Message Waiting: Whether to prompt if there is a voicemail. Pickup Service Code: To set the code to pick up calls. Default to “*8”. ... - Page 29 AT810 Series User Manual symbols, such dials will be rejected. 2. It will wait for input if there are more than one rule match user’s enters. 3. It will send the number directly if the input is timeout. 4. It will send the number directly if user presses the key “#”.
-
Page 30: Phone Setting
AT810 Series User Manual The following allows only placing international calls (011 call), with an arbitrary number of digits past a required 5 digit minimum, and also allows calling an international call operator (00). In addition, it lengthens the default short interdigit timeout to 4 seconds. - Page 31 AT810 Series User Manual 5.5.1.2 Input Gain Handset Gain: Specify handset gain, the bigger the gain, the louder will the other end hear when the user is using the handset. SpeakerPhone Mic Gain: Specify speakerphone mic gain, the bigger the gain, the louder will the other end hear when the user is using the speakerphone.
- Page 32 AT810 Series User Manual 5.5.1.5 Data And Time NTP 1. NTP Server: Network time protocol service server, default is pool.ntp.org. 2. Time Zone: Choose the time zone. 3. Daylight Saving Time: Whether to enable Daylight saving time or not.
-
Page 33: Features
AT810 Series User Manual In manual mode, IP phone will resume to the manual time value after a reboot or power off. 5.5.2 Features 5.5.2.1 Speed Dial Set speed dial number for 2-9. For example, set 6750 for key 2, then user can call 6750 by call 2. -
Page 34: Voice
AT810 Series User Manual 5.5.2.3 Call Settings Do Not Disturb: Whether to enable do not disturb function or not. The phone cannot receive any incoming call but show the missed call informations if specifies it as “Yes”. Call Waiting:Whether to enable call waiting function or not. The phone can receive a new call even if it is in busy the time a new call is coming if specifies it as “Yes”. -
Page 35: Ring
Range from 1 to 998. The default value is 120. 5.5.4 Ring Administrator can upload 2 user define rings for AT810. The ring file should be wav (8k, 8bit, u-law) and no larger than 200kb. ATCOM TECHNOLOGY CO., LIMITED... -
Page 36: Tone
AT810 Series User Manual 5.5.5 Tone Set the Tone Script for each tone. E.G.: MWI Dial Tone: 350@-19,440@-19;2(.1/,1/1+2);10(*/0/1+2). Syntax: Frequency1, Frequency2; Cadence Section1; Cadence Section2. 350@-19: Frequency1 is 350HZ at -19dBm. 440@-19: Frequency2 is 440HZ at -19dBm. 2(.1/,1/1+2): Cadence Section length is 2s, 0.1s on, 0.1s off, with frequencies 1 and ... -
Page 37: Update
Conference Tone:Plays to all parties when a 3-way conference is in progress. 5.6 Update 5.6.1 Manual Update Boot Loader: Download Boot file on ATCOM's webpage, then select the file from user’s PC to upgrade. Firmware: Download firmware on ATCOM's webpage, then select the firmware file ... -
Page 38: Reset & Reboot
5.6.3 Reset & Reboot Reboot: Press to reboot the phone, such action will terminate all active calls! Reset: Press to set AT810 to factory default, please backup the config.xml, phonebook.xml and attendant_keypad.xml before reset. 5.7 Phone Book ... -
Page 39: Call Log
AT810 Series User Manual Mode: Can be directory mode and blacklist mode. Maximum 100 directory recorders, and 50 blacklist recorders. Delete: Delete the current recorder. 5.8 Call Log Redial: The recorder of the dialed calls, maximum 50 items. -
Page 40: Upgrade Firmware Under Safe Mode
AT810 Series User Manual 2. Use navigation key “+” or “-” to find “SYSTEM”, then press “Menu/Enter” ; 3. Use navigation key “+” or “-” to find “SET DEFAULT”, then press “Menu/Enter”; 4. Press “Menu/Enter” to make factory reset after the LCD shows the message “ARE YOU SURE”. -
Page 41: The Phone Can't Obtain Ip Address
AT810 Series User Manual 6.2.2 The phone can’t obtain IP address Make sure the cable has been connected to the WAN port of the phone. Make sure the cable and the switch’s port that connected with the cable is available.
Need help?
Do you have a question about the at810 and is the answer not in the manual?
Questions and answers