Table of Contents
Advertisement
Advertisement
Table of Contents

Subscribe to Our Youtube Channel
Related Manuals for Dean 24G Series


Summary of Contents for Dean 24G Series
- Page 1 Models 1824G & 2424G Dean, a member of the Commercial Food Equipment Service Association, recommends using CFESA Certified Technicians. 24-Hour Service Hotline 1-800-551-8633 PRINTED IN THE USA NON-CE & DECEMBER 2003 *8196000* *8196000* *8196000* *8196000*...
- Page 2 DIRECTLY FROM FRYMASTER/DEAN, OR ANY OF ITS AUTHORIZED SERVICE CENTERS, AND/OR THE PART BEING USED IS MODIFIED FROM ITS ORIGINAL CONFIGURATION, THIS WARRANTY WILL BE VOID. FURTHER, FRYMASTER/DEAN AND ITS AFFILIATES WILL NOT BE LIABLE FOR ANY CLAIMS, DAMAGES OR EXPENSES INCURRED BY THE CUSTOMER WHICH ARISE DIRECTLY OR INDIRECTLY, IN WHOLE OR IN PART, DUE TO THE INSTALLATION OF ANY MODIFIED PART AND/OR PART RECEIVED FROM AN UNAUTHORIZED SERVICE CENTER.
- Page 3 The front ledge of the fryer is not a step. Do not stand on the fryer. Serious injury can result Do not store or use gasoline or other flammable vapors and liquids in the vicinity of this or any Instructions explaining procedures to be followed MUST the event the operator detects a gas leak.
-
Page 4: Table Of Contents
24G Series Flatbottom Gas Fryers Installation & Operation Manual TABLE OF CONTENTS INTRODUCTION Applicability and Validity Ordering Parts Service Information Safety Information Service Personnel IMPORTANT INFORMATION Receiving and Unpacking Equipment General Principles of Operation Rating Plate Pre-Installation Equipment Installed at High Altitudes... - Page 5 24G Series Flatbottom Gas Fryers Installation & Operation Manual TABLE OF CONTENTS (CONT.) FRYER OPERATIONS Initial Start-up Boil-Out Procedure Final Preparation CONTROLLER OPERATION Operating Fryers with Thermatron Controllers PREVENTATIVE MAINTENANCE General TROUBLESHOOTING Pilot Burner Malfunction Main Burner Malfunctions Thermatron Controller Calibration...
-
Page 6: Chapter 1: Introduction
CHAPTER 1: INTRODUCTION 1.1 Applicability and Validity The Dean 24G Series Flatbottom gas model family has been approved by the European Union (EU) for sale and installation in all EU countries. This manual is applicable to and valid for all Dean 24G Flatbottom gas units sold in English- speaking countries, including those in the European Union. -
Page 7: Safety Information
24G SERIES FLATBOTTOM GAS FRYERS 1.4 Safety Information Before attempting to operate your unit, read the instructions in this manual thoroughly. Throughout this manual, you will find notations enclosed in double-bordered boxes similar to the ones below. CAUTION boxes contain information about actions or conditions that may cause or result in a malfunction of your system. - Page 8 Dean equipment. A list of Dean Factory Authorized Service Centers (FASCs) was included with the fryer when shipped from the factory. Failure to use qualified service personnel will void the Dean warranty on your equipment.
-
Page 9: Chapter 2: Important Information
C. Move the fryer to the location of installation and install legs and/or casters as described in Chapter 3.2. D. Remove all plastic skin from sides, front, and doors of the fryer(s). Failure to do this prior to initial fryer operation will make it very difficult to remove later. -
Page 10: Energy Requirements
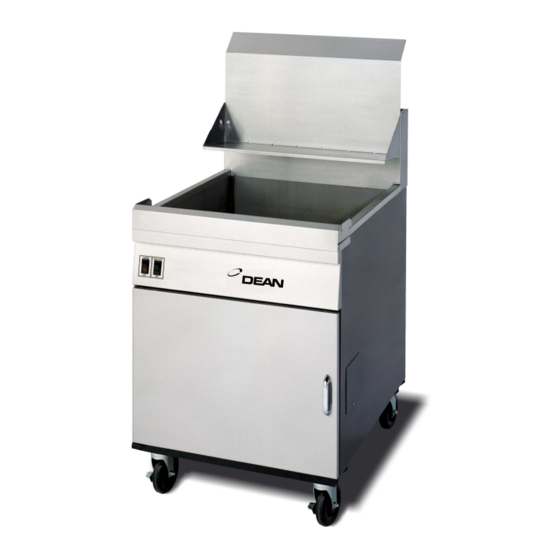
For moveable installations, optional equipment casters must be used. Questions? Call 1- 2.2.1 Fryer Description Dean 24G Series Flatbottom gas fryers are energy efficient, open frypot, gas-fired units. All units are shipped completely assembled, with accessories packed inside the frypot. All units are adjusted, tested, and inspected at the factory prior to crating for shipment. -
Page 11: Principles Of Operation
6-inch (15-cm) adjustable legs or optional 5-inch (13-cm) casters. Multiple units come equipped with casters. Dean 24G Series Flatbottom gas fryers come standard with an electronic thermostat for reliable temperature control. Fryers can be ordered with boil-out feature (optional- available only with electronic thermostat controller). -
Page 12: Pre-Installation
1. A manual gas shut-off valve must be installed in the gas supply line ahead of the fryers for safety and ease of future service. 2. Dean 24G Series Flatbottom gas fryers require 120 VAC (Non-CE), or 230VAC (CE), and are equipped with a 16-3 SJT power cord. -
Page 13: Equipment Installed At High Altitudes
Boston, MA 02110 2.6 Equipment Installed at High Altitudes 1. The fryer input rating [BTU/hr (kW/hr)] is for elevations up to 2,000 feet (610-m). For elevations above 2,000 feet (610-m), the rating should be reduced 4-percent for each additional 1,000 feet (305-m) above sea level. -
Page 14: Air Supply And Ventilation
Do not place the fryer’s flue outlet directly into the plenum of the hood, as it will affect the gas combustion of the fryer. -
Page 15: Conversion Of Units
24G SERIES FLATBOTTOM GAS FRYERS CHAPTER 2: IMPORTANT INFORMATION 2.8 Conversion of Units (CE Systems) Pressure: 1 mbar = 10,2 mm W.C. = 0,4-inch W.C. 20 mbar = 204 mm W.C. = 8-inch W.C. 1-inch W.C. = 25,4 mm W.C. = 2,5 mbar... -
Page 16: Chapter 3: Installation Instructions
A. Initial Installation: If installed with legs, do not push against the fryer’s side to adjust its position. Use a pallet or lift jack to lift the fryer slightly and place it where it is to be installed. B. Relocating the Fryer: If relocating a fryer installed with legs, remove all weight from each leg before moving. -
Page 17: Leg And Caster Installation
3.3 Leveling the Fryer A. Place a carpenter’s spirit level across the top of the fryer and level the unit front to back. If the fryer is not level from side to side, a platform or other surface adjustment is needed; there are no side-to-side level adjustments on a fryer equipped with caster/leg combinations. - Page 18 2. There are no level adjustments for the rigid casters. B. If the floor is uneven or has a decided slope, place the fryer on a level platform. C. If the fryer is moved, re-level the fryer following the instructions given in Steps 3.3, A-B.
-
Page 19: Gas Connections
If gas odors are detected, the gas supply MUST local gas company or FASC should be contacted immediately to rectify the problem. 3.4 Gas Connections CE REQUIREMENTS Dean 24G Series Flatbottom gas fryers have obtained CE markings for countries and gas categories shown below: COUNTRIES GERMANY (DE) - Page 20 The gas supply (service) line must be the same size or greater than the fryer inlet line. Dean 24G Series gas fryers are equipped with a 3/4" (22 mm) male ISO 7.1 inlet. The gas supply line must be sized to accommodate all gas-fired equipment connected to that gas supply.
- Page 21 Regulating Gas Pressure The fryer and shut-off valve must be disconnected from the gas supply during any pressure testing of the system.
- Page 22 1. CE Only: The following color codes indicate the type of gas to be used for each fryer and associated components. G20 and G25...
- Page 23 4. To limit movement of the fryer, restraints independent of the flexible coupling or connector must be used. Clips are located on the back panel of the fryer for the attachment of restraints.
-
Page 24: Adjustments/Adaptation To Different Gases
1. Proper operation of appliances requires operator to inspect the following adjustments in Section 3.6 in terms of gas inputs and pressures. 2. Dean 24G Series Flatbottom gas fryers are manufactured to use the type of gas and pressure specified on the rating plate. When changing gas, adaptation must be performed by qualified personnel as defined in Section 1.5. -
Page 25: Gas Inputs
24G SERIES FLATBOTTOM GAS FRYERS CHAPTER 3: INSTALLATION INSTRUCTIONS 3.6 Gas Inputs CE UNITS ONLY: Nominal Heat Inputs (Qn), Gas Type, Orifice Size, Part Number and Quantity/Color are listed in the table below: MODEL NOMINAL HEAT INPUT- Qn (kW) 24G Series (ALL) †Orifice size listed is for fryers operating at altitudes of 610 meters or less. -
Page 26: Gas Conversion Procedures
24G SERIES FLATBOTTOM GAS FRYERS CHAPTER 3: INSTALLATION INSTRUCTIONS 3.6 Gas Inputs (cont.) Gas Type Natural Propane * Orifice sizes are listed for altitudes of 2000 feet and less. Burner Adjustments- 24G Series Natural (G20/G25) Gas: Maximum Opening Propane/LP (G31) Gas: 15 mm Opening If gas odors are detected, the gas supply MUST the local gas company or authorized service agency contacted for immediate service. - Page 27 24G SERIES FLATBOTTOM GAS FRYERS CHAPTER 3: INSTALLATION INSTRUCTIONS 3.7 Gas Conversion Procedures (cont.) CE UNITS ONLY: When converting from G20 to G25 gas, the following procedures apply: Equipment replacement is not required. Adjust orifice gas pressure to the appropriate value listed in the table on page 3-9 by turning the gas valve "adjustment screw".
- Page 28 24G SERIES FLATBOTTOM GAS FRYERS CHAPTER 3: INSTALLATION INSTRUCTIONS 3.7 Gas Conversion Procedures (cont.) NON-CE UNITS ONLY: See gas valve illustration below for reference when performing gas valve conversions. When converting from natural gas to propane (or vice-versa), the following procedures apply: Burner orifices and pilot orifice MUST be replaced (see page 3-11 for required component part numbers).
-
Page 29: Gas Conversion Components
DO NOT CUT, REMOVE, OR OTHERWISE BYPASS THE GROUNDING The rating plate and wiring diagram are located inside the front door. The fryer is equipped with a 115VAC... -
Page 30: Chapter 4: Fryer Operations
24G SERIES FLATBOTTOM GAS FRYERS CHAPTER 4: FRYER OPERATIONS 4.1 Initial Start-up The on-site supervisor is responsible for ensuring that operators are made aware of the inherent hazards of operating a hot oil frying system, particularly the aspects of system operation, oil filtration, draining and cleaning procedures. - Page 31 Dean warranty. The inlet pipe at the lower rear of the fryer brings incoming gas to the pilot safety control valve, then to the pilot and main burners. The pilot is located high in the cabinet, at the base of the frypot.
- Page 32 8. Press the white pilot light button on the gas valve and hold approximately 45 seconds to 1 minute, until the pilot stays lit. (If fryer is equipped with a piezo ignitor, press and hold the white pilot light button, then repeatedly press the piezo ignitor button until the pilot lights.
- Page 33 24G SERIES FLATBOTTOM GAS FRYERS CHAPTER 4: FRYER OPERATIONS 4.1.1 Pilot Lighting Procedures, Standing Pilot (cont.) 7. Push and hold the knob in and apply a lighted match or taper to the pilot burner head. Continue to hold the knob in for about 60 seconds after the flame appears on the pilot. Release the knob.
-
Page 34: Boil-Out Procedure
These units are not intended for this purpose, and will be damaged by Leave fryer OFF for a minimum of 10 minutes prior to filtering to allow frypot heat to dissipate. Frypot damage can occur if the shortening is drained immediately after turning 1. - Page 35 "Off". Filtration/Boil-Mode-equipped fryers: After boil out is complete, turn the boil-out and fryer switches to "Off". Drain the solution from the frypot. Place a metal stockpot of sufficient size to safely hold the entire contents of the frypot under the drain port to collect the water/boil-out solution.
-
Page 36: Final Preparation
1. Ensure the drain valve is closed and the drain plug is in place. When using a liquid shortening, fill the fryer to the appropriate oil level line scribed into the back of the frypot. 2. When using a solid shortening, cut the shortening into small pieces and pack it into the frypot, leaving no air spaces. -
Page 37: Chapter 5: Controller Operation
Fryer power switch should be "OFF" when filter is in use. FRYER POWER SWITCH – This switch turns the fryer on and off. When the power switch is in the "ON" position, the indicator light will be lit when calling for heat. - Page 38 5.1 Operating Fryers with Thermatron Controllers (cont.) MANUAL FILTER POWER SWITCH (older systems with built-in filtration) – Controls power to the filter pump in the event the primary system fails. Fryer Power Switch should be in "OFF" position when in use.
-
Page 39: Chapter 6: Preventative Maintenance
Any equipment works better and lasts longer when maintained properly and kept clean. Cooking equipment is no exception. 24G Series Flatbottom gas fryers should be kept clean during the working day, and thoroughly cleaned at the end of each day. Below are recommendations for daily, weekly and periodic preventative maintenance. - Page 40 This appliance should be inspected and adjusted periodically by qualified service personnel as part of a regular kitchen maintenance program. Frymaster/Dean recommends that this appliance be inspected at least annually by a Factory Authorized Service Technician as follows: Inspect the cabinet inside and out, front and rear for excessive oil build-up and/or oil migration.
- Page 41 DO NOT let water splash into the tank of hot oil. It will splatter and can cause severe All stainless steel fryer cabinet parts should be wiped regularly with hot, soapy water during the day, and with a liquid cleanser designed for stainless steel at the end of each day.
-
Page 42: Chapter 7: Troubleshooting
24G SERIES FLATBOTTOM GAS FRYERS CHAPTER 7: TROUBLESHOOTING NOTE: Refer to the wiring diagram affixed inside the fryer cabinet door when troubleshooting electrical components. Hot cooking oil/shortening will cause severe burns. Never attempt to move this appliance when filled with hot cooking oil/shortening or to transfer hot cooking oil/shortening from one This equipment should be unplugged when servicing, except when electrical circuit tests are required. -
Page 43: Main Burner Malfunctions
24G SERIES FLATBOTTOM GAS FRYERS CHAPTER 7: TROUBLESHOOTING 7.1 Pilot Burner Malfunctions (cont.) PROBLEM Pilot burner ignites properly and burns properly, but goes out when the exhaust blower comes on. 7.2 Main Burner Malfunctions PROBLEM Main burner will not come on even though air blower is in operation;... -
Page 44: Thermatron Controller Calibration
24G SERIES FLATBOTTOM GAS FRYERS CHAPTER 7: TROUBLESHOOTING 7.2 Main Burner Malfunctions (cont.) PROBLEM Main burner flames are small and appear lazy; Oil or shortening does not come up to temperature quickly. Signs of excessive frypot temperature; oil or shortening quickly becomes discolored. -
Page 45: Recommended Spare Parts
24G SERIES FLATBOTTOM GAS FRYERS CHAPTER 7: TROUBLESHOOTING 7.4 Recommended Spare Parts Commonly replaced parts in older 24G Series Flatbottom gas fryers are: Gas Valve-24V, CE – G20/G25 – 807-2091 Gas Valve-24V, CE – G31– 807-2127 Gas Valve-24V, Non-CE – Natural – 807-3555 Gas Valve-24V, Non-CE –... -
Page 46: Service Hotline
Dean, 8700 Line Avenue, PO Box 51000, Shreveport, Louisiana 71135-1000 Shipping Address: 8700 Line Avenue, Shreveport, Louisiana 71106 TEL 1-318-865-1711 FAX (Parts) 1-318-688-2200 FAX (Tech Support) 1-318-219-7135 SERVICE HOTLINE Price: $14.00 PRINTED IN THE UNITED STATES 1-800-551-8633 819-6000 DECEMBER 2003...
Need help?
Do you have a question about the 24G Series and is the answer not in the manual?
Questions and answers