
Subscribe to Our Youtube Channel
Related Manuals for Dean Dean 52 Series


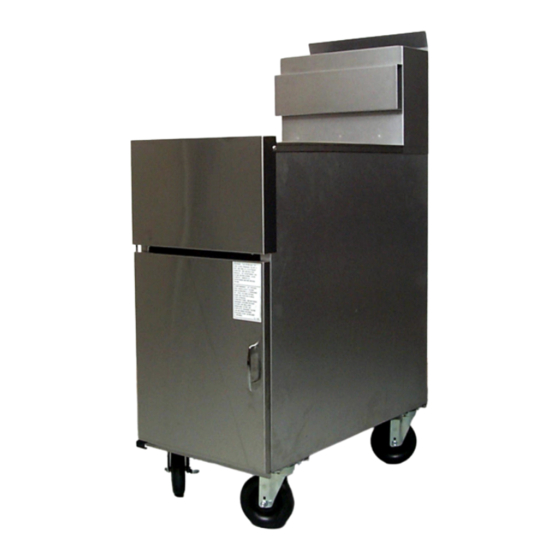
Summary of Contents for Dean Dean 52 Series
- Page 1 & PARTS LIST INCLUDED DOMESTIC Dean, a member of the Commercial Food Equipment Service Association, recommends using CFESA Certified Technicians. Price: $8.00 24-Hour Service Hotline 1-800-551-8633 819-5784 MARCH 2002...
- Page 2 The Commonwealth of Massachusetts requires any and all gas products to be installed by a licensed plumber or pipe fitter. Keep the oil temperature in the fryer to a maximum of 190°C. Higher temperatures will cause rapid breakdown of the oil and give you no faster cooking.
-
Page 3: Table Of Contents
SUPER RUNNER 52 SERIES GAS FRYERS INTRODUCTION IMPORTANT INFORMATION INSTALLATION INSTRUCTIONS DAILY OPERATION PREVENTATIVE MAINTENANCE TROUBLESHOOTING PARTS LIST TABLE OF CONTENTS Page #... -
Page 4: Service Information
Call the 1-800-551-8633 or (318) 865-1711 Service Hotline number for the location of your nearest maintenance and repair center. Always give the model and serial numbers of your fryer. To assist you more efficiently, the following information will be needed:... -
Page 5: Safety Information
DANGER Hot cooking oil causes severe burns. Never attempt to move a fryer containing hot cooking oil or to transfer hot cooking oil from one container to another. -
Page 6: Principles Of Operation
This is attached to the inside right-hand corner of the front door panel. Information provided includes the model and serial number of the fryer, BTU/hr (kW/hr) of the burners, outlet gas pressure in inches W.C. (mbars) and whether the unit has natural or propane gas orifices. -
Page 7: Equipment Installed At High Altitudes
Dean Super Runner Series gas fryers operate on millivolt, and do not require an external electric power supply. Clearances: The fryer area must be kept free and clear of all combustibles. This unit is design- certified for the following installations: Commercial installation only (not for household use). -
Page 8: Receiving And Unpacking Equipment
D. Do not place the fryer’s flue outlet directly into the plenum of the hood, as it will affect the gas combustion of the fryer. -
Page 9: Conversion Of Units
2.7 Receiving and Unpacking Equipment (cont.) C. Move the fryer to the location of installation and install legs and/or casters as described in Chapter 3.2. D. Remove all plastic skin from sides, front, and doors of the unit. Failure to do this will melt the plastic and make it very difficult to remove later. -
Page 10: Chapter 3: Installation Instructions
A. Initial Installation: If installed with legs, do not push against the fryer’s side to adjust its position. Use a pallet or lift jack to lift the fryer slightly and place it where it is to be installed. B. Relocating the Fryer: If relocating a fryer installed with legs, remove all weight from each leg before moving. -
Page 11: Leveling The Fryer
3.3 Leveling the Fryer A. Place a spirit level across the top of the fryer and level the unit front to back. If the fryer is off level side to side, a platform or other surface adjustment is needed; there is no side-to-side level adjustments on a fryer equipped with caster/leg combinations. - Page 12 C. If the fryer is moved, re-level the fryer following the instructions given in Steps 3.3.A-C. D. A fryer must be restrained to prevent tipping when installed in order to avoid the splashing of hot liquid. Restraints used can be straps or chains anchored to an immovable object (wall, floor anchor), or may be the manner of installation (installing the fryer in an alcove, battering to other appliances, etc.).
-
Page 13: Gas Connections
The fryer MUST be connected to the gas supply specified on the rating and serial number plate located on the back of the fryer door. - Page 14 3.4 Gas Connections (cont.) The gas supply (service) line must be the same size or greater than the fryer inlet line. Super Runner 52-Series gas fryers are equipped with a 3/4" (19 mm) male ISO 7.1 inlet. The gas supply line must be sized to accommodate all gas-fired equipment connected to that gas supply.
- Page 15 3.4 Gas Connections (cont.) Regulating Gas Pressure The fryer and shut-off valve must be disconnected from the gas supply during any pressure testing of the system. External gas regulators are not normally required on this fryer. A safety control valve protects the fryer against pressure fluctuations.
- Page 16 1. The following color codes indicate the type of gas to be used for each fryer and it’s components.
-
Page 17: Adjustments/Adaptation To Different Gases
When changing gas, adaptation must be performed by qualified personnel. Failure to use qualified personnel will void the Dean warranty. 3.6 Gas Inputs A. Nominal Qn Heat Input for the Super Runner SR-52 gas fryer is: Domestic 120,000 BTU/Hr. 35.19 kW 126.6 megajoules... -
Page 18: Gas Conversion: Procedures
3.6 Gas Inputs (cont.) C. Adjustments for different gases are as follows: Gases and Gas Supply Pressure* Injector Diameter Burner Marking Pilot Marking Gas pressure at the regulator (mbar)* NOTE: Outlet gas pressure must be adjusted strictly within the above requirements 5 to 10 minutes after the appliance is operating. - Page 19 3.7 Gas Conversion: Procedures (cont.) When converting from G20 (20 mbar) to G25 (25 mbar), or vice-versa, or G31 (37 mbar) to G31 (50 mbar), the following procedures apply: ♦ Check pilot-adjustment and adjust as necessary. ♦ Other adjustments are not necessary. Conversion from one gas family to another (i.e.
-
Page 20: Gas Conversion Components
“RED” 14-0067-2 Label Vessel Assembly 1/2—3/4 Reducer Gas Valve 1.63-inch [41-mm] Gas Manifold DESCRIPTION Pilot orifice Burner orifice, #53 (diameter: 1.51 mm) Appareil réglé pour: G31/37 Fryer equipped for: G31/37 3-11 Bushing Burner 1.30-inch [33-mm] Orifice Detail A Burner/Orifice Location... -
Page 21: Electrical Connections
C22.2), or the appropriate CE community standards. Do not cut or remove the ground prong from the power cord plug. Respect the phase – neutral polarity. DESCRIPTION Pilot orifice Burner orifice, #39 (diameter: 2.53 mm) Appareil réglé pour: G20/20 Fryer equipped for: G25/25 3-12... -
Page 22: Initial Startup
Dean warranty. The inlet pipe at the lower rear of the fryer brings incoming gas to the pilot safety control valve, then to the pilot and main burners. The pilot is located high in the cabinet center, at... - Page 23 Open the manual shut-off valve on the incoming service line. Apply lighted match or taper to the pilot burner head. (If fryer is equipped with a piezo ignitor, go to Step 8). Turn the gas cock dial on the control valve to "Pilot", then depress and hold the dial until the pilot stays lit (approximately 1 minute).
- Page 24 Ensure heating tubes are covered in liquid prior to engaging burners. 6. Open the manual shut-off valve on the incoming service line. 7. Apply a lighted match or taper to the pilot burner head. (If fryer is equipped with a piezo ignitor, go to Step 8).
-
Page 25: Boil-Out Procedure
(93°C). 5. The burners should shut-off, just as the boil-out solution reaches setpoint. If the pilot and main burner go out, the fryer(s) MUST be left completely shut down at least 5 minutes before lighting. 6. The burners will heat the boil-out solution to a simmer. Simmer the solution for approximately 45 minutes. -
Page 26: Final Preparation
This ensures maximum life of shortening. When the fryer is not in use, set the thermostat to a lower temperature than that used during cooking. Light loads, too, may be cooked at lower temperatures. A good operator should experiment to determine the optimum temperature and load conditions for the various food items to be cooked. -
Page 27: Opening: Beginning The Work Day
4.7 Filtering Basics When filtering, never leave the filter unit unattended. Oil moving through the lines can knock the flexible return hose out of the fryer, spraying hot oil and For filtration instructions and troubleshooting, consult the operating manual or instructions provided with the filtration equipment. -
Page 28: Closing: End Of Day
When completing a filter cycle, always close the return valve(s) at the fryer(s) to avoid siphoning oil out of the fryer into the filter system. Open the valve at the filter to promote draining of the return lines into the filter pan. -
Page 29: Chapter 5: Preventative Maintenance
5.1.2 Weekly A. Completely drain the oil from the fryer into a suitable container for disposal. Do not use a glass or plastic container. B. Clean the fry vessel by following boil-out procedures in Chapter 4-2. - Page 30 DO NOT let water splash into the tank of hot oil. It will splatter and can cause severe All stainless steel fryer cabinet parts should be wiped regularly with hot, soapy water during the day, and with a liquid cleanser designed for stainless steel at the end of each day.
-
Page 31: Chapter 6: Troubleshooting
SUPER RUNNER 52 SERIES GAS FRYERS CHAPTER 6: TROUBLESHOOTING 6.1 General This appliance may have more than one power supply connection point. Disconnect all power cords before servicing. The problems and possible solutions covered are those most commonly encountered. To troubleshoot, perform the test set-up at the beginning of each condition. Follow each step in sequence. -
Page 32: Main Burner Malfunction
6.2 Pilot Burner Malfunction (cont.) C. Pilot flame of proper size, but is unstable. thermocouple completely at all times. 1. Check for drafts that might be caused by air conditioning equipment or make-up air apparatus. Turn air-moving equipment off and recheck the pilot. Do not attempt to turn the adjustment past the stops or the controller will be 6.3 Main Burner Malfunction A. - Page 33 D. Fryer will not reach the temperature setting and/or runs erratically. 1. Incorrect location of sensor probe or defective temperature sensor. Loose wiring/wire connection E. Fryer shortening temperature cannot be controlled; fryer runs at high-limit temperature. Defective operating thermostat or temperature probe. Call Service Technician.
- Page 34 6.4 Millivolt Wiring Diagrams 6.4.1 All Units (Except Australia) High-Limit 6.4.2 Australia Only Temperature Control High-limit Thermopile Thermocouple Electrode AGA Pilot Bracket Ignitor Piezo Bracket White Combination Gas Valve Black Black Pilot Gas Valve Gas In Pilot Gas Thermopile Operating Thermostat Robertshaw Gas Valve Gas Out...
-
Page 35: Chapter 7: Parts List
SUPER RUNNER 52 SERIES GAS FRYERS CHAPTER 7: PARTS LIST 7.1 Super Runner 52 Primary Components... - Page 36 Upper Structural Back Door Assembly Adjustable Leg With Mounting Plate Fry Basket Grid Assembly Basket Hanger Vat Cover (106-1637 SR42) Clean-out Rod (Fryer’s Friend) Caster, 5" With Locking Brake Caster, 5" Without Locking Brake Caster, 5" Rigid (Optional) Drain Nipple, Extended...
- Page 37 7.2 Super Runner 52 Gas Valves and Related Components, Domestic, CE and Australia...
- Page 38 7.2 Super Runner 52 Gas Valves and Related Components, Domestic, CE and Australia (cont.) ITEM PART # 810-2036 807-3549 810-2294 810-2295 807-2122 807-2121 813-0165 813-0418 810-2043 813-0066 813-0254 813-0174 200-2042 807-3540 200-2042 807-3565 200-2042 810-1152 810-2296 810-2032 810-2155 810-1001 200-1868 810-1153 * Not Illustrated COMPONENT...
- Page 39 Dean, 8700 Line Avenue, Shreveport, Louisiana 71135 TEL 1-318-865-1711 FAX (Parts) 1-318-219-7140 (Tech Support) 1-318-219-7135 Price: $6.00 SERVICE HOTLINE 819-5784 PRINTED IN THE UNITED STATES 1-800-551-8633 06-01...
Need help?
Do you have a question about the Dean 52 Series and is the answer not in the manual?
Questions and answers