Table of Contents
Advertisement
Quick Links
Advertisement
Table of Contents

Subscribe to Our Youtube Channel
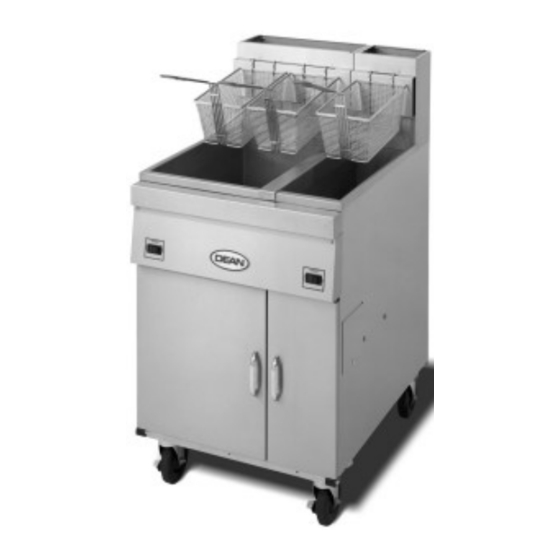
Summary of Contents for Dean Cool Zone Electric Fryer
- Page 1 INSTALLATION, OPERATION, & MAINTENANCE MANUAL COOL ZONE ELECTRIC FRYERS (CE) 14501 South Broadway, Gardena, California 90248 Printed in the United States of America English A WELBILT Company DEAN INDUSTRIES Dean Factory Service Center 1-800-551-8633 1-318-865-1711 P/N 819-5729 November 1999...
- Page 2 DIRECTLY FROM FRYMASTER DEAN, OR ANY OF ITS AUTHORIZED SERVICE CENTERS, AND/OR THE PART BEING USED IS MODIFIED FROM ITS ORIGINAL CONFIGURATION, THIS WARRANTY WILL BE VOID. FURTHER, FRYMASTER DEAN AND ITS AFFILIATES WILL NOT BE LIABLE FOR ANY CLAIMS, DAMAGES OR EXPENSES INCURRED BY THE CUSTOMER...
- Page 3 See Chapter 1 of this manual for definition of qualified service personnel. The front ledge of the fryer is not a step. Do not stand on the fryer. Serious injury can result from slips or contact with the hot oil.
-
Page 4: Table Of Contents
1.3 AFTER SALES: In order to improve service, have the following chart filled in by the Dean Authorized Servicer who installed this equipment. Authorized Servicer Address Telephone/Fax Model # Serial # Always give the Type: Fryer Equipped For: PAGE... -
Page 5: Important Information
IDENTIFIED ON THE ATTACHED RATING PLATE. 2.3 PRE-INSTALLATION: The temperature Local building codes usually prohibit a fryer with its open tank of hot oil from being installed beside an open flame of any type, whether a broiler or the open burner of a range. -
Page 6: Air Supply And Ventilation
European Community standards. 2.4 AIR SUPPLY & VENTILATION: a. The area around the fryer must be kept clear to prevent any obstruction to ventilation air flow as well as for service and maintenance. Never use the interior of the fryer’s cabinet for storage. -
Page 7: Installation
(50 inch-lbs.) minimum torque. CAUTION of the single fryer as shown in the Figure 3-1. Legs must be installed at the front of the fryer. installations as given above in steps... - Page 8 Lock Washer Rear Rigid Caster 13 cm/5 in the top of the fryer and level the unit both front-to-back and side-to-side. If the fryer is not level, the unit may not function efficiently, the oil may not drain properly for filtering and in a line-up it may not match adjacent units.
- Page 9 Do not rely on leg thread or caster shims for adjustments. f. If the fryer is moved, re-level the fryer BECOME following the instructions given in Steps 3.3.a-c.
-
Page 10: Electrical Connections
CAUTION The fryer MUST be connected to the voltage and phase as specified on the rating and serial number plate located on the back of the fryer door. A ground wire MUST be connected to the ground terminal provided near the input power terminal block. -
Page 11: Final Preparation
3.6 FINAL PREPARATION: a. When using liquid (cooking oil), fill the fryer to the “oil level” line scribed into the back of the fryer vessel. b. When using solid shortening, either melt it first, or cut into small pieces and pack into cool zone (bottom) of the frying vessel. -
Page 12: Daily Operation
When the fryer is not in use, the thermostat should be set lower than that used during cooking. 4.3 TURN ON PROCEDURES: a. If fryer is empty, pour enough b. - Page 13 CAUTION When filtering, never leave the filter unattended. Always point the flexible oil return hose nozzle down into the fry vessel to prevent spraying of hot oil which may cause severe burns. 4.5 CLOSING: When closing at night, filter oil in all fryers and drain the filter lines. Cover the open tanks of oil.
-
Page 14: Cleaning And Maintenance
Any piece of equipment works better and lasts longer when maintained properly and kept clean. Cooking equipment is no exception. The fryer must be kept clean during the working day and thoroughly cleaned at the end of each day. 5.2 DAILY: Wash all removable parts. -
Page 15: Stainless Steel
5.6 STAINLESS STEEL: steel fryer body parts should be wiped regularly with hot, soapy water during the day and with a liquid cleaner designed for this material at the end of each day. -
Page 16: Troubleshooting Guide
3. Wait at least 30 minutes for the oil temperature to stabilize. 4. If temperature is not within +/- 5°C (10°F) of the dial setting, call service for a new operating thermostat/temperature controller. High Limit Reset Switch Drain Sensing Bulb in Valve Fryer Vessel Figure 6-2... -
Page 17: Wiring Diagram
7. WIRING DIAGRAM Wiring Diagram Cool Zone Electric Fryer (CE) Electric Fryer 230/400V 24V Contactors June 1999... - Page 18 8. COOL ZONE 1414E ELECTRIC (CE) PARTS LIST ITEM PART NUMBER 2698 1942 1943 44-1363 36004-1 36-0014-1 12-0097 1503 1039-2 9002949 12220 12-0309-2 1501 1501-1 DESCRIPTION LEG, BLACK, ADJUSTABLE WITH MOUNTING PLATE, 6" CASTER, 5" W/BRAKE CASTER, 5" W/O BRAKE NIPPLE, DRAIN EXT.
- Page 19 ITEM PART NUMBER 24-0350 36-0012 8101202 12-0311 50-0041-1 50-0041-2 2557 1205 2025 8072196 12-0376 12-0323 12210 12-0322 14-0193 2066-1 36-0048 12-0237 2687 12212 14248-2 14-0592-6 1902 14-0695 2189 18-0041 14-0883 18-0041 18-0040 18-0031 12193 18-0031 18-0061 12-0377 Not Used Not Used 36-0026-2 2608 8071999...
- Page 20 Frymaster, L.L.C., 8700 Line Avenue, PO Box 51000, Shreveport, Louisiana 71135-1000 Shipping Address: 8700 Line Avenue, Shreveport, Louisiana 71106 TEL 1-318-865-1711 FAX (Parts) 1-318-219-7140 (Tech Support) 1-318-219-7135 Price: $6.00 SERVICE HOTLINE *8195729* PRINTED IN THE UNITED STATES 1-800-551-8633 NOV 1999...


Need help?
Do you have a question about the Cool Zone Electric Fryer and is the answer not in the manual?
Questions and answers