Sign In
Upload
Download
Table of Contents
Contents
Add to my manuals
Delete from my manuals
Share
URL of this page:
HTML Link:
Bookmark this page
Add
Manual will be automatically added to "My Manuals"
Print this page
×
Bookmark added
×
Added to my manuals
Manuals
Brands
Xerox Manuals
Printer
DocuPrint M205 b
User manual
Xerox DocuPrint M205 b User Manual
Xerox printers user guide
Hide thumbs
1
Table Of Contents
2
3
4
5
6
7
8
9
10
11
12
13
14
15
16
17
18
19
20
21
22
23
24
25
26
27
28
29
30
31
32
33
34
35
36
37
38
39
40
41
42
43
44
45
46
47
48
49
50
51
52
53
54
55
56
57
58
59
60
61
62
63
64
65
66
67
68
69
70
71
72
73
74
75
76
77
78
79
80
81
82
83
84
85
86
87
88
89
90
91
92
93
94
95
96
97
98
99
100
101
102
103
104
105
106
107
108
109
110
111
112
113
114
115
116
117
118
119
120
121
122
123
124
125
126
127
128
129
130
131
132
133
134
135
136
137
138
139
140
141
142
143
144
145
146
147
148
149
150
151
152
153
154
155
156
157
158
159
160
161
162
163
164
165
166
167
168
169
170
171
172
173
174
175
176
177
178
179
180
181
182
183
184
185
186
187
188
189
190
191
192
193
194
195
196
197
198
199
200
201
202
203
204
205
206
207
208
209
210
211
212
213
214
215
216
217
218
219
220
221
222
223
224
225
226
227
228
229
230
231
232
233
234
235
236
237
238
239
240
241
242
243
244
245
246
247
248
249
250
251
252
253
254
255
256
257
258
259
260
261
262
263
264
265
266
267
268
269
270
271
272
273
274
275
276
277
278
279
280
281
282
283
284
285
286
287
288
289
290
291
292
293
294
295
296
297
298
299
300
301
302
303
304
305
306
307
308
309
310
311
312
313
314
315
316
317
318
319
320
321
322
323
324
325
326
327
328
329
330
331
332
333
334
335
336
337
338
339
340
341
342
343
344
345
346
347
348
349
350
351
352
353
354
355
356
357
358
359
360
361
362
363
364
365
366
367
368
369
370
371
372
373
374
375
376
377
378
379
380
381
382
383
384
385
386
387
388
389
390
391
392
393
394
395
396
397
398
399
400
401
402
403
404
405
406
407
408
409
410
411
412
413
414
415
416
417
418
419
420
421
422
423
424
425
426
427
428
429
430
431
432
433
434
435
436
437
438
439
440
441
442
443
444
445
446
447
448
449
450
451
452
453
454
page
of
454
Go
/
454
Contents
Table of Contents
Troubleshooting
Bookmarks
Table of Contents
Table of Contents
Preface
Trademarks and Document Disclaimer
Types of Manuals
Using this Guide
Organization
Conventions
Safety Notes
Electrical Safety
Machine Installation
Operational Safety
Consumable
Warning and Caution Labels
Environment
Regulation
Radio Frequency Emissions (Class B)
Product Safety Certification (CB)
Illegal Copies and Printouts
Product Features
1 Specifications
Copy Function
Print Function
Scan Function
Fax Function (Docuprint M205 F/M205 Fw Only)
Direct Fax Function (Docuprint M205 F/M205 Fw Only)
2 Basic Operation
Main Components
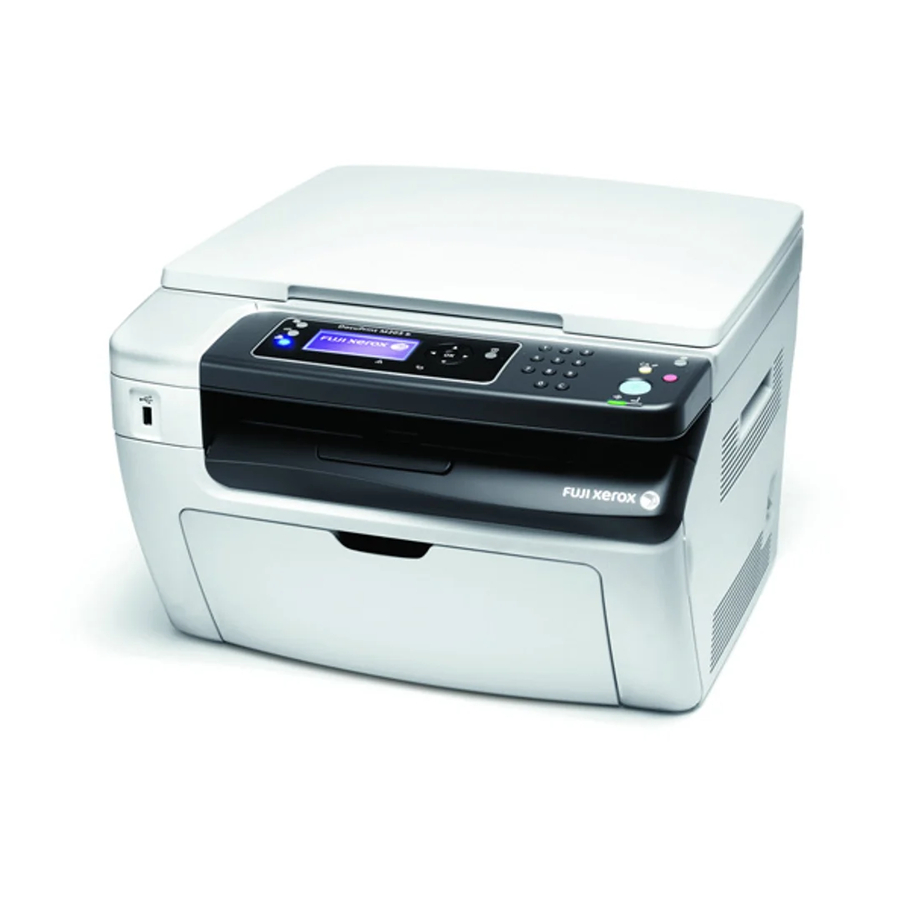
Front View
Rear View
Automatic Document Feeder (ADF) (Docuprint M205 F/M
Only)
Operator Panel
Turning on the Printer
Setting Initial Settings on the Operator Panel
Printing a Panel Settings Page
The Operator Panel
The Printer Setting Utility
Power Saver Mode
Exiting the Power Saver Mode
3 Printer Management Software
Print and Scan Drivers
Centreware Internet Services (Docuprint M205 F/M205 Fw Only)
Creating an Administrative Password
Printer Setting Utility (Windows Only)
Simplemonitor (Windows Only)
Launcher (Windows Only)
Address Book Editor (Docuprint M205 F/M205 Fw Only)
Express Scan Manager
Docuworks (Windows Only) (Docuprint M205 F/M205 Fw Only)
4 Printer Connection and Software Installation
Overview of Network Setup and Configuration (Docuprint M205 F/M205 Fw Only)
Connecting Your Printer
Connecting Printer to Computer or Network
Setting the IP Address (Docuprint M205 F/M205 Fw Only)
TCP/IP and IP Addresses
Automatically Setting the Printer's IP Address
Dynamic Methods of Setting the Printer's IP Address
Assigning an IP Address (for Ipv4 Mode)
Verifying the IP Settings
Printing and Checking the System Settings Page
Installing Print Driver on Computers Running Windows
Identifying Print Driver Pre-Install Status (for Network Connection Setup) (Docuprint M205 F/M205 Fw Only)
This Section Includes
F/M205 Fw Only)
Disabling the Firewall before Installing Your Printer
Inserting the Software Pack CD-ROM
USB Connection Setup
Network Connection Setup (Docuprint M205 F/M205 Fw Only)
Configuring Wireless Settings (Docuprint M205 Fw Only)
Using Wizard Setup to Configure Wireless Settings
Using Advanced Setup to Configure Wireless Settings
Ethernet Cable
Centreware Internet Services
Setting up for Shared Printing (Docuprint M205 F/M205 Fw Only)
Point and Print
Installing Print Driver on Computers Running Mac os X
Configuring Wireless Settings on the Operator Panel (Docuprint M205 Fw Only)
Installing the Drivers and Software
When Using a Usb Connection
5 Printing Basics
About Print Media
Print Media Usage Guidelines
Automatic Document Feeder (ADF) Guidelines (Docuprint M205 F/M205 Fw Only)
Print Media that Can Damage Your Printer
Print Media Storage Guidelines
Supported Print Media
Usable Print Media
Loading Print Media
Capacity
Print Media Dimensions
Loading Print Media in the Multipurpose Feeder (MPF)
Loading Envelope in the Multipurpose Feeder (Mpf)
Loading Print Media in the Priority Sheet Inserter (PSI)
Manual Duplex Printing (Windows Print Driver Only)
Using the Output Tray Extension
Setting Paper Sizes and Types
Setting Paper Sizes
Setting Paper Types
Printing
Printing from the Computer
Canceling a Print Job
Selecting Printing Options
Printing Options for Windows
Selecting Options for an Individual Job (Mac os X)
Printing Custom Size Paper
Using the Windows Print Driver
Using the Mac os X Print Driver
Checking Status of Print Job
Printing a Report Page
Printer Settings
Adjusting the Language
Printing with Web Services on Devices (WSD) (Docuprint M205 F/M205 Fw Only)
Adding Roles of Print Services
Printer Setup
6 Copying
Loading Paper for Copying
Preparing a Document
Making Copies from the Document Glass
Making Copies from the ADF (Docuprint M205 F/M205 Fw Only)
Setting Copy Options
Number of Copies
Collated
Reduce/Enlarge
Document Size
Document Type
Lighten/Darken
Sharpness
Auto Exposure
Multiple up
Margin Top/Bottom
Margin Left/Right
Margin Middle
Changing the Default Settings
7 Scanning
Scanning Overview
Scanning to a USB Connected Computer
Scanning from the Operator Panel
Scanning Using the TWAIN Driver
Scanning Using the WIA Driver
Using a Scanner on the Network (Docuprint M205 F/M205 Fw Only)
Overview
Confirming a Login Name and Password
Specifying a Destination to Store the Document
For Windows Xp Home Edition
Configuring the Printer Settings
Sending the Scanned File to the Network
Scanning to a USB Storage Device
Setting a Fax/E-Mail Address Book
Sending an E-Mail with the Scanned File
Adjusting Scanning Options
Adjusting the Default Scan Settings
Setting the Scan Resolution
Automatically Suppressing Background Variations
Changing the Scan Settings for an Individual Job
8 Faxing (Docuprint M205 F/M205 Fw Only)
Connecting the Telephone Line
Configuring Fax Initial Settings
Setting Your Region
Setting the Printer ID
Setting the Time and Date
Changing the Clock Mode
Sending a Fax
Loading an Original Document on the ADF
Loading an Original Document on the Document Glass
Resolution
Document Type
Lighten/Darken
Inserting a Pause
Sending a Fax Automatically
Sending a Fax Manually
Confirming Transmissions
Automatic Redialing
Sending a Delayed Fax
Sending a Fax from the Driver (Direct Fax)
For Windows
For Mac os X
Receiving a Fax
About Receiving Modes
Loading Paper for Receiving Faxes
Receiving a Fax Automatically in the FAX Mode
Receiving a Fax Manually in the TEL Mode
Receiving a Fax Automatically in the TEL/FAX Mode or Ans/Fax Mode
Receiving a Fax Manually Using an External Telephone
Receiving Faxes Using the DRPD Mode
Receiving Faxes in the Memory
Polling Receive
Automatic Dialing
Speed Dialing
Storing a Number for Speed Dialing
Sending a Fax Using a Speed Dial
Group Dialing
Setting Group Dial
Editing Group Dial
Sending a Fax Using Group Dialing (Multi-Address Transmission)
Printing an Address Book List
Other Ways to Fax
Using the Secure Receiving Mode
Using an Answering Machine
Using a Computer Modem
Setting Sounds
Speaker Volume
Ringer Volume
Specifying the Fax Settings
Changing the Fax Settings Options
Available Fax Setting Options
Prefix Dial
Changing Setting Options
Printing a Report
9 Using the Operator Panel Menus and Keypad
Understanding the Printer Menus
Report / List
Meter Reading
Admin Menu
Speed Dial
Initialize Nvm
Ans Select
Auto Answer Fax
Interval Timer
Line Monitor
Line Type
Company Name
Your Fax Number
Fax Cover Page
Drpd Pattern
Discard Size
Extel Hook Thresh
Modem Speed
Fax Activity
Fax Transmit
Fax Broadcast
Auto Reset
Job Time-Out
Power on Wizard
MM / Inch
Low Toner Alert Msg
Adjust Btr
F/W Version
Adjust Fusing Unit
Density Adjustment
Clean Developer
Adjust Altitude
Counter Reset
Secure Settings
Service Lock
Usb Settings
Edit from Field
Defaults Settings
Gray Balance
Scan Defaults
File Format
Tiff File Format
Image Compression
Delayed Start
Tray Settings
Panel Language
Panel Lock Function
Enabling the Panel Lock
Disabling the Panel Lock
Limiting Access to Printer Operations
Setting the Time for the Power Saver Mode
Resetting to Factory Defaults
Using the Numeric Keypad
Entering Characters (Docuprint M205 F/M205 Fw Only)
Changing Numbers or Names
10 Troubleshooting
Clearing Jams
Avoiding Jams
Identifying the Location of Paper Jams
Clearing Paper Jams from the ADF (Docuprint M205 F/M205 Fw)
Clearing Paper Jams from the Front of the Printer
Clearing Paper Jams from the Back of the Printer
Clearing Paper Jams from the Center Output Tray
Jam Problems
Basic Printer Problems
Display Problems
Printing Problems
Print Quality Problems
The Output Is too Light
Toner Smears or Print Comes Off/Stain on Back Side
Random Spots/Blurred Images
The Entire Output Is Blank
Streaks Appear on the Output
Mottle
Ghosting
Fog
Bead-Carry-Out (BCO)
Auger Mark
Wrinkled/Stained Paper
The Top Margin Is Incorrect
Protrudent/Bumpy Paper
Copy Problem
Copy Quality Problems
Fax Problems (Docuprint M205 F/M205 Fw Only)
Scanning Problems
Scan Driver/Printer Utility Problems
Other Problems
Understanding Printer Messages
Contacting Service
Getting Help
LCD Panel Messages
Simplemonitor Alerts
Obtaining the Product Information
Non-Genuine Mode
The Operator Panel
The Printer Setting Utility
Advertisement
Quick Links
Download this manual
DocuPrint M205 b/M205 f/M205 fw
User Guide
Table of
Contents
Previous
Page
Next
Page
1
2
3
4
5
Advertisement
Table of Contents
Need help?
Do you have a question about the DocuPrint M205 b and is the answer not in the manual?
Ask a question
Questions and answers
Related Manuals for Xerox DocuPrint M205 b
Printer Xerox C11 - DocuPrint Color Inkjet Printer Manual
Product recycling and disposal (28 pages)
Printer Xerox WORKCENTRE M118 Remanufacturing Instructions
Drum cartridge remanufacturing (14 pages)
Printer Xerox WorkCentre Pro 412 Service Manual
(380 pages)
Printer Xerox WorkCentre M24 Quick Connect Manual
Xerox workcentre m24: connection guide (4 pages)
Printer Xerox WorkCentre M24 Quick Start Manual
Auditron setting for print (4 pages)
Printer Xerox WorkCentre M24 System Administrator Manual
Xerox workcentre m24: supplementary guide (228 pages)
Printer Xerox WorkCentre M24 Quick Start Manual
Removing paper jam (2 pages)
Printer Xerox DocuPrint M750 Install Manual
Usb connection (windows millennium) (3 pages)
Printer Xerox DocuPrint M750 Quick Reference Manual
Xerox docuprint m750: reference guide (44 pages)
Printer Xerox DocuPrint M205 fw User Manual
Xerox printers user guide (454 pages)
Printer Xerox Phaser 3130 User Manual
Personal laser printer (148 pages)
Printer Xerox C11 - DocuPrint Color Inkjet Printer Stand Installation Manual
Stand installation guide (4 pages)
Printer Xerox DocuPrint 180 Reference Manual
Guide to performing routine maintenance (60 pages)
Printer Xerox DocuPrint 100 Operation Manual
Xerox docuprint 100: operations guide (34 pages)
Printer Xerox DocuPrint 180 Configuration Manual
Docuprint network printer series (276 pages)
Printer Xerox DocuPrint 180 System Configuration Manual
Xerox docuprint 180: user guide (132 pages)
This manual is also suitable for:
Docuprint m205 fw
Docutprint m205 f
Table of Contents
Save PDF
Print
Rename the bookmark
Delete bookmark?
Delete from my manuals?
Login
Sign In
OR
Sign in with Facebook
Sign in with Google
Upload manual
Upload from disk
Upload from URL


Need help?
Do you have a question about the DocuPrint M205 b and is the answer not in the manual?
Questions and answers