
Subscribe to Our Youtube Channel
Related Manuals for Emerson MultiFlex CUB-II


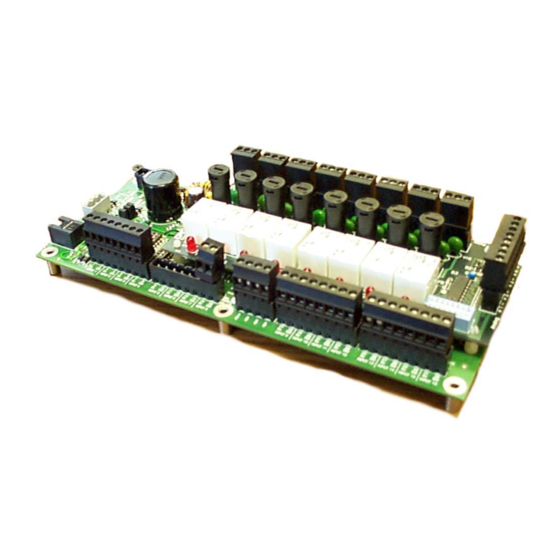
Summary of Contents for Emerson MultiFlex CUB-II
- Page 1 026-1705 Rev 7 06-APR-2010 MultiFlex Condensing Unit Board (CUB-II and CUB-TD) Installation and Operation Manual...
- Page 3 3240 Town Point Drive NW Suite 100 Kennesaw, GA 30144, USA Phone: 770-425-2724 Fax: 770-425-9319 ALL RIGHTS RESERVED The information contained in this manual has been carefully checked and is believed to be accurate. However, Computer Process Controls, Inc. assumes no responsibility for any inaccuracies that may be contained herein.
-
Page 6: Table Of Contents
Table of Contents 1 OVERVIEW OF THE MULTIFLEX CUB-II AND CUB-TD .................. 1 1.1. T CUB-II.............................. 1 ULTI 1.2. T CUB-TD ............................1 ULTI 2 MOUNTING AND POWERING..........................2 2.1. S ............................2 RACK NSTALLATION 2.2. T ............................. 3 UTPUT OARD 2.3. - Page 7 7.3.10.6. Door Switch Alarms ............................... 42 7.3.10.7. Wash Active Alarms ............................... 42 7.3.10.8. Case Temperature Alarms .............................. 42 7.3.10.9. Suction Temperature Alarms ............................43 7.3.10.10. TD Condenser Control Alarms ............................. 43 MultiFlex CUB-II and CUB-TD I&O Guide Table of Contents • vii...
- Page 8 8 THE MULTIFLEX CUB HAND-HELD INTERFACE................... 44 8.1. CUB H ....................... 44 ERMINAL TATUS CREENS 8.1.1. Pressure Status..............................44 8.1.2. Case Temp Status ..............................44 8.1.3. Other Temperatures ............................44 8.1.4. Input Summary Screen ............................45 8.1.5. Outputs Summary Screen #1 ..........................45 8.1.6.
- Page 9 8.2.10.4. Sensor Control Screen 4 (Alarm Priority, Comb Method) ..................... 60 APPENDIX A: TD QUICK START ..........................62 APPENDIX B: CASE TYPE DEFAULTS ........................68 MultiFlex CUB-II and CUB-TD I&O Guide Table of Contents • ix...
-
Page 11: Overview Of The Multiflex Cub-Ii And Cub-Td
The CUB-II and densing unit subsystem, a CUB-II will neces- CUB-TD may be configured either with a CPC sary. Hand-Held Terminal (HHT) or through the E2 or Einstein front panel. The MultiFlex CUB-II Overview of the MultiFlex CUB-II and CUB-TD • 1... -
Page 12: Mounting And Powering
Figure 2-1 - MultiFlex Snap-Track Mounting Figure 2-2 provides mounting dimensions for the MultiFlex board. Figure 2-2 - MultiFlex Board Dimensions 2 • MultiFlex CUB-II and CUB-TD I&O Guide 026-1705 Rev 7 06-APR-2010... -
Page 13: The Plug-In Output Board
Table 2-1 shows the trans- former sizes and whether they are center-tapped or non-center-tapped. Figure 2-3 - Exploded View — MultiFlex CUB-II The MultiFlex CUB has an output sub-board that plugs to the top of the baseboard. Typically,... -
Page 14: Choosing Transformer Sizes
MultiFlex is an old-style Multi- 1, 2002). Flex -- refer to Section 2.3.2.2., Old-Style Multi- Flex CUB Boards (No Isolated Power Supply) for power wiring instructions. 4 • MultiFlex CUB-II and CUB-TD I&O Guide 026-1705 Rev 7 06-APR-2010... -
Page 15: New-Style Multiflex Cub Boards (With Isolated Power Supply)
2.3.2.1. New-Style MultiFlex CUB Boards In addition, the MultiFlex CUB boards can (With Isolated Power Supply) be powered by one of the 50VA or 75VA non- center-tapped transformers listed in Table 2-1 on The new-style MultiFlex board can be con- page 3. -
Page 16: Wire Types And Maximum Distances
But it is very important not exceed this maximum wire length or the boards will malfunction. 6 • MultiFlex CUB-II and CUB-TD I&O Guide 026-1705 Rev 7 06-APR-2010... -
Page 17: The I/O Network
The I/O Network put communication boards, and terminates at the last input or output board on the network. A dia- gram of this network arrangement is shown in Figure 3-1. Although the MultiFlex CUB can operate as a stand-alone controller, it relies on an E2, Ein- stein, or REFLECS unit for advanced features such as remote dial-in/dial-out, logging, and alarm control. -
Page 18: Numbering The Multiflex Cub
9600 baud, set switch #6 UP and #7 DOWN. For 19200 baud, set switch #6 DOWN and #7 UP. Refer to Figure 3-2 for a visual look at how the switches must be set. 8 • MultiFlex CUB-II and CUB-TD I&O Guide 026-1705 Rev 7 06-APR-2010... -
Page 19: Cub Input And Output Setup
CUB Input and Output All Pressure Transducers, Humidity Sensors, and Re- frigeration Transducers Setup Pressure and refrigeration transducers and humidity sensors are to be wired with shielded, 3 conductor, at least 22 GA wire (Belden #8771 or equivalent). 4.1. The Inputs Dewpoint and Light Level Sensors These sensors are to be wired with shielded, 4.1.1. -
Page 20: Power Connection
Digital contact closure source, connect the sensor’s power wires to ter- Reset (switch or push button) minals AC1 and AC2. to reset alarms Table 4-1 - CUB Default Inputs 10 • MultiFlex CUB-II and CUB-TD I&O Guide 026-1705 Rev 7 06-APR-2010... -
Page 21: The Outputs
Decision #1 is made by setting the fail-safe 4.2. The Outputs switch. This is a bank of eight switches on the plug-in output module. Each switch corresponds The MultiFlex CUB has eight relays that to an output on the board (switch #1 = output #1, energize and de-energize to control output loads. -
Page 22: Relay Output Ratings And Fuse Protection
CUB. However, to make setup eas- ier, the CUB has assigned default sensor loca- tions to a few of the inputs on the board. 12 • MultiFlex CUB-II and CUB-TD I&O Guide 026-1705 Rev 7 06-APR-2010... -
Page 23: Board Status Leds
Board Status LEDs When a MultiFlex board is powered up, you will be able to determine the operating status of the board by observing its status LEDs. Figure 5-1 shows the location of the MultiFlex’s status LEDs. Figure 5-1 - MultiFlex Status LED Locations If the MultiFlex is connected to the network 5.1. -
Page 24: Relay Output Leds
(see Table 4-2). Therefore, if the output’s switch is UP, a lit LED means the path is CLOSED for N.C. contacts and OPEN for N.O. contacts. 14 • MultiFlex CUB-II and CUB-TD I&O Guide 026-1705 Rev 7 06-APR-2010... -
Page 25: Multiflex Cub-Ii And Cub-Td Software Overview
This perature sensor value becomes available. The strategy uses a temperature setpoint and a dead- CUB-II will then resume Temperature strategy band. When the case temperature is above the control. Compressor Control MultiFlex CUB-II and CUB-TD Software Overview • 15... -
Page 26: Condenser Fan Control
Cut Out set- available (due to probe failure), all fan stages points. will be staged on. Condenser fans may be programmed with a minimum ON time to prevent short-cycling. 16 • MultiFlex CUB-II and CUB-TD I&O Guide 026-1705 Rev 7 06-APR-2010... -
Page 27: Case Temperature Control
Typical uses for a sensor control application on a CUB-II include: refrigerant leak detection, motor room temperature control, and case lights. Defrost Control MultiFlex CUB-II and CUB-TD Software Overview • 17... -
Page 28: Motor Room Temperature Control
ANLG01 through SPARE ANLG04 are reserved for motor room temperatures in zones 1-4. If, for example, a CUB-II in zone 2 has a “Motor Room Temp” sensor control input, E2 or Einstein will 18 • MultiFlex CUB-II and CUB-TD I&O Guide 026-1705 Rev 7 06-APR-2010... -
Page 29: Alarm Conditions (Safety Modes)
High Discharge Trip Safety mode. This will lock the compressor OFF, and cause the Circuit State of the CUB to display Rack Fail in the E2 or Einstein and HHT status screens. Alarm Conditions (Safety Modes) MultiFlex CUB-II and CUB-TD Software Overview • 19... -
Page 30: Compressor Oil Failure Safety Mode
If the door is open longer than the met, it will remain in Oil Fail mode until it is fail-safe time, the CUB-II will resume refrigera- manually reset. tion to prevent product loss. 20 • MultiFlex CUB-II and CUB-TD I&O Guide 026-1705 Rev 7 06-APR-2010... -
Page 31: Clean (Wash) Switches
If this fail-safe time is passed, the CUB-II will resume normal control regard- less of the position of the clean switch. Door Switches and Clean (Wash) Switches MultiFlex CUB-II and CUB-TD Software Overview • 21... -
Page 32: The Multiflex Cub E2/ Einstein Interface
I/O Network (press with a CUB, it must be added as an I/O board. F10 or the key to go back to the menu, then 22 • MultiFlex CUB-II and CUB-TD I&O Guide 026-1705 Rev 7 06-APR-2010... -
Page 33: Deleting A Cub
press - Controller Status). If E2 or Einstein 7.2. Viewing the CUB Status and the CUB boards are communicating, this Screen screen will show the CUB boards as Online. If not, they will be shown as Offline. Once you have added a CUB to the E2 or Ein- 7.1.2. -
Page 34: Inputs And Setpoints
CUB. this CUB is controlling the compressor based on Oil press the suction pressure or case temperature. This field shows the current oil pressure in the CUB. 24 • MultiFlex CUB-II and CUB-TD I&O Guide 026-1705 Rev 7 06-APR-2010... -
Page 35: Sensor Control
Defrost Term Temp eration. This field shows the current value of the Board # defrost termination sensor in the CUB, which Indicates the number of the CUB board may be a digital value (ON/OFF) for a Klixon selected. type sensor or a temperature value, depending on Board Status the selected defrost termination type. -
Page 36: Defrost
Type field. • Defr Term setpt: appears when the Defrost Term Type is set to Suction Pressure. This field will con- tain the suction pressure termination setpoint in 26 • MultiFlex CUB-II and CUB-TD I&O Guide 026-1705 Rev 7 06-APR-2010... -
Page 37: Screen 1: General
Cond Strategy To begin programming a CUB, navigate to The Condenser Strategy determines whether the CUB Status Screen for the board you wish to the condenser will be controlled by discharge program (see Section 7.2.). For Einstein, press pressure (Pressure) or by temperature differen- followed by to enter the Setup Editor. -
Page 38: Screen 2: Setpoints
E2 or Einstein, or DISABLE if you Comb. method don’t want time synchronization. The Comb. method field appears only for the temperature compressor control strategy. 28 • MultiFlex CUB-II and CUB-TD I&O Guide 026-1705 Rev 7 06-APR-2010... - Page 39 Min ON time The Combination Method determines how The Minimum ON Time is the amount of multiple case temperature sensors in the case cir- time the compressor must remain ON after acti- cuit will be combined into a single control tem- vation before being allowed to turn OFF.
-
Page 40: Temperature Differential (Td)
CUB will cycle condenser fans ON condenser fan #2. When the discharge pressure regardless of the value of the TD. rises above the Cut In setpoint, the fan will turn 30 • MultiFlex CUB-II and CUB-TD I&O Guide 026-1705 Rev 7 06-APR-2010... -
Page 41: Screen 3: Inputs
It is recommended you program this fan with This input is automatically configured, and is a higher Cut In setpoint than condenser fan #1, primarily displayed in this screen as a reference. so that this fan will come on as a second stage. REMOTE INPUT The Remote Input is passed to any of the Fan 2 Cut Out... -
Page 42: Screen 4: Aux Inputs
(CT) rating. Refer to your ducers, and contact closures connected to the KW transducer’s installation instructions. MultiFlex CUB. 32 • MultiFlex CUB-II and CUB-TD I&O Guide 026-1705 Rev 7 06-APR-2010... - Page 43 Type There are sixteen rows on this screen labeled The Type field tells the CUB what kind of from #1 to #16, corresponding to the input points sensor is providing the input value. This value of on the MultiFlex CUB board. For each input that this field must correspond to the type of input has an input device connected to it, configure the suggested by the Input field.
-
Page 44: Screen 6: Defrost
Defrost to allow refrigerant to be pumped out of the evaporator. To enable the Pump Down Delay, set this field to ENABLE. To disable the Pump Down Delay, set this field to DISABLE. 34 • MultiFlex CUB-II and CUB-TD I&O Guide 026-1705 Rev 7 06-APR-2010... -
Page 45: Screen 7: Outputs
Fan ON Dly Enter a number from 1 through 12 in this This parameter delays the amount of time the field. When you enter a number, the appropriate CUB will wait after a defrost has ended before number of Defrost Time fields will appear under turning on the evaporator fans. - Page 46 The six CASE TEMP outputs are equal to the values of each of the six possible CUB case temperature inputs. CASE TEMP 1 corresponds to CUB’s case temp #1, etc. 36 • MultiFlex CUB-II and CUB-TD I&O Guide 026-1705 Rev 7 06-APR-2010...
-
Page 47: Screen 8: Cub Outputs
7.3.8. Screen 8: CUB Outputs SAFETY MODE When certain conditions are detected, the CUB and CUB-TD operate in a special mode called Safety mode. The options are: OK, Phase- Fail, OilFail, HiDischTrip, ProofFail, DoorO- penTime, CleanTime. CONTROL TYPE The active compressor control type. DIG OIL FAIL The current value of the CUB’s oil failure input. -
Page 48: Screen 9: Sensor Control
This is not the same thing as Out Control Works, for further explanation. Sensor Type, which is chosen by altering the Input Type in the Inputs screen (Section 7.3.3.). 38 • MultiFlex CUB-II and CUB-TD I&O Guide 026-1705 Rev 7 06-APR-2010... -
Page 49: Screen 10: Alarms
Min ON Tm Alarm Pri The Minimum ON Time is the amount of Alarm Priority sets the alarm priority level of time this sensor control output must remain ON the high and low alarms generated for this sensor after activating before being allowed to turn control application. -
Page 50: Discharge Pressure Alarm
CUB to attempt a reset. When the pressure Enter a number of retries from 0-2. reaches this setpoint, the CUB will restart the system. 40 • MultiFlex CUB-II and CUB-TD I&O Guide 026-1705 Rev 7 06-APR-2010... -
Page 51: High/Low Suction Pressure Alarms
Num Auto Reset The Num Auto Reset field sets the number NOTE: This alarm will not be generated when of attempts the CUB will make to automatically the system is in Pump Down mode. reset the system after a discharge trip shutdown has occurred. -
Page 52: Phase Fail Shutdown
Door Switch Time, the CUB will assume the door is stuck open and will restart refrigeration to prevent food loss. Enter the desired fail-safe time in hours:minutes (H:MM) format. 42 • MultiFlex CUB-II and CUB-TD I&O Guide 026-1705 Rev 7 06-APR-2010... -
Page 53: Suction Temperature Alarms
7.3.10.10. TD Condenser Control Alarms Case Defr Dly Because the case temperature can be consid- Drop Leg High erably higher in a case that is exiting defrost, the The Drop Leg High alarm setpoint is the Delay After Defrost allows you to prevent high drop leg temperature that, if exceeded, will case temp alarms from occurring for a fixed cause an alarm to be generated. -
Page 54: The Multiflex Cub Hand-Held Interface
(both of which are read from E2 or Einstein’s Global Data application), the Suction Tempera- ture (Suc), the Suction Saturation Temperature (SST), and the Discharge Temperature (Disch Temp). 44 • MultiFlex CUB-II and CUB-TD I&O Guide 026-1705 Rev 7 06-APR-2010... -
Page 55: Input Summary Screen
8.1.4. Input Summary Screen 8.1.8. Refrigeration Control Status Inputs ControlBy: Temp TermTemp: NDF CI/CO SP/DB TermDig: OFF 55 /45 55 /5 SC1 117 SC2 -12 P:32.5 T: 33.5 The Input Summary screen shows the status This screen shows the setpoints and control of the termination temperature sensor and the values for refrigeration control using both the defrost digital termination input. -
Page 56: Navigation
In Configuration mode, you will see a cursor shaped like an arrow pointing right. Use the UP ARROW and DOWN ARROW keys to move the cursor to the field you want to change. Then, 46 • MultiFlex CUB-II and CUB-TD I&O Guide 026-1705 Rev 7 06-APR-2010... -
Page 57: Refrigerant Select
8.2.3.2. Refrigerant Select 8.2.3.3. Phase Refrigernt:R401B PhaseEnable: NO Case Type : 00 Door Switch: YES Oil Protect: NO Wash Switch: NO Comp Prf: YES Pumpdwn: Disable Refrigerant Type Phase Enable The Refrigerant field is where the type of The PhaseEnable field specifies whether a refrigerant being used in the condensing unit phase loss detection device is present for the system must be specified. -
Page 58: Time And Date
Strategy is fixed as TD. The CUB Strategy can be set as TD or Traditional. For more informa- tion on TD Strategy, see Section 6.2.1., Temper- ature Differential (TD) Strategy. 48 • MultiFlex CUB-II and CUB-TD I&O Guide 026-1705 Rev 7 06-APR-2010... -
Page 59: Condenser Setpoints
8.2.4.3. TD Max See Section 8.2.4.4., Comb Method for the TD Max: start of the HHT screen list for CUB. TD DBand: 8.2.4.1. Condenser Setpoints FanOnDly: Condenser SPs FanOffDly: Strategy: TD Num Fans: 4 TD Maximum The TD setpoint that is maintained by cycling fans ON and OFF. -
Page 60: Min Off/On Times
(100-x)% of #2 to yield the combined tempera- Temperature Control Input fails. ture, where x is the value entered in this field. 50 • MultiFlex CUB-II and CUB-TD I&O Guide 026-1705 Rev 7 06-APR-2010... -
Page 61: Condenser Sps
Cut In Press and Cut Out Press Strategy The Cut In setpoint determines the suction Set the type of condenser strategy that will pressure that, when exceeded, will cause the be used to cycle fans ON and OFF. compressor to turn ON. In this strategy, the com- Number of Fans pressor will remain ON until the pressure falls Set the number of fans to be turned ON and... -
Page 62: Alarm Setpoints Screens
CUB will wait between retry attempts. Enter the value of this field. the number of minutes in this field. 52 • MultiFlex CUB-II and CUB-TD I&O Guide 026-1705 Rev 7 06-APR-2010... -
Page 63: Proof Failure
8.2.5.4. Proof Failure Oil Failure Run This field determines whether the CUB will ProofFail Alarm continue to attempt to control the compressor as OilFailStpt: 9 OilFailDly: 120S normal even after an oil failure has occurred. If AutoRestarts: 0 this field is set to Yes, the CUB will turn the compressor output ON and OFF as normal dur- Proof Fail ing an oil failure. -
Page 64: High Discharge Alarm
OFF until the system is manually reset. clean switch indicates “enter wash mode.” Choose either OPEN or CLSD in this field. Enter a number of retries per hour from 0-2. 54 • MultiFlex CUB-II and CUB-TD I&O Guide 026-1705 Rev 7 06-APR-2010... -
Page 65: Defrost Setup Screens
Wash Fail-Safe Time pires (this is the same as no termination). The Wash Fail-Safe time allows you to sus- • Min Case Temp - Instead of using a dedicated pend Wash mode and resume refrigeration if “Term Temp” sensor, the CUB will use the lowest Wash mode lasts longer than a fixed amount of value among all case temperature sensors as the de- frost termination temperature value. -
Page 66: Defrost Times
Case Type field. Enter a number from 1 through 6 in this field. 56 • MultiFlex CUB-II and CUB-TD I&O Guide 026-1705 Rev 7 06-APR-2010... - Page 67 Note that when you choose a value for the Name field, the CUB does not automatically Name Description enter an appropriate default value in the Type field. You must manually enter the type for all Suct Xdcr Suction pressure transducer sensor inputs.
-
Page 68: Outputs Screens
KW Per Pulse If you are using a pulse accumulation type KW transducer, you must enter the number of KW per pulse for this transducer in this field. 58 • MultiFlex CUB-II and CUB-TD I&O Guide 026-1705 Rev 7 06-APR-2010... -
Page 69: Sensor Control Screens
8.2.10.Sensor Control Screens The screens under the Sensors menu option Input Type Description are for setting up sensor control applications. Generic The sensor control application exists Each of the two sensor control applications have simply to control an output and to four screens full of fields that must be config- generate hi/lo alarms. -
Page 70: Sensor Screen 3 (Hi/Lo Alarm)
Enter the desired Select the engineering units that should be alarm delay in minutes. applied to the input type you are using for this sensor control application. 60 • MultiFlex CUB-II and CUB-TD I&O Guide 026-1705 Rev 7 06-APR-2010... - Page 71 Engineering Units Degrees Fahrenheit Degrees Celsius Pounds Per Square Inch Kilopascals Relative Humidity Volts Foot Candles Light Level Parts Per Million Not Defined Table 8-6 - Engineering Units Defined Altering CUB Configuration Using The Hand-Held Terminal The MultiFlex CUB Hand-Held Interface • 61...
-
Page 72: Appendix A: Td Quick Start
If you need to use some of Global Da- ta’s “Spare Analog” slots to share values, (plenum temp) use SPARE ANLG 05 through 08. 62 • MultiFlex CUB-II and CUB-TD I&O Guide 026-1705 Rev 7 06-APR-2010... - Page 73 Figure A-2 - Global Data Setup Degrees Fahrenheit Figure A-4 - Global Data Setup Spare Analog 5 Mode 3. To set the motor room temperature, 5. Arrow down to SpareAnlg5 EU (En- arrow down to SPARE ANALOG gineering Units) and set to DF (De- ...
- Page 74 CUB Status screen if using an E2). 2. Set Offset to 0 (zero). The rest of the Inputs on this screen should be set to 2. Press to move to the Inputs tab, 64 • MultiFlex CUB-II and CUB-TD I&O Guide 026-1705 Rev 7 06-APR-2010...
- Page 75 None, the Input Types to None, and Offsets to 0 (zero). 3. Press to exit screen and save changes, or to return to the Home screen. If using an E2, press to exit and save or to return to the Home screen. Figure A-9 - CUB Outputs General From the MultiFlex CUB Status screen, press...
- Page 76 1. To set the high alarm setpoint for drop below this setpoint, the fans will stage leg temperature, arrow down to the OFF using Condenser Fan Off Delay. Drop Leg High field and enter the 66 • MultiFlex CUB-II and CUB-TD I&O Guide 026-1705 Rev 7 06-APR-2010...
- Page 77 desired number (the default is NONE). 2. To set the alarm delay setpoint for drop leg temperature, arrow down to Drop Leg Dly field and enter the de- sired time in hours:minutes (HHH:MM). 3. To set the high alarm setpoint for tem- perature differential, arrow down to the TD High field and enter the de- sired number (the default is NONE).
-
Page 78: Appendix B: Case Type Defaults
Single deck pizza 32° 12° 01:00 3/18 3/45 3/60 3/60 KOSH Single deck kosher 32° 12° 01:00 3/18 3/45 3/60 3/60 Table B-1 - Case Type Default Settings 68 • MultiFlex CUB-II and CUB-TD I&O Guide 026-1705 Rev 7 06-APR-2010... - Page 79 Defrost Type Type Abbr. Description High Delay Hot Gas Elec. Rev. Air Timed Point Alarm Alarm (DEF) SDFH Single deck fish 32° 12° 01:00 3/18 3/45 3/60 3/60 MDMT Multi-deck meat 34° 18° 01:00 4/18 4/45 4/60 4/60 MDPO Multi-deck poultry 34°...
Need help?
Do you have a question about the MultiFlex CUB-II and is the answer not in the manual?
Questions and answers