Table of Contents
Advertisement
Advertisement
Table of Contents

Subscribe to Our Youtube Channel
Related Manuals for Icom IC-41S


Summary of Contents for Icom IC-41S
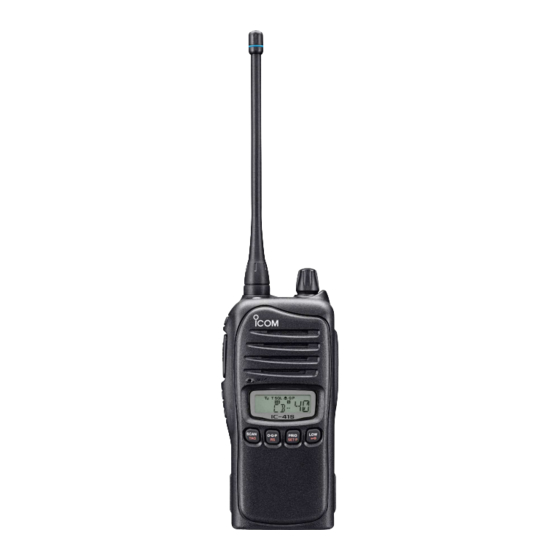
- Page 1 INSTRUCTION MANUAL UHF C.R.S.TRANSCEIVER i41S...
-
Page 2: Important
CALLING CHANNELS (CB-11,CB-40) In Australia channel 11 is the customary calling channel for establishing for the IC-41S UHF C.R.S. TRANSCEIVER. communication and channel 40 is the customary road vehicle channel. EMERGENCY CHANNELS (CB-05, CB-R5, CB-35) -
Page 3: Precautions
5 to 10 cm resistant, not waterproof. away from the lips and the transceiver is vertical. The use of non-Icom battery packs/chargers may impair R CAUTION! NEVER transceiver performance and invalidate the warranty. -
Page 4: Table Of Contents
TABLE OF CONTENTS IMPORTANT ..................i 6 TONE SQUELCH OPERATION ........22–24 I Tone squelch operation ............22 EXPLICIT DEFINITIONS ..............i I Pocket beep operation ............24 OPERATING NOTES ............... i PRECAUTIONS ................ii 7 SELCALL OPERATION ............ 25–29 I General ................ -
Page 5: Accessories
ACCESSORIES I Supplied accessories I Accessory attachments DFlexible antenna Flexible antenna Battery pack Battery charger Connect the supplied flexible anten- na to the antenna connector. CAUTION! • NEVER HOLD the antenna when carrying the transceiver. • Transmitting without an antenna may damage the transceiver. -
Page 6: Battery Pack
ACCESSORIES DBelt clip ïBattery pack To attach the battery pack: To attach the belt clip: q Release the battery pack if it is attached. Slide the battery pack in the direction of the arrow (q), then w Slide the belt clip in the direction of the arrow until the belt lock it with the battery release button. -
Page 7: Jack Cover
ACCESSORIES ïJack cover Attach the jack cover when the optional speaker-microphone or headset is not used. To detach the jack cover: To attach the jack cover: q Attach the jack cover to the [MIC/SP] jack. q Unscrew the screws using a Phillips screwdriver. w Detach the jack cover for the optional speaker-microphone w Tighten the screws using a Phillips screwdriver. -
Page 8: Panel Description
PANEL DESCRIPTION I Front panel q ANTENNA CONNECTOR Connects the supplied antenna. w TOP KEY* [Top] N N (Function/Set Mode) ➥ Push to turn Function mode ON. • “F” appears when Function mode is turned ON. ➥ Push and hold for 2 sec. to enter Set mode. (p. 34) F F (Function/RX VFO) Speaker ➥... - Page 9 PANEL DESCRIPTION r PTT SWITCH [PTT] (p. 12) o SCAN/TAG KEY* Push and hold to transmit; release to receive. N N (Scan/Scan Tag) t CH UP/CH DOWN KEYS [CH UP]/[CH DOWN] ➥ Push to start or stop the scan. (pgs. 19, 20) ➥...
-
Page 10: I Function Display
PANEL DESCRIPTION I Function display !1 PRIO/SET•P KEY* N N (PRIO/PRIO Set) ➥ Push to select the priority channel. (p. 13) ➥ Push and hold for 2 sec. to set the displayed channel as the priority channel. (p. 13) F F (S-Ring/PRIO Clear) ➥... - Page 11 PANEL DESCRIPTION t BELL INDICATOR !3 OPEN SCAN INDICATOR (p. 19) ➥ Appears when the pocket beep function is in use. (p. 24) Appears when the ‘Open scan’ is selected. ➥ Blinks when the specified SelCall or Smart Ring call is !4 GROUP SCAN INDICATOR (p.
-
Page 12: I Programmable Function Keys
PANEL DESCRIPTION I Programmable function keys The following functions can be assigned to [Top], [Side1], S-Ring/PRIO Clear ➥ Push to transmit the Smart-Ring call. programmable function keys with • When RX channel is selected, “N/A” appears. the optional CS-41S CLONING SOFTWARE ➥... - Page 13 PANEL DESCRIPTION Quiet/ID-MR Function/RX VFO ➥ Push to quiet function ON or OFF (CB channel operation (This key function can be assigned to the [Top] key only.) ➥ Push to turn Function mode ON or OFF. only). ➥ Push and hold for 2 sec. to enter the received ID code his- ➥...
-
Page 14: Basic Operation
BASIC OPERATION I Turning power ON DBattery type selection Prior to using the transceiver for the first time, the battery pack must be fully charged for optimum life and operation. The battery type MUST be selected according to the type of (p. -
Page 15: I Channel Selection
BASIC OPERATION I Channel selection I Receiving and transmitting ➥ Push [CH Up] or [CH Down] to select the desired channel. NOTE: Transmitting without an antenna may damage the • While pushing and holding [CH Up] or [CH Down], the displayed transceiver. -
Page 16: D Transmitting Notes
BASIC OPERATION D Transmitting notes Transmitting: Wait for the channel to become clear to avoid interference. • Transmit inhibit function q While pushing and holding [PTT], speak into the micro- The transceiver has several inhibit functions which restrict phone at a normal voice level. transmission under the following conditions: •... -
Page 17: I Priority Channel Setting
BASIC OPERATION I Priority channel setting DSet the priority channel The priority channel, simply recalled by pushing (PRIO) q Select the desired channel. (p. 11) and also is automatically monitored during the priority scan. w Push and hold You can set the only one channel as the priority channel. for 2 sec. -
Page 18: I Monitor Function
BASIC OPERATION I Monitor function I Adjusting the squelch level This function is used to listen to weak signal or to open the In order to receive signals properly, the squelch must be tone squelch manually. adjusted to the proper level. ➥... -
Page 19: I Display Backlighting
BASIC OPERATION I Display backlighting I Set mode The transceiver has display backlight for night-time operation. Set mode is accessed at power ON and allows you to set sel- dom-changed settings. In this case you can “customize” the q Push and hold [Top] for 2 sec. -
Page 20: Repeater Operation
REPEATER OPERATION I Repeater operation I Accessing a repeater Repeaters allow you to extend the operational range of your A repeater amplifies received signals and re-transmits them radio. on a different frequency, allowing you to communicate over Normally, a repeater has independent frequencies for receive greater distances with improved reliability. -
Page 21: Scan Operation
SCAN OPERATION I Scan types The transceiver has 4 scan types, tag function and 4 resume Tag channels are independently set for open, group and pri- conditions providing scanning versatility. ority scans. Initially, all channels may be set as tag channels for all scans. -
Page 22: I Scanning Preparation
SCAN OPERATION Scanning preparation DTag channel setting IC-41S scans all tagged channels, and can be selected so q Select the desired scan type. (See at left.) the scan resume condition is a pause or timer scan. w Select the desired channel. (p. 11) -
Page 23: I Open Scan
SCAN OPERATION I Open scan DSetting scan resume condition Open scan searches for being transmitted signals automati- q Push and hold [Top] for 2 sec. to enter set cally and makes it easier to locate new stations for contact or (Set Mode) mode. -
Page 24: I Group And Priority Scans
SCAN OPERATION I Group and priority scans e Push Group and priority scans repeatedly watch a priority channel to start the scan. (Scan) while scanning specified channels. This is useful when wait- Group scan starts. Blinks ing for a call on the priority channel or several specified chan- nels. -
Page 25: I Repeater Search Scan
SCAN OPERATION I Repeater search scan D D Repeater search scan flow The repeater search scan is not only searching for a signal on the repeater channels, but also access a repeater by Searches for sig- Scan start transmitting automatically in sequence. nal on the repeater Scan channel... -
Page 26: Tone Squelch Operation
TONE SQUELCH OPERATION I Tone squelch operation The transceiver is equipped with 51 CTCSS tone frequencies, CTCSS tone setting mode DTCS code setting mode 104 DTCS codes. CTCSS/DTCS operation provides commu- nication with silent standby since you will only receive calls from group members using the same CTCSS tone frequen- cy/DTCS code. - Page 27 TONE SQUELCH OPERATION DTurning ON the tone squelch operation • Available DTCS code list q Select the desired channel except for channels 5 and 35. Code Code Code Code Code (p. 11) w Set the desired CTCSS tone frequency/DTCS code in set mode.
-
Page 28: I Pocket Beep Operation
TONE SQUELCH OPERATION I Pocket beep operation This function uses CTCSS (subaudible) tones and DTCS code for calling and can be used as a “common pager” to inform you that someone has called while you were away from the transceiver. D Waiting for a call from a specific station q Select the desired channel except for channels 5 and 35. -
Page 29: Selcall Operation
SELCALL OPERATION I General I Calling operation D TX code channel selection In addition to the tone squelch operation for silent stand-by, the SelCall operation is available. SelCall is an abbreviation enables you to change the TX code chan- (TX Code CH) for “Selective Calling.”... -
Page 30: D Tx Code Number Edit
SELCALL OPERATION r Push [PTT] to transmit to the selected TX code channel, D TX code number edit or push to set the selected TX code (TX Code CH) enables you to change the TX code con- (TX Code CH) channel and return to the stand-by mode. -
Page 31: D Transmitting An Individual Call
SELCALL OPERATION t Push [CH Up] or [CH Down] to set the desired code. o Push [PTT] to transmit to the selected TX code channel, • Select “❋” when group code is set. or push to set the selected TX code (TX Code CH) channel and return to the stand-by mode. -
Page 32: I When Receiving A Call
SELCALL OPERATION I When receiving a call D Receiving an individual call q When receiving an individual call (default setting); Recall the memorised RX code: • “PiRo” beeps sound. q Push [Top] to enter the function mode, then push (Function) •... -
Page 33: I Quiet Mode Operation
SELCALL OPERATION I Quiet mode operation When the quiet mode operation is turned ON, the SelCall To enable SelCall mute: ➥ When “ mute is activated and allows the silent operation until receiv- ” blinks, push [Side1] to mute the (Monitor) ing a SelCall. -
Page 34: Other Functions
All IC-41S’s operating on the same op- the transceiver. The Smart-Ring is for manual, and the ATS erating channel will answer back to the call in the sur- is for automatic confirmation. -
Page 35: I Rx Frequency Setting (For Rx Channels Only)
OTHER FUNCTIONS I RX frequency setting (for RX channels only) D RX frequency programming The receive frequency in the RX channels can be re-pro- grammed within 450 to 520 MHz frequency range depending q Select the desired RX channel (‘RX-XX’). (See at left) on the setting. - Page 36 OTHER FUNCTIONS i Push and hold [Top]* for 2 sec. to return to the normal * to select the desired digit to be edited. r Push operation condition. • RX frequency setting is memorized to the channel. • Pushing [Top]* also returns to the normal operation condition. In this case, the RX frequency setting is not memorized to the channel.
-
Page 37: I Wide/Narrow Function
OTHER FUNCTIONS I Wide/Narrow function I PTT hold function This function temporarily/permanently changes the bandwidth The PTT switch can be operated as a one-touch PTT switch between wide or narrow on the RX channel only. (each push toggles between transmit/receive). Using this function you can transmit without pushing and holding the q Select the desired RX channel. -
Page 38: Set Mode
SET MODE I Set mode D Set mode operation Set mode allows you to change seldom used common set- q Push and hold [Top] ting for the transceiver, or individual setting for the operating for 2 sec. to enter Set mode. (Set Mode) channel. -
Page 39: I Set Mode Items
SET MODE I SET mode items D Squelch level D Backlight condition Select the noise squelch threshold level within 0 to 9 ranges. The transceiver has display backlight for night-time operation. • There are 10 squelch levels to choose from 0 is completely open; 9 : Backlight turns ON continuously. -
Page 40: Microphone Gain Level
SET MODE D Beep level D Signal Monitor function Set the key-touch beep output level from 1 to 5. This function controls the mute condition. The mute is re- leased (audible) during SelCall code signal and roger beep emission. Beep level 3 (default) Beep level 1 D Microphone gain level Signal monitor ON (default) -
Page 41: Lockout Function
SET MODE D Time-Out timer (TOT) D Scan resume timer The Time-Out Timer (TOT) function limits continuous trans- The scan resume condition can be set as a pause (P5) or mission to prevent accidental prolonged transmission, etc. timer scan (15/10/5). When a signal disappears, scan This timer cuts a transmission OFF after 1 min. - Page 42 SET MODE D Roger Beep r Push [CH Up] or [CH Down] several times to select the desired digit. This function emits a beep on the communication party to in- form the transmission is finished. Roger beep OFF (default) Roger beep ON * to set the digit and the editable digit move to t Push right automatically.
-
Page 43: Battery Charging
Icom radios or Icom charger. Only Icom battery water, or any other liquids. Do not charge or use a wet bat- packs are tested and approved for use and charge with Icom tery. If the battery gets wet, be sure to wipe it dry before radios or Icom charger. - Page 44 R DANGER! NEVER charge the battery pack in areas with abnormal odor, heats up, or is discolored or deformed. If any of these conditions occur, contact your Icom dealer or distrib- extremely high temperatures, such as near fires or stoves, utor.
-
Page 45: I Battery Chargers
BATTERY CHARGING I Battery chargers ï Rapid charging with the BC-160 ï AD-106 installation q Install the AD-106 desktop charger adapter into the holder The BC-160 provides rapid charging of optional Li-Ion battery space of the BC-119N/BC-121N. packs. w Connect the plugs of the BC-119N/BC-121N to the AD-106 •... - Page 46 BATTERY CHARGING ï Rapid charging with the BC-119N+AD-106 ï Rapid charging with the BC-121N+AD-106 The optional BC-119N provides rapid charging of battery The optional BC-121N allows up to 6 battery packs to be packs. The following items are additionally required. charged simultaneously.
-
Page 47: Battery Case
BATTERY CASE I Optional battery case (BP-240) When using the optional battery case, install 6 AAA (LR03) Fig.1 size alkaline batteries as illustrated at right. BP-240 q Unhook the battery cover release hook (q), and open the cover in the direction of the arrow (w). (Fig.1) w Then, install 6 AAA (LR03) size alkaline batteries. -
Page 48: Optional Swivel Belt Clip
OPTIONAL SWIVEL BELT CLIP I MB-93 contents e Clip the belt clip to a part of your belt. And insert the trans- ceiver into the belt clip until the base clip inserted fully into the groove. Qty. q Belt clip ……………………………………………………… 1 w Base clip ……………………………………………………... -
Page 49: I Detaching
OPTIONAL SWIVEL BELT CLIP I Detaching q Turn the transceiver upside down in the direction of the w Release the battery pack if it is attached. (p. 2) e Pinch the clip (q), and slide the base clip in the direction arrow and pull out from the belt clip. -
Page 50: Options
OPTIONS D BATTERY PACK D DC CABLES • CP-17L CIGARETTE LIGHTER CABLE Battery pack Voltage Capacity Battery life* Allows charging of the battery pack through a 12 V cigarette lighter socket. (For BC-119N/BC-160) BP-232N 7.4 V 2000 mAh 13.5 hrs. •... -
Page 51: Specifications
: 2-conductor 3.5 (d) mm/8 • Power supply requirement : 7.2 V DC nominal* (negative ground) All stated specifications are subject to change without *Specified Icom’s battery pack only notice or obligation. • Frequency stability : ±2.5 ppm (–30°C to + 60°C) •... -
Page 52: Warranty And Product Registration
Pty Ltd to an authorized Dealer of Icom (Australia) Pty. Ltd. quality of workmanship and components included in the production Please check with us if you feel an Icom product is being of every product. offered for sale that has been sourced from other than Icom (Australia) Pty. - Page 54 Purchasers Name: Purchasers Address: Email: Contact Phone No: Occupation: Answering the following question will better help us meet your future needs: In what media have you seen ICOM Advertising? Newspaper Magazine Radio Website Other: Magazines you regularly purchase and/or subscribe to:...
- Page 55 MEMO...
- Page 56 A-6547H-1AU-w Printed in Japan © 2006–2007 Icom Inc. 1-1-32 Kamiminami, Hirano-ku, Osaka 547-0003, Japan Printed on recycled paper with soy ink.
Need help?
Do you have a question about the IC-41S and is the answer not in the manual?
Questions and answers