Lucent Technologies PARTNER Advanced Communications System Installation Manual
Releases 1.0, 1.1, 2.0 or later
Hide thumbs
Also See for PARTNER Advanced Communications System:
- Programming and use instructions (484 pages) ,
- Installation manual (60 pages) ,
- System planner manual (41 pages)
Table of Contents
Advertisement
Quick Links
Download this manual
See also:
Installation Manual
Advertisement
Table of Contents

Related Manuals for Lucent Technologies PARTNER Advanced Communications System


Summary of Contents for Lucent Technologies PARTNER Advanced Communications System
- Page 1 ® Partner Advanced Communications Systems Installation 518-456-152 Comcode 108407768 Issue 1 November 1997...
-
Page 2: Issue
Lucent Technologies does not warrant that this product is immune from or will prevent unauthorized use of common-carrier telecommunication services or facilities accessed through or connected to it. -
Page 3: Table Of Contents
Contents Contents Overview An Example System Setup Required Parts Installation Guidelines Telephones and Devices Combination Extensions Installation Procedures Wall-Mounting a Standalone PARTNER ACS Processor Module Wall-Mounting a 2-Slot Carrier and Modules Wall-Mounting a 5-Slot Carrier and Modules Inserting Batteries in the PARTNER ACS Processor Module Initializing the System Connecting Lines and Extensions... -
Page 4: Important Safety Instructions
Important Safety Instructions The following list provides basic safety precautions that should always be followed when using your telephone equipment: 1. Read and understand all instructions. 2. Follow all warnings and instructions marked on the product. 3. Unplug all telephone connections before cleaning. DO NOT use liquid cleaners or aerosol cleaners. Use a damp cloth for cleaning. -
Page 5: Save These Instructions
If any wiring from the extension jacks leaves the building premises, you must install Lucent Technologies™ IROB protectors (see “Requirements for Out-of-Building Extensions” on page 36.) CAUTION: Use only Lucent Technologies-manufactured PARTNER modules in the PARTNER Advanced Communications System. CAUTION: Environmental and electrical conditions must meet the requirements as listed on page 36. -
Page 6: Overview
To have a Lucent Technologies service technician install and customize your system or change existing wiring, call 1 800 247-7000 (in the continental U.S. only) or call your Lucent Technologies Representative or local Authorized Dealer. -
Page 7: An Example System Setup
An Example System Setup CONTROL UNIT PARTNER NE R 30 jun ct PA RT su re Ad ct Clo Co nta PARTNER PARTNER Proc. MODULE R1.0 MODULE R1.0 MODULE R1.0 EXTENSIONS Extension 10 POWER RADIO PASS 555 1212 On/Off Redial Mute Feat/P Conf... -
Page 8: Required Parts
Required Parts You may have multiple system component packages; Figure 1 shows the package contents. Check your packages to be sure you have the parts shown here (if not, call for support as instructed on the inside front cover of this guide). PARTNER Advanced Communications System Processor Module Backup/Restore AC Power Cord... - Page 9 to "Product Ordering Information" in Appendix B of the PARTNER Advanced Communications System Programming and Use guide for ordering instructions. The PARTNER ACS processor module and the 206EC, 308EC, and 400EC modules support the Caller ID feature. These modules are required to provide Caller ID information on system display phones.
-
Page 10: Installation Guidelines
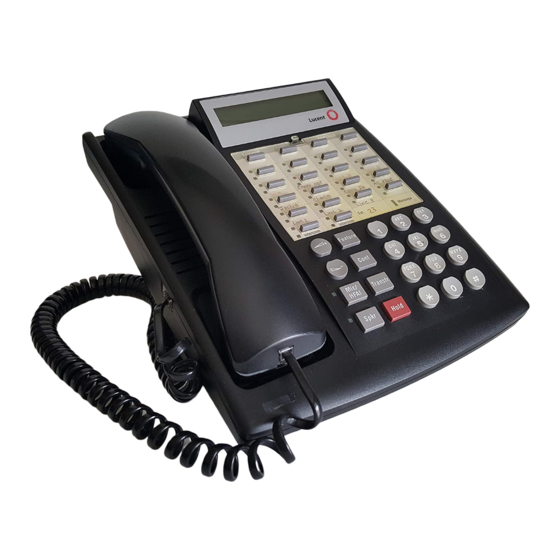
Telephones and Devices You can connect the following telephones and devices to the system: PARTNER-model, MLS-model, MDC 9000, and TransTalk™ 9000-series System Phones. System phones require at least two-pair wiring and are compatible with Lucent Technologies ® 4-pair SYSTIMAX wiring. -
Page 11: Combination Extensions
Programming and Use Guide . Call Reporting Devices. You can connect either a serial printer or a call accounting device, such as Lucent Technologies Call Accounting Terminal, to the SMDR jack on the processor module to record and/or analyze call activity. - Page 12 Using a Bridging Adapter Figure 3 shows how to connect a system phone and a standard device or two standard devices using a (separately orderable) Lucent Technologies 267F2 Bridging Adapter. Lucent Technologies 267F2 Adapter Standard Device Only System Phone or Standard Device Wall Jack Figure 3.
-
Page 13: Installation Procedures
Installation Procedures Before installing the system, be sure you read the safety instructions on page ii. The PARTNER Advanced Communications System can be installed in one of three configurations: standalone PARTNER ACS processor module. 2-Slot carrier, which can hold up to two modules. 5-Slot carrier, which can hold up to five modules and includes a cover. -
Page 14: Wall-Mounting A 2-Slot Carrier And Modules
Label the line and extension jacks as shown. If you are installing a two-module system, continue with ‘‘Wall-Mounting a 2-Slot Carrier Lines Modules’’; otherwise, skip to ‘‘Inserting Batteries in the PARTNER ACS Processor Module’’. Extensions Wall-Mounting a 2-Slot Carrier and Modules To wall-mount a 2-Slot Carrier, first follow the instructions in ‘‘Wall-Mounting a Standalone PARTNER ACS Processor... - Page 15 Slide the second module off the PARTNER ACS module and put it aside. PARTNER Slide the 308EC module onto the PARTNER ACS module, making sure the mounting tracks interlock, as shown in the side view. 2 0 6 D U L CAUTION: Do not force the module.
- Page 16 Press the power cord firmly into the power jack on the carrier. Plug the other end of the power cord into a properly grounded three-prong wall outlet not controlled by a switch. Check the green lights on the fronts of the modules. If a single light is out, power down the carrier, reseat the module, then power up the carrier.
-
Page 17: Wall-Mounting A 5-Slot Carrier And Modules
Wall-Mounting a 5-Slot Carrier and Modules Install the 5-Slot carrier within 5 feet (1.5 meters) of a properly grounded wall outlet (not controlled by a switch) and the network interface jacks. In addition, when you mount the carrier on the wall, leave at least 1 foot (0.3 meter) of clearance at the top and sides, and two feet (0.6 meter) at the front and bottom to ensure proper ventilation. - Page 18 Label the line and extension jacks. Connect line and telephone cords to the appropriate jacks on the new module. Route each cord through the hook on the front of its module. MODULE Connect the free end of each line cord to the appropriate network interface jack.
-
Page 19: Inserting Batteries In The Partner Acs Processor Module
Inserting Batteries in the PARTNER ACS Processor Module The PARTNER ACS processor module uses two user-replaceable, AAA-size standard alkaline batteries to guard against the loss of system programming in case of a power failure. These batteries will retain the system programming for 45 days to 6 months, depending on the freshness of the batteries. - Page 20 Remove the battery assembly by gently pulling the tab at the bottom of the battery compartment cover. Insert two new AAA-size standard alkaline batteries into the metal battery clips by pushing them straight in, placing the negative (–) end of one battery into the bottom clip, and the positive (+) end of the other battery into the top clip.
-
Page 21: Initializing The System
Initializing the System NOTE: The system must be powered down before you insert or remove a PC Card. The Backup/Restore, Automatic System Answer/Direct Extension Dial, PARTNER MAIL Basics and software upgrade features of the system all require the use of a PC card. If you plan to use any of these features, insert the appropriate PC Card in a PC Card Slot before applying to the system. - Page 22 If you have a 5-Slot carrier, power up the control unit by moving the On/Off switch to the "On" position. Check all green lights on the fronts of the modules. If all the lights are lit, continue with ‘‘Connecting Lines Extensions’’;...
-
Page 23: Connecting Lines And Extensions
Connecting Lines and Extensions If extensions are not wired to any modular jacks, call a qualified service technician. 555-1343 Test for dial tone at the network interface jacks before connecting outside lines to the control 555-1344 unit. For the test, connect a standard phone to the first network interface jack. - Page 24 Test the lines—plug a system phone into extension jack 10. Press the line buttons for each outside line and listen for dial tone. Repeat for the first extension on each module. Ext. Message Intercom Intercom Feature – Conf PQRS WXYZ Transfr HFAI Spkr...
-
Page 25: Assembling System Phones
Assembling System Phones All PARTNER-model system phones are shipped with a stand for either desk mounting or wall mounting the phone. Desk Mounting Gently place the phone upside down. Route the telephone cord through the hole in the top center of the Insert the tabs on the narrow end of the stand into the slots on the inside bottom edge of the phone. - Page 26 Holding the stand with the wide edge down, mount the stand on the wall plate using the keyholes on the base of the stand. For proper mounting, the wall plate must be a Lucent Technologies 630B connecting block. Installation Procedures...
- Page 27 Plug one end of the telephone cord into the jack in the center of the wall plate. Plug the other end of the telephone cord into the LINE jack on the bottom of the telephone. Wrap any excess cord around the cord wrap posts on the bottom inside of the stand.
-
Page 28: Connecting And Testing Telephones
(If you are connecting a standard phone and its mounting cord is loose, try a Lucent Technologies D2R mounting cord instead.) To install two phones (or other devices) on a single extension jack, see Combination Extensions earlier in... -
Page 29: Connecting Contact Closure, Call Reporting (Smdr), Paging, And Music-On-Hold Devices
Connecting Contact Closure, Call Reporting (SMDR), Paging, and Music-On-Hold Devices Only steps for connection to the processor module are provided here. See the manufacturer s instructions for more information about installing and using these devices. Contact Closure Adjunct Insert the modular plug into the Contact Closure jack, Contact Closure Jack the first jack on the PARTNER ACS processor module. - Page 30 Accordingly, in order for the performance of that music to be lawful, it must be licensed annually to the user by the copyright owners or their representatives. You can purchase a Magic On Hold system from Lucent Technologies, 1 800 446-5366, which includes the required license for the first year. This license must be renewed annually.
-
Page 31: Connecting A Partner-Ca48
Connecting a PARTNER-CA48 Intercom Autodialer The PARTNER-CA48 Intercom Autodialer is shipped with an adapter, a D8W line cord, a power cord, a power unit, and a button-labeling sheet. NOTE: The PARTNER-CA48 Intercom Autodialer can be wall mounted to work next to a wall-mounted system phone. -
Page 32: Equipment Upgrades
Equipment Upgrades If you are upgrading from a standalone PARTNER ACS processor module to a 2-Slot carrier, see ‘‘Wall-Mounting a 2-Slot Carrier and Modules’’ earlier in this guide for instructions. If you are adding modules to an existing 5-Slot carrier, see ‘‘Adding New Modules’’, below. - Page 33 Before you insert the new module, make sure that all 400 (or 200) modules are installed to the right of all 206 or 308EC modules. If you need to move a module to accommodate the new one, see Replacing System Modules later in this section.
-
Page 34: Replacing System Modules
Replacing System Modules The procedure for replacing a module depends on your configuration: If you have a... See... Standalone PARTNER ACS processor ‘‘Replacing a Standalone PARTNER ACS module configuration Processor Module’’ 2-Slot carrier configuration ‘‘Replacing Modules in a 2-Slot Carrier’’ 5-Slot carrier configuration ‘‘Replacing Modules in a 5-Slot Carrier’’... - Page 35 Check the slack in the wires. If there is not enough slack to remove the modules without pulling the line and extension cords free, label and disconnect the wires before continuing. Remove the long screw at the bottom of the modules. Remove the screws that attach the carrier to the modules.
- Page 36 Remove the screw at the top of the PARTNER ACS processor module and remove the module from the wall. Mount the new PARTNER ACS processor module by following the instructions in ‘‘Wall-Mounting a Standalone PARTNER ACS Processor Module’’ ‘‘Inserting Batteries in the PARTNER ACS Processor Module’’...
- Page 37 Before installing a module, make sure the clear, plastic protector has been removed from the connector area on the rear of the module. To remove the protector, grasp the tabs on the ends of the protector and lift. Check the slack in the wires. If there is not enough slack to remove the module without pulling the line and extension cords free, label and disconnect the wires before continuing with...
- Page 38 Make sure all modules are seated properly. The cover will not fit if the modules are not seated properly. To replace the cover, grasp it by its upper edges and hold it squarely over the control unit. PAGE Place the cover over the modules and make sure MODULE MODULE PROCESSOR...
- Page 39 Check that all green lights on the fronts of the modules are lit: Lights If a single light is out, power down the control unit, reseat the module, then power up the control unit. If multiple lights are out, power down the control unit, reseat the leftmost module that has a light out, then power up the control unit.
Need help?
Do you have a question about the PARTNER Advanced Communications System and is the answer not in the manual?
Questions and answers