Table of Contents
Advertisement
Quick Links
Download this manual
See also:
User Manual
Advertisement
Table of Contents

Related Manuals for Xerox Document Centre 420


Summary of Contents for Xerox Document Centre 420
- Page 1 Xerox Document Centre 440/432/420 User Guide 602P41800 Xerox Document Centre 440/432/420 User Guide...
- Page 2 Xerox he Document Company, the digital X and all Xerox products mentioned in this publication are trademarks of Xerox Corporation. Product names and trademarks of other companies are hereby acknowled ged. Changes are periodically made to this document. Changes, technical inaccuracies, and typographical errors will be corrected in subsequent editions.
-
Page 3: Table Of Contents
Environmental Compliance..............1-16 Energy Star® ..................1-16 Environmental ChoiceM................1-16 Illegal Copying ..................1-17 Ground Fault Interrupter (GFI)............1-20 2 Product Overview..............2-1 Identifying the machine components ..........2-2 Document Centre 440/432/420...............2-2 Optional Components ................2-3 Power ON/OFF..................2-6 Powering On ...................2-6 Xerox Document Centre 440/432/420 User Guide Page i... - Page 4 Image Adjustment tab (Copy) ............3-21 Original Size (DC440/432)/Original Input (DC420) .......3-21 Bound Originals..................3-24 Image Shift ....................3-26 Expert Image Quality................3-27 Erase.....................3-28 Edit (optional) ..................3-29 Output Format (Copy).................3-33 Transparencies ..................3-33 N Up (2 Up - DC420)................3-35 Page ii Xerox Document Centre 440/432/420 User Guide...
- Page 5 Send Priority (DC440/432)..............4-24 Advanced Features (Fax) ..............4-25 Build Job ....................4-26 Poll Remote Fax ...................4-27 Store for Polling ..................4-28 Fax Mailbox...................4-31 Original Size (DC440/432)/Mixed Size Originals (DC420)....4-34 Reports & Setups (Fax) ..............4-35 Fax Reports ..................4-36 Xerox Document Centre 440/432/420 User Guide Page iii...
- Page 6 Server IP Address /Server Name............6-17 Document Path / Volume ..............6-17 Document Folder...................6-18 Login Name/Password ................6-18 Filing Policy ...................6-19 Document Management Fields (DC440/432)........6-22 Scan to Fax (DC440/432)/Fax Setups(DC420)........6-23 Current Dial List ..................6-23 Change Phone Number ................6-23 Page iv Xerox Document Centre 440/432/420 User Guide...
- Page 7 Template Pools ..................8-14 Template Management .................8-14 Scan to File ...................8-22 Scan to Fax ..................8-25 Scan with Local Copy ................8-25 Problem Solving..................8-26 9 Paper and other media............9-1 Loading paper ..................9-2 Preparing paper for loading ..............9-2 Xerox Document Centre 440/432/420 User Guide Page v...
- Page 8 Additional Setups................10-16 Report Languages................10-16 Touch Screen Contrast ...............10-17 Customer Support Number ..............10-17 Paper Sizes..................10-18 Machine Serial Number...............10-18 Xerox Supplies Number / Supplies Tel. Number.........10-19 Fault Override..................10-20 Accessing Fault Override ..............10-20 Unavailable Features ................10-21 Copy Setups ..................10-29 Access the Copy Setups ..............10-29 Reduce/Enlarge ..................10-30...
- Page 9 The Document Glass and Constant Velocity Transport Glass....11-3 The Control Panel and Touch Screen...........11-4 The Document Feeder and Output Trays ..........11-4 Replacing the Copy/Print Cartridge ..........11-5 Removing the old Copy/Print Cartridge ..........11-6 Xerox Document Centre 440/432/420 User Guide Page vii...
- Page 10 Problem Solving Tables ..............12-4 Fault Codes and Messages ..............12-15 Table of Fault Codes................12-15 Output Quality ...................12-18 Call for Service procedure ...............12-19 Xerox Welcome Center Telephone Number ........12-19 13 Specifications ..............13-1 Machine Specifications ..............13-2 Electrical Specifications ................13-6 Specifications for the Fax Feature ............13-8 14 Glossary ................
-
Page 11: About This Guide
About This Guide Welcome to the Xerox family of Document Centre products. This User Guide provides detailed information, technical specifications and procedural steps when using the integrated features of the machine. Xerox Document Centre 440/432/420 User Guide Page 1-1... -
Page 12: Xerox Welcome Center
Xerox Welcome Center If after product installation further assistance is required, please call our experts using the Xerox Welcome Center telephone number. When telephoning, please quote the machine serial number, which may be written in the space below. The serial number is located behind the left hand front... -
Page 13: Conventions
Use the diagram below for more information. LEF Orientation SEF Orientation Paper feed direction Paper feed direction Xerox Document Centre 440/432/420 User Guide Page 1-3... -
Page 14: Bracket Text Typeface
Control Panel the Quick Pathway is a useful reminder of the steps required to À Enter Key Operator access a particular feature. À Select [Machine Setups] Page 1-4 Xerox Document Centre 440/432/420 User Guide... -
Page 15: Notes
CAUTION: When cleaning the DC440/432/420 , do not use organic solvents or aerosol cleaners. Warnings Warnings are statements that alert users to the possibility of personal damage. For example: WARNING:This equipment must be connected to an earthed mains socket outlet. Xerox Document Centre 440/432/420 User Guide Page 1-5... -
Page 16: Related Information Sources
- The On-line Help system - The Document Centre 440/432/420 ST System Administration Guide - The Xerox CentreWare Customer Documentation NOTE: Please note that the screens shown in this user guide apply to a fully configured DC440/432/420 and therefore may not exactly represent the configuration being used. -
Page 17: Safety Notes
Safety Notes Your Xerox product and supplies have been designed and tested to meet strict safety requirements. These include safety agency approval, and compliance to established environmental standards. Please read the following instructions carefully before operating the product and refer to them as needed to ensure the continued safe operation of your product. - Page 18 Never push objects of any kind into the slots of the product as they may touch dangerous voltage points or short out parts which could result in a fire or electric shock. Never spill liquid of any kind on the product. Page 1-8 Xerox Document Centre 440/432/420 User Guide...
-
Page 19: Safety Standards
Never remove covers or guards that require a tool for removal, unless directed to do so in a Xerox approved maintenance kit. Never defeat interlock switches. Machines are designed to restrict operator access to unsafe areas. Covers, guards and interlock switches are provided to ensure that the machine will not operate with covers opened. -
Page 20: Regulatory Information
Changes or modifications to this equipment not specifically approved by the Xerox Corporation may void the user’s authority to operate this equipment. WARNING:Shielded cables must be used with this equipment to maintain compliance with FCC regulations. -
Page 21: Fcc Part 68
ID and name. Data Coupler Information This Xerox Document Centre 440/432/420 machine contains an internal data coupler. Its use is restricted by the FCC (Federal Communications Commission). To comply with the FCC rules, you must carefully read and follow the instructions listed below. - Page 22 Do not connect this machine to a party or coin operated phone line. Repairs to the machine should be made only by a Xerox representative or an authorized Xerox service agency. This applies at any time during or after the service warranty period.
-
Page 23: Canadian Cso3
Repairs to certified equipment should be made by an authorized Canadian maintenance facility designated by the supplier. Any repairs or alterations made by the user to this Xerox Document Centre 440/432/420 User Guide Page 1-13... -
Page 24: Laser Safety
Since radiation emitted inside this product is completely confined within the protective housing and external covers, the laser beam cannot escape from the machine during any phase of the user operation. Page 1-14 Xerox Document Centre 440/432/420 User Guide... - Page 25 States. This product contains laser warning labels. These labels are intended for use by Xerox Service Representatives and are placed on or near panels or shields that require special tools for removal. Do not remove any of the panels. There are no operator serviceable areas inside these covers.
-
Page 26: Environmental Compliance
Environmental Compliance ® Energy Star Xerox Corporation designed this product to comply with the ® guidelines of the ENERGY STAR program of the ® Environmental Protection Agency. As an ENERGY STAR Partner, Xerox has determined that this product meets the ®... -
Page 27: Illegal Copying
3/4 or more than 1 1/2 times the linear dimensions of the original.) Postal Money Orders Xerox Document Centre 440/432/420 User Guide Page 1-17... - Page 28 Registrant’s earnings or income Registrant’s dependency status Registrant’s court record Registrant’s previous military service Registrant’s physical or mental condition NOTE: Exception: US Army and Navy discharge certificates may be photographed. Page 1-18 Xerox Document Centre 440/432/420 User Guide...
- Page 29 Department or Bureau) Copying of the following is also prohibited in certain states: automobile licences, driver’s licenses, and automobile Certificates of Title. This list is not all-inclusive. In case of doubt, consult your attorney. Xerox Document Centre 440/432/420 User Guide Page 1-19...
-
Page 30: Ground Fault Interrupter (Gfi)
Flip the switch to restore power to the machine. DC 420 DC 440/432 If the GFI interrupts power to the machine again, or if power has not been restored by this procedure, call your Xerox service representative. Page 1-20 Xerox Document Centre 440/432/420 User Guide... -
Page 31: Product Overview
User Guide are based on a fully configured Document Centre 440/432 . The appearance of the touch screens may differ slightly on other models or configurations. However, feature descriptions and functionality as described, remain the same. Xerox Document Centre 440/432/420 User Guide Page 2-1... -
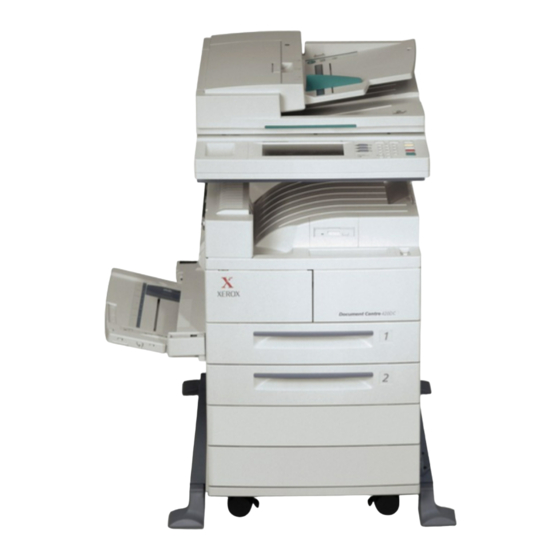
Page 32: Identifying The Machine Components
Identifying the machine components The following pages provide illustrations of the Document Centre components and control panel buttons as well as a description of the services and modes available. Contact the local Xerox Representative for more information. Document Centre 440/432/420 Document Glass Document... -
Page 33: Optional Components
Optional Components The graphic below shows some of the optional components available. Contact the local Xerox representative for more information. Finisher High Capacity Duplex Paper Trays 3 Module Feeder (HCF) & 4 Duplex module ( DC420 ) Makes two-sided copies from one-sided and/or two-sided documents. - Page 34 Finisher option is not fitted. The stapler can handle a maximum of 50 sheets of 20lb (substance 20) paper. Refer to page 3-13 for more information. NOTE: The Convenience Shelf can be installed without the Convenience Stapler. Page 2-4 Xerox Document Centre 440/432/420 User Guide...
- Page 35 For more information refer to “Fax” on page 4-1 . Hard Disk (DC420 ) The Digital Copier uses DRAM (Dynamic Random Access Memory) for permanent and temporary storage. The optional hard disk provides additional storage space for large or complex jobs. Xerox Document Centre 440/432/420 User Guide Page 2-5...
-
Page 36: Power On/Off
À Locate the ON / OFF switch. À Switch to to turn the machine on. The DC420 digital copier will take approximately 59 seconds to power ON. Page 2-6 Xerox Document Centre 440/432/420 User Guide... - Page 37 À Locate the ON / OFF switch. À Switch to to turn the machine on. The DC440/432 digital copier will take approximately 55 seconds to power ON. Xerox Document Centre 440/432/420 User Guide Page 2-7...
-
Page 38: Powering Off
/on can result in damage to the DC440/ 432/420 hard drive. NOTE: If the Printer option is installed and the power is turned off, the DC440/432/420 will remain on for approximately 15 seconds before the power is terminated. Page 2-8 Xerox Document Centre 440/432/420 User Guide... -
Page 39: Power Save Modes
The Power Saver Indicator is a light, located on the lower-left portion of the control panel. The Power Saver feature operates in three modes: - Stand-by - Low Power - Power Save (Auto Off/Sleep) Power Saver Indicator light Xerox Document Centre 440/432/420 User Guide Page 2-9... -
Page 40: Low Power Mode
Should a fax or print job be received by the machine automatic activation occurs. Page 2-10 Xerox Document Centre 440/432/420 User Guide... -
Page 41: Changing The Default Time Settings For Low Power And Power Save (Auto Off/Sleep) Modes
À Enter the password using the keypad and select [Enter]. NOTE: User access to Setups is password protected. Please contact the Key Operator or refer to “Setups” on page 10-1 for assistance. Xerox Document Centre 440/432/420 User Guide Page 2-11... - Page 42 À Select [Machine Setups]. À Select [Timers]. À Select the option required. Page 2-12 Xerox Document Centre 440/432/420 User Guide...
-
Page 43: Recycled Paper
Xerox recommends Xerox part number 3R5130 (8 1/2” x 11” size stock), a recycled paper with 20% post consumer content that can be obtained both through Xerox and many other office suppliers. The following paper is also available: - 3R94568 (A3 size, 80g/m... -
Page 44: Modes
DC440/432/420 . NOTE: The features available will depend on the machine configuration. Features button Job Status button Machine Status button Page 2-14 Xerox Document Centre 440/432/420 User Guide... -
Page 45: Features Button
À The Print Queue is the default setting and will be automatically displayed. À Select [Other Queues] to display the queues available. NOTE: The queues available are Dependant on the machine configuration. Xerox Document Centre 440/432/420 User Guide Page 2-15... -
Page 46: Machine Status Button
NOTE: Machine Status cannot be accessed during a system fault, when the confirmation window is displayed, or when the Key Operator Tools is accessed on the touch screen. Page 2-16 Xerox Document Centre 440/432/420 User Guide... -
Page 47: Machine Information
(if fax is installed). The Key Operator sets the defaults and enables specific paper for printing fax documents. Xerox Document Centre 440/432/420 User Guide Page 2-17... -
Page 48: Reports And Counters
(active or cleared). Select the Fault Clearance Instructions button for assistance when clearing an active fault. Reports and Counters Print Reports Accesses the various reports available for printing. Refer to the list for information. Page 2-18 Xerox Document Centre 440/432/420 User Guide... - Page 49 - PCL Font List - lists the available PCL fonts for the printer. Account Information When the Auditron is enabled use this screen to review the limit and current count for your account number. Xerox Document Centre 440/432/420 User Guide Page 2-19...
- Page 50 Fax is not installed, the counters screen will not display a fax button. On receipt of a Xerox meter card, check that the serial number on the card matches that shown on the machine, if the information is correct enter the Machine counter reading in the relevant box and return the pre-paid card to Xerox.
-
Page 51: System Controls
Also telephone number entering a password. replaces the current when transmitting a value with a default fax. value. Xerox Document Centre 440/432/420 User Guide Page 2-21... -
Page 52: Auditron Access Screen
Select [Account Information]. À The screen shown will be displayed with the count for Copy and/or Fax jobs completed and the limit set for the account. À Select [Exit] to close the screen. Page 2-22 Xerox Document Centre 440/432/420 User Guide... -
Page 53: Information Sources
- System to gain help about the machine, - Index for a list of features available. À Select [Close] to exit the help screens. NOTE: Jobs cannot be programmed when using the Help screen. Xerox Document Centre 440/432/420 User Guide Page 2-23... - Page 54 - There are 2 books available which fully describe the operation of the system. - User Guide: All operational, maintenance and machine setup procedures. - DC440/432/420ST System Administration Guide: Information on Network installation and setup procedures. Page 2-24 Xerox Document Centre 440/432/420 User Guide...
-
Page 55: Copy
Copy This chapter contains information about the Copy screen and the features available. Xerox Document Centre 440/432/420 User Guide Page 3-1... -
Page 56: Copying Procedure
NOTE: For information about copying mixed size originals using the document feeder please refer to page 3-22. For instructions on faxing mixed size originals using the document feeder refer to page 4-34 . Page 3-2 Xerox Document Centre 440/432/420 User Guide... -
Page 57: Document Glass
NOTE: Auto Paper is used with standard document sizes. For non-standard sizes, manually select the paper tray required. Document Glass The document glass should be used for single pages or bound originals up to a maximum of 11 x 17” size. Xerox Document Centre 440/432/420 User Guide Page 3-3... - Page 58 Pic of document feeder being raised À Place the document face down onto the document glass, aligned with the tip of the registration arrow near the top left of the document glass. À Lower the document feeder. Page 3-4 Xerox Document Centre 440/432/420 User Guide...
-
Page 59: Select The Features Button
Constant Velocity Transport Glass 2. Select the Features button À Select [Features] located on the left of the numeric keypad. Ensure that the first Copy screen is displayed. Xerox Document Centre 440/432/420 User Guide Page 3-5... -
Page 60: Select The Features
À Select the button for the feature required. The button changes to white. If Other is selected, select [Save] to confirm the selected feature or [Cancel] to return to the previous screen. Page 3-6 Xerox Document Centre 440/432/420 User Guide... -
Page 61: Enter The Quantity
The number entered is displayed in the top right hand corner of the touch screen. To cancel an incorrect entry, select [C] and enter the correct quantity. Xerox Document Centre 440/432/420 User Guide Page 3-7... -
Page 62: Select Start
Print Queue . À The job will be displayed in the queue. If there are no jobs in the queue, the job may have already been processed. Page 3-8 Xerox Document Centre 440/432/420 User Guide... -
Page 63: Standard Features (Copy)
Center Tray. Copy sets delivered to the Left Tray will be face up and are not offset. NOTE: A6 size paper should not be fed to the Finisher. Xerox Document Centre 440/432/420 User Guide Page 3-9... - Page 64 This option delivers the copies to the Center Tray in the order 3,3.. based on the total number of copies for each document. The order of the output for two copies of a three-page document will 2,2.. be 1-1, 2-2, 3-3. 1,1.. Page 3-10 Xerox Document Centre 440/432/420 User Guide...
- Page 65 Finisher. The green light next to the button is lit. NOTE: If a job is currently in process, the light will flash - wait until the job finishes. Xerox Document Centre 440/432/420 User Guide Page 3-11...
- Page 66 Slide the documents forward until you hear the click of the staple being inserted. The staple is inserted in the upper left corner of the documents. À Remove the stapled set from the Finisher. Page 3-12 Xerox Document Centre 440/432/420 User Guide...
-
Page 67: Sides Imaged
Duplex Module are required to produce double sided output. • 1 1: single-sided copies from single-sided documents. • 1 2: double-sided copies from single-sided documents. • 2 2: double-sided copies from double-sided documents. Xerox Document Centre 440/432/420 User Guide Page 3-13... - Page 68 Portrait —the image appears in the portrait orientation. Landscape —the image appears in the landscape orientation. The following illustration depicts the results for Head to Head or Head to Toe selections for Portrait and Landscape images. Page 3-14 Xerox Document Centre 440/432/420 User Guide...
- Page 69 Other option and then 1 2 to access the following orientation options available: Head to Head— the output will be the same orientation as the documents. Head to Toe— the output will be rotated 180 Xerox Document Centre 440/432/420 User Guide Page 3-15...
-
Page 70: Reduce/Enlarge
/ enlarge settings. The presets are set up by the Key Operator. Other used to specify a magnification not listed, or to select normal or custom settings. Page 3-16 Xerox Document Centre 440/432/420 User Guide... -
Page 71: Paper Supply
If the type or color of stock is not being changed, select Confir m to close the window. NOTE: For information about loading paper, refer to “Paper and other media” on page 9-1 . Xerox Document Centre 440/432/420 User Guide Page 3-17... -
Page 72: Image Quality
Key Operator. Other displays a list of all the trays and the paper type, color, size and orientation loaded. Image Quality Use the image quality settings to adjust the quality of the output. Page 3-18 Xerox Document Centre 440/432/420 User Guide... - Page 73 HINT: For best results, copy a maximum of 5 photographs in one job, unless the machine has additional memory. Lighter/Darker scroll bar allows manual adjustment to be made to the lightness and darkness of the output. Scroll bar Xerox Document Centre 440/432/420 User Guide Page 3-19...
-
Page 74: Added Features (Copy)
Output Formats - page 3-33 À If necessary select Job Assembly - page 3-47 [Copy]. À Select [Added Features]. NOTE: Only those features relevant to the machine configuration will be available. Page 3-20 Xerox Document Centre 440/432/420 User Guide... -
Page 75: Image Adjustment Tab (Copy)
Document Feeder and Document Glass. Use the following steps to program select this feature on the DC440/432 . NOTE: This feature is known as Original Input on the DC420 . Xerox Document Centre 440/432/420 User Guide Page 3-21... - Page 76 11” x 17” short edge feed can be loaded with 8 1/2” x 11” long edge feed, but 11” x 17”short edge feed cannot be loaded with 8 1/2” x 11” short edge feed. Page 3-22 Xerox Document Centre 440/432/420 User Guide...
- Page 77 Select [Mixed Size] and select [Save]. À Enter the quantity and select [Start]. NOTE: Inserts, Booklet Creation and N Up (2 Up on the DC420 ) cannot be used with Mixed Size Originals . Xerox Document Centre 440/432/420 User Guide Page 3-23...
-
Page 78: Bound Originals
Do not force it shut. À Select the features required. À Select [Added Features]. À Select [Bound Originals] and select the features required. À Select [Save]. À Select [Start]. Page 3-24 Xerox Document Centre 440/432/420 User Guide... - Page 79 2 in from the gutter area down the center of a bound document. When the 1 and 2 option is selected any amount from 0 - 2 in can be entered. Xerox Document Centre 440/432/420 User Guide Page 3-25...
-
Page 80: Image Shift
- Side 2: shifts the image to the left or right, up or down for the second page of the document being copied. The image can be shifted up to 2 in. Page 3-26 Xerox Document Centre 440/432/420 User Guide... -
Page 81: Expert Image Quality
However, it is advisable not to decrease the sharpness too much, the copy might appear distorted. Normal is the default setting. Xerox Document Centre 440/432/420 User Guide Page 3-27... -
Page 82: Erase
Select [Erase]. À Select [Border Erase] or [Edge Erase]. À Use the scroll arrows to enter the amount of erase required. À Select [Save] . À Enter the quantity and select [Start]. Page 3-28 Xerox Document Centre 440/432/420 User Guide... -
Page 83: Edit (Optional)
1/4 of an inch of the edge of the document. DC440/432 there is a choice of two edit options - Area Edit or Page Edit . DC420 there is a only one choice available - Edit Xerox Document Centre 440/432/420 User Guide Page 3-29... - Page 84 Place the marked copy on to the Document Glass. À Select [Added Features] and then [Image Adjustment]. À Select [Edit]. À Select [Area Edit]. À Select the option required and select [Save] . À Select [Start] . Page 3-30 Xerox Document Centre 440/432/420 User Guide...
- Page 85 Document Glass. À Select [Added Features] and then [Image Adjustment]. À Select [Edit]. À Select [Page Edit] . À Select the option you want to use and select [Save] . À Select [Start]. Xerox Document Centre 440/432/420 User Guide Page 3-31...
- Page 86 The center area will be blank. Delete Outside scans everything inside the orange lines and ignores everything outside. The outside area will be blank. Page 3-32 Xerox Document Centre 440/432/420 User Guide...
-
Page 87: Output Format (Copy)
This feature enables copying on to transparency stock, placement of dividers between the pages and making hard copy sets for handouts. NOTE: For information about loading transparency stock please refer to “Paper and other media” on page 9-1 . Xerox Document Centre 440/432/420 User Guide Page 3-33... - Page 88 Select [Transparency] and select [Save]. • Select [Colour] then [Clear] and then [Save]. À Select [Start]. NOTE: A maximum quantity of 1 can be selected. Page 3-34 Xerox Document Centre 440/432/420 User Guide...
-
Page 89: N Up (2 Up - Dc420)
2 Up. It enables two independent documents to be printed side by side on to one sheet of paper. It reduces / enlarges the images as needed to display them in landscape orientation on one page. Xerox Document Centre 440/432/420 User Guide Page 3-35... - Page 90 Select landscape or portrait and then [Save]. À Enter the quantity. À Select [Start]. On the DC420: À Select [Added Features] and then [Output Format]. À Select [2 Up]. À Select [On]. Page 3-36 Xerox Document Centre 440/432/420 User Guide...
-
Page 91: Annotation
Select [Added Features]. À Select [Output Format]. À Select [Annotation]. The Annotation options will be displayed. À Select the option required and follow the instructions displayed on the screen. À Select [Save]. Xerox Document Centre 440/432/420 User Guide Page 3-37... - Page 92 Selecting Transparent means that the image on the document is not deleted and the annotation is placed on top of the document image. Selecting Opaque means that the annotation replaces the document image. Page 3-38 Xerox Document Centre 440/432/420 User Guide...
-
Page 93: Programming A New Comment
DC420 ). À If Off is selected, select comment and the Document Centre will display the list. À Select an empty slot in the Comment List . À Select [Enter]. Xerox Document Centre 440/432/420 User Guide Page 3-39... - Page 94 Select [More Characters] to use additional characters. If an incorrect entry is made, select the button to backspace. À Select [Save]. À The comment will be displayed in the list. Page 3-40 Xerox Document Centre 440/432/420 User Guide...
-
Page 95: Inserts
À Program the T ray Attributes window and select [Save]. À Select the features required. À Select [Added Features] and then [Output Format]. À Select [Inserts]. À Select the option required. Xerox Document Centre 440/432/420 User Guide Page 3-41... - Page 96 NOTE: If blank sheets are not placed in the set of documents to mark the location of the inserts, the DC440/432/420 prints the image from the next page on to the insert. Page 3-42 Xerox Document Centre 440/432/420 User Guide...
-
Page 97: Booklet Creation
Otherwise, the extra pages in the book will be blank. NOTE: Booklet Creation is not available on platen glass or simplex configurations of the DC420 . Xerox Document Centre 440/432/420 User Guide Page 3-43... -
Page 98: Covers (Dc440/432)
À The [Change Attributes] window will be displayed. Program the new paper stock and select [Save]. À Select the features required. À Select [Added Features] and then [Output Format]. À Select [Covers]. Page 3-44 Xerox Document Centre 440/432/420 User Guide... - Page 99 (and last, if programmed) page of the set of documents will be copied onto the cover stock. Blank sheets must be added to the set of documents if only the front or the back cover is to be printed. Xerox Document Centre 440/432/420 User Guide Page 3-45...
- Page 100 Envelope Tray, Booklet Creation and Mixed Size Originals (if APS is selected) cannot be used with the Covers feature. If Annotation is selected with Printed Covers , the annotation programmed will appear on the back cover. Page 3-46 Xerox Document Centre 440/432/420 User Guide...
-
Page 101: Job Assembly (Copy)
By default, Build Job is set to Off. HINT: To save time use the Build Job Screen instead of the control panel to program each page. Xerox Document Centre 440/432/420 User Guide Page 3-47... - Page 102 À After the last section has been scanned, select [End Build Job] to indicate that the job has been completed. The machine will complete the quantity selected. Page 3-48 Xerox Document Centre 440/432/420 User Guide...
-
Page 103: Stored Jobs
Program the job features. À Select [Added Features]. À Select [Job Assembly]. À Select [Stored Job]. À If required, use the scroll arrows to select an empty job in the Store Job list. Xerox Document Centre 440/432/420 User Guide Page 3-49... - Page 104 Characters]. If an incorrect entry is made, select the button to backspace. À Select [Save] to store the name or [Cancel] to exit. À The job will appear in the Job List. À Select [Close]. Page 3-50 Xerox Document Centre 440/432/420 User Guide...
- Page 105 Select the required job in the list then select [Delete] . À In the pop-up window select [Confirm] to delete or [Close] to cancel. À The job will be deleted from the Job List . Xerox Document Centre 440/432/420 User Guide Page 3-51...
-
Page 106: Managing Copy Jobs
Jobs are placed in the queue according to job priority and type. When full the queue will not accept any more jobs. As space becomes available new jobs will enter the queue. Job # a number is assigned to identify each job . Page 3-52 Xerox Document Centre 440/432/420 User Guide... - Page 107 (the paper size required is not available). Releasing a fax job forces the machine to print the fax on any available paper, which might require a reduction or other modification. It is held in memory until the problem is resolved. Xerox Document Centre 440/432/420 User Guide Page 3-53...
-
Page 108: Completed Print Jobs Queue
The queue contains the last 50 completed print jobs. Jobs are maintained on a first-in, first-out basis and organized in order of completion. Page 3-54 Xerox Document Centre 440/432/420 User Guide... - Page 109 Use the toolbar across the top of the Completed Print Jobs Queu e to manage jobs. Details displays additional information about the jobs in the queue. Other Queues displays the other job queues available. Xerox Document Centre 440/432/420 User Guide Page 3-55...
- Page 110 Page 3-56 Xerox Document Centre 440/432/420 User Guide...
-
Page 111: Fax
Sending and receiving a facsimile (fax) is an optional feature on the DC440/432/420. Xerox Document Centre 440/432/420 User Guide Page 4-1... -
Page 112: Sending A Fax
If the DC440/432/420 is connected to a network, faxes can be sent over the network from a Workstation to the machine for forwarding on to the end remote fax machine. Use the following steps to send a fax. Page 4-2 Xerox Document Centre 440/432/420 User Guide... -
Page 113: Select Features
Selecting [Clear All] twice clears all the programming pathways and returns the machine to its default status. Features Button Clear All À Select [Fax]. À The first Fax screen will be displayed. Xerox Document Centre 440/432/420 User Guide Page 4-3... -
Page 114: Load The Documents
2. Load the documents À Load documents face up in to the Document Feeder or face down on the Document Glass. Page 4-4 Xerox Document Centre 440/432/420 User Guide... -
Page 115: Dial The Number
À Select [Start] . The Fax Job Monitor pop-up window will be displayed. This shows information about the fax job. The Document Centre scans the images and places them in its memory. Xerox Document Centre 440/432/420 User Guide Page 4-5... - Page 116 Setups tab and in the Completed Fax Jobs List in Job Status . A status of Completed in the Fax Queue means the fax has been received, but it does not mean it has been printed. Page 4-6 Xerox Document Centre 440/432/420 User Guide...
- Page 117 NOTE: If an error is detected, a message is displayed on the touch screen. Correct the error and proceed. Xerox Document Centre 440/432/420 User Guide Page 4-7...
-
Page 118: Standard Features (Fax)
A lower resolution reduces communication time. Standard (200 x 100 dpi) recommended for text documents. It requires less communication time, but does not produce the best image quality for graphics and photos. Page 4-8 Xerox Document Centre 440/432/420 User Guide... -
Page 119: Original Type
Use this setting for combinations of text and photos, or text and graphics. Photo use this setting for photographs and images that have a continuous tone. However, it might reduce the sharpness of the text. Xerox Document Centre 440/432/420 User Guide Page 4-9... -
Page 120: Sides Scanned
If the document is double-sided, specify the type of document. - Portrait or Landscape - Head to Head or Head to Toe Page 4-10 Xerox Document Centre 440/432/420 User Guide... -
Page 121: Dialing
(using the keypad, speed dial etc) À Select [Next Destination] - the touch screen displays the Dial Directory À Enter the next fax number. A maximum of 50 numbers can be entered using Next Destination. Xerox Document Centre 440/432/420 User Guide Page 4-11... -
Page 122: Dialing Characters
Repeat the above steps for each character. À Select [Enter] to exit. Depending on the setup of the telephone and communication lines, some or all of the following characters will need to be used. Page 4-12 Xerox Document Centre 440/432/420 User Guide... - Page 123 DTMF (tone or touch-tone) dialing. After switching from pulse to tone, you cannot switch back to the original mode during the fax operation. For example, use pulse mode to make the connection and tone Xerox Document Centre 440/432/420 User Guide Page 4-13...
- Page 124 Telephone option window will be displayed offering the following features: Auto Select with this option the system will automatically select an available telephone line. Line 1 is checked first, if this is not available, Line 2 is used. Page 4-14 Xerox Document Centre 440/432/420 User Guide...
- Page 125 They are available only through a special character keypad. Select the special character keypad from the touch screen. Keypad The keypad corresponds to the control panel telephone keypad buttons. Select Keypad to use it instead of another method. Xerox Document Centre 440/432/420 User Guide Page 4-15...
-
Page 126: Speed Dial
To dial all speed dial numbers. The * acts as a wildcard and selects all numbers. Speed Dial To dial group number 01. HINT: To save time print the Dial Directory and display it near the machine. Page 4-16 Xerox Document Centre 440/432/420 User Guide... -
Page 127: Dial Directory
[Next Destination] . À Repeat the above steps until all of the numbers added are displayed in the Current Dial List. A maximum of 50 numbers can be added. Xerox Document Centre 440/432/420 User Guide Page 4-17... - Page 128 In addition, a telephone number from the dialing keypad can also be entered. Use this is an alternative to selecting a speed dial number from the dial directory. Up to 120 digits or special characters can be entered using this method. Page 4-18 Xerox Document Centre 440/432/420 User Guide...
-
Page 129: Added Features (Fax)
Cover Letter - page 4-20 Transmission Report - page 4-21 Lighter/Darker - page 4-22 Communications Mode (DC440/432) / Forced 4800 Mode (DC420) - page 4-22 Delayed Start - page 4-23 Send Priority (DC440/432) - page 4-24 Xerox Document Centre 440/432/420 User Guide Page 4-19... -
Page 130: Cover Letter (Cover Page)
Dial Directory, the first line of the To comment is blank.) - The To comment (recipient’s name). - The local name. - The From comment (sender’s name). Page 4-20 Xerox Document Centre 440/432/420 User Guide... -
Page 131: Transmission Report
When sending a fax to multiple recipients (broadcast), one transmission report will be printed listing all of the recipients. À Load the document. À Select [Added Features]. À Select [Transmission Report]. À Select [On]. À Select [Save] and then [Start]. Xerox Document Centre 440/432/420 User Guide Page 4-21... -
Page 132: Lighter/Darker
NOTE: On the DC420 the Forced 4800 bps feature is the only available option. À Load the document. À Select [Added Features] . À Select [Communications Mode]. À Select the required option. À Select [Save] and then [Start]. Page 4-22 Xerox Document Centre 440/432/420 User Guide... -
Page 133: Delayed Start
Only one delayed poll can be saved at a time. Use the Fax Job Monitor feature to check the available memory. Xerox Document Centre 440/432/420 User Guide Page 4-23... -
Page 134: Send Priority (Dc440/432)
NOTE: Send Priority can be used with Delayed Start. À Select [Added Features]. À Select [Send Priority]. À Select either [Normal] or [High]. À Select [Save]. Page 4-24 Xerox Document Centre 440/432/420 User Guide... -
Page 135: Advanced Features (Fax)
À Select [Advanced Fax Mailbox - page 4-31 Features]. Original Size (DC440/432)/Mixed Size Originals (DC420) - page 4-34 À Select [Added Features]. À Select [Advanced Features] the options available will be displayed. Xerox Document Centre 440/432/420 User Guide Page 4-25... -
Page 136: Build Job
The job will be faxed. If the machine reaches a low memory level during a build job operation, the job will be cancelled. Page 4-26 Xerox Document Centre 440/432/420 User Guide... -
Page 137: Poll Remote Fax
À Select [Poll Remote Fax]. À Select [On] and [Save]. À On the first Fax screen enter the number of the remote fax machine. À Select [Start] . Xerox Document Centre 440/432/420 User Guide Page 4-27... -
Page 138: Store For Polling
Enter the fax number for the remote machine. À Select [Added Features]. À Select [Advanced Features]. À Select [Store for Polling]. À Select [Free Polling] then [Close] . À Select [Start] . Page 4-28 Xerox Document Centre 440/432/420 User Guide... -
Page 139: Secure Polling
Start to complete the job. NOTE: If the DC440/432/420’s memory is full when trying to store a document for secure polling, cancel the operation and try again later when more memory is available. Xerox Document Centre 440/432/420 User Guide Page 4-29... -
Page 140: Polling Password Button
DC440/432/420 is configured by the Key Operator to delete the stored documents after they are printed, a confirmation message will appear confirming the request. HINT: Configuring the machine to delete the stored documents after printing saves memory. Page 4-30 Xerox Document Centre 440/432/420 User Guide... -
Page 141: Fax Mailbox
À Load the documents. À Select [Start]. NOTE: On the DC440/432 mailbox numbers are 3 digits from 001-200. On the DC420 mailbox numbers are 2 digits from 01-30. Xerox Document Centre 440/432/420 User Guide Page 4-31... -
Page 142: Print From Mailbox
Using the keypad on the control panel enter the four- digit mailbox password (0000-9999). The password will be displayed as ****. À Select [Enter] . After the document is printed, it is deleted. Page 4-32 Xerox Document Centre 440/432/420 User Guide... -
Page 143: Delete Mailbox Contents
(0000-9999). The password will be displayed as ****). À Select [Enter]. The DC440/432/420 confirms deletion after the mailbox number and password have been entered. Xerox Document Centre 440/432/420 User Guide Page 4-33... -
Page 144: Original Size (Dc440/432)/Mixed Size Originals (Dc420)
Features]. À On the DC440/432 select [Original Size]. On the DC420 select [Mixed Size]. À On the DC440/432 select [Save]. On the DC420 select [On] and then [Save] . À Select [Start]. Page 4-34 Xerox Document Centre 440/432/420 User Guide... -
Page 145: Reports & Setups (Fax)
Dial Directory Setup - page 4-38 À Select [Added Comment Setup - page 4-43 Features] Transmit Header Print (DC440/432) - page 4-44 À Select [Reports & Setups]. À Select [Added Features]. À Select [Reports and Setups]. Xerox Document Centre 440/432/420 User Guide Page 4-35... -
Page 146: Fax Reports
Dial Directory Report provides information about the Dial Directory numbers. Print a (Complete Report) complete report, or specific sections of the report (the first 50 numbers, 51–100, 101–150, 151–200, or Dial Groups). Page 4-36 Xerox Document Centre 440/432/420 User Guide... -
Page 147: Answer Mode
0), the machine automatically answers. the DC440/432/420 will not automatically answer. On Manual Answer answering the telephone and if a fax tone is heard, select Receive and Start to switch from the telephone to fax. Xerox Document Centre 440/432/420 User Guide Page 4-37... -
Page 148: Dial Directory Setup
Select [Individual]. À Select a blank location in [Dial Directory]. À Select [Next]. À Using the keypad on the control panel enter the fax telephone number for the individual. À Select [Next]. Page 4-38 Xerox Document Centre 440/432/420 User Guide... - Page 149 À Select [Next]. À Select the desired default settings for the faxes to be sent to this recipient Resolution, Communication Mode and Maximum Storage Width . À Select [Next]. Xerox Document Centre 440/432/420 User Guide Page 4-39...
- Page 150 À Select [Save] and then [Close]. The Individual listing and all selections made for that listing will now be displayed in the Dial Directory . Page 4-40 Xerox Document Centre 440/432/420 User Guide...
- Page 151 Deleting a number from the Dial Directory À Select the number to be deleted. À Select [Delete]. NOTE: Numbers cannot be deleted out of order. Always start from at the bottom of the list. Xerox Document Centre 440/432/420 User Guide Page 4-41...
- Page 152 Numbers cannot be deleted out of order, always start with the last number on the list. NOTE: Up to 10 groups can be programmed and stored. Each group can contain a maximum of 20 destinations. Page 4-42 Xerox Document Centre 440/432/420 User Guide...
-
Page 153: Comment Setup
Comments List . The DC420 can store up to 34 comments. À Select [Comment Setup] in Reports & Setups . À Select an empty line in the Comment List to enter the name(s) you want to program. Xerox Document Centre 440/432/420 User Guide Page 4-43... -
Page 154: Transmit Header Print
- Date, Time, and Page number Use the following steps to switch this feature on. À Select [Transmit Header Print] feature in Reports & Setups . À Select [On] and then [Save]. Page 4-44 Xerox Document Centre 440/432/420 User Guide... -
Page 155: Lan Fax (Local Area Network Fax)
Refer to “Print” on page 7-1 for more information about the print features. NOTE: Refer to the CentreWare customer documentation for further information on the LAN Fax features. Xerox Document Centre 440/432/420 User Guide Page 4-45... -
Page 156: Managing Fax Jobs
The DC440/432 can have up to two fax lines available, making it possible to have two active jobs at one time. Any job currently being sent or received via a telephone line is considered active Page 4-46 Xerox Document Centre 440/432/420 User Guide... - Page 157 Use the toolbar across the top of the Fax Queue to manage jobs. When a toolbar button is selected a pop-up window is displayed, select Confirm or Cancel to complete the requested action. Xerox Document Centre 440/432/420 User Guide Page 4-47...
-
Page 158: Completed Fax Jobs Queue
The Completed Fax Queue button will only be displayed if Fax is available. Maintains completed fax jobs that were successful, or terminated at the user’s request or due to a fault. Name the name of the destination for the job. Page 4-48 Xerox Document Centre 440/432/420 User Guide... - Page 159 When a toolbar button is selected a pop-up window is displayed. Select Confirm or Cancel to complete the requested action. Details displays additional information about the job in the Completed Fax Jobs Queue. Other Queues displays the other job queues available. Xerox Document Centre 440/432/420 User Guide Page 4-49...
-
Page 160: Connecting Fax To The Isdn (Digital Line)(Dc440/432)
ISDN (Integrated Services Digital Network) is a digital alternative to the analogue network. To connect the Xerox DC440/432 to the ISDN requires the use of a Terminal Adapter (TA) to interface between the machine’s analogue modem and the digital network. Once connected to the TA, the machine will operate in the same way as if it were connected to an analogue telephone system. -
Page 161: Media Print
Media Print Media Print allows a walk-up user to print a file from a floppy disk. Xerox Document Centre 440/432/420 User Guide Page 5-1... -
Page 162: Using Media Print
Print the files to the format required and copy them on to a floppy disk. À At the DC440/432/420 insert the disk into the floppy drive. Floppy Drive Page 5-2 Xerox Document Centre 440/432/420 User Guide... - Page 163 Scroll through the list to find the file to be printed. If the file is inside a subdirectory, select the subdirectory to display the list of files. À To exit the subdirectory, select [Close Directory] . Xerox Document Centre 440/432/420 User Guide Page 5-3...
- Page 164 Job Status to review the job. À On completion remove the disk from the floppy drive. NOTE: The disk must remain in the floppy drive until the system has finished reading the files. Page 5-4 Xerox Document Centre 440/432/420 User Guide...
-
Page 165: Scan To File
Scan to File The Scan option will only be available on the DC440/432/420 if the machine is connected to the network and the optional Scan to File kit has been installed. Xerox Document Centre 440/432/420 User Guide Page 6-1... -
Page 166: Standard Features (Scan)
Scan to Fax - refer to page 6-23 NOTE: The Scan to Email option is not available on the DC420 . The screen shown below will only be displayed on the DC440/432. Page 6-2 Xerox Document Centre 440/432/420 User Guide... -
Page 167: Scan To Email (Dc440/432)
Document Feeder or place it on the Document Glass. À Select [Scan]. À Select [Scan to Email]. The Email list will be displayed. À Select [Enter]. NOTE: Selecting Delete will delete the selected email address. Xerox Document Centre 440/432/420 User Guide Page 6-3... - Page 168 Editing an existing email address: À Select an email address from the Email List. À Select [Enter]. À Using the keypad, edit the address. À Select [Save] to store the changes. Page 6-4 Xerox Document Centre 440/432/420 User Guide...
-
Page 169: Scan To File
The default template is selected at the DC440/432/420 Touch Screen and programmed prior to scanning the job. NOTE: Xerox CentreWare Network Scanning Services also provides additional functionality. Refer to the Xerox CentreWare documentation for more information. Xerox Document Centre 440/432/420 User Guide... - Page 170 NOTE: Template pools are used for storing Templates created using Xerox CentreWare Scanning Services. Templates created using Internet Services are stored directly on the DC440/432/420 .
- Page 171 [Scan to File Queue] in [Job Status]. This will only show active or pending scan jobs. À Access the electronic version of the document at the location specified in the selected template. Xerox Document Centre 440/432/420 User Guide Page 6-7...
-
Page 172: Summary Box Features
1 or 2 sided scanning. Scan Resolution 600 x 600 dpi ( DC440/432 ), 400 x 400 dpi, 300 x 300 dpi, 200 x 200 dpi, or 100 x 200 dpi. Page 6-8 Xerox Document Centre 440/432/420 User Guide... -
Page 173: Added Features (Scan Setups)
Basic Image Quality - page 6-11 À Select [Added Sides Imaged/Copy of Originals - page 6-12 Features] Reduce/Enlarge - page 6-13 À Select [Scan Setups] Stored Image Settings - page 6-14 Erase - page 6-15 Xerox Document Centre 440/432/420 User Guide Page 6-9... -
Page 174: Original Size
Do not use Auto Auto for non-standard sizes. The machine cannot sense the size of non-standard documents. Custom to define the magnification level by programming the X and Y settings for non-standard sizes. Page 6-10 Xerox Document Centre 440/432/420 User Guide... -
Page 175: Basic Image Quality
Text , Auto and Photo mode. Sharpness ( DC440/432 ) enhances or decreases the sharpness level of fine lines and edges. This feature is used with the Photo mode. Xerox Document Centre 440/432/420 User Guide Page 6-11... -
Page 176: Sides Imaged
Head to Head or Head to Toe orientation. NOTE: All single and double-sided scan to file jobs are always stored as single-sided images. A Document Feeder is required to scan in double-sided documents. Page 6-12 Xerox Document Centre 440/432/420 User Guide... -
Page 177: Reduce/Enlarge
NOTE: On the DC440/432 133% is the maximum enlargement setting available with the 600dpi option . HINT: Selecting the numeric input area on the touch screen displays a pop-up keypad which can be used to enter values. Xerox Document Centre 440/432/420 User Guide Page 6-13... -
Page 178: Stored Image Settings
Custom: to define the magnification level by programming the X and Y settings for non-standard sizes. Output Image Format (DC440/ sets the format for scanned images to Tiff, Multipage Tiff or 432) PDF files. Page 6-14 Xerox Document Centre 440/432/420 User Guide... -
Page 179: Erase
(0–2 in) from the top, bottom and both sides of the document. Edge Erase erases amounts (0–2 in) specified from the top, bottom, and both sides independent of each other. Xerox Document Centre 440/432/420 User Guide Page 6-15... -
Page 180: Filing Setups
NOTE: Any changes that are made are discarded after the All Clear timer expires, or the All Clear button is selected. À Select the features as required. À Apply changes. À Select [Save]. À Select [Start]. Page 6-16 Xerox Document Centre 440/432/420 User Guide... -
Page 181: Server Ip Address /Server Name
For NetWare, enter the volume name. For example: - For IP: enter the Document Path - For Netware: enter the Document Path and Volume Xerox Document Centre 440/432/420 User Guide Page 6-17... -
Page 182: Document Folder
NOTE: After the machine is reset, the Template setting for the Document Folder will return to its original Template setting. Login Name/Password used to enter the login name and password. Page 6-18 Xerox Document Centre 440/432/420 User Guide... -
Page 183: Filing Policy
Single Page TIFF file that has the same name as the job being scanned. The Document Centre creates a separate TIFF 6.0, Multipage Tiff or PDF formatted file for each page it scans. Xerox Document Centre 440/432/420 User Guide Page 6-19... - Page 184 NEXTSCAN.XSM where the scanned image files are stored. If repeating the scan operation using the same template settings then a directory NETSC001.XSM is created using the information contained in Page 6-20 Xerox Document Centre 440/432/420 User Guide...
- Page 185 File server full. The error is recorded in the confirmation report and the job is terminated. Files placed on the file server up until that point remain on the file server. Xerox Document Centre 440/432/420 User Guide Page 6-21...
-
Page 186: Document Management Fields (Dc440/432)
Start to scan the job. Users can select the Edit Next Value if applying more than one change. Document Management Fields information is stored in the job log (.xst) file along with the scanned file. Page 6-22 Xerox Document Centre 440/432/420 User Guide... -
Page 187: Scan To Fax (Dc440/432)/Fax Setups(Dc420)
Used to change a selected telephone number in the Current Dial List or enter a new telephone number. NOTE: Any entered telephone numbers are deleted after the Clear All timer expires, or the Clear All button is selected. Xerox Document Centre 440/432/420 User Guide Page 6-23... -
Page 188: Delayed Start
Used to scan a document into the machine and send as a fax at a later time. À Select [Delayed Start]. À Select [On] . Enter the start time for the fax job to be transmitted . À Select [Save]. Page 6-24 Xerox Document Centre 440/432/420 User Guide... -
Page 189: Managing Scan Jobs
If all 50 jobs are active and pending jobs, no new jobs will be added until an active job is completed. Use the scroll buttons to move through the jobs in the queue. Xerox Document Centre 440/432/420 User Guide Page 6-25... -
Page 190: Completed Scan To File Queue (Dc440/432)
This queue can hold up to 50 jobs at one time. When the queue reaches its capacity, the oldest jobs are deleted to make room for new jobs. Page 6-26 Xerox Document Centre 440/432/420 User Guide... - Page 191 Use the toolbar across the top of the Completed Scan to File Queue to manage the jobs. Details displays additional information about a job in the Completed Scan to File Queue. Other Queues displays the other job queues available. Xerox Document Centre 440/432/420 User Guide Page 6-27...
- Page 192 Page 6-28 Xerox Document Centre 440/432/420 User Guide...
-
Page 193: Print
Print When the Document Centre 440/432/420 is connected to the network, electronic jobs that require printing can be sent from a workstation directly to the machine. Xerox Document Centre 440/432/420 User Guide Page 7-1... -
Page 194: Print Driver Features
After selecting Delay Print , enter the time of day the job is to be processed. The job will be placed on hold until the specified time. The job is then released automatically and Page 7-2 Xerox Document Centre 440/432/420 User Guide... - Page 195 16 Up. Booklet Creation is also available from this screen. Document Options tab use this screen to select banner sheets, transparency separator pages and to set margins. Xerox Document Centre 440/432/420 User Guide Page 7-3...
- Page 196 Capture Print Port, Form and Job (for example banner, copies) . Use to map or remove the mapping to the network drive, change page dimensions and select a banner page, number of copies etc. Page 7-4 Xerox Document Centre 440/432/420 User Guide...
-
Page 197: Tower Mailbox
Output is delivered face down in the bins. NOTE: Envelopes should be fed to the center tray only. Xerox Document Centre 440/432/420 User Guide Page 7-5... -
Page 198: Managing Print Jobs
For copy jobs, the default name local is Name used. For network print jobs and reports, the name of the file is used. For faxes received, the name is typically the remote fax ID number. Page 7-6 Xerox Document Centre 440/432/420 User Guide... - Page 199 A password is required to release a Secure Print job. Each user sets his or her password(s) at the network user application driver. Different passwords for each job, or one password for Xerox Document Centre 440/432/420 User Guide Page 7-7...
-
Page 200: Completed Print Jobs Queue
The queue contains the last 50 completed print jobs. Jobs are maintained on a first-in, first-out basis and organized in order of completion. Use the scroll buttons to move through the jobs in the queue. Page 7-8 Xerox Document Centre 440/432/420 User Guide... - Page 201 Use the toolbar across the top of the Completed Print Jobs Queu e to manage jobs. Details displays additional information about the jobs in the queue. Other Queues displays the other job queues available. Xerox Document Centre 440/432/420 User Guide Page 7-9...
- Page 202 Page 7-10 Xerox Document Centre 440/432/420 User Guide...
-
Page 203: Internet Services
NOTE: This feature must be installed and set up by the System Administrator prior to use. After installation some of the Internet Services features will have restricted access. Contact the System Administrator for further assistance if required. Xerox Document Centre 440/432/420 User Guide Page 8-1... -
Page 204: Standard Features (Internet Services)
Selecting an icon or name will expand the tree and/or display further information in the right frame. Feature pages Divided into a left and right frame. Page 8-2 Xerox Document Centre 440/432/420 User Guide... - Page 205 Accesses the network or local directory paths. The Browse buttons do not appear if Internet Explorer version 3.0 or less is being used Accesses the Document Centre home page. Device Home Queue Refreshes the job listing. Xerox Document Centre 440/432/420 User Guide Page 8-3...
-
Page 206: Services Tab
User Name and Account ID before submitting the job to the machine. Refer to “Job Based Accounting (DC440/432) (optional)” on page 10-82 for more information. Page 8-4 Xerox Document Centre 440/432/420 User Guide... -
Page 207: Stored Templates
Go to the Document Centre and select [Scan] on the Touch Screen. À Select the template. À Load the documents and select [Start]. For more information about Stored Templates refer to “Template Management” on page 8-14 . Xerox Document Centre 440/432/420 User Guide Page 8-5... -
Page 208: Queue Tab
NOTE: Only jobs that are pending can be promoted. - [Cancel] to remove the job from the print queue. - [Release] to allow the job to process. NOTE: Users can only promote and cancel their own jobs. Page 8-6 Xerox Document Centre 440/432/420 User Guide... -
Page 209: Status Tab
Use the scroll bars to view more information. À Select [Refresh Status] to update the information. À Select [Reboot Machine] to remotely reboot the machine. NOTE: The Reboot button can only be accessed by the System Administrator. Xerox Document Centre 440/432/420 User Guide Page 8-7... -
Page 210: Properties Tab
Fax priority will not apply. Power Saver Sets the timings for the power saver feature on the Document Centre . Printer Languages: Contains information about PostScript, PCL or TIFF settings for the Document Centre . Page 8-8 Xerox Document Centre 440/432/420 User Guide... - Page 211 • EMail From Address - contains the users e-mail address. For example, ‘name@company.com’. Repository Setup Selects a file server repository for configuration. Template Pool Setup Used to set up a server for the template pool. Xerox Document Centre 440/432/420 User Guide Page 8-9...
- Page 212 Document Centre . Portfolio Contains the Document Centre service information. Xerox and system contact information, the Document Centre profile, fault history and billing meters are also included here. Page 8-10 Xerox Document Centre 440/432/420 User Guide...
-
Page 213: Maintenance Tab
- Font Listing displays a listing of PCL and PostScript fonts. - Print Test Page enables a test page to be printed at the machine. - Reports displays a list of the reports that are available for printing. Xerox Document Centre 440/432/420 User Guide Page 8-11... -
Page 214: Assistance Tab
Assistance Tab Use Assistance to access the internet links for software, browser and Xerox support. À Select [Assistance]. À Select the option required to access the relevant information. Page 8-12 Xerox Document Centre 440/432/420 User Guide... -
Page 215: Scanning With Internet Services
Stored Templates page. When a template containing a private repository is selected by the user, the correct user name and password to access that filing location must be entered at the Document Centre . Xerox Document Centre 440/432/420 User Guide Page 8-13... -
Page 216: Template Pools
NOTE: Templates with the ‘@’ symbol at the beginning of a name are created with Internet Services. These templates cannot take advantage of the distribution capabilities of Network Scanning Services. Page 8-14 Xerox Document Centre 440/432/420 User Guide... -
Page 217: Template Services
File Server IP Address Server IP address and optional port (TCP/IP) number. Server Name (NetWare) Name of the server. Server Volume (NetWare) Netware Volume name. NDS Context (NetWare) NDS context. NDS Tree (NetWare) NDS tree. Xerox Document Centre 440/432/420 User Guide Page 8-15... - Page 218 Send fax now or at a specific time. Fax Recipients Where the fax is sent to. Phone Number Fax number of the recipient. Phone List Add or delete fax numbers from the Document Centre phone list. Page 8-16 Xerox Document Centre 440/432/420 User Guide...
- Page 219 Sides Imaged Selects the number of sides (single/ double-sided) to scan and how the pages are scanned (Head to Head or Head to Toe). Resolution Selects the dots per inch. Xerox Document Centre 440/432/420 User Guide Page 8-17...
- Page 220 Pre-Set - specifies a standard supported size for the output document. Custom - specify a unique size for the output document. Page 8-18 Xerox Document Centre 440/432/420 User Guide...
- Page 221 Border Erase - enables you to erase equal amounts of area on each side of a page. Edge Erase - enables you to erase disproportionate areas on each side of a page. Xerox Document Centre 440/432/420 User Guide Page 8-19...
- Page 222 Document Management Fields entry. Up to six entries can be programmed for each template. NOTE: Contact the Xerox representative for more information about the Third Party Software that can be used to access image files referenced with Document Management Fields data.
-
Page 223: Template Operations
Document Management Field entry. Modifying a template: À Select [Stored Templates]. À Select the required template. À Select the service area to modify and make changes. À Select [Apply New Settings]. Xerox Document Centre 440/432/420 User Guide Page 8-21... -
Page 224: Scan To File
Scan to File Prior to scanning a document and creating an electronic file, users must firstly set up the parameters for the job on a template within Internet Services. The template can then be Page 8-22 Xerox Document Centre 440/432/420 User Guide... - Page 225 Retrieving a Scanned Document using PaperPort NOTE: This feature is intended for use with CentreWare 4.1SP2 or earlier. It is not used when scanning using CentreWare 5.1 or later. Xerox Document Centre 440/432/420 User Guide Page 8-23...
- Page 226 À Scan the document. The document is scanned to the repository. À Access [PaperPort] and retrieve the scanned document file within PaperPort. HINT: For best results select [Text] in Original Type . Page 8-24 Xerox Document Centre 440/432/420 User Guide...
-
Page 227: Scan To Fax
Load the document and select [Start]. À The document is printed according to the Local Copy settings in the template. HINT: Templates that will Fax and Print Local Copy can be selected using this feature. Xerox Document Centre 440/432/420 User Guide Page 8-25... -
Page 228: Problem Solving
Is the Document Centre filtered or blocked on the network? À Is the Document Centre inside a firewall? À Is the Document Centre configured for HTTP? NOTE: If the network is experiencing connection performance problems, do not use the proxy server. Page 8-26 Xerox Document Centre 440/432/420 User Guide... -
Page 229: Paper And Other Media
DC440/432/ 420 as well as recommending the different types of paper and media that can be loaded in to the various paper trays on the machine. Xerox Document Centre 440/432/420 User Guide Page 9-1... -
Page 230: Loading Paper
Loading the paper trays Depending on the DC440/432/420 configuration, up to four paper trays will be available. NOTE: If the machine is processing a job, do not open the active paper tray. Page 9-2 Xerox Document Centre 440/432/420 User Guide... - Page 231 HINT: To avoid jams and misfeeds do not load paper on top of paper that may still be in the tray. Remove the paper, and reload it on top of the new stock loaded. Xerox Document Centre 440/432/420 User Guide Page 9-3...
- Page 232 À Side guide Make sure that the guides lock tightly into place. If the paper is not firmly against the sides of the paper tray and the guides, paper jams may occur. Page 9-4 Xerox Document Centre 440/432/420 User Guide...
- Page 233 [Change Attributes]. NOTE: Although paper does not have to be loaded in the same orientation as the documents, the DC440/432/420 runs at a slightly slower speed when jobs require rotation. Xerox Document Centre 440/432/420 User Guide Page 9-5...
-
Page 234: The Bypass Tray
To ensure excellent performance when loading stock of 32lbs or heavier, it is recommended that the Heavyweight option is selected as the Type in the Tray Attributes screen . Page 9-6 Xerox Document Centre 440/432/420 User Guide... - Page 235 Slide the rear guide towards the paper until it is just touching the edge of the stack. NOTE: If loading a different paper type or color, reprogram the features as required in Change Attributes . Xerox Document Centre 440/432/420 User Guide Page 9-7...
-
Page 236: The Envelope Tray (Optional)
NOTE: Envelopes must only be copied single-sided. CAUTION: To prevent unnecessary damage to a tray after it has been removed always make sure that it is placed or stored on a smooth surface, for example a desk top. Page 9-8 Xerox Document Centre 440/432/420 User Guide... -
Page 237: Loading The Envelope Tray
NOTE: When the envelope tray is inserted, the touch screen changes to display Envelope Tray Attributes . Select Confirm to accept the size shown or select Change Envelope Size to change the size. Xerox Document Centre 440/432/420 User Guide Page 9-9... -
Page 238: The High Capacity Feeder (Optional)
20lb (substance 20) 8 1/2” x 11” paper. NOTE: To ensure maximum performance when loading stock of 32lbs or heavier, it is recommended that the Heavyweight option is selected as the Type in the Tray Attributes screen . Page 9-10 Xerox Document Centre 440/432/420 User Guide... -
Page 239: Loading The High Capacity Feeder
À Select [Confirm] in the Tray Attributes window. NOTE: If loading a different paper type or color, reprogram the features as required in Change Attributes . Xerox Document Centre 440/432/420 User Guide Page 9-11... -
Page 240: Auto Tray Switching
When not in use, the paper trays can be opened and paper can be loaded while the DC440/432/420 is running. However, do not open the active tray. This will cause the machine to stop. Page 9-12 Xerox Document Centre 440/432/420 User Guide... -
Page 241: Storing And Handling Paper
- Store paper flat on a shelf or pallet above floor level. - Leave the paper wrapped and boxed until ready to be used. - Re-wrap partly used packages of paper. NOTE: Paper should not be stored in the paper trays. Xerox Document Centre 440/432/420 User Guide Page 9-13... -
Page 242: Other Media
• Trays 2, 3, 4: do not use in these trays. • Bypass Tray: load LEF, 50 sheets maximum (20lb/ substance 20) paper. When printing from a workstation, load paper SEF; when making copies, load LEF. Page 9-14 Xerox Document Centre 440/432/420 User Guide... - Page 243 8 1/2” x 14” Legal documents Legal Paper 500 sheets maximum (20lb/substance 20) paper. • Bypass Tray: load SEF,50 sheets maximum (20lb/ substance 20) paper. • High Capacity Feeder: do not use in this tray. Xerox Document Centre 440/432/420 User Guide Page 9-15...
- Page 244 50 sheets maximum (20lb/substance 20) paper. • High Capacity Feeder: load LEF with the holes on the right (for duplexing, load with the holes on the left), 2000 sheets maximum (20lbsubstance 20) paper. Page 9-16 Xerox Document Centre 440/432/420 User Guide...
- Page 245 Refer to page 9-8 for Trays 1, 2, 3, 4 and Bypass more information. Tray: do not use in these trays. • Envelope Tray: (replaces Tray 1) load with the opening facing down. Xerox Document Centre 440/432/420 User Guide Page 9-17...
- Page 246 HINT: For maximum performance it is recommended that labels should only be loaded into the paper trays when required. On completion of the job the labels should be removed and replaced in the box. Page 9-18 Xerox Document Centre 440/432/420 User Guide...
- Page 247 Cover stock Booklets • Trays 1, 2, 3, 4: load LEF or SEF, face up. • Bypass Tray: load LEF or SEF, face down. • High Capacity Feeder: load LEF, face down. Xerox Document Centre 440/432/420 User Guide Page 9-19...
- Page 248 LEF, paper and removable strip up, with the glued edge as lead edge. Always feed paperbacked transparencies long edge feed only with the glued edge as the feed edge. No special instructions for clear transparencies. Page 9-20 Xerox Document Centre 440/432/420 User Guide...
-
Page 249: 10 Setups
This chapter contains an explanation and step by step instructions for customizing the various defaults available on the machine, plus general information regarding the procedures. This chapter is for the Owner, Key Operator and System Administrator of the machine. Xerox Document Centre 440/432/420 User Guide Page 10-1... -
Page 250: Setup Procedures
For further information refer to “Fault Override” on page 10-20. Copy Setups enable the Copy specific default settings to be changed or set Refer to “Copy Setups” on page 10-29 for further information. Page 10-2 Xerox Document Centre 440/432/420 User Guide... -
Page 251: System Administrator Tools
Refer to “Foreign Interface Device” on page 10-84 for further information. Xerox Document Centre 440/432/420 User Guide Page 10-3... -
Page 252: Owner Tools
When the DC440/432/420 is delivered, it contains a default password (#22222) which can be used to provide access to the Setup Tools prior to PINs and Access Rights being assigned. To change the default password contact the Xerox Service representative. À... - Page 253 À Select the button for the setups to be changed. For Scan to File and Print Setup instructions and information , please refer to the DC440/432/420 System Administration Guide. Xerox Document Centre 440/432/420 User Guide Page 10-5...
-
Page 254: Machine Setups
Customer Support No. - page 10-17 Paper Sizes - page 10-18 Machine Serial Number - page 10-18 Xerox Supplies Number - page 10-19 Fault Override instructions are also included on page 10-20 . NOTE: These changes can only be made when a PIN (Personal Identification Number) which has been assigned Key Operator access rights is entered. -
Page 255: Access The Machine Setups
Select [Machine Setups]. À The Machine Setups screen is displayed. NOTE: Additional Setups accesses more Machine Setup features. Select this button if the feature required is not displayed on the initial Machine Setups screen. Xerox Document Centre 440/432/420 User Guide Page 10-7... -
Page 256: Paper Tray Setups
Another tray must contain paper of the same size, type and orientation for automatic switching to occur. To de-select this feature, select Off. Page 10-8 Xerox Document Centre 440/432/420 User Guide... -
Page 257: Date/Time Setup
(mm), day (dd) and year (yy). NOTE: The current date is displayed on fax documents, À Select [Save]. confirmation pages and activity reports. It is also displayed when users select Annotation and Date for their copies. Xerox Document Centre 440/432/420 User Guide Page 10-9... - Page 258 À Select [Save] and [Close]. NOTE: The current time is displayed on fax documents, confirmation pages and activity reports. It is also displayed when users select Annotation and Time for their copies. Page 10-10 Xerox Document Centre 440/432/420 User Guide...
-
Page 259: Walkup Screen
Select any button to change the setting - a description of each follows. À Make changes as required. À Select [Save] to continue. Auto Clear With the Auto Clear feature enabled, the machine returns to the default settings after the specified time. Xerox Document Centre 440/432/420 User Guide Page 10-11... -
Page 260: Low Power
NOTE: If the Low Power timeout is set higher than the timeout for Power Save or Auto Off (depending on system configuration), the machine displays a message that Low Power cannot exceed Power Save (or Auto Off) . Page 10-12 Xerox Document Centre 440/432/420 User Guide... -
Page 261: Contention
Power Save/Auto Off. Contention À Select [Contention]. À Select any button to change the setting - a description of each follows. À Make changes as required. À Select [Save] to continue. Xerox Document Centre 440/432/420 User Guide Page 10-13... -
Page 262: Interrupt Button
5. Priority can only be changed for print and fax jobs. À Select [Priority] or [Print Queue Priority]. À Select a priority for either the Print or Fax Queue . À Select [Save]. Page 10-14 Xerox Document Centre 440/432/420 User Guide... - Page 263 Localization À Select [Localization. À Select the preferred measurement display format - Inches or Millimeters . À Select [Save]. Xerox Document Centre 440/432/420 User Guide Page 10-15...
-
Page 264: Additional Setups
À Make changes as required. À Select [Save]. Report Languages Various language options can be made available for printed reports. Please contact the Xerox representative for further information. À Select [Report Languages]. À Select the language to use for printed reports. -
Page 265: Touch Screen Contrast
When Machine Status is selected the machine displays the Xerox customer support telephone number. Typically, the correct number is entered by a Xerox representative when the machine is first installed. If it is not on the screen, or if it is incorrect, follow the instructions below to enter the correct number. -
Page 266: Paper Sizes
- if necessary select More Characters to display an alternative keypad. À Select [Save]. HINT: The Machine serial number is located inside the Left Front Cover of the machine under the Copy/Print Cartridge. Page 10-18 Xerox Document Centre 440/432/420 User Guide... -
Page 267: Xerox Supplies Number / Supplies Tel. Number
Xerox Supplies Number / Supplies Tel. Number The machine displays the Xerox supplies telephone number when Machine Status is selected. À Select [Xerox Supplies Number] or [Supplies Tel. Number]. À Use the numeric keypad on the screen to enter the Xerox Supplies telephone number. -
Page 268: Fault Override
Select [Confirm] to delete the current job and or disable the faulty component. NOTE: The default password - #22222 - may be used if PINs have not been assigned. Refer to “Access Rights” on page 10- 86 for more information. Page 10-20 Xerox Document Centre 440/432/420 User Guide... -
Page 269: Unavailable Features
Duplex is È 2 Sided disabled and Sides Imaged È È 2 or 2 2 are the default settings. The Sides Imaged button will not be displayed on the Touch Screen. Xerox Document Centre 440/432/420 User Guide Page 10-21... - Page 270 Editing. In Fax Setups, Finisher The machine will Fax Terminal not print Fax jobs if Setups, Fax the Finisher is Printing disabled and the Options, default is Stapled. Output Selection, Left, Stapled Page 10-22 Xerox Document Centre 440/432/420 User Guide...
- Page 271 Finisher The machine will Fax Terminal not print Fax jobs if Setups, Fax the Finisher is Printing disabled and the Options, default output is Output the Left Tray . Selection, Left Tray Xerox Document Centre 440/432/420 User Guide Page 10-23...
- Page 272 The Output button will not be displayed on the Copy screen. Foreign Interface In the Copy The Copy feature Device feature with is disabled. Foreign Interface Device Page 10-24 Xerox Document Centre 440/432/420 User Guide...
- Page 273 Control, Copy is enabled only for Internal Auditron Control. In the Copy The Copy feature Foreign Interface Device feature with is disabled. Foreign Interface Device High Capacity Copy High Capacity Feeder Tray Xerox Document Centre 440/432/420 User Guide Page 10-25...
- Page 274 Print Queue Print Network/Print Controller jobs are temporarily removed from the Print Queue. When the fault is cleared, the machine attempts to recover the jobs. Page 10-26 Xerox Document Centre 440/432/420 User Guide...
- Page 275 The machine will Setups, Paper not print Copy or Trays, Default Fax jobs if the Tray disabled tray is the default tray. The Paper Supply button will not be displayed on the Copy screen. Xerox Document Centre 440/432/420 User Guide Page 10-27...
- Page 276 The machine will Setups, Paper not print Copy or Trays, Default Fax jobs if the Tray disabled tray is the default tray. The Paper Supply button will not be displayed on the Copy screen. Page 10-28 Xerox Document Centre 440/432/420 User Guide...
-
Page 277: Copy Setups
A pop-up window will be displayed on the Touch Screen. À Select [#] on the Control Panel and use the number keypad to enter a Key Operator PIN. À Select [Enter] in the pop-up window. Xerox Document Centre 440/432/420 User Guide Page 10-29... -
Page 278: Reduce/Enlarge
Use the arrow buttons to select the default magnification setting. The default magnification will automatically be selected when the machine is switched ON , when programming or job timeout occurs, or when Clear All is selected. Page 10-30 Xerox Document Centre 440/432/420 User Guide... - Page 279 X and Y values are selected from a range of 25% to 400% À Select [Custom]. À Use the scroll buttons to select a value for X and Y. À Select [Save]. Xerox Document Centre 440/432/420 User Guide Page 10-31...
-
Page 280: Image Quality
Photo for documents that contain photographs. This setting identifies the use of black, white, and halftones to focus on the photo image and make a clear copy. Page 10-32 Xerox Document Centre 440/432/420 User Guide... -
Page 281: Output
Sides Imaged À Select [Sides Image]. À Select the preferred default options - see below for an explanation. À Select [Save]. NOTE: The options available will be dependent on the machine configuration. Xerox Document Centre 440/432/420 User Guide Page 10-33... - Page 282 Head to Head for binding on the long edge for binding on the short edge Head to Toe Head to Toe for binding on the short edge for binding on the long edge Page 10-34 Xerox Document Centre 440/432/420 User Guide...
-
Page 283: Expert Image Quality
[Off] to disable this feature. À If Side 2 shift is selected, select [Independent] and the settings or [Mirror] to mirror the side 1 settings. À Select [Save]. Xerox Document Centre 440/432/420 User Guide Page 10-35... -
Page 284: Erase (Dc440/432)
Select [Save]. Border Erase ( DC440/432 ) À Select [Border Erase]. À Use the scroll buttons to set the default measurement for Border Erase between 0 and 50 mm. À Select [Save]. Page 10-36 Xerox Document Centre 440/432/420 User Guide... - Page 285 Edge Erase ( DC440/432 ) À Select [Edge Erase]. À Use the scroll buttons to set the default Edge Erase settings. À Select [Save]. À Select [Close] to exit Copy Setups . Xerox Document Centre 440/432/420 User Guide Page 10-37...
-
Page 286: Fax Setups
Touch Screen. À Select [#] on the Control Panel and use the number keypad to enter a Key Operator PIN - see NOTE above. À Select [Enter] in the pop-up window. Page 10-38 Xerox Document Centre 440/432/420 User Guide... -
Page 287: Fax Terminal Setups
Fax Report Options - page 10-47 PIN. Fax Panel Defaults - page 10-50 À Select [Fax Setups]. Fax Mailboxes - page 10-53 À Select [Fax Terminal Fax File Management - page 10-55 Setups]. Xerox Document Centre 440/432/420 User Guide Page 10-39... -
Page 288: Access Fax Terminal Setups
DC440/432/420 will not continue until the number is entered. Entering the Local ID number is only required on the first occasion the machine is used. Page 10-40 Xerox Document Centre 440/432/420 User Guide... - Page 289 The Local Name is the name allocated to this particular machine. For example, it could indicate the location of the machine - for example, ‘Copier West’, or be the Company name. À Select [Local Name]. Xerox Document Centre 440/432/420 User Guide Page 10-41...
-
Page 290: Company Logo
Company Logo Company Logo is used to identify the organization sending the fax in the header of the transmission report and in the cover letter for fax documents. À Select [Company Logo]. Page 10-42 Xerox Document Centre 440/432/420 User Guide... -
Page 291: Delayed Start Time
Select the second [Delayed Start Time] on the right of the screen. À Use the scroll buttons on the screen to select the default transmission start time. À Select [Save] to continue. Xerox Document Centre 440/432/420 User Guide Page 10-43... -
Page 292: Fax Printing Options
It avoids image loss if users are printing onto a smaller size paper. À Select [Page Margin]. À Use the scroll buttons to select the required margin. Page 10-44 Xerox Document Centre 440/432/420 User Guide... -
Page 293: Duplex Printing
All 2 Sided: prints fax documents and reports double-sided. 1, 2, 2... prints fax documents with the first page single-sided and the rest of the pages double-sided. Reports are printed all double- sided. Xerox Document Centre 440/432/420 User Guide Page 10-45... -
Page 294: Paper Attributes
HINT: Typically, the Left Tray is the default fax tray; the Center Tray is the default copy tray. If a Finisher is installed, the options will include Finisher/Stapled. Page 10-46 Xerox Document Centre 440/432/420 User Guide... -
Page 295: Fax Report Options
Programs the machine to automatically print a report of phone line activity. À Select [Activity Report]. À Select the default option required - see description below . [Auto Print] is the factory default. Xerox Document Centre 440/432/420 User Guide Page 10-47... - Page 296 [Auto Print] is the factory default. Transmission Report Programs the machine to print the status of each transmission and displays a reduced image of the first page of the original document after each transmission is completed. Page 10-48 Xerox Document Centre 440/432/420 User Guide...
-
Page 297: Mailbox Report
Programs the machine to automatically print a report informing the mailbox owner each time a fax is received. À Select [Mailbox Report]. À Select the default option required . À Select [Save]. Xerox Document Centre 440/432/420 User Guide Page 10-49... -
Page 298: Fax Panel Defaults
. Super Fine (400 x 400) improves image quality and rendition - use for photos, halftones and images with grey tones. Page 10-50 Xerox Document Centre 440/432/420 User Guide... - Page 299 Auto separates images into text and photo areas automatically, and implements image processing for each area. Text optimizes image processing for text, lines, and solid areas. Photo optimizes image processing for photographs. Xerox Document Centre 440/432/420 User Guide Page 10-51...
- Page 300 The speed can also be selected manually. The lower the speed, the less chance errors will occur during transmission. The Kilo Bits Per Second (Kbps) speeds available are 33.6, 31.2, 28.8, 24.0, 21.6, 19.2 and 16.8. Page 10-52 Xerox Document Centre 440/432/420 User Guide...
-
Page 301: Fax Mailboxes
Select a mailbox in the list to select it. Select the scroll buttons to move up and down the list. À Follow the instructions below to delete, edit or add a mailbox. Xerox Document Centre 440/432/420 User Guide Page 10-53... - Page 302 À Select [Next Mailbox] to program another mailbox. Select [Previous Mailbox] to return to a previous mailbox. À HINT: Select Change Keyboard to access Select [Save] and then additional characters. [Close] . Page 10-54 Xerox Document Centre 440/432/420 User Guide...
-
Page 303: Fax File Management
Setups” on page 10-39 . À Select [Fax File Management]. À Select any button to change the setting - a description of each follows. À Make changes as required. À Select [Save]. Xerox Document Centre 440/432/420 User Guide Page 10-55... - Page 304 Auto Delete automatically deletes all failed fax documents. Delete in 24 hours (DC420) automatically deletes all failed fax documents after 24 hours. Keep keeps all failed fax documents until they are manually deleted. Page 10-56 Xerox Document Centre 440/432/420 User Guide...
- Page 305 À Select [Save]. Select [Close]. Auto Delete automatically deletes stored fax files after they have been transmitted. Keep keeps stored fax files after they have been transmitted until they are manually deleted. Xerox Document Centre 440/432/420 User Guide Page 10-57...
-
Page 306: Fax Communication Setups
Access Fax Communication Setups PIN. À Select [Fax Setups] À Select [Fax Communication Setups]. À Select [Fax Setups]. À Select [Fax Communication Setups]. NOTE: Only those selections relevant to the product configuration will be available. Page 10-58 Xerox Document Centre 440/432/420 User Guide... -
Page 307: Outgoing Fax Options
- 20 PPS (pulse per second): for a rotary dial. À Select [ Dialing Type]. À If necessary, select [Line 1] or [Line 2]. À Select the desired option. À Select [Save]. Xerox Document Centre 440/432/420 User Guide Page 10-59... -
Page 308: Pause Time
Redial Interval sets the time intervals in minutes between redials. NOTE: This feature is restricted in some areas. À Select [Redial Management]. Page 10-60 Xerox Document Centre 440/432/420 User Guide... -
Page 309: Line Monitor
Select [On] to enable this feature or [Off] to switch this feature off. À Select [Save] to continue. sets a default volume for line monitoring as High, Normal, or Line Monitor Volume Low. Xerox Document Centre 440/432/420 User Guide Page 10-61... -
Page 310: Batch Send
Sets the number of attempts that can be made to automatically re-transmit a failed page if a page error occurs. À Select [Resend Count]. À Select the number of attempts the machine should make to send a failed page. À Select [Save]. Page 10-62 Xerox Document Centre 440/432/420 User Guide... -
Page 311: Incoming Fax Options
Sets the delay in seconds before incoming calls are automatically answered. NOTE: This feature is restricted in some areas. À Select [Auto Answer Delay]. À Select the scroll buttons to set the time delay before calls are answered. Xerox Document Centre 440/432/420 User Guide Page 10-63... -
Page 312: Ring Volume
À Select [Junk Fax Prevention]. À Select [On] to enable this feature and [Off] to switch this feature off. À Select [Save]. Page 10-64 Xerox Document Centre 440/432/420 User Guide... - Page 313 À Select [On] or [Off]. Secure Fax Receive ( DC440/432 ) This feature ensures that incoming faxes are treated as secure faxes. À Select [Secure Fax Receive]. À Select [On] or [Off]. Xerox Document Centre 440/432/420 User Guide Page 10-65...
-
Page 314: Line Use Restriction (Dc440/432)
À Alternatively, select [Transmit and Receive] to enable the chosen line to accept incoming and outgoing fax documents. À Select [Save] and then [Close] . Page 10-66 Xerox Document Centre 440/432/420 User Guide... -
Page 315: Auditron Setups
- the chosen option must initially be enabled by the Xerox Service representative. NOTE: The default password is #22222 which may be used if PINs have not yet been assigned. -
Page 316: Access Auditron Setups
Touch Screen. À Select [#] on the Control Panel and use the number keypad to enter an Auditron Administrator PIN . À Select [Enter] in the pop-up window. À Select [Auditron Setups]. Page 10-68 Xerox Document Centre 440/432/420 User Guide... -
Page 317: Internal Auditron (Dc440/432)
4. Account Summary —reviews all the auditron accounts. À Select [Auditron NOTE: The default password is #22222 which may be used if Setups] PINs have not yet been assigned. À Touch [Internal Auditron] Xerox Document Centre 440/432/420 User Guide Page 10-69... - Page 318 Auditron for Fax jobs. NOTE: The choice available will depend on the machine configuration - for example if the machine does not have Fax capability, then the Fax option will not be displayed. Page 10-70 Xerox Document Centre 440/432/420 User Guide...
- Page 319 Select [Add Account]. À Enter the account number (between 4 and 16 digits long) using the screen keypad. À Select [Save]. To modify an account: À Select the account number and select [Modify Account]. Xerox Document Centre 440/432/420 User Guide Page 10-71...
- Page 320 0 will be displayed. No prints can be allocated to this account for the service selected. HINT: Users can check the status of their accounts by selecting Machine Status on the Control Panel. Auditron is on the Reports & Counters tab. Page 10-72 Xerox Document Centre 440/432/420 User Guide...
- Page 321 Select [Confirm] . À Select [Close] to continue. Reset All Limits À To reset the limits for ALL ACCOUNTS to zero, select the [Reset All Limits]. À Select [Confirm] . À Select [Close]. Xerox Document Centre 440/432/420 User Guide Page 10-73...
- Page 322 Terminate on Job Boundary the machine allows the current job to be completed. No further jobs are allowed until the limit is increased or the counter reset. Page 10-74 Xerox Document Centre 440/432/420 User Guide...
- Page 323 Auditron information to a PC. Button ( DC440/432 ) However, the download process requires additional external hardware in order to operate. Contact the Xerox representative for further information. Xerox Document Centre 440/432/420 User Guide Page 10-75...
-
Page 324: Internal Auditron (Dc420)
Make changes as Service Access Setup ( DC420) required À Select [Save] to This setup enables the Auditron services to be enabled or continue. disabled as required. One or more services can be selected. Page 10-76 Xerox Document Centre 440/432/420 User Guide... - Page 325 NOTE: The choice available will depend on the machine configuration - for example if the machine does not have Fax capability, then the Fax option will not be displayed. Xerox Document Centre 440/432/420 User Guide Page 10-77...
- Page 326 4 and 16 digits. À Access Auditron Setups . À Select [Internal Auditron]. À Select [Account Setup]. À Make selections as required - see below for a description of each. À Select [Close]. Page 10-78 Xerox Document Centre 440/432/420 User Guide...
-
Page 327: Add Accounts
Unlimited there is no limit on the number of prints that can be assigned to this account. Xerox Document Centre 440/432/420 User Guide Page 10-79... - Page 328 Download All Accounts downloads Auditron information to a PC. However, the download process requires additional external hardware in order to operate. Contact the Xerox representative for further information. Job Completion Setup ( DC420) This feature sets machine behavior when the user’s account limit has been reached.
- Page 329 - any pages committed to print will be allowed to print. Delete Pending Jobs if set to On, when an account limit is reached all pending jobs assigned to this account will be deleted. Xerox Document Centre 440/432/420 User Guide Page 10-81...
-
Page 330: Job Based Accounting (Dc440/432) (Optional)
NOTE: The default password is #22222 which may be used if PINs have not yet been assigned. To enable Job Based Accounting a floppy disk must be purchased from Xerox. The floppy disk is used to install the software. NOTE: This feature cannot be used if the Internal Auditron or External Auditron is in use. - Page 331 This will normally occur when the machine has logged 2000 jobs and has not been polled by the EAS server to send the Job Log. NOTE: Job Interrupt is available when this feature is enabled. Xerox Document Centre 440/432/420 User Guide Page 10-83...
-
Page 332: Foreign Interface Device
For example, for a coin-operated device, set External Auditron to Per-Page Control. Otherwise, more than the current page will be printed, even though only one coin was inserted. Page 10-84 Xerox Document Centre 440/432/420 User Guide... - Page 333 Monitor with limits to set the device to track the usage of the machine, but limit users to a number of copies or prints. Xerox Document Centre 440/432/420 User Guide Page 10-85...
-
Page 334: Access Rights
PINs being assigned. To prevent unauthorized access, the default password should be changed by a Xerox Service Representative. Each privilege determines the right to set up the default settings for a specified set of functions, as shown in the table below. - Page 335 2345 3456 5678 4567 - PIN 1234 enables its assigned user to enter the Setup Tools and access only the Auditron and Access Setup features. This user cannot access any other Setups. Xerox Document Centre 440/432/420 User Guide Page 10-87...
-
Page 336: Assign Privileges
NOTE: The factory default password is #22222. This password is used initially, prior to new PINs being assigned. To prevent unauthorized access, the default password should be changed by a Xerox Service Representative. Page 10-88 Xerox Document Centre 440/432/420 User Guide... -
Page 337: Add Pin
If necessary, select [Additional Setups]. À Select [Access Rights]. Add Pin À Select [Add Pin] . À Using the pop-up keypad, enter a number between 4 and 16 digits. À Select [Save]. Xerox Document Centre 440/432/420 User Guide Page 10-89... -
Page 338: Set User Privileges
À Select [Confirm] . Delete PIN À Use the search facility or scroll buttons to select the User PIN number to be deleted À Select [Delete PIN]. À Select [Confirm] . Page 10-90 Xerox Document Centre 440/432/420 User Guide... -
Page 339: Scan To File Setups
Refer to the list below for an explanation of each option. À Select [Save] to save the changes made or [Cancel] to leave the setting with its original selection. À Select [Close] to exit. Xerox Document Centre 440/432/420 User Guide Page 10-91... -
Page 340: Job Template Pool
Job Template Pool The Job Template Pool is located on a file server. Job Templates that have been created by Xerox CentreWare Scanning Services are stored here. Default Repository This is the filing location that is used by the default template (@default.xst). -
Page 341: Print Setups
À Select [Close] to exit. Port Setups set up the required port on the system. Ethernet, Parallel Port or Token Ring are the available options. Xerox Document Centre 440/432/420 User Guide Page 10-93... -
Page 342: Protocol Setups
1 and 120 hours, after which time the job(s) will be automatically deleted. Postscript Setups The Postscript Setups feature allows the System Administrator to enable or disable an error sheet for postscript printing errors. Page 10-94 Xerox Document Centre 440/432/420 User Guide... -
Page 343: Pcl Setups
PCL Setups Allows the System Administrator to select and format the available PCL Resident Fonts. Tower Mailbox Setups Allows users to be assigned to a specified bin. There are 10 bins available. Xerox Document Centre 440/432/420 User Guide Page 10-95... - Page 344 Page 10-96 Xerox Document Centre 440/432/420 User Guide...
-
Page 345: 11 Maintenance
11 Maintenance There will be times when the machine will require maintenance tasks to be carried out. Information contained in this chapter will assist in these tasks. Xerox Document Centre 440/432/420 User Guide Page 11-1... -
Page 346: Ordering Supplies
A variety of supplies, such as the Copy/Print Cartridge, cleaning solutions, editing markers and staples are available for the DC440/432/420. To obtain supplies, contact the local Xerox office, giving the company name, the product number and it’s serial number. Use the space below to record the telephone number: Supplies Telephone Number: .............. -
Page 347: Cleaning The Dc440/432/420
This helps avoid output with streaks, smears and other marks that transfer from the glass area when scanning documents. Xerox Document Centre 440/432/420 User Guide Page 11-3... -
Page 348: The Control Panel And Touch Screen
The Document Feeder and Output Trays Use a cloth moistened with water to clean the Document Feeder, output trays, paper trays and the outside areas of the DC440/432/420. Page 11-4 Xerox Document Centre 440/432/420 User Guide... -
Page 349: Replacing The Copy/Print Cartridge
WARNING:Do not shake an empty cartridge or hold it close to you. Some dry ink residue might accidentally spill. Do not shake the empty Copy/Print Cartridge and return it to the machine to extend its use. Xerox Document Centre 440/432/420 User Guide Page 11-5... -
Page 350: Removing The Old Copy/Print Cartridge
Removing the old Copy/Print Cartridge NOTE: If the DC440/432/420 does not include the Finisher and/or High Capacity Feeder, ignore the first step. À Slide the Finisher and/or High Capacity Feeder away from the machine. Page 11-6 Xerox Document Centre 440/432/420 User Guide... - Page 351 To open the Duplex Module door, release the lever located at the front of the Duplex Module (optional on the DC420 ). À Release the handle to open the Upper Left Door. Xerox Document Centre 440/432/420 User Guide Page 11-7...
- Page 352 Pull the Left Front Cover open towards you. À Holding the coloured lever, as shown, slide the cartridge out until you can take hold of the handle on top of the cartridge. Page 11-8 Xerox Document Centre 440/432/420 User Guide...
-
Page 353: Recycling The Copy/Print Cartridge
However, refilling the cartridge is not recommended because critical components may need replacing. To recycle used Print/ Copy Cartridges, return them to Xerox in the original packaging. Return labels are included with each new cartridge. Xerox Document Centre 440/432/420 User Guide... -
Page 354: Inserting The New Copy/Print Cartridge
It is located on the front of the cartridge. CAUTION: To avoid spills, do not remove the sealing tape until the Copy/Print Cartridge is completely in place. Page 11-10 Xerox Document Centre 440/432/420 User Guide... - Page 355 CAUTION: Occasionally, after the Copy/Print Cartridge is replaced, the first page printed is blank. This is because the roller has not yet turned over to distribute fresh dry ink. If this happens, reprint the job. Xerox Document Centre 440/432/420 User Guide Page 11-11...
-
Page 356: Loading Staples
The Finisher contains an automatic stapler. A staple cartridge, holding 5000 staples is located in the Finisher. To replace the cartridge: À Press and hold the button on top of the Finisher to lower the Finisher Tray. Page 11-12 Xerox Document Centre 440/432/420 User Guide... - Page 357 Pull open the door towards you. À Take hold of the cartridge as shown. À Gently pull out the cartridge and dispose of the unit. Xerox Document Centre 440/432/420 User Guide Page 11-13...
- Page 358 Close the staple cartridge door. À If the Finisher tray does not rise automatically, press and release the button on top of the Finisher to return the Finisher Tray to its operating position. Page 11-14 Xerox Document Centre 440/432/420 User Guide...
-
Page 359: Convenience Stapler (Optional)
Convenience Stapler will be lit. One cartridge contains 5000 staples. Indicator light À Holding the sides of the Convenience Stapler door, gently pull the door open towards you. Xerox Document Centre 440/432/420 User Guide Page 11-15... - Page 360 If the staple is not in this position or appears damaged, manually remove the staple. À Slide the new cartridge into the stapler and close the stapler door. Page 11-16 Xerox Document Centre 440/432/420 User Guide...
-
Page 361: 12 Problem Solving
It also contains troubleshooting and problem-solving procedures to help quickly resolve the problem. Refer to the information contained in this chapter to resolve any problem solving issues. Xerox Document Centre 440/432/420 User Guide Page 12-1... -
Page 362: Fault Clearance Procedure
NOTE: If Fax is enabled and a loss of power occurs, the DC440/432/420 will print a Power Off Report when the machine is switched on . This will show a list of the fax jobs lost during the power loss. Page 12-2 Xerox Document Centre 440/432/420 User Guide... -
Page 363: Clearing Jams
Chapter 2 of this User Guide are followed. CAUTION: Failure to leave at least 20 seconds between repeated power OFF / ON can result in damage to the DC440/432/420 hard drive. Xerox Document Centre 440/432/420 User Guide Page 12-3... -
Page 364: Problem Solving Tables
If a tray is ajar, the machine in the Paper Supply selections. cannot sense its connection. À Open and close each paper tray and the High Capacity Feeder, power OFF the machine and then power ON the machine. Page 12-4 Xerox Document Centre 440/432/420 User Guide... - Page 365 N Up ( 2 Up on the DC420 ), Booklet Creation, Gray Scale Copying (DC420), Build Job, uncollated copies, custom size documents, or Bound Documents . Re-program the job. Xerox Document Centre 440/432/420 User Guide Page 12-5...
- Page 366 Left Tray. Slide the document face down toward the stapler, over the green tab, until you hear the click of the Finisher inserting the staple. Page 12-6 Xerox Document Centre 440/432/420 User Guide...
- Page 367 The edited area must be fully enclosed. If you draw a circle, square, or other object around the area to be edited, you must close the object to ensure that the machine edits the area as programmed. Xerox Document Centre 440/432/420 User Guide Page 12-7...
- Page 368 À Check the quality of the document. À Select Lighter or Darker on the touch screen. À Run off more prints until the copy quality has improved. À Replace the Copy/Print Cartridge. Page 12-8 Xerox Document Centre 440/432/420 User Guide...
- Page 369 Check the quality of the documents. À If transparencies are used, select Transparency on the touch screen. The machine automatically adjusts the quality for transparencies. À Feed the document short edge feed. À Replace the Copy/Print Cartridge. Xerox Document Centre 440/432/420 User Guide Page 12-9...
- Page 370 Save button. À The Finisher does not stack output Check to see if the paper tray guides are correctly locked into position against the paper. Page 12-10 Xerox Document Centre 440/432/420 User Guide...
- Page 371 Check documents. If using computer fanfold forms ensure that the perforations down each side of the sheets have been removed. When removed the forms can be loaded either short edge feed or long edge feed. Xerox Document Centre 440/432/420 User Guide Page 12-11...
- Page 372 Check the external control device to (such as a coin-operated device), the ensure that it is properly connected and machine displays a Ready to copy powered on. message, but users cannot log in Page 12-12 Xerox Document Centre 440/432/420 User Guide...
- Page 373 If using Speed Dial, check the setting for the Maximum Store Width that is programmed for that Speed Dial. If the document is wider than the programmed setting, the document will be reduced to match the programmed width. Xerox Document Centre 440/432/420 User Guide Page 12-13...
- Page 374 Or the Key Operator might want to set up the machine so fax documents do not print on letterhead paper. Page 12-14 Xerox Document Centre 440/432/420 User Guide...
-
Page 375: Fault Codes And Messages
0221 The remote machine does not have the capability to be polled. 0222 The remote machine is unable to receive a document. Contact the remote operator and begin again. Xerox Document Centre 440/432/420 User Guide Page 12-15... - Page 376 02A1–02A3 A communication error occurred. Begin again. 02D1–02D5 A transmission error occurred. Begin again. 0510–0542 A communication error occurred. Check the telephone line and the dial directory DTMF sequence and begin again. Page 12-16 Xerox Document Centre 440/432/420 User Guide...
- Page 377 A communication error occurred. Begin again. 057E–0589 Either the dial tone was not detected or the telephone circuit was busy. Check the telephone line and begin again. 05E0–0601 A communication error occurred. Begin again. Xerox Document Centre 440/432/420 User Guide Page 12-17...
-
Page 378: Output Quality
- Always set the media size sensor tab (at the rear of the paper tray) to the size of the media in the tray. Otherwise, you might experience jams, or dry ink residue on the output. Page 12-18 Xerox Document Centre 440/432/420 User Guide... -
Page 379: Call For Service Procedure
Call for Service procedure If the difficulty persists, contact the Xerox Welcome Center. Xerox Welcome Center Telephone Number The telephone number of the Xerox Welcome Center is provided at the time of product installation. For convenience and future reference, please record the telephone number in... - Page 380 Page 12-20 Xerox Document Centre 440/432/420 User Guide...
-
Page 381: 13 Specifications
Use the specifications listed in this chapter to quickly identify the capability of the machine. If further specification information is required please contact your Xerox Representative. Xerox Document Centre 440/432/420 User Guide Page 13-1... -
Page 382: Machine Specifications
DC440/432/420 with Duplex Module, Finisher, Finisher Stand (or High Capacity Feeder), Finisher Output Tray, Tower Mailbox: 72”D x 104 1/2”W (1828mmD x 2654mmW) Machine Weight Basic configuration approximately 120kgs/265lbs Accessibility From the front and sides Page 13-2 Xerox Document Centre 440/432/420 User Guide... - Page 383 Left Tray: after the job is scanned First Copy Out Time for the DC440/432 Center Tray using the Document Feeder: 6.9 seconds Center Tray using the Platen Glass: 3.9 seconds Left Tray: after the job is scanned Xerox Document Centre 440/432/420 User Guide Page 13-3...
-
Page 384: Warm-Up Time
DC440/432 - 10 sizes from tray 1, 8 sizes from trays 2, 3 and 4 Simplex/Duplex Feed: from all 4 trays Media Type: Bond; Index; Covers; Labels; Transparencies; Drilled; Standard; Preprinted; Recycled Page 13-4 Xerox Document Centre 440/432/420 User Guide... -
Page 385: Bypass Tray
Capacity: 200 sheets Paper Sizes: 8 1/2 x 5 x 1/2”SEF to 11” x 17” SEF Paper Weights: 16 - 110lb (substance 16 - 110) Delivery: face up in order, without offsetting Xerox Document Centre 440/432/420 User Guide Page 13-5... -
Page 386: Electrical Specifications
Paper Sizes: 5 1/2” x 8 1/2” / 8 1/2” x 11” LEF and 11” x 17” SEF Paper Weights: 16 - 24lb (substance 16 - 24) Delivery: face down NOTE: Envelopes should not be fed to the Finisher. Electrical Specifications Frequency: 50/60 HZ Page 13-6 Xerox Document Centre 440/432/420 User Guide... -
Page 387: Power Consumption
Electrical Voltage: 102-140VAC Power Consumption Maximum average - 1.38 KVA (@115VAC) Xerox Document Centre 440/432/420 User Guide Page 13-7... -
Page 388: Specifications For The Fax Feature
Telephone Line Requirements Standard public analogue switched telephone line or equivalent. Compatibility Super G3 ECM; G3; Xerox proprietary mode (NSF) Resolution Capability 200 x 100 dpi; 200 x 200 dpi; 200 x 400 dpi; 300 x 300 dpi; 400 x 400 dpi Resolution Conversion Available for sending and receiving;... - Page 389 Long Document Send/Receive Send: 3600 mm maximum length Receive: 65535 lines Connection Approvals EU/EEA: certified by Xerox to Directive 1999/5/EC USA: approved to FCC Pt 68 Canada: approved to DOC CS-03 Other countries: certified to national PTT standards Xerox Document Centre 440/432/420 User Guide...
- Page 390 Page 13-10 Xerox Document Centre 440/432/420 User Guide...
-
Page 391: 14 Glossary
This chapter contains a list of terms used in the User Guide. Each term has a corresponding definition that reflects the meaning of the term as it is used in this Guide. Xerox Document Centre 440/432/420 User Guide Page 14-1... -
Page 392: Terms Defined
Document Feeder. Comments To and From lines on a fax cover page, or an annotation on a copy job. Page 14-2 Xerox Document Centre 440/432/420 User Guide... - Page 393 Dialing Characters special characters which apply only to Xerox machines that support fax mailboxes. Digital Copier a copier that scans an image once to make one or many copies.
- Page 394 Group Dialing a form of abbreviated dialing that enables the dialing of multiple locations by entering one three-character code. The machine stores the image in memory and then transmits it to each location. Page 14-4 Xerox Document Centre 440/432/420 User Guide...
- Page 395 Long Edge Feed (LEF) the long edge of the paper is positioned to enter the machine first. Low Power Mode a Power Saver Mode that reduces power consumption when the machine is not in use. Xerox Document Centre 440/432/420 User Guide Page 14-5...
- Page 396 Copy or Fax. PCL Files (Printer Control Language file) the command language for the HP LaserJet printers. Page 14-6 Xerox Document Centre 440/432/420 User Guide...
- Page 397 First Touch Screen the first touch screen displayed for each feature. It contains the settings used most often. Repository stores electronic documents. Xerox Document Centre 440/432/420 User Guide Page 14-7...
- Page 398 System Administrator a designated user who sets and maintains the network settings on the machine. TCP/IP Transmission Control Protocol/Internet Protocol. Page 14-8 Xerox Document Centre 440/432/420 User Guide...
- Page 399 Transmit to send. Uncollated output programming whereas the specified number of copies for each page in a copy set is delivered in the order the documents were placed in the Document Feeder. Xerox Document Centre 440/432/420 User Guide Page 14-9...
- Page 400 Page 14-10 Xerox Document Centre 440/432/420 User Guide...
-
Page 401: 15 Index
13-5 auditron access screen 2-22 change phone number, scan 6-23 auditron enable setup (DC440/432) 10-70 changing the default time settings, power save auditron setups 10-67 modes 2-11 auto answer setup 10-63 cleaning Xerox Document Centre 440/432/420 User Guide Page 15-1... - Page 402 2 up 3-35 options 3-16 added features 3-20 sides imaged 3-13 annotation 3-37 orientation 3-14 options 3-38 standard features 3-9 area edit 3-30 stored jobs 3-49 options 3-31 deleting a stored copy job 3-51 Page 15-2 Xerox Document Centre 440/432/420 User Guide...
- Page 403 4-41 dial directory, fax 4-17 failed fax files setup (DC420) 10-56 dial pause button 2-21 fault clearance procedure 12-2 dialing characters(fax) 4-12 fault codes and messages 12-15 Xerox Document Centre 440/432/420 User Guide Page 15-3...
- Page 404 1. select features 4-3 finisher 2. load the documents 4-4 loading staples 11-12 3. dial the number 4-5 finisher - automatic stapling 3-11 4. select start 4-5 finisher - manual stapling 3-11 Page 15-4 Xerox Document Centre 440/432/420 User Guide...
- Page 405 8-2 labels 2-24 internal auditron setup (DC420) 10-76 LAN fax (local area network) 4-45 internal auditron setup (DC440/432) 10-69 LAN fax features 4-45 internet services 8-1 language button 2-21 Xerox Document Centre 440/432/420 User Guide Page 15-5...
- Page 406 (DC440/432), fax 4-34 faults 2-18 original size options, scan 6-10 machine information 2-17 original size, scan 6-10 paper supply status 2-17 original type setup 10-51 print reports 2-18 original type, fax 4-9 Page 15-6 Xerox Document Centre 440/432/420 User Guide...
- Page 407 6-25 power save modes 2-9 quick pathway, conventions 1-4 changing the default time settings 2-11 low power 2-10 power save (auto off/sleep) 2-10 receive header print setup (DC440/432) 10-65 Xerox Document Centre 440/432/420 User Guide Page 15-7...
- Page 408 6-19 activity report 10-47 filing setups 6-16 add accounts 10-79 login name/password 6-18 add/modify accounts (DC440/432) 10-71 original size 6-10 additional setups 10-16 options 6-10 administrator privileges (DC440/432) 10-89 reduce/enlarge 6-13 Page 15-8 Xerox Document Centre 440/432/420 User Guide...
- Page 409 (DC440/432) 10-57 priority or print queue priority 10-14 filing policy 10-92 protocol setups 10-94 forced 4800 (DC420) 10-52 public repository 1,2,3,4 10-92 image quality 10-32 receive header print (DC440/432) 10-65 Xerox Document Centre 440/432/420 User Guide Page 15-9...
- Page 410 2-21 copier speed-paper tray 1 13-3 language button 2-21 document feeder 13-4 pause (stop) button 2-21 envelope tray paper supply 13-5 power save indicator light 2-21 finisher 13-6 start button 2-21 Page 15-10 Xerox Document Centre 440/432/420 User Guide...
- Page 411 1-5 owner 10-4 welcome center 1-2 system administrator 10-3 touch screen contrast setup 10-17 tower mailbox 7-5 xerox welcome center tower mailbox setups 10-95 telephone number 12-19 tower mailbox specifications 13-6 Xerox Document Centre 440/432/420 User Guide Page 15-11...
- Page 412 Page 15-12 Xerox Document Centre 440/432/420 User Guide...
Need help?
Do you have a question about the Document Centre 420 and is the answer not in the manual?
Questions and answers