Table of Contents
Advertisement
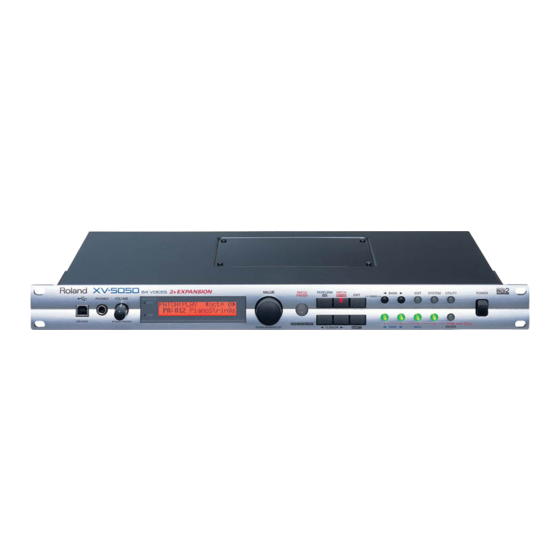
OWNER'S MANUAL
Thank you, and congratulations on your choice of the Roland XV-5050.
Before using this unit, carefully read the sections entitled: "IMPORTANT SAFETY
INSTRUCTIONS" (p. 2), "USING THE UNIT SAFELY" (pp. 3–4), and "IMPORTANT NOTES"
(p. 5). These sections provide important information concerning the proper operation of
the unit. Additionally, in order to feel assured that you have gained a good grasp of every
feature provided by your new unit, Owner's Manual should be read in its entirety. The
manual should be saved and kept on hand as a convenient reference.
Listening to the Demo Songs
fig.Cover
1. Hold down the [EXIT] button and press the [
The DEMO PLAY screen appears in the display.
2. Turn the [VALUE] dial to choose the song you want to hear.
Choose "CHAIN PLAY" to hear all songs performed in order, starting with the first song.
3. Press the [ENTER] button to start demo song playback.
4. Press the [EXIT] button to stop the performance and return to the song-selection screen.
Press the [EXIT] button again to leave the DEMO PLAY screen.
* No data for the music that is played will be output from MIDI OUT.
Convention Used in This Manual
• Words enclosed in square brackets indicate buttons or a dial or a knob on the panel.
• (p. **) indicates a reference page.
* The explanations in this manual include illustrations that depict what should typically be shown by the display.
Note, however, that your unit may incorporate a newer, enhanced version of the system (e.g., includes newer
sounds), so what you actually see in the display may not always match what appears in the manual.
Copyright © 2001 ROLAND CORPORATION
All rights reserved. No part of this publication may be reproduced in any form without the
written permission of ROLAND CORPORATION.
4
1
2
BANK] button.
3
Advertisement
Table of Contents

Related Manuals for Roland XV-5050

Summary of Contents for Roland XV-5050
- Page 1 OWNER’S MANUAL Thank you, and congratulations on your choice of the Roland XV-5050. Before using this unit, carefully read the sections entitled: “IMPORTANT SAFETY INSTRUCTIONS” (p. 2), “USING THE UNIT SAFELY” (pp. 3–4), and “IMPORTANT NOTES” (p. 5). These sections provide important information concerning the proper operation of the unit.
-
Page 2: Important Safety Instructions
The lightning flash with arrowhead symbol, within an CAUTION equilateral triangle, is intended to alert the user to the RISK OF ELECTRIC SHOCK presence of uninsulated “dangerous voltage” within the DO NOT OPEN product’s enclosure that may be of sufficient magnitude to ATTENTION : RISQUE DE CHOC ELECTRIQUE NE PAS OUVRIR constitute a risk of electric shock to persons. -
Page 3: Using The Unit Safely
• When using the unit with a rack or stand recommended ......................by Roland, the rack or stand must be carefully placed so it is level and sure to remain stable. If not using a rack or • Do not force the unit’s power-supply cord to share an stand, you still need to make sure that any location you outlet with an unreasonable number of other devices. - Page 4 Before using the unit in a foreign country, consult with • The unit should be located so that its location or position your retailer, the nearest Roland Service Center, or an does not interfere with its proper ventilation. authorized Roland distributor, as listed on the “Infor- ......................
-
Page 5: Important Notes
• Although the LCD and LEDs are switched off when the Roland assumes no liability concerning such loss of data. POWER switch is switched off, this does not mean that the... -
Page 6: Table Of Contents
Playing Sounds ..................18 Playing Patches (Phrase Preview)......................18 Setting the Way In Which Sounds Are Previewed..............18 Playing a Patch on the XV-5050 from an External MIDI Device (MIDI Keyboard)......19 Connecting the MIDI Keyboard....................19 Matching MIDI Channels......................19 Choosing a Patch ............................ - Page 7 Contents Advanced Use ......37 Chapter 1 Creating a Patch ..............38 How a Patch Is Organized ........................38 How a Tone Is Organized ......................38 Tips for Creating a Patch ......................... 38 Choosing the Tones That Sound (Tone On/Off) ................. 39 Settings Common to the Entire Patch (COMMON) ................
- Page 8 Scale Tune............................. 110 Confirming the Current Status ......................110 Saving the System Settings........................110 Chapter 7 Using the XV-5050 as a General MIDI Sound Module..111 Entering GM Mode..........................111 Initializing the Sound Generator for General MIDI System Basic Settings ......111 Playing Back a GM Score ......................
- Page 9 Specifying the Output Destination for MIDI Data ..............131 Deleting the USB MIDI Driver ......................131 Using OMS on the Macintosh....................... 132 Installing the XV-5050 Driver....................132 OMS settings ..........................132 Using FreeMIDI on the Macintosh....................... 134 Installing the XV-5050 Driver....................134 FreeMIDI settings........................
-
Page 10: Features
64-Voice Polyphony and 16-Part Equipped with a USB Connector Multitimbrality The XV-5050 has a USB connector on its front panel, so that you can easily connect your computer. The XV-5050 is a 16-part multitimbral sound generator that produces up to 64 simultaneous polyphonic voices. It provides ample Supports General MIDI system Level 2 polyphony, even with Patches containing multiple Tones. -
Page 11: Panel Descriptions
Front Panel fig.FrontPanel USB Connector CURSOR], [CURSOR ] Buttons Use this for connecting a computer to the XV-5050 using a USB cable Move the cursor (underline) with these. (p. 35). [SHIFT] Button PHONES Jack Use [SHIFT] in combination with other buttons. Holding down this Headphones are plugged in here (p. -
Page 12: Rear Panel
These jacks are used when the SYSTEM SETUP Mix/Parallel parameter is set to MIX. (p. 107) MIDI Connectors (IN, OUT, THRU) * The XV-5050, as shipped from the factory, routes the output of all These connectors connect the XV-5050 with other MIDI devices, PRESET Patches to these jacks. -
Page 13: Getting Ready
Connecting to MIDI Devices and Audio Equipment The XV-5050 is not equipped with an internal amp or speakers. To hear sound, you will need to connect it to a keyboard amp or audio system, or connect headphones. Refer to the following figure when connecting the XV-5050 with external devices. -
Page 14: Turning The Power On/Off
Before turning on the power, confirm the following. • Are all devices connected properly? • Are the volume levels on the XV-5050 and any amp or mixer that is connected turned down to the lowest settings? This unit is equipped with a protection circuit. -
Page 15: Restoring The Factory Settings (Factory Reset)
Restoring the Factory Settings (Factory Reset) To ensure the XV-5050 operates correctly as described in the procedures found in the Owner’s Manual when using the XV-5050 for the first time, be sure to restore the settings to their initial status as shipped. fig.Reset 4, 5 Press [UTILITY] to make its indicator light. - Page 16 MEMO...
-
Page 17: Quick Start
Quick Start... -
Page 18: Playing Sounds
Playing Sounds The XV-5050 comes with a rich palette of onboard sounds, called “Patches.” Let’s listen to some Patches in Patch mode. Playing Patches (Phrase Preview) Even when there’s no MIDI keyboard or sequencer connected, the XV-5050 allows you to audition sounds using a number of prepared phrases that are perfectly matched to each Patch (category). -
Page 19: Playing A Patch On The Xv-5050 From An External Midi Device (Midi Keyboard)
Executing a Factory Reset sets the XV-5050’s In order for the XV-5050 to respond to MIDI data sent by an external MIDI device, reception channel in Patch both devices must be set to use the same MIDI channel or channels. - Page 20 Press [PATCH] to make its indicator light. * If you’re using the XV-5050 for the first time – or if you’ve just performed a Factory Reset – you can skip the following steps and play the XV-5050 from your keyboard right now.
-
Page 21: Choosing A Patch
XB (Expansion B)-> XA (Expansion A)-> GM (General MIDI) -> PH (Preset H) -> PG (Preset G) -> . . . -> US (User) Choosing a Patch by Category (Patch Finder) The XV-5050’s “Patch Finder” allows you to quickly find any Patch. fig.0-07 2, 5 Press [PATCH] to make its indicator light. - Page 22 Playing Sounds Turn [VALUE] to choose a Patch in the currently selected category. Press [PATCH FINDER] to turn off its indicator. * If you press [VALUE] in Step 3, the CATEGORY SELECT screen appears. fig.00-07 • On the CATEGORY SELECT screen, turn [VALUE] to choose a category, and then press [VALUE] or [ENTER] to confirm your choice.
-
Page 23: Setting A Patch's Pitch In Octave Steps (Octave Shift)
RHYTHM (Rhythm Set Mode) Choose this mode when playing Rhythm Sets from a keyboard or when changing Rhythm Set settings. XV-5050 Rhythm Sets can be used in any Part in a Performance. You can also select the desired multi-effects for a Rhythm Set. - Page 24 With Performances, you can combine a total of up to sixteen separate Patches and Rhythm Sets to produce complex, rich ensemble textures. In other words, a Performance allows you to produce sixteen separate sounds with a single XV-5050. A sound module that can simultaneously produce multiple sounds – such as the XV- 5050 –...
-
Page 25: Playing Multiple Layered Patches (Layer)
Playing Sounds Playing Multiple Layered Patches (Layer) The collected assignment of Patches or Rhythm Sets to the XV-5050’s sixteen Parts is referred to as a “Performance.” fig.Performance Performance Part 16 Part11 Patch/ Rhythm set Part 10 Patch/ Rhythm set Part 9... -
Page 26: Turning A Part On Or Off
Playing Sounds Turning a Part On or Off Let’s try turning the Parts used in a Performance on and off. In Performance PB:001 Dulcimar&Gtr, Parts 1, 2 and 10 are turned on. Let’s try turning Part 2 on and off. fig.0-11 3, 5, 8 4, 7... -
Page 27: Assigning A New Patch To A Part
Playing Sounds Assigning a New Patch to a Part Here’s how to change the Patch assigned to a Part in a Performance. We’ll change the patch assigned to Part 2 of Performance “PA:001 Seq:Template” to “PB:018 Slap Bass 1.” On the PERFORM PLAY screen, choose Performance “PA:001 Seq:Template.” Press [PERFORM] and [PATCH] to make their indicators light. -
Page 28: Playing Different Patches In Different Areas Of The Keyboard (Split)
Playing Sounds Playing Different Patches In Different Areas of the Keyboard (Split) In a Performance, you can divide the keyboard into separate ranges and assign a different Patch to each range. This can be done by selecting the same MIDI reception channel for multiple Parts and then changing the pitch range over which each Part plays. -
Page 29: Setting The Note Range Of Each Part
Playing Sounds Setting the Note Range of Each Part Now let’s change the settings so that Part 2 sounds in the C5–G9 range and Part 3 sounds in the C-1–B4 range. fig.0-13 3, 5, 8 4, 7 10, 13 First, make sure Performance “PB:029 Organ/Lead” is chosen. Press [EDIT] to make its indicator light. -
Page 30: Using An External Midi Device To Select Patches And Change Other Settings
XV-5050’s reception channel (Patch Rx Channel) to “1,” we’ll send a MIDI message mode to MIDI Channel 1. from the external MIDI device to select the XV-5050 Patch “PB:018 Slap Bass 1.” Use a MIDI cable to connect the MIDI OUT connector on the external MIDI device to the XV-5050’s MIDI IN connector. -
Page 31: Selecting Performances
Selecting Performances To switch Performances, after matching the send channel for the external MIDI device with the XV-5050’s Performance Control channel (Control Channel p. 108), send the Bank Select number and Program Change messages. Upon execution of Factory Reset, Performance Ctrl-Ch is set to “16.” Here, set the external MIDI device’s send channel to “16,”... -
Page 32: Turning Effects On And Off
Turning Effects On and Off You can turn each of the XV-5050’s built-in effects processors (multi-effects, chorus, reverb, and equalizer) on or off for the entire XV-5050, regardless of its current mode (Performance, Patch, and Rhythm Set). fig.0-14 Hold down [SHIFT] and press [PATCH FINDER] to make its indicator blink. -
Page 33: Making A List Of Your Favorite Patches
You can bring together your favorite and most frequently used Patches in one place by registering them in the FAVORITE LIST. The FAVORITE LIST gives you immediate access to your favorite Patches, whether they’re in the XV-5050 itself or on Wave Expansion Boards. You can register up to 64 Patches in this list. -
Page 34: Selecting A Patch From The Favorite List
Making a List of Your Favorite Patches Selecting a Patch from the FAVORITE LIST fig.0-16 1, 2, 3 On the PATCH PLAY screen, press [VALUE]. The FAVORITE LIST screen appears. fig.00-16 Turn [VALUE] to select the desired Patch. Press [VALUE] or [ENTER] to confirm your choice and return to the previous screen. -
Page 35: Connecting To A Computer
If you’re running music software on your computer, you can use the computer to control the operation of the XV-5050. This allows you to create and play back song data, select sounds on the XV-5050 from the computer, and create new XV-5050 sounds on the computer. -
Page 36: About Patches And Performances
Patch and a Performance. What Is a Patch? The type of sound most commonly played on the XV-5050 is called a Patch. A Patch is a combination of Tones, which are the smallest units of sound. Each Patch can contain up to four Tones. -
Page 37: Advanced Use
Advanced Use... -
Page 38: Chapter 1 Creating A Patch
TVF (Time Variant Filter) This specifies how the frequency components of the Tone change. The type of sound most commonly played on the XV-5050 is called a TVA (Time Variant Amplifier) Patch. Each Patch can contain up to four Tones. -
Page 39: Choosing The Tones That Sound (Tone On/Off)
Chapter 1 Creating a Patch Choosing the Tones That Sound Selecting a Tone for Editing (Tone Select) (Tone On/Off) Some parameters can be set independently for each Tone in a Patch. Here’s how to turn on the Tones that you want to hear in a Patch. fig.1-03 You can also use the on/off technique described in this section to audition an individual Tone by turning off all the other Tones in a... - Page 40 Analog Feel Depth 0–127 Specifies the depth of Analog Feel that is applied to the Patch. Traditional analog synthesizers often exhibited a degree of instability in their tuning. The XV-5050’s Analog Feel feature can simulate this characteristic. Ocatve Shift -3–+3 Sets the pitch of the Patch in units of an octave.
- Page 41 V-Sens values of the Tones in the Patch. With the XV-5050, you can set each Tone’s expression range, or “key range.” You can also change the way the Tone responds to the force, or “velocity,” with which a key is pressed. These settings are collectively referred to as the TMT (Tone Mix Table).
- Page 42 Chapter 1 Creating a Patch Parameter Value Description TYPE 3 TYPE 4 TONE 1 (3) TONE 1 (3) TONE 2 (4) TONE 2 (4) TYPE 5 TYPE 6 TONE 1 (3) TONE 1 (3) TONE 2 (4) TONE 2 (4) TYPE 7 TYPE 8 TONE 1 (3)
-
Page 43: More Advanced Editing Of Tones
More Advanced Editing of Tones Tips for Choosing a Waveform Because the XV-5050 is designed to create highly realistic sounds, the success of the editing process depends to a large degree on the PCM You can edit the Tones in a Patch with a tremendous degree of detail. -
Page 44: Changing A Waveform (Wave)
* It’s not possible to select XP-A, B unless a wave expansion board is inserted into the corresponding slot. Wave Number Left 0001–1083 Chooses the desired waveform. You can choose a separate waveform for the XV-5050’s left and right channels. Wave Number Right Gain Wave Gain -6, 0, +6, +12 dB Specifies the gain (or amplitude) of the waveform. -
Page 45: Changing Pitch (Pitch)
Chapter 1 Creating a Patch Changing Pitch (PITCH) These settings allow you to set the currently selected Tone’s pitch. Parameter Value Description PITCH These parameters set the basic pitch of each Tone. Coarse Tune Tone Coarse -48–+48 Adjusts the pitch of the Tone in semitone steps over a range of +/-4 octaves. Tune Fine Tune Tone Fine Tune... -
Page 46: Changing The Brightness With A Filter (Tvf)
Chapter 1 Creating a Patch Parameter Value Description Envelope V-T1 Pitch Envelope -63–+63 Use this parameter when you want keyboard playing dynamics to affect T1 (Time 1) of the pitch envelope. If Time 1 Velocity you want T1 to be sped up for strongly played notes, set this parameter to a positive (+) value. If you want it Sensitivity to be slowed down, set this to a negative (-) value. - Page 47 Chapter 1 Creating a Patch Parameter Value Description Cutof Keyfollow Cutoff Keyfol- -200–+200 Use this parameter if you want the cutoff frequency to change according to the key that’s pressed. At Middle C (C4), the original Cutoff value is used. Positive (+) settings cause the cutoff frequency to rise for notes higher than Middle C, and negative (-) settings cause the cutoff frequency to fall for notes higher than Middle C.
-
Page 48: Changing The Volume (Tva)
Chapter 1 Creating a Patch Changing the Volume (TVA) The TVA (Time Variant Amplifier) controls volume changes to the Tone, as well as its stereo positioning. Parameter Value Description Level Tone Level 0–127 Sets the Tone’s basic volume. This setting is useful primarily for adjusting the vol- ume balance between Tones in a Patch. - Page 49 Chapter 1 Creating a Patch Parameter Value Description Pan Alternate Tone Alternate Pan Depth L63–63R This setting causes panning to be alternated between left and right each time a key is pressed. Higher values result in a greater left/right width. You can select the ste- reo placement of the first key using this parameter—its opposite is used for the sec- ond note, and so on back and forth.
-
Page 50: Applying Vibrato Or Tremolo (Lfo)
Chapter 1 Creating a Patch Applying Vibrato or Tremolo (LFO) The LFO (Low Frequency Oscillator) can alter various Tone settings in a back-and-forth, cyclic manner. Each Tone has two LFOs, and each can apply the desired amount of repetitive change to the Tone’s Pitch, TVF cutoff frequency, TVA Level and TVA Pan settings. This can be used as the Matrix Control source (p. -
Page 51: Using Controllers To Change How Sounds Are Played (Control)
Chapter 1 Creating a Patch Using Controllers to Change How Sounds Are Played (CONTROL) The parameters in this group determine how various controllers affect the Patch and its Tones. * Parameters that can be set independently for each Tone are indicated by “T.” Parameter Value Description... - Page 52 Chapter 1 Creating a Patch Parameter Value Description Rx MIDI Redamper Tone Redamper Switch OFF, ON If a Hold 1 message is received during the time between a note-off— when you release the key—and the time at which the note actually disappears, any currently sounding notes will be sustained if Re- damper is set to ON.
-
Page 53: Adjusting Effect Settings
Chapter 1 Creating a Patch Adjusting Effect Settings Patch Name Copy Refer to “Patch/Rhythm Set Mode Settings” (p. 70). You can copy the name of a Patch to the currently selected Patch. Saving Patches You Create 1. Select the Patch whose name you wish to change. 2. -
Page 54: Chapter 2. Creating A Rhythm Set
All Rhythm Sets built into the XV-5050 consist of Rhythm Tones PANEL&MIDI: Percussion instrument sounds can be selected based on these waveforms. using the XV-5050’s TONE SW [1]–[4] or by pressing a key on a TVF (Time Variant Filter) connected MIDI keyboard. -
Page 55: Settings Common To An Entire Rhythm Set
Settings Common to an Entire Rhythm Set Setting Procedure: 1. Hold down [SHIFT] and press [PATCH] to make its indicator blink. The XV-5050 enters Rhythm Set mode. 2. Choose the Rhythm Set you wish to use. 3. Press [EDIT] to make its indicator light. -
Page 56: Setting Up Individual Rhythm Tones
Chapter 2. Creating a Rhythm Set Setting up Individual Rhythm Editing Procedure: Tones 1. Choose the Rhythm Set you wish to set up. 2. Press [EDIT] to make its indicator light. EFFECTS 3. Press [ CURSOR] a few times to move the cursor to the Patch/Rhythm Set Mode Settings (p. -
Page 57: Modifying A Rhythm Tone's Waveform And Panning (Wave)
With the XV-5050, up to four stereo Waves can be assigned to a single Rhythm Tone. You can select the way tones sound according to the force with which the keys are played, thus allowing you to create Rhythm Tones featuring great expressive power. This function is called WMT (Wave Mix Table). - Page 58 Chapter 2. Creating a Rhythm Set Parameter Value Description FXM (Frequency cross modulation) uses a specified waveform to apply frequency modulation to the currently selected waveform, creating complex overtones. This can be useful when creating wilder sounds or sound effects. WMT FXM Wave FXM switch OFF, ON...
-
Page 59: Modifying A Rhythm Tone's Pitch (Pitch)
Chapter 2. Creating a Rhythm Set Modifying a Rhythm Tone’s Pitch (PITCH) Parameter Value Description PITCH Coarse Tune Rhythm tone C-1–G9 This selects the basic pitch at which the Rhythm Tone will play. coarse tune Fine Tune Rhythm tone fine -50–... - Page 60 Chapter 2. Creating a Rhythm Set Parameter Value Description Resonance Resonance 0–127 This increases the level of the cutoff frequency to add a popular classic synth character to the sound. Excessively high settings can produce oscillation, causing the sound to distort. Level High Frequency...
-
Page 61: Making The Volume Change (Tva)
For example, in a real-world acoustic drum set, an open hi-hat and a closed hi-hat sound will never occur si- multaneously, since they’re produced by the same instrument. To simulate this behavior on the XV-5050, you can set the open and closed hi-hat Rhythm Tones to the same Mute Group. You can have up to 31 Mute Groups per Rhythm Set. -
Page 62: Effects Settings
Chapter 2. Creating a Rhythm Set Effects Settings Rhythm Set Name Copy Refer to “Patch/Rhythm Set Mode Settings” (p. 70). You can copy the name of a Rhythm Set to the current Rhythm Set. Saving Rhythm Sets You 1. Select the Rhythm Set whose name you wish to change. Create 2. -
Page 63: Chapter 3 Creating A Performance
Turning a Part On or Off Organized Turn on each Part you wish to use. In the XV-5050’s Performance mode, you can play and control up to 1. Choose the Performance you wish to use. 16 instrument sounds at the same time, including Patches and/or 2. -
Page 64: Establishing Settings For An Entire Performance (Common)
Chapter 3 Creating a Performance Selecting a Part for Editing Some parameters can be set independently for each Part in a Performance. 1. In the PERFORMANCE EDIT screen, press [ PART]/[PART ] to choose the Part whose parameters you wish to edit. The selected Part’s number appears in the upper right of the display. -
Page 65: Settings For Each Part
Calculating the Number of Voices Being Used The number of notes, or “voices,” that the XV-5050 can sound simultaneously depends on the number of Tones in the Patches you’re using and the number of keys being pressed. For example, if you play one note using a Patch that consists of only one Tone, you’ll use up one voice of polyphony. -
Page 66: Changing The Pitch
Portamento can also be applied when Key Assign is polyphonic (POLY). Scale Tune The XV-5050 allows you to use temperaments other than equal temperament. One set of Scale Tune settings can be created in Patch mode. In Performance mode, each Part can have its own Scale Tune settings. -
Page 67: Establishing A Part's Midi Settings
For each Part, you can select from among four velocity curves to find the one that best matches the touch of the MIDI keyboard connected to the XV-5050. Set this to “OFF” if you’re using the MIDI keyboard’s own velocity curve. -
Page 68: Adjusting Effect Settings
Chapter 3 Creating a Performance Adjusting Effect Settings Performance Name Copy Refer to “Performance Mode Settings” (p. 72). You can copy the name from any Performance to the current Performance. Saving Performances You 1. Select the Performance whose name you want to Create change. -
Page 69: Chapter 4 Using The Xv-5050 Effects
This chapter explains how effects are applied in Patch/Rhythm Set mode or Performance mode. The XV-5050’s onboard effects can be turned on/off as a whole. Turn these settings OFF when you wish to listen to the unprocessed For information about the application of effects in GM mode, sound as you create a sound, or when you wish to use external refer to “Making Effects Settings in GM Mode (EFFECTS)”... -
Page 70: Patch/Rhythm Set Mode Settings
Chapter 4 Using the XV-5050 Effects Patch/Rhythm Set Mode 4. Setting the Multi-Effects Controller When using MIDI messages to change the Multi-effects Settings parameters in realtime, select the Multi-effects controller. -> (p. Only one Multi-effect, Chorus, or Reverb effect can be set for each Patch or Rhythm Set. -
Page 71: Setting Procedure
Chapter 4 Using the XV-5050 Effects Setting Procedure For more information on how to choose Tone/Rhythm Tone, refer to pages 39 and 56. You can set the direct sound’s output method and the amount of 8. Press [CURSOR ] to move the cursor to the value. -
Page 72: Performance Mode Settings
Chapter 4 Using the XV-5050 Effects Performance Mode Settings Select the type of Multi-effects to be used, and set the parameters for the selected Multi-effect. You can also Multi-effects settings for a Patch or Rhythm Set assigned to a Part. -> (pp. 74–101) Three different Multi-effects can be used in a Performance. -
Page 73: Setting Procedure
Chapter 4 Using the XV-5050 Effects Setting Procedure 7. Press [ PART]/[PART ] to choose the Part for which you want to make settings. Here, set the way the direct sound is output and the amount of each 8. Press [CURSOR ] to move the cursor to the value. -
Page 74: Multi-Effects Settings
Chapter 4 Using the XV-5050 Effects Multi-Effects Settings Parameter Value Description EFFECTS MFX Source Multi-Effects Source PERFORM, PART 1–16 Selects the Multi-effects parameter settings that will be used by the Performance. If you wish to use the Performance settings, select PERFORM. If you wish to use the settings of the Patch/Rhythm Set assigned to one of the Parts, select the Part number. -
Page 75: Multi-Effects Parameters
Chapter 4 Using the XV-5050 Effects Multi-Effects Parameters SHUFFLE DLY (p. 87) 3D DELAY (p. 87) The multi-effects feature 90 different kinds of effects. Some of the 3V PCH SHIFT (p. 87) effects consist of two or more different effects connected in series or LOFI COMP (p. - Page 76 Chapter 4 Using the XV-5050 Effects 1: STEREO EQ (Stereo Equalizer) 4: PHASER This is a four-band stereo equalizer (low, mid x 2, high). Adds a phase-shifted sound to the original sound, producing a fig.02-001m swirling modulation that creates spaciousness and depth.
- Page 77 Chapter 4 Using the XV-5050 Effects 7: AUTO WAH 9: COMPRESSOR A filter that turns on and off to create a cyclical change in timbre. Flattens out high levels and boosts low levels, smoothing out fig.02-007m fluctuations in volume. L in L out fig.02-009m...
- Page 78 Chapter 4 Using the XV-5050 Effects 11: HEXA-CHORUS 13: SPACE-D Uses a six-phase chorus (six layers of chorused sound) to give This is a multiple chorus that applies two-phase modulation in richness and spaciousness to the sound. stereo. It creates no audible modulation, yet produces a transparent chorus effect.
- Page 79 Chapter 4 Using the XV-5050 Effects 15: St FLANGER (Stereo Flanger) 17: St DELAY (Stereo Delay) This is a stereo flanger. (The LFO has the same phase for left and This is a stereo delay. right.) It produces a metallic resonance that rises and falls somewhat When Mode is NORMAL: like a jet airplane taking off or landing.
- Page 80 Chapter 4 Using the XV-5050 Effects 18: MOD DELAY (Modulation Delay) 19: 3 TAP DELAY (Triple Tap Delay) Adds modulation to the delayed sound, producing an effect similar Produces three delay sounds; center, left and right. to a flanger. fig.02-019m...
- Page 81 Chapter 4 Using the XV-5050 Effects 21: TM CTRL DLY (Time Control Delay) 23: FB PCH SHIFT (Feedback Pitch Shifter) This effect allows you to use a specified controller — the controller This allows the pitch-shifted sound to be fed back into the effect.
- Page 82 Chapter 4 Using the XV-5050 Effects 25: GATED REVERB 27: OD -> FLANGER This is a special type of reverb in which the reverb is cut off without fig.02-027m Balance D being allowed to decay naturally. L out L in fig.02-025m...
- Page 83 Chapter 4 Using the XV-5050 Effects 29: DIST -> CHORUS 33: ENH -> FLANGER The parameters are essentially the same as in “26: OD -> CHORUS,” fig.02-033m Balance D with the exception of the following two. L in L out Enhancer OD Drive ->...
- Page 84 Chapter 4 Using the XV-5050 Effects 35: CHORUS -> DELAY 37: CHO -> FLANGER fig.02-035m fig.02-037m Balance D Balance D Balance D L in L out L in L out Balance D Feedback Balance W Balance W Balance W Balance W...
- Page 85 Chapter 4 Using the XV-5050 Effects 40: CHO/FLANGER 42: KEYSYNC FLG (Keysync Flanger) The parameters are the same as for “37: CHO -> FLANGER.” This effect controls the Flanger by resetting the effect at the volume However, the Flanger Balance parameter adjusts the volume balance of the sound sent into to the effect, restarting from the same pitch between the direct sound and the flanger sound.
- Page 86 Chapter 4 Using the XV-5050 Effects 43: FORMANT FLTR (Formant Filter) 45: MLT TAP DLY (Multi Tap Delay) Adds a vowel character to the sound, making it similar to a human This effect provides four delays. Each of the Delay Time parameters voice.
- Page 87 Chapter 4 Using the XV-5050 Effects 47: SHUFFLE DLY (Shuffle Delay) Parameter Value Description Level C 0-127 Output level of the delay sound Adds a shuffle to the delay sound, giving the sound a bouncy delay Level L Level R effect with a swing feel.
- Page 88 Chapter 4 Using the XV-5050 Effects 50: LOFI COMP (Lo-Fi Compress) 52: SPEAKER SIM (Speaker Simulator) This is an effect that intentionally degrades the sound quality for Simulates speaker types and mic settings used to capture the creative purposes. speaker’s sound.
- Page 89 Chapter 4 Using the XV-5050 Effects 54: DISTORTION 2 57: GATE This is a distortion effect that provides heavy distortion. The Cuts the reverb’s delay according to the volume of the sound sent parameters are the same as for “53: OVERDRIVE 2.”...
- Page 90 Chapter 4 Using the XV-5050 Effects 58: SLICER Parameter Value Description By applying successive cuts to the sound, this effect turns a Low # -60-+4 dB These boost and cut each of the High, Middle, and Low frequen- conventional sound into a sound that appears to be played as a Mid # cy ranges.
- Page 91 Chapter 4 Using the XV-5050 Effects 61: 3D FLANGER 63: AUTO PAN This applies a 3D effect to the flanger sound. The flanger sound is Cyclically modulates the stereo location of the sound. positioned 90 degrees left and 90 degrees right.
- Page 92 Chapter 4 Using the XV-5050 Effects 65: St AUTO WAH (Stereo Auto Wah) 67: MLT TAP DLY2 (Multi Tap Delay 2) fig.02-065m This allows you to achieve longer delay times (max. 3000 ms) for the Multi-Tap Delay function. L in...
- Page 93 Chapter 4 Using the XV-5050 Effects 69: SHUFFLE DLY2 (Shuffle Delay 2) Parameter Value Description Balance # D100:0W- Volume balance between the direct This allows you to achieve longer delay times (max. 3000 ms) for the D0:100W sound (D) and the effect sound (W)
- Page 94 Chapter 4 Using the XV-5050 Effects 72: ROTARY MULTI 73: KEYBD MULTI (Keyboard Multi) L in Ring Mod 3-Band EQ fig.02-072m L in Pitch Overdrive/ Shifter 3-Band EQ Distortion Simulator Feedback R in R in Ring Mod 3-Band EQ L out...
- Page 95 Chapter 4 Using the XV-5050 Effects 74: RHODES MULTI 75: JD MULTI L in Enhancer This allows the Distortion (DS), Phaser (PH), Spectrum (SP), and Resonance Enhancer (EH) effects to be connected in series in any desired order. fig.02-075m Phaser...
- Page 96 Chapter 4 Using the XV-5050 Effects 76: St LOFI COMP 77: St LOFI NOIZ (Stereo Lo-Fi Noise) (Stereo Lo-Fi Compress) This is a stereo Lo-Fi compressor. It deliberately degrades the sound This is a stereo Lo-Fi noise. In addition to a Lo-Fi effect, this effect quality for creative effect.
- Page 97 Chapter 4 Using the XV-5050 Effects 78: GTR AMP SIM 79: STEREO OD (Stereo Overdrive) (Guitar Amp Simulator) This is an effect that simulates the sound of a guitar amplifier. 2-Band Overdrive L in L out Simulator fig.02-078m L in...
- Page 98 Chapter 4 Using the XV-5050 Effects 81: GTR MULTI A (Guitar Multi A) 82: GTR MULTI B (Guitar Multi B) fig.02-081m fig.02-082m L in L in Overdrive/ Overdrive/ Compressor Compressor Distortion Simulator Distortion Simulator R in R in L out...
- Page 99 Chapter 4 Using the XV-5050 Effects 83: GTR MULTI C (Guitar Multi C) 84: CL GTR MLT A (Clean Guitar Multi A) L in fig.02-084m L in Overdrive/ Distortion Simulator Compressor 3-Band EQ R in R in L out Chorus/...
- Page 100 Chapter 4 Using the XV-5050 Effects 85: CL GTR MLT B 86: BASS MULTI (Clean Guitar Multi B) fig.02-085m fig.02-086m L in L in Overdrive/ 3-Band EQ Compressor Distortion Simulator R in R in L out L out Chorus/ Chorus/...
- Page 101 Chapter 4 Using the XV-5050 Effects 87: ISOLATOR 2 88: St SPECTRUM (Stereo Spectrum) This adds a filter to the ISOLATOR effect. Isolator is an equalizer This is a stereo spectrum. Spectrum is a type of filter that modifies that radically cuts the volume of selected frequencies, allowing you...
-
Page 102: Chorus Parameters
Chapter 4 Using the XV-5050 Effects Chorus Parameters When Using 3D Effects The XV-5050’s Chorus effect unit can also be used as a stereo delay unit. The following 3D effects utilize RSS (Roland Sound Space) These settings allow you to select chorus or delay, and the technology to create a spaciousness that cannot be produced by characteristics of the selected effect type. -
Page 103: Reverb Parameters
Chapter 4 Using the XV-5050 Effects Reverb Parameters Copying Effect Settings These settings allow you to select the desired type of reverb and its You can copy the effect settings from any Patch, Performance, or characteristics. Rhythm Set into the currently selected Patch, Performance, or Rhythm Set. -
Page 104: Chapter 5 Saving A Sound You Create
CURSOR] a few times to move the cursor to the upper left of the display. Performance, the changes you have made will be lost. If you wish to preserve the data, store it into the XV-5050’s USER memory. 4. Turn [VALUE] to select “WRITE RHYTHM.” Internal Write Protect The Internal Write Protect setting is provided to help prevent 5. -
Page 105: Initializing A Sound (Init)
If you wish to restore all of the XV-5050’s settings to their factory values, perform a Factory Reset. (p. 15) 3. Turn [VALUE] to select “WRITE PROTECT.”... -
Page 106: Transmitting Sound Settings (Xfer)
USER memory. You can transmit sound generator or System settings that are in the 1. Press [UTILITY] to make its indicator light. XV-5050’s memory to an external MIDI device or to the XV-5050’s 2. Press [ USER memory. CURSOR] a few times to move the cursor to the upper left of the display. -
Page 107: Chapter 6 Other Settings/Status Checks
This setting allows you to quickly route everything through headphones when you are creating sounds, or to combine all of your sounds into two outputs when sending the XV-5050’s signal to a mixer that has only two channels. When MIX is selected, sound routed to the INDIVIDUAL OUTPUT 3 jack is sent to the left A (MIX) OUTPUT jack, and sound routed to the INDIVIDUAL OUTPUT 4 jack are sent to the right A (MIX) OUTPUT jack. -
Page 108: Establishing The Midi And Usb Settings
Connecting Two or More XV-5050s to Increase Polyphony The Stack feature allows you to combine two or more XV-5050 units to increase the number of voices that can be played simultaneously. You can connect and use up to eight XV-5050s. -
Page 109: Making Usb-Related Settings
* The Stack feature will not operate when using Patches in which Key Mode Asgn is set to “MONO” or whose Portamento Switch is “ON” (p. 51), or for Rhythm Sets. Patches for which the Key Mode Asgn is “MONO” or whose Portamento Switch is “ON” will be sounded by the first XV-5050, and Rhythm Sets will be sounded by the second XV-5050. -
Page 110: Adjusting The Overall Tuning Of The Xv-5050
On the XV-5050, you can use Arabian temperament in the three keys of G, C and F. Confirming the Current Status On this display, you can view the names of the installed Wave Expansion Boards and check the version of the XV-5050’s system program. Parameter Description... -
Page 111: Chapter 7 Using The Xv-5050 As A General Midi Sound Module
The XV-5050 features a GM mode-a convenient way to play back or create GM score data (music files for General MIDI sound module). When the XV-5050 is in GM mode, it plays back GM scores correctly. You’re able to play back commercial GM score data releases and... -
Page 112: Making Effects Settings In Gm Mode (Effects)
Chapter 7 Using the XV-5050 as a General MIDI Sound Module Making Effects Settings in GM Mode or mono). (EFFECTS) 2. Setting the Amount of Each Effect Applied (Send Level) Sets the level (volume) of each effect signal to be sent for each In GM mode, a GM-exclusive Chorus and Reverb can be used. -
Page 113: Making Settings For Receiving Midi (Midi)
Chapter 7 Using the XV-5050 as a General MIDI Sound Module GM REVERB Parameter Value Description EFFECTS Rev Type Reverb type SMALL ROOM, Selects the type of Reverb. MEDIUM ROOM, SMALL ROOM: Reverb resembling that obtained in a small room. -
Page 114: Chapter 8 Examples Of Applications Using The Xv-5050
Chapter 8 Examples of Applications Using the XV-5050 Controlling the XV-5050 in Changing Tone Settings Realtime Using an External You can use the Matrix Control parameter to manipulate Tone MIDI Device settings in realtime. Choosing the MIDI Messages Used for External MIDI controllers —... -
Page 115: Applications For Patches
Chapter 8 Examples of Applications Using the XV-5050 Applications for Patches MATRIX CTR1–4 (Matrix control 1–4) This select the parameters to be controlled in the Matrix Control 1–4 Source and the Sens settings, as well as the Tone to which they’re Syncing the LFO Cycle to the System applied. -
Page 116: Making A Tone's Delay Time Match The System Tempo
Chapter 8 Examples of Applications Using the XV-5050 Playing Phrase Loops at a System’s 1. Choose a Patch on the PATCH PLAY screen. Tempo 2. Set its Patch Clock Source (PATCH:COMMON screen) to SYSTEM. An optional Wave Expansion Board can contain Patches based on 3. -
Page 117: Changing Part Settings From An External Midi Device
(Control Number 101) informs the XV-5050 that an RPN setting is to follow, and the RPN LSB (Control Number 100) value tells Remotely Changing the Cutoff Frequency (p. the XV-5050 which parameter is to be set. Finally, a Data Entry 155) (Control Change 6) message sets the desired value. -
Page 118: Applications For Matrix Control
Chapter 8 Examples of Applications Using the XV-5050 Applications for Matrix Control 9. Choose the Number for Tones 1 and 2 (PATCH:WAVE screen, p. 44). 10.Press [EXIT] to return to the PATCH PLAY screen. Controlling the TMT with the LFO Other possible applications include synchronizing the Control and Changing the Tone’s Timing... -
Page 119: Appendices
Appendices... -
Page 120: Installing The Wave Expansion Board
Installing the Wave Expansion Board How to Install a Wave The XV-5050 can be further expanded with the installation of up to two optional wave expansion boards (SRX Series). Wave data is Expansion Board stored in these wave expansion boards. Also stored are Patches and Rhythm Sets that use the Wave data from the wave expansion 1. - Page 121 Installing the Wave Expansion Board Next, check to make sure the board has been installed properly. 1. Use the procedure in “Turning On the Power” (p. 14) to turn the power on. 2. Press [SYSTEM] to make its indicator light. 3.
-
Page 122: Installation De La Carte D'extension Wave (French Language For Canadian Safety Standard)
● Lors de l’insertion de la carte d’extension Wave, enlevez seulement les vis indiquées dans les instructions. Support d’extension ● Veillez à ne pas laisser tomber de vis dans le châssis du XV-5050. Wave ● Ne pas laisser le panneau de protection avant détaché. S’assurer de l’avoir rattacher après avoir installé... - Page 123 Installation de la carte d'extension Wave Les manipulations suivantes vous permettront de verifier si votre carte a ete correctement installee. 1. Allumer votre appareil en suivant les instructions de la p.14. 2. Appuyer sur [SYSTEM] pour allumer le voyant lumineux. 3.
-
Page 124: Installing & Setup The Driver
Installing & Setup the Driver In order to use the XV-5050 with your computer, you must first install the USB MIDI Driver. The USB MIDI Driver is included in the “XV-5050 Driver CD-ROM.” What is the USB MIDI Driver? The USB MIDI Driver is a software which passes data between the XV-5050 and the application (sequencer software, etc.) that is running on the USB-connected... -
Page 125: Windows 98 / Me Users
Use the following procedure to install the XV-5050 Driver. If the XV-5050 is already connected to your computer * Disconnect the XV-5050 from your computer before starting up Windows. and a message of “Add New Hardware Wizard” is With all USB cables disconnected, start up Windows. (except the... - Page 126 Click “OK” button in the “SETUPINF” dialog box. Then refer to Specifying the Output Destination for MIDI Data (the section that follows), and make settings for the XV-5050 to be used from your computer. The XV- 5050 cannot be used unless you make these settings.
-
Page 127: Specifying The Output Destination For Midi Data
[Control Panel]. In the Control Panel, double-click the [Multimedia] icon. In Multimedia Properties, click the [MIDI] tab. In the “MIDI Output” field select [Roland XV-5050]. Windows Media Player is Click [OK]. located in Start menu -> Programs-Accessories- Start up Windows Media Player or Media Entertainment-Windows Player, select a MIDI file, and play back. -
Page 128: Windows 2000 Users
Windows 2000 Users Use the following procedure to install the XV-5050 driver. If the XV-5050 is already * Disconnect the XV-5050 from your computer before starting up Windows. connected to your computer and a message of “Found * To install the driver, you must log on to Windows as the Administrator or other user with New Hardware Wizard”... - Page 129 * Enter the drive name D: appropriate for the drive name of your CD-ROM drive. The SETUPINF dialog box appear, and the display indicates “Ready to install the driver.-” * Don’t click “OK” here. Use the USB cable to connect the XV-5050 and your computer. fig.USB-01 To prevent malfunction USB connector of your computer...
- Page 130 Windows.) Then refer to “Specifying the Output Destination for MIDI Data” (the section that follows), and make settings for the XV-5050 to be used from your computer. The XV- 5050 cannot be used unless you make these settings.
-
Page 131: Specifying The Output Destination For Midi Data
Media Player. Deleting the USB MIDI Driver If you were not able to install the XV-5050 driver according to the procedure, or if you are unable to use the XV-5050 even after installing the driver, you must delete the driver. -
Page 132: Using Oms On The Macintosh
* The XV-5050 OMS Driver included on the disc is provided as an additional module that from the Web site of allows the XV-5050 to be used with OMS. In order to use it, OMS must already be installed Opcode System, Inc. - Page 133 When you move the mouse pointer near the keyboard icon, the pointer will change to the shape of an eighth note. Verify that you can hear sound from your XV-5050. After you have finished the above check, exit OMS Setup.
-
Page 134: Using Freemidi On The Macintosh
Inc. * The XV-5050 FreeMIDI Driver included on the disc is provided as an additional module that allows the XV-5050 to be used with FreeMIDI. In order to use it, FreeMIDI must already be installed on the start-up hard disk. -
Page 135: Freemidi Settings
Installing & Setup the Driver FreeMIDI settings Use the USB cable to connect the XV-5050 and your Macintosh. fig.USB-01 USB connector of your computer USB cable To prevent malfunction and/or damage to speakers or other devices, always turn down the volume, and... -
Page 136: Troubleshooting
Are you playing back GS format song data? Since the XV-5050 is a General MIDI system compatible sound source, there may be cases in which GS format song data will not playback correctly. Is the Patch mode selected? When song data is played back in the Patch mode, only the sound of a single Part is played. -
Page 137: Error Messages
Error Messages If there has been a mistake in operation, or if the XV-5050 is unable to continue processing as you directed, an error message will appear in the display. Take the appropriate action for the displayed error message. * This section gives the error messages in alphabetical order. -
Page 138: Waveform List
Waveform List Wave Name Wave Name Wave Name Wave Name Wave Name StGrand pA L Clav 3A Jazz Gtr B Koto A Oboe mf A StGrand pA R Clav 3B Jazz Gtr C Koto B Oboe mf B StGrand pB L Clav 3C LP Rear A Koto C... - Page 139 Waveform List Wave Name Wave Name Wave Name Wave Name Wave Name Trumpet 1A Voice Aahs B MMM VOX TVF_Trig Rock SN f R Trumpet 1B Voice Aahs C Lead Wave Org Click Rock Rim p L Trumpet 1C Voice Oohs1A Synth Reed Cut Noiz Rock Rim p R...
- Page 140 Waveform List Wave Name Wave Name Wave Name Wave Name Wave Name Rock Tom M f Ride 2 REV Wet SNfR REV 70s K 1 1051 REV RkRCym2p Rock Tom H f Ride Bell REV Dry SN REV 70s K 2 1052 REV RkRCym2f Rock Flm L1...
-
Page 141: Patch List
Patch List US (User Group) PA (Preset A Group) No. Name Voice Key Assign No. Name Voice Key Assign No. Name Voice Key Assign No. Name Voice Key Assign 001 Rhodes Trem POLY 065 COSM Searing MONO 001 64voicePiano POLY 065 Dual Profs POLY 002 Hydrogen... -
Page 142: Pf (Preset
Patch List PB (Preset B Group) PC (Preset C Group) No. Name Voice Key Assign No. Name Voice Key Assign No. Name Voice Key Assign No. Name Voice Key Assign 001 Dist Gtr 1 POLY 065 Analog Seq POLY 001 Harmon Mute POLY 065 Harmonicum POLY... - Page 143 Patch List PD (Preset D Group) PE (Preset E Group) No. Name Voice Key Assign No. Name Voice Key Assign No. Name Voice Key Assign No. Name Voice Key Assign 001 Echo Piano POLY 065 Civilization POLY 001 Grand XV POLY 065 St.
-
Page 144: Ph (Preset
Patch List PF (Preset F Group) PG (Preset G Group) No. Name VoiceKey Assign No. Name VoiceKey Assign No. Name VoiceKey Assign No. Name VoiceKey Assign 001 80s Retrosyn POLY 065 Kickin' Bass MONO 001 Power Octs POLY 065 Harm is Fine POLY 002 Power Stack POLY... - Page 145 Patch List PH (Preset H Group) No. Name Voice Key Assign No. Name Voice Key Assign 001 Hall Grand POLY 065 Froggy Bass MONO 002 Warm pF Mix POLY 066 Tape Orch POLY 003 R&Ballad Mix POLY 067 Tekno Pizz POLY 004 PingE Piano POLY...
- Page 146 Patch List GM (GM2 Group) No. Name Voice No. Name Voice No. Name Voice No. Name Voice 001 Piano 1 065 Chorus Gt. 129 French Horns 193 Sitar 002 Piano 1w 066 Mid Tone GTR 1 130 Fr.Horn 2 194 Sitar 2 003 European Pf 067 Muted Gt.
-
Page 147: Rhythm Set List
Rhythm Set List US (User Group) Note No. R&B Kit 1 House Kit XV WayHipKit XV Jazz Kit Dance Kick House Kick 6 808 Kick JazzDry Kick Dry Kick House Kick 5 Dry Kick Pillow Kick R&B1 SN Roll House ClHH 3 WHip Sweep Jazz Swish Hybrid Kick... - Page 148 Rhythm Set List PA (Preset A Group) PB (Preset B Group) PC (Preset C Group) Note No. PopDrumSet 1 PopDrumSet 2 PowerDrumSet RaveDrumSet JazzDrumSet2 OrchDrumSet ----- ----- ----- ----- ----- ----- ----- ----- ----- ----- ----- ----- ----- ----- ----- ----- ----- -----...
- Page 149 Rhythm Set List PD (Preset D Group) PE (Preset E Group) PF (Preset F Group) Note No. PowerDrmSet2 PowerRaveSet XV Pop Kit XV Rock Kit XV Jazz Kit XV Rust Kit ----- ----- Dance Kick Dance Kick JazzDry Kick 70s Kick 2 ----- ----- Dry Kick...
- Page 150 Rhythm Set List PG (Preset G Group) PH (Preset H Group) XV WayHipKit XV Bully Kit R&B Kit 1 House Kit Note No. 808 Kick 808 Kick Dance Kick House Kick 6 Dry Kick Jazz Kick Dry Kick House Kick 5 WHip Sweep Jazz Roll R&B1 SN Roll...
- Page 151 Rhythm Set List GM (GM2 Group) 001 (PC: 1) 002 (PC: 9) 003 (PC: 17) 004 (PC: 25) 005 (PC: 26) 006 (PC: 33) GM2 STANDARD GM2 ROOM GM2 POWER GM2 ELECTRIC GM2 ANALOG GM2 JAZZ Note No. High-Q High-Q High-Q High-Q High-Q...
- Page 152 Rhythm Set List GM (GM2 Group) 007 (PC: 41) 008 (PC: 49) 009 (PC: 57) GM2 BRUSH GM2 ORCHSTRA GM2 SFX Note No. High-Q Close HiHat2 ----- Slap Pedal HiHat2 ----- ScratchPush Open HiHat2 ----- ScratchPull Ride Cymbal ----- Sticks Sticks ----- SquareClick...
-
Page 153: Performance List
Bass / Lead CrystalVoxXV Seq:GM2Temp BellPad 5050 S&H / Pad Demo Song List Turbulent © 2001 Roland Corporation Take Control © 2001 Roland Corporation No Return © 2001 Roland Corporation Grow Up © 2001 Roland Corporation All rights reserved. Unauthorized use of this material for purposes other than private,... -
Page 154: Midi Implementation
MIDI Implementation ❍Modulation (Controller number 1) Model: XV-5050 Date: Oct. 4, 2001 Status 2nd byte 3rd byte Version: 1.00 n = MIDI channel number: 0H - FH (ch.1 - 16) 1. Receive data vv = Modulation depth: 00H - 7FH (0 - 127) * Not received in Performance mode when the Receive Modulation parameter ■Channel Voice Messages... - Page 155 MIDI Implementation ❍Hold 1 (Controller number 64) ❍Cutoff (Controller number 74) Status 2nd byte 3rd byte Status 2nd byte 3rd byte n = MIDI channel number: 0H - FH (ch.1 - 16) n = MIDI channel number: 0H - FH (ch.1 - 16) vv = Control value: 00H - 7FH (0 - 127) 0-63 = OFF, 64-127 = ON vv = Cutoff value (relative change):...
- Page 156 MIDI Implementation ●Program Change ❍Portamento control (Controller number 84) Status 2nd byte 3rd byte Status 2nd byte n = MIDI channel number: 0H - FH (ch.1 - 16) n = MIDI channel number: 0H - FH (ch.1 - 16) kk = source note number: 00H - 7FH (0 - 127) pp = Program number: 00H - 7FH (prog.1 - prog.128)
- Page 157 This is the ID number (manufacturer ID) to indicate the manufacturer Status Data byte Status whose Exclusive message. Roland’s manufacturer ID is 41H. 7FH, 7FH, 04H, 01H, llH, mmH ID numbers 7EH and 7FH are extensions of the MIDI standard; Universal Non-realtime Messages (7EH) and Universal Realtime...
- Page 158 MIDI Implementation ❍Master Fine Tuning ❍Chorus Parameters Status Data byte Status Status Data byte Status 7FH, 7FH, 04H, 03H, llH, mmH 7FH, 7FH, 04H, 05H, 01H, 01H, 01H, 01H, 02H, ppH, vvH Byte Explanation Exclusive status Byte Explanation ID number (universal realtime message) Exclusive status Device ID (Broadcast) ID number (universal realtime message)
- Page 159 = 00H - 7FH 0 - 200% device ID (dev: 10H - 1FH, 7FH) pp=3 LFO Pitch Depth model ID #1 (XV-5050) rr = 00H - 7FH 0 - 600 [cents] model ID #2 (XV-5050) pp=4 LFO Filter Depth...
- Page 160 Byte Explanation When execute the Data Transfer, following Control Changes and Program Change will Exclusive status transmit. ID number (Roland) ●Control Change Device ID (dev: 10H - 1FH, 7FH) Model ID (GS) Command ID (DT1) ❍Bank Select (Controller number 0, 32)
- Page 161 Status 2nd byte 3rd byte ❍Identity Reply Message Receiving Identity Request Message, the XV-5050 send this message. n = MIDI channel number: 0H - FH (ch.1 - 16) vv = Vibrato Depth value (relative change): 00H - 40H - 7FH (-64 - 0 - +63)
- Page 162 00 0B | 0000 000a | Chorus Switch (0 — 1) | OFF, ON * “<*>” marked address or parameters are ignored when the XV-5050 received them. 00 0C | 0000 000a | Reverb Switch (0 — 1) | OFF, ON |—————————————+———————————+————————————————————————————————————————————————————|...
- Page 163 MIDI Implementation 00 10 | 000a aaaa | EQ4 High Gain (0 — 30) | 00 05 | 0aaa aaaa | MFX Control 1 Source (0 — 101) | —15 — +15 OFF, CC01 — CC31, CC33 — CC95, | |—————————————+————————————————————————————————————————————————————————————————| BEND, AFT, SYS1 —...
- Page 164 MIDI Implementation —20000 — +20000 |—————————————+————————————————————————————————————————————————————————————————| 00 69 | 0000 aaaa | 00 00 | 0000 aaaa | Reverb Type (0 — 5) | | 0000 bbbb | OFF, REVERB, SRV ROOM, SRV HALL, SRV PLATE, | | 0000 cccc | GM2 REVERB | 0000 dddd | MFX Parameter 23 (12768 —...
- Page 165 MIDI Implementation |—————————————+———————————+————————————————————————————————————————————————————| 00 08 | 0aaa aaaa | Patch Name 9 (32 — 127) | 00 0A | 0000 000a | Phase Lock (0 — 1) | 32 — 127 [ASCII] OFF, ON 00 09 | 0aaa aaaa | Patch Name 10 (32 —...
- Page 166 MIDI Implementation MFX-CTRL3, MFX-CTRL4 TVF—LFO1, TVF—LFO2, TVA—LFO1, TVA—LFO2, | 00 36 | 0aaa aaaa | Matrix Control 2 Sens 1 (1 — 127) | PAN—LFO1, PAN—LFO2, LFO1—RATE, LFO2—RATE, | —63 — +63 PIT—ATK, PIT—DCY, PIT—REL, | 00 37 | 00aa aaaa | Matrix Control 2 Destination 2 (0 —...
- Page 167 MIDI Implementation | 0000 dddd | MFX Parameter 17 (12768 — 52768) | | 0000 dddd | Chorus Parameter 9 (12768 — 52768) | —20000 — +20000 —20000 — +20000 00 55 | 0000 aaaa | 00 28 | 0000 aaaa | | 0000 bbbb | | 0000 bbbb | | 0000 cccc |...
- Page 168 MIDI Implementation 1-4-1-5 Patch TMT (Tone Mix Table) 00 19 | 0000 00aa | Tone Control 1 Switch 3 (0 — 2) | OFF, ON, REVERSE 00 1A | 0000 00aa | Tone Control 1 Switch 4 (0 — 2) | +——————————————————————————————————————————————————————————————————————————————+ OFF, ON, REVERSE | Offset...
- Page 169 MIDI Implementation 00 6A | 0aaa aaaa | TVA Env Level 1 (0 — 127) | BEND, AFT, SYS1 — SYS4 00 6B | 0aaa aaaa | TVA Env Level 2 (0 — 127) | 00 0C | 0aaa aaaa | MFX Control 4 Sens (1 —...
-
Page 170: Pe (Preset
MIDI Implementation | 0000 bbbb | —20000 — +20000 | 0000 cccc | 00 0B | 0000 aaaa | | 0000 dddd | MFX Parameter 26 (12768 — 52768) | | 0000 bbbb | —20000 — +20000 | 0000 cccc | 00 79 | 0000 aaaa | | 0000 dddd | Reverb Parameter 3 (12768 —... - Page 171 MIDI Implementation 10, 20, 30, 40, 50, 60, 70, 80, | 00 65 | 0000 aaaa | 90, 100, 200, 300, 400, 500, | | 0000 bbbb | 600, 700, 800, 900, 1000, 1100, | | 0000 cccc | 1200 | 0000 dddd | WMT3 Wave Number R (0 —...
- Page 172 MIDI Implementation 01 39 | 0aaa aaaa | TVA Env Time 4 Velocity Sens (1 — 127) | 40 1x 1A | 0aaa aaaa | Velocity Sens Depth (0 — 127) | —63 — +63 —64 — +63 01 3A | 0aaa aaaa | TVA Env Time 1 (0 —...
- Page 173 MIDI Implementation ■Decimal and Hexadecimal Table 40 2x 35 | 0aaa aaaa | PAf LFO1 TVF Depth (0 — 127) | 0 — 2400 [cent] 40 2x 36 | 0aaa aaaa | PAf LFO1 TVA Depth (0 — 127) | (An “H”...
- Page 174 Calculating a Checksum <Example1> 92 3E 5F Roland Exclusive messages (RQ1, DT1) are transmitted with a checksum at the end (before 9n is the Note-on status, and n is the MIDI channel number. Since 2H = 2, 3EH = 62, and F7) to make sure that the message was correctly received.
- Page 175 Temporary Performance Part 1 This method of tuning divides the octave into 12 equal parts. It is currently the most widely used form of tuning, especially in occidental music. On the XV-5050, the default settings for 10 00 2F 00H Temporary Performance Part 16 the Scale Tune feature produce equal temperament.
- Page 176 SYNTHESIZER MODULE Date : Oct. 4, 2001 MIDI Implementation Chart Model XV-5050 Version : 1.00 Transmitted Recognized Function... Remarks Basic Default 1–16 Channel Changed 1–16 Default Mode 3 Mode Messages Mode 3, 4 (M = 1) Altered ************** Note 0–127 Number : 0–127...
-
Page 177: Specifications
Specifications XV-5050: 64-Voice Sound Module (conforms to General MIDI 2 System) Parts Connectors Headphones Jack USB Connector Maximum Polyphony A (MIX) Output Jack (L/MONO, R) 64 voices B Output Jack (L, R) (or Individual Jacks 1–4) MIDI Connectors (IN, OUT, THRU) -
Page 178: Index
Index Numerics 2V PCH SHIFT ............... 81 DIST -> CHORUS ............83 3 TAP DELAY ..............80 DIST -> DELAY ............. 83 3D AUTO SPIN ............101 DIST -> FLANGER ............83 3D CHORUS ..............90 DISTORTION ............76, 97 3D DELAY .............. - Page 179 Index HEXA-CHORUS ............78 Note Range ..............29 INFO ................110 Ocatve Shift ..............40 INIT ................105 Octave Shift ..............23 INITIALIZE ..............105 OD -> CHORUS ............. 82 Internal Write Protect ......... 104–105 OD -> DELAY ..............82 ISOLATOR ..............
- Page 180 Index Resonance ..............46, 60 Tempo ............... 40, 55, 107 REVERB ..............81–82 Time Variant Amplifier ......38, 48, 54, 61 Reverb ............69, 74, 103, 113 Time Variant Filter ........38, 46, 54, 59 REVERSE DLY ............... 86 TM CTRL DLY ............... 81 REVERSE DLY2 .............
- Page 181 MEMO...
- Page 182 Information When you need repair service, call your nearest Roland Service Center or authorized Roland distributor in your country as shown below. MALAYSIA EL SALVADOR IRELAND IRAN AFRICA AFRICA Roland Ireland BENTLEY MUSIC SDN BHD OMNI MUSIC MOCO, INC. 140 & 142, Jalan Bukit Bintang...
-
Page 183: Federal Communications Commission
* GS ( ) is a registered trademark of Roland Corporation. * Windows is registered trademarks of Microsoft Corporation. * Windows® 98 is known officially as: “Microsoft® Windows® 98 operating system.” * Windows® 2000 is known officially as: “Microsoft® Windows® 2000 operating system.”... - Page 184 02890967 ’03-7-8N...
Need help?
Do you have a question about the XV-5050 and is the answer not in the manual?
Questions and answers