
Subscribe to Our Youtube Channel
Related Manuals for Omtech PRO 2440


Summary of Contents for Omtech PRO 2440
- Page 1 V20240530 PRO 2440 Cabinet Laser Engraver User Manual Read Carefully Before Use Keep for Future Reference...
- Page 2 PREFACE Thank you for choosing OMTech! Your new CO₂ laser engraving machine is intended for personal and professional use. When used in accordance with these instructions, it comprises a Class 1 laser system but some components remain extremely dangerous. Never disable the preinstalled safety devices and always use your laser safely and responsibly.
-
Page 3: Table Of Contents
CONTENTS 1. Introduction ................................1 1.1 General Information ............................1 1.2 Symbol Guide ..............................2 1.3 Designated Use ...............................2 1.4 Technical Specifications ..........................3 1.5 Components ..............................4 1.5.1 Main Components ...........................4 1.5.2 Laser Path ..............................7 1.5.3 Laser Head ..............................7 1.5.4 Control Panel ............................8 1.5.5 Water Chiller ............................8 1.5.6 Electronics Bay ............................9 2. - Page 4 5.3 File Management ............................41 5.4 Setting Speed Levels .............................42 5.5 Setting Power Levels ............................43 5.6 File Parameters ..............................43 5.7 Engraving Time Estimation ..........................45 5.8 Manual Adjustment ............................46 5.8.1 Manual Axes Adjustment ........................46 5.8.2 IO Diagnosis ............................47 5.8.3 Frame Cutting ............................47 5.8.4 Laser Head Return ..........................48 5.8.5 System Reset ............................48 5.9 Menu Submenu .............................49...
-
Page 5: Introduction
1. Introduction 1.1 General Information This manual is the designated user guide for the installation, setup, safe operation, and maintenance of your cabinet laser engraver. It is divided into seven chapters covering general information, safety instructions, installation steps, operation and adjustment instructions, maintenance procedures, and contact information. ALL personnel involved in the installation, setup, operation, maintenance, and repair of this machine should read and understand this manual, particularly its safety instructions. -
Page 6: Symbol Guide
1.2 Symbol Guide The following symbols are used on this machine’s labeling or in this manual: These items present a risk of serious property damage or personal injury. These items address similarly serious concerns with regard to the laser beam. These items address similarly serious concerns with regard to electrical components. -
Page 7: Technical Specifications
1.4 Technical Specifications Model PRO 2440 Diameter 3.15 in. 80 mm Laser Tube Length 49.2 in. 1250 mm Max. Input Power 1200 W (Laser and Motors) Rated Power 80 W Wavelength 10640 nm Diameter 0.79 in. 20 mm Focus Lens Thickness 0.08 in. -
Page 8: Components
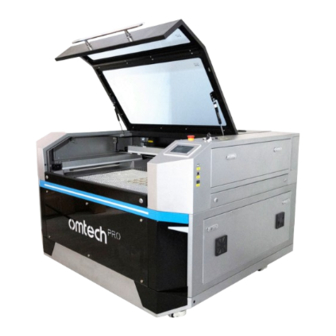
1.5 Components 1.5.1 Main Components Front A. Handle—Use this to raise and lower the cover. The laser is automatically disabled when the cover is opened. B. Cover—The cover provides access to the main bay for placing and retrieving materials, as well as fixing the laser path alignment and other maintenance. - Page 9 Left Side Right Side A. Top Left Access Door—This door provides access to the left Y-axis rail and the 2nd mirror. For all of the engraver’s access doors, unlock, open, and rotate the handles found on each end together. When the latches are freed, carefully support the door as it opens to avoid damage.
- Page 10 Rear A. Rear Access Door—This door provides access to the laser bay, including the laser tube, its brackets, its electrical and cooling water connections, and the 1st mirror. B. Laser Tube—During use, the gas mixture inside this long glass tube produces a powerful laser.
-
Page 11: Laser Path
1.5.2 Laser Path A. Laser Tube—The glass tube that produces the laser is mounted on brackets and immobile. Its connection with the laser power supply is extremely high voltage and extremely dangerous. B. 1st Mirror—This adjustable-angle mirror is fixed in place to transfer the invisible engraving laser from the tube to the 2nd mirror. -
Page 12: Control Panel
1.5.4 Control Panel A. Laser Key—This lock turns the laser power supply on and off, helping ensure only approved operators can use your engraver. B. Ammeter—This digital display shows the current being provided to the laser tube in mA. The knob to its right is its master power control. It should be turned completely clockwise to enable your software to use the engraver’s full power range. -
Page 13: Electronics Bay
1.5.6 Electronics Bay A. Mainboard—This circuit board controls the engraving process, responding to commands from your engraving software or the machine’s control panel. B. Z-Axis Driver—This device controls the motor that raises and lowers the workbed. C. Rotary-Axis Driver—This device directs attached and enabled rotary devices. D. -
Page 14: Safety Information
2. Safety Information 2.1 Disclaimer Your engraver may differ somewhat from those shown in this manual due to options, updates, etc. Contact us if your engraving machine came with an outdated manual or if you have any other questions. 2.2 General Safety Instructions •... -
Page 15: Laser Safety Instructions
2.3 Laser Safety Instructions When used as instructed, this machine comprises a Class 1 laser system safe for users and bystanders. However, the invisible engraving laser, the laser tube, and its electrical connections remain extremely dangerous. Used or modified without care, they can cause serious property damage and personal injury including but not limited to the following: •... -
Page 16: Electrical Safety Instructions
2.4 Electrical Safety Instructions • ONLY use this device with a compatible and stable power supply with less than 5% fluctuation in its voltage. • DO NOT plug the engraver and chiller into the same circuit or connect other devices to same circuits that they will use, as this laser system is extremely powerful and will require its full amperage. - Page 17 This machine can be safely used with the following materials: Plastics • Acrylonitrile Butadiene Styrene (ABS) • Nylon (Polyamide, PA, etc.) • Polyethylene (PE) • High-Density Polyethylene (HDPE, PEHD, etc.) • Biaxially-Oriented Polyethylene Terephthalate (BoPET, Mylar, Polyester, etc.) • Polyethylene Terephthalate Glycol (PETG, PET-G, etc.) •...
-
Page 18: Installation
3. Installation 3.1 Installation Overview A complete working system consists of the laser engraving cabinet, both laser nozzles and their accessories, the integrated cooling system, a ventilation system adequate for the materials you’re working (fan and ducts included), all applicable connection cables, and the laser and access keys. The cabinet can use designs provided by the enclosed engraving software by direct or internet connection with your computer. -
Page 19: Unpacking Your Engraver
If you have not already done so, finish removing the crate from around your engraver. Note that your chiller is not prefilled with coolant. ALWAYS check the chiller’s coolant level before turning the power on. Use antifreeze as needed. It is recommended that you use OMTech antifreeze for optimal performance. -
Page 20: Electrical Grounding
3.4 Electrical Grounding This device employs a powerful laser. As discussed in the Safety Information above, it is extremely high voltage and potentially dangerous, so users must securely ground it to avoid the buildup of static electricity. Using a standard 3-prong outlet will provide sufficient grounding. -
Page 21: Exhaust System
5. For initial use, press ⯆ to speed activation of the compressor. The default setting is to keep the chiller within 3.6°F (±2°C) of 77°F (25°C). 6. To change the target temperature, press SET, use ⯅ and ⯆ to adjust the value up or down, and press RST to save your changes. -
Page 22: Main Power Connections
3.7 Main Power Connections Confirm that the labeling beside the connection sockets matches your power supply. If you have not already done so, connect one end of the power cables to the connection sockets and the other ends to grounded outlets. The combined electrical load of all the major components of this device will draw over 30A. - Page 23 3. When the installation is finished, click to run the program. 4. Click “Config” and then “System Setting”. 5. Click “Parameter setting” and then “Optimize” in the pop up as shown. Click “Import soft para”. 6. Choose “Scanning (Reverse compensation)” under the directory of the provided flash drive.
-
Page 24: Lightburn Scanning Offset
7. Click “Optimize” again to ensure that the Engraver Reverse Offset has been imported as shown. Tick the box before “Scanning (Reverse compensation)” 3.8.2 Lightburn Scanning Offset 1. Click open your Lightburn, then “Edit”, and then “Device Settings”. - Page 25 2. Click “Import” in the pop-up that shows up. 3. Find and choose the “Scanning Offset Adjust” in the provided flash drive. 4. Enable the scanning offset adjustment by clicking green the toggle switch as shown.
-
Page 26: Connection Through The Usb Cable
3.8.3 Connection Through the USB Cable RDWorks V8 1. Initiate RDWorks V8 on your control computer and connect it to the engraver using the provided USB cable. 2. Click “Setting” 3. Click to tick the box as shown. Click “Modify”. Click “Test”... - Page 27 5. The connection is successful when the pop-up as shown shows up. 6. Click OK to confirm the connection and close the dialogue box. 7. Click “Exit” to return to the home interface. Lightburn 1. Initiate RDWorks V8 on your control computer and connect it to the engraver using the provided USB cable. 2.
- Page 28 4. Choose “Ruida” and Click “Next”. 5. Choose Serial/USB and then “Next”. 6. Enter the circled engraver name and X and Y axis length. Click “Next”.
- Page 29 7. Set the origin to “Rear Right” as shown and click “Next”. 8. Confirm your configuration and click “Finish” to close the pop-up. 9. Click the device drop list in the lower right corner and choose “PRO 2440”. The engraver is connected when the system shows “Ready”.
-
Page 30: Connection Through Wi-Fi
3.8.4 Connection Through Wi-Fi RDWorks V8 1. Enable Wi-Fi on your computer. Search or select network “OMTECH PRO 2440”. Enter the passcode (123456abc) to connect your control computer to the laser engraver. 2. Initiate RDWorksV8. Click “Setting”. 3. Click to tick the box before “Device”, being sure the IP... - Page 31 4. Set the IP address to “192.168.1.20” in the pop-up that shows up. Click “Test”. 5. You should see the pop-up as shown. Click OK. 6. Click “Exit” to return to the home interface.
- Page 32 Lightburn 1. Enable Wi-Fi on your computer. Search or select network “OMTECH PRO 2440”. Enter the passcode (123456abc) to connect your control computer to the laser engraver. 2. Initiate Lightburn and click “Device” in the lower right corner as shown.
- Page 33 5. Choose Ethernet/UDP and click “Next’ in the pop-up as shown. 6. Enter “192.168.1.20” in the dialogue box as shown. Click “Next”. 7. Enter the engraver name, X axis length, and Y axis length as shown. Click “Next”.
- Page 34 9. Confirm your configuration and click “Finish” to close the pop-up. 10. Click the device drop list in the lower right corner and choose “PRO 2440”. The engraver is connected when the system shows “Ready”. DO NOT connect your computer to the engraver with a network cable. The port marked with “Ethernet”...
-
Page 35: Air Assist
3.9 Air Assist The air assist system for normal cutting and engraving should arrive should arrive preinstalled and correctly wired. Simply check that it is correctly configured and connected as shown. If any tubing or wiring needs to be reconnected, shut off all power to the machine (including by pressing the emergency stop) before adjusting anything. - Page 36 7. Tap Z+, Z–, X+, X–, Y+, and Y– so that that the laser head is about 1 or 2 inches above the laserable scrap. 8. Hold and the laser head should start firing laser beam continuously. 9. Turn the laser key to its “OFF” postion and observe if the laser stops immediately. Warning! If the laser continues to fire, the laser key is not working and must be replaced before the engraver can be used.
-
Page 37: Security
Water Shutoff Because of the danger posed by an uncooled laser tube, this engraver also shuts off the laser automatically when the water cooling system malfunctions. After ensuring that the emergency stop button and cover protection both work, you should also test that the water shutoff works properly before conducting any other work on your machine. -
Page 38: Operation
4. Operation 4.1 Operation Overview Operate this laser engraver only in accordance with all the instructions provided in this manual. Failure to follow the guidelines detailed here can result in property damage and personal injury. You can control your engraver directly from the built-in control panel, through a direct USB cable connection with your computer, or over the engraver’s in-built Wi-Fi module. -
Page 39: Typical Operation Instructions
4.2 Typical Operation Instructions Step 1. Create the design that you’d like to engrave or cut into standard materials. (See §4.3 for engraving circular objects.) You can do this directly in your engraving software or use any other graphics program to create the image and set its engraving parameters. -
Page 40: Rotary Operation Instructions
Store everything neatly away. 4.3 Rotary Operation Instructions The base model of the PRO 2440 does not come with a rotary axis but is compatible with standard four-pin models. To use a compatible rotary axis, remove the steel saw bed, place your rotary axis in an open area, and connect its cord to the rotary port at the back of the main bay. - Page 41 Average Engraving Settings Leather Description Acrylic Glass Tile/Stone Wood Natural Artificial Speed 325 mm/s 225 mm/s 400 mm/s 425 mm/s 145 mm/s 200 mm/s Power Ceramics When engraving on ceramics, generally use moderate to high power. Using more loops rather than higher power and lower speed can help avoid cracking the material during work.
- Page 42 may produce poor engraving quality, noxious fumes, and even fires. High resolution engraving can cause the same problem, so medium to low resolution designs should be preferred for most plastics. Thickness of Acrylic Description 1/16 in. 1/8 in. 1/4 in. 1/2 in.
-
Page 43: Adjustment
5. Adjustment 5.1 Adjustment Overview Operate this laser engraver only in accordance with all the instructions provided in this manual. Failure to follow the guidelines detailed here can result in property damage and personal injury. To get the best effect for your work on different materials, however, you should familiarize yourself with the different control systems and how and when to adjust them. -
Page 44: Main Menu
5.2 Main Menu... -
Page 45: File Management
5.3 File Management System Memory Files In the main menu, tap “File”, and the following menu pops up. Files are listed in the left column and a preview of a selected file is shown in the graphic display area. When there are multiple files, use the up and down icons to scroll through the file list. -
Page 46: Setting Speed Levels
USB Files The system is compatible with FAT32 and FAT16 USB file formats. For best results, however, store your files under the root directory of the USB flash drive so that the system can recognize them quicker and easier. By default, the system dissects a file name exceeding 8 characters and shows it in more than one word. Also, the system cannot recognize file whose names consist of characters other than English and Arabic numbers. -
Page 47: Setting Power Levels
5.5 Setting Power Levels All powers are displayed as percentages (%) of the engraver’s rated power. Running your laser above 70% risks shortening your laser’s service life. If you find power settings of 70% or lower do not produce the results that you need, for most materials it is better if you first attempt to increase the amount of energy per unit area by slowing the laser or running more loops before further increasing the power setting itself. - Page 48 Attribute: Encompasses four parameters concerning the way a file is processed. Repeat times: Sets how many times the process is repeated. Repeat delay: Sets the interval between two repeated processing. Once the repeat times and delay is set and saved, the change applies to all the files that are currently on the system’s worklist unless it suffers a power breakout or being turned off.
-
Page 49: Engraving Time Estimation
Listed on the left are all the array names for this file. Use the up and down button to scroll through all the array names if there are many of them. After being tapped, the information of the selected array is displayed as shown direction: Determines how an array is formed, along the X or Y axis. -
Page 50: Manual Adjustment
5.8 Manual Adjustment Tap “Manual” in the main menu, and the following menu pops up. This menu is mainly for manual debugging, including axes (X, Y, Z, & U) motion, manual laser firing, positioning, IO diagnosis, frame cutting, return and system reset, and aligning the laser path. To exit this menu, tap “Auto” in this menu. -
Page 51: Io Diagnosis
5.8.2 IO Diagnosis Tap “I/O”, and the menu pops up as shown. The alteration of those parameters is currently disabled. 5.8.3 Frame Cutting Tap “ CutF” , and the menu as shown pops up. To cut a frame at a set distance from the outer circumference of the design file, 1. -
Page 52: Laser Head Return
5.8.4 Laser Head Return Tap “Return” to enter the laser head return menu as shown. Under “XY return to”, there are four options for the laser head’s return: ABS position, Not return, Origin pos, and Docking point. ABS position: Sets the laser head to return to the mechanical origin along the X and Y axis. -
Page 53: Menu Submenu
5.9 Menu Submenu Tap “Menu” in the main menu, and the menu submenu shows up as shown. This menu includes SysCfg, Lang, User, Vendor, and Main. 5.9.1 SysCfg Ethernet Tapping “Ethernet” accesses the IP setting. Tap to change the value and tap OK to save your change. Sysinfo Tapping “SysInfo”... -
Page 54: Setting Multi-Origins
Product Activation 1. Tap menu>SysCfg>Sysinfo>Product Authorization, and the pop-up as shown shows up. 2. Enter your product authorization/activation code. 3. Tap OK to confirm. Tapping Cancel closes the pop-up and returns to the SysInfo menu. Setting Time Zone 1. Tap menu>SysCfg>Sysinfo>Time zone, and the pop-up as shown shows up. - Page 55 Input Origin 1. Tap to choose an Origin, Origin 1 as is in the case demonstrated below. 2. Put in your desired X & Y coordinates. If you are unsure whether the coordinates you put in will be the position you want the laser head to move to, tap “Move to current Origin”.
- Page 56 Use the keys (Z+, Z–) and the arrows to move the laser head to a desired position in relation to the workbed. (U+ and U– are disabled.) To change the way and distance the laser head moves, see 5.8 Manual Adjustment. Once set, tap to return to the origin menu.
-
Page 57: Backing Up Factory Parameters
5.9.3 Backing up Factory Parameters Tap “BackUp”, and the menu as shown shows up. To back up the current set parameter values, 1. Tap “Confirm to backup parameters”. 2. Enter your passcode in the pop up that shows up. Caution! Use this feature upon powering on the engraver so that the factory defaults of the parameters can be stored for future restoring the factory parameter values. -
Page 58: Restore Factory Parameters
5.9.4 Restore Factory Parameters Tap “Restore”, and the menu as shown shows up. To restore factory parameter values, 1. Tap “Confirm to restore default parameters to controller!” 2. Put in your passcode. 3. Tap OK. -
Page 59: Setting The Screen Orientation
5.9.5 Setting the Screen Orientation 1. Tap “Display”, and the menu as shown shows up. 2. To set a different screen orientation, tap one of the four options that you desire. Note that your screen shows your engraving design the way you set your screen. For instance, if the screen origin is set at the Up- left, then a design will be shown in its original orientation. -
Page 60: User Parameters
5.9.7 User Parameters Return Submenu Parameters Options Functions/Meanings Origin pos Sets the laser head to return to the default origin. ABS position Sets the laser head to return to the mechanical origin. work return to Docking Point Sets the laser head to return to the preset origin(s) Not return Keeps the laser where it is. - Page 61 Parameters Options Functions/Meanings XY Reset speed (mm/s) Numerical Sets the laser head’s return speed along the X and Y axes. Z Reset speed (mm/s) Numerical Sets the laser head to its Z origin upon powering up. U Reset speed (mm/s) Numerical Disabled Focus Submenu...
- Page 62 Engrave Submenu Parameters Options Functions/Meanings X start speed (mm/s) Numerical Sets the speed at which the laser head starts along the X axis. Y start speed (mm/s) Numerical Sets the speed at which the laser head starts along the Y axis. X Acc (mm/s²) Numerical Sets the laser head’s acceleration along the X axis.
- Page 63 Options Functions/Meanings Parameters Fast feed speed (mm/s) Numerical Sets the speed of the laser head when not firing laser beams. Fast feed acc (mm/s²) Numerical Sets the acceleration of the laser head when not firing laser beams. Corner spd (mm/s)* Numerical Sets the speed of the laser head when making sharp turns.
-
Page 64: Ammeter Adjustment
5.11 Setting Rotary Axis Parameters The base model of the PRO 2440 does not come with a rotary axis but is compatible with any standard four-pin model. Attach it to the aviator plug near the back of the workbed and flip the nearby switch to toggle the engraver from normal operation to using the Y axis for rotational information. - Page 65 Target Temp. 25°C Ultrahigh Temp. Alarm 45°C Temp. Difference −3°C Access Passcode Temp. Tolerance ±0.5°C ±2°C Upper Temp. Limit 31°C +30°C Control Mode Lower Temp. Limit 25°C −5°C High Temp. Alarm +15°C +5°C Low Flow Alarm (dL/min) Low Temp. Alarm −15°C −10°C Device Address...
-
Page 66: Maintenance
6. Maintenance 6.1 Maintenance Overview The use of procedures other than those specified herein may result in hazardous laser radiation exposure. Before any cleaning or maintenance work, always switch off the device and disconnect it from its power supply. Always keep the system clean, as flammable debris in the working and exhaust areas constitutes a fire hazard. -
Page 67: Cleaning The Mirrors
3. Remove the air assist hose and the guide wire from the laser nozzle. 4. Loosen the bolt in the upper part of the laser head that holds the middle part in place. 5. Carefully slide the middle part of the laser head out and remove the lens from its casing. 6. -
Page 68: Refilling
NEVER touch or adjust your laser’s water supply while it is still turned on or connected to power. Your chiller should arrive with no prefilled coolant or antifreeze. It is recommended that you use OMTech laser-safe antifreeze for safety. Always fill the chiller with distilled water or a custom-purpose laser-safe antifreeze. Using deionized or tap water for any purpose but rinsing out cleansers (see §6.2.5 above) will gradually degrade the quality... -
Page 69: Laser Tube Alignment
6.4.1 Laser Tube Alignment 1. To test the alignment of the laser tube with the 1st mirror, cut out a piece of tape and place it on the mirror's frame. DO NOT place the tape directly onto the mirror. Turn on the machine and set the power level to 15% or lower. -
Page 70: 1St Mirror Alignment
6.4.2 1st Mirror Alignment After ensuring the laser is well aligned between the laser tube and 1st mirror, check the alignment between the 1st and 2nd mirrors. 1. Tap “manual” in the main menu. 2. Use the direction arrows on the control panel to send the 2nd mirror to the back of the bed along the Y axis. 3. -
Page 71: 2Nd Mirror Alignment
6.4.3 2nd Mirror Alignment After ensuring the laser is well aligned between the 1st and 2nd mirrors, check the alignment between the 2nd and 3rd mirrors. Repeat the steps and adjustments above, taking care to use the tape on the mirror's frame and not its surface. -
Page 72: Error Messages
6.5 Error Messages The chiller may display the following error messages: Code Meaning Typical Solution(s) Cool the area directly around the engraver. Pause work until the room itself cools. Ultrahigh Room Temp. Alarm Move the engraver to a cooler area. Contact customer service for information on checking the wiring for the chiller’s ambient temperature sensor. -
Page 73: Parts Replacement
6.6 Parts Replacement This engraver should not be modified or disassembled by anyone except trained and licensed professionals, but some consumable parts may require replacement after prolonged use. Contact your vendor or our technicians if you have any questions about fitment or installation. Using incompatible components is highly dangerous and waives all the manufacturer’s liability for any damage or injury caused. - Page 74 .pdf copy of the latest version of this manual, use the appropriate app on your smartphone or other device to scan the QR code to the right. Come join the OMTech community at our official laser group on Facebook or visit the company forums at omtechlaser.com! Check our YouTube channel for helpful hints and instructional videos.
Need help?
Do you have a question about the PRO 2440 and is the answer not in the manual?
Questions and answers