
Related Manuals for Omtech POLAR 350


Summary of Contents for Omtech POLAR 350
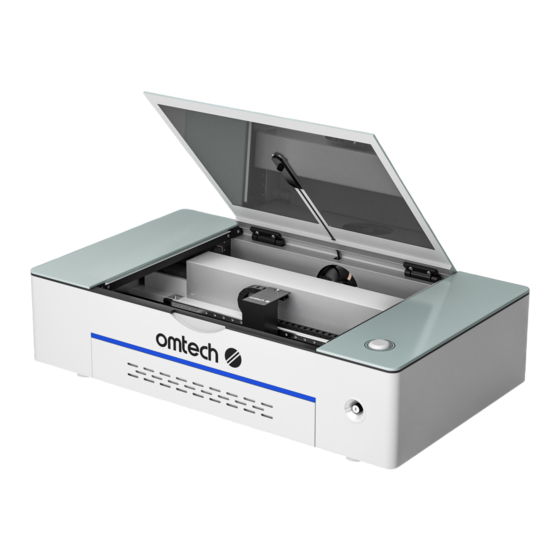
- Page 1 V20240527 POLAR 350 50W Desktop Laser Engraver User Manual Read Carefully Before Use Keep for Future Reference...
- Page 2 Welcome to the OMTech Community! For a .pdf copy of the latest version of this manual, use the appropriate app on your smartphone or other engraver to scan the QR code to the right. For helpful hints and instructional videos, join us at our official laser group on Facebook and visit our channel on YouTube or visit the company forums at omtechlaser.com! If you encounter any problem regarding your engraver,...
- Page 3 However, constantly running your laser above 70% of its rated power can significantly shorten its service life. Read this manual before use, keep it for future reference, contact OMTech customer service if any point is unclear, and provide it with the machine if it is ever given or sold to another person.
-
Page 4: Table Of Contents
Content Safety Information ....................1 Disclaimer ................................1 Symbol Guide ..............................1 General Safety Instructions ..........................2 Laser Safety Instructions ..........................3 Electrical Safety Instructions ........................... 4 Material Safety Instructions ..........................5 Disposal Instructions ............................8 Introduction ......................9 General Information ............................9 Designated Use .............................. - Page 5 Operation ........................ 40 Operation Overview ............................41 General Operation Instructions ........................42 Preparing Your Material ........................... 42 Turning on Your Engraver ........................47 Loading Your Design ..........................48 Adjusting the Software’s Parameters ....................49 Focusing Your Laser ..........................50 Engraving ..............................51 Shutdown ..............................
- Page 6 Content Refilling the Water Tank ........................... 73 Laser Path Alignment ............................74 Rail Lubrication ..............................74 Parts Replacement ............................. 75 Troubleshooting ....................76 Connection ................................76 The Engraver Can't Find the Device Through Ethernet Cable ............76 The Engraver Can't Find the Device Through Wi-Fi ................. 77 The Engraver Can't Find Device Through USB ..................
-
Page 8: Safety Information
Safety Information Disclaimer Your engraver may differ somewhat from those shown in this manual due to options, updates, etc. Please contact us if your engraving machine comes with an outdated manual or if you have any other questions. Symbol Guide The following symbols are used on this machine’s labeling or in this manual: These items present a risk of serious property damage or personal injury. -
Page 9: General Safety Instructions
General Safety Instructions • Your engraver should come with instruction labels in the following locations. If any of these labels is missing, illegible, or damaged, it must be replaced. • Use this laser engraving engraver only in accordance with all applicable local and national laws and regulations. -
Page 10: Laser Safety Instructions
Safety Information • Any untrained personnel who might be near the engraver while it is in operation MUST be informed that it is dangerous and fully instructed on how to avoid injury during its use. • ALWAYS keep a fire extinguisher or other flame-retardant system nearby in case of accidents. Ensure that the local fire department’s phone number is displayed nearby. -
Page 11: Electrical Safety Instructions
• DO NOT ever under ANY circumstances use this laser engraver if the water-cooling system is not working properly. Always activate the water-cooling system and visually confirm that water is flowing through the entire system before turning on the laser tube. Immediately stop use if the water-cooling system malfunctions. -
Page 12: Material Safety Instructions
Safety Information • DO NOT drain or fill the integrated water tank while it is connected to its power supply. Disconnect the chiller and the laser from power before adjusting the cooling liquid level. Do not allow any electronic component to become wet and, if any accidentally does become wet, leave the entire system disconnected from power until all components are fully dry. - Page 13 • ALWAYS use clean and properly fastened equipment for your oxygen. Have your tanks tested for safety at least every few years and ALWAYS keep them well secured, safe from any possibility of falls or impacts. Store any unsecured tanks horizontally against a wall away from any foot traffic. •...
- Page 14 Safety Information This machine CAN NOT be used with the following materials or with any materials that include them: • Artificial Leather containing Hexavalent Chromium (Cr [VI]), due to its toxic fumes • Astatine, due to its toxic fumes • Beryllium Oxide, due to its toxic fumes •...
-
Page 15: Disposal Instructions
Disposal Safety Instructions Electrical products should not be disposed of with household products. In the EU and UK, according to the European Directive 2012/19/EU for the disposal of electrical and electronic equipment and its implementation in national laws, used electrical products must be collected separately and disposed of at the collection points provided for this purpose. -
Page 16: Introduction
Introduction General Information This manual is the designated user guide for the installation, setup, safe operation, and maintenance of your cabinet laser engraver. It is divided into several chapters covering general information, safety instructions, installation steps, operation and adjustment instructions, maintenance procedures, and contact information. -
Page 17: Designated Use
Designated Use The Polar 350 is intended for use in engraving signs and other consumer products on applicable substrates. This laser can process a wide variety of materials including wood and cork, paper and cardboard, most plastics, glass, cloth and leather, and stone. It can also be used with some specially coated metals. -
Page 18: Specifications
Engraving System Introduction Specifications Model Polar 350 Input Power AC 230 V, 50 Hz Power Consumption 600 W Rated Power 50 W Expected Service Life 11,000 / 10,000 / 8,000 hr. at <40% / 40–70% / >70% Power 10.6 μm (10,600 nm) - Page 19 Port Diameter 0.4 in. 10 mm Integrated Air Assist Air Flow 18.8 cfm 533 L/min. Max. Resolution 5 MP Integrated Field of View 20.1×11.8 (in.) 510×300 (mm) Digital Camera ±0.04 in. ±1 mm Accuracy Rated Power 60 W External Port Diameter 5.9 in.
-
Page 20: Components
Components Top View This small aviation plug connects to the provided rotary axes to Rotary Plug provide them with power and command signals. The 2.4 GHz wireless terminal device located behind the central part Wifi Card of the rear panel provides wifi connectivity for your engraver. This device transforms standard electricity into the extremely high Laser Power Supply voltage charge necessary for the laser tube. - Page 21 This tank helps keep your laser tube cool and stable. It arrives full of Water Tank OMTech antifreeze but can also be replaced with distilled water. This circuit board located under the left panel controls the engraving process, responding to commands from your computer’s engraving Mainboard software.
-
Page 22: Front View
Components Front View This acrylic window allows you to monitor the engraving process, absorbing most reflected laser beams. However, always use Cover protective eyewear when observing the active laser and never stare at it for extended periods. Cover Interlocks These switches automatically pause work if the cover is opened. Camera This fisheye camera helps you position your designs precisely. -
Page 23: Rear View
Rear View This dial provides a master power control for your engraver. It should Beam Attenuator be turned completely clockwise to enable your software to use the engraver’s full power range. This port functions as a second key necessary to activate the laser Remote Interlock tube. -
Page 24: Laser Head
Components Laser Head This fixed mirror transfers the laser from the 2nd mirror at the end of 3rd Mirror the X-axis rail downward to the focus lens. This 15.5 mm lens directs and focuses the laser beam to its point of Focus Lens contact with your material. -
Page 25: Rotary Axes
Rotary Axes This plug should be covered during normal engraving. When you use Rotary Aviation Plug the rotary axes, the 4-pin connection will power and direct the rotary motor. These arrows indicate the correct position of the laser and the X-axis Alignment Arrows rail for use with Rotary Axis 1 (on the right) or Rotary Axis 2 (on the left). -
Page 26: Package List
Package List... - Page 27 Item Name Qty. 4-wheel Rotary Axes with Its Aviator Connection Cord Rotary Cable 60W Duct Fan Fan Remote Adapter Ring Exhaust Pipes Hose Clamps Main Power Cord Ethernet Cable USB Cable 1×Cotton Swab 1×Height Ruler 1×Focal Ruler 2×Laser Key 1×Interlock Connector Big Storage Box: 1×Set of Hex Wrenches Target Discs...
-
Page 28: Installation
Installation Installation Overview A complete working system consists of the laser engraving machine, its integrated air assist and water pump, its vent and exhaust fan, its control computer, all applicable connection cables, the interlock connector, and the laser key. The engraver can receive designs and commands from the control computer directly from its USB cable or remotely from its wireless network or ethernet cable. -
Page 29: Unpacking And Checking
• The power cord should be plugged into a compatible and stable power source via a grounded 3-prong outlet. No other item should be drawing current from the same circuit. There should be firefighting equipment nearby and the local fire department’s phone number should be clearly displayed. -
Page 30: Installing The Exhaust System
Installation 4. Open the cover and take out all the parts. § Package List Make sure that you have received all listed accessories in the package list. (See on Page 19) 5. Carefully remove any remaining interior packaging and stays—including the strap around the laser head—and set them aside. - Page 31 5. Place the other end of the hose out a door, window, and so on, or—if there will be any harmful byproducts produced as you engrave— connect the hose to a dedicated fume extractor. 6. Seal all seams and connections tightly. 7.
-
Page 32: Inspecting The Cooling System
Open the cover and confirm that the plastic tank to the right of your main bay is full. The integrated water pump should arrive with about 1.5 L of OMTech coolant already in place. This should not require replacement during the first year of service, but refill it if the tank ever seems below two- thirds full before activation. -
Page 33: Control System Setup
Control System Setup Confirm the beam attenuator is turned fully clockwise. 2. Plug in the interlock connector. 3. Plug the engraver into a grounded outlet or into a surge protector rated over 2000J that is itself connected to a grounded outlet. Use a dedicated circuit with no other devices on it. Confirm that the voltage on the label above the laser’s power socket matches your local power supply. - Page 34 Installation 5. Connect the engraver and computer. Use any of these 3 ways: a) Use the other USB cable to connect the main engraver port to your computer. b) Connect the engraver and computer via the ethernet cable. c) Connect your engraver and computer through wi-fi. USB Cable Ethernet Cable 6.
-
Page 35: Wi-Fi Setup
123456abc. If it is not there, you may need to reconfigure your own device’s TCP/IP address. The default address of the Polar 350’s wireless network is 192.168.1.100. You will need to set your computer’s network to use a similar but not identical address. -
Page 36: Software Setup
You can also download the latest version of RDWorksV8 from Ruida’s website at www.rdacs.com/en or from us at www. omtechlaser.com/pages/software-download. For LightBurn and other software setup, contact Customer Service, visit the OMTech website, or see our YouTube channel. - Page 37 2. D o u b l e c l i c k t h e “ R D Wo r k s V 8 S e t u p 8.01.60-20211201.rar”, and then “RDWorksV8 Setup8.01.60-20211201.exe” to install the software. T h e s o f t w a r e v e r s i o n number and release date may differ depending on the engraving machine.
- Page 38 Installation c. Click Open and then load the settings file “Manufacturer_parameters.RDVSet” from the USB. d. Click Write to save the parameters and then click Exit. 5. Configure the software parameters. a. P r e s s A LT + S ( “ C o n f i g ” ) a n d s e l e c t System Settings.
- Page 39 6. Configure the user parameters. a. On the System Work Platform on the upper right side of the main interface, change the tab from Work to User. b. Click Read. c. Click Open and then load the file “User_ parameters.RDUSet”. d.
- Page 40 Installation 7. Configure the camera. a. On Laser Work at the lower right side of the main interface, change the Position value from Current Position to Absolute Coordinates. b. On the Canvas Tools toolbar, click the u n l a b e l e d c h e c k b o x t o e n a b l e t h e canvas function and controls.
- Page 41 d. Click Import Calibration and load the file Camera_calibration_file.calx. 8. Now the software is correctly configured for your engraver. Turn off your engraver if you are not going to use it. Familiarize yourself with your software’s image design and laser control features before using them to operate the laser.
-
Page 42: Initial Testing
Initial Testing Wear safety glasses during the entire test process! Because of the risk of blindness, burns, and other injuries from direct exposure to the invisible engraving beam, this device shuts off the laser automatically when any one of its protective interlocks is triggered. - Page 43 7. Taking care not to expose yourself to seeing or being hit by any possible reflected laser light, open the cover as little as possible. 8. Check the status of the engraver. The laser should pause automatically and the Start button should become red. If the laser continues to engrave the design while the cover is raised, the automatic shutoffs are not working and must be repaired before the engraver can be used.
-
Page 44: Tray Shutoff (Interlocks)
Initial Testing Tray Shutoff (Interlocks) After ensuring that the cover shutoff works, you should also test that the tray shutoff activates. Perform the same procedure as before but, instead of opening the cover, open the debris tray. The laser should stop completely. If it continues to engrave the design while the debris tray is open, the automatic shutoff is not working and must be repaired before the engraver can be used. -
Page 45: Rear Key (Interlock Connector)
2. Move the tray interlock switch into a closed position and hold it there by sliding the nearby metal bracket to the right. 3. Never leave the switch in this position after completing your work. Reenable the switch before leaving the work area. Rear Key (Interlock Connector) After ensuring that the cover and tray interlocks work properly, you should test that the rear key functions correctly. -
Page 46: Water Shutoff
Initial Testing Water Shutoff Because of the danger posed by an uncooled laser tube, this engraver also shuts off the laser automatically when its sensors do not detect the correct water flow. This can be tested by crimping or tying the water hoses and attempting to fire the laser. If you perform this test, be careful not to damage the hoses themselves and to only briefly activate the laser. -
Page 47: Security
Security For your safety and that of passersby, this engraver requires two keys to provide power to the laser tube, the laser power key in the front and the interlock connector at the back of the machine. Operators should always remove at least one of these between uses to prevent unauthorized operation of the machine. -
Page 48: Operation Overview
Operation Operate this laser engraver only in accordance with all the instructions provided in this manual. Failure to follow these instructions can result in property damage and personal injury. Wear safety glasses during the entire test process! Operation Overview This section will address only some of the options and features provided by the operation software. Before beginning to use the machine, make sure that you have read this entire manual (particularly §... -
Page 49: General Operation Instructions
General Operation Instructions Preparing Your Material Make sure that the engraver is powered off. 2. Open the cover. - Page 50 Operation 3. Confirm the thickness of your material with the provided ruler and place a sample piece into the main bay. The standard location is in the top left corner of the workbed. This can be changed by moving either your design or the origin position in your software. For pieces no longer than 20 inches (510 mm) Thickness Instructions...
- Page 51 Thickness Instructions Remove the tray and honeycomb workbed. 2. Cover the exposed area of your table with a non-reflective plank, preferably an MDF that fits the space. > 51 mm Warning! Failure to totally cover your table may cause a fire hazard. Using reflective surfaces risks reflecting the laser beam and destroying your engraver.
- Page 52 Operation Thickness Instructions 4. Slide the X-axis rail forward to expose the tray interlock switch. 5. Move the tray interlock switch into a closed position and hold it there by sliding the nearby metal bracket to the right. Tray Interlock Switch Bracket X-Axis Rail Never leave the switch in this position after completing your work.
- Page 53 b. Remove the debris tray and workbed. c. Slide the X-axis rail forward to expose the tray interlock switch. d. Move the tray interlock switch into a closed position and hold it there by sliding the nearby metal bracket to the right.
-
Page 54: Turning On Your Engraver
Operation 8. Confirm that the rotary switch is flipped down to its standard position and then close the cover. X-Axis Rail § Instructions for Rotary Operation For round pieces, you will need to use a rotary axis (see Page 54). Turning on Your Engraver T u r n o n y o u r d u c t f a n a n d a n y f u m e extractor or other ventilation equipment. -
Page 55: Loading Your Design
Loading Your Design Create the design that you’d like to engrave and save. You can do this directly in your engraving software or use any other graphics program. 2. Confirm that your control computer has a connection to the Polar, either directly through the provided cables or Wi-Fi connection or via the internet. -
Page 56: Adjusting The Software's Parameters
Operation Adjusting the Software’s Parameters Adjust your software’s parameters to suit your project. When working with new materials, remember that you should always start on the low end of likely settings. If the effect is not yet strong enough, you can always rerun the design loop several times or rerun it with more powerful settings until you create the effect that you want. -
Page 57: Focusing Your Laser
Focusing Your Laser For Materials with a Thickness of 17 mm or Less Focus your laser using the Offset parameter in your software, located on the Test tab of the System Work Plat on the upper right side of the main interface. 2. -
Page 58: Engraving
Operation For Materials Thicker than 17 mm For thicker materials, find their height relative to the bed’s usual level, roughly 2 ¾ in. (70 mm) above the bottom of the laser’s support legs. To focus by using the provided focusing ruler: Place the side of the focusing ruler marked with 50.8 against the top of the laser mounting board as shown. - Page 59 3. Watch for possible issues like sparks or fires using the camera view. Do not stare continuously at the active laser even through your protective eyewear. Be prepared to quickly extinguish a fire if necessary. 4. If any dust or fumes begin to build up within the main bay, increase the power of the duct fan by pressing Fast on the remote control or pause work periodically by pressing the...
-
Page 60: Shutdown
Operation Shutdown When you have finished your project, close your engraving software. 2. Allow the cooling and ventilation systems to continue to run until the air in the main bay is clear and the tube has safely cooled. 3. Turn off the engraver using the laser key and the main power switch and then turn off the external fan. -
Page 61: Instructions For Rotary Operation
Instructions for Rotary Operation The Polar 350 comes with two separate 4-wheel rotary axis devices to engrave spherical and cylindrical surfaces. Use Rotary Axis 1 for larger items and use Rotary Axis 2 for smaller ones. Installing Your Rotary Axis Remove the debris tray and the honeycomb workbed. - Page 62 Operation 3. Slide the X-axis rail forward to expose the tray interlock switch. 4. Move the tray interlock switch into a closed position and hold it there by sliding the nearby metal bracket to the right. Never leave the switch in this position after completing your work.
- Page 63 6. Connect the rotary cable. a. Uncover the rotary aviation socket. b. Connect one of the rotary cables to the socket. You will need to pull back its outer sheath while aligning the 4 holes to their pins. c. Connect the other end of the cable to the motor of the rotary you will be using.
-
Page 64: Preparing Your Material
Operation Preparing Your Material Place your object carefully onto the rotary axis. 2. Use the adjusting knob to adjust the supporting bracket to an appropriate position. Adjusting Knob Turning On Your Engraver § Turning On Your Engraver on Page 47. Loading Your Design §... -
Page 65: Focusing Your Laser
Focusing Your Laser Measure the distance from the upper surface of the rotary base to the upper surface of your object. 2. Enter the offset value in Offset(mm). The Offset value for the 2-inch focus lens will be 86.2 minus this distance in mm. -
Page 66: Uninstalling Your Rotary Axis
Operation Uninstalling Your Rotary Axis Gently move the laser tube and X-axis rail forward. X-Axis Rail 2. Flip the rotary switch up to Standard to activate the Y axis motors and control signals. 3. Disconnect the rotary cable from the rotary aviation socket and then cap the socket. - Page 67 5. Gently move the laser tube and X-axis rail back. 6. Take out your rotary axis. 7. Disconnect the rotary cable from the motor. 8. Replace the honeycomb workbed and the debris tray. 9. Close the cover.
-
Page 68: Instructions For Specific Materials
Operation Instructions for Specific Materials The following instructions are suggestions to help speed safe work with a range of materials. The user should research the specific safety and engraving requirements of their specific material to avoid the risk of fire, hazardous dust, corrosive and poisonous fumes, and other potential problems. Once the product is known to be safe or appropriate protective equipment has been set up, it can be helpful to engrave a test matrix of small boxes produced at various speed and power settings to discover the ideal settings for your design. -
Page 69: Glas
Glass When engraving glass, generally use high power and low speed. As with ceramics, it can be helpful to run more loops at lower settings to avoid cracks. Care must be taken when engraving fiberglass and carbon fiber to avoid combinations of settings that produce a laser intensity great enough to damage the structural integrity of its component fibers, producing blurry markings. -
Page 70: Rubber
Operation Rubber The various compositions and densities of rubber cause slightly varying engraving depths. Testing various settings on sample pieces of your specific rubber is highly recommended for the best results. When engraving rubber, generally use a consistent high-power setting and create your effects by varying the laser’s speed. -
Page 71: Maintenance
Maintenance Maintenance Schedule The use of procedures other than those specified herein may result in hazardous laser radiation exposure. Before any cleaning or maintenance work, always switch off the engraver and disconnect it from its power supply. Always keep the system clean, as flammable debris in the working and exhaust areas constitutes a fire hazard. -
Page 72: Cleaning
Maintenance Cleaning ALWAYS allow any fluid used in any cleaning to dry completely before further use of the engraver. Cleaning the Main Bay and Engraver Check at least once a day whether dust has accumulated in the main engraving bay. If so, it must be removed. - Page 73 Interior of the Main Bay Do not use caustic chemicals or harsh abrasives. Be careful not to allow any electronic component to become wet and let all surfaces dry completely before further use. Do not leave standing water in the tray. Clean the interior of the main bay thoroughly, removing any debris particles or deposits.
- Page 74 Maintenance Removing the left panel requires unplugging its LED light. 3. Remove the screws and remove the panels.
- Page 75 4. Clean the right or left sides of the main bay thoroughly. 5. Replace them using the same screws and then restore the electrical connections. Exterior Do not use caustic chemicals or harsh abrasives. Be careful not to allow any electronic component to become wet and let all surfaces dry completely before further use.
-
Page 76: Cleaning The Camera, Mirrors, And Focus Lens
Maintenance Cleaning the Camera, Mirrors, and Focus Lens Be careful in all of the following steps not to directly touch the surface of any of these windows, mirrors, or lenses with your finger or any dirty, oily, or abrasive surface. Use lens-safe gloves or cloths only. - Page 77 2. Clean the lens of the 3rd mirror and both sides of the focus lens in the same way as the 2nd mirror’s protective windows. 3. Gently remove any other dust or debris from other components inside the laser head and wipe the shell’s holes clean as well.
-
Page 78: Cleaning The Exhaust System
Maintenance Clean the camera Clean the camera lens in the same way. If any permanent spots or debris appear under the camera’s glass lens, it cannot be wiped clean and will require replacing the camera itself. Contact customer or technical support for details. -
Page 79: Cleaning The Cooling System
Cleaning the Cooling System NEVER touch or adjust your engraver’s water supply while your engraver is still connected to power. Your coolant tank should be shielded from ambient dust created during work. If your coolant ever becomes visibly dirty, discontinue work. The debris in the water will reduce its cooling efficiency, can heat up itself, and can damage the cooling pipes. -
Page 80: Refilling The Water Tank
Maintenance Refilling the Water Tank NEVER touch or adjust your engraver’s water supply while your engraver is still connected to power. Always fill the chiller with deionized or distilled water or a custom-purpose laser- safe antifreeze. Using tap water for any purpose but rinsing out cleansers (see §... -
Page 81: Laser Path Alignment
Laser Path Alignment The Polar 350 goes through a complete beam alignment before shipping and its design should keep your mirrors locked into their proper positions at all times. If you wish to test the alignment by using the laser to mark pieces of tape along its path to your material, remember to never place the tape directly on any mirrors or lenses, to never use power levels above 15% to mark the tape, and to never disable the cover’s interlock switches during your testing. -
Page 82: Parts Replacement
Maintenance Parts Replacement ALWAYS completely disconnect the engraver from its power supply before replacing any parts. The engraver should not be modified or disassembled by anyone except trained and skilled professionals, but some consumable parts may require replacement after prolonged use. Be sure only to use identical or compatible replacement parts with this engraver. -
Page 83: Troubleshooting
Troubleshooting Connection The Engraver Can’t Find the Device Through Ethernet Cable Issue After powering the device on and connecting it to the computer with an Ethernet cable, the machine’s name can’t be found in the device list. Solution Please check the Ethernet connection cable. Replug the Ethernet Cable Ensure that both ends are properly plugged in. -
Page 84: The Engraver Can't Find The Device Through Wi-Fi
Troubleshooting The Engraver Can’t Find the Device Through Wi-Fi Issue After connecting the machine to the computer via Wi-Fi, the machine’s name can’t be found in the device list Solution Affected by VPN Close any VPN on your computer and restart the software to connect Software again. -
Page 85: The Engraver Can't Find Device Through Usb
The Engraver Can’t Find Device Through USB Issue After powering the device on and connecting it to the computer with a USB cable, the machine’s name can’t be found in the device list. Solution Check and make sure the connection is secure. Check the USB Cable Connection 2. -
Page 86: Hardware
Troubleshooting Hardware The Laser Tube Won’t Light Up Issue The laser tube won’t light up when trying to process after turning on the engraver. Do not touch the laser tube when it is illuminating. Solution As the laser tube ages, more power will be needed for the same level Adjust the Laser Power of laser activation as before. -
Page 87: The Engraver Won't Fire Laser
Solution Check the Power Have a technician check the power supply of the laser tube or contact Supply of the Laser our customer service support team for further analysis. Tube If none of the above works, the laser tube may be faulty. Please take a Replace the Laser Tube video of the problem, film the troubleshooting steps you have taken, and contact our service team for further assistance. -
Page 88: The Engraver Gets Non-Responsive After Power-On
Troubleshooting The Engraver Gets Non-Responsive After Power-on Issue After the engraver is powered on by the rear switch, it doesn’t give any response. The ammeter display screen, light panel, water pump, motor, etc. won’t work at all. Solution Check the Power Cable Check if the power cable is properly plugged in on both ends. - Page 89 Scenario 1: If smoke evacuation remains poor If the smoke evacuation is still poor after removing the accessory devices, the issue may be related to the installation of the smoke exhaust fan. C h e c k t h e s m o k e Ensure that the smoke exhaust pipe is not pressed or bent, hindering exhaust pipe proper smoke evacuation.
-
Page 90: Not Cutting Through The Material
Troubleshooting Not Cutting Through the Material Issue The engraver won’t fully and effectively cut through the material as expected. Solution For the materials suggested in this manual, you can choose the recommended parameter values for cutting. Check the Processing Parameters For those not suggested, you can get the ideal parameter values after several tests. - Page 91 Solution Use Compatible Some materials are not cuttable with the engraver. For recommended §Material Safety Instructions Material materials, see (Page 5). When the laser path is misaligned, the laser performance may vary significantly in different processing areas. Calibrate the Laser Path Contact our service to guide you on calibrating the laser path if the solutions above don’t work.
-
Page 92: Poor Engraving Results
Troubleshooting Poor Engraving Results Issue When this issue occurs, you may find the engraving performance is not as expected: the pattern appears blurry, and the engraving outcome is excessively darkening or too shallow to be identified. Solution For materials suggested in this manual, you can choose the recommended parameter values for cutting. -
Page 93: Engraving Image Shifts During Processing
Engraving Image Shifts During Processing Issue The engraved image is deviated or won’t close up because of the losing steps in processing. Solution If the processing speed is too fast, it may cause step loss. Lower the Speed of the Engraving Process Please try again by lowering the speed. - Page 96 POLAR 350 50W Desktop Laser Engraver User Manual U S B - 0 5 0 3 - U 3 R e v. 2 7 M a y 2 0 2 4...
Need help?
Do you have a question about the POLAR 350 and is the answer not in the manual?
Questions and answers