
Related Manuals for DCS BH1-48RI-N


Summary of Contents for DCS BH1-48RI-N
- Page 1 OUTDOOR GRILL BH1-48RI-N, BH1-48RI-L, BH1-48RS-N, BH1-48RS-L, BH1-48R-N, BH1-48R-L, BH1-36RI-N, BH1-36RI-L, BH1-36R-N and BH1-36R-L models USER GUIDE US CA...
- Page 2 DANGER IF YOU SMELL GAS • Shut off gas to the appliance. • Extinguish any open flame. • Open lid. • If odor continues, keep away from the appliance and immediately call your gas supplier or your fire department. WARNING! •...
-
Page 3: Table Of Contents
CONTENTS Safety and warnings Installation requirements for Natural Gas Product overview Control panel Planning your cook Setting up the grill Using the grill Using the sear burner (some models only) Using the smoker (some models only) Using the grates Using the rotisserie Accessories Cleaning Cleaning the grill burners... -
Page 4: Safety And Warnings
SAFETY AND WARNINGS To reduce the risk of fire, electrical shock, injury to persons, or damage when using the appliance, follow the important safety instructions listed below: WARNING! Hot Surface Hazard Failure to follow this advice may result in burns and scalds or serious injury. •... - Page 5 SAFETY AND WARNINGS WARNING! Hot Surface Hazard Failure to follow this advice may result in burns and scalds or serious injury. • Use only dry pot-holders; moist or damp pot- holders on hot surfaces may cause burns from steam. Do not use a towel or bulky cloth in place of pot-holders.
- Page 6 SAFETY AND WARNINGS WARNING! Cut Hazard Failure to use caution could result in injury. • Take care: some edges are sharp. WARNING Excessive Weight Hazard Failure to follow this advice may result in injury or death. • Two or more people are required to move and install this unit.
- Page 7 SAFETY AND WARNINGS WARNING! Fire Hazard Failure to follow this advice may result in death or serious injury. • Do not operate the grill under un protected combustible construction. Use only in well ventilated areas. • Cylinders shall be stored outdoors and out of the reach of children.
- Page 8 SAFETY AND WARNINGS To reduce the risk of fire, injury to persons or damage when using the appliance, follow the important safety instructions listed below. Read all the guidance before using the appliance. Do not use an outdoor cooking gas appliance for purposes other than intended.
- Page 9 SAFETY AND WARNINGS Fire Have an ABC rated fire extinguisher accessible – never attempt to extinguish a grease fire with water or other liquids. Never leave the product unattended when in use. Always remove dust cover and open hood before lighting. Do not replace cover during cooking or before appliance has cooled.
- Page 10 SAFETY AND WARNINGS Gas Requirements Do not change the regulator/hose assembly from that supplied with the unit or attempt to use a Type 1 equipped regulator/hose assembly with a standard 510 POL cylinder/ valve assembly. The cylinder pressure relief valve outlet must point away from the user when in use. An installer-supplied gas shut-off valve must be installed in an easily accessible location.
- Page 11 SAFETY AND WARNINGS LP Cylinder Hazards Installation must conform with local codes or with the National Fuel Gas Code ANSI Z223.1 or the CSA-B149.2 Propane Installation Code. This appliance can be used with any brand of 20 lb LP gas cylinder provided it is compatible with a proper retention device (not supplied for built-in installations).
-
Page 12: Installation Requirements For Natural Gas
INSTALLATION REQUIREMENTS FOR NATURAL GAS Natural gas Installation and connection Check with your local gas utility company or local codes for instructions on installing gas supply lines. Be sure to check on type and size of run, and how deep to bury the line. -
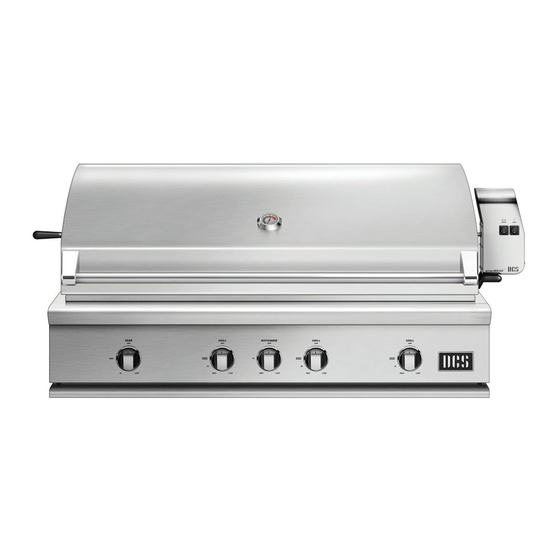
Page 13: Product Overview
PRODUCT OVERVIEW BH1-48RI model illustrated. Features and accessories 1 Sear burner (some models only) 7 Rotisserie rod 8 Rotisserie light 2 Grill burners 9 Rotisserie motor 3 Control panel !0 Secondary cooking area 4 Drip tray and removeable insert !1 Tray (not shown) 5 Temperature gauge 6 Rotisserie burner... - Page 14 PRODUCT OVERVIEW BH1-48RS model illustrated. Features and accessories 1 Side burners (some models only) 7 Rotisserie rod 8 Rotisserie light 2 Grill burners 9 Rotisserie motor 3 Control panel !0 Secondary cooking area 4 Drip tray and removeable insert !1 Smoker tray (some models only) 5 Temperature gauge !2 Tray (not shown) 6 Rotisserie burner...
-
Page 15: Control Panel
CONTROL PANEL BH1-48RI model. BH1-48RS model. Control panel 1 Sear burner dial Use to ignite sear burner and select heat setting. (some models only) 2 Grill burner dials Use to ignite grill burners and select heat settings. 3 Rotisserie dial Use with rotisserie safety valve to ignite rotisserie burner and to select heat setting. -
Page 16: Planning Your Cook
PLANNING YOUR COOK Before using the grill, plan what you want to cook and how you want to cook it. The grill design allows you to tailor your cook with different cooking methods, areas and grate types. For optimal results, take advantage of the entire grill to move food between high and low heat zones at different stages of the cook. - Page 17 PLANNING YOUR COOK Grill burners The grill burners deliver a range of heat intensities. Choose cooking zones and heat settings to cook a variety of foods using direct or indirect heat. Use with radiant trays and double-sided grates to cook and brown food.
-
Page 18: Setting Up The Grill
SETTING UP THE GRILL Before you begin Inspect the gas piping or hose for signs of cuts, wear or abrasion before each use. Replace any damaged parts before using the grill. Season the grates. See 'Using the grates.' 1. Ensure all dials are turned off, then lift the grill hood. -
Page 19: Using The Grill
USING THE GRILL Preheating the grill Preheat each zone according to the heat settings you plan to cook at. There will be minimal heat bleed from high heat to low heat zones. Use high heat for searing and browning, and medium, low or indirect heat to cook food through without burning. -
Page 20: Using The Sear Burner (Some Models Only)
USING THE SEAR BURNER (SOME MODELS ONLY) 1. Make sure the sear burner grate is secured in the hooks at the back of the grill, with its legs on the ledge at the front. 2. Light one burner at a time. Push and turn dial to ignite. - Page 21 USING THE SEAR BURNER (SOME MODELS ONLY) 4. Once browned, move the food to another area of the grill to finish cooking, if required. Turn sear burner dial to OFF. Manual lighting Turn dial to allow gas to flow. At the same time, hold a long match or lighter to the side of the sear burner, in the gap between grates.
- Page 22 USING THE SIDE BURNERS (SOME MODELS ONLY) 1. Remove rotisserie rod and the side burner cover. Take care if grill is in use, as rod and cover may be hot. Lighting the side burners 2. Light one burner at a time. Push and turn dial to ignite.
-
Page 23: Using The Smoker (Some Models Only)
USING THE SMOKER (SOME MODELS ONLY) Use the smoker tray for short-time smoking or to add smoky flavor to food when used on its own or with grill burners or rotisserie. When using the smoker system with the rotisserie burner, set smoker burner to to minimize the heat transfer to the rotisserie tray or position the meat away from the smoker burner. -
Page 24: Using The Grates
USING THE GRATES Seasoning the grates Season all grates before use to protect surface from corrosion and to stop food sticking. Repeat after cleaning or after long periods without use. 1. Apply a light coating of high-heat cooking oil to all grates, then heat on MAX/ with the hood down. - Page 25 USING THE GRATES Double-sided grates Use W-shaped side to create sear lines on food and channel juice and grease away from flame. Use the radius side to support and cook delicate food items like scallops and salmon.
-
Page 26: Using The Rotisserie
USING THE ROTISSERIE The rotisserie delivers intense and even heat to food to achieve a crust on roasts or to slowly cook large food items up to 50 lb. Do not ignite the grill burners while the rotisserie burner is lit. Avoid using the rotisserie in windy conditions. - Page 27 USING THE ROTISSERIE 3. Insert sharp end of rod into rotisserie motor. Rest other end on rollers at opposite side of grill. Rod does not rest on rollers next to motor. 5. Place the tray beneath food to collect drips. Switch on rotisserie motor.
- Page 28 USING THE ROTISSERIE Manual lighting Hold lighter to side of burner, then push and turn dial to Release the dial, and press and hold the safety valve button for 10 seconds or until burner ignites. Turn dial to desired heat. Checking food temperature Turn dial to , switch...
-
Page 29: Accessories
ACCESSORIES For a complete list of accessories, scan the QR code or visit dcsappliances.com/us/accessories. Canada For a complete list of accessories, scan the QR code or visit dcsappliances.com/ca/accessories. -
Page 30: Cleaning
CLEANING General Clean your grill regularly, and after periods without use, to maintain performance. Stainless steel surfaces Clean regularly with mild detergent, kitchen spray or stainless steel cleaner to maintain condition, especially if located near a pool or the coast. Cover when not in use. Secondary cooking rack Allow to cool, then remove from grill and wash with hot water and mild detergent. -
Page 31: Cleaning The Grill Burners
CLEANING THE GRILL BURNERS Grill burners should be removed regularly for cleaning and to check for blockages from food residue and insects. Always turn off gas supply before removing and cleaning burners. 1. Remove grates and radiant trays. Use a flathead screwdriver to loosen clamps, then carefully lift burner up and out of grill. -
Page 32: Cleaning The Sear Burner
CLEANING THE SEAR BURNER Run the sear burner for 10–20 minutes, then allow to cool. The sear burner is self-cleaning, but it can be removed for further cleaning if required. Do not use water as it can damage the sear burner and affect its performance. Always turn off gas supply before removing and cleaning burners. - Page 33 CLEANING THE SEAR BURNER 4. Hold sear burner at the sides and fit burner inlet back into opening at front of grill. Ensure it is aligned correctly on the valve inside the opening. Lower at rear to refit it securely on mount.
-
Page 34: Cleaning The Side Burners
CLEANING THE SIDE BURNERS Side burners should be removed regularly for cleaning and to check for blockages from food residue and insects. Always turn off gas supply before removing and cleaning burners. 1. Allow to cool, then remove grate, burner caps and brass rings. -
Page 35: Leak Testing
LEAK TESTING Do not smoke while leak testing, and extinguish all open flames. Check with a full cylinder and make sure all dials are 1. Open the gas cylinder valve. 2. Apply a soap solution of 1:1 liquid soap and water to all connections, hoses and fittings from the cylinder to the connection at the grill. -
Page 36: Changing The Gas Cylinder
CHANGING THE GAS CYLINDER Inspect the gas connection hose every time you change the gas cylinder. Replace hose if there are any signs of damage. 1. Before connecting new cylinder, check the rubber O-ring. If O-ring is damaged, return it to gas supplier. Do not use damaged cylinder. -
Page 37: Replacing The Light And Battery
REPLACING THE LIGHT AND BATTERY Replacing rotisserie light 1. Disconnect rotisserie motor from power supply. Loosen handles, and lift motor off grill. 2. Unscrew and replace light bulb. The rotisserie uses a 50W (or its equivalent) Max. Halogen Narrow bulb. Refit motor to grill, tighten lugs and reconnect the power supply. -
Page 38: Resetting Flow Limiting Device
RESETTING FLOW LIMITING DEVICE The flow limiting device on the gas cylinder may activate if the cylinder gets cold or is low on gas. This can affect gas flow and heat output and will need to be reset. 1. Turn all burner dials to 2. -
Page 39: Troubleshooting
TROUBLESHOOTING Why is the burner flame yellow/orange? Burner needs to be adjusted. See Install Guide. Why won't the burners light when I turn the dial? Dial not pushed in when attempting to light grill. Push and turn to . See SEAR/MAX 'Using the grill.' Gas supply is turned off. - Page 40 TROUBLESHOOTING Why isn't the rotisserie staying lit when I release the safety valve button? Releasing button too soon. Keep pressing the safety valve button until the rotisserie burner stays lit. Why isn't the rotisserie rotating? Motor is off. Check that motor is switched on and plugged into a GFI outlet. Reset if tripped.
-
Page 41: Customer Care
CUSTOMER CARE Before you call for service or assistance Check the things you can do yourself. Refer to the installation instructions and your user guide and check that: 1 Your product is correctly installed. 2 You are familiar with its normal operation. 3 Model number (can be found on the inside, right side panel behind the drip tray handle). - Page 42 Under our policy of continuous product improvement, these specifications may change at any time. For current details about model and specification availability in your country, please go to our website or contact your local DCS dealer. 431824A 01.24...
Need help?
Do you have a question about the BH1-48RI-N and is the answer not in the manual?
Questions and answers