Table of Contents
Advertisement
Quick Links
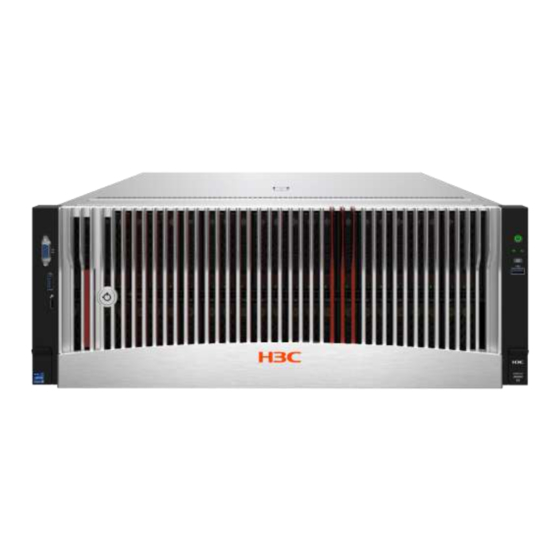
H3C UniServer R6900 G6
Technology White Paper
Copyright © 2023 New H3C Technologies Co., Ltd. All rights reserved.
No part of this manual may be reproduced or transmitted in any form or by any means without prior written consent of New
H3C Technologies Co., Ltd.
Except for the trademarks of New H3C Technologies Co., Ltd., any trademarks that may be mentioned in this document are
the property of their respective owners.
The information in this document is subject to change without notice.
Advertisement
Table of Contents

Related Manuals for H3C UniServer R6900 G6


Summary of Contents for H3C UniServer R6900 G6
- Page 1 No part of this manual may be reproduced or transmitted in any form or by any means without prior written consent of New H3C Technologies Co., Ltd. Except for the trademarks of New H3C Technologies Co., Ltd., any trademarks that may be mentioned in this document are the property of their respective owners.
-
Page 2: Table Of Contents
Contents Overview · · · · · · · · · · · · · · · · · · · · · · · · · · · · · · · · · · · · · · · · · · · · · · · · · · · · · · · · · · · · · · · · · · · · · · · · · · · · · · · · · · · · · · · · 1 Product features ·... - Page 3 Storage controllers and power fail safeguard modules· · · · · · · · · · · · · · · · · · · · · · · · · · · · · · · · · · · · · · · · · · · · · · · · · · · · · · · · · · · · · · · · · · · · · · · 43 Storage controllers ·...
-
Page 4: Overview
Overview The H3C UniServer R6900 G6 server is a new generation of enterprise-grade 4U four-processor rack server developed by H3C. The overall design has been comprehensively optimized based on the previous generation, achieving a new level of computing efficiency, scalability, and low carbon energy saving. -
Page 5: Excellent Scalability And Flexibility
Accommodate up to 64 DDR5 DIMMs with a maximum speed of 4800 MT/s. Support the advanced vector extension instruction set AVX-512, the advanced matrix extension sub-instruction set AMX, and tile matrix MULtiply unit (TMUL). Support PCI Express 5.0 and SAS 4.0, reducing I/O latency and improving overall system performance. -
Page 6: System Diagram
System diagram P0+P1 4*MCIO x8 4*MCIO x8 P1+P2 2*MCIO x8 2*MCIO x8 CPU3 CPU4 P3+P4 P3+P4 4*MCIO x8 4*MCIO x8 UPI0 UPI1 UPI1 UPI2 UPI2 UPI0 UPI1 UPI2 UPI2 UPI0 UPI0 UPI1 CPU1 CPU2 P3+P4 P3+P4 4*MCIO x8 4*MCIO x8 2*MCIO x8 2*MCIO x8 RISER3... -
Page 7: Server Specifications
Server specifications Components Figure 1 Server components Item Description (1) Chassis access panel Provides RAID capability to SAS/SATA drives, including RAID (2) Storage controller configuration and RAID scale-up. It supports online upgrade of the controller firmware and remote configuration. Standard PCIe network Installed in a standard PCIe slot to provide network ports. - Page 8 Item Description (11) Serial & DSD module Provides one serial port and two SD card slots. (12) Server management Provides I/O connectors and HDM out-of-band management features. module (13) System battery Supplies power to the system clock to ensure system time correctness. (14) Riser card Provides PCIe slots for installing PCIe modules.
-
Page 9: Front Panel
Front panel Front panel view Figure 2 Front panel Table 1 Front panel description Item Description Bay 1: 8SFF drives (optional)* Bay 2: 8SFF drives (optional)* Bay 3: 8SFF drives (optional)* LCD smart management module (optional) USB 3.0 connector 8SFF UniBay drives when the 25SFF drive backplane is installed (optional) Drive (optional) Bay 6: 8SFF UniBay drives (optional) Bay 5: 8SFF UniBay drives (optional) -
Page 10: Leds And Buttons
LEDs and buttons Front panel LEDs and buttons Figure 3 Front panel LEDs and buttons Table 2 LEDs and buttons on the front panel Button/LED Status Steady green—The system has started. Flashing green (1 Hz)—The system is starting. ... - Page 11 Button/LED Status managed from HDM. Do not power off the server. 4 Hz—HDM is restarting. To restart HDM, press the UID button LED for eight seconds. Off—UID LED is not activated. Security bezel light The security bezel provides hardened security and uses effect light to visualize operation and health status to help inspection and fault location.
-
Page 12: Ports
Ports Table 4 Ports on the front panel Port Type Description VGA connector DB-15 Connects a display terminal, such as a monitor or KVM device. Connects the following devices: USB flash drive. USB connector USB 2.0/3.0 USB keyboard or mouse. ... -
Page 13: Leds
Item Description Power supply 3 Power supply 1 OCP 3.0 network adapter/Serial & DSD module (in slot 24) (optional) VGA connector Two USB 3.0 connectors HDM dedicated network port (1Gbps, RJ-45, default IP address 192.168.1.2/24) OCP 3.0 network adapter (in slot 23) (optional) Serial label pull tab For more information about the serial &... -
Page 14: Ports
Status Off—No link is present on the port. Flashing green (1 Hz)—The port is receiving or sending data. Activity LED of the Ethernet Off—The port is not receiving or sending data. port Steady green—The power supply is operating correctly. ... -
Page 15: Processor System Board
Processor system board Processor system board components Figure 7 Processor system board components Table 8 System board components Description Mark OCP riser module connector 2/Serial & DSD module connector OCP2 Fan connector for OCP 3.0 network adapter 2 OCP2 FAN TPM/TCM connector... - Page 16 Description Mark PFR expander module connector PFRCPLD Server management module connector PCIe riser connector 1 (x16 PCIe5.0, for processor 1) RISER1 PCIe X16 Fan connector for OCP 3.0 network adapter 1 OCP1 FAN OCP riser module connector 1 OCP1 SlimSAS connector 2 (x4 SATA) SATA PORT2 SlimSAS connector 1 (x4 SATA) SATA PORT1...
-
Page 17: System Maintenance Switch
Description Mark Front VGA and USB2.0 connector LEFT EAR Power connector 8 for the rear drive backplane PWR8 Signal connector for power supplies 3 and 4 PSU34 Power connector 7 for the rear drive backplane PWR7 Power expander module connector for RISER3 and 4, GPU, OCP RISER &... -
Page 18: Processor Mezzanine Board Components
Item Description Remarks On—HDM login requires the default username and password. To restore the default BIOS settings, turn on and then turn off the switch. The server starts up with the default BIOS settings at the next startup. Off (default)—Normal server startup. -
Page 19: Dimm Slots
Table 10 Processor mezzanine board components Description Mark MCIO connector C4-P2C (x8 PCIe5.0, for processor 4) C4-P2C MCIO connector C4-P2A (x8 PCIe5.0, for processor 4) C4-P2A MCIO connector C4-P1A (x8 PCIe5.0, for processor 4) C4-P1A MCIO connector C4-P1C (x8 PCIe5.0, for processor 4) C4-P1C MCIO connector C4-P0C (x8 PCIe5.0, for processor 4) C4-P0C... - Page 20 Figure 10 DIMM slot layout on the Processor system board Figure 11 DIMM slot layout on the processor mezzanine board...
-
Page 21: Hdds And Ssds
For the correspondence between the drive numbering of physical drives on the server and the drive numbering on HDM or BIOS, see H3C UniServer R6900 G6 Server Drive Configurations and Cabling Solutions. - Page 22 NVMe drives support managed hot removal and hot insertion. For information about operating systems that support managed hot removal and hot insertion, use the OS compatibility lookup tool at http://www.h3c.com/en/home/qr/default.htm?id=65. Table 11 SAS/SATA drive LED description Fault/UID LED status...
-
Page 23: Drive Backplanes
Fault/UID LED status Present/Active LED status Description (4.0 Hz) by the RAID controller. The drive is performing a RAID migration or Flashing green (4.0 Hz) rebuilding, or the system is reading or writing data to the drive. The drive is present but no data is being Steady green read or written to the drive. -
Page 24: Front 8Sff Sas/Sata Drive Backplane
Front 8SFF SAS/SATA drive backplane The PCA-BP-8SFF-2U-G6 8SFF SAS/SATA drive backplane can be installed at the server front to support eight 2.5-inch SAS/SATA drives. Figure 16 8SFF SAS/SATA drive backplane (1) x8 SlimSAS connector (SAS PORT 1) (2) AUX connector (AUX) (3) Power connector (PWR) Front 8SFF UniBay drive backplane The PCA-BP-8UniBay-2U-G6 8SFF UniBay drive backplane can be installed at the server front to... -
Page 25: Front 25Sff 17Sas/Sata+8Unibay Drive Backplane
(1) x8 SlimSAS connector (SAS PORT) (2) AUX ( AUX) (7) MCIO connector A1/A2 (PCIe5.0 x8)(NVMe A1/A2) PCIe5.0 x8 description: PCIe5.0: Fifth-generation signal speed. x8: Bus bandwidth. Front 25SFF 17SAS/SATA+8UniBay drive backplane The PCA-BP-25SFF-2U-G6 25SFF drive backplane can be installed at the server front to support twenty-five 2.5-inch SAS/SATA/NVMe drives, including 17 SAS/SATA drives and 8 SAS/SATA/NVMe drives. -
Page 26: Riser Cards
Figure 19 8E1.S drive backplane (1) AUX connector (AUX) (2) MCIO connector A1/A2 (PCIe5.0 x8) (EDSFF-A1/A2) (3) Power connector 1 (PWR 1) (4) MCIO connector A3/A4 (PCIe5.0 x8) (EDSFF-A3/A4) (5) MCIO connector B1/B2 (PCIe5.0 x8) (EDSFF-B1/B2) (6) MCIO connector B3/B4 (PCIe5.0 x8)(EDSFF-B3/B4) PCIe5.0 x8 description: ... -
Page 27: Rc-7Fhhl-4U-G6
For more information about riser cards and installation guidelines, see "Riser cards and PCIe modules." RC-7FHHL-4U-G6 Figure 20 RC-7FHHL-4U-G6 riser card (1) Figure 21 RC-7FHHL-4U-G6 riser card (2) Table 14 RC-7FHHL-4U-G6 riser card description Description PCIe5.0 x16 (8,4) slot 7/14 PCIe5.0 x16 (8,4) slot 6/13 PCIe5.0 x16 (8,4) slot 5/12 PCIe5.0 x16 (8,4) slot 4/11... -
Page 28: Rc-3Fhhl/1Fhfl-4U-G6
Description x16: Connector bandwidth. (8,4): Compatible bus bandwidth, including x8 and x4. NOTE: slot 1/8: When the riser card is installed in PCIe riser card slot 1, this slot corresponds to PCIe slot 2. When the riser card is installed in PCIe riser card slot 2, this slot corresponds to PCIe slot 8. This rule applies to all the other PCIe riser card slots. -
Page 29: Rc-2Fhhl/2Fhfl-4U-G6
Description MCIO connector 2-A MCIO connector 4-C MCIO connector 2-C PCIe5.0 x16 (8,4) description: PCIe5.0: Fifth-generation signal speed. x16: Connector bandwidth. (8,4): Compatible bus bandwidth, including x8 and x4. NOTE: slot 2/9: When the riser card is installed in PCIe riser card slot 1, this slot corresponds to PCIe slot 2. When the riser card is installed in PCIe riser card slot 2, this slot corresponds to PCIe slot 9. -
Page 30: Rc-4Hhhl-R3-4U-G6
Description PCIe5.0 x16 (16,8,4) slot 2/9 MCIO connector 4-A MCIO connector 2-A MCIO connector 4-C MCIO connector 2-C PCIe5.0 x16 (8,4) description: PCIe5.0: Fifth-generation signal speed. x16: Connector bandwidth. (8,4): Compatible bus bandwidth, including x8 and x4. NOTE: slot 2/9: When the riser card is installed in PCIe riser card slot 1, this slot corresponds to PCIe slot 2. -
Page 31: Rc-1Fhhl/1Fhfl-R3-4U-G6
RC-1FHHL/1FHFL-R3-4U-G6 Figure 28 RC-1FHHL/1FHFL-R3-4U-G6 riser card Table 17 RC-1FHHL/1FHFL-R3-4U-G6 riser card description Description PCIe5.0 x16 (16, 8,4) slot 18 GPU power connectors 1 and 2 AUX connector PCIe5.0 x16 (8,4) slot 16 PCIe5.0 x16 (8,4) description: PCIe5.0: Fifth-generation signal speed. ... -
Page 32: Rc-4Hhhl-R4-4U-G6
RC-4HHHL-R4-4U-G6 Figure 30 RC-4HHHL-R4-4U-G6 riser card Table 19 RC-4HHHL-R4-4U-G6 riser card description Description PCIe5.0 x16 (8,4) slot 22 PCIe5.0 x16 (8,4) slot 21 GPU power connector AUX connector PCIe5.0 x16 (8,4) slot 20 PCIe5.0 x16 (8,4) slot 19 PCIe5.0 x16 (8,4) description: ... -
Page 33: Upi Mezzanine Module
UPI mezzanine module When the processor mezzanine module is not installed, install the UPI mezzanine module to form 2-way interconnection. Align the connectors in the blue box areas in Figure 32 Figure 33 with the mid module connectors on the system board. For more information about connectors on the system board, see "Processor system board components."... -
Page 34: Fan Modules
Figure 34 LCD smart management module Table 20 LCD smart management module description Item Description Mini-USB connector Used for upgrading the firmware of the LCD module. Connects the LCD module to the system board of the server. For LCD module cable information about the LCD smart management module connector on the system board, see "Processor system... -
Page 35: Pcie Slot
Figure 35 Fan module layout PCIe slot The server supports installing riser cards and rear 8E1.S drives at the server rear. The PCIe slot numbers vary by configuration. Figure 36 PCIe slot numbering when riser cards are installed at the server rear B/D/F information You can obtain B/D/F information by using one of the following methods: ... - Page 36 Operating system—The obtaining method varies by OS. For Linux, execute the lspci command. For Windows, install the pciutils package, and then execute the lspci command. For VMware, execute the lspci command. NOTE: If the system does not support the lspci command by default, use the yum source to obtain and install the pci-utils package.
-
Page 37: Installation Guidelines
You can install two or four processors. To install only two processors, install them over processor sockets 1 and 2. To avoid damage to a processor or the system board, only H3C authorized or professional server engineers can install, replace, or remove a processor. ... -
Page 38: Sas/Sata Drives
For more information, see NVMe Drives Online Replacement User Guide. If an operating system supports hot swapping of NVMe drives, follow these guidelines: Insert NVMe drives steadily without pauses to prevent the operating system from being stuck or restarted. - Page 39 The SATA M.2 expander module supports building a RAID for SATA M.2 SSDs and RAID 0 and RAID 1 are supported. As a best practice, use SATA M.2 SSDs to install the operating system. Figure 37 SATA M.2 expander module front view (1) SATA data cable connector (2) SATA M.2 SSD card slot 1 Figure 38 SATA M.2 expander module rear view...
-
Page 40: Server Management Module
Figure 39 NVMe M.2 expander module (1) NVMe M.2 SSD card slot 1 (2) NVMe M.2 SSD card slot 2 Server management module The server management module is installed on the system board to provide I/O connectors and HDM out-of-band features for the server. Figure 40 Server management module... -
Page 41: Serial & Dsd Module
(1) VGA connector (2) Two USB 3.0 connectors (3) HDM dedicated management interface (4) UID LED (5) HDM serial port (6) iFIST module (optional) (7) NCSI connector Serial & DSD module The serial & DSD module is installed in the slot on the server rear panel. The module provides two SD slots and forms RAID 1 by default. -
Page 42: Riser Card And Pcie Module Compatibility
HHHL—Half height and half length. HHFL—Half height and full length. Riser card and PCIe module compatibility Guidelines If a processor is faulty or absent, the PCIe slots connected to it are unavailable. For more information about riser card, PCIe slot, and processor mappings, see "Riser cards and PCIe modules."... - Page 43 PCIe5.0 Proce slot 10 FHHL (8,4) ssor 4 PCIe5.0 Proce slot 11 FHHL (8,4) ssor 4 PCIe5.0 Proce slot 12 FHHL (8,4) ssor 2 PCIe5.0 Proce slot 13 FHHL (8,4) ssor 2 PCIe5.0 Proce slot 14 FHHL (8,4) ssor 2 Table 24 Riser card and PCIe module compatibility (2) PCIe PCIe...
- Page 44 Connected to MCIO connector C3-P1C(X16 -A) on the system x8 MCIO Proce SLOT4-A board, connector ssor 3 providing an x16 PCIe link for slot 4 with MCIO connector SLOT4-C Connected to MCIO connector C3-P1A(X16 -C) on the system x8 MCIO Proce SLOT4-C board,...
- Page 45 connector ssor 3 MCIO connector C3-P2A system board, providing an x16 PCIe link for slot 2 with MCIO connector SLOT2-C Connected to MCIO connector C3-P2C system MCIO board, Proce SLOT2-C connector providing an ssor 3 x16 PCIe link for slot 2 with MCIO connector SLOT2-A...
- Page 46 C2-P2C system board, providing an x16 PCIe link for slot 6 with MCIO connector SLOT6-A Table 25 Riser card and PCIe module compatibility (3) PCIe PCIe PCIe slot or module for slot Proc Riser card Riser card PCIe slots on connector PCIe slot...
- Page 47 connector C1-P1A system board, providing an x16 PCIe link for slot 4 with MCIO connector SLOT4-C Connected to MCIO connector C1-P1C system MCIO board, Proce SLOT4-C connector providing an ssor 1 x16 PCIe link for slot 4 with MCIO connector SLOT4-A PCIe5.0 Proce...
- Page 48 connector C2-P2A system board, providing an x16 PCIe link for slot 4 with MCIO connector SLOT4-C Connected to MCIO connector C2-P2C system MCIO board, Proce SLOT4-C connector providing an ssor 4 x16 PCIe link for slot 4 with MCIO connector SLOT4-A Table 26 Riser card and PCIe module compatibility (4) PCIe...
- Page 49 providing an x16 PCIe link for slot 2 Connected to MCIO connector C4-P1A(X16 MCIO -C) on the Proce SLOT2-C connector system ssor 4 board, providing an x16 PCIe link for slot 2 Connected to MCIO connector C4-P2A on MCIO Proce SLOT4-A the system connector...
-
Page 50: Storage Controllers And Power Fail Safeguard Modules
PCIe PCIe PCIe slot or Proc module for slot Riser card Riser card PCIe slots on connector PCIe slot power esso model location a riser card description capabi connector lity board, providing an x16 PCIe link for slot 2 MCIO Connected connector MCIO... -
Page 51: Powerfail Safeguard Modules
Powerfail safeguard modules For some storage controllers, you can order a powerfail safeguard module to prevent data loss when power outage occurs. A powerfail safeguard module provides a flash card and a supercapacitor. When a system power failure occurs, this supercapacitor can provide power for a minimum of 20 seconds. -
Page 52: Installation Guidelines
Make sure the standard storage controllers are of the same vendor (PMC or LSI) on a server. For information about the available storage controllers and their vendors, use the component compatibility lookup tool at http://www.h3c.com/en/home/qr/default.htm?id=66. Configure the storage controllers in the corresponding slots in the following order: slot 5, slot 6, slot 7, slot 1, slot 2, slot 3, and slot 4. -
Page 53: Gpu Modules
For operating systems that support hot swapping of OCP network adapters, use the component compatibility lookup tool at http://www.h3c.com/en/home/qr/default.htm?id=66. For operating systems that do not support hot swapping of OCP network adapters, power off the server, replace an OCP network adapter, and then start up the server. -
Page 54: Fan Modules
Fan modules are hot swappable. Make sure all four fan modules are installed correctly on the server. Power supplies To avoid damage to hardware, use only H3C approved power supplies. The server supports N+N power supply redundancy. ... -
Page 55: Lcd Smart Management Module
11. The following component types occupy PCIe I/O resources: Storage controllers Ethernet adapters Converged network adapters To obtain the component types of PCIe modules, use the component compatibility lookup tool at http://www.h3c.com/en/home/qr/default.htm?id=66. -
Page 56: Product Specifications
Product specifications Technical specifications Item Specifications 4 × Intel ® Xeon ® scalable processors of the fourth generation. Each processor supports up to 60 cores and up to 350 W power consumption per processor Processors Supports Montage Jintide processors Chipset Intel C741 Emmitsburg chipset The graphics chip (model AST2600) is integrated in the BMC management chip to provide... -
Page 57: Operating Environment Requirements
Item Specifications Optical drives External USB optical drives HDM (agentless tool, with dedicated management interface) & H3C FIST Management Supports LCD smart management module Supports chassis intrusion detection, TCM/TPM module, trusted silicon root firmware Security protection module (optional),... -
Page 58: Component Compatibility
Up to 350 W power consumption for each processor. NOTE: For information about processors that are available for purchase, contact the H3C sales representative. Processors configured in a server must be the same model. For more information about the processors, visit the website at http://ark.intel.com. -
Page 59: Guidelines
You can query the memory frequency by selecting Memory Module and query the maximum supported memory frequency by selecting Processor. The actual operating memory frequency is equal to the lesser of the memory frequency or the maximum memory frequency supported by the processors. - Page 60 As a best practice, install DDR5 DIMMs that have the same product code and DIMM specification (type, capacity, rank, and frequency). For information about DIMM product codes, use the component compatibility lookup tool at http://www.h3c.com/en/home/qr/default.htm?id=66. To install components or replace faulty DIMMs of other specifications, contact Technical Support. ...
-
Page 61: Storage
Figure 45 DDR5 DIMM population schemes for four processors (2) DIMM population Processor mezzanine board (processor 4) Processor mezzanine board (processor 3) Number of DIMMs √ ● ● √ ● ● ● ● √ ● ● ● ● ● ● ●... -
Page 62: Supported Operating Systems And Software
SSD expander modules GPU modules Storage controllers For information about the system components that are available for purchase, contact the H3C sales representative. Supported operating systems and software The following are supported on the server: Fourth generation Intel... -
Page 63: Intelligent Management
REPO is used for upgrading servers and their components. In combination with other New H3C software, REPO covers various customer upgrade scenarios, including single node online or offline upgrade and bulk online or offline upgrades. - Page 64 REPO to HDM. Supports various upgrade scenarios including offline upgrade, bulk firmware upgrade, and bulk driver upgrade by mounting REPO to FIST. For more information about other management software, see H3C HDM Technology White Paper at: http://www.h3c.com/en/Support/Resource_Center/EN/Home/Severs/00-Public/Trending/Technolog y_White_Papers/H3C_HDM_Technology_WP/.
-
Page 65: Maintenance
(such as failure report and hardware repair report), sales and purchase consulting, service and policy consulting, and complaint and suggestion platforms. After receiving the network or system failure report, H3C engineers analyze and deal Remote technical with the failures remotely to remove the issues in time. Remote technical support support includes telephone contact and remote access. -
Page 66: Certifications
Certifications Country/Region Certificate Standard GB 17625.1 China GB 4943.1-2011 GB/T 9254.1 (Class A) China SEPA HJ 2507-2011 GB/T26572-2011 China RoHS SJ/T11364-2014 America NTRL-UL UL 62368-1, 2 Ed, Issue Date:2014-12-01 Canada NTRL-UL CSA C22.2 NO.62368-1-14, 2nd Ed., Issue Date:2014-12-01 2011/65/EU Europe RoHS EN IEC 63000:2018 Safety:...
Need help?
Do you have a question about the UniServer R6900 G6 and is the answer not in the manual?
Questions and answers