Table of Contents
Advertisement
Advertisement
Table of Contents

Related Manuals for Xerox WorkCentre XE80


Summary of Contents for Xerox WorkCentre XE80
- Page 1 WorkCentre XE Series XE60/62/80/82 701P98848 9/98...
-
Page 2: Fcc Compliance In The Usa
Consult the dealer or an experienced radio/TV technician for help. Changes or modifications to this equipment not specifically approved by the Xerox Corporation may void the authority granted by the FCC to operate this equipment. Shielded cables must be used with this equipment to maintain compliance with FCC regulations. - Page 3 ©1998 Xerox Corporation. Xerox®, The Document Company®, the stylized X, and the identifying product names and numbers herein are registered trademarks of Xerox Corporation. Xerox Canada Ltd. is the licensee of all the trademarks. Copyright protection claimed includes all forms and matters of copyrighted...
-
Page 4: Table Of Contents
Table of Contents Introduction -------------------------------------------------------------------------------- i Supplies -------------------------------------------------------------------------------- i Information ----------------------------------------------------------------------------- i Service ---------------------------------------------------------------------------------- i Manual Conventions ------------------------------------------------------------------- ii Safety Notes ------------------------------------------------------------------------------ ii Setting Up the WorkCentre ---------------------------------------------------------- 1 Introduction --------------------------------------------------------------------------- 1 WorkCentre Features --------------------------------------------------------- 1 Unpacking the WorkCentre-------------------------------------------------- 4 Removing the Cardboard ---------------------------------------------------- 4 Removing the Shipping Tape ----------------------------------------------- 4 Removing the Shipping Screw---------------------------------------------- 5... - Page 5 WorkCentre XE Properties (Printer Driver)... 33 Displaying the Driver Properties dialog from an application ... 33 Displaying the Properties dialog from the Start Menu ... 34 Displaying the Properties dialog from the Xerox Printer Services Program (Status Monitor) ... 34 Properties Tabs ... 35 On-Line Help ...
-
Page 6: Introduction
To order supplies for your WorkCentre, call or visit your local retailer. If your store does not stock these items, you may call the following number. In the United States and Canada: Xerox SupplyNet toll free at: 1 – 800 – 822 – 2200 Toner Cartridge: 6R916 Copy Cartridge: 13R553... -
Page 7: Manual Conventions
Manual Conventions The following conventions are used throughout this manual: Provides information required to successfully complete an operation or procedure. Caution. You are not to overlook the mentioned points. Safety Notes Your Document WorkCentre XE Series Digital WorkCentre and supplies have been designed and tested to meet strict safety requirements. - Page 8 Safety Notes (continued) This product is equipped with a 3-wire grounding type plug (e.g., a plug having a third grounding pin). This plug will fit only into a grounding-type power outlet. This is a safety feature. To avoid risk of electric shock, contact your electrician to replace the receptacle if you are unable to insert the plug into the outlet.
- Page 9 Safety Notes (continued) Never spill liquid of any kind on the copier. Never remove covers or guards that require a tool for removal. There are no casual operator serviceable areas within these covers. Never defeat interlock switches. Machines are designed to restrict operator access to unsafe areas.
-
Page 10: Setting Up The Workcentre
The maximum copy speed for the Document WorkCentre XE Series Digital WorkCentre XE60/XE62 is 6 copies per minute. The maximum print speed for the Document WorkCentre XE80/XE82 Series Digital WorkCentre is 8 prints per minute. The WorkCentre features a high-capacity paper tray for easy loading of paper, envelopes, label sheets and transparency film. -
Page 11: Unpacking The Workcentre
Unpacking the WorkCentre Your box contains the items shown below. If you are missing any of the items shown, call 1 – 800 – TEAM – XRX (1 – 800 – 832 – 6979). Do not remove the toner cartridge from the foil bag until you are ready to install it in the WorkCentre. -
Page 12: Removing The Shipping Screw
Removing the Shipping Screw DO NOT FORCE THE DOCUMENT COVER. THE WORKCENTRE WILL MALFUNCTION IF THE SHIPPING SCREW IS NOT REMOVED. 1. Remove the shipping screw. 2. Lift the document cover so that the left hinge separates. Remove the restraining strip and reconnect the document cover to the WorkCentre. -
Page 13: The Paper Output Support
Installing the Paper Tray 1. Using two hands (one on each side of the tray), hold the paper tray so that the paper tray guide is facing front. 2. Insert the paper tray into the paper tray slots at the rear of the WorkCentre. -
Page 14: Removing The Protective Paper From The Drum Cartridge
Removing the Protective Paper from the Drum Cartridge attached, carefully remove the cardboard from the drum cartridge. Make sure not to leave any torn pieces of paper in the WorkCentre. 1. Open the front door by pushing in on the front door latches on each side of the front door. -
Page 15: Installing The Paper Tray
Installing the Toner Cartridge PUSH 1. Remove the toner cartridge from its bag, unwrap the tape and remove the protective cover. 2. Shake the toner cartridge four to five times to distribute the toner evenly inside the reservoir. 3. Hold the handle of the toner cartridge (which locks in place) so that the stamped markings are facing upward. - Page 16 4. Gently insert the toner cartridge inside the WorkCentre. 5. Push firmly until the toner cartridge is fully seated and the handle springs slightly back. 6. Close the front door.
-
Page 17: Installing The Toner Cartridge
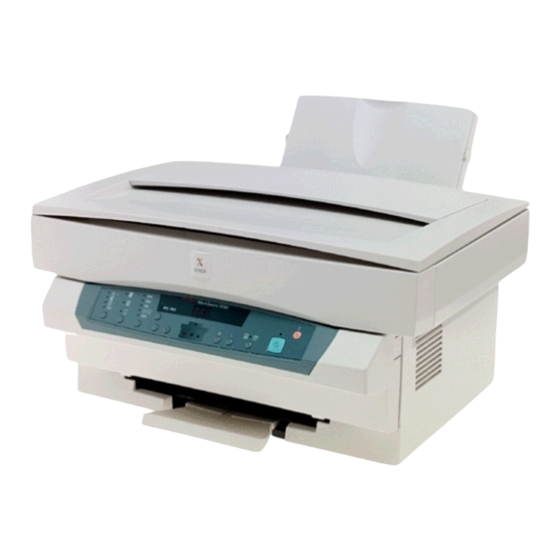
Getting To Know Your WorkCentre 1 Paper tray with extension 2 Control panel 3 Paper output support 4 Front door 5 Front door latch (2) 6 Paper release lever 7 Parallel Cable Port (XE80 and XE82 only. Use only cables labeled IEEE-1284) 8 Power cord socket 9 Power switch (on side) 10 Starter-Toner cartridge... -
Page 18: Installation
Installation Requirements All electrical equipment is potentially dangerous if not installed and operated correctly. Make sure that you meet the following requirements when you set up or move the WorkCentre. 1. Use only the rated voltage from a properly-grounded wall socket. 2. -
Page 19: Connecting The Parallel Cable (Xe80, Xe82)
Connecting the Parallel Cable (XE80, XE82 only) 1. Connect the IEEE-1284 parallel cable to the parallel port on the back of the WorkCentre. 2. Connect the IEEE-1284 parallel cable to the parallel port on the back of the PC. Turn to the Printer Driver Software Installation section in this User Guide to set up the WorkCentre XE for printing. -
Page 20: Copying/Printing
Copying/Printing Selecting Media Paper Specifications Paper Storage For reliable WorkCentre operation and good copy/print quality, Xerox recommends that paper be stored: on a flat surface. in a closed container. in a low humidity area. tightly wrapped, if the ream is partially used. -
Page 21: Paper Tips
Paper Tips will flash in the copy quantity display and the indicator in the WorkCentre diagram will flash when a paper tray is empty. Do not reuse the misfed paper. Close the paper tray. Press Start to make the remaining copies. Do not use envelopes that: - have been fed into the printer before - are composed with glues, inks and adhesive that could discolor,... - Page 22 4. Push the paper release lever back. The paper will be clamped by the paper feed roller inside the printer. The handle may position itself. Do not force the handle or breakage could occur. Paper jams may occur if: The paper tray is overstacked. If the space between the paper guide and the left edge of the paper is greater than 1 mm, or if the paper guide is pushing the paper so hard that the paper buckles.
-
Page 23: Copy/Print Features
Copy/Print Features Control Panel Copy Quality: Select Auto Exposure, Text, Photo or Toner Saver. Use Auto when copying from originals with a colored background. NOTE: When Auto is selected, the copier automatically varies the contrast of your copies. Lighter/Darker settings are not available. Use Text to copy documents containing mostly text. - Page 24 Control Panel (Continued) Reduction/Enlargement: is preset at 50% and is customer programmable (refer to Customizing Your WorkCentre). 78%,129% and 200% are standard reduction/enlargement options. Reduction/Enlargement: The down and up arrows reduce and enlarge in 1% increments. The % button indicates the present percent chosen when pressed.
- Page 25 Control Panel (Continued) On-line/Off-line Button (XE80, XE82 only): Alternates between the On-line and Off-line status. The On-line/Off-line button can be pressed to interrupt a print job to run a copy job. When the copy job is complete, touch the On-line/Off-line button to take it back to print mode or it will revert to print mode automatically after 1 minute.
-
Page 26: Customizing Your Workcentre
Customizing Your WorkCentre Programmable Feature Settings 0 – 7, and 14 To change the programmable features (refer to the Control Panel), find the Program Number and the desired Option Number in the Programmable features chart on the following pages. Follow the instructions below. 1. - Page 27 6. Press Start to store the selection. 7. Press the Clear button to continue making other changes. Press the Copy Quality button to return to the copy. Programmable Features Chart Program Program Number Auto Clear time-out Time-out to Power Save (Part of Power Saver ) Time-out to Power Shut-off (Part of Power Saver )
- Page 28 Programmable Features Chart (continued) Program Program Number Copy Contrast Adjustment: The copy contrast range may be adjusted when the copy image is consistently too light or too dark. Paper Trail Edge Void (4 can be turned off to accommodate originals that have print to the very bottom edge.
-
Page 29: Copying A Page
Copying a Page The basic procedure for copying is described below. 1. Turn on the copier. 2. Raise the Document Cover. 3. Place the original face down on the document glass. 4. Select the number of copies desired using the unit buttons. 5. -
Page 30: Copying While Printing
Copying While Printing In order to perform a copy job while the machine is printing: 1. Set up the copy job while the machine is printing. 2. Press Start. The current page will finish printing, then the copy job will start. -
Page 31: Auto Clear
Auto Clear This copier is enabled at the factory to return to the Normal Copy mode approximately one minute after a job is completed. Unless otherwise programmed, the Normal Copy settings are as follows: Copy Quality – Auto Copy lighter/darker – Normal Priority Magnification –... -
Page 32: Troubleshooting
Troubleshooting Clearing Paper Jams At the Paper Tray E1 Jam 3. Straighten the edges of the stack of paper and then reinsert it into the paper tray. 4. Push the paper release lever back again to secure the paper. 1. Pull the paper release lever at the right of the paper tray toward the front of the WorkCentre. -
Page 33: Inside The Workcentre
Inside the WorkCentre E2 Jam 3. Remove the toner cartridge. 4. Remove any paper that may be inside the WorkCentre. 5. Install the toner cartridge. 6. Close the front door. Paper Exit Area E3 Jam 1. Open the front door by pushing in on the front door latches on each side of the front door. -
Page 34: Workcentre Fault Codes
WorkCentre Fault Codes Fault codes are listed below. If multiple faults exist, only the highest-priority fault code appears in the message display. Press and hold the Start button to display the other codes. The original fault code is redisplayed by releasing the Start button. -
Page 35: Problem Solving
Problem Solving If you have any problems with the operation of your WorkCentre, refer to the table below and on the following pages as well as the WorkCentre Fault Codes. If the problem cannot be solved by carrying out the instructions given below, refer to this User Guide Introduction. - Page 36 Problem The three trouble indicators are flashing in the copier diagram. Jam Drum Toner Frequent copy paper jams. All of the page is blank. Part of the page is blank. Back of the copy/print is dirty. Suggested Solution The machine is in the program mode. Press the Copy Quality mode button to exit.
- Page 37 The following is for the XE80 and XE82 machines only. Problem The WorkCentre does not print. Half of the page is blank. Printing is too slow. Incorrect fonts Suggested Solution Use the IEEE-1284 parallel port cable supplied with the machine. Check the IEEE-1284 parallel cable connection at the WorkCentre and the PC.
-
Page 38: Printer Driver Software Installation (Xe80, Xe82)
WorkCentre XE. This sheet explains how you can: download the necessary software from the WEB site at: http://www.teamxrx.com order floppy diskettes from Xerox. WorkCentre XE Series IBM PC/AT or Compatible Computer Windows 3.1x, Windows 95, Windows 98, Windows NT 4.0... - Page 39 Installation for Windows 3.1x and Windows NT 4.0. 95 or The Printer Driver Installation software cannot be installed using the Control Panel/Printers for Win 3.1x or the Add Printer Wizard for Win 95/98/NT4.0. Please use one of the following methods depending on your operating system.
-
Page 40: Xerox Printer Services Program (Status Monitor)
2. Select Programs 3. Select Xerox WorkCentre XE 4. Click on Status Monitor To use Status Monitor Help: For more information on the Xerox Printer Services Program (Status Monitor), refer to the on-line Help. 1. Click on Start 2. Select Programs 3. -
Page 41: Xerox Printer Services Program (Status Monitor)
2. Double click Xerox WorkCentre XE program group 3. Double click Status Monitor To use Status Monitor Help: For more information on the Xerox Printer Services Program (Status Monitor) refer to the on-line Help. 1. Open Program Manager 2. Double click Xerox WorkCentre XE program group 3. -
Page 42: Workcentre Xe Properties (Printer Driver)
WorkCentre XE Properties (Printer Driver) The purpose of this section is to provide information about how to access and use the options in the Xerox WorkCentre XE Printer Driver Properties dialog. Use the Xerox WorkCentre XE Properties dialog to change the settings used for printing. -
Page 43: Displaying The Properties Dialog From The Start Menu
Displaying the Properties dialog from the Xerox Printer Services Program (Status Monitor) Windows 95, 98 and NT 1. Click on the Properties button in the Xerox Printer Services window Windows 3.1 1. Click on the Properties button in the Xerox Printer Services window 2. -
Page 44: Properties Tabs
It also provides troubleshooting information, in case you should run into any problems. When you have a question simply click on the Help button on the Xerox WorkCentre XE Properties dialog. The main Help Topics window will be displayed. -
Page 45: Creating Workcentre Xe Floppy Disk Installation Diskettes
Creating WorkCentre XE Floppy Disk Installation Diskettes If floppy diskettes are required to install the WorkCentre Printer Driver Software, the user can order floppy diskettes or create a set of diskettes from CD-ROM. To create a set of WorkCentre XE Printer Driver floppy Diskettes, find a PC that has a floppy diskette drive with a CD-ROM drive and follow the procedure below. -
Page 46: Cleaning And Maintenance
Cleaning the Document Glass and Cover Keeping the document glass clean helps ensure the best possible copies. Xerox suggests that you clean the document glass at the start of each day and during the day as needed. Do not pour or spray water directly onto any part of the WorkCentre. -
Page 47: Cleaning The Drum Cartridge
Cleaning the Drum Cartridge If some of the print is missing, you may need to clean the surface of the drum. Because the drum surface is very sensitive, you must take extreme care when cleaning it. Otherwise, it may become damaged and will have a serious effect on the print quality. -
Page 48: Repacking The Workcentre
The WorkCentre cannot be shipped for service without the authorization of a service representative. Visit the Xerox Web site at: http://www.teamxrx.com or call our experts at:1 – 800 – TEAM – XRX (1 – 800 – 832 – 6979) -
Page 49: Consumables
Consumables Replacement of drum cartridges, toner cartridges, and other supplies are customer maintenance responsibilities and are not covered by the warranty. See the warranty. The toner cartridge and the drum cartridge in your WorkCentre are "consumable" parts. This means that after a certain period of use, these parts will need to be replaced. -
Page 50: Toner Cartridge Yield
Toner Cartridge Yield Low printed area The main factor affecting toner cartridge yield is the printed area of a document. The graph is a sample representation of how the number of copies/prints per cartridge decreases as the printed area increases. Other factors which can affect the toner cartridge yield are: The size of the document being copied/printed. -
Page 51: Storage
Storage The toner cartridge and drum cartridge should always be stored in sealed opaque bags to protect them from direct sunlight. Furthermore, the toner cartridge and the drum cartridge should be stored at temperatures of not lower than approximately 0°C (32°F) and not higher than approximately 40°C (104°F). -
Page 52: Drum Cartridge Life
NOTE: Help the environment by recycling your used toner cartridge. Use the recycle sticker packed with the toner cartridge for instructions on returning the used toner cartridge to Xerox. 5. Refer to Installing the Toner Cartridge. Drum Cartridge Life The rated life for the drum cartridge is approximately 18,000 pages, but this can vary depending on how the drum cartridge is handled. - Page 53 NOTE: Help the environment by recycling your used drum cartridge. Use the recycle sticker packed with the drum cartridge for instructions on returning the used drum cartridge to Xerox. 6. Hold the tabs on the drum cartridge handle between your thumbs and index fingers,...
- Page 54 14. Ensure that the WorkCentre power is on. You must hold in the button indicated and close the door at the same time. Continue to hold the button for 3 seconds then release the button. The 3 Copy Contrast LEDs will flash and return to ready state. If the J2 code is still present, repeat the process.
-
Page 55: Appendix
Appendix Technical Data Type Recording system Paper feeding method Paper output User Interface Dimensions Weight Power source Nominal line frequency Power consumption Resolution Copy speed Print Speed Noise Level Operating temperature Operating humidity Usable media sizes Paper weight Paper capacity Desktop Electro-reprographic with semiconductor laser diode... -
Page 56: Warranty
Xerox WorkCentre Copier Three Year Limited Hardware Warranty If you are not satisfied with the performance of the Xerox WorkCentre covered by this warranty, Xerox warrants that, upon your request, it will be repaired or replaced, at your option, during the first two years of the warranty period and that it will be repaired during the third year of the warranty period. - Page 57 The replacement unit we ship to you may be reconditioned by Xerox. The unit that needs service must be packed and returned to us. Upon its receipt, we will release your credit card security. Replacement service is only available during the first two years of the warranty period;...
- Page 58 Service after your three year warranty expires When your three year warranty expires, you can obtain Xerox post warranty coverage maintenance agreements by calling 1-800-TEAM-XRX (1-800-832-6979). We recommend you call 90 days prior to warranty expiration to ensure continuous...
Need help?
Do you have a question about the WorkCentre XE80 and is the answer not in the manual?
Questions and answers