Bolin Technology D Series User Manual
Dante av-h ptz camera
Hide thumbs
Also See for D Series:
- User manual (47 pages) ,
- Manual (47 pages) ,
- Quick start manual (19 pages)

Related Manuals for Bolin Technology D Series


Summary of Contents for Bolin Technology D Series
- Page 1 D Series D2-210H and D2-220H USER GUIDE VERSION: D-1 DANTE AV-H™ PTZ CAMERA D2-210H &D2-220H © 2023 Bolin Technology...
-
Page 2: Table Of Contents
Table of Contents Welcome to Bolin Technology…………………………………………….4 Important Information.................5 What's in the Box? ……………………………………………………………………….. Camera Features & Software Installation ………………………………………. D2- 210 H and D2- 220 Camera Overview……………………………10 IR Remote Control……………………………………………………….11 Camera Installation………………………………………………………11 Ceiling Mount Installation……………………………………………………..13 Wall Mount Installation………………………………………………………..15 Camera Power & HDMI Output Setup ………………………………..16 Power &... - Page 3 Firmware Upgrade…………………………………………………………29 Upgrading Dante AV-H™ Firmware…………………………………………...30 Basic Dante AV-H™ System Setup……………………………………...30 Audinate Dante Controller Overview……………………………………..31 Dante Controller Device Info, Clock Status and Network Status……………32 Dante Controller Device View, Overview………………………………………33 Dante AV-H™ Streaming Workflow Example…………………………………36 Web User Interface Overview………………………………………..37 Settings Menu > Fast Settings…………………………………………………..40 Settings Menu >...
-
Page 4: Welcome To Bolin Technology
Bolin camera. Copyright Copyright 2015-2023 Bolin Technology all rights reserved. No part of this manual may be copied, reproduced, translated, or distributed in any form or by any means without prior consent in writing from our company. -
Page 5: Important Information
Important Information Legal Notice Attention: To ensure account security, please change the password after your first login. We recommend setting a strong password (no less than eight characters). Password login does not apply to certain models. The contents of this document are subject to change without prior notice. Updates will be added to new versions of this manual. - Page 6 Warnings: o If the product does not work properly, please contact your dealer. Never attempt to disassemble the camera yourself. (We will not assume any responsibility for problems caused by unauthorized repair or maintenance.) o This installation should be made by a qualified service person and should conform to all the local codes.
- Page 7 Any updates and content changes will be added to the subsequent new manual version. If there are any concerns, please contact Bolin Support Team at: www.bolintechnology.com Website Reference and other information For related product information please visit Bolin Technology website https://bolintechnology.com/...
-
Page 8: What's In The Box
What’s in the Box? Accessories (Optional) -
Page 9: Camera Features & Software Installation
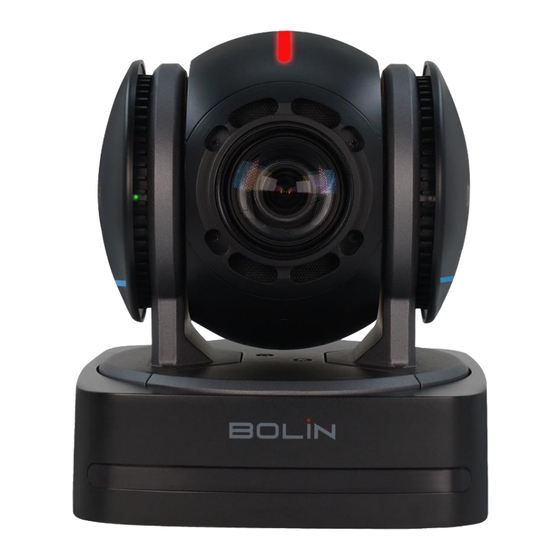
Camera Features & Software This user guide is suitable for the following Bolin Dante AV™ cameras: D2-210 H and D2-220H Camera features o Dante AV™H supports Unicast or Multicast video streaming over a standard 1Gbps Ethernet. o Sony 1/2.8 Inch CMOS sensor, Effective pixel number: 2.13 Megapixels. o Resolution: Up to 1920×1080p60/50/30/25fps. - Page 10 D2-210H Camera Overview 3.5mm audio input DC12V Power input USB2.0 HDMI 1.4 Port RS232/RS422/4 85 Control port LAN/PoE + Ethernet port USB 2.0 Type C Audio / Video IP streaming Note: The D2-210H can be powered using the included power supply adapter, an Ethernet Switch with PoE+ support or PoE+ device.
- Page 11 D2-220H Camera Overview 3G SDI DC12V Power input USB2.0 HDMI 1.4 Port RS232/RS422/485 Control port LAN/PoE + Ethernet port USB 2.0 Type C Audio / Video IP streaming Note: The D2-220H can be powered using the included power supply adapter, an Ethernet Switch with PoE+ support or PoE+ device. The D2-220H does not have a 3.5mm audio input connection.
-
Page 12: Ir Remote Control
IR Remote Control 1 Menu - On Screen Display (OSD) ON/OFF 13. AI only active when AI button is activated. Press the button to turn it on (highlighted when activated) and use the # 2 (I) and 3 (III) to adjust the fan speed of the camera. -
Page 13: Camera Installation
Camera Installation This device is designed for indoor use only. It is not designed to be used outdoors. Do not operate the device in environments where it may meet constant heavy water. Please avoid installing the unit in a location commonly exposed to sunlight for extended periods of time. -
Page 14: Ceiling Mount Installation
Celling Mount Installation Ceiling mount is sold separately. Please follow the diagrams below to install the camera ceiling mount. Required accessories and components: Ceiling Mount brackets and M4*6PW/M3*6PW screws. Bracket A Bracket B Safety Rope M4*6PW M3*6PW Ceiling Mount Installation Install Bracket A at the desired position on the celling. - Page 15 Slide Bracket B with Camera into Backet A Insert M3*6PW screw in the front bracket and M3*6PW in the back of the bracket.
-
Page 16: Wall Mount Installation
Wall Mount Installation Wall Mount is sold separately. Please follow the diagrams below to install the wall mount. Required accessories and components: Wall Mount bracket and M4*6PW screws o Wall mount pendant installation: o Wall mount standard installation... -
Page 17: Camera Power & Hdmi Output Setup
Camera Power & HDMI Output Setup Camera Power o Use only the DC power adaptor (JEITA type4) supplied with the unit. o Do not use any other DC power adaptor. o POE+ (IEEE802.3at) is supported to power the camera. Note: Verify that the POE+ power source has sufficient power to power the camera, or some features may not function properly. -
Page 18: Audio In
Audio IN The D2-210H is equipped with a 3.5 mm MIC/LINE audio input jack on the rear panel. A microphone or audio source can be directly connected to feed audio into the camera. You can select Audio ON/OFF and the input type (MIC / LINE) using the IR remote control Menu (OSD) under SYSTEM. -
Page 19: Camera Control Options & Configurations
Camera Control Options & Configurations Camera Control Options and System Examples There are multiple ways to control the camera using included accessory and /or third-party equipment. This section describes different controlling system examples. o Use the Infrared Remote Control (included) o Use RS-232 (VISCA), VISCA Over IP o Use RS-422/485 (VISCA/PELCO P/D) Use the Infrared Remote Control... - Page 20 VISCA Over IP, Color, Video Format, and IR ID Dip Switch Settings Note: Any DIP Switch changes should be done with the camera turned off. D2-210H / 220H camera bottom view IS A Ov I ON - ON Reserved RS 232 RS 422 7- 8 2400Bps...
-
Page 21: Using Rs-232 (Visca)
Using RS-422(VISCA) You can use RS-422/485 port to connect optional controllers, such as joystick keyboard controller or PC control station, to operate the camera. To perform pan/tilt and zoom operations, use the joystick of the keyboard controller. Preset operation can be done using the control buttons on the keyboard as well. An application software that supports this camera is needed if using a PC station. - Page 22 VISCA (Non-Sony) Keyboard RS422 Connection Use included RJ45 to RS422 Phoenix connecter adaptor to make RS422 connection for your control device. How to make RS422 Daisy Chain multiple camera connection with RS422 standard serial port controller:...
-
Page 23: Pelco P/D Controller Rs485 Connection
PELCO P/D Controller RS485 Connection Note: Use RS422 for RS485 connection. Only use TX+ and TX- for RS485 connection. Set the Dip Switch SW1 pin #6 to ON (RS422 control) Set the Dip Switch SW1 pin # 7-8 to the same Baud Rate as the controller. Set the camera ID on OSD menu via remote control or Dip Switch (SW2 B7 -B8). -
Page 24: Visca Over Ip Control
RS485 multiple cameras connection using a RS485 standard serial port controller Note: RS-232 VISCA control, this unit supports daisy chain connection for using multiple cameras. For control details, refer to the Operating manual of the control controller. o Make sure the communication speed (Baud Rate) matches between the camera and the joystick controller. - Page 25 Communication Specifications of VISCA Over IP: o Interface: RJ-45 100/1000M o Interface protocol: IPv4 o Transport protocol: UDP o IP address: DHCP by default (Settings specify by camera maker) o Port: 52381 by default (Specify by camera/controller maker, refer to camera/controller user guide) Network cable connected to IP port.
-
Page 26: Bolin Controller Visca Over Ip Setup Overview
Bolin Controller VISCA Over IP Setup Overview Push the SETUP button and enter the password (default 0000) Rotate the P/T SPEED knob to move the cursor and select a function. Push the P/T SPEED to make a selection / enter. Rotate the ZOOM SPEED to change /save the setting(s) of a selected... -
Page 27: On Screen Display (Osd) Settings & Options
On Screen Display Settings & Options On Screen Display (OSD) Settings & Options About the On-Screen-Display (OSD) Menus Various settings and options for the camera, like shooting conditions and system setup, can be changed using the OSD menu of a connected visual output device or software. Note: You cannot perform pan/tilt operations while the menu is displayed MAIN MENU To display the main menu, press the MENU button on the supplied infrared remote control, or use Bolin... - Page 28 WB MODE: SVL (Sodium Vapor Lamp): This is a fixed white balance mode specifically for sodium vapor lamps illumination. WB MODE - USER: R GAIN and B GAIN: This mode allows you to manually set the red and blue gain from 0 to up 100 steps.
- Page 29 Learning & Download Center - Bolin Technology Note: The firmware upgrade process is intended to be performed under the supervision of a BOLIN- Authorized repair technician, dealer, installer, or integrator. BOLIN Technology Technical Support can also be reached for assistance.
-
Page 30: Firmware Upgrade
Firmware Upgrade Firmware Upgrade Bolin Dante AV-H™ Firmware is based on the operating software for Dante AV-H™ developed by Audinate and has been optimized for Bolin Dante AV-H™ cameras. Firmware upgrades to Bolin’s Dante AV-H™ cameras are done via IP using Audinate’s Dante Firmware Update Manager software. -
Page 31: Basic Dante Av-H™ System Setup
Dante AV-H™ Basic Setup Basic Dante AV- H™ System Setup Display Monitor D2-210 / D2-220H PTZ camera Bolin camera and controller powered via 1Gbps PoE+ network switch. HDMI / SDI cable direct to display monitor 1Gbps PoE+ Network Switch Dante™ audio devices IR Remote Control Network Cables Bolin PTZ IP controller... -
Page 32: Audinate Dante Controller Overview
Dante Controller Overview Audinate Dante Controller Overview Open Dante Controller on your PC and click on the “Choose a Dante Interface” icon”. Select the network interface that the Dante Controller will use to communicate with other Dante devices. Click on the Refresh icon. All Dante AV Transmitters (TX) and Receivers (RX) devices within the selected network will be listed and available for subscriptions. -
Page 33: Dante Controller Device Info, Clock Status And Network Status
Important Notes: All subscriptions made in the Routing section of the Dante Controller are Unicast (one to one). You can only subscribe (TX to RX) audio channels to audio channels with matching sample rates. You can subscribe (TX to RX) video channels the same way as audio channels. Video channels typically require more bandwidth than audio channels (based on the video format) therefore, a 1Gbps or higher switch port is required. -
Page 34: Dante Controller Device View Overview
Latency Status Notes: If the Latency Status light is green the device does not have a latency issue. All packets are arriving within the set latency setting of the device. An amber light indicates that packets for one or more channels are arriving at, or near the limit of the device latency setting. - Page 35 Device Config tab allows you to configure the selected Dante device with specific parameters. For the Bolin D2 210/220H camera the following options are adjustable: Sample Rate: 44.1K, 48K, 88.2K and 96K Encoding (PCM setting):16, 24 or 32. Unicast Delay Requests: Enabled | Disabled.
- Page 36 Network Config Tab: Bolin D2 210 and 220H cameras do not support Redundancy, and Static addressing. Under View > View Flow Information (Ctrl + F or CMD + F) the Flow Information dialog displays any audio, video, or ancillary flows to and from the selected device. Unicast | Multicast Subscriptions: All subscriptions made in the Routing section are Unicast (one to one).
-
Page 37: Dante Av-H™ Streaming Workflow Example
Dante AV-H™ Streaming Workflow Example D2-210H or D2-220H PTZ camera Display Monitor 4K Display Monitor HDMI / SDI cable direct to display monitor Bolin D20S Transceiver Set to Decoder in this example. 1Gbps PoE++ Network Switch Bolin D412 PTZ camera Network Cables IR control of D412 PTZ camera via... -
Page 38: Web User Interface Overview
Web User Interface Overview Web user interface connection requirements The PTZ camera is powered on (via the DC power adapter or PoE+) and connected to the network switch. The camera’s IP address is located within the same subnet as the PC. The PC is connected to the network switch. - Page 39 Bolin Web Interface Overview Info and Menu Section Display Section Live View Menu: Display the video image, options, controls, settings, and OSD menu of the PTZ camera. Live View Display Section: Toggle between the Main Stream and Sub Stream video image. Play/Pause, Mute, Full Screen, and Picture in Picture function.
- Page 40 Cruise: Create a list of presets to recall with a specific retention time in seconds. 1. Click on the Create button to open the Set Cruise window. 2. Select an ID number (up to 12 available) and name it. 3. Click on the “Start to add preset points” option. 4.
-
Page 41: Settings Menu > Fast Settings
Settings Menu > Fast Settings Device Tab Device tab displays the PTZ camera information and let you name the camera. Click Apply to save. Network Tab Network tab displays the PTZ camera network information, and the option to enter and apply custom network settings when set to Static mode. -
Page 42: Settings Menu > Camera Settings
Settings Menu > Camera Settings Codec Tab Digital Output Tab Same as Fast Settings > Codec tab (detailed above). Select the HDMI | SDI video resolution output of the camera and click Apply. OSD Tab Switch the video image from Main Screen to Sub Screen PTZ camera controls Create and position titles, date, logo, or PNG image (Browser) within the video image frame. -
Page 43: Settings Menu > Image Settings
Settings Menu > Image Settings Exposure Tab Exposure tab let you set the Exposure to: Full Auto, Manual, Shutter Priority, or Iris Priority mode. Note that the parameters below (Iris, Shutter Speed etc.), will adjust automatically based on the mode selection. On/Off BLC (Backlight Compensation), Smart Exposure, and De-Flicker (Off, 50 or 60Hz settings) White Balance Tab... - Page 44 Picture 2 Tab Picture 2 tab let you adjust: Gamma level, Contrast, Saturation, and Brightness with an On/Off option for Wide Dynamic Range (WDR), and level adjustment. Scene Tab Scene tab offers: Scene presets (Default, Brightness, Clear and Soft settings). Defog options: Off, Auto, Manual and Low settings.
-
Page 45: Settings Menu > Audio Settings
Color Matrix Tab Color Matrix tab let you adjust the gain levels of the following colors: Magenta, Red, Yellow, Green, Cyan and Blue (from 0 to 100). Settings Menu > Audio Settings Audio Settings page allows for: Audio Input: Mute On/Off Audio Compression setting: AAC, G711a or G711u Bit Rate selection: 30K, 40K, 48K, 64K, 96K,128K Sample Rate setting: 16K, 32K, 44.1K, and 48K... - Page 46 Port Tab Port tab allows you to adjust: TCP Port: From 1 to 65535 UDP Port: From 1 to 65535 RTSP Port: Set to 554 by default. RTSP is the protocol used to play video in real time over the network, like the VLC Media Player or other network video-compatible software.
- Page 47 SRT Tab (Secure Reliable Transport) tab offers: Stream Type: Main and Sub Stream options SRT Streaming: Enable: Caller, Listener and Rendezvous selection. Caller: Set the source or destination device as the initiator of the SRT streaming session. Note, Caller mode only send to one receiver. 1.
-
Page 48: Settings Menu > System Settings
Device Tab Settings Menu > System Settings Device tab displays basic information about the PTZ camera. Device Name: Give the camera a custom name and click Apply. You might be asked to provide the information from this tab to the Bolin technical team: Model #, Serial #, IP Encoder Version and AF Version. -
Page 49: Settings Menu > Operation Settings
User Tab User tab allows the administrator to add / delete users and change passwords. Settings Menu > Operation Settings Log Tab tab let you search the action log of the PTZ camera (all actions of the camera are saved in the log). - Page 50 Open the IP Finder folder and click on IPCSearch (application). A list of all the connected PTZ camera(s) including the IP address will be listed in the IP Finder window. For any other issues Please visit our website: Bolin Technology - Support • Email: support@bolintechnology.com •...
-
Page 51: Warranty
Warranty Disclaimer Bolin Technology in no event shall be liable to any party or any person for cases including but not limited to the ones below, except for reasonable replacement or maintenance of Bolin products. -
Page 52: Dimensions
Dimensions Unit: Millimeters... - Page 53 2082 TECHNOLOGY LLC BOLIN TECHNOLOGY...
Need help?
Do you have a question about the D Series and is the answer not in the manual?
Questions and answers