
Related Manuals for Bolin Technology SD5SN-M-10162017


Summary of Contents for Bolin Technology SD5SN-M-10162017
-
Page 1: User Manual
SD500 SDI+IP SERIES IR PTZ CAMERA USER MANUAL Part One: Camera User Manual VERSION: SD5SN-M-10162017 © 2017 Bolin Technology... -
Page 2: Table Of Contents
Contents IMPORTANT INFORMATION ............................3 OVERVIEW ..................................5 WHAT’S IN THE BOX................................6 CAMERA DIAGRAMS ............................... 7 INSTALLING YOUR CAMERA ............................8 ..................................9 OWER NPUT ............................... 10 OUNTING THE AMERA USE SDI VIDEO OUTPUT ..............................11 ................................11 TARTING THE AMERA ID, B ...................... -
Page 3: Important Information
Before operating the unit, please read this manual thoroughly and retain it for future reference. Copyright Copyright 2015-2016 Bolin Technology all rights reserved. No part of this manual may be copied, reproduced, translated, or distributed in any form or by any means without prior consent in writing from our company. - Page 4 Safety Information WARNING! Installation and removal of the unit and its accessories must be carried out by qualified personnel. You must read all of the Safety Instructions supplied with your equipment before installation and operation. Warnings: If the product does not work properly, please contact your dealer. Never attempt to disassemble the camera yourself.
-
Page 5: Overview
Overview Model Numbers This user guide is suitable for the following models: If the model numbers that have following letter included in the end, means some extra features included: 1. B Class – Use for broadcasting, SDI video format 1080P and 1080I supported, frame rate up to 60/59.94. -
Page 6: What's In The Box
WHAT’S IN THE BOX Accessories- Optional... -
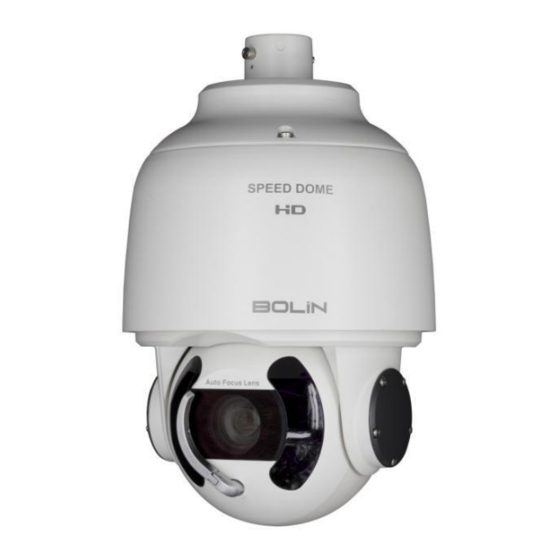
Page 7: Camera Diagrams
Camera Diagrams Camera Tail-Cable All cables are tagged to indicate their functions separately. The cables available may vary with the product model. -
Page 8: Installing Your Camera
Cable Connection NOTE! Use water proof / IP67 rated junction box/ connection box to protect the RJ45 and other connections. A water proof RJ45 connector is available on some models. Installing Your Camera The following diagrams are for your reference only. See the actual product to mount your camera. -
Page 9: Power Input
Cable Requirements Network cable 10/100 Mbps Ethernet CAT 5/5E UTP cables are applicable to the ANSI/EIA/TIA-568A/B and ISO/D. Eight wires in the network cable need to be inserted in parallel into the top of the cable connector. The cable connector needs to be crimped in position. When the cable connector is in position, ensure that the metal pieces of the cable connector are parallel to each other and the clamp of the cable connector is intact. -
Page 10: Mounting The Camera
NOTE: Important: Power supply requirement is 24VAC 2.5 Amp to ensure proper functionality of PT motor and LED illumination. Using power supply lower than 24VAC 2.5Amp will cause camera crashing or insatiability. Power Connector: Phoenix Connector Description 1. The anode and the cathode are not distinguished for phoenix connectors of red and black cables. 2. -
Page 11: Use Sdi Video Output
Wall Mount Install the wall mount bracket. Get the heads of necessary cable (Wall cable) through the bracket from the wall outside of the bracket. Pull the wall cable out through the secure ring. Pull the wall cable out through the adaptor and install the secure ring and adaptor to the bracket. -
Page 12: Setup Camera Id, Baud Rate And Control Protocol
1.1 RS485 (PELCO D) control connection diagram Connect the Camera’s RS485+ and RS485 to RS485/TX+ and RS485/TX- on the control system/keyboard. The identity of the control system or equipment may be different; the corresponding relationship is as follows: RS-485 A RS-485 D+ RS-485 + RS-485 B... -
Page 13: Controlling The Camera
3. Use RS485 Pelco-D can control up to 255 cameras, camera ID from 001 to 255 has to be set. 4. Use RS422 VISCA protocol can control up to 7 cameras, camera ID from 1 to 7 has to be set. 5. -
Page 14: The On-Screen Menu Configuration
The On-Screen Menu Configuration 95 Preset EXPOSURE AE MODE FULL AUTO IRIS PRI CLOSE, F14, F11, F9.6, F8.0, F6.8, F5.6, F4.8, F4.0, F3.4, F2.8, F2.4, F2.0, F1.6 1/1, 1/2, 1/3, 1/6, 1/12, 1/25, 1/50, 1/75, 1/100, 1/120, 1/150, 1/215, 1/300, 1/425, SHUTTER 1/600, 1/1000, 1/1250, 1/1750, 1/2500, 1/3500, 1/6000, 1/10000 s BRIGHT... -
Page 15: Exposure Menu
FUNCTION SETTING PRESET SETUP PRESET NUMBER 001-256 SET NEW PRESET DELETE PRESET EXIT TOUR SETUP SEQUENCE NUMBER DEFAULT DWELL 003-255 EDIT SEQUENCE RUN CONTIONOUSLY EXIT PATTERN SETUP PATTERN NUMBER RECORD NEW PATTERN 003-255 RUN CONTIONOUSLY EXIT SCAN SETUP PANNING NUMBER SET LEFT LIMIT SET RIGHT LIMIT DEFAULT SPEED... -
Page 16: White Balance Menu
WIDE-D (Wide dynamic range mode): Wide Dynamic: ON, OFF. The camera distinguishes light and dark areas within the same scene, adjusts the brightness for dark areas, and also controls the blown out highlights. You can select the wide dynamic range mode between ON and OFF. DEFOG: Defog: ON, OFF. - Page 17 LENS PARAMETERS Menu EXPOSURE The LENS PARAMETERS menu is used to set the items related to the lens. WHITE BALANCE PICTURE 〉LENS PARAMETERS DIGITAL ZOOM: SYSTEM SETUP Digital zoom: ON, OFF. When DIGITAL ZOOM is set to on, it can use the digital FUNCTION SETTING zoom.
-
Page 18: Video Format
FACTORY DEFAULT: FACTORY DEFAULT The menu is used to restore the factory settings. DISPLAY CONFIGURATION DISPLAY CONFIGURATION: >INTERFACE SET FLIP: OFF Entered the menu of DISPLAY CONFIGURATION, it will be shown the below SDI VIDEO: 1080P30 items: IP VIDEO: 1080P ZOOM LENSPOSITION: VIDEO FARMAT: 1080P30 PROPORTIONAL PT: ON... - Page 19 PROPORTIONAL PT: Proportional pan automatically reduces or increases the pan and tilt speeds in proportion to the amount of zoom. At telephoto zoom settings, the pan and tilt speeds will be slower for a given amount of joystick deflection than at wide zoom settings.
- Page 20 In order to use the special functions of the camera, the following presets are predefined for specific functions (You can find the default predefined preset at Web interface, Setup -> PTZ -> Advanced Settings): Preset number Set / call Function description Lens Reset Call Open back light...
- Page 21 PATTERN NUMBER: The current pattern number that you are managing. RECORD NEW PATTERN: Set up the above pattern. 1. Push the joystick to the right to enter this setting menu. 2. Move the camera to the start position you want, and then call the preset 1 to save. 3.
-
Page 22: Use Ip Video Output
Use IP video output Setting Camera Over the LAN To view and configure your camera via the local area network (LAN), you need to install the VMS (Video Management System to access IP camera. 1. Connect your camera and your PC as shown in the figure below to ensure the routing is available. 2. -
Page 23: Installing The Activex
Accessing Your Camera Before you begin, please check: 1. Make sure the self-test is completed. 2. Your camera is operating properly and connected to the network. 3. The PC client you are using is installed with Internet Explorer 8.0 or higher. 4. -
Page 24: Dimensions
Dimensions Unit: mm... -
Page 25: Specifications
Specifications... - Page 27 2082 TECHNOLOGY LLC BOLIN TECHNOLOGY...
Need help?
Do you have a question about the SD5SN-M-10162017 and is the answer not in the manual?
Questions and answers