Table of Contents
Advertisement
Quick Links
~HA<O>
Model:
A-3
Model:
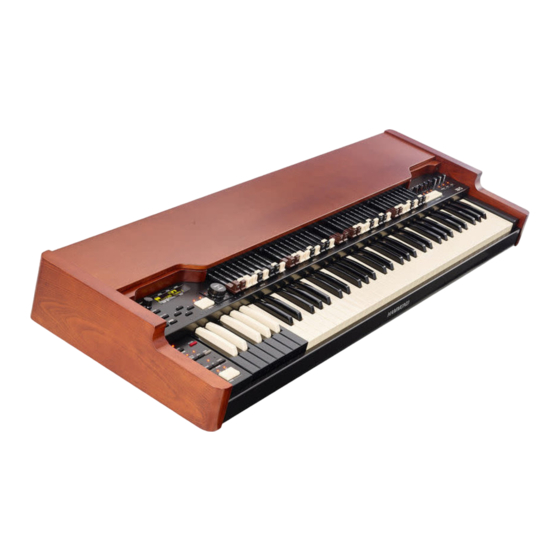
Thank you, and congratulations on your choice of the Hammond XK-5
/ A-3 Organ
The XK-5 / A-3 is an all-new instrument which produces the sound and
contains the features of a classic Hammond "Tone Wheel" organ,
Please take a moment to review this manual thoroughly in order to famil-
iarize yourself with the features of this instrument as well as the installa-
tion procedures. Keep this manual for future reference.
UPPER
PEDAL
LOWER
BANK KEY
PATCH
OWNER'S PLAYING GUIDE
Advertisement
Table of Contents

Subscribe to Our Youtube Channel
Related Manuals for Hammond A-3


Summary of Contents for Hammond A-3
- Page 1 Thank you, and congratulations on your choice of the Hammond XK-5 / A-3 Organ The XK-5 / A-3 is an all-new instrument which produces the sound and contains the features of a classic Hammond “Tone Wheel” organ, Please take a moment to review this manual thoroughly in order to famil- iarize yourself with the features of this instrument as well as the installa- tion procedures.
-
Page 2: Important Safety Instructions
IMPORTANT SAFETY INSTRUCTIONS Read these instructions. Only use attachments/accessories specified by the manufacturer. Keep these instructions. Use only with the cart, stand, tripod, bracket, or table specified by the manufacturer, or sold Heed all warnings. with the apparatus. When cart is used: use cau- tion when moving the cart/apparatus combi- Follow all instructions. - Page 3 If the fuse cover is lost, the plug must not be used until a replacement cover is obtained. A replacement fuse cover can be obtained from your local Hammond Dealer. IF THE FITTED MOULDED PLUG IS UNSUITABLE FOR THE SOCKET OUTLET IN YOUR HOME, THEN THE FUSE SHOULD BE REMOVED AND THE PLUG CUT OFF AND DISPOSED OF SAFELY.
-
Page 4: Important - Please Read
Unfortunately, it may be impossible to restore the contents of data that was stored in another MIDI device (e.g., a u Placement sequencer) once it has been lost. Hammond assumes no u Using the unit near power amplifiers (or other equipment liability concerning such loss of data. -
Page 5: Introduction
INTRODUCTION HA<O> XK-5 Owner’s Playing Guide... -
Page 6: Table Of Contents
CUSTOM PEDAL REGISTRATION PARAMETERS ........54 SINGLE MANUAL WITH MIDI PEDAL CLAVIER ............26 CREATING & RECORDING A CUSTOM PEDAL REGISTRATION .......55 SPECIAL NOTE - MODEL A-3 ...............26 NAMING A CUSTOM PEDAL REGISTRATION ............56 PERCUSSION ....................57 TURN ON & PLAY ........27 PERCUSSION Edit Menu (PERCUSS) ............58... - Page 7 u WHAT IS A “CUSTOM LESLIE CABINET?” ...........73 u Example: RECORD TO D#-D (U32) ............113 LESLIE Edit Menu ..................74 ASSIGNING PATCHES (FAVORITES) ............114 u CABINET NUMBER ....................74 WHAT IS A “FAVORITE?” ..................114 u CUSTOM LESLIE CABINET PARAMETERS ..........74 USING THE PRESET KEYS TO STORE FAVORITES ..........
- Page 8 RECORD AND PLAYBACK ..................140 u Recording to a sequencer/DAW along with a synthesizer ..... 140 u Playing back a performance ..............140 u Recording a performance to a computer DAW over USB....141 u Recording a performance using the XLK-5 XPK-250nd 141 ..141 u Recording a performance including External Zones over USB ..
-
Page 9: Main Features
B-3 and C-3. The unique “touch” of a Vin- tage Hammond, where the different harmonics sound in sequence as a key is pressed, is now at your fingertips. All of the iconic Hammond performance techniques or “Moves” used by legendary Hammond players have the familiar response and sound. -
Page 10: Feature Callout
FEATURE CALLOUT CONTROL PANEL ㉖ ㉗ ❽ ㉘ UPPER PEDAL LOWER ❹ ❶ ❾ BANK KEY PATCH ㉕ ❷ ❻ ❼ ❸ ㉓ ㉔ ❺ ❿ ⓬ ⓮ ⓯ ⓰ ⓫ ⓭ ⓱ ⓲ ⓳ ㊺ ㉑ ㉒ ⓴ ⓬ RECORD Touch Button u UPPER LEFT ❶... - Page 11 ㉙ ㉚ ㉟ ㊱ ㊲ ㊳ ㊵ ㊷ ㊹ ㉛ ㉜ ㉝ ㉞ ㊶ ㊴ ㊸ ㉞ THIRD/SECOND Touch Tab u VIBRATO AND CHORUS ㉓ UPPER Touch Tab Selects “SECOND” or “THIRD” Percussion harmonic. (P. 57) Turns the Vibrato/Chorus “ON” for the Upper Manual. (P. 70) u MASTER EQUALIZER ㉔...
-
Page 12: Accessory Panel (Recessed)
❷ CU-1 jack Connect the CU-1 Leslie mode switch. ❶ ❷ ❸ ❸ H-BUS jack Connect an XLK-5 Lower keyboard or XPK-250 Pedal Clavier using a Hammond -BUS cable. HEAD CU-1 PHONES TO KEYBOARD PEDAL ACCESSORIES ❶ AC POWER CORD ❶... -
Page 13: Rear Panel
L/MONO terminal. (P. 18) ❻ MIDI IN 1/PEDAL port ⓭ HEADPHONES jack Use to connect the MIDI OUT of a Hammond Pedal Clavier such Use to connect a set of stereo headphones. as an XPK-200L. (P. 130) NOTE: The HEADPHONE jack does not mute the LINE OUT or ❼... -
Page 14: Sound Engine Structure
SOUND ENGINE STRUCTURE Virtual Tonewheel Set Upper Keyboard Pedalboard Lower Keyboard Percussion Pedal Lower Upper Drawbars Drawbars Drawbars Matching Pedal V&C Vibrato & Chorus Transformer Exp. Multi Effect 1 Tube 1 Expression Overdrive Tube 2 switched if Leslie on Reverb Master Leslie Reverb... - Page 15 MATCHING TRANSFORMER The Matching Transformer on a tone-wheel Hammond Organ matches the low impedance of the Tone Wheels and key circuits to the high impedance amplifier input. It serves also, through taps on its primary winding, to establish a series of intensity levels for the Drawbars. This feature reproduces these characteristics digitally.
- Page 16 ***THIS PAGE INTENTIONALLY LEFT BLANK TO PRESERVE PAGE FORMATTING *** HA<O> XK-5 Owner’s Playing Guide...
-
Page 17: Making The Connections
MAKING THE CONNECTIONS HA<O> XK-5 Owner’s Playing Guide... -
Page 18: Basic Connections
BASIC CONNECTIONS IMPORTANT: Make sure both the instrument and amplifier are “OFF” before connecting amplifiers or headphones. Connect audio cables and accessories as shown below. Tne XK-5 is not self-contained - an external amplifier/speaker system is required in order to hear the sound. However, if you connect a set of stereo headphones to the HEADPHONES jack, you can hear the sound through the headphones even if an external amplifier is not connected. -
Page 19: Connecting The Controllers
CONNECTING THE CONTROLLERS CONNECTING THE EXPRESSION PEDAL u CONNECTING AN EXP-100F Connect the EXP-100F to the EXP. PEDAL jack. NOTE: In order to use the EXP-100F Expression Pedal, the EXP- UPPER PEDAL LOWER SOURCE switch in the CONTROL Edit Menu must be set either to “EXP. -
Page 20: Connecting A Leslie Speaker
CONNECTING A LESLIE SPEAKER A Leslie speaker with an 11-pin interface can be directly connected to this keyboard. CONNECTING A SINGLE-CHANNEL LESLIE SPEAKER UPPER PEDAL LOWER BANK KEY PATCH BASIC CONNECTION 1. Set the LESLIE - EXT. LESLIE CH at “1.” See page 76 for instructions on how to do this. 2. -
Page 21: Basic Connection
CONNECTING A MULTI-CHANNEL LESLIE SPEAKER UPPER PEDAL LOWER BANK KEY PATCH 11-pin Leslie Cable MIDI Cable (if needed) BASIC CONNECTION eslie speakers are equipped with a Stationary speaker system, independent of the Rotary channel to provide direct Multi-channel L organ sounds. To connect a multi-channel Leslie Speaker such as the model 2101 or 2101mk2, do the following: 1. -
Page 22: Expanding The Xk-5
EXPANDING THE XK-5 The XK-5 Drawbar Keyboard can be made into a complete console organ by connecting an external keyboard and pedal clavier. 2 MANUALS AND PEDALS (USING XLK-5 AND XPK-250) HEAD CU-1 PHONES TO KEYBOARD PEDAL XLK-5 CU-1 XPK-250 H-BUS 1. -
Page 23: Manuals And Pedals (Using Midi Keyboard & Pedal Clavier)
XLK-5 The diagram on the left shows where to position the rubber feet on the bottom of the XK-5 to match the Hammond keyboard you wish to use as a Lower Manual. Use a #2 Dotted for Phillips screwdriver to unscrew and relocate the feet if necessary. -
Page 24: Manuals With Xlk-5 Lower Manual
2. Turn the power to the instrument “ON.” H-BUS Upstream -BUS This keyboard uses Hammond’s new interface which supplies both DC power and data transfer using a single con- nection. -BUS IMPORTANT: Use the cable provided with this -BUS... -
Page 25: Manuals With Midi Keyboard
2 MANUALS WITH MIDI KEYBOARD UPPER UPPER PEDAL PEDAL LOWER LOWER BANK KEY BANK KEY PATCH PATCH Use Expression cable on Use Expression cable on XLK-3 and XLK-B3. XLK-3 and XLK-B3. MIDI Keyboard MIDI Keyboard MIDI OUT MIDI OUT 1. Connect the cables as shown in the diagram above. -
Page 26: Single Manual With Midi Pedal Clavier
All of the feature descriptions with the exception of the SPLIT feature apply equally to the XK-5 single-manual instrument and the A-3 Organ. Since the A-3 is a complete two-manual-and-pedal organ, the SPLIT feature does not apply. It is not needed due to the dedicated Lower Manual of the A-3. -
Page 27: Turn On & Play
TURN ON & PLAY HA<O> XK-5 Owner’s Playing Guide... -
Page 28: Power On
POWER ON HOW TO POWER ON Follow the procedures below for powering on your XK-5. UPPER PEDAL LOWER NOTE: In order to avoid possible damage, be sure you have connected a sound source - either a keyboard amplifier or a Leslie Speaker cabinet - before powering the XK-5 “ON.” BANK KEY PATCH 1. -
Page 29: Using Controllers
USING CONTROLLERS Expression Pedal The Expression Pedal controls the overall volume or loudness of the organ. Press forward with the front of your foot to increase the volume and back with your heel to decrease the volume. NOTE: The performance of the Expression Pedal can be tailored in various ways. -
Page 30: Make Your Own Sound
MAKE YOUR OWN SOUND In this section you’ll see how to create your own sound. This example is that of a classic jazz organ. SELECT THE “B” Preset Key UPPER PEDAL LOWER BANK KEY PATCH First, select the “B” Preset Key (LED lit). The “A#”... -
Page 31: Pull Out The "B" Drawbars
[THIRD], [FAST], [SOFT]) “ON” (red LEDs lit). “UPPER” and “LOWER” MANUALS The diagram on the left shows the basic traditional configuration of a Hammond Organ. On tone-wheel Hammond Organs of the “B-3” type, pipe organ terminology was used - the Upper Manual (Keyboard) was the “Swell,” and the Lower Manual (Keyboard) was the “Great.”... -
Page 32: Add Effects
MAKE YOUR OWN SOUND - continued ADD EFFECTS ADD EFFECTS u VIBRATO AND CHORUS These controls add the Hammond Vibrato/Chorus effect to the sound. [UPPER], [LOWER] Touch Tabs Turn the Vibrato & Chorus effect “ON”(LED lit) or “OFF” for each Manual. UPPER... -
Page 33: Split - Divide The Keyboard By Parts
SPLIT - DIVIDE THE KEYBOARD BY PARTS The XK-5 has only one Manual, but by using the SPLIT feature it can be made to perform as if it were a two-manual instrument. [SPLIT] Touch Button To use the SPLIT feature, press the [SPLIT] Touch Button and the LED will turn “ON.”... - Page 34 ***THIS PAGE INTENTIONALLY LEFT BLANK TO PRESERVE PAGE FORMATTING *** HA<O> XK-5 Owner’s Playing Guide...
-
Page 35: Information Center
INFORMATION CENTER HA<O> XK-5 Owner’s Playing Guide... -
Page 36: Information Center
INFORMATION CENTER All of the parameters and controls not accessed by the top panel Rotary Knobs and switches are here. UPPER PEDAL LOWER BANK KEY PATCH There are 3 modes - “PLAY,” “MENU” and “FUNCTION.” The PLAY Mode allows you to graphically see Drawbar PLAY Mode settings, Patch Numbers and Patch Names. -
Page 37: Play Mode
PLAY MODE The PLAY Mode is the normal performance mode. The information necessary for ordinary performance will be displayed. PLAY Mode is normally displayed when the instrument is first powered “ON.” However, if you need to locate this mode from another display mode, touch the [PLAY] Touch Button. HOW TO READ THE DISPLAY Drawbar Registration UPPER / PEDAL / LOWER... -
Page 38: Menu Mode
MENU MODE The MENU Mode provides a directory of all the various functions. To locate this Menu, press the [MENU/EXIT] Touch Button. You will see the first screen (“A”) of the MENU Mode. There are 6 pages in the MENU Mode, labeled “A” through “F.” Each page has up to four items. Select the item you wish to edit using the direction buttons, then press the [ENTER] Touch Button to enter the FUNCTION Mode for each item. -
Page 39: Menu Mode Contents
MENU MODE CONTENTS MENU E MENU A 1. SAVE 1. DRAWBAR This allows you to save a Setup to a USB Flash Drive or Internal This allows you to set the parameters for the Drawbars of each Manual. Memory. (P. 148) (P. -
Page 40: Function Mode
FUNCTION MODE Each Menu selection has a FUNCTION Mode which allows you to control the individual parameters for each selection. The general procedure is the same for all Menu selections. Read the sections below to see how to navigate through FUNCTION Mode. HOW TO READ THE DISPLAY Indicates other pages below or above the current pages.. -
Page 41: Shortcuts
SHORTCUTS To make programming quicker and easier, each button or tab on the control panel can be used to access the FUNCTION Mode Menu page associated with that button instantaneously. Pressing and holding any of the buttons on the top panel automatically “shortcuts” the display to the related FUNCTION Mode item. SHORTCUT EXAMPLE: LOCATE THE PERCUSSION FUNCTION Mode If you wish to edit the Percussion settings, Press and Hold any... -
Page 42: How To Change Parameters
HOW TO CHANGE PARAMETERS EXAMPLE: ADJUST THE [FAST] PERCUSSION DECAY TIME ENTER PERCUSSION FUNCTION MODE LOCATE THE MENU Mode UPPER PEDAL LOWER UPPER PEDAL LOWER BANK KEY PATCH BANK KEY PATCH Press the [ENTER] Touch Button to enter Percussion FUNC- Press the [MENU/EXIT] Touch Button. - Page 43 RETURN TO PLAY MODE UPPER PEDAL LOWER BANK KEY PATCH Press the [PLAY] Touch Button to return to the PLAY Mode. RECORD TO THE PATCH IF DESIRED UPPER PEDAL LOWER BANK KEY PATCH The parameter “DECAY FAST” is a Patch Parameter. If you select a different Patch, the setting for the [DECAY FAST] Touch Tab may change also.
-
Page 44: Display Lock Mode
DISPLAY LOCK MODE You can lock the display to avoid accidentally changing something in the midst of playing. To do this, follow the instructions below. To lock the display, 1. Press and Hold the [] and [] Touch Buttons. UPPER PEDAL LOWER 2. -
Page 45: Drawbars & Percussion
DRAWBARS & PERCUSSION HA<O> XK-5 Owner’s Playing Guide... -
Page 46: Harmonic Drawbars
HARMONIC DRAWBARS™ The XK-5 has 4 sets of nine Drawbars, two for each manual. The Harmonic Drawbars are the heart of the renowned Hammond Sound and have been used since the first Hammond Organ Model A was introduced in 1935. -
Page 47: Drawbars For Upper And Lower Manuals
16´ fundamental. NOTE: The Colors of the Drawbars are traditional to Hammond, and were established to provide a quick visual guide to the har- monics generated by the Drawbars. -
Page 48: Drawbar Registration Patterns
Notice that Drawbar registrations are expressed in number groups of 2, 4 and 3. This “2-4-3” number formula for Drawbar Registration has been a Hammond convention since the beginning. It has been found to be the easiest way to convey a specific setting. The first two numbers correspond to the two brown Drawbars of either manual. -
Page 49: Modern Drawbar Registrations
Hammond Organ. Later on, as the Hammond Organ spread throughout Jazz, Pop, Rock and (especially) Gospel music, Some timeless registrations become common. -
Page 50: Match The Registration To The Drawbar Setting
MATCH THE REGISTRATION TO THE DRAWBAR SETTING When you recall a Patch, the Drawbar registration stored in the Patch will be heard, regardless of the actual Drawbar settings. If you move any Drawbar, its position will automatically change to its physical position, The rest of the Drawbars will remain at their Patch settings if you do not move them. -
Page 51: Pedal Sustain
PEDAL SUSTAIN When the [PEDAL SUSTAIN] Touch Button is “ON,” the Pedal tones will smoothly decay upon release, much in the manner of a string bass. This is a popular option for playing the Pedal tones. [PEDAL SUSTAIN] Touch Button Turns PEDAL SUSTAIN “ON”(LED lit) and “OFF.”... -
Page 52: Drawbar Edit Menu
On the earliest model Hammond Organs, the The bottom key on the keyboard is displayed as “1C.” The setting range is “1C” to “2C.” Sub-Fundamental Drawbar (the one marked, ❻... -
Page 53: Pedals
❽ UPPER ZONE OCTAVE This allows you to select the octave in which the Drawbars will sound for the Upper Manual. You can select “-2” (up to two octaves down) through +2” (up to two octaves up). ❾ UPPER ZONE LOW ❿... -
Page 54: Ped. Reg (Pedal Registration) Edit Menu
REGISTRATION?” setting range is “F1” to “F3” (non-rewritable) and “U1” to “U3” (rewritable). On a tone-wheel Hammond Organ, the harmon- ic resources for Pedal tones are combined into NOTE: The “F” stands for Factory. Factory settings are permanently stored in memory two Drawbars each of which draws a combina- and cannot be changed. -
Page 55: Creating & Recording A Custom Pedal Registration
CREATING & RECORDING A CUSTOM PEDAL REGISTRATION The Pedal Registration parameters can be saved as a Custom Pedal Registration. To record a Custom Pedal Registration, do the following: LOCATE THE MENU Mode UPPER PEDAL LOWER UPPER PEDAL LOWER BANK KEY PATCH BANK KEY PATCH... -
Page 56: Naming A Custom Pedal Registration
NAMING A CUSTOM PEDAL REGISTRATION After you have created and saved a Custom Contact, you may give it a unique name if you wish. To do this: LOCATE THE MENU Mode SELECT THE PED.REG NAME PAGE UPPER PEDAL LOWER UPPER PEDAL LOWER BANK KEY... -
Page 57: Percussion
PERCUSSION An important component of the Hammond Sound is “Touch-Response Percussion Control™.” The Percussion controls on the XK-5 consist of four separate tabs, located immediately to the right of the Drawbars, which control har- monic Percussion tones playable from the Upper Manual. They control all the same functions as the tilt tablets on a tone-wheel Ham- mond. -
Page 58: Percussion Edit Menu (Percuss)
The volume level of the Drawbars will be reduced by 3 decibels, or a small amount, when Percussion is “ON” at Normal volume. This replicates the original Hammond Organs with Touch-Response Percussion Control. OFF: The volume of the Drawbars will stay at the same level, or “0db, ” when Percussion is “ON” at Normal volume. This replicates later Hammond Organs with Percussion. -
Page 59: Drawbar Organ Type
DRAWBAR ORGAN TYPE The Drawbars on the XK-5 can be made to control other organ sounds other than traditional Hammond Drawbars. Several makes of combo organs, for example, also used Drawbar-type slider controls to register the sounds, which were actual organ voices rather than individual harmonics as with Hammond Drawbars. -
Page 60: Drawbar Organ Type - "Farf
u DRAWBAR ORGAN TYPE - “Farf” The “Farf ” Drawbar Organ Type allows you to use the Drawbars to register the sound of a vintage Italian combo organ. The figure below shows how the Drawbars are allocated in “Farf ” mode. The above configuration follows the layout of the “Combo Compact”... -
Page 61: Drawbar Organ Type - "Pipe
u DRAWBAR ORGAN TYPE - “Pipe” The “Pipe” Drawbar Organ Type allows you to use the Drawbars to control the voices of a classical pipe organ. The figure below shows how the Drawbars are allocated in “Pipe” mode. IMPORTANT NOTE: When “Pipe” mode is activated, the Drawbars will function similar to drawstops on a traditional pipe organ - pull- ing a Drawbar “out”... -
Page 62: Pipe Edit Menu
PIPE Edit Menu This Menu Page a allows you to change the characteristics of the Drawbar Pipe Voices. To locate this Menu, follow the steps below: DRAWBARS MENU/EXIT ENTER ❶ CUSTOM PIPE NUMBER (P) SELECTING A PIPE VOICE TO EDIT This allows you to select the Custom Pipe Number to use in a Patch. - Page 63 ❻ PIPE VOICE CHIFF WHAT IS “CHIFF?” This allows you to set the amount of Chiff or attack for each individual Pipe Voice. There are two classifications of or- gan pipes based on the method You can select “OFF” (no Chiff), “SOFT” (sounds the chiff noise slightly), “MID” (medium amount used to produce sound.
-
Page 64: Creating & Recording A Custom Pipe
CREATING & RECORDING A CUSTOM PIPE The Pipe parameters can be saved as a Custom Pipe. To record a Custom Pipe, do the following: LOCATE THE MENU Mode UPPER PEDAL LOWER UPPER PEDAL LOWER BANK KEY PATCH BANK KEY PATCH Press the [MENU/EXIT] Touch Button. -
Page 65: Naming A Custom Pipe
NAMING A CUSTOM PIPE After you have created and saved a Custom Pipe, you may give it a unique name if you wish. To do this: LOCATE THE MENU Mode SELECT THE CUSTOM PIPE NAME PAGE UPPER PEDAL LOWER UPPER PEDAL LOWER BANK KEY... -
Page 66: Split
SPECIAL NOTE If you have the model A-3 or XK Heritage series, this section does not apply to you. The SPLIT feature is disabled for these instruments. Also, the SPLIT feature is disabled if an XK-5 is connected to a Lower Manual such as the XLK-5 or XLK-3, or if a a MIDI keyboard is connected and used as a Lower Manual. -
Page 67: Octave
OCTAVE u OCTAVE This feature allows you to select the Octave range in which the Manual will play. You can select “-2” (up to two octaves down) through +2” (up to two octaves up). SPLIT OCTAVE [OCTAVE] Touch Buttons Raises or Lowers each Manual by up to two octaves. w To raise the Upper Manual, press the [UP] Touch Button. - Page 68 ***THIS PAGE INTENTIONALLY LEFT BLANK TO PRESERVE PAGE FORMATTING *** HA<O> XK-5 Owner’s Playing Guide...
-
Page 69: Drawbar Effects
DRAWBAR EFFECTS HA<O> XK-5 Owner’s Playing Guide... -
Page 70: Vibrato & Chorus
On a tone-wheel Hammond Organ equipped with Vibrato & Chorus, the vibrato circiutry consists of a series of plural coils or low-pass filter sections called a “delay line” or “line box” and a motor-driven “scanner” which, as the name implies, scans the delay line and progres- sively retards the phase, creating the Vibrato effect. -
Page 71: Vibrato & Chorus Edit Menu (Vib&Cho)
❶ TYPE Hammond tone-wheel organs with Vibrato & Chorus were manufactured from 1949 through 1975. During that time, several different types of vibrato circiuts were employed, particularly line boxes of different construction. The Vibrato TYPE feature creates the effect of different types of Vibrato delay lines. -
Page 72: Leslie
LESLIE The Hammond XK-5 has a built-in digital Leslie effect that replicates the sound of a twin-rotor Leslie Speaker cabinet. In addition, the instrument can also be used with a variety of different Leslie Speaker cabinets. u WHAT IS THE LESLIE EFFECT? When the Hammond Organ was first introduced in the mid 30’s, the sound-producing apparatus was not contained within the console. -
Page 73: Leslie Parameters
LESLIE PARAMETERS The Hammond XK-5 has a special group of Leslie Parameters. Using these special Leslie features, you can define different character- istics of how the built-in digital Leslie effect will perform. The Leslie Parameters are: 1. Slow Speed for both Horn and Bass Rotor. -
Page 74: Leslie Edit Menu
This allows you to select the virtual speaker type. 145: Leslie 145, small rotary speaker system 147: Leslie 147, large rotary speaker system 122: Leslie 122, large rotary speaker system PR-40: Hammond PR-40, stationary speaker system HA<O> XK-5 Owner’s Playing Guide... - Page 75 ❹ / ⓭ SLOW SPEED - HORN / DRUM (L) These allow you to set the rotor speed for the Slow or Chorale Mode: SLOW FAST SLOW FAST STOP mode. The setting range is 0, 24 to 318 rpm. ❺ / ⓮ FAST SPEED - HORN / DRUM (L) These allow you to set the rotor speed on the “FAST”...
-
Page 76: External Leslie Speaker
u EXTERNAL LESLIE SPEAKER ㉖ LESLIE CHANNELS This allows you to select the channel setting for the Leslie speaker connected to the LESLIE 11-PIN jack. 1ch: For connecting a single-channel Leslie Speaker cabinet such as a 122XB, 3300/3300W or 981. 3ch: For connecting a 3 channel Leslie such as a model 2101 or 2101 mkII. -
Page 77: Creating And Recording A Leslie Cabinet
CREATING AND RECORDING A LESLIE CABINET The Leslie Parameters (= 2 - 11 of the previous page) can be saved as a Leslie Cabinet. To record a Leslie Cabinet, do the following: LOCATE THE MENU Mode UPPER PEDAL LOWER UPPER PEDAL LOWER BANK KEY... -
Page 78: Naming A Leslie Cabinet
NAMING A LESLIE CABINET After you have created and saved a Custom Contact, you may give it a unique name if you wish. To do this, do the following: LOCATE THE MENU Mode SELECT THE LESLIE NAME PAGE UPPER PEDAL LOWER UPPER PEDAL... -
Page 79: Overdrive
OVERDRIVE Overdrive adds distortion to the sound by increasing the pre-amplifier input gain. On the XK-5, the Overdrive feature is controller by an “ON / OFF” button and a Rotary Knob for controlling the amount of Overdrive. The [OVERDRIVE] Touch Button must be “ON” in order to hear the Overdrive effect. -
Page 80: Temporary Equalizing (Master Equalizer)
TEMPORARY EQUALIZING (MASTER EQUALIZER) u WHAT IS “EQUALIZATION?” “Equalization” is a term used by sound engineers to describe changes or alterations they make to the character of sound. For example, if a piano is being “miked,” (its sound output being picked up by a microphone) and the tone needs to sound brighter or to have more bass, a sound engineer can increase or decrease the level of individual “frequency bands,”... -
Page 81: Equaliz (Equalizer)
An Equalizer is used to adjust the tonal quality. The XK-5’s built-in Equalizer consists of 3 bands and a digital implementation of the “tone control ” found on the preamp of a tone-wheel Hammond Organ. The Bass and Treble bands are handled by “shelf ”... -
Page 82: Multi Effects
MULTI EFFECTS The XK-5 has a number of “Multi Effects” which you can use to enhance the Drawbar and Percussion tones. u MULTI EFFECTS There are 8 Multi Effects which can be applied to the Drawbar and Percussion tones. Tremolo - Raises and lowers the amplitude or volume at a determined rate. Auto Pan - Moves the sound back and forth between Left and Right channels. -
Page 83: Amp/Eff (Pre-Amplifier / Multi-Effects)
❶ TUBE - ROUTING The purpose of the Matching Transformer in This allows you to select the route of the Tube Preamp signals. a Hammond tone-wheel organ is to “match” the low Impedance of the generator and key Value Pre Expression Tube Post Expression Tube circuits to the high impedance amplifier input. -
Page 84: Multi Effects
⓫ OVERDRIVE - EXPRESSION Level This allows you to set the response of Overdrive to an Expression Pedal. EX-OD: Overdrive effect increases/decreases along with Volume. OD-EX: Overdrive effect remains constant, Expression Pedal increases/decreases Volume. OD ONLY: Volume remains constant, Expression Pedal increases/decreases the amount of Overdrive. INPUT: Expression Pedal attenuates INPUT level to Overdrive effect. - Page 85 Auto Pan “Auto Pan” smoothly shifts the sound back and forth between Left and Right channels. NOTE: This Multi-Effect requires that both Left and Right channels be connected via the LINE OUT jacks Left Right ⓮ ⓯ ⓰ ⓱ ⓯ AUTO PAN - WAVEFORM Rate This allows you to set which waveform to modulate the direction.
- Page 86 Ring Mod. “Ring modulation” is a signal-processing effect whereby two different frequencies are mixed together in such a way as to eliminate, as much as possible, the individual frequencies themselves, leaving only the sum and the difference of the two frequencies. In analog circuits, this is accomplished by arranging diodes in a circle or ring, giving rise to the term, “ring modulator.”...
- Page 87 Phaser “Phaser” will create the effect of splitting an audio signal into two paths and varying their phase relationship to each other, resulting in an alternately hollow and full-bodied sound. It can be described as a “swooshing” or “twisting” effect. ⓲...
- Page 88 Flanger “Flanging” occurs when two identical signals are mixed together, and one of the signals is time-delayed by a very small amount. The small time delay produces peaks and valleys in the harmonic structure of the sound, resulting in a sweeping effect sometimes referred to colloquially as a “Jet Airplane”...
- Page 89 NOTE: Do not confuse this Chorus with the Hammond Vibrato/Chorus effect. The Chorus Multi-Effect, as mentioned, is non-peri- odic or “random” sounding. With the Vibrato Chorus, a “cycle” is clearly audible. The parameters described below DO NOT affect the Vibrato Chorus.
- Page 90 Delay “Delay” adds echo effects. ⓲ ⓮ ⓯ ⓰ ⓱ ⓯ DELAY - TYPE Level TYPE = MONO Original Signal Select the type of delay here. E ect Signal MONO: A simply monophonic “echo. ” RtoL, LtoR: The delay is alternated in the stereo field. At RtoL the delayed sound comes from the right, and Feedback at LtoR from the left.
-
Page 91: Reverb
REVERB REVERB (or Reverberation) is the prolongation or persistence of sound caused by sound bouncing or reflecting off of hard surfaces such as floors, walls or ceilings. It is measurable by the interval of time required for the sound to decay to inaudibility after the source of the sound has been stopped. -
Page 92: Reverb Edit Menu
REVERB Edit Menu This Edit Menu allows you to make changes to the Reverb. To locate this Menu, follow the setps below: MENU/EXIT ENTER Or, Press and Hold the [REVERB] Touch Button. ❻ ❸ ❹ ❺ ❶ ❷... -
Page 93: Custom Tone Wheels
CUSTOM TONE WHEELS HA<O> XK-5 Owner’s Playing Guide... -
Page 94: Custom Tone Wheels
4 teeth, others have 8, 16, 32, 64, 128, up to 192 teeth. On a B-3-type organ, only 91 of the 96 wheels generate musical notes - five of the wheels are blanks, or wheels having no teeth, to maintain mechanical balance. On later Hammond models such as the H-100 and X-77-series, the last 5 tone wheels are cut with 256 teeth, allowing them to play frequencies 91 through 96. -
Page 95: What Are "Custom Tone Wheels
Because of these many factors - again, some real, some contrived - and because different people therefore mean different things when they say “Hammond Sound” or “B-3 Sound,” the Custom Tone Wheel feature is included to allow you to find the nearest approximation of what you want your “Hammond Sound”... -
Page 96: Cust. Tw Edit Menu
CUST. TW Edit Menu This Edit Menu allows you to select from among a library of different Tone Wheel settings as well as create your own Custom Tone Wheels. To locate this Menu, follow the steps below: ENTER MENU/EXIT ❹... - Page 97 ❹ ❼ ❽ ❹ ❺ ❻ ❸ Soft Loud ❷ Coil Tone-wheel Magnet ❶ Level Adjustment ❺ LEVEL (TW) DECIBEL (dB) This allows you to set the volume of the selected Wheel. A “decibel” (abbreviated “db”) is a unit for measuring the level of audio waves.
-
Page 98: Creating And Recording A Custom Tone Wheel
CREATING AND RECORDING A CUSTOM TONE WHEEL The arameters described on the previous pages can be saved as Custom Tone Wheel. To save a Custom Tone Wheel, do the following: LOCATE THE MENU Mode UPPER PEDAL LOWER UPPER PEDAL LOWER BANK KEY PATCH BANK KEY... -
Page 99: Naming A Custom Tone Wheel
NAMING A CUSTOM TONE WHEEL After you have created and saved a Custom Tone Wheel, you may give it a unique name if you wish. To do this: LOCATE THE MENU Mode INPUT THE NAME UPPER PEDAL LOWER UPPER PEDAL LOWER BANK KEY PATCH... - Page 100 ***THIS PAGE INTENTIONALLY LEFT BLANK TO PRESERVE PAGE FORMATTING *** HA<O> XK-5 Owner’s Playing Guide...
-
Page 101: Virtual Multi- Contacts
VIRTUAL MULTI- CONTACTS HA<O> XK-5 Owner’s Playing Guide... -
Page 102: Contacts Of A Tone-Wheel Organ & Virtual Multi-Contacts
WHAT IS A “CUSTOM CONTACT?” On a tone-wheel Hammond Organ, the 9 switches close in the same order. This is due to the physical placement of the busbars for each harmonic under the playing keys. However, you can customize the Virtual Multi-Contacts so that they close in any order you wish - from top to bottom, from bottom to top, all at once, etc. -
Page 103: Contact Edit Menu
CONTACT Edit Menu This Edit Menu allows you to change how the Virtual Multi-Contacts function and to save your changes as a Custom Contact. To locate this Menu, follow the steps below: ENTER MENU/EXIT ❸ ❹ ❺ ❻ ❼... -
Page 104: Condition
Contact on the keyboard of the XK-5 or XLK-5. The setting value is 1--3. Physical contact 1 will sound first, then 2 then 3. NOTE: The Hammond pedal claviers such as the XPK-250 have only one physical contact; therefore, this value does not apply to the Pedal tones.. -
Page 105: Creating And Recording A Custom Contact
CREATING AND RECORDING A CUSTOM CONTACT The Contact Parameters (= 2 - 11 of the previous page) can be saved as Custom Contacts. To record a Custom Contact, do the following: LOCATE THE MENU Mode UPPER PEDAL LOWER UPPER PEDAL LOWER BANK KEY PATCH... -
Page 106: Naming A Custom Contact
NAMING A CUSTOM CONTACT After you have created and saved a Custom Contact, you may give it a unique name if you wish. To do this: LOCATE THE MENU Mode SELECT THE CONTACT NAME PAGE UPPER PEDAL LOWER UPPER PEDAL LOWER BANK KEY PATCH... -
Page 107: Patches & Favorites
PATCHES & FAVORITES HA<O> XK-5 Owner’s Playing Guide... -
Page 108: Patches
PATCHES WHAT IS A “PATCH?” The Hammond XK-5 has, in addition to Drawbar settings, many ways to customize and tailor those settings. In the organ world, this mixing, blending and tailoring of sounds is called Registration. In the keyboard and synth world, a sound or group of sounds and effects is called a Patch. -
Page 109: User And Factory Patches
USER AND FACTORY PATCHES The settings you have prepared can be recorded to User Patches. USER AND FACTORY Bank A Bank D Bank C Bank C Adjust Presets Patches A “VALUE” in PLAY mode Favorite Table Preset Keys There are two categories of Patches on the XK-5 - Factory and User. -
Page 110: Patch Edit Menu
PATCH Edit Menu This Edit Menu allows you to customize the characteristics of the Patches. To locate this Menu, follow the steps below: ENTER MENU/EXIT ⓱ ⓲ ⓳ ⓴ ㉑ ㉒ ⓯ ⓰ ❼ ❾ ❿ ⓫ ⓬ ⓭... -
Page 111: Patch Load
u PATCH LOAD Allows you to select which components of the instrument will be saved as part of a Patch. ❻ PATCH LOAD - PEDAL TO LOWER (B) Allows you to select whether to load Pedal parameters when a LOWER Patch is recalled. ❼... -
Page 112: Patch Banks
UPPER PEDAL LOWER WHAT ARE “PRESET KEYS?” A feature unique to Hammond Organs is a set of twelve keys identical to the Bank A playing keys except reversed in color. These keys are not playing keys, but BANK KEY PATCH... -
Page 113: Record The Patch To Memory
RECORD THE PATCH TO MEMORY All the previous settings can be recorded to any Patch within the The Patch can be recorded by using Preset Keys when the Favorite range of U00 to U99. is “OFF” (P. 111). u Example: RECORD TO U32 u Example: RECORD TO D#-D (U32) UPPER PEDAL... -
Page 114: Assigning Patches (Favorites)
Patch.. NOTE: The “C” Preset Key is also called the Cancel Key. It silences the manuals on a tone-wheel Hammond Organ. Although you can record a Preset into the “C” Preset Key, the factory setting replicates that of a tone-wheel organ - no sound will be heard if the “C”... -
Page 115: Switching "Favorite" On And Off
SWITCHING “FAVORITE” ON AND OFF 1. LOCATE THE MENU Mode 4. LOCATE THE PRESET KEY PAGE UPPER PEDAL LOWER UPPER PEDAL LOWER BANK KEY PATCH BANK KEY PATCH Press the [MENU/EXIT] Touch Button to display the menu. If the above message does not display, press [PLAY] then [MENU/ Press the [] Touch Button four times, and the [] Touch Button EXIT]. -
Page 116: Assign A Patch To A Preset Key ("Favorite")
ASSIGN A PATCH TO A PRESET KEY (“FAVORITE”) Assignment Patches to the 100 Preset Bank/Key (“C-C” to “A-A,” except A < and B) regarding your playlist or changing scene in the song. 1. SET THE FAVORITE SWITCH TO “ON.” Make sure that the “FAVORIT” switch is set to “ON.” Refer to the previous page for instructions on how to do this. 2. -
Page 117: Naming A Patch
NAMING A PATCH INPUT THE NAME LOCATE THE MENU Mode UPPER PEDAL LOWER UPPER PEDAL LOWER BANK KEY PATCH BANK KEY PATCH Press the [MENU/EXIT] Touch Button. MENU Mode will be You can enter a name using up to 10 characters. displayed. - Page 118 ***THIS PAGE INTENTIONALLY LEFT BLANK TO PRESERVE PAGE FORMATTING *** HA<O> XK-5 Owner’s Playing Guide...
-
Page 119: Special Advanced Features
SPECIAL ADVANCED FEATURES HA<O> XK-5 Owner’s Playing Guide... -
Page 120: Transpose
TRANSPOSE This feature allows you to shift the musical key of the entire instrument. This is useful if you have a piece of music written in one key but which needs to sound in another key. TRANSPOSE will step either up or down six (6) semitones or half-steps from the center position. The TRANSPOSE feature consists of the [TRANSPOSE] Touch Button, plus the [DOWN] and [UP] Touch Buttons immediately to the right of the [TRANSPOSE] Touch Button. -
Page 121: Tune
TUNE This Edit Menu allows you to fine-tune the overall pitch of the entire instrument up or down. To locate this Menu, follow the steps below: MENU/EXIT ❶ u MASTER TUNE ❶ MASTER TUNE This parameter changes the overall tuning pitch of the entire instrument. The reference pitch is “A-440.” The selectable range is from “A-430”... -
Page 122: Control Edit Menu
CONTROL Edit Menu This Edit Menu allows you to select the parameters for the various controls that you prefer. NOTE: Please insure that the Expression Pedal and Foot Switch are properly connected before adjusting their settings. To locate this Menu, follow the steps below: CONTROL ENTER ... -
Page 123: Expression
A, B=, etc) while the Chord Type is the denomi- nation of the chord (Major, Minor, etc.) This allows you to set the Foot Switch function for the Foot Switch on Hammond Expres- sion Pedals EXP-100F and EXP-250. Played as... -
Page 124: Damper
㉗ ㉘ ㉙ ㉒ ㉓ ㉔ ㉕ ㉖ ⓳ ⓴ ㉑ ⓱ ⓲ ⓮ ⓯ ⓰ ⓫ ⓬ ⓭ ❹ ❺ ❻ ❼ ❽ ❾ ❿ ❶ ❷ ❸ ⓭ GLIDE - AMP (P) DAMPER Engages a “fade” along with the Glide, where the volume drops in tandem with the pitch On an acoustic piano, pressing the right-most to total silence. -
Page 125: Display
㉓ ASSIGNABLE DRAWBARS (S) ASSIGNABLE DRAWBARS This is for switching whether or not to assign special MIDI functions to the Lower Manual The XK-5 can control the external MIDI equip- “B” Drawbar set. ment using the External Zone (P. 137). In that case, the function to use the LOWER “B”... -
Page 126: Using Expression And Leslie Mode
Using EXPRESSION and LESLIE MODE Expression and Leslie Mode can be operated by more than one control. Occasionally the status shown may be different from the actual status. For example, if you are using a CU-1 switch to control Leslie Mode, pressing one of the {LESLIE} tabs may result in a speed set- ting different from the CU-1 switch position. -
Page 127: Default
DEFAULT This Edit Menu Menu allows you to reset the XK-5 to factory-default settings. To locate this Menu, follow the steps below: ENTER MENU/EXIT ❺ ❻ ❼ ❽ ❶ ❷ ❸ ❹ To initialize each parameter, select the parameter you want to ini- tialize with the [][] Touch Buttons and press the [ENTER] ❼... -
Page 128: System Edit Menu
Use a storage device such as a USB Flash Drive or external hard drive. This shows whether an EXP-100F Expression Pedal is connected. u PERIPHERAL DEVICE NOTE: This jack is intended for the Hammond EXP-100F ONLY. Other devices will not be recognized. ❸ IS ACTIVE - XLK u SOFTWARE VERSION This shows whether the Lower Manual (e.g. -
Page 129: Midi/Usb
MIDI/USB HA<O> XK-5 Owner’s Playing Guide... -
Page 130: Midi/Usb
MIDI/USB WHAT IS “MIDI?” MIDI is an acronym for Musical Instrument Digital Interface. MIDI is the musical instrument industry standard for allowing electronic musical instruments to communicate with one another, as well as with other elctronic devices such as computers, sequencers, effects, lighting and sound reinforcement gear, etc. In addition, instruments made by different manufacturers to effectively communicate with each other. -
Page 131: What Is A "Midi Channel
SYSTEM MESSAGE w SYSTEM EXCLUSIVE MESSAGE Transmits data unique to Hammond Products. This is done by means of a MIDI Dump, which transmits all unique Hammond informa- tion (Sysx) data to an external sequencer. NOTE: More information can be found by consulting the MIDI Implementation Chart in the APPENDIX at the back of this Guide. -
Page 132: Midi Structure
MIDI STRUCTURE The XK-5 can transmit and receive MIDI data on Keyboatd Channels as well as transmit MIDI data on External Zones. The following diagram and the paragraphs below explain this in more detail. u KEYBOARD CHANNELS The Keyboard Channels are both MIDI IN and MIDI OUT - that is, they transmit MIDI information played on the Upper, and Lower Manuals and Pedal, and respond to incoming MIDI data as well. -
Page 133: Expanded Keyboards
u EXPANDED KEYBOARDS A Lower Manual and Pedal Clavier attached via MIDI can play the sounds from the XK-5 internal sound engine and can also trans- mit MIDI Data via the MIDI OUT jack using both Keyboard Channels and External Zones. HA<O>... -
Page 134: Using External Midi Equipment
USING EXTERNAL MIDI EQUIPMENT You can control external MIDI equipment with the XK-5, both as a single-manual and as an expanded instrument. BASIC CONNECTION 1. Connect the MIDI cables as shown in the figure at left 2. Go into the MIDI Edit Menu and select “Use.Ex,xxx” as a Set the MIDI template MIDI Template. -
Page 135: Midi Edit Menu
MIDI Edit Menu This Edit Menu allows you to set the overall MIDI parameters for the instrument and and perform a MIDI Dump operation. To locate this Menu, follow the steps below: MENU/EXIT ENTER ⓳... -
Page 136: Keyboard Channel
SYSTEM EXCLUSIVE MESSAGE ⓳ DEVICE ID This allows you to set the Device ID when transmitting System Exclusive (Sysx) messages such as Memory Dump (#21, 22). Hammond’s ID number is 55h.) HA<O> XK-5 Owner’s Playing Guide... -
Page 137: What Are "Zones
ZONE Edit Menu WHAT ARE “ZONES?” The External Zones allow you to use the XK-5 as a MIDI Master Keyboard. These allow you to play additional sounds from another MIDI instrument such as a sound module. The External Zones transmit but do not receive MIDI data - in other words, they are MIDI OUT only. There are six (6) External Zones - three for the Upper Manual, two for the Lower Manual and one for the Pedals. -
Page 138: Switch On/Off The Messages
To locate this Menu, follow the steps below: MENU/EXIT ENTER ㉑ MESSAGE - DAMPER This allows you to set which controller to transmit Damper infor- mation. OFF: No transmission. CTRL1: Transmits to the controller connected to the CTRL1 jack. CTRL2: Transmits to the controller connected to the CTRL2 jack. -
Page 139: Using An External Sequencer
USING AN EXTERNAL SEQUENCER This is to record and play back a performance by connecting an external sequencer or computer with DAW to the XK-5. u Recording a performance to a Sequencer/DAW 1. Make the connections as shown in the diagram at left. -
Page 140: Record And Playback
RECORD AND PLAYBACK u Recording to a sequencer/DAW along with a synthesizer 1. Go into the MIDI Edit Menu and do the fol- lowing: A. Select the “Use EX.” MIDI Template. B. Manually turn the Keyboard Channels for Upper, Lower and Pedal “ON” for both Transmit (Tx) and Receive (Rx). -
Page 141: Recording A Performance To A Computer Daw Over Usb
Record and Playback even if MIDI cables HEAD CU-1 are used between the computer and the XK-5. PHONES TO KEYBOARD PEDAL NOTE: This also applies if you have the A-3 or Heri- tage system. XLK-5 XPK-250 - MIDI - MIDI Interface Optional HA<O>... -
Page 142: Recording A Performance Including External Zones Over Usb
u Recording a performance including External Zones over USB The XK-5 can transmit and receive MIDI data via USB. The Record and Playback your performance with controlling the diagram at the left shows how this works. External Zones from / to the external sequencer via USB With MIDI LOCAL CONTROL set to “OFF,”... -
Page 143: Using The Usb Ports
USING PORTS HA<O> XK-5 Owner’s Playing Guide... -
Page 144: Using The Usb Ports
FOLDER STRUCTURE When the XK-5 formats a USB Flash Drive, the following folders are automatically created on the drive: 1. hammond - the Root folder 2. xk5 - inside the Root folder. 3. setup and system . inside the xk5 folder. -
Page 145: Formatting A Usb Flash Drive
FORMATTING A USB FLASH DRIVE To format a USB Flash Drive for use with the XK-5, do the following: UPPER PEDAL LOWER BANK KEY PATCH Insert the USB flash drive to the USB “B” port. USB. Please Press the [ENTER] Touch Button. You will see the screen shown Wait until the display “Confirming wait...”... -
Page 146: Setup Files
SETUP FILES As explained elsewhere in this Manual, the XK-5 can be customized in a number of different ways - you can create Custom Tone Wheel settings and custom Leslie Cabinets, create your own Patches, etc. After you have made your changes, you can save your edits and custom settings as one “bundle”... -
Page 147: Usb Mass Storage
USB MASS STORAGE WHAT IS “USB MASS-STORAGE?” To switch the function of the USB TO HOST jack, do the fol- lowing: This unit has, in addition to the USB Flash Drive, a built-in “INTERNAL MEMORY” for saving Setup Files. The Internal Memory can function identically with a USB Flash Drive - that is, it can save and load data, as well as exchange files with a computer via the USB connection. -
Page 148: Save Edit Menu
SAVE Edit Menu This Edit Menu allows you to save a Setup file either from a USB Flash Drive or the Internal Memory. To locate this Menu, follow the steps below: ENTER MENU/EXIT HOW TO READ THE DISPLAY SETUP Name Type of File This indicates there is another... - Page 149 UPPER PEDAL LOWER BANK KEY PATCH You can enter a name using up to 10 characters. [][] Touch Buttons: Moves the cursor. [VALUE] Rotary Knob: Selects letters. The available characters include: Punctuation Marks (space - . ‘ &), Numeric Characters (0 ~ 9), Upper-case Letters (“A ~ Z”), and Lower-case Letters (“a ~ z”).
-
Page 150: Load Edit Menu
LOAD Edit Menu This Edit Menu allows you to load a Setup file either from a USB Flash Drive or the Internal Memory. To locate this Menu, follow the steps below: MENU/EXIT ENTER HOW TO READ THE DISPLAY SETUP Name Type of File This indicates there is another... - Page 151 UPPER PEDAL LOWER UPPER PEDAL LOWER BANK KEY PATCH BANK KEY PATCH Select the parameter which you wish to load (see P. 146) using the [VALUE] Rotary Knob. If you have selected a Patch in Step 5, the page will appear as above. Use the []/[] Touch Button and the [VALUE] Rotary Knob to select which Patch number in this Setup file you want to recall.
-
Page 152: Delete Edit Menu
DELETE Edit Menu This Edit Menu allows you to delete a Setup file either from a USB Flash Drive or the Internal Memory. To locate this Menu, follow the steps below: MENU/EXIT ENTER HOW TO READ THE DISPLAY SETUP Name Type of File This indicates there is another... - Page 153 UPPER PEDAL LOWER BANK KEY PATCH Press the [ENTER] Touch Button again to delete the selected file. UPPER PEDAL LOWER BANK KEY PATCH When the above screen displays, the Delete procedure is finished. Press the [PLAY] Touch Button to return to PLAY Mode. HA<O>...
-
Page 154: Update Edit Menu
LOWER BANK KEY PATCH The update files will be found on the Hammond website. Down- load the update file(s) to your computer. It is recommended that you download the update file to your Desktop. Follow the steps in the diagram at the top of the page to access the UPDATE Edit Menu. - Page 155 UPPER PEDAL LOWER BANK KEY PATCH When the above message displays, the Update procedure is Com- pleted. When the Update procedure is complete: 1. Remove the USB Flash Drive from the USB Port. 2. Turn the power to the instrument “OFF,” then “ON.” The XK-5 is now updated and ready to play.
- Page 156 ***THIS PAGE INTENTIONALLY LEFT BLANK TO PRESERVE PAGE FORMATTING *** HA<O> XK-5 Owner’s Playing Guide...
-
Page 157: Frequently Asked Questions
FREQUENTLY ASKED QUESTIONS HA<O> XK-5 Owner’s Playing Guide... -
Page 158: Troubleshooting
Set the MIDI IN mode according to your preference (See p. 135 for instructions on how to do this). If you have the Model A-3 or you are using the XK-5 in conjunction with the XLK-5 or XLK-3 Lower Manual, the SPLIT feature is disabled. -
Page 159: Appendix
APPENDIX HA<O> XK-5 Owner’s Playing Guide... -
Page 160: Midi Template
MIDI TEMPLATE MIDI TEMPLATE Template Basic 2or3 KBD SeqMContact Messages MIDI IN Sequence Lower Sequence Local Control NRPN Program Change Drawbar Registration External Zone Transmit Channel Tx. Upper 1(disregarded) Tx. Lower 4(disregarded) Tx. Pedal 7(disregarded) Tx. Multi Rx. Upper 1(disregarded) 1(disregarded) Rx. -
Page 161: Factory Patches
FACTORY PATCHES Category Name Category Name Jimmy 1 Gedeckt 8 Jimmy 2 Flute 8 & 4 Jimmy 3 Principal 8 Burner Principal Chorus Groove Rohr Flute Smooth Bass Gamba Celeste Shirley Comet Jimmy MC Sesquialtera Fat Bass Chorus & Mixture All Nine Sforzando Gospel 1... -
Page 162: Midi Information
MIDI INFORMATION MIDI IMPLEMENTATION Leslie Fast (CC#92) Status 2nd Byte 3rd Byte u CHANNEL VOICE MESSAGE n=MIDI Channel Number: 0H - FH (Ch. 1 - 16) vv=Control Value: 00H - 7FH (0 - 127) Note Off 0 - 63=Off, 64 - 127=On Status 2nd Byte 3rd Byte This control change is only for receive. - Page 163 DRAWBAR DATA LIST 1 CONTROL NUMBER Upper: 50H(80) Lower: 51H(81) Pedal: 52H(82) Upper / Lower Pedal Level 16´ 5 1/3´ 8´ 4´ 2 2/3´ 2´ 1 3/5´ 1 1/3´ 1´ 16´ 8´ 00H(0) 09H(9) 12H(18) 1BH(27) 24H(36) 2DH(45) 36H(54) 3FH(63) 48H(72) 00H(0) 09H(9) 01H(1)
- Page 164 MIDI INFORMATION - continued SYSTEM EXCLUSIVE MESSAGE MEMORY DUMP MODE SET 1. Each Packet Full Parameters Reset (Rx. only) System Exclusive System Exclusive SUZUKI ID SUZUKI ID Device ID (refer to P. <?> #19) Device ID Model ID MSB Mode ID for DT1 Model ID LSB Command: DT1 Command: Data Packet...
- Page 165 GLOBAL PARAMETERS Category Parameter NRPN SysEx Address SysEx Data Default Description MSB to LSB Length (62) (63) Tune Transpose 3A - 40 - 46 (-6 - 0 - 6) Master Tune 032E - 0338 - 0342 0338 A= 440 Hz (430 - 440 - 450 Hz) Expression Source...
- Page 166 MIDI INFORMATION - continued PATCH PARAMETERS Category Parameter NRPN SysEx Address SysEx Data Patch Load MSB to LSB Length (62) (63) Upper Name 10 Characters 7 bit ASCII always Lower Name 10 Characters 7 bit ASCII always Internal Zone Split 00, 01 (Off/On) Split Point 24 - 60 (MIDI note number)
- Page 167 Category Parameter NRPN SysEx Address SysEx Data Patch Load MSB to LSB Length (62) (63) Percussion Percussion On 00, 01 (Off/On) PERC Third On 00, 01 (Off/On) Decay Fast 00, 01 (Off/On) Volume Soft 00, 01 (Off/On) Level On Soft 00 - 3F (-22 - +10.5 dB) Level On Normal 00 - 3F (-22 - +10.5 dB)
- Page 168 MIDI INFORMATION - continued Category Parameter NRPN SysEx Address SysEx Data Patch Load MSB to LSB Length (62) (63) Pedal Organ Type 00 - 03 DRAWB 00: Normal 01: Muted 02: Synth 1 03: Synth 2 Envelope 00, 01 - 10, 11 - 20 00: Contact 01 - 10: R1 - R15 11 - 20: AR1 - AR15...
- Page 169 Category Parameter NRPN SysEx Address SysEx Data Patch Load MSB to LSB Length (62) (63) Effects Overdrive On 00, 01 (Off/On) EFFECT Overdrive Type 00 - 03 00: Tube 01: Stomp Box 02: Clip 03: E. Pf. Amp Overdrive Drive Level 00 - 7F Overdrive Controlled Exp.
- Page 170 MIDI INFORMATION - continued FAVORITES Category Parameter SysEx Address SysEx Data Default Description MSB to LSB Length Favorites Upper 00 00 - 00 63, 01 00 - 01 63 same as b: Bank [C] - [A]: 0 - 9 (U00 - U99, F00 - F99) k: Key [C] - [A]: 0 - 9 Lower Example...
- Page 171 TONE WHEEL PARAMETERS Category Parameter SysEx Address SysEx Data Description MSB to LSB Length Temporary Tone Name (10 characters) s: Tone Wheel set 0 = A-100 Wheels 1 = B-3 2 = C-3 3 = Mellow Wheel Level 00 00 - 01 1B (0 - 155) tt: Tone Wheel number;...
- Page 172 SYSTEM PARAMETERS Category Parameter SysEx Address SysEx Data Range Description MSB to LSB Length MIDI MIDI IN Lower/Other Sequence, Lower, Upper Local Control Off/On TRx. NRPN (P. <?>) Off/On Tx. Leslie Param. XK/21 Rx. Dump Off/On TRx. Prog. Change Off/On TRx.
-
Page 173: Drawbar Organ Types
DRAWBAR ORGAN TYPES These templates indicate Voices and Footages for the “Farf,” “Vx” and “Pipe” Drawbar Organ Types. If you wish, you may copy and cut these, and place them in front of the Drawbars on the top panel. NOTE: Be sure to use “removable” tape when affixing these templates. Using regular transparant or “magic” tape may damage the finish. -
Page 174: Custom Sets List
CUSTOM SETS LIST CUSTOM TONE WHEELS A-100, B-3, C-3 F1: Normal Simulates the organ’s Tone Wheels with precision. F2: Rumble less Cut off the motor rumble by using high-pass filter. F3: Mixture Sounds leakage tones with harmonized. Mellow F1: Full Flats Like the electronic organ, oscillates at flatly. -
Page 175: Midi Implementation Chart
MIDI IMPLEMENTATION CHART Drawbar Keyboard MIDI Implementation Chart Date: 27-Nov-2014 Model: XK-5 Version: 1.0 Function Transmitted Recognized Remarks Basic Default *1: Upper = 1, Lower = 2, Changed 1 - 16 1 - 16 Pedal = 3 Channel Default Messages Mode Altered *****... -
Page 176: Midi Channel And Message
MIDI CHANNEL AND MESSAGE External Zone Upper Lower Pedal (Tx. only) Part Part Part Note Pitch Bend Modulation Volume O *1 (10) Expression (11) O *1 Hold 1 (64) Hold 2 (69) Drawbar Reg. CC#80, CC#81 CC#82 12 - 20 (Upper) 21 - 29 (Lower) 33, 35 (Pedal) Spring Shock... -
Page 177: Specifications
SPECIFICATIONS Sound Generator Controllers Volume MTW I(Modelled Tone Wheel I) 61 polyphony (for manual) Master Volume 3 polyphony (for pedal) Switch Keyboards Power On/Off 73 (61 + 12 Preset Keys) Storage Square-front (“waterfall”-style) USB Flash Drive Virtual Multi Contact Display Harmonic Drawbars 20 - Characters, 2 - Lines Drawbars... - Page 178 Index Leakage Tone 52, 91 Wah-Wah 79 Leslie Mode Switch 29 Leslie Speaker 20 Active Drawbars 119 L/MONO 13 Adjust Preset 30, 108 Load 144 Assign 118 Lock 44 Assignable Drawbars 119 Auto Power Off 28 Match 50 Menu Mode 38 Back Up 28 MIDI 124 MIDI Template 154...
-
Page 179: Service
Although every attempt has been made to insure the accuracy of the descriptive contents of this Manual, total accuracy cannot be guaranteed. Should the owner require further assistance, inquiries should first be made to your Authorized Hammond Dealer. If you still need further assistance, contact Hammond at the following addresses:... - Page 180 FM2329 - 0718...
Need help?
Do you have a question about the A-3 and is the answer not in the manual?
Questions and answers