Table of Contents
Advertisement
Advertisement
Table of Contents

Related Manuals for Hammond M-SOLO


Summary of Contents for Hammond M-SOLO
- Page 1 REFERENCE GUIDE rev013124...
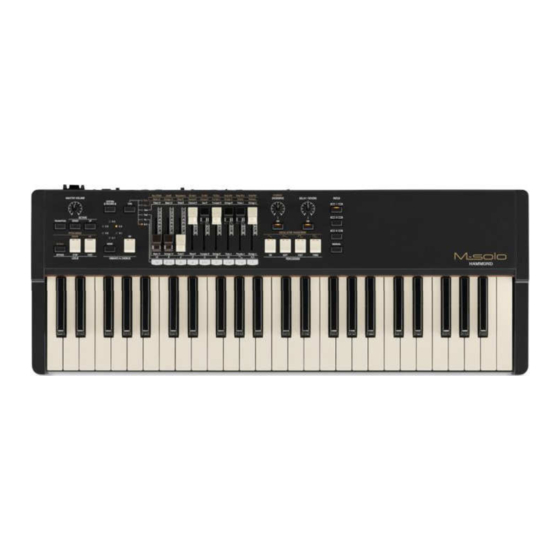
- Page 3 IMPORTANT - PLEASE READ Your Hammond M-solo is designed to give you the true and authentic sound of Hammond Harmonic Drawbars, as well as provide you a large variety of other sounds and features to allow great flexibility in how you want to play.
- Page 5 TABLE CONTENTS...
-
Page 6: Table Of Contents
Fil-Dcy..................... 28 HA<O> M-solo Reference Guide... - Page 7 INSTALLING A SOFTWARE UPGRADE TO THE M-SOLO ........
- Page 9 INTRODUCTION...
-
Page 10: Introduction
The main sections of the Control Panel are outlined above. The following is a brief description of each one. DRAWBARS This section is used to control all the sounds possible on the M-solo, which consist of classic Hammond Drawbar tones as well as Transistor Combo Organ tones, String and Vocal Ensemble sounds and a polyphonic Synthesizer. -
Page 11: Percussion / Synth
Turn this knob to the right to increase the amount of Reverb. Turn this knob to the left to increase the amount of Delay. NOTE: The DELAY / REVERB button must be “ON” (orange LED lit) in order to hear each effect. HA<O> M-solo Reference Guide... -
Page 12: Patch
The OCTAVE / TRANSPOSE buttons allow you to change the Octave as well as shift the musical key of the entire instrument. This is explained in more detail in the SPECIAL PERFORMANCE FEATURES chapter of this Guide starting on page 44. HA<O> M-solo Reference Guide... -
Page 13: Accessory Panel
Connect the AC Adapter (provided) to this receptacle. Power Switch This turns the power to the M-solo “ON” and “OFF.” When this switch is in "ON," LED's (Light Emitting Diodes) on the front panel will light up showing that the instrument is "ON."... -
Page 14: Control Jacks
Send and Receive Setup and System files. Send and Receive MIDI data (UPPER, LOWER, PEDAL Internal Zones and System Exclusive messages). NOTE: For more information about the USB Port, see the USING MEMORY chapter of this Guide starting on page 68. HA<O> M-solo Reference Guide... -
Page 15: Basic Hook-Up
If your amplifier has only a single (1) female " phono plug audio input, you can connect one end of one cable to the L/MONO audio output connector on the M-solo, and the other end to the female " audio input connector of your amplifier. -
Page 16: Connecting A Foot Switch
M-solo. Connect the foot switch plug to the jack marked LESLIE FAST on the back of the M-solo. NOTE: In order to insure proper operation of the Foot Switch, be sure to connect it when the power to the M-solo is “OFF.” MIDI Connections Your M-solo can interface with a great number of MIDI-compatible devices. -
Page 17: Drawbars
NOTE: More details can be found in later chapters of this Guide. Playing the instrument The M-solo is a single-keyboard instrument, with all controls necessary for operation located on the front panel within easy reach of the player. There is/are no display or Menus; however, several features are provided for configuring the instrument to your tastes. -
Page 18: Auto Power Off
IMPORTANT - PLEASE READ AUTO POWER OFF The M-solo has a special feature called AUTO POWER OFF which automatically turns the power to the instrument “OFF” if no keys or buttons are pressed for 30 minutes. This is done for safety reasons and under most normal conditions we do not recommend disabling this feature;... - Page 19 INSTRUMENT TYPES...
-
Page 20: Instrument Types
Drawbars, sometimes called Tonebars, are the heart and basis of the renowned Hammond Sound and have been used since the first Hammond Organ Model A introduced in 1935. An explanation of how to use these Drawbars is given later in this chapter of the Guide. -
Page 21: B-3 - Vintage Tone-Wheel Organ
Instrument Types In addition to traditional Hammond Drawbar tones, the Drawbars on the M-solo can control a number of models of Combo Organs as well as Vocal and String Ensembles and polyphonic Synthesizer. The following pages will explain the Instrument Types in more detail. - Page 22 Instrument Types TRY THIS: After turning the M-solo “ON,” the LEDs will flash for a few seconds, after which some LEDs will light continuously. Make sure the B-3 Instrument Type is selected. See the previous page for instructions on how to do this.
-
Page 23: Sound Groups
While still holding the “C” chord down, pull each of the brown Sub Drawbars out until you like the sound. Now do the same with the Brilliance Drawbars. It's that easy to create your own custom Drawbar settings. HA<O> M-solo Reference Guide... -
Page 24: Color Groups
Pull the first white Drawbar all the way out. You will hear the note “C.” While holding “C,” pull the 3 Black Drawbars all the way out. The sound produced by the Drawbars is that of a clarinet. HA<O> M-solo Reference Guide... -
Page 25: Brown Drawbars
With the Hammond Organ Drawbars, a touch of a finger is all that is needed to make the tone quality softer or more brilliant, richer in one harmonic or another. -
Page 26: Typical Drawbar Registration Patterns
French Horn 00 7654 321 Kinura 8' 00 0172 786 Oboe 8" 00 4764 210 Trombone 8' 01 8777 530 Trumpet 8' 00 6788 650 Tuba Sonora 8' 02 7788 640 Vox Humana 8' 00 4720 123 HA<O> M-solo Reference Guide... -
Page 27: Flute Family
85 8524 100 Harmonic Diapason 8' 00 8877 760 Harmonic Diapason 4' 00 0606 045 Horn Diapason 8' 00 8887 480 Open Diapason 8' 01 8866 430 Solo Diapason 01 8855 331 Wood Diapason 8' 00 7754 321 HA<O> M-solo Reference Guide... -
Page 28: Jazz And Pop Drawbar Registrations
There are many Drawbar combination which are not imitative of any instrument, but which are immediately recognized as "Hammond Sounds.” The basic Hammond Organ jazz sound is obtained with the first three Drawbars, such as 88 8000 000. When the last white Drawbar is used along with the first three Drawbars, a very pleasing effect is created. -
Page 29: Vx - British Combo Organ
The type of combo organ replicated by Vx had drawbar-type controls, but they functioned differently from Hammond Harmonic Drawbars. The first four Drawbars control individual pitches, while the next three are “Mixture” Drawbars which cause multiple pitches to sound. “II,” “III” and “IV” refer to the number of pitches represented by that Drawbar. -
Page 30: Farf - Italian Combo Organ
The above configuration follows the layout of the “Combo Compact” series of combo organ, which used rocker-type tilt tablets rather than Drawbars to turn voices “ON” and “OFF.” On the M-solo, the Drawbars are used to control the same sounds. To replicate the effect of tablets, simply pull the Drawbar(s) representing the tone(s) you want “out”... -
Page 31: Ace - Japanese Combo Organ
The above configuration follows the layout of the “TOP7” combo organ, which used rocker-type tilt tablets rather than Drawbars to turn voices “ON” and “OFF.” On the M-solo, the Drawbars are used to control the same sounds. To replicate the effect of tablets, sim ply pull the Drawbar(s) representing the tone(s) you want “out”... -
Page 32: Ens - String / Vocal Ensemble
The figure below shows how the Drawbars are allocated for the Ens Instrument Type. The first seven Drawbars control String and Vocal sounds of different pitches, while the last two Drawbars control the Attack and Release type of tone produced by the first seven Drawbars. HA<O> M-solo Reference Guide... -
Page 33: Syn - Polyphonic Synthesizer
To select the Syn Instrument Type, do the following: Press the TYPE button repeatedly until the Syn LED lights. The figure below shows how the Drawbars are allocated for the Syn Instrument Type. The following pages explain the Syn Instrument Type in detail. HA<O> M-solo Reference Guide... -
Page 34: Oscillator Waveform Controls
When this button is “ON” (LED lit), a Pulse waveform will play from the keyboard. Use the first brown Drawbar to adjust the Pulse Width. NOTE: One of these buttons is always “ON” (LED lit) when the Syn Instrument Type is selected. HA<O> M-solo Reference Guide... -
Page 35: Using The Drawbars In The Syn Instrument Type
The second brown Drawbar allows you to adjust the cutoff frequency of the filter. By controlling high-frequency component, the sound becomes brighter or mellower. Resonance The first white Drawbar allows you to adjust the emphasis of the sound around the cutoff frequency. By increasing the emphasis, the sound becomes more distinctive. HA<O> M-solo Reference Guide... -
Page 36: Filter Envelope
NOTE: The operating direction of the Drawbars can be reversed so that the amount of a Parameter is increased by pushing a Drawbar in, and decreased by pulling a Drawbar out. To do this, please consult the SPECIAL PERFORMANCE FEATURES chapter of the Guide starting on page 51. HA<O> M-solo Reference Guide... -
Page 37: Vibrato & Chorus
- M-solo Vibrato and Chorus Controls - The Vibrato and Chorus controls on vintage Hammond console organs with either a “2" or a “3" as part of their model designation (B-2, B-3, etc.) consist of two tilt tablets and a six-position rotary control to the left of the Drawbars. - Page 38 To turn the Vibrato or Chorus effect "OFF" for the Swell To turn the Vibrato or Chorus effect "OFF" for the M-solo, press the ON button "OFF" (LED not lit). or Great Manuals of a vintage B-3 / C-3, press the tilt tabs at the bottom.
-
Page 39: Amount Of Vibrato And Chorus
“V-3" will light. This is the fullest amount and adds much warmth and enhances your music. Remember, the ON button must be "ON" (orange LED lit) to allow you to hear the selected Vibrato effect. HA<O> M-solo Reference Guide... -
Page 40: Chorus
Six degrees of Vibrato. Six degrees of Vibrato. Six degrees of Vibrato. Six degrees of Delay Vibrato. The Vibrato is delayed for about ½ second after a key is pressed. Turn the VALUE Rotary Control to make your selection. HA<O> M-solo Reference Guide... -
Page 41: Leslie
Instrument Types LESLIE® Your Hammond M-solo has a built-in digital Leslie effect that replicates the sound of a twin-rotor Leslie Speaker cabinet. What Is A “Leslie Speaker?” When the Hammond Organ was first introduced in the mid 30's, it was not “self-contained” - in other words, the sound-producing apparatus was not contained within the console. -
Page 42: What Are "Horn" And "Bass
Bass. The newer motor design reduces the total number of motors from four to two, and also allows for “Brake” mode, or the ability to shut the rotors completely off (previously a special “brake kit” had to be added to the cabinet to permit this feature). HA<O> M-solo Reference Guide... -
Page 43: Leslie Buttons
Instrument Types New digital technology has now made it possible to recreate the Doppler effect without using moving parts. This technology has been incorporated into the M-solo. The following paragraphs explain how the internal digital Leslie of your Hammond M-solo works. - Page 44 *** THIS PAGE INTENTIONALLY LEFT BLANK TO PRESERVE PAGE FORMATTING ***...
- Page 45 PERCUSSION...
-
Page 46: Percussion - Touch-Response Percussion
PERCUSSION - Touch-Response Percussion An important component of the Hammond Sound is Touch-Response Percussion Control. On a vintage Hammond console organ, this feature is controlled by four tilting tablets on the extreme right of the control panel which look like this: The PERCUSSION controls on the M-solo consist of four separate buttons, located on the right of the Control Panel, which control harmonic Percussion tones. - Page 47 PATCHES...
-
Page 48: Patches
“Tone” or “Voice” to describe collections of sounds and parameters). Using Patches TRY THIS: Turn the M-solo “ON.” Press Patch button 1 if it is not already “ON” (LED lit). Play some notes. You will hear a classic jazz organ registration. Press Patch button 2. -
Page 49: Creating A New User Patch
While holding the SYSTEM [RECORD] button, press one of the three PATCH buttons. You will see the LED of the PATCH button you selected flash “ON” and “OFF” for approximately 2 seconds. After the LED stops flashing, your new Patch has been Recorded. HA<O> M-solo Reference Guide... -
Page 50: Editing A Factory Patch
If you have made changes to a Patch or Patches and you want to restore the factory Patch settings, you can do so by doing the RESTORING FACTORY SETTINGS procedure. This procedure is described in the SPECIAL PERFORMANCE FEATURES chapter of this Guide on page 53. HA<O> M-solo Reference Guide... - Page 51 SPECIAL PERFORMANCE FEATURES...
-
Page 52: Special Performance Features
Play some notes on the keyboard. You will hear the registration for the selected Patch play one octave higher. Press the DOWN button once. The LED of the UP button will turn “OFF” and the keyboard will now play in the normal octave. HA<O> M-solo Reference Guide... -
Page 53: Transpose
Recorded. If you Load the Backup File to the instrument, the transposition setting will load along with the rest of the information contained in the Setup. For more information about Backup Files, please consult the USING MEMORY chapter of this Guide starting on page 69. HA<O> M-solo Reference Guide... -
Page 54: Master Tune
After you have made your selection, press the SYSTEM button to turn it “OFF” (LED not lit). The Key Click will sound with the tuning you selected. NOTE: This Parameter setting can be Recorded as part of a Patch or in the MANUAL button. HA<O> M-solo Reference Guide... -
Page 55: Contacts Of A Tone-Wheel Organ & Virtual Multi-Contacts
The basis for the “Hammond Sound” is the tone- or phonic-wheel generator. When a key is pressed on a tone-wheel Hammond Organ, it closes 9 small electrical switch contacts. These 9 contacts represent the 9 pitches provided by the Drawbars - the fundamental tone plus eight harmonics. -
Page 56: Key Click Level
The Key Click will sound at the level you selected. NOTE: This Parameter is available for the B-3, Vx, Farf and Ace Instrument Types. NOTE: This Parameter setting can be Recorded as part of a Patch or in the MANUAL button. HA<O> M-solo Reference Guide... -
Page 57: Vmc Depth
Special Performance Features VMC depth As explained previously, when a key is pressed on a tone-wheel Hammond Organ, it closes 9 small switch contacts, one for each Drawbar. These contacts do not all sound simultaneously, but one after the other. -
Page 58: Leakage Lvl
LEAKAGE LVL WHAT IS “LEAKAGE?” In a vintage Hammond Organ, each tone-wheel rotates next to a magnet. The wheels are mounted in separate bins to isolate them from each other and prevent the magnets from intercepting frequencies from neighboring wheels; however, a sm all am ount of current m ay still “leak” through, producing a phenomenon called Leakage. -
Page 59: Drawbar Direction
Also, the V-3 LED of the VIBRATO & CHORUS Mode will light. *default setting After you have made your selection, press the SYSTEM button to turn it “OFF” (LED not lit). The Drawbars will now change sounds or Parameters according to your selection. HA<O> M-solo Reference Guide... -
Page 60: Power - Auto Off
Special Performance Features POWER - AUTO OFF For safety reasons, the M-solo is equipped with a POWER - AUTO OFF feature which turns the power to the instrument “OFF” if no keys are controls are touched within a 30-minute period. -
Page 61: Restoring Factory Settings
USING MEMORY chapter of this Guide starting on page 69. If you have made changes to the instrument, such as creating and Recording your own User Patches, and you want to restore the M-solo to its factory settings, do the following: Turn the power to the instrument “OFF.”... - Page 62 *** THIS PAGE INTENTIONALLY LEFT BLANK TO PRESERVE PAGE FORMATTING ***...
- Page 63 MIDI...
-
Page 64: Midi
The above is an example of two-way communication between two MIDI-equipped devices. In this example, the keyboard(s) of either instrument can be used to control the sound generators of the other. NOTE: In some MIDI tutorials, you can also see references to Main and Secondary or Source and Destination. HA<O> M-solo Reference Guide... -
Page 65: Audio And Midi Connections
Example: A synthesizer If you connect the MIDI OUT jack of the M-solo to the MIDI IN jack on the synthesizer and the synthesizer's LINE OUTPUT jack to the organ's LINE IN jack, you can play both instruments simultaneously from the M- solo keyboard. -
Page 66: Usb Midi
Connecting the M-solo to a computer via USB MIDI If you want to use your M-solo to control a DAW, you can do so by connecting the TO HOST port on the M-solo to an open USB port on your computer. -
Page 67: Using Midi On The M-Solo
MIDI USING MIDI ON THE M-SOLO The MIDI of your M-solo can be configured in a number ways depending upon the specific application. The following pages will describe the different MIDI features available, MIDI Channels The M-solo can transmit and receive on MIDI Channels 1 through 6. -
Page 68: Midi Receiving Channel
MIDI Channel 6 *default setting After you have made your selection, press the SYSTEM button to turn it “OFF” (LED not lit). The M-solo will now receive MIDI data on the Channel you selected. NOTE: This Parameter affects all Instrument Types. HA<O>... -
Page 69: Midi Local Control
After you have made your selection, press the SYSTEM button to turn it “OFF” (LED not lit). The MIDI Local Control of the M-solo will now function according to the setting you selected. NOTE: If MIDI looping or sound duplication occurs with an external device with a MIDI Echo function, set this Parameter to 0 (“OFF”). -
Page 70: Midi Generic Control
MIDI MIDI Generic Control In addition to transmitting basic MIDI information such as Note On/Note Off and Note Velocity, the M-solo also can transmit Program Changes, Control Changes, NRPN and System Exclusive (SyxEx) codes. This Parameter allows you to select whether to transmit these MIDI messages from the M-solo along with MIDI Note data. -
Page 71: Midi Implementation
MIDI MIDI IMPLEMENTATION Message transmission timing The M-solo incorporates the Virtual Multi-Contact (VMC) system; therefore, the relation between playing the keyboard and transmitting a MIDI note message works as described below. B-3 - The sound will gradually appear at the Shallow sounding point, fully appear at the Deep sounding point, then a MIDI note message will be sent. -
Page 72: Midi Implementation Chart
MIDI MIDI IMPLEMENTATION CHART HA<O> M-solo Reference Guide... -
Page 73: Drawbar Data List
MIDI DRAWBAR DATA LIST HA<O> M-solo Reference Guide... - Page 74 *** THIS PAGE INTENTIONALLY LEFT BLANK TO PRESERVE PAGE FORMATTING ***...
- Page 75 USING MEMORY...
-
Page 76: Using Memory
USB - TO HOST Your Hammond M-solo contains Internal Memory which is accessible via the TO HOST port. This allows data transfer between the M-solo and a PC connected to the TO HOST port by turning the M-solo into a Mass Storage Device. -
Page 77: Creating A Backup File
Key Click Amount, VMC Depth, Drawbar Direction, etc. to your liking. If you make changes to the M-solo (Recording your own User Patches, changing the settings for Key Click Level, VMC Depth, etc.), the m-solo.set file will retain your changes. This file can be copied to another location such as your computer’s hard drive or external data storage such as a USB Flash Drive. -
Page 78: Restoring Factory Settings
Using Memory RESTORING FACTORY SETTINGS If you have made changes to the M-solo and want to restore the factory settings, follow the procedure below. NOTE: Restoring the factory settings will erase any changes you have made. Therefore it is recommended to make a backup copy of your changes before doing this procedure. Please consult page 69 for instructions on how to create a Backup File. -
Page 79: Installing A Software Upgrade To The M-Solo
INSTALLING A SOFTWARE UPGRADE TO THE M-SOLO: Make sure the power to the M-solo is “OFF.” Make sure the M-solo is connected to the computer you wish to use as the Host via the TO HOST port. Turn the power to the M-solo “ON.”... - Page 80 TYPE LEDs will light “ON” and progressively turn “OFF” as the software modules update. When the update is complete, the six LEDs in the VIBRATO/CHORUS section will all light. Turn the power to the M-solo “OFF.” The new software will Load when the instrument is next turned “ON.” HA<O>...
-
Page 81: Update Errors
Using Memory UPDATE ERRORS If an update error occurs, the LEDs will blink or light. If this happens, turn the M-solo “OFF,” try the solution listed below, then try the Update again. The data chart below describes the different error messages and what they mean. - Page 82 Guide, total accuracy cannot be guaranteed. Should the player require further assistance, inquiries should first be made to your Authorized Hammond Dealer. If you still need further assistance, contact Hammond at the following addresses: In the United States contact: In Europe and the U.K.
- Page 84 © 2024 Hammond Suzuki USA, Inc. HA<O> M-solo Reference Guide FM2336-0124...
Need help?
Do you have a question about the M-SOLO and is the answer not in the manual?
Questions and answers