Table of Contents
Advertisement
Quick Links
INSTALLATION INSTRUCTIONS &
MANUAL FOR MAINTENANCE
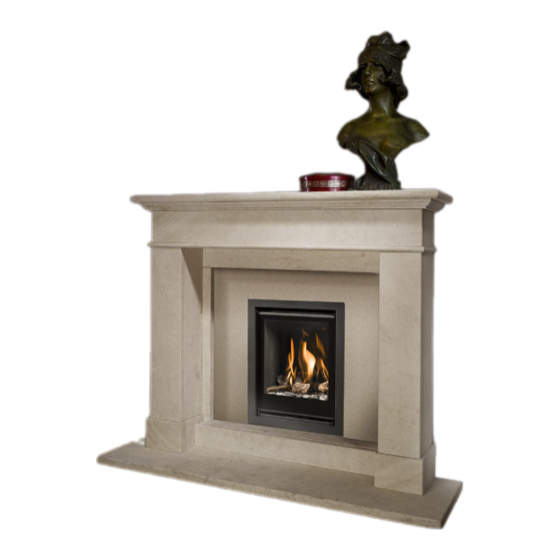
UNICA-2 40
Gas fi re with open combustion system
Bellfi res wishes you many cosy evenings with your new Bellfi res gas fi re
This document is an essential part of your gas fi re. Read it carefully
before installation and maintenance of the gas fi re and keep it in a safe place!
Serial number:
Production date:
Advertisement
Table of Contents

Subscribe to Our Youtube Channel
Related Manuals for Bellfires UNC-2 40


Summary of Contents for Bellfires UNC-2 40
- Page 1 INSTALLATION INSTRUCTIONS & MANUAL FOR MAINTENANCE UNICA-2 40 Gas fi re with open combustion system Bellfi res wishes you many cosy evenings with your new Bellfi res gas fi re This document is an essential part of your gas fi re. Read it carefully before installation and maintenance of the gas fi...
- Page 3 Bellfi res English BELLFIRES GAS FIRE WITH OPEN COMBUSTION SYSTEM: Unica-2 40 (UNC-2 40) Installation instructions...
- Page 4 Bellfi res English Installation instructions...
-
Page 5: Table Of Contents
Bellfi res English CONTENTS Page 1. INTRODUCTION ..................2. INSTALLATION ..................3. ANNUAL MAINTENANCE ................. 4. FAULTS ...................... 5. DISMANTLING / ASSEMBLING OF THE GLASS, THE REGULATOR AND BURNER ............6. CONNECTING DIAGRAM ................ 7. DIMENSIONS .................... 8. TECHNICAL DETAILS/REGULATIONS ............ 9. - Page 6 Bellfi res English Installation instructions...
-
Page 7: Introduction
Bellfi res English INTRODUCTION 1.1 GENERAL The gas fi re must be positioned and connected as an “open” appliance by a “Gas Safe Register” registered gas installation engineer in accordance with the following installation instructions, nationally and locally applicable regulations (see “Technical Details / Regulations”... - Page 8 Bellfi res English • If the pilot fl ame goes out for any reason, wait for 5 minutes before attempting to re-light it. • It is essential that the appliance, the complete fl ue system and the room ventilation openings are cleaned and inspected annually by a recognised fi tter/gas specialist. The safe operation of the appliance will thus remain guaranteed.
- Page 9 Bellfi res English In the event that the “oxy-stop” pilot fl ame is to be replaced, then only the original model should be applied. This atmosphere protection; the “oxy-stop” pilot light, is not a substitute for an independent-mounted carbon monoxide detector. 1.4 INCLUDED Set documentation - Instructions for use...
- Page 10 Bellfi res English PREPARATIONS BEFORE INSTALLATION Before installing the appliance, fi rst observe the following instructions. 1.6.1 The most important facilities according to the regulations NATURALLY VENTILATED HOUSE (see Figure 1) • Check that the room in which the appliance is to be fi tted has non-closable ventilation openings, according the national and local applicable building regulations.
- Page 11 Bellfi res English MECHANICALLY VENTILATED HOUSE (see Figure 2) • Check that the room in which the appliance is to be fi tted has non-closable ventilation openings according the national and local applicable building regulations. The minimum dimensions are detailed in “Technical Details / Regulations”...
- Page 12 Bellfi res English 1.7 GENERAL SERVICES FLUE There are 3 possible conventional fl ue connections: • Appliance installed into a new chimney (e.g. stud work) Top exit only: Ø4” (Ø100 mm for rigid pipe sleeved, or twin wall or Ø106 mm for fl...
- Page 13 Bellfi res English ELECTRICAL CONNECTION If the appliance is equipped with ambient lighting or AC Power adaptor, there must be a wall socket with earth connection, preferably at the right-hand side of the appliance. The socket should be accessible at all times. The powercable (+ 0.5 m) is coming from the rear of the appliance, near the gas inlet pipe.
-
Page 14: Installation
Bellfi res English INSTALLATION POSITIONING THE APPLIANCE Important: • Never use combustible materials during the installation. The appliance may not be installed against a fl ammable rear wall. • During installation of the gas fi re, a clearance of 3 mm should be maintained on all sides of the appliance to allow for expansion of the appliance during operation. - Page 15 Bellfi res English 2.1.1 Fitting into a new chimney The fi replace must be mounted on a concrete fl oor. If there is no concrete fl oor, it is essential to re-enforce the fl oorboards underneath with concrete. Build in the fi re insert up to the top of the fi...
- Page 16 Bellfi res English The brickwork must be built up around the hearth. In connection with the hearth expanding during burning: there must be at least 3 mm clearance on either side of the appliance. Do not build up the brickwork farther than the top of the appliance (keep in mind the thickness of any plastering!).
- Page 17 Bellfi res English Do not use masking tape on the appliance when installing and plastering. Tape can damage the fi nish of the hearth. The brickwork or the fi re-resistant sheet construction can now be continued to ceiling height. If using other materials, such as stone or heat-resistant plating, you should follow the supplier’s instructions.
- Page 18 Bellfi res English 2.1.2 Fitting into an existing opening larger than the appliance “Lined” installation: Place an (insulated) aluminium or (fl exible) stainless steel pipe of Ø100 mm (Ø4”) (or Ø127 mm (Ø5”) with an adapter) into the fl ue for the connection between the fl ue spigot of the appliance and the chimney and then position the appliance into the fi...
- Page 19 Bellfi res English Removal of the top exit fl ue connection piece: Disassemble the top fl ue outlet connection piece from the inside of the appliance. a. Disassemble fi rst the baffl e plate at the top of the combustion chamber, by a front screw loosening, and take the plate out.
- Page 20 Bellfi res English b. Disassemble after this the draft diverter from the top of the combustion chamber, by loosening the screws around and take it out. c. Disassemble the plate with fl ue outlet connection piece, by loosening the bolts on the outer edge.
- Page 21 Bellfi res English Removal of the rear exit fl ue opening cover plate: Disassemble the rear exit fl ue opening cover plate from the back of the appliance. Installation instructions...
- Page 22 Bellfi res English Mounting of the top cover plate, draft diverter and baffl e plate: Assemble the top cover plate (comes with the conversion kit; “Lined” “Unlined” fl ue connection) from the inside of the appliance. Refi t the draft diverter and baffl e plate.
- Page 23 Bellfi res English For further installation procedures, refer to paragraph 2.1.1 and 2.1.3. Installation instructions...
- Page 24 Bellfi res English “Unlined” installation (UK only!): Minimum installation sizes All sizes in mm. Installation instructions...
- Page 25 Bellfi res English 2.1.3 Fitting into an existing opening equal to or smaller than the appliance If the opening in the fi replace is too small for the appliance, it must be enlarged by a recognised installer in accordance with applicable building regulations. “Lined”...
- Page 26 Bellfi res English Dismantle the fl ue gas outlet connection: (see pictures 2.1.2) In order to connect the (insulated) aluminium or (fl exible) stainless steel fl ue (Ø100 mm) onto the appliance, the fl ue gas outlet connection must fi rst be dismantled from inside the appliance.
- Page 27 Bellfi res English Ø5“ Flue: Installation instructions...
- Page 28 Bellfi res English Assembling the fl ue gas outlet connection: Push the plate with the fl ue gas outlet connection back upwards and secure. Then assemble the draft diverter and baffl e plate. Check all connections connect properly and check for tightness ! Gas and electricity connection: Using a compression fi...
- Page 29 Bellfi res English Positioning the grate: Position the grate around the burner. Positioning the ceramic log set or marble shingles: The appliance can be supplied with: • Ceramic log set + embers • Marble shingles white (small, white marble stones) •...
- Page 30 Bellfi res English 10.1 Ceramic log set + chips of wood + embers 1 Place the ceramic mat on the burner in such a way that the holes in the mat are in line with the burner openings. 2 Remove the embers carefully from their packaging and spread them evenly over the burner mat and the grate around the burner.
- Page 31 Bellfi res English Note ! Small embers and their residue should not be scattered on • the burner. This can cause a blockage on the burner orifi ces. • Embers must not be placed next to the pilot light burner. •...
- Page 32 Bellfi res English Logs: Log no u Log no. v Log no w Log no x Log no y Log no z Log no { Log no | Installation instructions...
- Page 33 Bellfi res English Embers must not be placed next to the pilot light burner Keep the burner orifi ces unblocked! Figure 3: Log set Unica-2 40 Position natural gas burner Embers must not be placed next to the pilot light burner Keep the burner orifi...
- Page 34 Bellfi res English 10.2 Marble shingles 1 Place the ceramic mat on the burner in such a way that the holes in the mat are in line with the burner openings. 2 Spread the shingles over the whole burner bed (burner and grid around the burner).
- Page 35 Bellfi res English Marble shingles must not be placed Keep the burner next to the pilot light burner orifi ces unblocked! Keep the burner orifi ces unblocked! Figure 6: Marble shingles Unica-2 40 Position natural gas and propane/butane burner • Important: Do not place any marble shingles in front of the pilot light.
- Page 36 Bellfi res English Assembling the glass door: Assemble the door (including the glass) by hooking it in at the top, and then screwing it into place at the bottom left and right. Remember to wear work gloves ! Check whether the door’s sealing cord fi ts snugly on the appliance! Checking the appliance after installation: Having installed the appliance the installer must check the following: Full functioning of the appliance.
-
Page 37: Annual Maintenance
Bellfi res English ANNUAL MAINTENANCE It is essential that the appliance, the fl ue and the combustion air supply outlet are cleaned and inspected annually by a recognised fi tter/gas specialist. The safe operation of the appliance will thus remain guaranteed. Maintenance consists of the following: •... - Page 38 Bellfi res English • Check the correct operation of the gas regulating block, thermocouple circuit and the ignition of the main burner. • Check the gas inlet-pressure (both when the appliance is off and when it burns at maximum) and the burner pressure. ‚...
- Page 39 Bellfi res English • Carefully unscrew the broken light bulbs from the ceramic fi tting. • Carefully turn the new light bulbs, left and right, in the ceramic fi ttings. Use only the Bellfi res Fire Glow light bulb. • Turn the Fire Glow light bulbs completely into the socket •...
- Page 40 Only when the appliance has cooled, it can be cleaned. Never use abrasive, corrosive agents or fi replace cleaner. • Any damage to paintwork can repaired with an aerosol BELLFIRES heat- resistant paint. (Note that the appliance has suffi ciently cooled down !) ‡...
-
Page 41: Faults
Bellfi res English FAULTS POSSIBLE REASONS Possible reasons for the gas fi re going out are: • Atmosphere protection (= ”oxy-stop” pilot fl ame) reacts (= pilot fl ame extinguishes) when the fl ue gases are insuffi ciently exhausted. • Atmosphere protection (= ”oxy-stop” pilot fl ame) is contaminated or defective. •... -
Page 42: Dismantling / Assembling Of The Glass, The Regulator And Burner
Bellfi res English DISMANTLING / ASSEMBLING OF THE GLASS, REGULATOR AND BURNER DISMANTLING Close the gas supply tap. Unscrew with several turns the 2 screws (to fi x the door) left and right below. Remove the door by lifting it and pulling it forwards out. Use working gloves when removing the door ! Remove the log set and the embers, or the marble shingles. -
Page 43: Connecting Diagram
Main burner Main burner gas piping 8 Wire Connecting Motor knob Cable Pilot light Gas regulator block GV 60 Thermocouple Ambient Pilot light gas piping lighting Thermo-electric (option) “black” cable SW Thermo-current Interrupter Block Thermo-electric “red” “yellow” cable TC “red” Ignition(piezo)cable Connecting cable (option) for external operating... -
Page 44: Dimensions
Bellfi res English DIMENSIONS UNICA-2 40 Lined fl ue: Ø4” or Ø5” Top fl ue opening: Ø100/106 mm GAS (factory fi tted) (Option GAS bottom) (Option GAS both sides and bottom) Installation instructions... - Page 45 Bellfi res English UNICA-2 40 (U.K. only!) Unlined fl ue: Ø7” (180 mm) Minimal Rear fl ue opening: 217 x 34.5 mm GAS (factory fi tted) (Option (Option GAS both sides and bottom) GAS bottom) Installation instructions...
-
Page 46: Technical Details/Regulations
Bellfi res English TECHNICAL DETAILS/REGULATIONS National installation regulations: • Gas safety installation and use regulations 1998 plus all relevant safety and building regulations concerning fi re installation • Document J: Combustion appliances and fuel storage systems Model : UNICA-2 40 : NATURAL GAS : BUTANE/PROPANE Country... - Page 47 Bellfi res English Model : UNICA-2 40 : NATURAL GAS : BUTANE/PROPANE Country : GB; Great Britain/IE; Ireland : GB; Great Britain/IE; Ireland Batteries remote control - Receiver : 4x 1.5V AA : 4x 1.5V AA - Hand-transmitter : 1x 9V block : 1x 9V block Electrical supply(****) : 230 VAC / 50 Hz...
-
Page 48: Replacement Parts List
Bellfi res English REPLACEMENT PARTS LIST When requesting service or ordering replacement parts, please quote the model type and serial number. All parts listed in this manual may be ordered from a Bellfi res dealer. Article no Description 336923 Main burner Natural gas G20/G25.3 / Butane/Propane G30/G31 G20: 1x Ø15 mm (side venturi) G30/G31: 15x20 mm + 20x25 mm (side+underside venturi) 337098... - Page 49 Appliance Log set Marble shingles Marble shingles set (white) set (grey) Embers with Log no Chips of Glow-effect wood set Anthracite 3 pieces Bag: 125 gr. Bag: 2.5 kg. Bag: 2.5 kg. Art. no: 331357 331358 331359 331360 331361 331362 331363 331364 ..
-
Page 50: Disposal Of Packaging And Appliance
Bellfi res English DISPOSING OF PACKAGING AND APPLIANCE The appliance comes in recyclable packaging. This can include: • Cardboard • Wood • Plastic • Paper Such materials must be disposed of responsibly, in line with local regulations. Batteries should be disposed of as chemical waste. Batteries must be disposed of responsibly, in line with local regulations. - Page 52 Your Bellfi res dealer 01 - 010414 - 337106...
Need help?
Do you have a question about the UNC-2 40 and is the answer not in the manual?
Questions and answers