Table of Contents
Advertisement
Quick Links
Advertisement
Table of Contents

Related Manuals for Formax AutoSeal FD 2094


Summary of Contents for Formax AutoSeal FD 2094
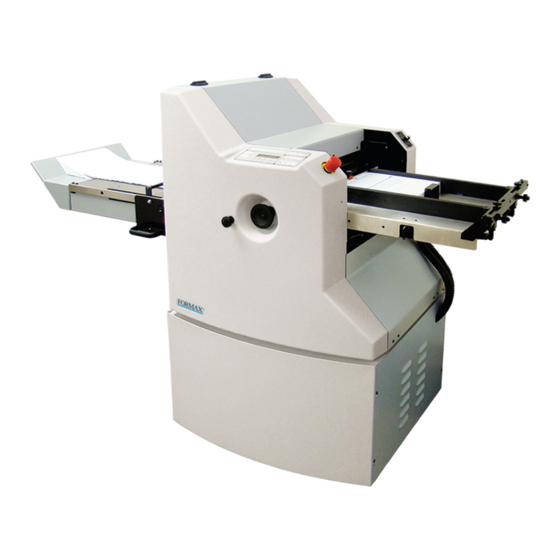
- Page 1 FD 2094 / FD 2084 AutoSeal ® OPERATOR MANUAL FIRST EDITION 6/2009...
-
Page 3: Table Of Contents
TABLE OF CONTENTS 2094 DESCRIPTION / SPECIFICATIONS COUNTER OPERATION 2084 DESCRIPTION / SPECIFICATIONS Resetting Total Count Unpacking & Set-Up Programming the Batch Counter Burster Unpacking & Set-Up Resetting the Batch Counter Output Conveyor Installation Rate Fold Plate Installation Run Time Feed Table Assembly Installation (2094) Start/Stop - Drive Motor Transfer Table Assembly Installation... -
Page 5: 2094 Description / Specifications
2094 DESCRIPTION Folder Transport Table & Ball Deck Upper Fold Plate Emergency Shut-Off Button Control Panel Cover Air Blow Adjustment Knobs Infeed Table Side Guides Seal Rollers Side Guide Adjustment Knobs Conveyor Feeder Valve Knob Conveyor Jog Switch Folder Air and Power Switch Vacuum Hoses Pump Access... -
Page 6: 2084 Description / Specifications
2084 DESCRIPTION PRESSURE SEALER Emergency Shut-Off Button Burster Control Panels BURSTER Upper Fold Plate BURSTER Cover TRANSPORT Safety Cover TABLE Control Panel Conveyor Conveyor Jog Switch Power Switch Hand Wheel Stand Lower Fold Plate Cover Pump Access Pull-Down Tray Panel BURSTER BASE FUNCTION The 2084 separates, folds, and seals continuous pressure sensitive forms with pre-applied glue lines into mail... - Page 7 ASSEMBLY UNPACKING & INSPECTION The 2094 is shipped in two cartons - Folder/Sealer (Fig. 1a) Feed Table and Accessories (Fig. 1b) The 2084 is shipped in four cartons - Folder/Sealer (Fig. 1a) Transfer Table and Accessories (Fig. 1b) Burster (Fig. 2a) Burster Base (Fig.
-
Page 8: Unpacking & Set-Up
BURSTER ASSEMBLY - 2084 UNPACKING AND SET-UP Front view 1. Remove bands which hold cardboard box to wooden pallet. Remove top of box. 2. Remove (4) carriage bolts: (2) on infeed end of burster and (2) outfeed end (Fig. 3a & 3b). Hint: Leave carriage bolts in place on center burster support. -
Page 9: Output Conveyor Installation
Once the unit and its components have been carefully removed from the packaging begin by attaching the Output Conveyor, next install Fold Plates and then the Feed Table (2094) or Transfer Table & Burster (2084). OUTPUT CONVEYOR INSTALLATION 1. Insert the output conveyor with the drive wheel toward the seal rollers. -
Page 10: Fold Plate Installation
FOLD PLATE INSTALLATION Upper Fold Plate WARNING: Unplug the AC power cord when installing or removing fold plates. The fold plates are interchangeable. Each fold plate has an open end which faces toward the fold rolls. 1. To install the fold plates, pivot the fold plate hold- downs (Fig. -
Page 11: Feed Table Assembly Installation (2094)
FEED TABLE ASSEMBLY INSTALLATION - 2094 (NOTE: For 2084, skip this process and go to page 8.) 1. Insert the feed table with the feed wheel toward the fold rolls. 2. Slide the paper feed table over both sets of locating pins. -
Page 12: Transfer Table Assembly Installation
TRANSFER TABLE ASSEMBLY INSTALLATION - 2084 1. Install the transfer table for the 2084. Insert the 3. Plug burster power cable & interlock cable into table between the folder side frames (Fig. 13) and folder (Fig. 15). Remove lower fold plate to access set the notches on to the locating pins (Fig. -
Page 13: Control Panels
CONTROL PANELS Folder Control Panel NAME MEMORY #2 SET SHEET MODE SELECT (2094 Only) PUMP START/STOP (2094 Only) MEMORY #3 SET SHEET FEED (2094 Only) FOLDER DRIVE START/STOP SHEET JAM SELECT INCHES/METRIC UNIT SET LETTER FOLD SELECT FUNCTION RESET SPEED ADJUST Z-FOLD SELECT COUNT SELECT UPPER FOLD PLATE ADJUST... -
Page 14: Operation - 2094
OPERATION - 2094 MAIN POWER/RESET SWITCH The main power/reset switch (Fig. 17) will completely Side guide shut off all power to the operating system. This will locking knobs stop everything immediately. Side guides Main power switch Side guide adjustment knob Fig. -
Page 15: Air Blow Adjustment
AIR BLOW ADJUSTMENT CHECK SQUARENESS OF FOLD 1. Turn the air blow adjustment on the vacuum/air Examine the folded sheets on the stacker to be sure control panel fully clockwise to the (-) position (Fig. you are getting an even and square fold. A skew 20a). -
Page 16: Setup With Optional Slitter
SETUP WITH OPTIONAL SLITTER OUTPUT CONVEYOR STACKER ADJUSTMENT The output stacker has a variable speed control 1. Set the fold setting on folder. Select from one of the dial that can be used to adjust the shingle spac- standard preset folds or set a custom fold if needed. ing or the space between each form in the stack. -
Page 17: Operation - 2084
OPERATION - 2084 4. Center leading edge of form at infeed end of the burster. 5. Position tractors to proper form width by releasing Slitter Adjustment thumbscrews on top of tractors and sliding tractors to Alignment Mark Screw Edge Slitters Wedger proper width. - Page 18 13. The tear bar is adjustable to accommodate characteristics of various forms. To adjust height, bar must be pushed to compress spring and lift out. Rotate 180 degrees (turned over) and replace making sure that square end of bar locks into brackets. (Fig. 26, shown in HIGH position) Fig.
-
Page 19: Form Set-Up With Optional Imprinter
Form Set-Up Procedures With Optional 10. Move timing collar so that mark on collar aligns with mark on side frame. Tighten setscrews. Imprinter 11. Remove forms from tractors. Install signature NOTE: It is recommended that numbered forms or patches on imprint cylinder. checks fed into imprinter should be last form first, right side up. -
Page 20: Job Setup & Programming
JOB SETUP & PROGRAMMING WARNING: When adjusting fold lengths on the fold plates using the keypad, the plates will move automatically. Be sure to keep hands away from fold plates when adjusting fold lengths. It is recommended that all guards be closed when adjusting fold lengths. -
Page 21: Setting A Standard Fold
SETUP FOR A STANDARD FOLD 5. To adjust fold settings, press “PLATE 1” button to adjust top fold plate and/or “PLATE 2” button to adjust the bottom Note: See page 30 to help determine fold type fold plate. Use the “+” or “-” keys to adjust settings up or down, then press “ENTER.”... -
Page 22: Setting Custom Folds
A) ENTERING A NEW SHEET LENGTH: B) DO NOTHING: 1. After 5 seconds the data will be accepted and the last After 5 seconds, the count screen will be displayed. fold type indicator will start flashing. Select the desired fold type by pressing the appropriate “FOLD TYPE”... -
Page 23: Starting Production
STARTING PRODUCTION: PROGRAMMING THE BATCH COUNTER After the sheet length and the fold type have been Program the batch counter by pressing the “BATCH SET” selected: button. The set batch screen will be displayed. 1. Start the main drive (press “DRIVE”) 2. -
Page 24: Rate
RATE Pressing the “TIME” button will change the display to the time mode. The “RATE” button is used to display the average pieces per hour, both current and average since the last total counter In this mode the first line of the display will show job run reset. -
Page 25: Speed
SPEED FOLD PLATES The speed of the machine can be changed by pressing The fold plates can be set at any time from the operating the SPEED button while the main drive motor is running or mode by pressing the PLATE button that corresponds to the stopped. -
Page 26: Changing Dimension Settings
CHANGING DIMENSION SETTINGS Pressing the “-” button will decrement the stacker wheels position at slow speed. Holding the “-” button down for more To change dimensions from English to Metric, press the than 2 seconds will decrement the stacker wheels position SET U/M button. -
Page 27: Shutting Off Jam Detectors
If one or more of these conditions are noted, contact your authorized Formax folder dealer to inquire about inspection and/ or possible roller replacement. Sealer Roller Cleaning Keep sealer rollers clean. -
Page 28: Display Messages
DISPLAY MESSAGES The following are other display messages that may appear... -
Page 29: Language Selection
LANGUAGE SELECTION Switch location, on the electronic board, for language and voltage selection settings. -
Page 30: Basic Theory Of Buckle Folding
BASIC THEORY OF BUCKLE FOLDING If a sheet of paper is laid on a flat surface and driven into a stationary object, a buckle or series of buckles will form along the surface of the sheet. If the sheet of paper is pushed into a narrow channel before butting up against the stationary object, the buckles that form within the channel will be of a much smaller size than free-forming buckles. - Page 31 If the channel is angled to produce a downward pressure, and two folding rollers, spinning as indicated, are placed close to the end of the channel, the larger buckles that start forming there will always be formed downward and be pulled into the rollers, compressing into a fold.
- Page 32 On a buckle folder, the sheet is laid flat on a feed table and then enters the fold plate assembly where it comes to a stop against the stationary sheet stop. A series of buckles then forms throughout the sheet. The buckles within the fold plate are kept very small by the narrow channel design.
-
Page 33: Safety Covers
Fault Detectors Safety Covers Burster (2084) - The burster is equipped with an The 2084 burster is equipped with a plexi safety cover outfeed jam detector grill (Fig. 27). This device senses (Fig. 29), and will not run unless this cover is in closed jams between the burster and the transfer table and position. -
Page 34: Jam Clearing
JAM CLEARING & FAULT INDICATOR RESET Ball Deck JAM OCCURS IN A FOLD TABLE 1. Unplug and remove the fold table and remove paper. Use the hand wheel to assist in advancing the paper through the rollers. 2. Reinstall and plug in fold table. 3 Press the reset button on the control panel to clear the fault signal. -
Page 35: Determining Fold Type
DETERMINING FOLD TYPE Two Standard Folds 11” “Z” & 11” “C” Refer to Operator Manual for custom fold setup. Leading glue edge Glue Glue 11” “Z” Fold 11” “Z” Fold Leading glue edge Glue Glue 11” “C” Fold 11” “C” Fold... -
Page 36: Troubleshooting
TROUBLESHOOTING TROUBLE POSSIBLE CAUSE REMEDY Machine not running Is the power on? Make sure the power to the folder, sealer, conveyor and burster are in the on position. Check to make sure the wall outlet has power Machine not plugged in Make sure all the plugs are plugged in properly Safety covers are raised/open... - Page 37 Forms Creasing Form is not exiting the folder Check that the forms are being fed straight squarely. Check that the eight ball track is sitting properly. Check to see if the fold rollers are clean. Form is not entering the sealer Check that the eight ball track is sitting straight properly.
- Page 38 Forms pull out of burster Roller timing is off Call service. tractors. Incorrect form length setting Reset form length pg. 13 Incorrect feed roller tension Check and adjust roller tension, Call Service Tractor drive pulley bound up Check for paper jam and clear, Call service. Tractors binding internally Call service.
Need help?
Do you have a question about the AutoSeal FD 2094 and is the answer not in the manual?
Questions and answers