True TBR Series Installation Manual
Hide thumbs
Also See for TBR Series:
- Installation manual (33 pages) ,
- Installation manual (240 pages) ,
- Installation manual (56 pages)
Table of Contents
Advertisement
Quick Links
TRUE
TBR72-RISZ1-L-S-GGG
TBR72-RISZ1-L-B-111-1
TRUE MANUFACTURING CO., INC.
2001 East Terra Lane • O'Fallon, Missouri 63366-4434
(636) 240-2400 • FAX: (636)-272-2408
International FAX: (636)-272-7546 • (800)-325-6152
Parts Department: (800)-424-TRUE (424-8783)
Parts Department FAX: (636)-272-9471
North America – Canada and Caribbean
Warranty Phone: +1 855-878-9277
Warranty Fax: +1 636-980-8510
Warranty Email: WarrantyInquiries@TrueMfg.com
Technical Phone: +1 855-372-1368
Technical Email: Service@TrueMfg.com
7:00am–6:00pm CST Monday–Friday,
8:00am–12:00pm Saturday
TEC_TM_043 | REV. F | EN
MANUFACTURING CO., INC.
Mexico
Phone: +52 555-804-6343/44
Service-MexicoCity@TrueMfg.com
9:00am–5:30pm M–F
Latin America
Phone: +52 555-804-6343/44
ServiceLatAm@TrueMfg.com
9:00am–5:30pm M–F
INSTALLATION MANUAL
TBR | TDR SERIES
INSTALLATION MANUAL
UK, Ireland, Middle East, Africa
& India
Phone: +44 (0) 800-783-2049
Service-EMEA@TrueMfg.com
8:30am–5:00pm M–F
Australia
Phone: +61 2-9618-9999
Service-Aus@TrueMfg.com
8:30am–5:00pm M–F
03/2/2023
TBR32-RISZ1-L-B-S-1
TDR48-RISZ1-L-B-SG
TBR | TDR SERIES
Original Instructions
European Union & Commonwealth of
Independent States
Phone: +49 (0) 7622-6883-0
Service-EMEA@TrueMfg.com
8:00am–5:00pm M–F
Page 1 of 40
Advertisement
Table of Contents

Related Manuals for True TBR Series


Summary of Contents for True TBR Series
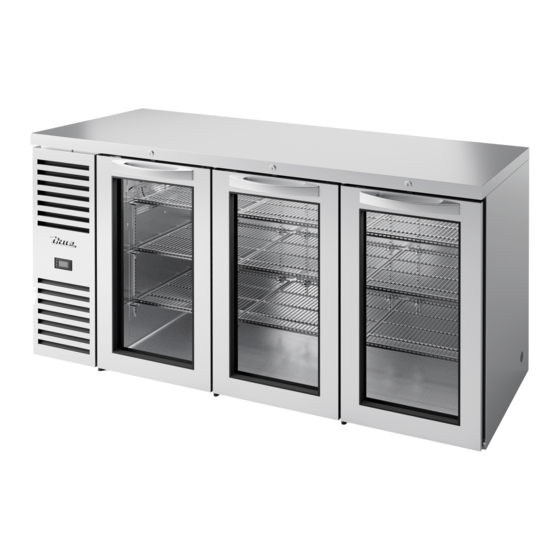
- Page 1 INSTALLATION MANUAL TBR | TDR SERIES TBR72-RISZ1-L-S-GGG TBR32-RISZ1-L-B-S-1 TDR48-RISZ1-L-B-SG TBR72-RISZ1-L-B-111-1 TRUE MANUFACTURING CO., INC. 2001 East Terra Lane • O’Fallon, Missouri 63366-4434 INSTALLATION MANUAL (636) 240-2400 • FAX: (636)-272-2408 International FAX: (636)-272-7546 • (800)-325-6152 TBR | TDR SERIES Parts Department: (800)-424-TRUE (424-8783)
-
Page 2: Table Of Contents
TBR | TDR SERIES www.truemfg.com T HAN K YO U F O R YO U R PU R C H A S E Congratulations! You have just purchased the finest commercial refrigerator available. You can expect many years of trouble-free operation. Table of Contents Safety Information Cabinet Operation... -
Page 3: Safety Information Safety Precautions & Proper Disposal
You have selected one of the finest commercial refrigeration units made. It is manufactured under strict quality controls with only the best quality materials available. Your TRUE cooler, when properly maintained, will give you many years of trouble-free service. – Use this appliance for its intended purpose as described in this Installation Manual. -
Page 4: Prior To Installation Ownership
TRUE equipment. The cost of AMPS a professional installation is money well spent. Before you start to install your TRUE unit, carefully inspect it for freight damage. If damage is discovered, immediately file a claim with the delivery freight carrier. -
Page 5: Installation
TBR | TDR SERIES www.truemfg.com Installation Uncrating Tools Required • Adjustable wrench • Phillips screwdriver • Level The following procedure is recommended for uncrating the unit: Procedure 1. Remove the outer packaging (cardboard and bubbles or styrofoam corners and clear plastic). See fig. 1. Inspect for concealed damage. -
Page 6: Cabinet Location
TBR | TDR SERIES www.truemfg.com Installation (cont.) Cabinet Location 1. Ensure that the drain hose or hoses are positioned in the pan. 2. Free the plug and cord from inside the lower rear of the cooler (DO NOT plug in). 3. -
Page 7: To The Floor
Leveling 5. Apply a bead of NSF-approved sealant (see list below) to the Proper leveling of your TRUE cooler is critical to operating success floor, 1/2" (13 mm) inside the front part of the outline drawn in step 4. The bead of sealant must be heavy enough to seal the (for non-mobile models). -
Page 8: Electrical Installation & Safety
Refer to cabinet data plate for this voltage requirement. TRUE uses these types of NEMA plugs shown. If you DO NOT have • The refrigerator/freezer should always be plugged into a the proper outlet, have a licensed electrician verify and install the dedicated electrical circuit. -
Page 9: Cabinet Setup Shelf Installation
TBR | TDR SERIES www.truemfg.com Cabinet Setup Shelf Installation Procedure 1. Hook the shelf clips into the shelf standards. See fig. 1. 2. Push up on the bottom of the clip. See fig. 2. NOTE: You may need to squeeze or twist the bottom of the shelf clip for proper installation. -
Page 10: Draft Tower Installation
TBR | TDR SERIES www.truemfg.com Cabinet Setup (cont.) Draft Tower Installation Procedure 1. Position the rubber washer (see fig. 1) over the mounting holes in the cabinet countertop. 2. Thread the beer line connector (see fig. 2) to the draft arm. See fig. -
Page 11: Draft Spill Tray
TBR | TDR SERIES www.truemfg.com Cabinet Setup (cont.) Parts Key Spill Tray Grate Spill Tray Tray Gasket Spill Tray Access Port Draft Spill Tray Procedure 1. Place the tray gasket over the spill tray tube. 2. Slide the spill tray tube into the spill tray access port. 3. -
Page 12: Air Distributor Manifold & Distributor Cover
NOTE: CO2 cylinders, regulators, and keg tappers are not A 2-way air distributor manifold is included to allow a single CO₂ provided by TRUE. supply line to pressurize two kegs. The air distributor is located behind the distributor cover. To access, lift the cover off the Required Tools manifold mounting bracket. -
Page 13: Beer Drain Bottle & Hanger
TBR | TDR SERIES www.truemfg.com Cabinet Setup (cont.) Beer Drain Bottle & Hanger Access Ports An optional beer drain bottle and hanger may be purchased to Access ports provide optional locations to route external beer lines, collect the overflow from the draft spill tray. The bottle hanger CO₂... - Page 14 TBR | TDR SERIES www.truemfg.com Cabinet Setup (cont.) Access Ports (cont.) DRILL ZONES* – No drilling allowed on any face with doors! Access ports are available for purchase to plug drilled holes. *Applies to all sizes. 3-door model shown. NO DRILLING ALLOWED Mirror dimensions for right-hand cooling systems CONDENSING UNIT SIDE VIEW NON-CONDENSING UNIT SIDE VIEW...
-
Page 15: Overlay Panel Specifications
TBR | TDR SERIES www.truemfg.com Cabinet Setup (cont.) 05/24/22 Overlay Panel Specifications For panel installation instructions, see “Overlay Panel Installation” on page 19. Slotted Grill FRO N T BACK 11 19/32" 11 19/32" 294mm 294mm 31/32" 9 11/16" 3/4" 3/4" 31/32"... - Page 16 TBR | TDR SERIES www.truemfg.com Cabinet Setup (cont.) Overlay Panel Specifications (cont.) For panel installation instructions, see “Overlay Panel Installation” on page 19. TBR | TDR–48 Glass Door Panel Specifications Solid Door Panel Specifications Width 17-5/8" (448 mm) Width 17-5/8" (448 mm) Height 31-11/16"...
- Page 17 TBR | TDR SERIES www.truemfg.com Cabinet Setup (cont.) Overlay Panel Specifications (cont.) For panel installation instructions, see “Overlay Panel Installation” on page 19. TBR | TDR–32/52/72/92 Glass Door Panel Specifications Solid Door Panel Specifications Width 19-5/8" (498 mm) Width 19-5/8" (498 mm) Height 31-11/16"...
- Page 18 TBR | TDR SERIES www.truemfg.com Cabinet Setup (cont.) Overlay Panel Specifications (cont.) For panel installation instructions, see “Overlay Panel Installation” on page 19. TBR | TDR–36/60/84/108 Glass Door Panel Specifications Solid Door Panel Specifications Width 23-5/8" (600 mm) Width 23-5/8" (600 mm) Height 31-11/16"...
-
Page 19: Overlay Panel Installation
TBR | TDR SERIES www.truemfg.com Cabinet Setup (cont.) Overlay Panel Installation Overlay units are custom order. Required Tool(s) • Surface Protection* • Marking Utensil • Phillips Screwdriver • Tape • 2+ Clamps [≥2” (50.8 mm)] • 3/8" Drill Bit • 5/16" Socketwrench •... - Page 20 TBR | TDR SERIES www.truemfg.com Cabinet Setup (cont.) Overlay Panel Installation (cont.) Procedure (cont.) 5. Clamp the door and panel. See fig. 6. NOTE: If the clamp jaws are not padded, insert padding between the clamp and the overlay to protect the panel’s finish.
-
Page 21: Cabinet Operation
TRUE dealer or recommended service agent. • Good air flow inside your TRUE unit is critical. Take care to Factory Installed TruLumina LED prevent product from pressing against the sides or back To change the display color of the TruLumina LEDs, toggle the light wall and coming within 4"... -
Page 22: General Sequence Of Operation
TBR | TDR SERIES www.truemfg.com Cabinet Operation (cont.) General Sequence of Operation: Refrigerator and Freezer Cabinets When the cabinet is plugged in • Interior lights will illuminate on glass door models (see previous page for light switch location). • An electronic control with digital display will illuminate (if installed). •... -
Page 23: Draft Beer Storage, Handling & Operation
TBR | TDR SERIES www.truemfg.com Cabinet Operation (cont.) Draft Beer Storage, Handling & Operation DRAFT BEER SHOULD BE TREATED AS A FOOD PRODUCT. Pressure Dispensing pressures differ based on the following: In most instances draft beer is not pasteurized. It is very important that you store and handle it properly. -
Page 24: Draft Beer Problems & Troubleshooting
TBR | TDR SERIES www.truemfg.com Cabinet Operation (cont.) Draft Beer Problems & Troubleshooting To minimize draft beer problems, always follow the recommended Cloudy Beer instructions for temperature and CO₂ pressures from your beer Beer in the glass appears hazy, not clear. supplier. -
Page 25: Changing Co₂ Gas Cylinder
TBR | TDR SERIES www.truemfg.com Cabinet Operation (cont.) Changing CO₂ Gas Cylinder Pressure Adjustment on CO₂ Regulator Increasing Pressure CAUTION – Always follow these instructions when you replace a CO₂ gas cylinder: Procedure 1. Close regulator shut-off C. Procedure 2. Turn the regulator key B clockwise and adjust setting. 1. -
Page 26: Maintenance, Care, And Cleaning
Beer Tap Cleaning Kit – Required Tools regularly. Flushing the draught dispenser with only water is not enough to maintain cleanliness. True recommends cleaning the draught dispenser whenever changing to a fresh keg. Clean dispensers ensure your draught beer will be at its best when served. -
Page 27: Condenser Coil Cleaning
TBR | TDR SERIES www.truemfg.com Maintenance, Care & Cleaning (cont.) - Take care during operation, maintenance or repairs CAUTION to avoid cuts or pinching from any cabinet part/component. Condenser Coil Cleaning When using electrical appliances, basic safety precautions should be followed, including the following: –... - Page 28 THE CLEANING OF THE CONDENSER IS NOT COVERED BY WARRANTY! If you have any questions, please contact your local TRUE Manufacturing Service Department. See the front cover for locations and contact information. • Condenser coils accumulate dirt and require cleaning every 30 days or as needed.
-
Page 29: Stainless Steel Care & Cleaning
TBR | TDR SERIES www.truemfg.com Maintenance, Care & Cleaning (cont.) Stainless Steel Care & Cleaning 8 Tips to Help Prevent Rust on Stainless Steel – DO NOT use any steel wool, abrasive or chlorine- CAUTION Maintain the Cleanliness of Your Equipment based products to clean stainless steel surfaces. -
Page 30: Cabinet Adjustments, Servicing
TBR | TDR SERIES www.truemfg.com Cabinet Adjustments, Servicing & Component Replacement NOTE: Any cabinet adjustments are to be made AFTER the cabinet has been verified level and properly supported. Servicing & Replacing Components • Replace component parts with OEM (original equipment manufacturer) components. - Page 31 TBR | TDR SERIES www.truemfg.com Cabinet Adjustments, Servicing & Component Replacement (cont.) Reverse Door Swing (cont.) 4. Remove all door hardware except the door handle (see figs. 4a and 4b). Set the door brackets aside. NOTE: The door brackets are the only hardware that will be relocated.
-
Page 32: Slide Door Removal
TBR | TDR SERIES www.truemfg.com Cabinet Adjustments, Servicing & Component Replacement (cont.) Slide Door Removal DO NOT use the side latch before removing the slide door. The tension on the door cord is needed to execute these operation instructions. The doors cannot be removed unless they are positioned as described in the instructions below. - Page 33 TBR | TDR SERIES www.truemfg.com Cabinet Adjustments, Servicing & Component Replacement (cont.) Slide Door Removal (cont.) 2. Remove the door cord from the roller bracket. See figs. 5 and 6. NOTE: The black plastic tab holding the door cord slides out the back.
-
Page 34: Slide Door Operation
TBR | TDR SERIES www.truemfg.com Cabinet Adjustments, Servicing & Component Replacement (cont.) Slide Door Operation – Door Adjustment Only adjust the cabinet after it has been installed in its final location and correctly leveled. Procedure 1. Completely close the slide doors and check for openings. If there are any gaps/openings between the closed doors and cabinet, the doors will need to be adjusted. -
Page 35: Gasket Replacement
TBR | TDR SERIES www.truemfg.com Cabinet Adjustments, Servicing & Component Replacement (cont.) Gasket Replacement Tools Required • Caulk gun • Black 100% silicone There are two types of door gaskets; narrow and wide gaskets (see fig 1). The correct gasket for your unit varies by cabinet age and model. -
Page 36: Swing Door Lock & Cam Replacement
TBR | TDR SERIES www.truemfg.com Cabinet Adjustments, Servicing & Component Replacement (cont.) Swing Door Lock & Cam Replacement The door must be open prior to proceeding. Procedure: Removing Components 1. Insert the master key (included with the replacement lock kit) into the lock cylinder. -
Page 37: Warranty Warranty
TBR | TDR SERIES www.truemfg.com USA Foodservice & Canada Warranty Statement Warranty Information To view and download the Warranty Statements for USA and Canada, please scan the QR code below. TEC_TM_043 | REV. F | EN 03/2/2023 Page 37 of 40... - Page 38 TBR | TDR SERIES www.truemfg.com NOTES Page 38 of 40 03/2/2023 P#803294 TEC_TM_043 | REV. F | EN...
- Page 39 TBR | TDR SERIES www.truemfg.com NOTES TEC_TM_043 | REV. F | EN 03/2/2023 Page 39 of 40...
- Page 40 truemfg.com Page 40 of 40 03/2/2023 P#803294 TEC_TM_043 | REV. F | EN...
Need help?
Do you have a question about the TBR Series and is the answer not in the manual?
Questions and answers