Table of Contents
Advertisement
Quick Links
Advertisement
Table of Contents

Related Manuals for 3D Systems SLA 750 Series


Summary of Contents for 3D Systems SLA 750 Series
- Page 1 User Guide Release Date: 6/6/2023 Original Instructions...
-
Page 2: Table Of Contents
4.4 Transfer Cart ....................................21 SLA 750 SERIES SPECIFICATIONS AND REQUIREMENTS ............23 SLA 750 SERIES USER INTERFACE OVERVIEW ................24 6.1 SLA 750 Series Using the Transfer cart .............................24 6.2 Status ......................................25 6.3 Queue ......................................26 6.4 Settings ......................................29 6.4.1 General ....................................31... - Page 3 11.1.2 Resin Blade vacuum Level Adjustment .........................87 11.2 Required Power Cycling ................................88 SLA 750 SERIES PRINTER SHUTDOWN ..................89 SLA 750 SERIES TROUBLESHOOTING ................... 91 SLA 750 SERIES OPENING A PRINTER OR MATERIAL SUPPORT CASE ........92 3D Systems, Inc. p/n 40-D150, Rev. C...
- Page 4 SLA 750 SERIES SERVICE AND SUPPORT ..................93 SLA 750 SERIES EC DECLARATION OF CONFORMITY ..............94 SLA 750 SERIES LEGAL NOTICES ....................96 3D Systems, Inc. p/n 40-D150, Rev. C...
-
Page 5: Sla 750 Series Introduction
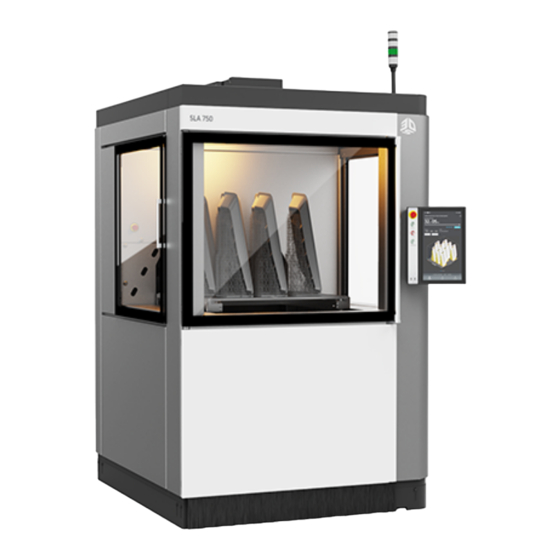
SLA 750 SERIES INTRODUCTION The SLA 750 Series printer is a manufacturing-ready SLA solution from 3D Systems, the market leader and inventor of SLA technology! With a small machine footprint and a large build volume, makes the SLA 750 your single solution for all product-... -
Page 6: Sla 750 Series Safety
Operators are trained to operate the system and to perform all the necessary tasks to print a part. • Certified service personnel have completed the 3D Systems service training package and are certified to perform service tasks. Certification may occur at various levels and servicers should only perform tasks that they are authorized and certified to complete. -
Page 7: Laser Safety
To release the E-Stop, pull it out and turn it clockwise. The system cannot run while an E-Stop is depressed. The SLA 750 Dual will have an additional E-Stop on its B-side Laser Assembly in the identical location seen below. 3D Systems, Inc. p/n 40-D150, Rev. C... - Page 8 A SLA 750 Dual will illuminate a bright white color when the two lasers are enabled. When the laser(s) are not enabled, the LED will be dimmed. 3D Systems, Inc. p/n 40-D150, Rev. C...
- Page 9 There are a total of (6) interlock switches. If an SLA 750 Dual, there will be one additional interlock inside the B-side laser assembly, identical to what is seen below. Inside of printer Inside of laser assembly 3D Systems, Inc. p/n 40-D150, Rev. C...
-
Page 10: Label Installation Diagram
Danger - ARCH FLASH AND SHOCK HAZARD. APPROPRIATE PPE REQUIRED. SHOCK WARNING WARNING - PINCH POINT HAZARD. KEEP HANDS CLEAR. WARNING - BURN HAZARD. HOT SURFACE INSIDE, PLEASE ALLOW TO COOL BEFORE SERVICING. WARNING - RADIATION 3D Systems, Inc. p/n 40-D150, Rev. C... - Page 11 ITEM DESCRIPTION LABEL MAX LASER OUTPUT CLASS I (1) LASER SLA 750 PRINTER PRODUCT LABEL (DATA PLATE) SLA 750 Dual PRINTER PRODUCT LABEL (DATA PLATE) 3D Systems, Inc. p/n 40-D150, Rev. C...
- Page 12 ITEM DESCRIPTION LABEL SLA VAT PRODUCT LABEL (DATA PLATE) Outside of SLA 750 3D Systems, Inc. p/n 40-D150, Rev. C...
- Page 13 Front of SLA Vat Inside of printer 3D Systems, Inc. p/n 40-D150, Rev. C...
-
Page 14: Chemical Safety
Consult the manufacturer's Material Safety Data Sheet / Safety Data Sheet (MSDS/SDS) for information on specific materials. For further information on this and related topics, consult the 3D Systems - Materials website at https://support.3dsystems.com/s/article/materials-materials?language=en_US https:// support.3dsystems.com/s/article/materials-materials?language=en_US... - Page 15 Improperly stored resins may increase in viscosity, and eventually result in a gelled, polymerized product in the storage container. Materials should be stored in conformance with applicable laws and regulations. 3D Systems is not responsible for losses incurred as the result of improper storage of print material. See subjects of Light and Temperature below.
- Page 16 If material splashes into the eye when contact lenses are worn, flush the eye with water immediately. Verify that flushing has removed the contact lens from the eye. Protect eyes from light and obtain immediate medical attention. Discard contact lenses that come into contact with liquid material. 3D Systems, Inc. p/n 40-D150, Rev. C...
- Page 17 Fume Inhalation Remove the person to fresh air. Give artificial respiration or cardiopulmonary resuscitation (CPR) if required. If breathing is difficult, give oxygen. Obtain immediate medical attention. 3D Systems, Inc. p/n 40-D150, Rev. C...
-
Page 18: Sla 750 Series Environmental Conditions
SLA 750 SERIES ENVIRONMENTAL CONDITIONS Please refer to the SLA 750 Series Facility Requirements Guide for environmental conditions found here. 3D Systems, Inc. p/n 40-D150, Rev. C... -
Page 19: Sla 750 Series Hardware Overview
SLA 750 SERIES HARDWARE OVERVIEW 4.1 Production Printer 4.1.1 Printer - Outside View Removable Laser Assembly. Refer to the section, "Laser Assembly" for further information. Light Stack: The light stack consists of four lights: red, yellow, green and white. The lights reflect what state the machine is in at any given time. - Page 20 Dual-Laser Setup The dual-laser version of the machine will have the same components as seen above, as well as an additional Laser Assembly. The two lasers are referred to as A-side and B-side. 3D Systems, Inc. p/n 40-D150, Rev. C...
-
Page 21: Printer - Inside View
System Controller: A computer which controls the printer is located inside the electrical cabinet. The user does not have direct access to this device. The touchscreen user interface provides all user functionality. 3D Systems, Inc. p/n 40-D150, Rev. C... -
Page 22: Led Indicators
This feature significantly reduces material swap time. In addition, you can warm up an vat offline, enabling you to swap one vat for another that is ready to use. 3D Systems, Inc. p/n 40-D150, Rev. C... - Page 23 Vat Communication Umbilical: Communicates information from the printer to the vat. Recoater basket: This rest area basket is used to stow the removable recoater when changing Vats. The removable recoater basket can be removed for transport when installing or removing recoater. 3D Systems, Inc. p/n 40-D150, Rev. C...
-
Page 24: Light Stack
• Off > E-Stop is pressed • On, Solid > Print Job is in progress • On, Flashing > Manual operation in progress • Off > E-Stop is pressed or normal operating conditions 3D Systems, Inc. p/n 40-D150, Rev. C... -
Page 25: Transfer Cart
CAUTION: Do not try to navigate on stairs or steep inclines. CAUTION: When not in use, the transfer cart should be parked in a designated area. Refer to the section, Using the Transfer Cart for information on operating the cart. 3D Systems, Inc. p/n 40-D150, Rev. C... - Page 26 "ON/OFF" to indicate which way to push the lever to release or engage the brake. Engage the brake any time the Transfer Cart is to stay stationary. Locking pins will keep the casters from rotating. 3D Systems, Inc. p/n 40-D150, Rev. C...
-
Page 27: Sla 750 Series Specifications And Requirements
SLA 750 SERIES SPECIFICATIONS AND REQUIREMENTS Total Printer Footprint (lwh) 3034 x 2677 x 2422 mm (303.4 x 26.7 x 242.2 in) Doors open 1638 x 1807 x 2442 mm (163.8 x 180.7 x 242.2 in) Doors closed Net Build Volume (lwh) 750 x 750 x 550 mm (29.5 x 29.5 x 21.65 in) -
Page 28: Sla 750 Series User Interface Overview
SLA 750 SERIES USER INTERFACE OVERVIEW 6.1 SLA 750 Series Using the Transfer cart 1. Once the print has completed, the build platform will raise to the Offload position. 1. Open the top door. 2. Raise or lower the resin catch tray so the tray clears the crossbar and travels below the build platform without obstruction. -
Page 29: Status
6.2 Status The Status screen displays important real-time information about the printer. Unlock Door: Pressing this button will toggle the doors between Lock and Unlock positions. 3D Systems, Inc. p/n 40-D150, Rev. C... -
Page 30: Queue
Navigation Bar: The navigation bar consists of three distinct tabs: Status, Queue, and Settings. Select any of these tabs to open up a new screen and navigate through the selected item. 6.3 Queue The Print Queue screen displays the current jobs waiting to be processed. 3D Systems, Inc. p/n 40-D150, Rev. C... - Page 31 - Moves the selected job to the top of the list - Moves the selected job up one position - Moves the selected job down one position - Moves the selected job to the bottom of the list - Deletes selected job 3D Systems, Inc. p/n 40-D150, Rev. C...
- Page 32 Blade Gap - Used in concert with the layer thickness to define the clearance (or distance between the bottom of the recoater and last layer of the part) at time of sweeping. Velocity - The velocity of the blade when it sweeps. Reprint Job: Selected Cancel or Reprint 3D Systems, Inc. p/n 40-D150, Rev. C...
-
Page 33: Settings
View More: - Shows older hidden jobs in history . 6.4 Settings The Settings Screen allows you to navigate to the settings screens for various components of the printer. General: Network: Users: Printer Info Usage Log 3D Systems, Inc. p/n 40-D150, Rev. C... - Page 34 3D Systems, Inc. p/n 40-D150, Rev. C...
-
Page 35: General
Display: Change the delay before the screensaver activates. Language: Change the language displayed on the UI. Log Out: Only displayed when a remote session is in progress. Date & Time: Adjust date and time. Restart: Restarts the computer. 3D Systems, Inc. p/n 40-D150, Rev. C... -
Page 36: Network
The Network Settings Screen allows the user to view the values related to the system network. DHCP: Switch the Dynamic Host Configuration Protocol (DHCP) on or off. MAC Address: View the MAC Address for the system. 3D Systems, Inc. p/n 40-D150, Rev. C... -
Page 37: Users
Gateway: View the TCP/IP address for the Default Gateway DNS Server 1: View the main TCP/IP address for the DNS Server DNS Server 2: View the main TCP/IP address for the DNS Server 6.4.3 Users 3D Systems, Inc. p/n 40-D150, Rev. C... - Page 38 Add Users: Create new Standard Users with an assigned passcode. 6.4.3.1 Assigning users and access levels Assigning users and access levels 1. From the UI, select Settings from the bottom. 2. Select Users screen. 3D Systems, Inc. p/n 40-D150, Rev. C...
-
Page 39: Printer Info
Active Users - Admin - Active Users - Standard Users - 6.4.4 Printer Info Here you will find the following current printers information: • Printer Name: • Printer Model: • Serial Number: • Release Version: • License: 3D Systems, Inc. p/n 40-D150, Rev. C... - Page 40 3D Systems, Inc. p/n 40-D150, Rev. C...
-
Page 41: Usage Log
Aborted Jobs: Displays total number of aborted jobs on printer View User Manual: Access the SLA 750 User Guide. Export Logs: Export the printers log information to a flash drive or the printers hard drive. 3D Systems, Inc. p/n 40-D150, Rev. C... -
Page 42: Elevator And Recoater
Move To Start: Move the elevator to its start position. Move To Home: Move the elevator to its home position. Move To Drain: Move the elevator to its drain position as defined in the Drain Platform Settings. STOP: Stop the current motion. 3D Systems, Inc. p/n 40-D150, Rev. C... - Page 43 Smart Sweep - Turn on/off Smart Sweep feature during printing Post Print: • Move Platform - Select box to move platform to either the drain or offload position after the build is complete. Position: • Drain • Offload 3D Systems, Inc. p/n 40-D150, Rev. C...
-
Page 44: Setting The Print Platform Start Position
1. From the UI, tap on Elevator & Recoater (1) near the bottom tray and tap on More Settings. 2. Tap Move to Start (2). This will bring the build platform to the starting position. 3. Tap Level Material (3). 3D Systems, Inc. p/n 40-D150, Rev. C... - Page 45 5. Visual determine if the print platform and resin level are at the optimal position (See Figure B). If not, repeat steps 6 and 7. 6. Once you are satisfied with the print platform height, tap Set To Current Position under the Elevator Settings (6). 3D Systems, Inc. p/n 40-D150, Rev. C...
-
Page 46: Setting Platform Drain Position
Setting the Drain Position will be determined by the Start Position value. To set the Drain Position: 1. From the UI, tap on Elevator & Recoater (1) near the bottom tray and tap on More Settings. 3D Systems, Inc. p/n 40-D150, Rev. C... -
Page 47: Setting Platform Offload Position
Setting the Offload Position will be determined by the Drain Position value. To set the Offload Position for use of Transfer Cart 1. From the UI, tap on Elevator & Recoater (1) near the bottom tray and tap on More Settings. 3D Systems, Inc. p/n 40-D150, Rev. C... - Page 48 Manually offloading a build platform by hand does not require the offload position to be as high if the Transfer Cart is being used. A comfortable build platform height position for removal is 4" above the Drain Position. This is high enough to clear the crossbar. 3D Systems, Inc. p/n 40-D150, Rev. C...
-
Page 49: Laser
X Position: Current X position of the laser beam X Move To: Set the value to manually adjust the laser beam along the x-axis. To move the laser beam, use the move laser beam arrows. 3D Systems, Inc. p/n 40-D150, Rev. C... - Page 50 This works as a checkpoint to ensure that printing is starting at the same point. Dual Laser If you have a dual-laser machine, you will see an extra laser control screen on the GUI with the same sections as the single laser screen seen above. 3D Systems, Inc. p/n 40-D150, Rev. C...
- Page 51 3D Systems, Inc. p/n 40-D150, Rev. C...
-
Page 52: Material
Displays Material Batch ID # Displays if the Bottle is Full or Empty Displays Vat Serial # Material Temperature: Current material temperature. Set To: Change material temperature in vat. Build Temperature: Current build chamber temperature. 3D Systems, Inc. p/n 40-D150, Rev. C... -
Page 53: Leveling The Material
2. Select Level Material (2) icon under the Stir Vat section. 1. Select Yes if a print platform has been previously installed. 2. Select No if there is not a print platform installed. 3D Systems, Inc. p/n 40-D150, Rev. C... - Page 54 1. Below is a status screenshot of the leveling process. You may Stop this process at anytime. 3D Systems, Inc. p/n 40-D150, Rev. C...
- Page 55 1. During the leveling process, the printer will determine if there is enough material present. If there is not enough material, the printer will automatically add material. 3D Systems, Inc. p/n 40-D150, Rev. C...
-
Page 56: Removing Bubbles
3. You may Dismiss this procedure at anytime during the process (3). 4. Wait while an automated procedure manipulates the hardware to remove the bubbles. Once the automated procedure has been completed, the printer is ready to print. 3D Systems, Inc. p/n 40-D150, Rev. C... - Page 57 Figure A - Before bubble removal Figure B - After bubble removal 3D Systems, Inc. p/n 40-D150, Rev. C...
-
Page 58: Sla 750 Series Starting A Build
SLA 750 SERIES STARTING A BUILD 7.1 Turn Printer On Turn Printer On 1. Confirm power plug is connected to outlet. 1. The power switch is located on the right side of the printer. 2. Turn the power switch to the "I" position to turn the printer on. - Page 59 1. From the UI, select Settings from the bottom. 2. Select Network screen to enter the Network Settings screen. 3D Systems, Inc. p/n 40-D150, Rev. C...
- Page 60 Contact your network administrator if there is a need to change this number. Gateway - a router interface connected to the local network that sends packets out of the local network. For display only. This number cannot be changed through this interface. 3D Systems, Inc. p/n 40-D150, Rev. C...
-
Page 61: Installing 3D Sprint
Apply Button - Tap this button to keep all your changes and go back to the Settings home screen. 7.3 Installing 3D Sprint 3D Sprint is the 3D Systems' software application used for preparing CAD models ™ to be printed on an SLA printer. It is installed on a standalone computer which is provided by the customer. - Page 62 2. Click Apply when complete (6). 1. Select File icon to import file from local source or drag in drop into 3D Sprint (7). 2. Select Set or enter CAD Import Options and select Set (8). 3D Systems, Inc. p/n 40-D150, Rev. C...
- Page 63 1. Select Smart Support icon (9). 2. Select Create (10). 3D Systems, Inc. p/n 40-D150, Rev. C...
- Page 64 Note: A warning message will display if supports are not created. 1. Save file to either a flash drive or your computers hard drive. 2. Select Add to Queue (13). 3. Change Job Name (if needed) and select Add to Queue (14). 3D Systems, Inc. p/n 40-D150, Rev. C...
-
Page 65: Installing The Print Platform
2. Select Move to Offload (2) icon under the Elevator section. This will raise the elevator forks out of the vat. 3. Once elevator forks have moved to the offload position, disable the interlocks to open front door by tapping the Door (3) slider icon. 3D Systems, Inc. p/n 40-D150, Rev. C... - Page 66 1. Put on a pair of Nitrile gloves to avoid material contact. 2. Open front door of printer. 3. Carefully guide and place the build platform at the end of the forks. 3D Systems, Inc. p/n 40-D150, Rev. C...
- Page 67 1. Slowly slide the platform to the far end of the forks. 1. Confirm platform corners are seated inside of the fork brackets. 3D Systems, Inc. p/n 40-D150, Rev. C...
-
Page 68: Adding Material Cartridge
1. Close front door. Note: When installing a build platform, always perform a leveling material process. 7.6 Adding material cartridge The below message will appear when the material bottle is empty. 3D Systems, Inc. p/n 40-D150, Rev. C... - Page 69 1. Remove empty bottle by pushing the release button at the bottom of the bottle tray. 3D Systems, Inc. p/n 40-D150, Rev. C...
- Page 70 1. Tilt bottle tray away from printer and remove empty bottle. 1. Remove cap from new material bottle. 3D Systems, Inc. p/n 40-D150, Rev. C...
- Page 71 1. Using a small awl or equivalent tool and hammer, pierce a hole into the bottle vent orifice. 1. Place bottle into tray. 2. Loosely replace bottle cap. Do not tighten. 1. Push bottle tray back into printer. 3D Systems, Inc. p/n 40-D150, Rev. C...
-
Page 72: Select Job
Type in your desired blade gap and then click Set • Type in your desired recoat velocity and then click Set • Z Wait : • Type in your desired Z Wait time (in seconds) and then click Set 3D Systems, Inc. p/n 40-D150, Rev. C... -
Page 73: Setting Up A Delayed Start
2. Click Save on the bottom right corner of the screen 7.9 Setting up a delayed start Select Delay Start Time from the Status home page and set a future printing date and time. 3D Systems, Inc. p/n 40-D150, Rev. C... -
Page 74: Sla 750 Series Using The Transfer Cart
SLA 750 SERIES USING THE TRANSFER CART 1. Once the print has completed, the build platform will raise to the Offload position. 2. Open the top door. Raise or lower the resin catch tray so the tray clears the crossbar and travels below the build platform without obstruction. - Page 75 5. Slowly back the build platform out of the printer. 3D Systems, Inc. p/n 40-D150, Rev. C...
-
Page 76: Sla 750 Series Procedures
SLA 750 SERIES PROCEDURES 9.1 Recoater Installation and Removal RECOATER INSTALLATION AND REMOVAL The recoater is on a rail system inside the print chamber, above the material vat. The application process combines the elevator and recoater movements to apply material to the top of the part so that the next layer can be printed. The recoater, which contacts the material, can be removed from the SLA 750. - Page 77 1. Put on a pair of Nitrile gloves to avoid material contact. 2. Remove the recoater cover by pulling straight up. Set cover to the side on a clean surface. 3D Systems, Inc. p/n 40-D150, Rev. C...
-
Page 78: Calibrating The Recoating Blade
9.2 Calibrating the recoating blade Prerequisites To avoid damage to the recoater cover during installation and removal, remove the (2) side belt drive covers from the left and right side of chamber by lifting up and away. 3D Systems, Inc. p/n 40-D150, Rev. C... - Page 79 Calibrating the Recoater Blade Calibrating the recoater blade is required anytime the recoater blade has been removed and replaced. 1. From the UI, tap on Elevator & Recoater near the bottom tray. 2. Select Calibrate icon. 3D Systems, Inc. p/n 40-D150, Rev. C...
- Page 80 1. Select Run Calibration Sequence and select Continue. The entire process takes about 5 minutes to complete. 3D Systems, Inc. p/n 40-D150, Rev. C...
- Page 81 1. A message window will appear that displays the progress of the calibration. You may Dismiss at anytime during the calibration. 3D Systems, Inc. p/n 40-D150, Rev. C...
-
Page 82: Material Vat Removal
9.3 Material Vat Removal 1. From the Material menu, select More Settings to display Eject Vat icon. 2. Select Eject Vat (1) icon from bottom left corner of UI. 3D Systems, Inc. p/n 40-D150, Rev. C... - Page 83 4. The Vat-removal process will begin and display the following messages as it goes through the process: • Locking printer doors • Moving elevator • Moving recoater to home • Moving displacer • Saving parameters to vat controller 3D Systems, Inc. p/n 40-D150, Rev. C...
- Page 84 5. Once complete, a message will display Remove Accessories and Vat. 3D Systems, Inc. p/n 40-D150, Rev. C...
- Page 85 9. Lift displacer straight up off guide pins and remove from printer. 10. Release the (2) vat locking arms on the left and right side of vat. 11. Slowly and carefully pull the vat out of printer. 12. Select Confirm Removal from UI. 3D Systems, Inc. p/n 40-D150, Rev. C...
-
Page 86: Vat Swap
Store the RDM in an opaque container with a lid, ensuring you keep it with the vat with which it is associated. Label the RDM and vat to ensure you know which RDM goes with which vat. 3. Remove the vat as in the Material Vat Removal section. 3D Systems, Inc. p/n 40-D150, Rev. C... - Page 87 6. Place the RDM bracket on the RDM, with the forked side in the orientation shown. 7. Install the RDM in the machine, as shown, and secure it with the thumb screw. 8. Plug the RDM power and data cables into the corresponding cables on the machine side. 3D Systems, Inc. p/n 40-D150, Rev. C...
-
Page 88: Material Vat Installation
2. Reconnect the vat power supply and data cable. 3. Turn the power switch to the On (l) position. d. Install and secure the recoater with the two locking levers and install the recoater cover. 3. Select All Steps Complete. 3D Systems, Inc. p/n 40-D150, Rev. C... -
Page 89: Check Material Temperature
The mixer will run for 30 minutes, along with the elevator/ print platform stirring. • The mixer will turn off for 330 minutes, while the elevator/ print platform will continue to stir the material until the user presses Stop on the touch screen. 3D Systems, Inc. p/n 40-D150, Rev. C... -
Page 90: Sla 750 Series System Requirements And Setup
SLA 750 SERIES SYSTEM REQUIREMENTS AND SETUP 10.1 Remote Access 1. From the UI, select Settings>Users 2. Select Remote Connections check box. 3. Select Add User from either Active Users or Standard Users. 4. Go to any web browser and enter IP address of printer followed by ":333" ( ie. https://xx.xx.xx.xxx:333/) 10.2 3D Connect... -
Page 91: Sla 750 Series Preventative Maintenance
SLA 750 SERIES PREVENTATIVE MAINTENANCE 11.1 Recoating blade 11.1.1 Cleaning The recoater blade will need to be cleaned periodically. Remove the recoater blade (see Recoater Installation and Removal section in User Guide) and wipe it off using a paper towel soaked with isopropyl alcohol. Be careful not to contaminate the material in the vat with the isopropyl alcohol. -
Page 92: Required Power Cycling
3. Repeat steps until ideal resin level is achieved. 11.2 Required Power Cycling We advise to fully power cycle your SLA 750 printer once every two weeks to prevent firmware and hardware errors. Follow the Printer Shutdown procedure for instructions. 3D Systems, Inc. p/n 40-D150, Rev. C... -
Page 93: Sla 750 Series Printer Shutdown
SLA 750 SERIES PRINTER SHUTDOWN If you do not plan on operating the system on a regular basis and want to shut it down for an extended period of time, power off the UI and turn off the main power disconnect. - Page 94 "Off" Position "On" Position 3D Systems, Inc. p/n 40-D150, Rev. C...
-
Page 95: Sla 750 Series Troubleshooting
SLA 750 SERIES TROUBLESHOOTING SUMMARY RECOVERY Build Stops with no Warning. Power Cycle + Resume Print feature. Y Motor Stopping during Recoater Calibration. Power Cycle the System. This is a known issue with using the Home Function before calibration. Please use the manual controls to move the recoater to the home position. -
Page 96: Sla 750 Series Opening A Printer Or Material Support Case
SLA 750 SERIES OPENING A PRINTER OR MATERIAL SUPPORT CASE To open a Printer or Material Support Case, please click on the following link. https://support.3dsystems.com/s/search-knowledge-article?type=printersupport https://support.3dsystems.com/s/search- knowledge-article?type=printersupport 3D Systems, Inc. p/n 40-D150, Rev. C... - Page 97 +96 2.6262.9900 General SLA 750 printer service procedures must be performed only by a 3D Systems-certified service technician unless this guide explicitly states otherwise. If your 3D printer system needs service, contact 3D Systems Technical Support at the following numbers: Americas Toll Free (U.S./Canada)
- Page 98 SLA 750 SERIES EC DECLARATION OF CONFORMITY SLA 750 and SLA Dual 3D Systems, Inc. p/n 40-D150, Rev. C...
- Page 99 SLA Vat 3D Systems, Inc. p/n 40-D150, Rev. C...
- Page 100 (the "Licensed User") does not have the right to copy, reproduce, or translate this document in any way or to any media without the prior written consent of 3D Systems, Inc. No copies of the document may be sold or given to any person or other entity.
- Page 101 3D Systems, Inc. 333 Three D Systems Circle Rock Hill, SC 29730 www.3dsystems.com Register Statement 2023 by 3D Systems, Inc. All rights reserved. Specifications subject to © change without notice. 3D Systems and the 3D Systems logo are registered trademarks of 3D Systems, Inc.
Need help?
Do you have a question about the SLA 750 Series and is the answer not in the manual?
Questions and answers